Interior Trim
Replacement
a Weai gloves to remove and installthe ttim and panels.
a When prying with a flat tip screwdriver, wrap it with
protective tape to prevent damage.
NOTE: Take care not to bend or scratch the trim andpanels.
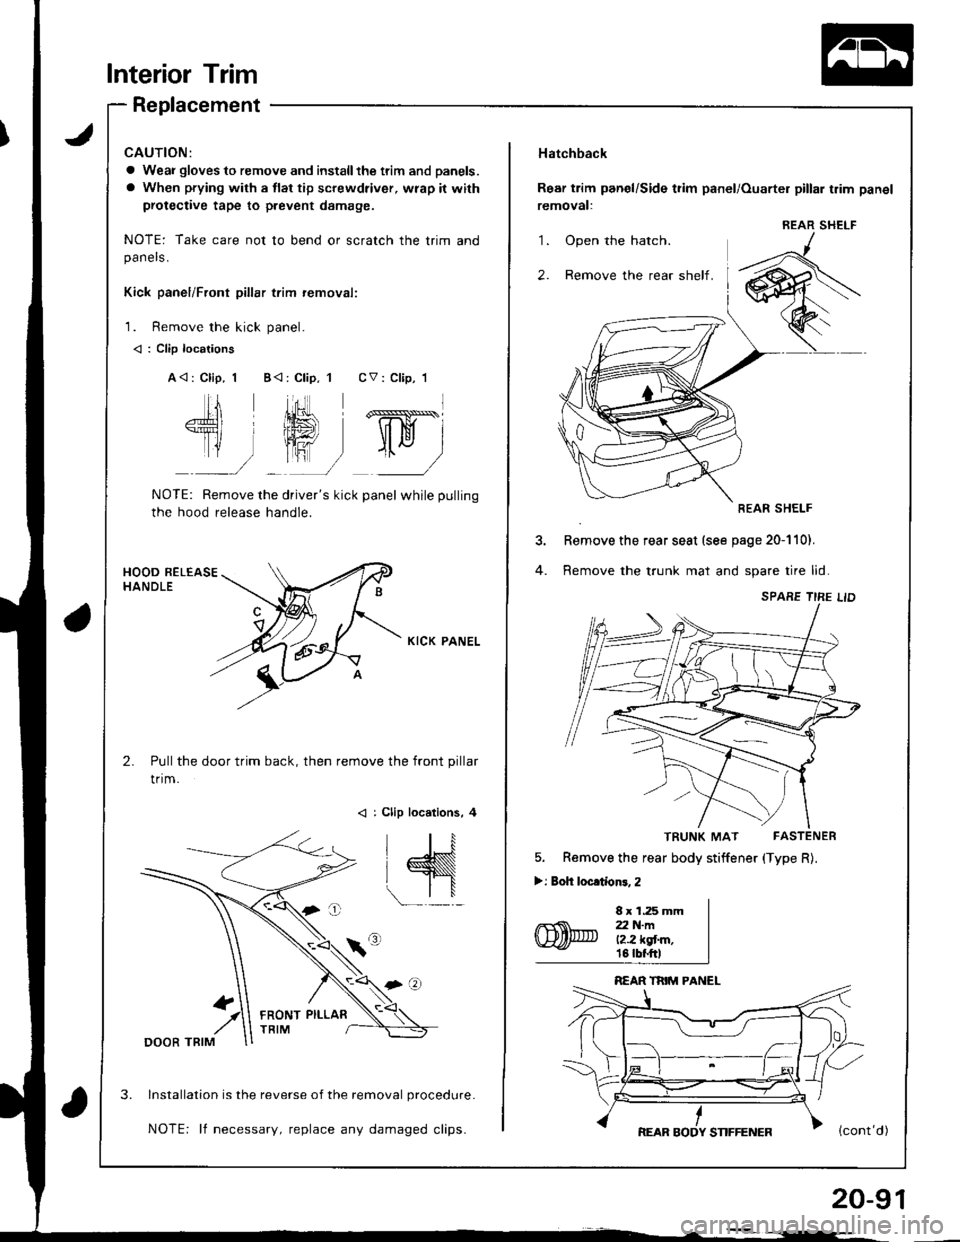
Kick panel/Front pillar trim removali
1. Remove the kick panel.
< : Clip locations
A<: Clip, 1 B<:Clip, 1 CV: Clip,'l
fl,ffi,ry
NOTE: Remove the driver's kick panel while pulling
the hood release handle.
KICK PANEL
Pull the door trim back, then remove the front pillar
trim.
< : Clip locations, 4
lnstallation is the reverse of the removal procedure.
NOTE: lf necessary, replace any damaged clips.
FRONT PILLAR
'1.
2.
Hatchback
Rear trim panel/Side t?im panel/Ouarter pillar trim panel
removal:
REAR SHELF
Remove the rear seat (see page 20-110).
Remove the trunk mat and spare tire lid
TRUNK MAT FASTENER
5. Remove the rear body stiffener (Type R).
>: Boh locltionr, 2
8 x 1.25 mmZ2 N-ml?.2 kgt m,18 tbf.ftl
REAR SHELF
20-91
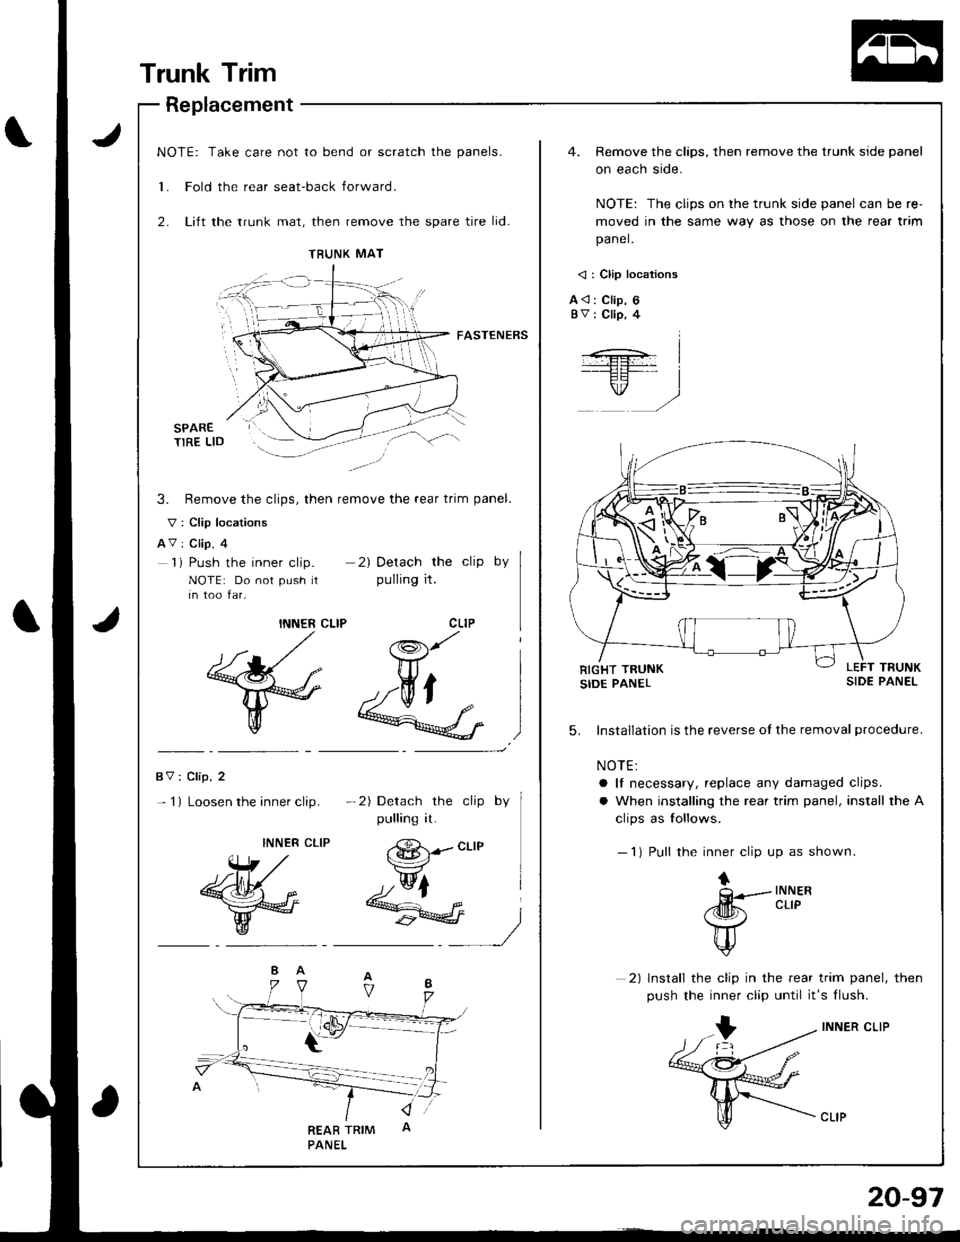
NOTE: Take care not to bend or scratch the panels.
1. Fold the rear seat-back forward.
2. Lift the trunk mat, then remove the spare tire lid-
4. Remove the clips, then remove the trunk side panel
on each side.
NOTE: The clips on the trunk side panel can be re-
moved in the same way as those on the rear trim
panel.
< : Clip locations
A<: Clip, 6BV : Clip, 4
FASTENERS
3. Remove the clips, then remove the rear trim panel.
V: Clip locations
AV: Clip, 4'l ) Push the inner clip.
NOTE: Do not push rtin too far,
2) Detach the clip by
pulling it.
INNER CLIP
ffi
co.r/ I
&l5.
BV: Clip, 2
- 1) Loosen the inner clip.-2) Detach the clip by
pulling it.
Installation is the reverse of the removal procedure.
NOTE:
a It necessary, replace any damaged clips.
a When installing the rear trim panel, install the A
clips as follows.
- 1) Pull the inner clip up as shown.INNER
Wr ,/
&M*
W
@1--crte
&
+INNERCLIPff
Y
2) lnstall the clip in the rear trim panel, then
push the inner clip until it's flush.
INNER CLIP
TBUNK MAT
Trunk Trim
Replacement
20-97

