HONDA ODYSSEY 2020 Navigation Manual (in English)
Manufacturer: HONDA, Model Year: 2020, Model line: ODYSSEY, Model: HONDA ODYSSEY 2020Pages: 127, PDF Size: 27.73 MB
Page 71 of 127
69
uuEntering a DestinationumyTrips
Navigation
myTrips
H (Home)uNavigationuumyTrips
Set the route to your destination selecting a saved trip.
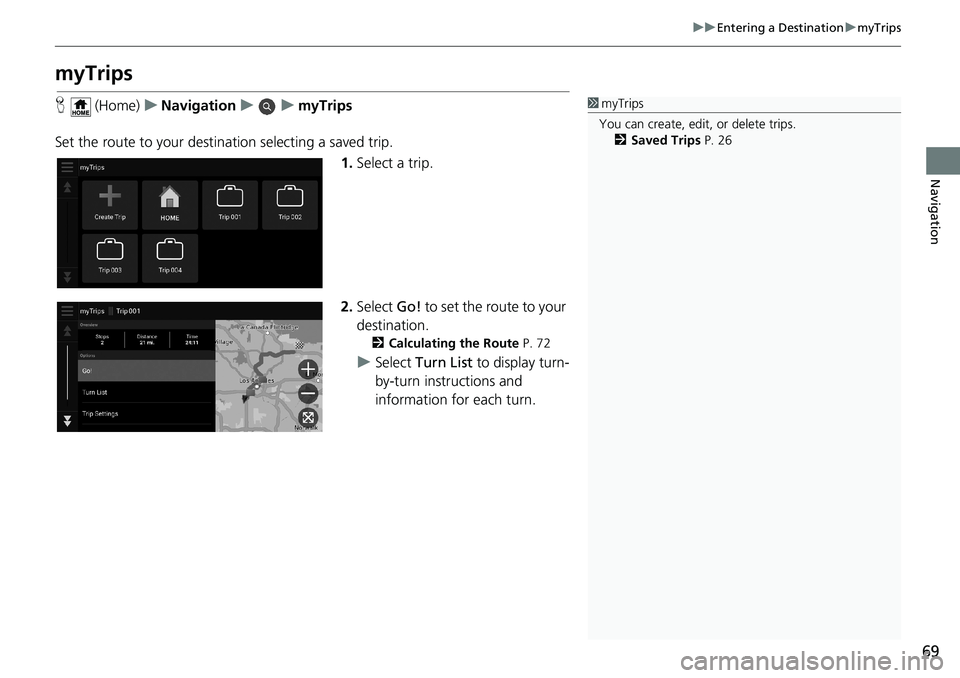
1.Select a trip.
2.Select Go! to set the route to your
destination.
2Calculating the Route P. 72
uSelect Turn List to display turn-
by-turn instructions and
information for each turn.
1myTrips
You can create, edit, or delete trips.
2Saved Trips P. 26
Page 72 of 127
70
uuEntering a DestinationumyTrends
Navigation
myTrends
H (Home)uNavigationuumyTrends
Select a frequently-visited place to use as the destination.
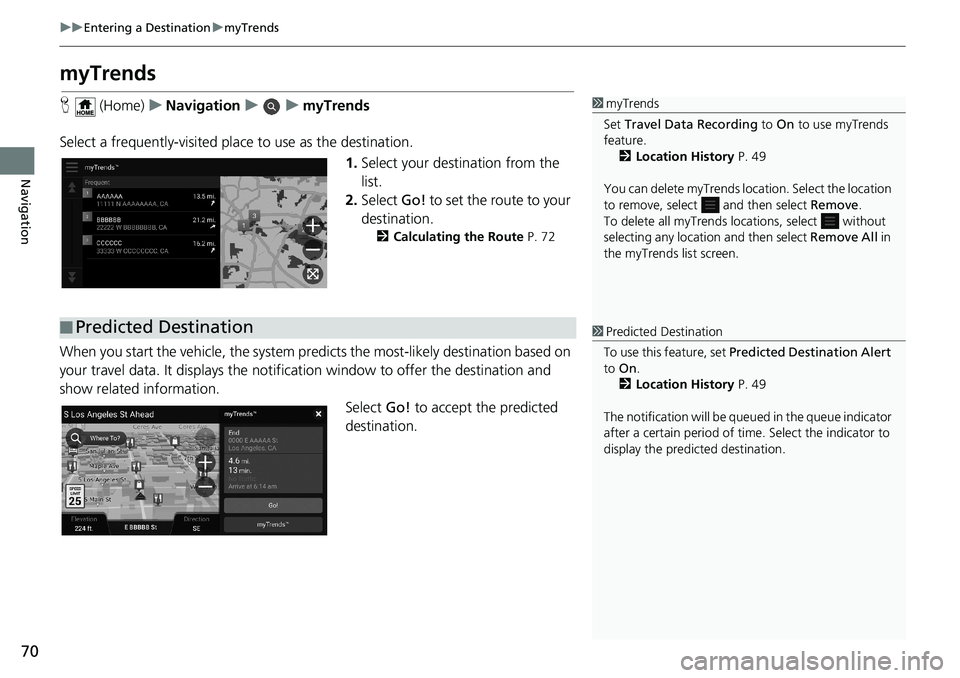
1.Select your destination from the
list.
2.Select Go! to set the route to your
destination.
2Calculating the Route P. 72
When you start the vehicle, the system predicts the most-likely destination based on
your travel data. It displays the notification window to offer the destination and
show related information.
Select Go! to accept the predicted
destination.
1myTrends
Set Travel Data Recording to On to use myTrends
feature.
2Location History P. 49
You can delete myTrends location. Select the location
to remove, select and then select Remove.
To delete all myTrends locations, select without
selecting any location and then select Remove All in
the myTrends list screen.
■Predicted Destination1Predicted Destination
To use this feature, set Predicted Destination Alert
to On.
2Location History P. 49
The notification will be queued in the queue indicator
after a certain period of time. Select the indicator to
display the predicted destination.
Page 73 of 127
71
uuEntering a DestinationuMap Input
Navigation
Map Input
H (Home)uNavigation
Scroll the map to manually select an icon or a location as the destination.
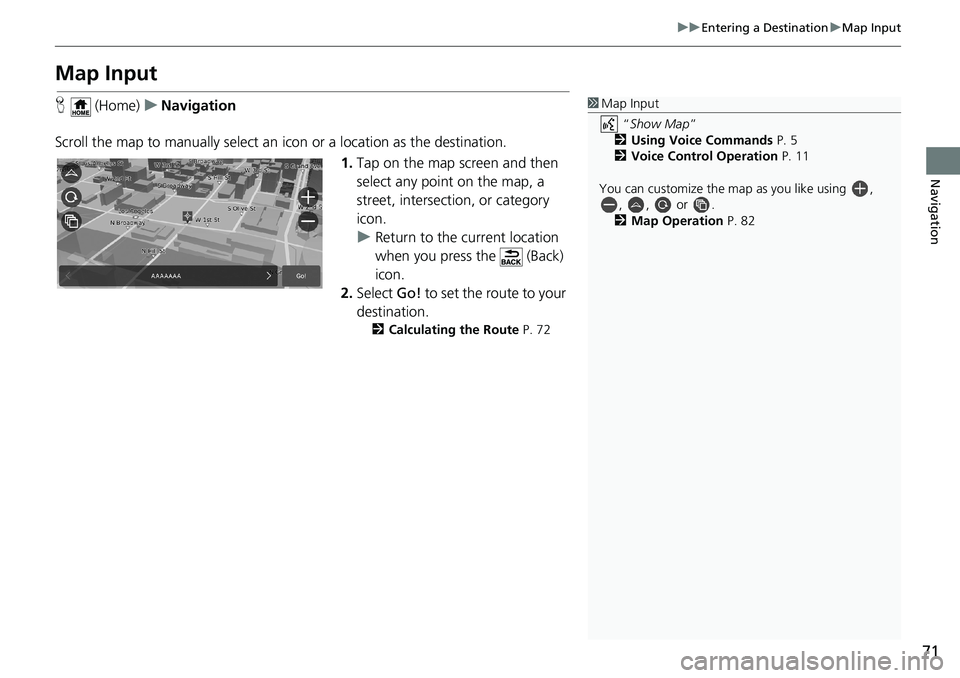
1.Tap on the map screen and then
select any point on the map, a
street, intersection, or category
icon.
uReturn to the current location
when you press the (Back)
icon.
2.Select Go! to set the route to your
destination.
2Calculating the Route P. 72
1Map Input
“Show Map”
2Using Voice Commands P. 5
2Voice Control Operation P. 11
You can customize the map as you like using ,
, , or .
2Map Operation P. 82
Page 74 of 127
72
Navigation
Calculating the Route
This section describes how to calculate your route.
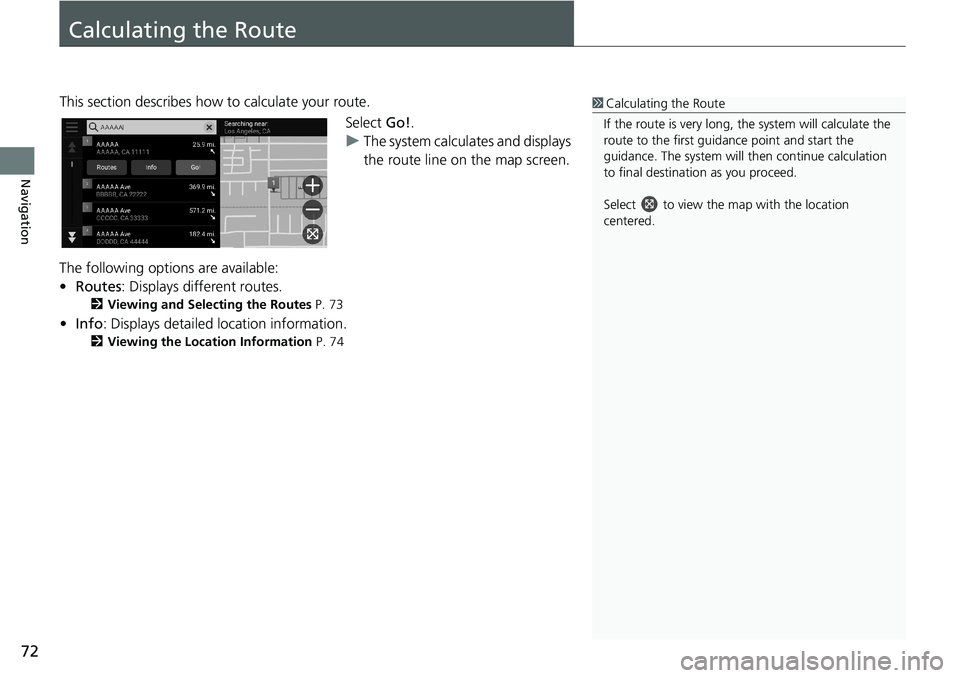
Select Go!.
uThe system calculates and displays
the route line on the map screen.
The following options are available:
•Routes: Displays different routes.
2Viewing and Selecting the Routes P. 73
•Info: Displays detailed location information.
2Viewing the Location Information P. 74
1Calculating the Route
If the route is very long, the system will calculate the
route to the first guidance point and start the
guidance. The system will then continue calculation
to final destination as you proceed.
Select to view the map with the location
centered.
Page 75 of 127
73
uuCalculating the RouteuViewing and Selecting the Routes
Navigation
Viewing and Selecting the Routes
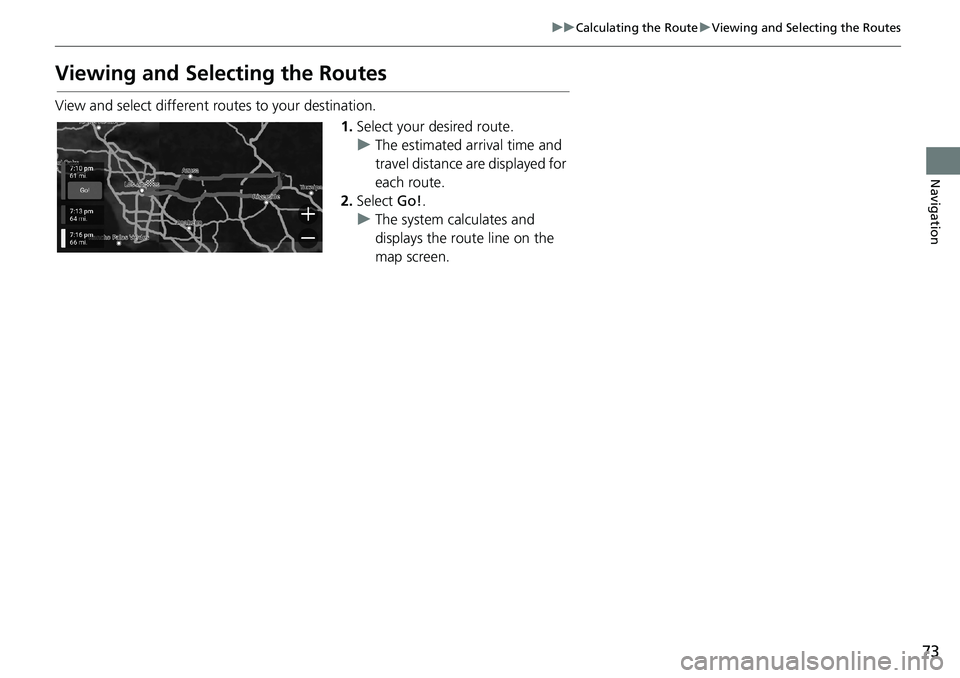
View and select different routes to your destination.
1.Select your desired route.
uThe estimated arrival time and
travel distance are displayed for
each route.
2.Select Go!.
uThe system calculates and
displays the route line on the
map screen.
Page 76 of 127
74
uuCalculating the RouteuViewing the Location Information
Navigation
Viewing the Location Information
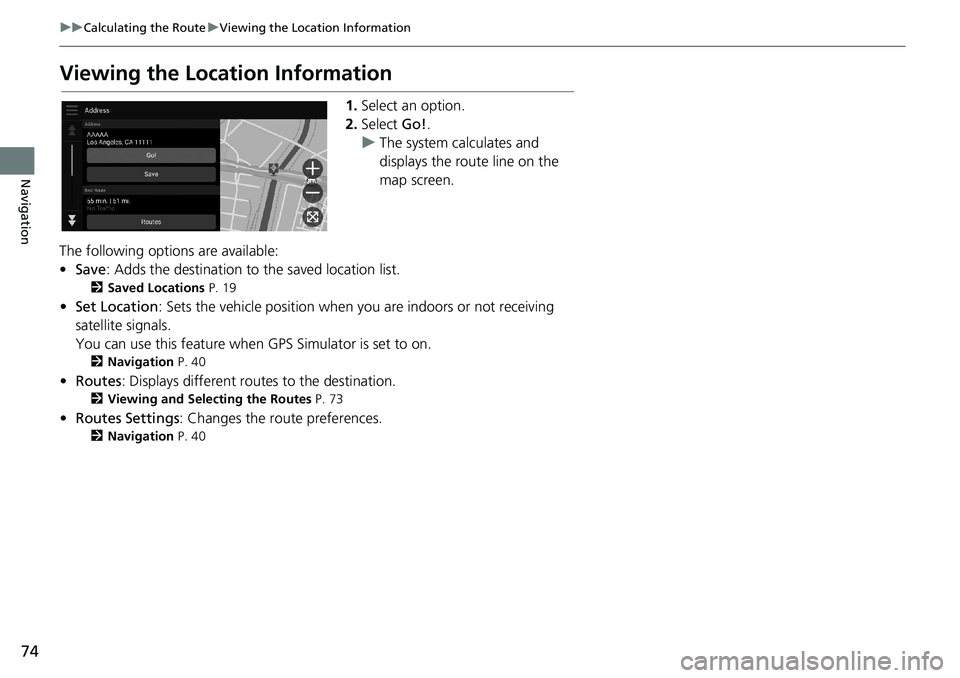
1.Select an option.
2.Select Go!.
uThe system calculates and
displays the route line on the
map screen.
The following options are available:
•Save: Adds the destination to the saved location list.
2Saved Locations P. 19
•Set Location: Sets the vehicle position when you are indoors or not receiving
satellite signals.
You can use this feature when GPS Simulator is set to on.
2Navigation P. 40
•Routes: Displays different routes to the destination.
2Viewing and Selecting the Routes P. 73
•Routes Settings: Changes the route preferences.
2Navigation P. 40
Page 77 of 127
75Continued
Navigation
Driving to Your Destination
Viewing the Route
This section describes how to follow the route guidance to your destination.
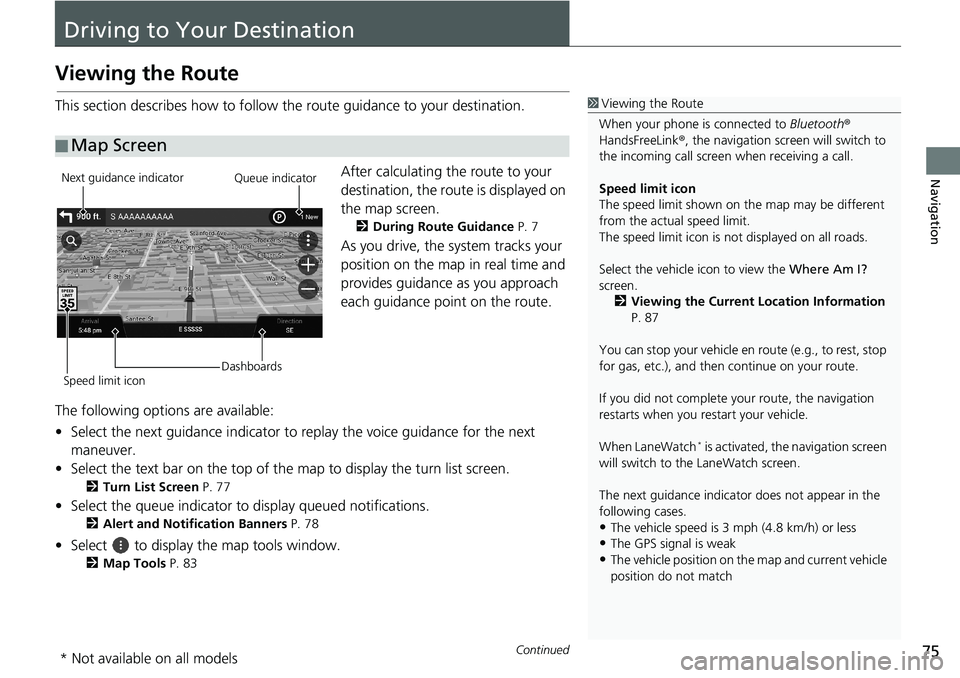
After calculating the route to your
destination, the route is displayed on
the map screen.
2During Route Guidance P. 7
As you drive, the system tracks your
position on the map in real time and
provides guidance as you approach
each guidance point on the route.
The following options are available:
• Select the next guidance indicator to replay the voice guidance for the next
maneuver.
• Select the text bar on the top of the map to display the turn list screen.
2Turn List Screen P. 77
• Select the queue indicator to display queued notifications.
2Alert and Notification Banners P. 78
• Select to display the map tools window.
2Map Tools P. 83
■Map Screen
1Viewing the Route
When your phone is connected to Bluetooth®
HandsFreeLink®, the navigation screen will switch to
the incoming call screen when receiving a call.
Speed limit icon
The speed limit shown on the map may be different
from the actual speed limit.
The speed limit icon is not displayed on all roads.
Select the vehicle icon to view the Where Am I?
screen.
2Viewing the Current Location Information
P. 87
You can stop your vehicle en route (e.g., to rest, stop
for gas, etc.), and then continue on your route.
If you did not complete your route, the navigation
restarts when you restart your vehicle.
When LaneWatch
* is activated, the navigation screen
will switch to the LaneWatch screen.
The next guidance indicator does not appear in the
following cases.
•The vehicle speed is 3 mph (4.8 km/h) or less•The GPS signal is weak
•The vehicle position on the map and current vehicle
position do not match
Next guidance indicator
Speed limit iconDashboardsQueue indicator
* Not available on all models
Page 78 of 127
uuDriving to Your DestinationuViewing the Route
76
Navigation
• Select the map dashboards when you want to change the information that is
displayed. Select the following options:
Elevation, Direction, Location, Arrival, Distance, Arrive In, Via Arrival, Via
Distance, Via In.
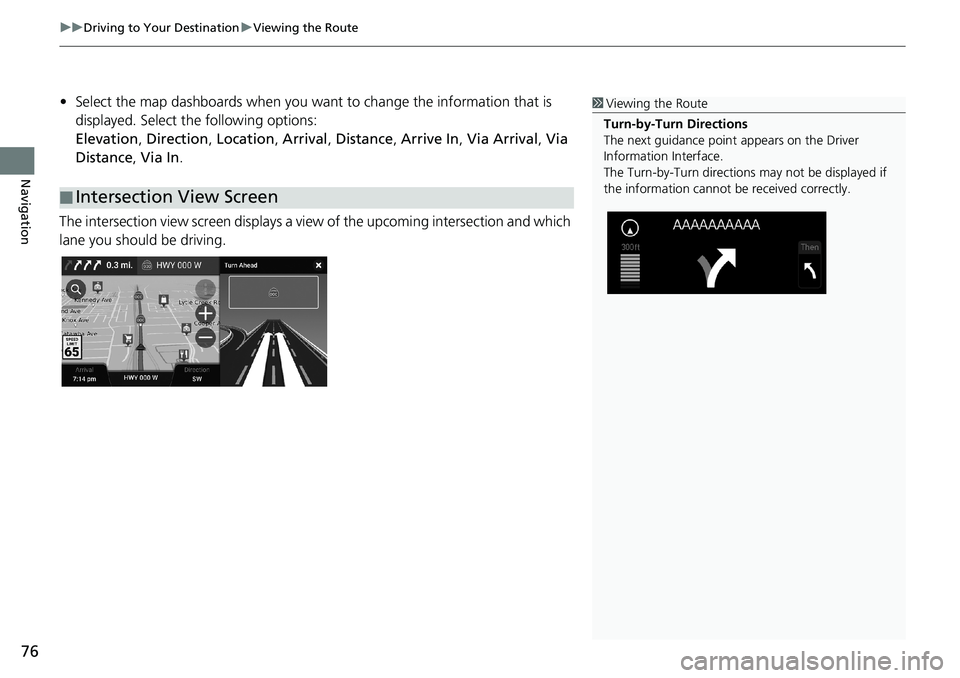
The intersection view screen displays a view of the upcoming intersection and which
lane you should be driving.
■Intersection View Screen
1Viewing the Route
Turn-by-Turn Directions
The next guidance point appears on the Driver
Information Interface.
The Turn-by-Turn directions may not be displayed if
the information cannot be received correctly.
Page 79 of 127
Continued77
uuDriving to Your DestinationuViewing the Route
Navigation
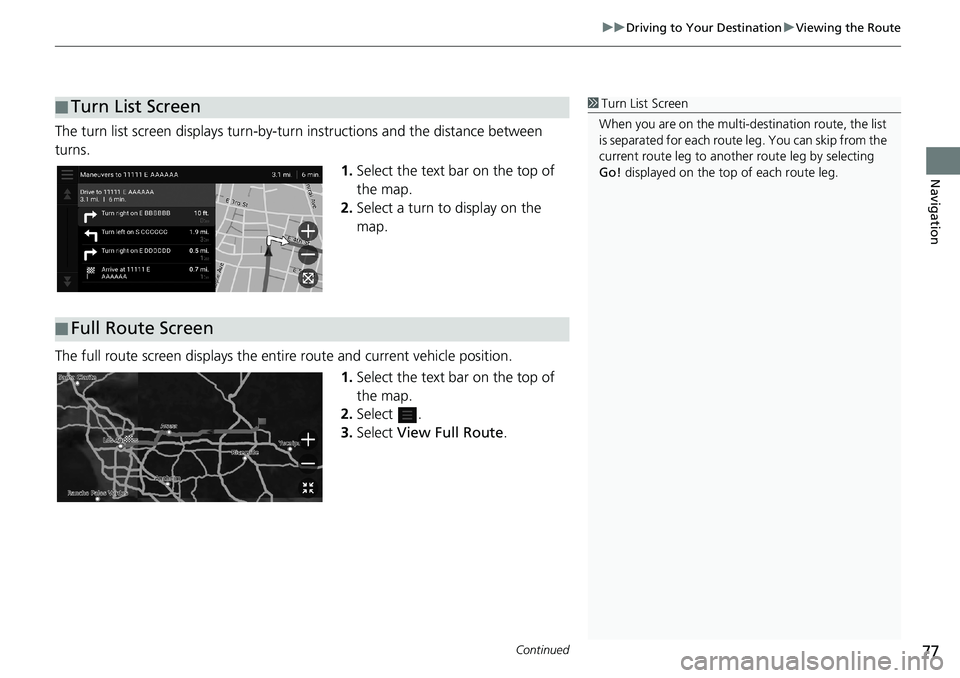
The turn list screen displays turn-by-turn instructions and the distance between
turns.
1.Select the text bar on the top of
the map.
2.Select a turn to display on the
map.
The full route screen displays the entire route and current vehicle position.
1.Select the text bar on the top of
the map.
2.Select .
3.Select View Full Route.
■Turn List Screen1Turn List Screen
When you are on the multi-destination route, the list
is separated for each route leg. You can skip from the
current route leg to another route leg by selecting
Go! displayed on the top of each route leg.
■Full Route Screen
Page 80 of 127
uuDriving to Your DestinationuViewing the Route
78
Navigation
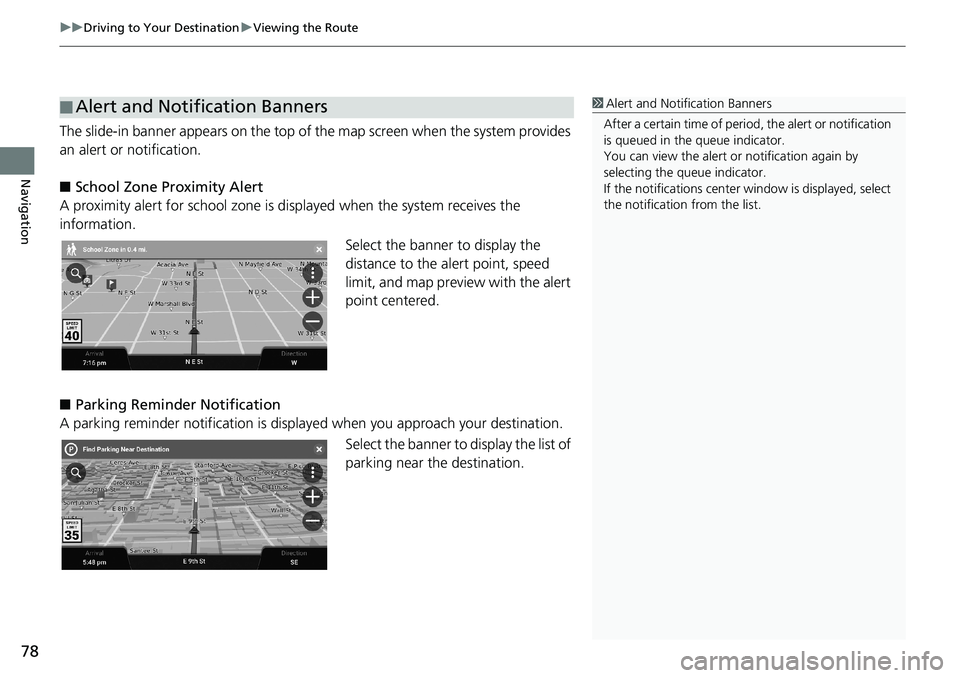
The slide-in banner appears on the top of the map screen when the system provides
an alert or notification.
■School Zone Proximity Alert
A proximity alert for school zone is displayed when the system receives the
information.
Select the banner to display the
distance to the alert point, speed
limit, and map preview with the alert
point centered.
■Parking Reminder Notification
A parking reminder notification is displayed when you approach your destination.
Select the banner to display the list of
parking near the destination.
■Alert and Notification Banners1Alert and Notification Banners
After a certain time of period, the alert or notification
is queued in the queue indicator.
You can view the alert or notification again by
selecting the queue indicator.
If the notifications center window is displayed, select
the notification from the list.