phone HONDA PILOT 2015 2.G Navigation Manual
[x] Cancel search | Manufacturer: HONDA, Model Year: 2015, Model line: PILOT, Model: HONDA PILOT 2015 2.GPages: 175, PDF Size: 5.87 MB
Page 27 of 175
Navigation System27Getting Started
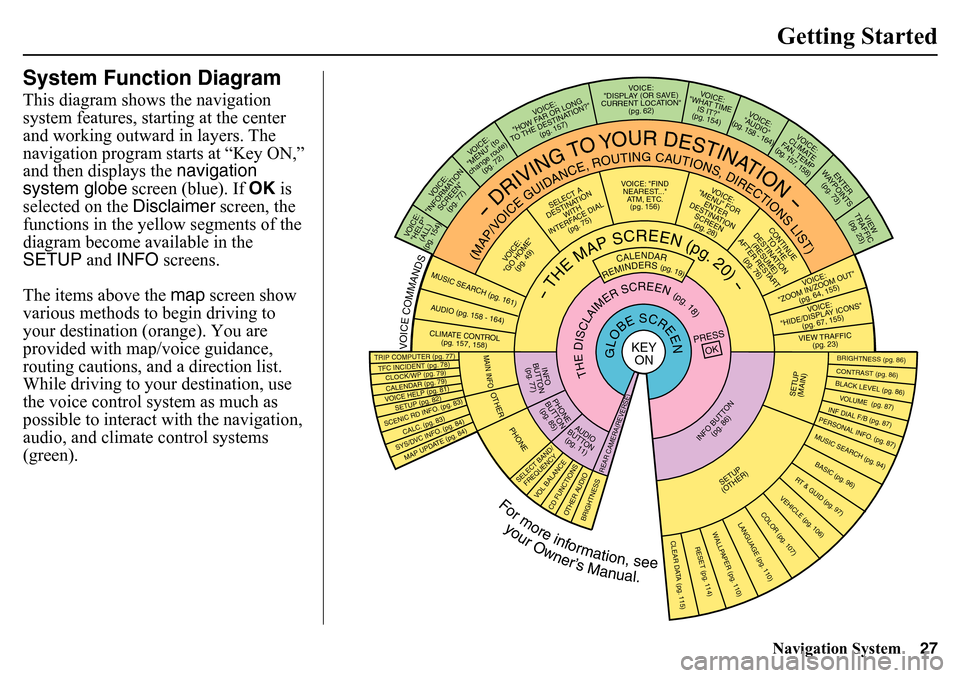
System Function DiagramThis diagram shows the navigation
system features, starting at the center
and working outward in layers. The
navigation program starts at âKey ON,â
and then displays the navigation
system globe screen (blue). If OK is
selected on the Disclaimer screen, the
functions in the yellow segments of the
diagram become available in the
SETUP and INFO screens.
The items above the map screen show
various methods to begin driving to
your destination (orange). You are
provided with map/voice guidance,
routing cautions, an d a direction list.
While driving to your destination, use
the voice control system as much as
possible to interact with the navigation,
audio, and climate control systems
(green).
REMINDERS (pg. 19)
CALENDAR
- THE MAP SCREEN (pg. 20) -
(MAP/VOICE GUIDANCE, ROUTING CAUTIONS, DIRECTIONS LIST)
- DRIVING TO YOUR DESTINATION -
VOICE:
"HELP" (ALL)
(pg. 154)
VOICE:
"INFORMATION SCREEN"(pg. 77)
VOICE:
"MENU" (to
change route) (pg . 72)
VOICE:
"HOW FAR OR LONG
TO THE DESTINATION?" (pg. 157)
VOICE:
"DISPLAY (OR SAVE)
CURRENT LOCATION" (pg. 62)
VOICE:
"WHAT TIME IS IT?"
(pg. 154)
VOICE:
"AUDIO"
(pg. 158 - 164)
VOICE:
CLIMATE
F AN, TEMP
(pg . 157, 158 )
ENTER
WA YPOINTS
(pg. 73)
VIEW
TRAFFIC (pg . 23)
VOICE :
"ZOOM IN/ZOOM OUT" (pg. 64, 155)VOICE:
"HIDE/DISPL AY ICONS"
(pg . 67, 155)VIEW TRAFFIC
(pg . 23)
BRIGHTNESS (pg. 86)CONTRAST (pg. 86)BLACK LEVEL (pg. 86)VOLUME (pg. 87)INF DIAL F/B (pg. 87)PERSONAL INFO. (pg. 87)MUSIC SEARCH (pg. 94)BASIC (pg. 96)
RT & GUID (pg. 97)VEHICLE (pg. 106)
COLOR (pg. 107)
LANGUAGE (pg. 110)
CLEAR DATA (pg. 115)
RESET (pg. 114)
WALLPAPER (pg. 110)
TFC INCIDENT (pg. 78)TRIP COMPUTER (pg . 77)CALENDAR (pg. 79)VOICE HELP (pg. 81)SETUP (pg . 82)SYS/DVC INF O. (pg. 84)MAP UP DATE (pg. 84)
SCENIC RD INFO. (pg. 83)
PRESS
OK
SELECT BAND/FREQUENCY
V OL BALANCECD FUNCTIONSOTHER AUDIO
BRIGHTNESS
REAR CAMERA(REVERSE)
INFO BUT TON
(pg. 86)
AUDIO
BUT TON
(pg. 11)
INFO
BUTT ON
(pg . 77)PHONE
B UTTON
(pg . 85)
PHONE
THE DISCLAIMER SCREEN (pg. 18)
VOICE: "FIND NEAREST..." ATM, ETC.(pg. 156)
SELECT A
DESTINATION WITH
INTERFACE DIAL (pg. 75)
VOICE:
"GO HOME" (pg. 49)
VOICE:
"MENU" FOR ENTER
DESTINATION SCREEN(pg. 2 8)
CONTINUE
TO THE
DESTINATION (RESUME)
AFTER RESTA R T (pg. 76)
GLOBE SCREEN
KEY
ON
VOICE COMMANDS MUSIC SEARCH
(pg. 161)
AUDIO (pg. 1 5 8 - 164)CLIMATE CONTROL
(pg. 157, 158)
For more information, see
your Ownerâs Manual.
SETUP
( O THER)
CLOCK/WP (pg. 79)
CALC. (pg . 83)
MAIN INFOOTHER
SETUP
(MAIN)
Page 28 of 175
28
Navigation System
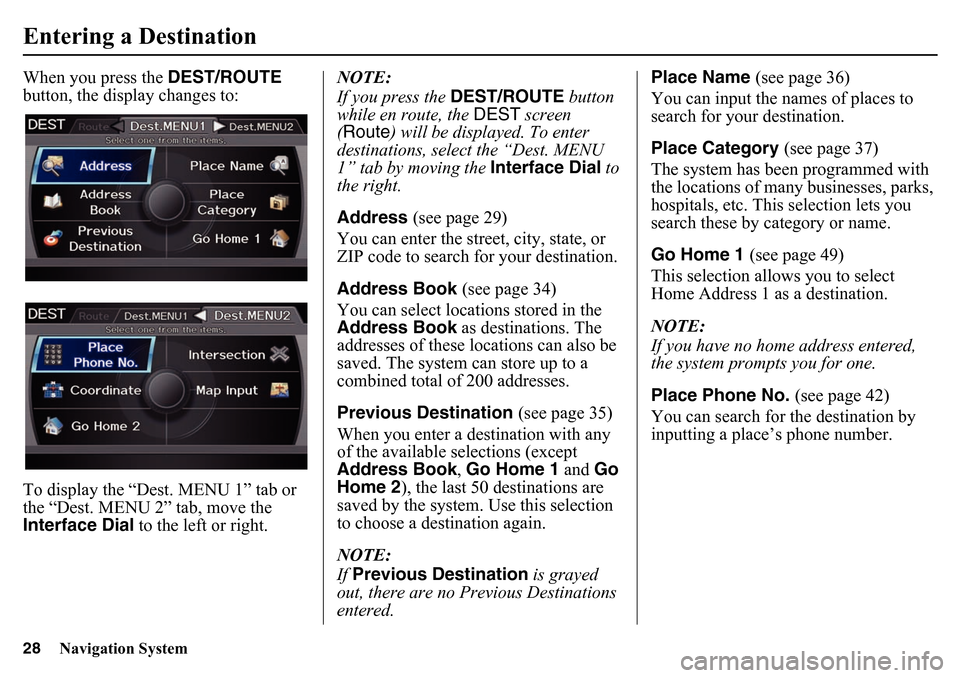
When you press the DEST/ROUTE
button, the display changes to:
To display the âDest. MENU 1â tab or
the âDest. MENU 2â tab, move the
Interface Dial to the left or right. NOTE:
If you press the DEST/ROUTE
button
while en route, the DEST screen
(Route ) will be displayed. To enter
destinations, select the âDest. MENU
1â tab by moving the Interface Dial to
the right.
Address (see page 29)
You can enter the street, city, state, or
ZIP code to search for your destination.
Address Book (see page 34)
You can select locations stored in the
Address Book as destinations. The
addresses of these locations can also be
saved. The system can store up to a
combined total of 200 addresses.
Previous Destination (see page 35)
When you enter a destination with any
of the available selections (except
Address Book , Go Home 1 and Go
Home 2 ), the last 50 destinations are
saved by the system. Use this selection
to choose a destination again.
NOTE:
If Previous Destination is grayed
out, there are no Prev ious Destinations
entered. Place Name
(see page 36)
You can input the names of places to
search for your destination.
Place Category (see page 37)
The system has been programmed with
the locations of many businesses, parks,
hospitals, etc. This selection lets you
search these by category or name.
Go Home 1 (see page 49)
This selection allows you to select
Home Address 1 as a destination.
NOTE:
If you have no home address entered,
the system prompts you for one.
Place Phone No. (see page 42)
You can search for the destination by
inputting a placeâs phone number.Entering a Destination
Page 37 of 175
Navigation System37
Entering a Destination
NOTE:
When there are more than 2,000
destinations, the ordering of the items in
the list cannot be sorted by distance or
name.
When you select a location, the system
displays the Calculate route to screen.
(See Driving to Your Destination on
page 50.)
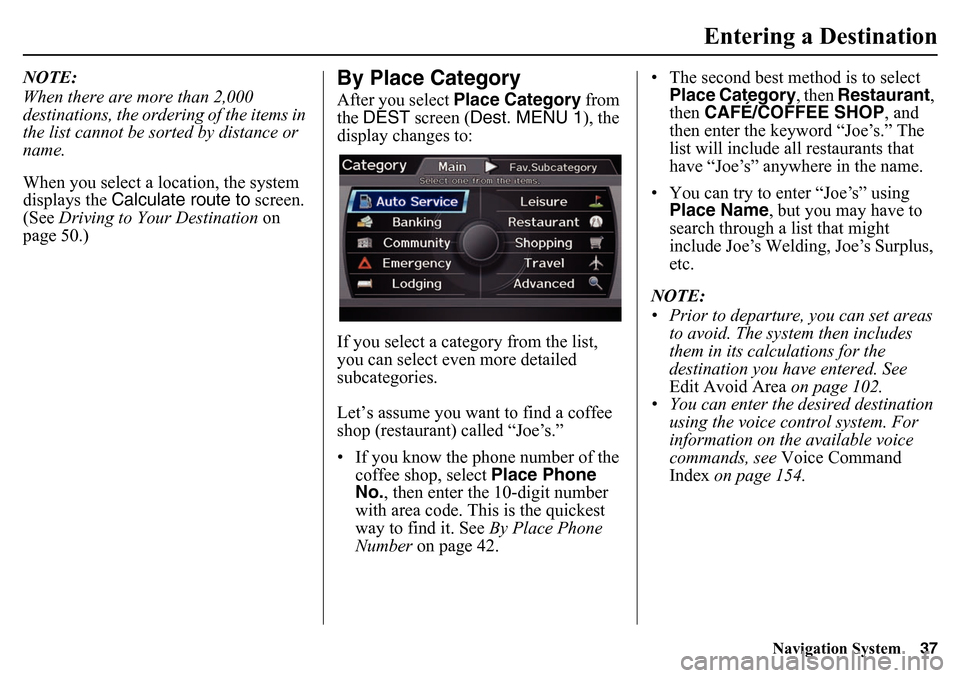
By Place CategoryAfter you select Place Category from
the DEST screen ( Dest. MENU 1 ), the
display changes to:
If you select a category from the list,
you can select even more detailed
subcategories.
Letâs assume you want to find a coffee
shop (restaurant) called âJoeâs.â
⢠If you know the phone number of the coffee shop, select Place Phone
No. , then enter the 10-digit number
with area code. This is the quickest
way to find it. See By Place Phone
Number on page 42. ⢠The second best method is to select
Place Category , then Restaurant ,
then CAFĂ/COFFEE SHOP , and
then enter the keyword âJoeâs.â The
list will include all restaurants that
have âJoeâsâ anywhere in the name.
⢠You can try to enter âJoeâsâ using Place Name , but you may have to
search through a list that might
include Joeâs Welding, Joeâs Surplus,
etc.
NOTE:
⢠Prior to departure, you can set areas to avoid. The system then includes
them in its calculations for the
destination you have entered. See
Edit Avoid Area on page 102.
⢠You can enter the desired destination
using the voice control system. For
information on the available voice
commands, see Voice Command
Index on page 154.
Page 42 of 175
42
Navigation System
Entering a DestinationBy Place Phone NumberYou can select a destination by phone
number. Only phone numbers saved in
the system are recognized. The phone
numbers of private residences and
numbers entered in your private address
book are not in the system. If you select
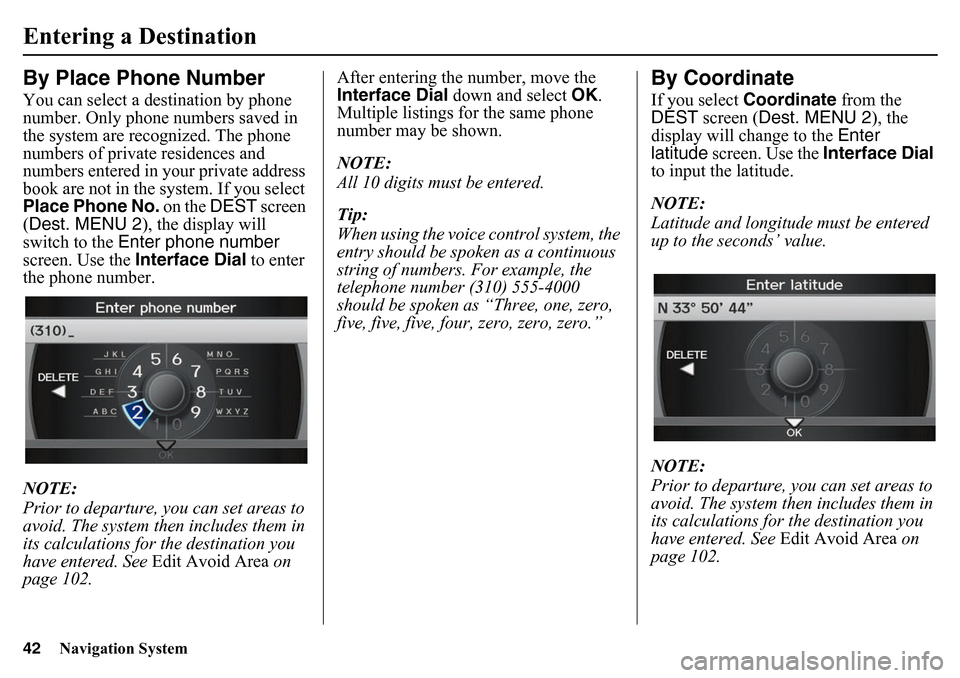
Place Phone No. on the DEST screen
(Dest. MENU 2 ), the display will
switch to the Enter phone number
screen. Use the Interface Dial to enter
the phone number.
NOTE:
Prior to departure, you can set areas to
avoid. The system then includes them in
its calculations for the destination you
have entered. See Edit Avoid Area on
page 102. After entering the number, move the
Interface Dial
down and select OK.
Multiple listings for the same phone
number may be shown.
NOTE:
All 10 digits must be entered.
Tip:
When using the voice control system, the
entry should be spoken as a continuous
string of numbers. For example, the
telephone number (310) 555-4000
should be spoken as âThree, one, zero,
five, five, five, four, zero, zero, zero.â
By CoordinateIf you select Coordinate from the
DEST screen (Dest. MENU 2 ), the
display will change to the Enter
latitude screen. Use the Interface Dial
to input the latitude.
NOTE:
Latitude and longitude must be entered
up to the secondsâ value.
NOTE:
Prior to departure, you can set areas to
avoid. The system then includes them in
its calculations for the destination you
have entered. See Edit Avoid Area on
page 102.
Page 62 of 175
62
Navigation System
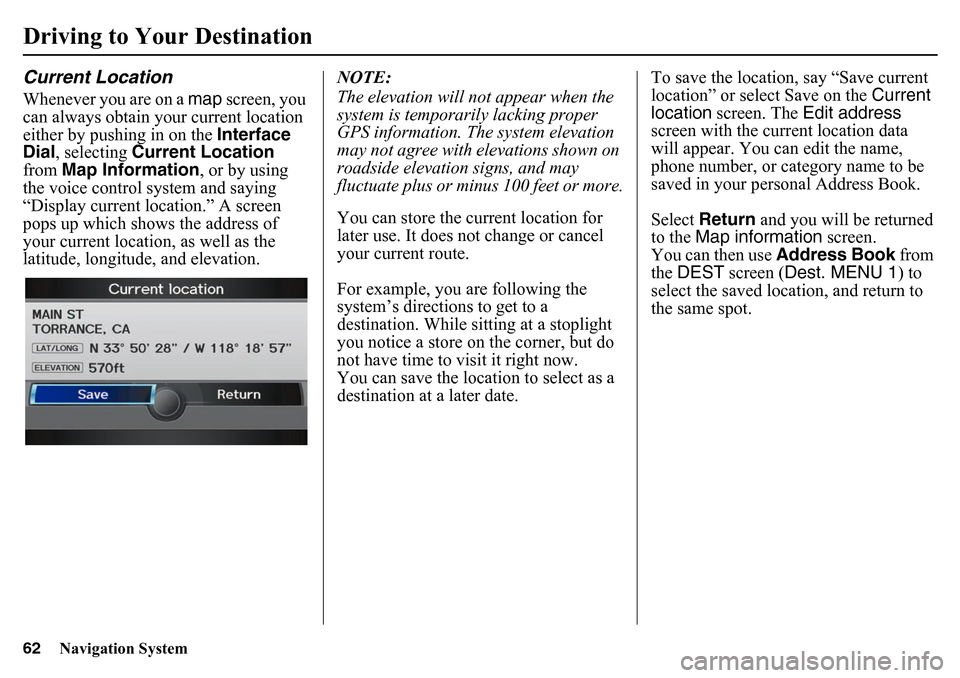
Driving to Your DestinationCurrent LocationWhenever you are on a map screen, you
can always obtain your current location
either by pushing in on the Interface
Dial , selecting Current Location
from Map Information, or by using
the voice control system and saying
âDisplay current location.â A screen
pops up which shows the address of
your current location, as well as the
latitude, longitude, and elevation. NOTE:
The elevation will not appear when the
system is temporarily lacking proper
GPS information. The system elevation
may not agree with elevations shown on
roadside elevation signs, and may
fluctuate plus or minus 100 feet or more.
You can store the current location for
later use. It does not change or cancel
your current route.
For example, you are following the
systemâs directions to get to a
destination. While sitting at a stoplight
you notice a store on the corner, but do
not have time to visit it right now.
You can save the location to select as a
destination at a later date.To save the location, say âSave current
locationâ or select Save on the
Current
location screen. The Edit address
screen with the current location data
will appear. You ca n edit the name,
phone number, or category name to be
saved in your personal Address Book.
Select Return and you will be returned
to the Map information screen.
You can then use Address Book from
the DEST screen ( Dest. MENU 1 ) to
select the saved location, and return to
the same spot.
Page 85 of 175
Navigation System85Phone Features
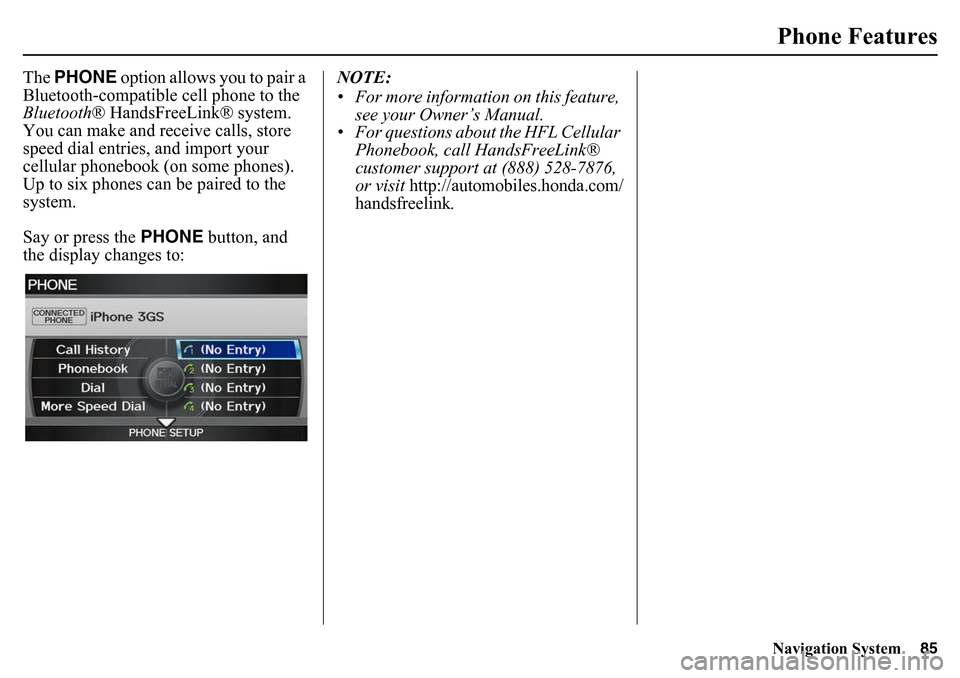
The PHONE option allows you to pair a
Bluetooth-compatible cell phone to the
Bluetooth ÂŽ HandsFreeLinkÂŽ system.
You can make and receive calls, store
speed dial entries, and import your
cellular phonebook (on some phones).
Up to six phones can be paired to the
system.
Say or press the PHONE button, and
the display changes to: NOTE:
⢠For more information on this feature,
see your Ownerâs Manual.
⢠For questions abou t the HFL Cellular
Phonebook, call HandsFreeLinkÂŽ
customer support at (888) 528-7876,
or visit
http://automobiles.honda.com/
handsfreelink
.
Page 89 of 175
Navigation System89
System Setup
Edit NameYou may use the âNameâ field to give
the entry a name or title that you will
recognize later, such as âDoctor Smithâ
or âBroadway Theatre.â If you do not
give the address a name, the system will
assign one (Address 001, etc.).
Say or select Edit Name. Then use the
Interface Dial to enter the name.
Select OK when finished.
NOTE:
You can always re-enter, edit, or make
changes to any entry. âAddressâ is the
only required field.
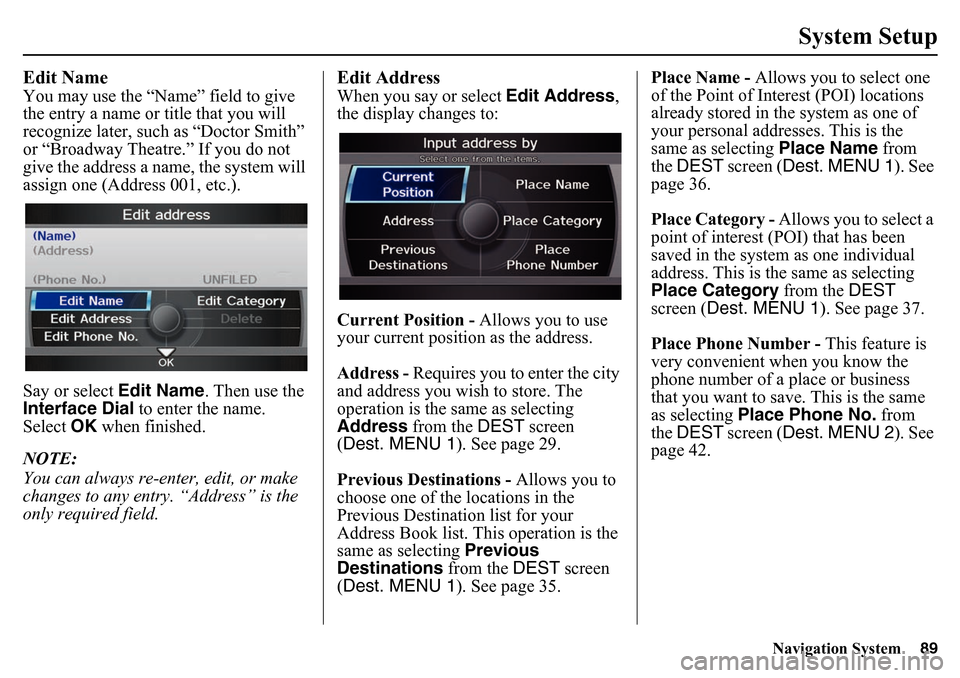
Edit AddressWhen you say or select Edit Address,
the display changes to:
Current Position - Allows you to use
your current position as the address.
Address - Requires you to enter the city
and address you wish to store. The
operation is the sa me as selecting
Address from the DEST screen
(Dest. MENU 1 ). See page 29.
Previous Destinations - Allows you to
choose one of the locations in the
Previous Destination list for your
Address Book list. This operation is the
same as selecting Previous
Destinations from the DEST screen
(Dest. MENU 1 ). See page 35. Place Name -
Allows you to select one
of the Point of Inte rest (POI) locations
already stored in the system as one of
your personal addresses. This is the
same as selecting Place Name from
the DEST screen ( Dest. MENU 1 ). See
page 36.
Place Category - Allows you to select a
point of interest (POI) that has been
saved in the system as one individual
address. This is the same as selecting
Place Category from the DEST
screen ( Dest. MENU 1 ). See page 37.
Place Phone Number - This feature is
very convenient when you know the
phone number of a place or business
that you want to save. This is the same
as selecting Place Phone No. from
the DEST screen ( Dest. MENU 2 ). See
page 42.
Page 90 of 175
90
Navigation System
System SetupAfter you have used one of these six
options to enter the address, the initial
screen for entering the personal address
is redisplayed, with the address shown
in the âAddressâ field. If you have
entered the address using Place Name,
Place Category , or Place Phone
Number , the phone number
corresponding to the address also
appears in the âPhone No.â field.Edit Phone NumberYou can enter the phone number of the
address. If the address was chosen with
Place Name, Place Category , or
Place Phone Number , and it has a
phone number, that number is entered
automatically. Say or select
Edit Phone No. to
display the Enter phone number
screen. Enter the phone number,
including the area code, by using the
voice control system (say the entire
phone number one digit at a time) or by
using the Interface Dial . Say or select
OK when finished.
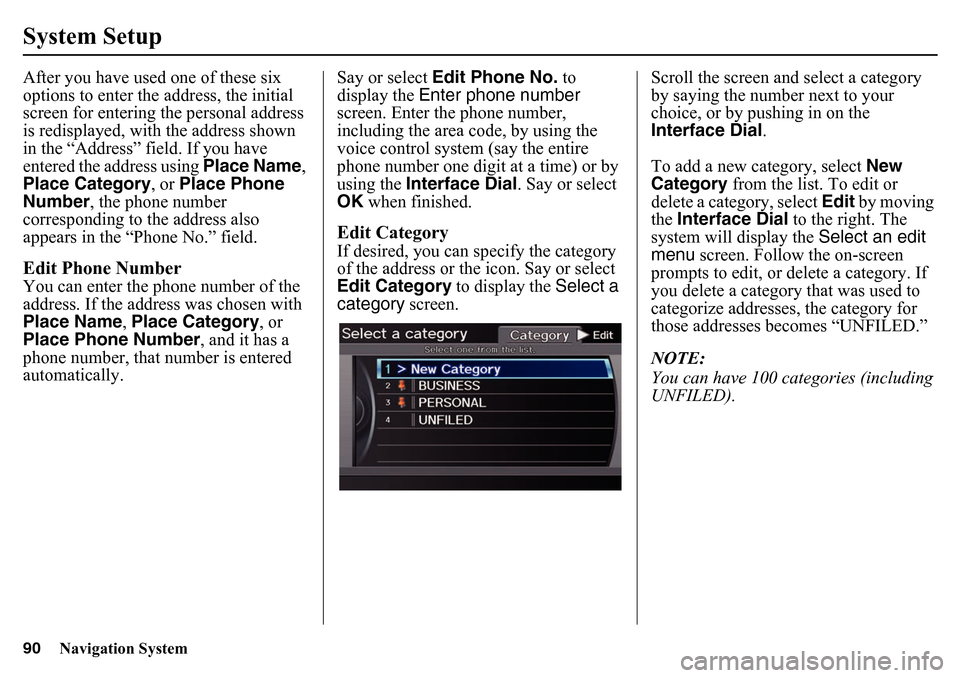
Edit CategoryIf desired, you can sp ecify the category
of the address or the icon. Say or select
Edit Category to display the Select a
category screen. Scroll the screen and select a category
by saying the number next to your
choice, or by pushing in on the
Interface Dial
.
To add a new category, select New
Category from the list. To edit or
delete a category, select Edit by moving
the Interface Dial to the right. The
system will display the Select an edit
menu screen. Follow the on-screen
prompts to edit, or delete a category. If
you delete a category that was used to
categorize addresses, the category for
those addresses becomes âUNFILED.â
NOTE:
You can have 100 categories (including
UNFILED).
Page 91 of 175
Navigation System91
System Setup
The system will then display everything
that you have entered. If all the
information is correct, say or select OK.
This will return you to the Address
Book list.
If you want to enter another address,
select New Address in the list, then
repeat the procedures above. If not,
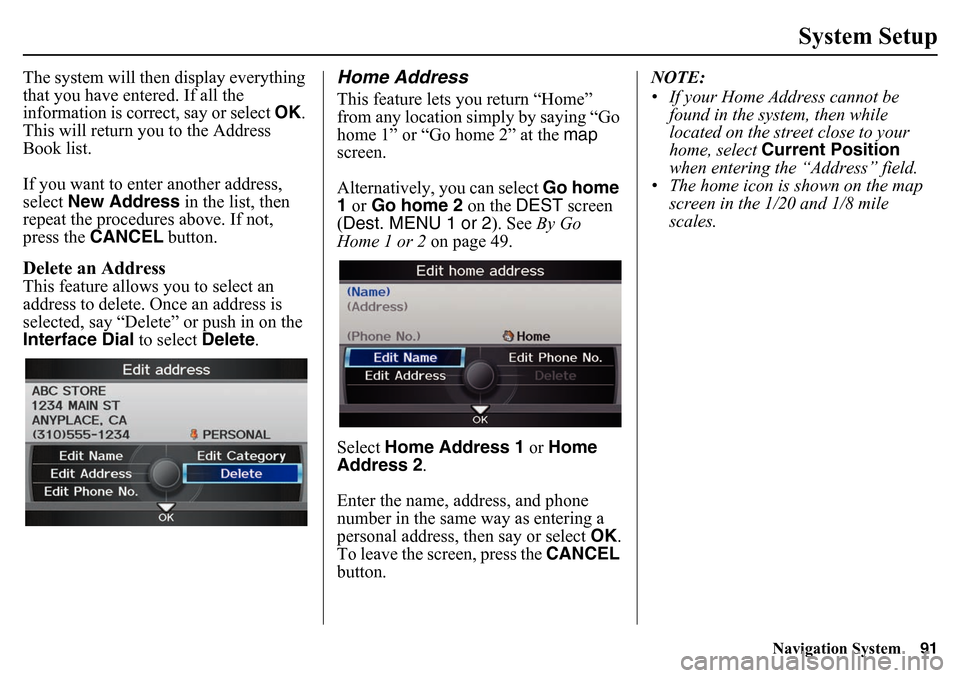
press the CANCEL button.Delete an AddressThis feature allows you to select an
address to delete. Once an address is
selected, say âDeleteâ or push in on the
Interface Dial to select Delete.
Home AddressThis feature lets you return âHomeâ
from any location simply by saying âGo
home 1â or âGo home 2â at the map
screen.
Alternatively, you can select Go home
1 or Go home 2 on the DEST screen
(Dest. MENU 1 or 2 ). See By Go
Home 1 or 2 on page 49.
Select Home Address 1 or Home
Address 2 .
Enter the name, address, and phone
number in the same way as entering a
personal address, then say or select OK.
To leave the screen, press the CANCEL
button. NOTE:
⢠If your Home Address cannot be
found in the system, then while
located on the street close to your
home, select Current Position
when entering the âAddressâ field.
⢠The home icon is shown on the map screen in the 1/20 and 1/8 mile
scales.
Page 95 of 175
Navigation System95
System Setup
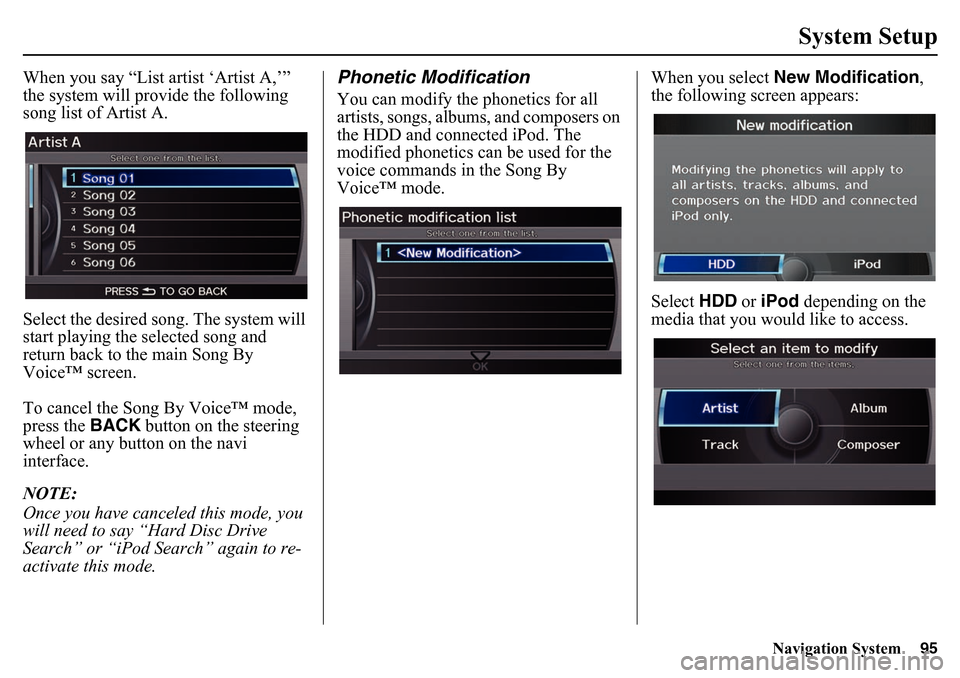
When you say âList artist âArtist A,ââ
the system will provide the following
song list of Artist A.
Select the desired song. The system will
start playing the selected song and
return back to the main Song By
Voice⢠screen.
To cancel the Song By Voice⢠mode,
press the BACK button on the steering
wheel or any button on the navi
interface.
NOTE:
Once you have canceled this mode, you
will need to say âHard Disc Drive
Searchâ or âiPod Searchâ again to re-
activate this mode.
Phonetic ModificationYou can modify the phonetics for all
artists, songs, albums, and composers on
the HDD and connected iPod. The
modified phonetics can be used for the
voice commands in the Song By
Voice⢠mode. When you select
New Modification ,
the following screen appears:
Select HDD or iPod depending on the
media that you would like to access.