light HONDA S2000 2000 1.G Owner's Manual
[x] Cancel search | Manufacturer: HONDA, Model Year: 2000, Model line: S2000, Model: HONDA S2000 2000 1.GPages: 273, PDF Size: 21.58 MB
Page 59 of 273
Steering Wheel Controls
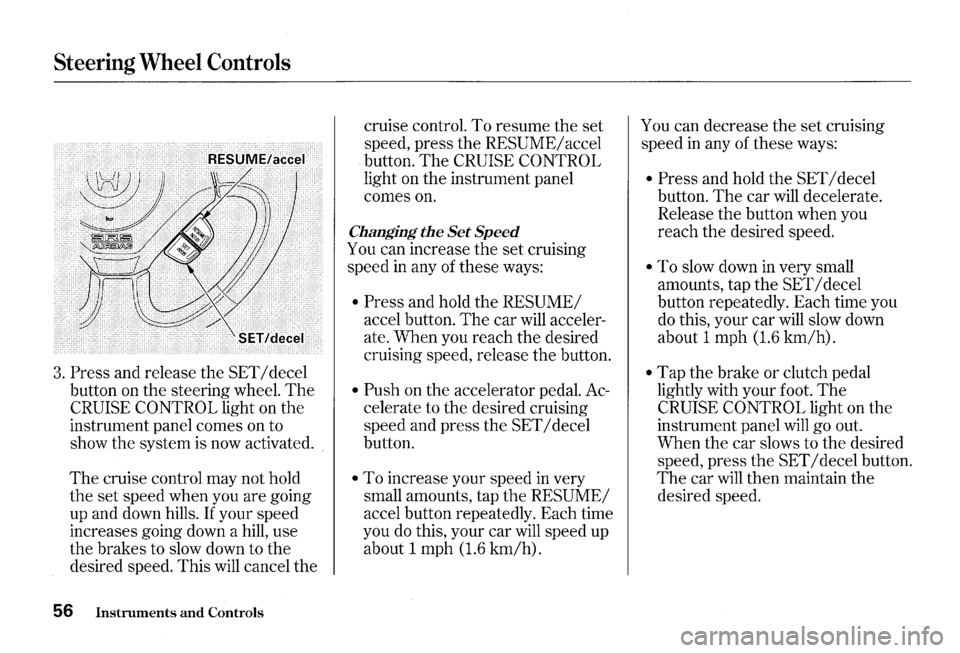
3. Press and release the SET I decel
button on the steering wheel.
The
CRUISE CONTROL light on the
instrument panel comes on to
show the system is now activated.
The cruise control may not hold
the set speed when you are going
up and down hills.
If your speed
increases going down a hill, use
the brakes to slow down to the
desired speed. This
will cancel the
56 Instruments and Controls
cruise control. To resume the set
speed, press the
RESUME/ accel
button.
The CRUISE CONTROL
light on the instrument panel
comes
on.
Changing the Set Speed
You can increase the set cruising
speed
in any of these ways:
• Press and hold the RESUME/
accel button. The car will acceler
ate. When you reach the desired
cruising speed, release the button.
• Push on the accelerator pedal. Ac
celerate to the desired cruising
speed and press the
SET I decel
button.
• To increase your speed in very
small amounts, tap the
RESUME/
accel button repeatedly. Each time
you
do this, your car will speed up
about 1 mph
(1.6 km/h).
You can decrease the set cruising
speed
in any of these ways:
• Press and hold the SET I decel
button.
The car will decelerate.
Release the button when you
reach the desired speed.
• To slow down in very small
amounts, tap the
SET I decel
button repeatedly. Each time you
do this, your car will slow down
about 1 mph
(1.6 km/h).
• Tap the brake or clutch pedal
lightly with your foot.
The
CRUISE CONTROL light on the
instrument panel
will go out.
When the car slows to the desired
speed, press
the SET I decel button.
The car will then maintain the
desired speed.
Page 60 of 273
Even with the cruise control turned
on, you can still use the accelerator
pedal to speed up for passing. After
completing the pass, take your foot
off the accelerator pedal.
The car
will return to the set cruising speed.
Resting your foot on the brake or
clutch pedal
will cause the cruise
control to cancel.
Cancelling the Cruise Control
You can cancel the cruise control in
any
of these ways:
• Tap the brake or clutch pedal.
• Press the SET I decel and RE
SUME/ accel buttons at the same
time.
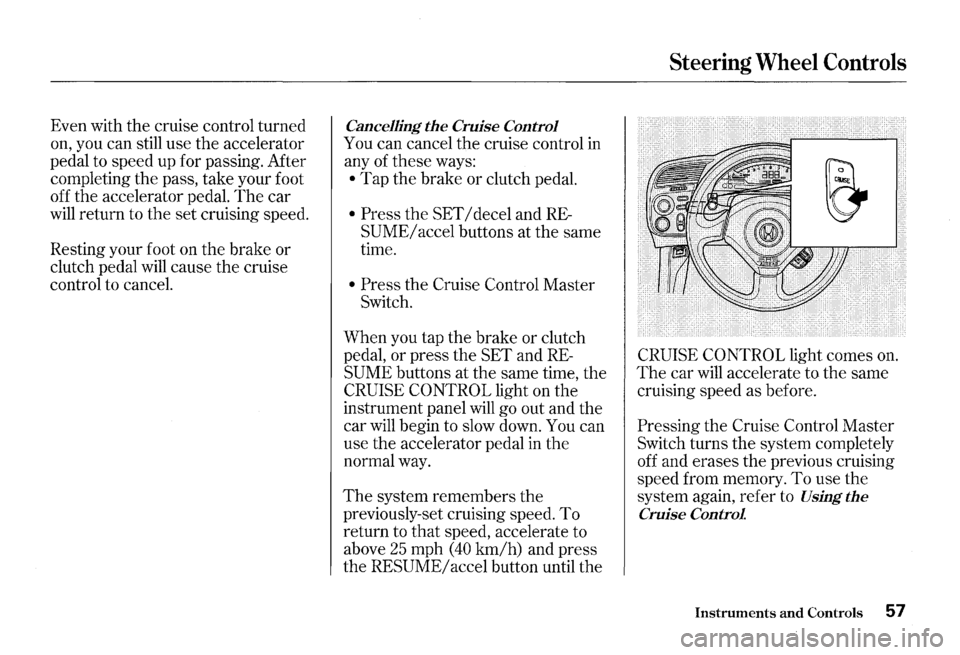
• Press the Cruise Control Master
Switch.
When you tap the brake or clutch
pedal, or press the SET and
RE
SUME buttons at the same time, the
CRUISE CONTROL light on the
instrument panel will
go out and the
car
will begin to slow down. You can
use the accelerator pedal in the
normal way.
The system remembers the
previously-set cruising speed. To
return to that speed, accelerate to
above
25 mph (40 km/h) and press
the
RESUME/ accel button until the
Steering Wheel Controls
CRUISE CONTROL light comes on.
The car will accelerate to the same
cruising speed as before.
Pressing the Cruise Control Master
Switch turns the system completely
off and erases the previous cruising
speed from memory.
To use the
system again, refer to
Using the
Cruise Control
Instruments and Controls 57
Page 61 of 273
Keys and Locks
Keys
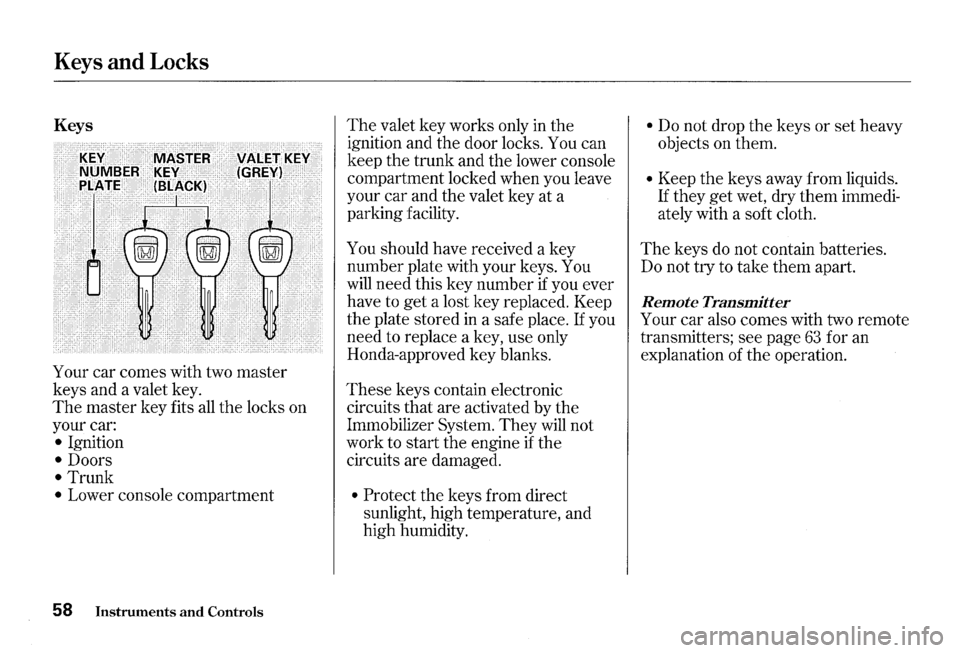
Your car comes with two master
keys and a valet key.
The master key fits all the locks on
your car:
• Ignition
• Doors
• Trunk
• Lower console compartment
58 Instruments and Controls
The valet key works only in the
ignition and the door locks. You can
keep the trunk and the lower console
compartment locked when you leave
your car and the valet key at a
parking facility.
You should have received a key
number plate with your keys. You
will need this key number if you ever
have to
get a lost key replaced. Keep
the plate stored
in a safe place. If you
need to replace a key, use only
Honda-approved key blanks.
These keys contain electronic
circuits that are activated by the
Immobilizer System.
They will not
work to start the engine if the
circuits are damaged.
• Protect the keys from direct
sunlight, high temperature, and
high humidity.
• Do not drop the keys or set heavy
objects on them.
• Keep the keys away from liquids.
If they get wet, dry them immedi
ately with a soft cloth.
The keys do not contain batteries.
Do not try to take them apart.
Remote Transmitter
Your car also comes with two remote
transmitters; see page
63 for an
explanation of the operation.
Page 63 of 273
Keys and Locks
Ignition Switch
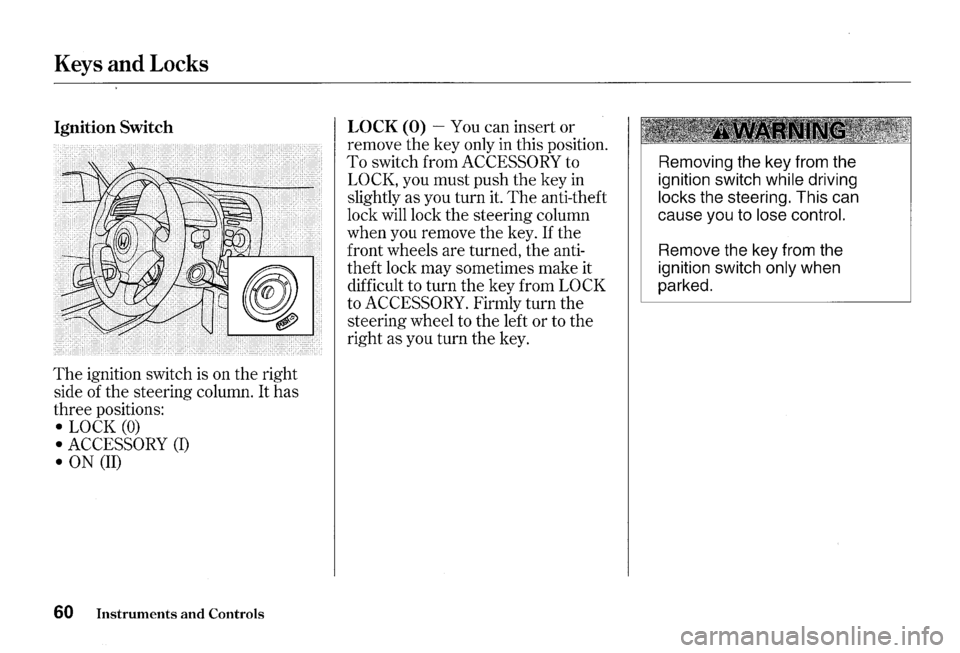
The ignition switch is on the right
side of the steering column.
It has
three positions:
• LOCK (0)
• ACCESSORY (I)
• ON (II)
60 Instruments and Controls
LOCK (0)-You can insert or
remove the key only in this position.
To switch from ACCESSORY to
LOCK, you must push the key in
slightly as you turn it. The anti-theft
lock will lock the steering column
when you remove the key.
If the
front wheels are turned, the anti
theft lock may sometimes make it
difficult to turn the key from
LOCK
to ACCESSORY. Firmly turn the
steering wheel to the left or to the
right as you turn the key.
Removing the key from the
ignition switch
while driving
locks the steering. This can
cause you to
lose control.
Remove the key from the
ignition switch
only when
parked.
Page 64 of 273
ACCESSORY (I) -In this position,
you can operate
the audio system
and the accessory power socket.
ON (II) -This is the normal key
position when driving. All features
and accessories on
the car are usable.
Several of
the lights on the instru
ment panel come on as a test when
you
turn the ignition switch from
ACCESSORY to
ON.
The engine can be started with the
key in this position by pressing the
engine START button (see page
131 ).
The engine will not start if the
Immobilizer System does not
recognize the key's coding (see page
59).
You will hear a reminder beeper if
you leave
the key in the ignition
switch in
the LOCK (0) or
ACCESSORY (I) position and open
the driver's door. Remove the key to
turn off the beeper.
Keys and Locks
Instruments and Controls 61
Page 66 of 273
Remote Transmitter
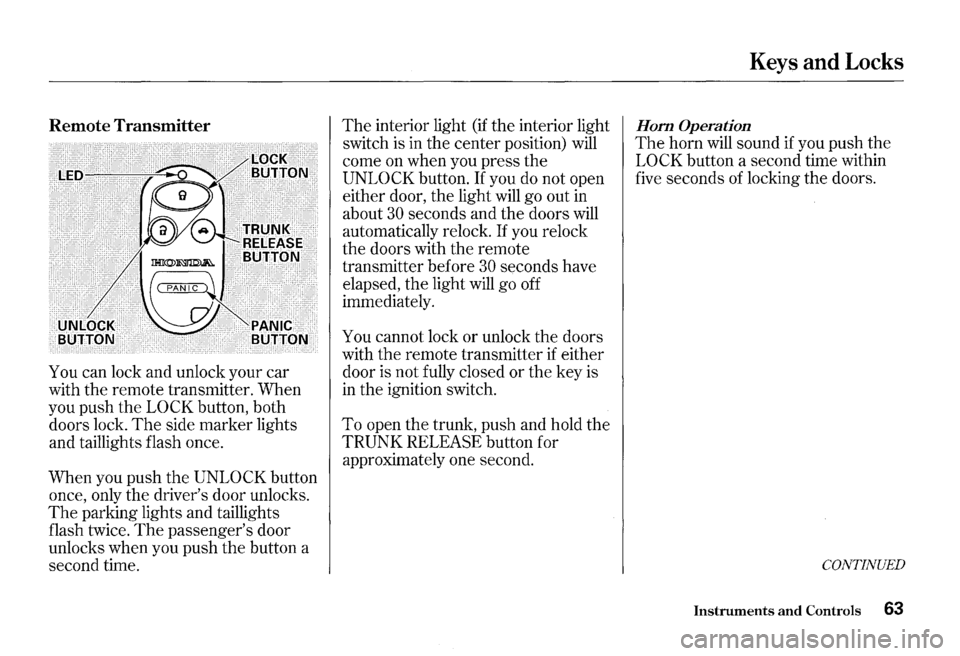
You can lock and unlock your car
with the remote transmitter. When
you push the
LOCK button, both
doors lock.
The side marker lights
and taillights flash once.
When you push
the UNLOCK button
once, only the driver's door unlocks.
The parking lights and taillights
flash twice.
The passenger's door
unlocks when you push the button a
second time.
The interior light (if the interior light
switch is in
the center position) will
come on when you press the
UNLOCK button. If you do not open
either door, the light will go out in
about
30 seconds and the doors will
automatically relock.
If you relock
the doors with the remote
transmitter before
30 seconds have
elapsed, the light will go off
immediately.
You cannot lock or unlock the doors
with
the remote transmitter if either
door is not fully closed
or the key is
in the ignition switch.
To open the trunk, push and hold the
TRUNK RELEASE button for
approximately one second.
Keys and Locks
Hom Operation
The horn will sound if you push the
LOCK button a second time within
five seconds of locking the doors.
CONTINUED
Instruments and Controls 63
Page 67 of 273
Keys and Locks
Panic Mode
Panic mode allows you to remotely
activate your car's security system to
attract attention. When activated,
the
horn will sound, and the exterior
lights will flash for about
30 seconds.
To activate panic mode, press and
hold
the PANIC button for about one
second.
To cancel Panic mode before 30
seconds, press any button on the
remote transmitter. You can also
turn the ignition switch to
0 N (II).
64 Instruments and Controls
Replacing the Battery
When the remote transmitter's
battery begins to
get weak, it may
take several pushes on the button to
lock or unlock
the doors, and the
LED will
get dim. Replace the
battery as soon as possible.
Battery type: CR2025
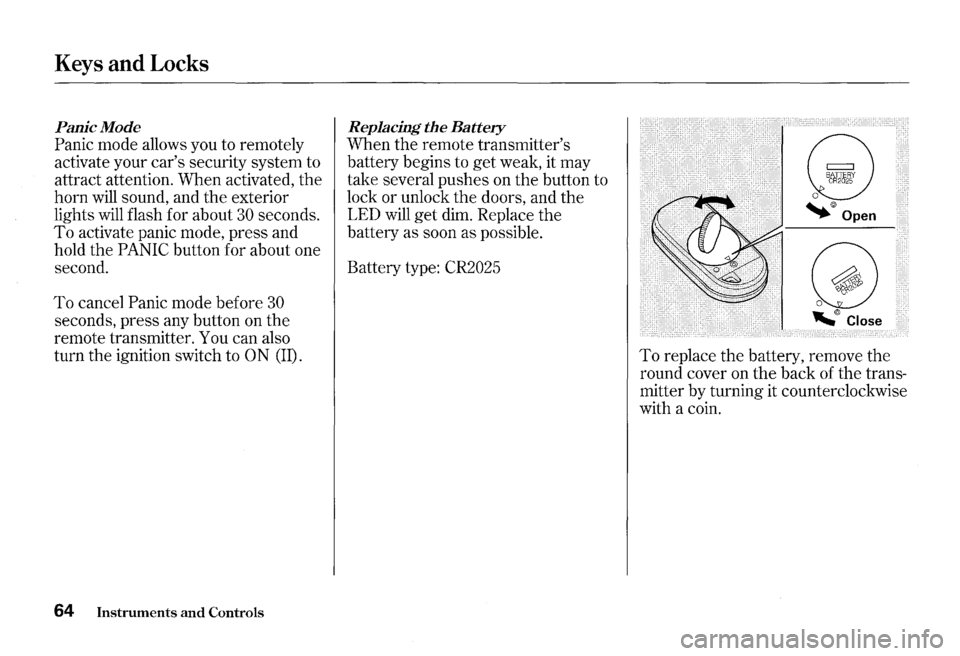
To replace the battery, remove the
round cover on the back of the trans
mitter by turning it counterclockwise
with a coin.
Page 73 of 273
Power Windows
The master control panel also con
tains
these extra features:
AUTO-To open the driver's
window fully, push
the window
switch firmly down and release
it.
The window automatically goes all
the way down. To stop the window
from going all the way down, pull
back on the window switch briefly.
To open the driver's window only
partially, push
the window switch
down lightly and hold
it. The window
will stop as soon as you release the
switch.
The AUTO function only works to
lower
the driver's window. To raise
the window, you must pull back on
the window switch and hold it until
the window reaches the desired
position.
70 Instruments and Controls
The MAIN switch controls power to
the passenger's window. With this
switch off,
the passenger's window
cannot
be raised or lowered. The
MAIN switch does not affect the
driver's window. Keep
the MAIN
switch off when you have a child in
the car so the child does not
get
injured by operating the window
unintentionally.
Page 74 of 273
The convertible top on your Honda
lowers and raises electrically.
Before operating the convertible top,
make sure the car is parked on level
ground, and that there is enough
clearance above the top.
It is advisable to raise the top
whenever you park the car. This
helps to protect the car from
unexpected weather changes, and
from theft of your valuables.
NOTICE
• Do not operate the convertible top in
freezing weather. You can damage
the material and mechanism
of the
convertible top.
• Do not operate the top if it is wet,
dirty, or covered with ice or snow.
• Never drive the car with the
convertible top
half open.
• Do not lower or raise the top while
the engine
is running.
• Do not operate the convertible top if
the car is raised on the jack, a hoist,
or on jack stands.
Lowering the Convertible Top
Park your car in the shade whenever
possible. Extended exposure to sunlight can
cause the convertible top to
deteriorate.
1. Apply the parking brake. The
convertible top will not operate
unless
the parking brake is fully
engaged.
2. Turn the ignition switch to ON (II).
Convertible Top
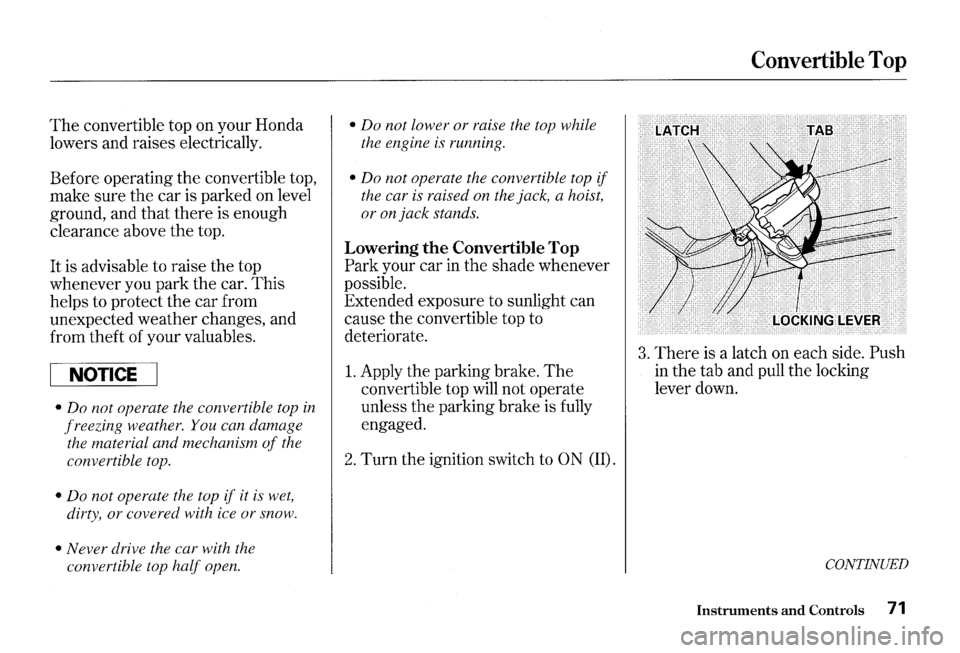
3. There is a latch on each side. Push
in the tab and pull the locking
lever down.
CONTINUED
Instruments and Controls 71
Page 82 of 273
Hazard Warning
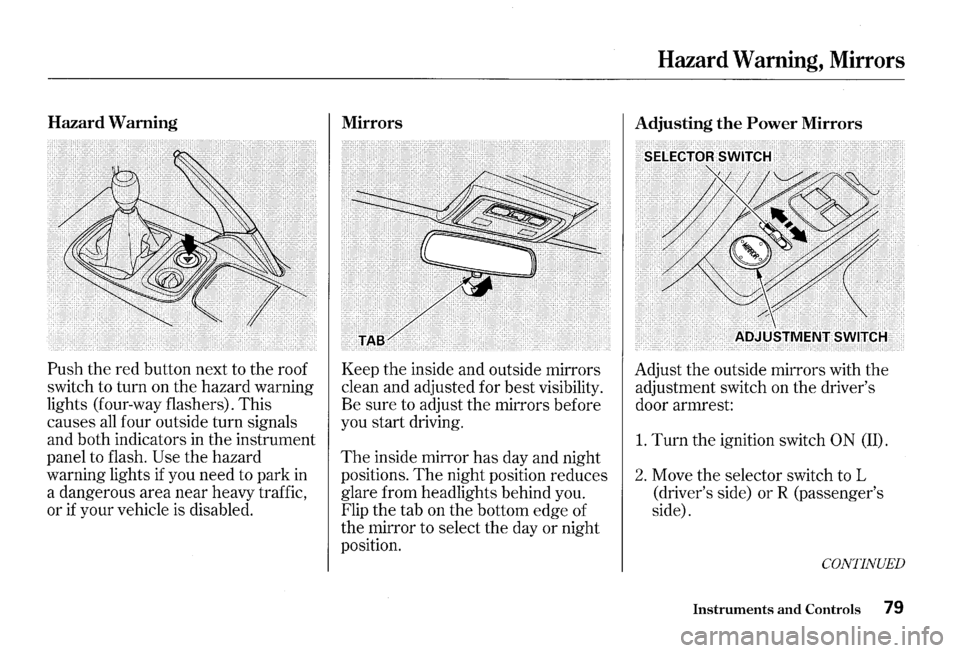
Push the red button next to the roof
switch to turn on the hazard warning
lights (four-way flashers). This
causes
all four outside turn signals
and both indicators in the instrument
panel to flash.
Use the hazard
warning lights
if you need to park in
a dangerous area near heavy traffic,
or
if your vehicle is disabled.
Mirrors
Keep the inside and outside mirrors
clean and adjusted for best visibility.
Be sure to adjust the mirrors before
you start driving.
The inside mirror has day and night
positions.
The night position reduces
glare from headlights behind you.
Flip the tab on the bottom edge of
the mirror to select the day or night
position.
Hazard Warning, Mirrors
Adjusting the Power Mirrors
Adjust the outside mirrors with the
adjustment switch on the driver's
door armrest:
1. Turn the ignition switch 0 N (II).
2. Move the selector switch to L
(driver's side)
orR (passenger's
side).
CONTINUED
Instruments and Controls 79