Hyundai Accent 2003 Repair Manual
Manufacturer: HYUNDAI, Model Year: 2003, Model line: Accent, Model: Hyundai Accent 2003Pages: 186, PDF Size: 11.36 MB
Page 61 of 186
1- 48 FEATURES OF YOUR HYUNDAI
o To open the glove box, pull on the glove box
release lever.
B500B01HP-AAT
MULTI BOX
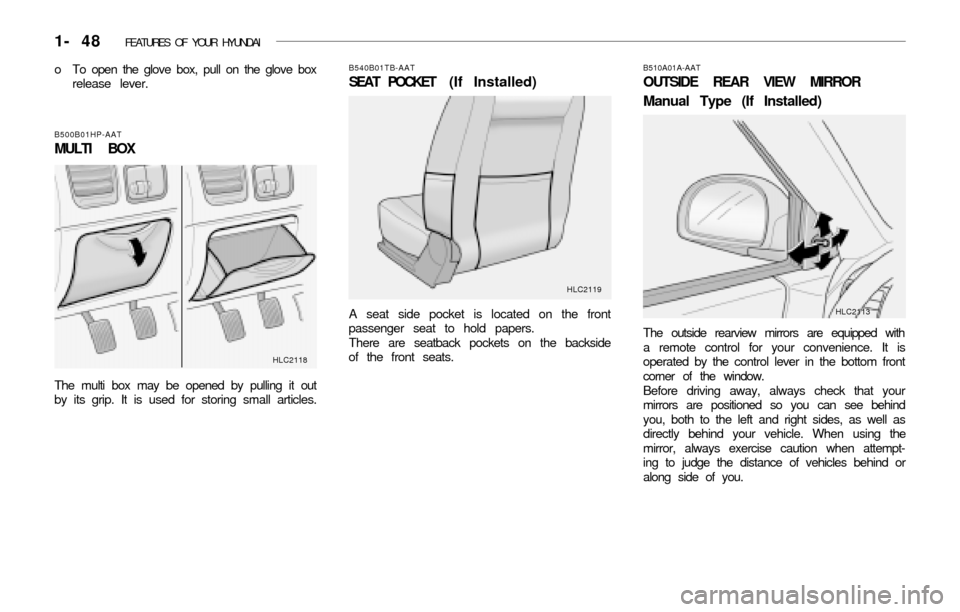
The multi box may be opened by pulling it out
by its grip. It is used for storing small articles.
HLC2118B510A01A-AAT
OUTSIDE REAR VIEW MIRROR
Manual Type (If Installed)
The outside rearview mirrors are equipped with
a remote control for your convenience. It is
operated by the control lever in the bottom front
corner of the window.
Before driving away, always check that your
mirrors are positioned so you can see behind
you, both to the left and right sides, as well as
directly behind your vehicle. When using the
mirror, always exercise caution when attempt-
ing to judge the distance of vehicles behind or
along side of you.
B540B01TB-AAT
SEAT POCKET (If Installed)
A seat side pocket is located on the front
passenger seat to hold papers.
There are seatback pockets on the backside
of the front seats.
HLC2119
HLC2113
Page 62 of 186
FEATURES OF YOUR HYUNDAI 1- 49
CAUTION:If the mirror control is jammed with ice, do not
attempt to break it free using the control
handle or by manipulating the face of the
mirror. Use an approved spray de-icer (not
radiator antifreeze) to release the frozen
mechanism or move the vehicle to a warm
place and allow the ice to melt.
!
B510B01Y-AAT
Electric Type (If Installed)
HLC2114
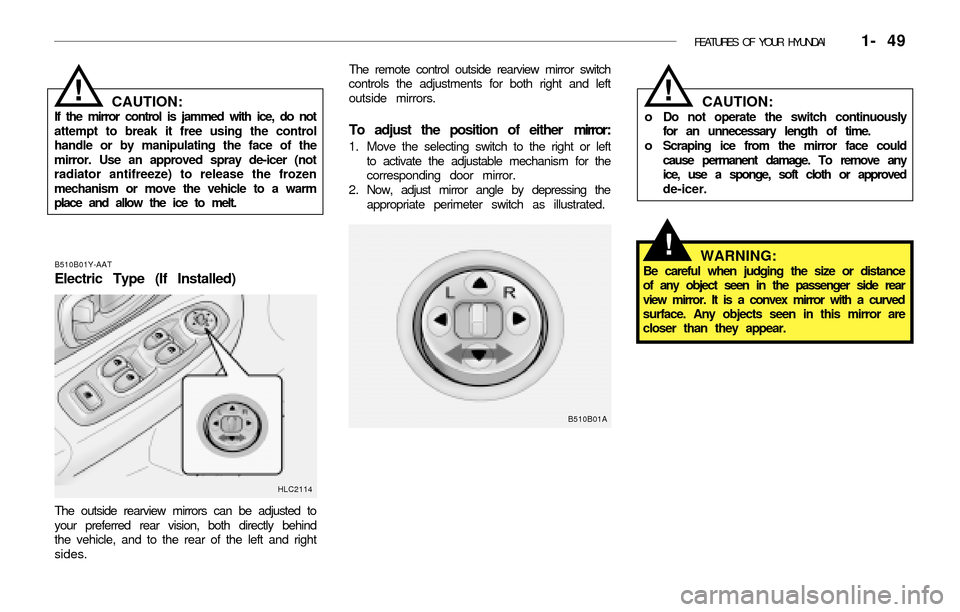
The outside rearview mirrors can be adjusted to
your preferred rear vision, both directly behind
the vehicle, and to the rear of the left and right
sides.The remote control outside rearview mirror switch
controls the adjustments for both right and left
outside mirrors.
To adjust the position of either mirror:
1. Move the selecting switch to the right or left
to activate the adjustable mechanism for the
corresponding door mirror.
2. Now, adjust mirror angle by depressing the
appropriate perimeter switch as illustrated.
B510B01A
CAUTION:o Do not operate the switch continuously
for an unnecessary length of time.
o Scraping ice from the mirror face could
cause permanent damage. To remove any
ice, use a sponge, soft cloth or approved
de-icer.
WARNING:Be careful when judging the size or distance
of any object seen in the passenger side rear
view mirror. It is a convex mirror with a curved
surface. Any objects seen in this mirror are
closer than they appear.
!
!
Page 63 of 186
1- 50 FEATURES OF YOUR HYUNDAI
B510D01HP-GAT
OUTSIDE REAR VIEW MIRROR HEAT-
ER (If Installed)
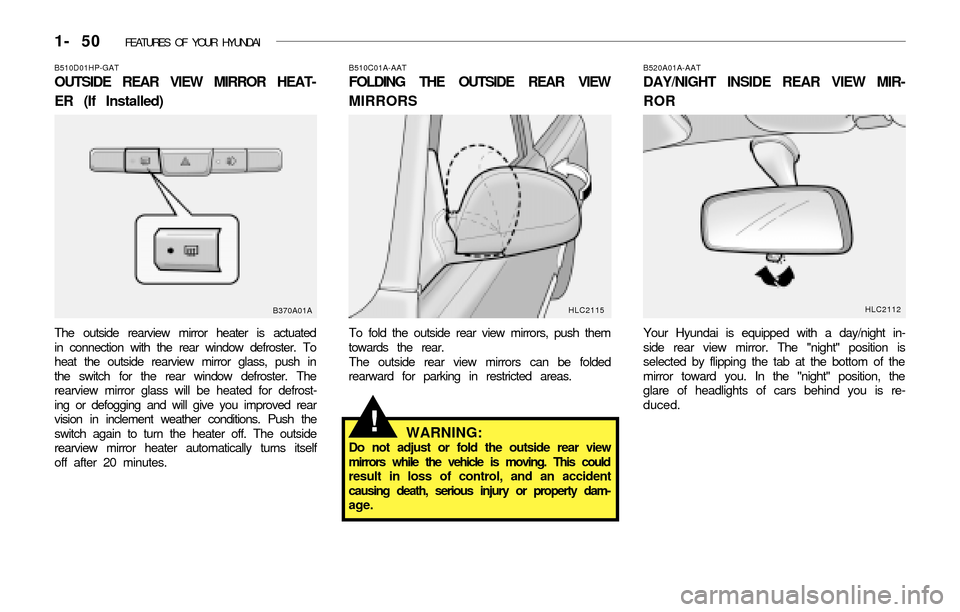
The outside rearview mirror heater is actuated
in connection with the rear window defroster. To
heat the outside rearview mirror glass, push in
the switch for the rear window defroster. The
rearview mirror glass will be heated for defrost-
ing or defogging and will give you improved rear
vision in inclement weather conditions. Push the
switch again to turn the heater off. The outside
rearview mirror heater automatically turns itself
off after 20 minutes.
B370A01AB510C01A-AAT
FOLDING THE OUTSIDE REAR VIEW
MIRRORS
To fold the outside rear view mirrors, push them
towards the rear.
The outside rear view mirrors can be folded
rearward for parking in restricted areas.
B520A01A-AAT
DAY/NIGHT INSIDE REAR VIEW MIR-
ROR
Your Hyundai is equipped with a day/night in-
side rear view mirror. The "night" position is
selected by flipping the tab at the bottom of the
mirror toward you. In the "night" position, the
glare of headlights of cars behind you is re-
duced.
HLC2115
WARNING:Do not adjust or fold the outside rear view
mirrors while the vehicle is moving. This could
result in loss of control, and an accident
causing death, serious injury or property dam-
age.
!
HLC2112
Page 64 of 186
FEATURES OF YOUR HYUNDAI 1- 51
B530A01A-AAT
PARKING BRAKE
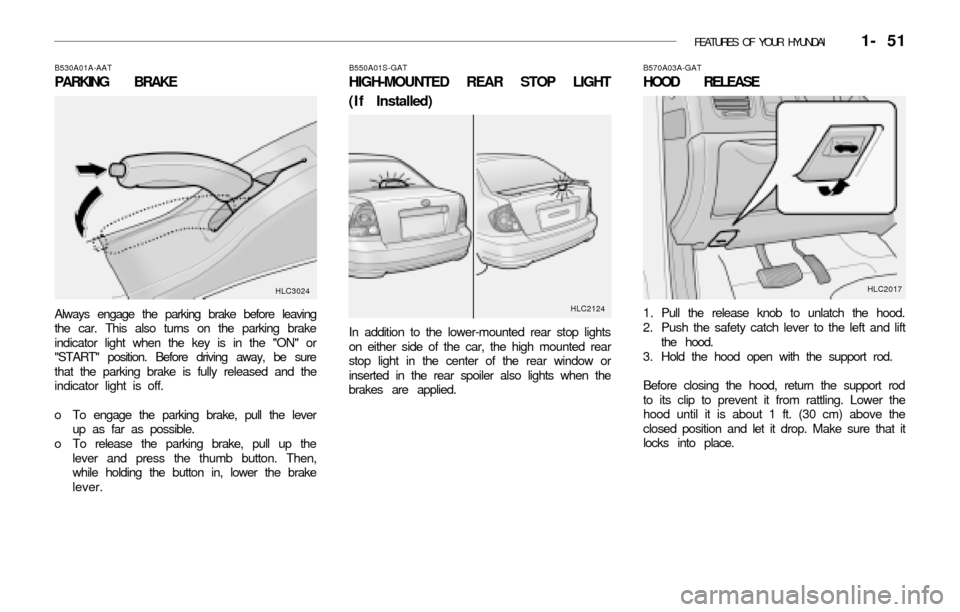
Always engage the parking brake before leaving
the car. This also turns on the parking brake
indicator light when the key is in the "ON" or
"START" position. Before driving away, be sure
that the parking brake is fully released and the
indicator light is off.
o To engage the parking brake, pull the lever
up as far as possible.
o To release the parking brake, pull up the
lever and press the thumb button. Then,
while holding the button in, lower the brake
lever.
HLC3024B550A01S-GAT
HIGH-MOUNTED REAR STOP LIGHT
(If Installed)
In addition to the lower-mounted rear stop lights
on either side of the car, the high mounted rear
stop light in the center of the rear window or
inserted in the rear spoiler also lights when the
brakes are applied.
HLC2124HLC2017 B570A03A-GAT
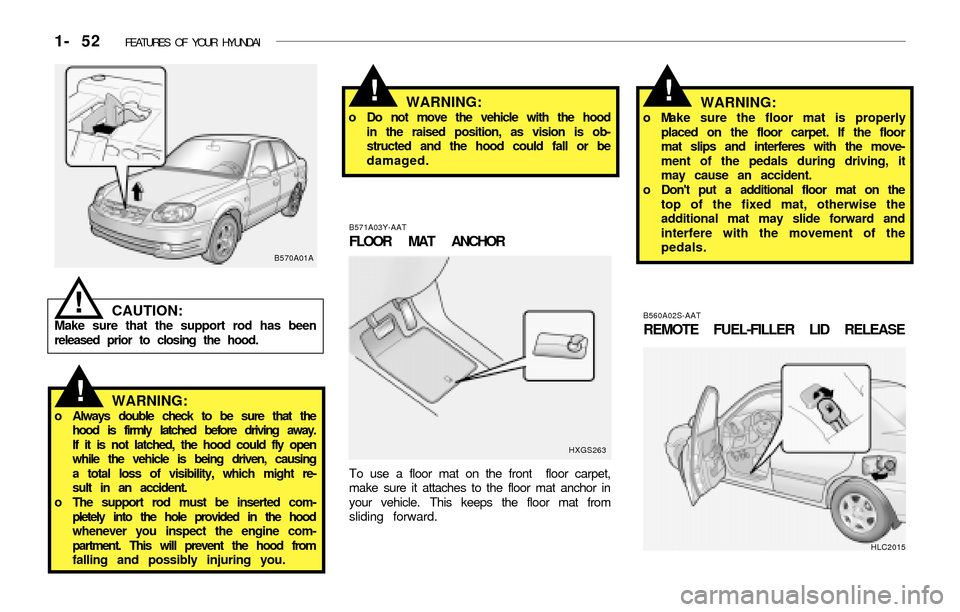
HOOD RELEASE
1 . Pull the release knob to unlatch the hood.
2. Push the safety catch lever to the left and lift
the hood.
3. Hold the hood open with the support rod.
Before closing the hood, return the support rod
to its clip to prevent it from rattling. Lower the
hood until it is about 1 ft. (30 cm) above the
closed position and let it drop. Make sure that it
locks into place.
Page 65 of 186
1- 52 FEATURES OF YOUR HYUNDAI
B570A01A
CAUTION:Make sure that the support rod has been
released prior to closing the hood.
!
WARNING:o Always double check to be sure that the
hood is firmly latched before driving away.
If it is not latched, the hood could fly open
while the vehicle is being driven, causing
a total loss of visibility, which might re-
sult in an accident.
o The support rod must be inserted com-
pletely into the hole provided in the hood
whenever you inspect the engine com-
partment. This will prevent the hood from
falling and possibly injuring you.
!
B560A02S-AAT
REMOTE FUEL-FILLER LID RELEASE WARNING:
o Do not move the vehicle with the hood
in the raised position, as vision is ob-
structed and the hood could fall or be
damaged.
B571A03Y-AAT
FLOOR MAT ANCHOR
To use a floor mat on the front floor carpet,
make sure it attaches to the floor mat anchor in
your vehicle. This keeps the floor mat from
sliding forward.
HXGS263
WARNING:o Make sure the floor mat is properly
placed on the floor carpet. If the floor
mat slips and interferes with the move-
ment of the pedals during driving, it
may cause an accident.
o Don't put a additional floor mat on the
top of the fixed mat, otherwise the
additional mat may slide forward and
interfere with the movement of the
pedals.
!
HLC2015
!
Page 66 of 186
FEATURES OF YOUR HYUNDAI 1- 53
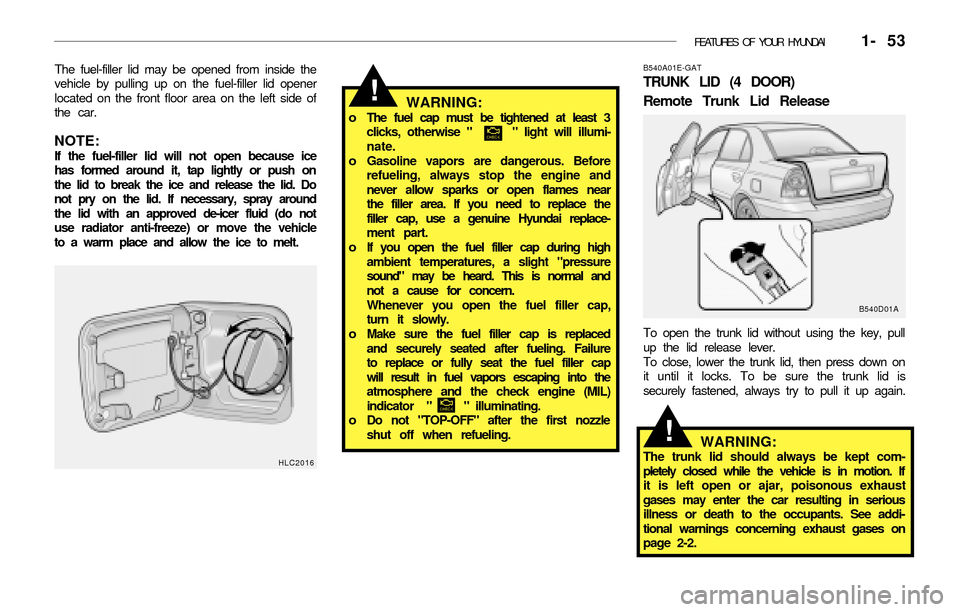
The fuel-filler lid may be opened from inside the
vehicle by pulling up on the fuel-filler lid opener
located on the front floor area on the left side of
the car.
NOTE:If the fuel-filler lid will not open because ice
has formed around it, tap lightly or push on
the lid to break the ice and release the lid. Do
not pry on the lid. If necessary, spray around
the lid with an approved de-icer fluid (do not
use radiator anti-freeze) or move the vehicle
to a warm place and allow the ice to melt.
WARNING:o The fuel cap must be tightened at least 3
clicks, otherwise " " light will illumi-
nate.
o Gasoline vapors are dangerous. Before
refueling, always stop the engine and
never allow sparks or open flames near
the filler area. If you need to replace the
filler cap, use a genuine Hyundai replace-
ment part.
o If you open the fuel filler cap during high
ambient temperatures, a slight "pressure
sound" may be heard. This is normal and
not a cause for concern.
Whenever you open the fuel filler cap,
turn it slowly.
o Make sure the fuel filler cap is replaced
and securely seated after fueling. Failure
to replace or fully seat the fuel filler cap
will result in fuel vapors escaping into the
atmosphere and the check engine (MIL)
indicator " " illuminating.
o Do not "TOP-OFF" after the first nozzle
shut off when refueling.
HLC2016
B540A01E-GAT
TRUNK LID (4 DOOR)
Remote Trunk Lid Release
B540D01A
To open the trunk lid without using the key, pull
up the lid release lever.
To close, lower the trunk lid, then press down on
it until it locks. To be sure the trunk lid is
securely fastened, always try to pull it up again.
WARNING:The trunk lid should always be kept com-
pletely closed while the vehicle is in motion. If
it is left open or ajar, poisonous exhaust
gases may enter the car resulting in serious
illness or death to the occupants. See addi-
tional warnings concerning exhaust gases on
page 2-2.
!
!
Page 67 of 186
1- 54 FEATURES OF YOUR HYUNDAI
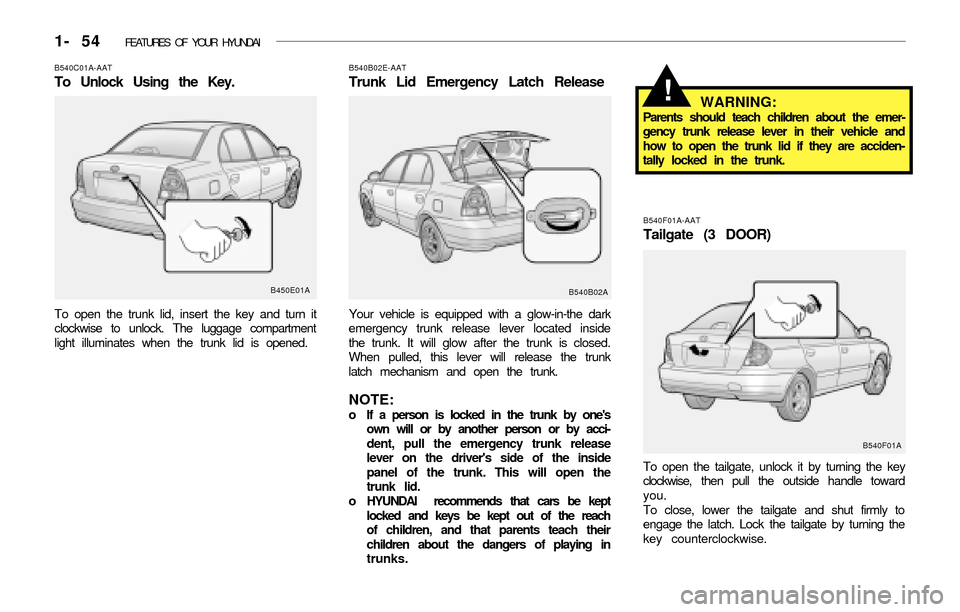
B540C01A-AAT
To Unlock Using the Key.
To open the trunk lid, insert the key and turn it
clockwise to unlock. The luggage compartment
light illuminates when the trunk lid is opened.
B450E01AB540F01A-AAT
Tailgate (3 DOOR)
To open the tailgate, unlock it by turning the key
clockwise, then pull the outside handle toward
you.
To close, lower the tailgate and shut firmly to
engage the latch. Lock the tailgate by turning the
key counterclockwise.
B540B02E-AAT
Trunk Lid Emergency Latch Release
Your vehicle is equipped with a glow-in-the dark
emergency trunk release lever located inside
the trunk. It will glow after the trunk is closed.
When pulled, this lever will release the trunk
latch mechanism and open the trunk.
NOTE:o If a person is locked in the trunk by one's
own will or by another person or by acci-
dent, pull the emergency trunk release
lever on the driver's side of the inside
panel of the trunk. This will open the
trunk lid.
o HYUNDAI recommends that cars be kept
locked and keys be kept out of the reach
of children, and that parents teach their
children about the dangers of playing in
trunks.
WARNING:Parents should teach children about the emer-
gency trunk release lever in their vehicle and
how to open the trunk lid if they are acciden-
tally locked in the trunk.
B540B02A
!
B540F01A
Page 68 of 186
FEATURES OF YOUR HYUNDAI 1- 55
If the vehicle is equipped with central door
locking, the tailgate can be locked without a key.
Push the central door lock switch toward the
front of the vehicle after closing the tailgate.
If the tailgate is open when the switch is pushed,
the tailgate will be locked when it is fully closed.
WARNING:The tailgate should always be kept completely
closed while the vehicle is in motion. If it is left
open or ajar, poisonous exhaust gases may
enter the car which could result in serious
injury or death to the occupants. See addi-
tional warnings concerning exhaust gases on
page 2-2.
!
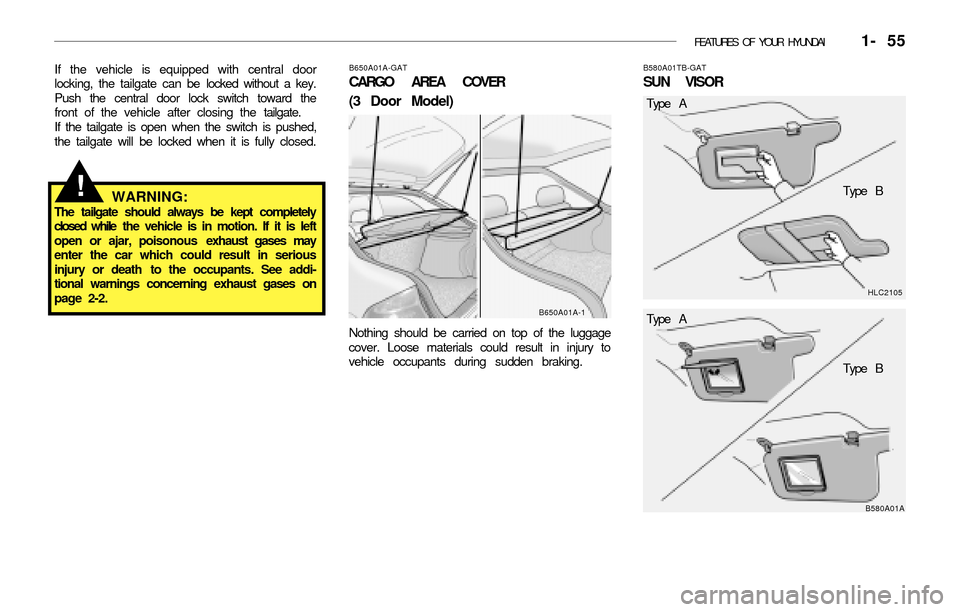
HLC2105 B580A01TB-GAT
SUN VISOR
B580A01A
Type A
Type B
B650A01A-GAT
CARGO AREA COVER
(3 Door Model)
Nothing should be carried on top of the luggage
cover. Loose materials could result in injury to
vehicle occupants during sudden braking.
B650A01A-1Type A
Type B
Page 69 of 186
1- 56 FEATURES OF YOUR HYUNDAI
Your Hyundai is equipped with sun visors to
give the driver and front passenger either frontal
or sideward shade. The sun visors are fitted on
both sides on all models. To reduce glare or to
shut out direct rays of the sun, turn the sun visor
down to block the annoyance. A ticket holder is
provided on the back of the sun visor for the
driver. Vanity mirrors are provided on the back
of the sunvisor for the driver and the front
passenger (If Installed).
NOTE:The Supplemental Restraint System (SRS)
label containing useful information can be
found on the front of each sun visor.
!WARNING:Do not place the sun visor in such a manner
that it obscures visibility of the roadway, traf-
fic or other objects.
B610A01A-AAT
HORN
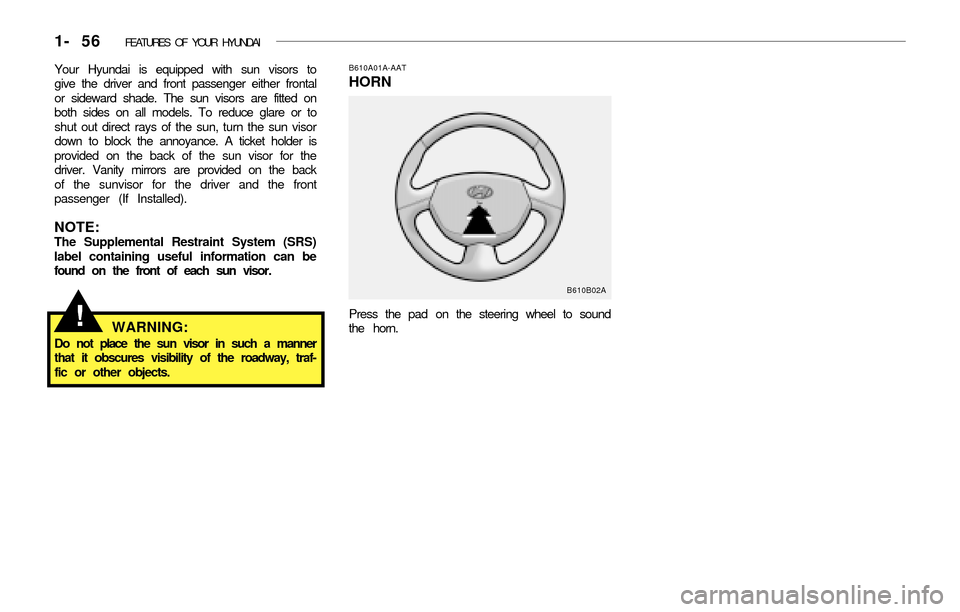
Press the pad on the steering wheel to sound
the horn.
B610B02A
Page 70 of 186
FEATURES OF YOUR HYUNDAI 1- 57
B710A01TB-GAT
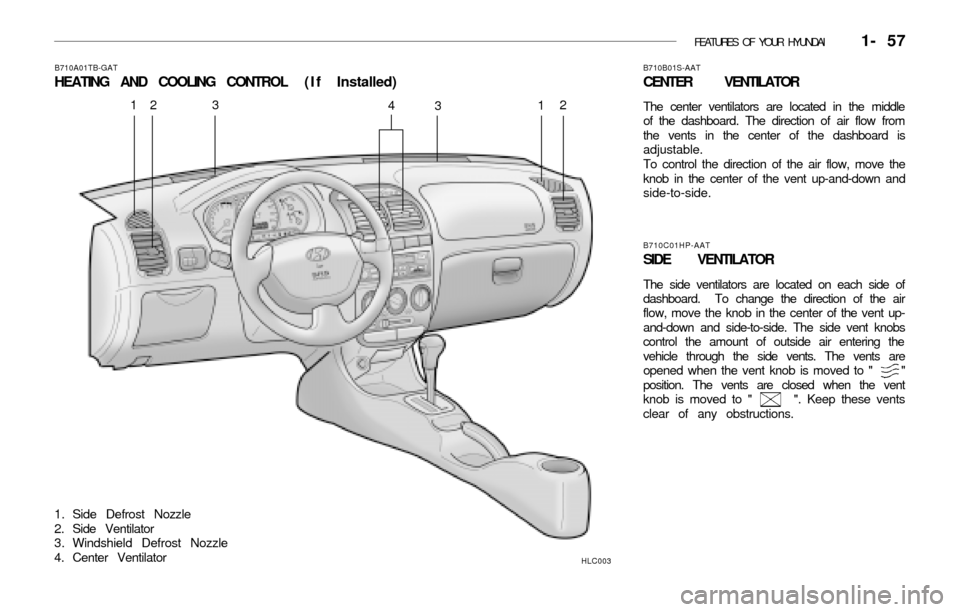
HEATING AND COOLING CONTROL (If Installed)
HLC003
1. Side Defrost Nozzle
2. Side Ventilator
3. Windshield Defrost Nozzle
4. Center Ventilator
12 3
412
B710B01S-AAT
CENTER VENTILATOR
The center ventilators are located in the middle
of the dashboard. The direction of air flow from
the vents in the center of the dashboard is
adjustable.
To control the direction of the air flow, move the
knob in the center of the vent up-and-down and
side-to-side.
B710C01HP-AAT
SIDE VENTILATOR
The side ventilators are located on each side of
dashboard. To change the direction of the air
flow, move the knob in the center of the vent up-
and-down and side-to-side. The side vent knobs
control the amount of outside air entering the
vehicle through the side vents. The vents are
opened when the vent knob is moved to " "
position. The vents are closed when the vent
knob is moved to " ". Keep these vents
clear of any obstructions.
3