Hyundai Coupe 2002 Workshop Manual
Manufacturer: HYUNDAI, Model Year: 2002, Model line: Coupe, Model: Hyundai Coupe 2002Pages: 140, PDF Size: 1.45 MB
Page 51 of 140
CONTROLS AND EQUIPMENT1- 43
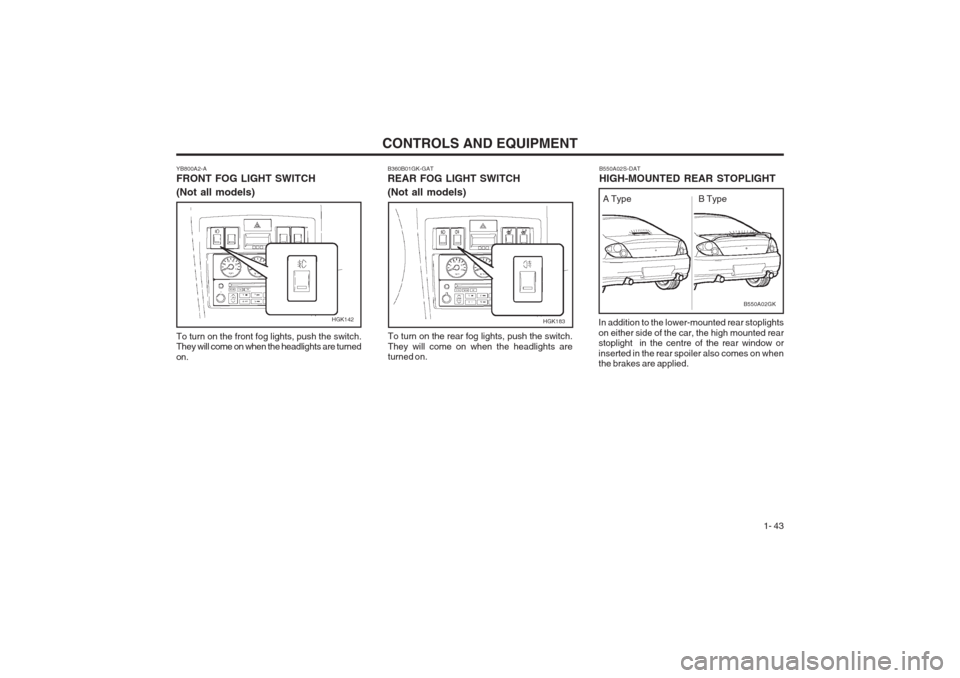
B550A02S-DAT HIGH-MOUNTED REAR STOPLIGHT
In addition to the lower-mounted rear stoplights on either side of the car, the high mounted rear stoplight in the centre of the rear window or inserted in the rear spoiler also comes on when the brakes are applied.
B360B01GK-GAT REAR FOG LIGHT SWITCH (Not all models)
HGK183
To turn on the rear fog lights, push the switch. They will come on when the headlights are turned on.
B550A02GK
A Type B Type
YB800A2-A FRONT FOG LIGHT SWITCH (Not all models) To turn on the front fog lights, push the switch. They will come on when the headlights are turned on.
HGK142
Page 52 of 140
CONTROLS AND EQUIPMENT
1- 44
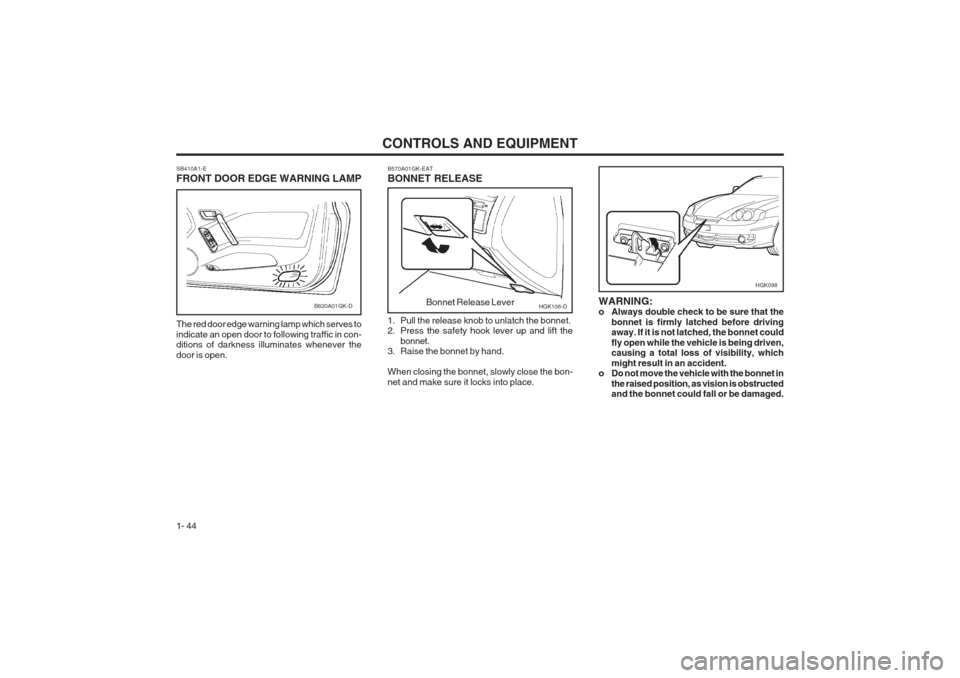
SB410A1-E FRONT DOOR EDGE WARNING LAMP The red door edge warning lamp which serves to indicate an open door to following traffic in con- ditions of darkness illuminates whenever the door is open.
B620A01GK-DWARNING:
o Always double check to be sure that the
bonnet is firmly latched before drivingaway. If it is not latched, the bonnet could fly open while the vehicle is being driven, causing a total loss of visibility, which might result in an accident.
o Do not move the vehicle with the bonnet in
the raised position, as vision is obstructed and the bonnet could fall or be damaged.
B570A01GK-EAT BONNET RELEASE
1. Pull the release knob to unlatch the bonnet.
2. Press the safety hook lever up and lift the
bonnet.
3. Raise the bonnet by hand. When closing the bonnet, slowly close the bon- net and make sure it locks into place.HGK106-DBonnet Release Lever
HGK098
Page 53 of 140
CONTROLS AND EQUIPMENT1- 45
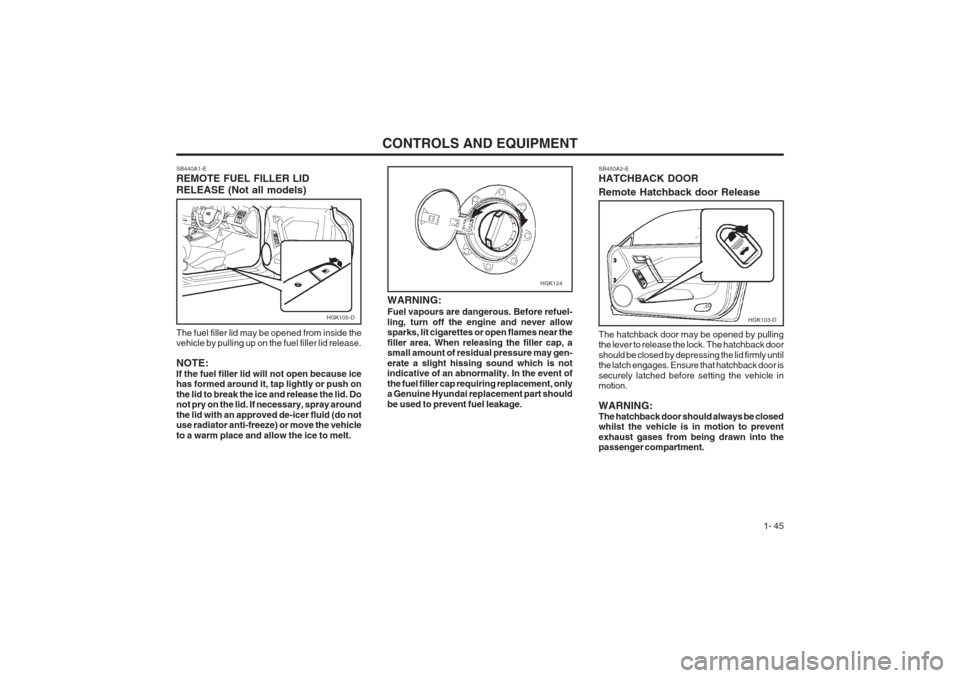
SB450A2-E HATCHBACK DOOR Remote Hatchback door Release The hatchback door may be opened by pulling the lever to release the lock. The hatchback door should be closed by depressing the lid firmly until the latch engages. Ensure that hatchback door is securely latched before setting the vehicle in motion. WARNING: The hatchback door should always be closed whilst the vehicle is in motion to prevent exhaust gases from being drawn into the passenger compartment.
HGK103-D
SB440A1-E REMOTE FUEL FILLER LID RELEASE (Not all models) The fuel filler lid may be opened from inside the vehicle by pulling up on the fuel filler lid release. NOTE: If the fuel filler lid will not open because ice has formed around it, tap lightly or push on the lid to break the ice and release the lid. Do not pry on the lid. If necessary, spray around the lid with an approved de-icer fluid (do not use radiator anti-freeze) or move the vehicle to a warm place and allow the ice to melt.
HGK105-D
HGK124
WARNING: Fuel vapours are dangerous. Before refuel- ling, turn off the engine and never allow sparks, lit cigarettes or open flames near the filler area. When releasing the filler cap, a small amount of residual pressure may gen- erate a slight hissing sound which is not indicative of an abnormality. In the event of the fuel filler cap requiring replacement, only a Genuine Hyundai replacement part should be used to prevent fuel leakage.
Page 54 of 140
CONTROLS AND EQUIPMENT
1- 46
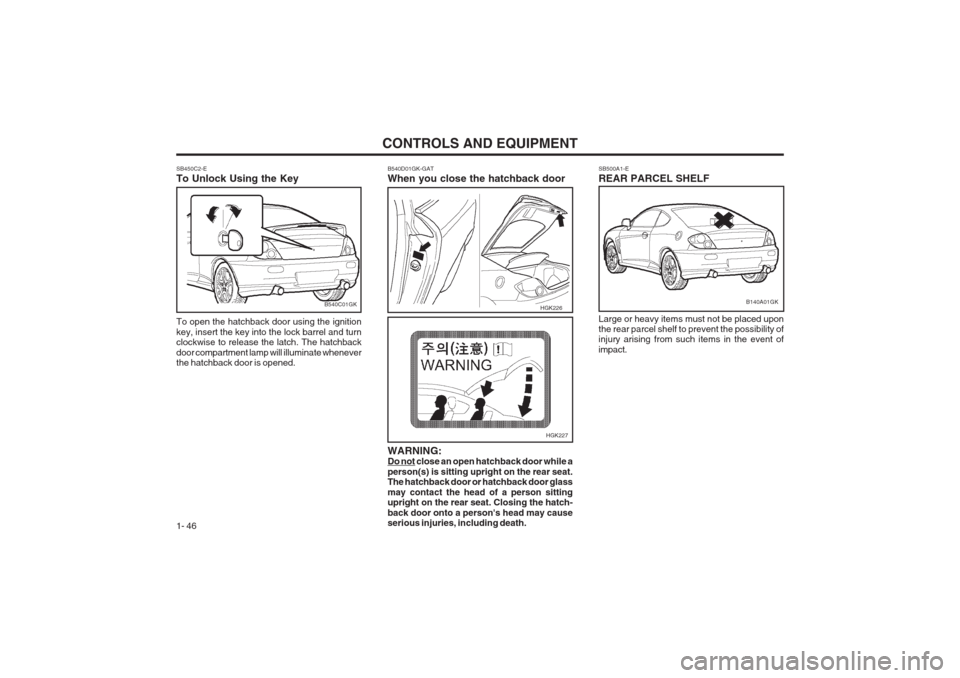
SB450C2-E To Unlock Using the Key To open the hatchback door using the ignition key, insert the key into the lock barrel and turn clockwise to release the latch. The hatchback door compartment lamp will illuminate whenever the hatchback door is opened.
SB500A1-E REAR PARCEL SHELF Large or heavy items must not be placed upon the rear parcel shelf to prevent the possibility ofinjury arising from such items in the event of impact.
B540C01GK
B540D01GK-GAT
When you close the hatchback door
HGK226
HGK227
WARNING:
Do not close an open hatchback door while a person(s) is sitting upright on the rear seat. The hatchback door or hatchback door glass may contact the head of a person sitting upright on the rear seat. Closing the hatch- back door onto a person's head may cause serious injuries, including death.
B140A01GK
Page 55 of 140
CONTROLS AND EQUIPMENT1- 47
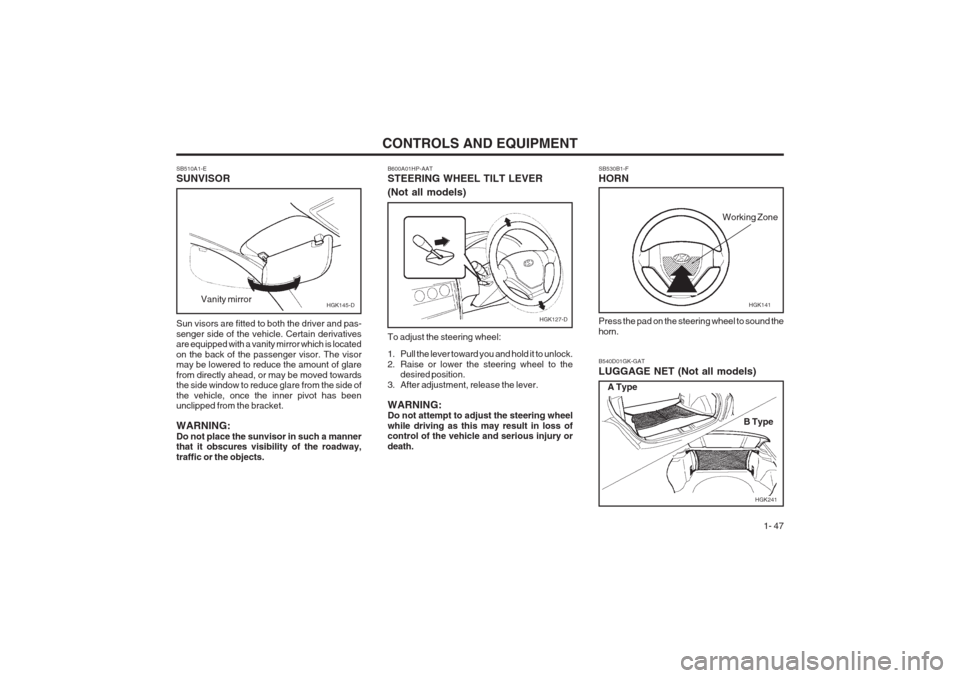
SB530B1-F HORN Press the pad on the steering wheel to sound the horn.
HGK141
Working Zone
B540D01GK-GAT LUGGAGE NET (Not all models)
HGK241
A Type
B Type
SB510A1-E SUNVISOR Sun visors are fitted to both the driver and pas- senger side of the vehicle. Certain derivatives are equipped with a vanity mirror which is located on the back of the passenger visor. The visor may be lowered to reduce the amount of glare from directly ahead, or may be moved towards the side window to reduce glare from the side of the vehicle, once the inner pivot has been unclipped from the bracket. WARNING: Do not place the sunvisor in such a manner that it obscures visibility of the roadway, traffic or the objects.
Vanity mirror
HGK145-D
B600A01HP-AAT STEERING WHEEL TILT LEVER (Not all models) To adjust the steering wheel:
1. Pull the lever toward you and hold it to unlock.
2. Raise or lower the steering wheel to the
desired position.
3. After adjustment, release the lever. WARNING: Do not attempt to adjust the steering wheel while driving as this may result in loss of control of the vehicle and serious injury or death.
HGK127-D
Page 56 of 140
CONTROLS AND EQUIPMENT
1- 48
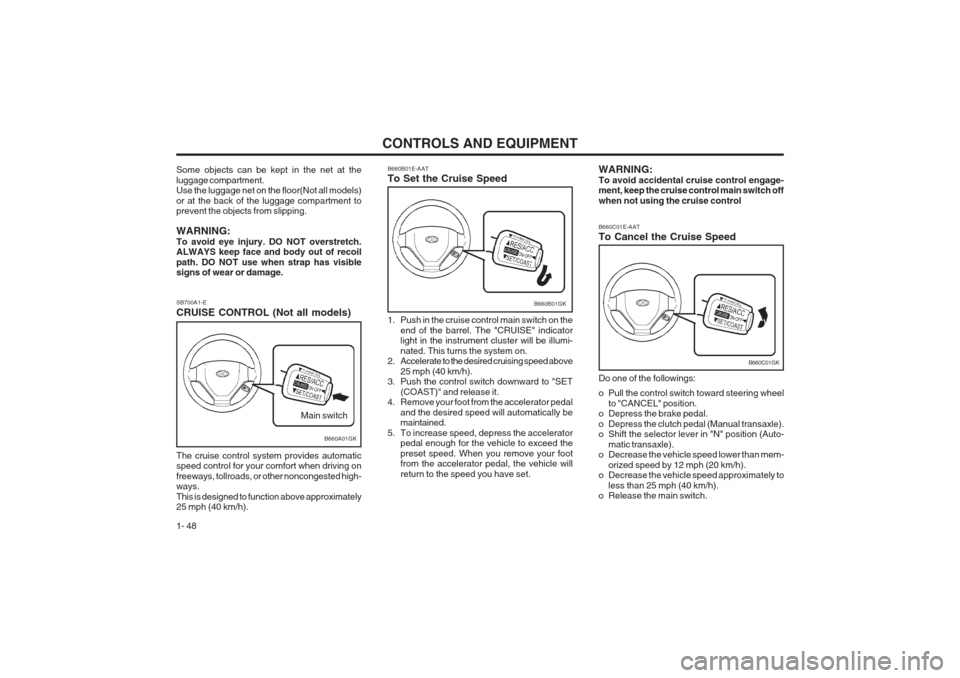
SB700A1-E CRUISE CONTROL (Not all models) The cruise control system provides automatic speed control for your comfort when driving on freeways, tollroads, or other noncongested high- ways. This is designed to function above approximately 25 mph (40 km/h).
B660A01GK
Main switch
Some objects can be kept in the net at the luggage compartment. Use the luggage net on the floor(Not all models) or at the back of the luggage compartment to prevent the objects from slipping. WARNING: To avoid eye injury. DO NOT overstretch. ALWAYS keep face and body out of recoil path. DO NOT use when strap has visible signs of wear or damage.
B660B01GK
B660B01E-AAT To Set the Cruise Speed
1. Push in the cruise control main switch on the
end of the barrel. The "CRUISE" indicator light in the instrument cluster will be illumi- nated. This turns the system on.
2. Accelerate to the desired cruising speed above
25 mph (40 km/h).
3. Push the control switch downward to "SET
(COAST)" and release it.
4. Remove your foot from the accelerator pedal
and the desired speed will automatically be maintained.
5. To increase speed, depress the accelerator pedal enough for the vehicle to exceed the preset speed. When you remove your foot from the accelerator pedal, the vehicle will return to the speed you have set.
B660C01GK
B660C01E-AAT To Cancel the Cruise Speed Do one of the followings:
o Pull the control switch toward steering wheel
to "CANCEL" position.
o Depress the brake pedal.
o Depress the clutch pedal (Manual transaxle).
o Shift the selector lever in "N" position (Auto-
matic transaxle).
o Decrease the vehicle speed lower than mem-
orized speed by 12 mph (20 km/h).
o Decrease the vehicle speed approximately to
less than 25 mph (40 km/h).
o Release the main switch.
WARNING: To avoid accidental cruise control engage- ment, keep the cruise control main switch off when not using the cruise control
Page 57 of 140
CONTROLS AND EQUIPMENT1- 49
o During cruise-control driving with a manual
transaxle vehicle, do not shift into neutral without depressing the clutch pedal, or the engine will be overrevved. If this happens, depress the clutch pedal or release the main switch.
o With the cruise control engaged, when the
brake pedal is applied, it is normal to hear the cruise control system deactivate. This is an indication of normal system opera- tion.
o During normal cruise control operation, when the "SET(COAST)" is activated or reactivated after applying the brakes, the cruise control will energize after approxi- mately 3 seconds. This delay is normal.
B660B01GKB660D01GK
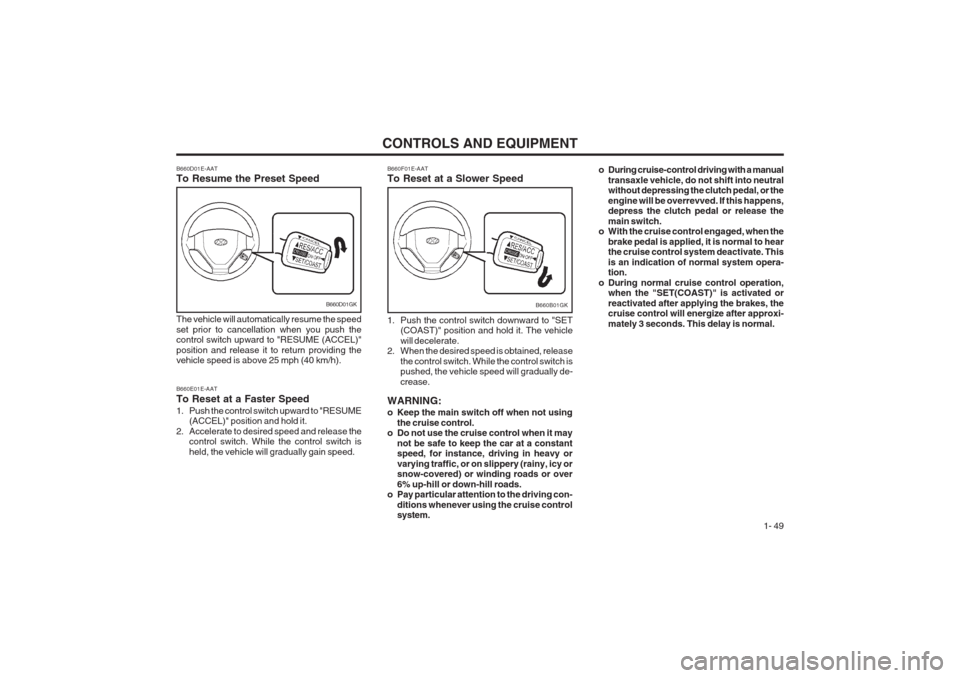
B660F01E-AAT To Reset at a Slower Speed
1. Push the control switch downward to "SET (COAST)" position and hold it. The vehicle will decelerate.
2. When the desired speed is obtained, release
the control switch. While the control switch is pushed, the vehicle speed will gradually de- crease.
WARNING:
o Keep the main switch off when not using the cruise control.
o Do not use the cruise control when it may
not be safe to keep the car at a constant speed, for instance, driving in heavy or varying traffic, or on slippery (rainy, icy or snow-covered) or winding roads or over 6% up-hill or down-hill roads.
o Pay particular attention to the driving con-
ditions whenever using the cruise control system.
B660D01E-AAT To Resume the Preset Speed The vehicle will automatically resume the speed set prior to cancellation when you push the control switch upward to "RESUME (ACCEL)" position and release it to return providing the vehicle speed is above 25 mph (40 km/h). B660E01E-AAT To Reset at a Faster Speed
1. Push the control switch upward to "RESUME
(ACCEL)" position and hold it.
2. Accelerate to desired speed and release the control switch. While the control switch is held, the vehicle will gradually gain speed.
Page 58 of 140
CONTROLS AND EQUIPMENT
1- 50
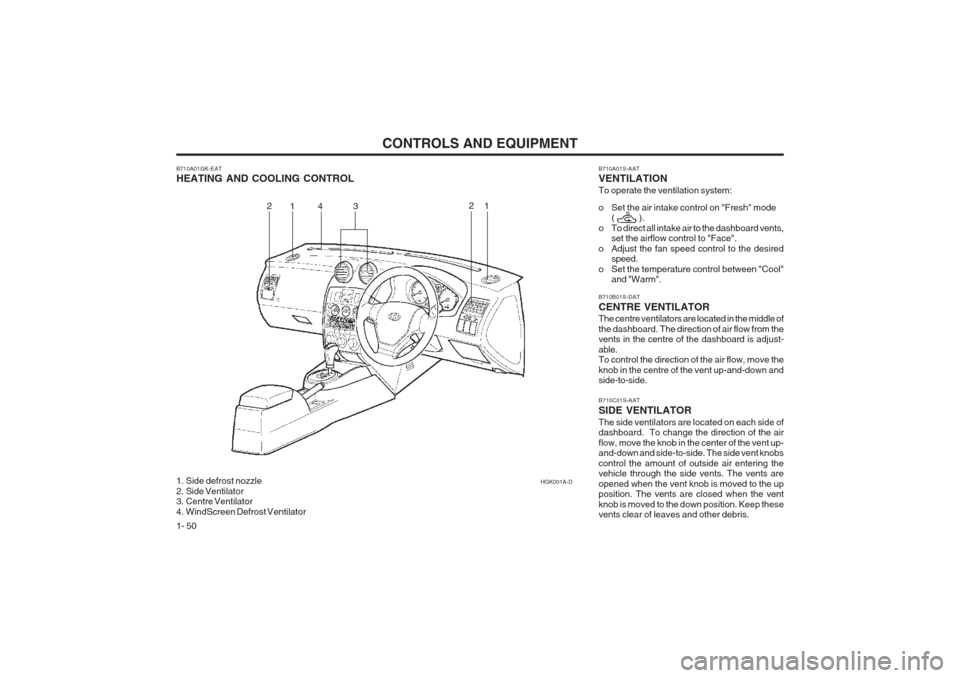
B710A01GK-EAT HEATING AND COOLING CONTROL
1. Side defrost nozzle
2. Side Ventilator
3. Centre Ventilator
4. WindScreen Defrost VentilatorHGK001A-D
1
2
3
1
2 B710A01S-AAT VENTILATION To operate the ventilation system:
o Set the air intake control on "Fresh" mode
( ).
o To direct all intake air to the dashboard vents, set the airflow control to "Face".
o Adjust the fan speed control to the desired speed.
o Set the temperature control between "Cool" and "Warm".
B710C01S-AAT SIDE VENTILATORThe side ventilators are located on each side of dashboard. To change the direction of the air flow, move the knob in the center of the vent up- and-down and side-to-side. The side vent knobs control the amount of outside air entering the vehicle through the side vents. The vents are opened when the vent knob is moved to the up position. The vents are closed when the vent knob is moved to the down position. Keep these vents clear of leaves and other debris.
B710B01S-DAT CENTRE VENTILATOR The centre ventilators are located in the middle of the dashboard. The direction of air flow from the vents in the centre of the dashboard is adjust- able. To control the direction of the air flow, move the knob in the centre of the vent up-and-down and side-to-side.4
Page 59 of 140
CONTROLS AND EQUIPMENT1- 51
HGK002
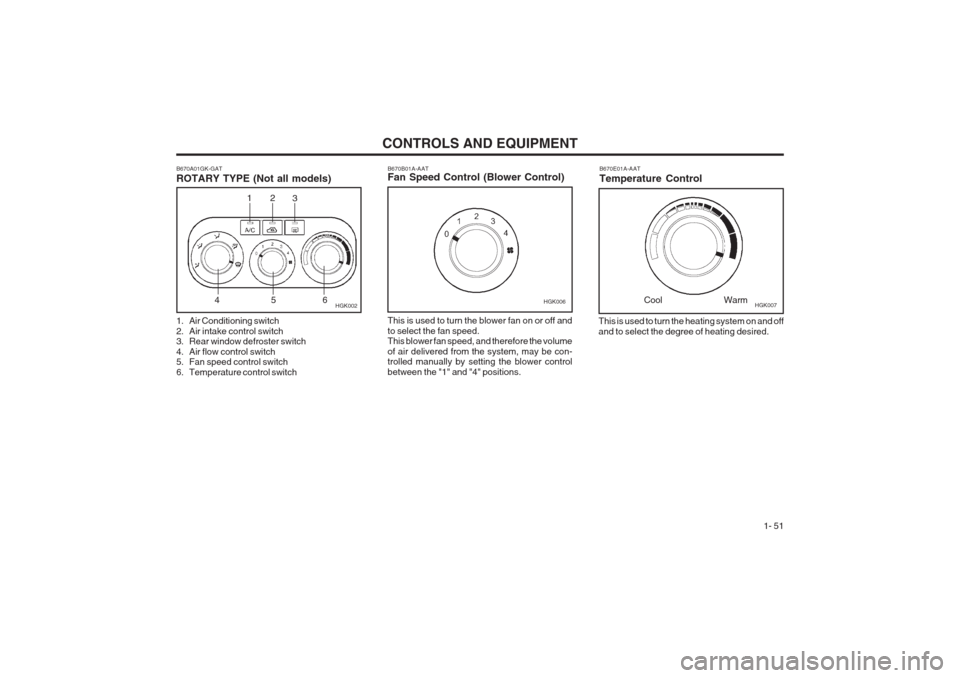
B670A01GK-GAT ROTARY TYPE (Not all models)
This is used to turn the heating system on and off and to select the degree of heating desired.B670E01A-AAT Temperature ControlCool Warm
B670B01A-AAT Fan Speed Control (Blower Control)HGK006
This is used to turn the blower fan on or off and to select the fan speed. This blower fan speed, and therefore the volume of air delivered from the system, may be con- trolled manually by setting the blower control between the "1" and "4" positions.
12 3
456
1. Air Conditioning switch
2. Air intake control switch
3. Rear window defroster switch
4. Air flow control switch
5. Fan speed control switch
6. Temperature control switch HGK007
Page 60 of 140
CONTROLS AND EQUIPMENT
1- 52
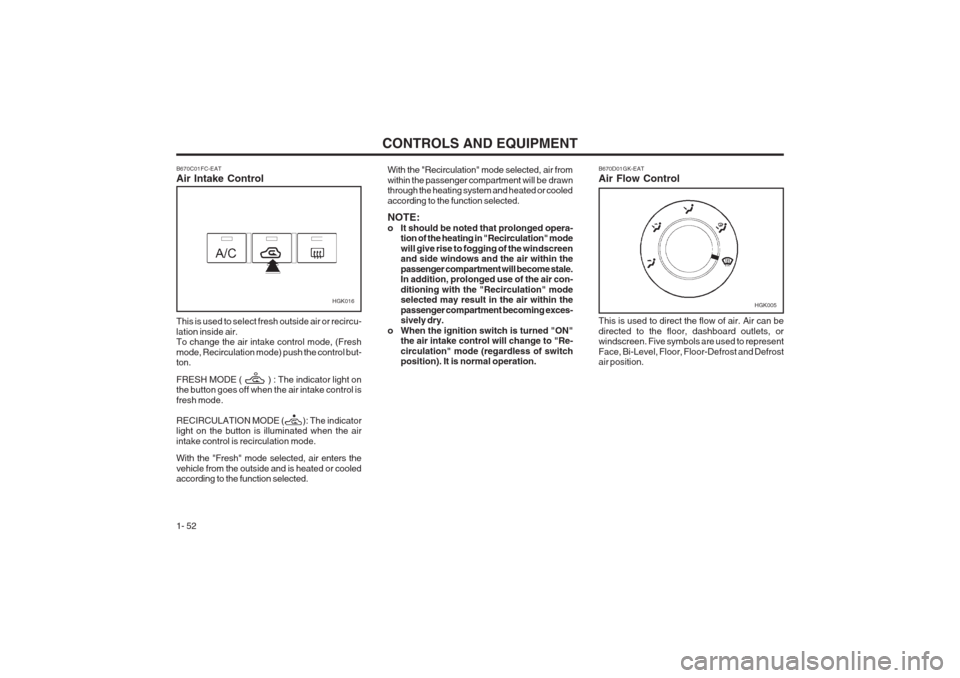
HGK016 B670D01GK-EAT Air Flow Control This is used to direct the flow of air. Air can be directed to the floor, dashboard outlets, or windscreen. Five symbols are used to represent Face, Bi-Level, Floor, Floor-Defrost and Defrost air position.HGK005
B670C01FC-EAT Air Intake Control This is used to select fresh outside air or recircu- lation inside air. To change the air intake control mode, (Fresh mode, Recirculation mode) push the control but- ton. FRESH MODE ( ) : The indicator light on the button goes off when the air intake control is fresh mode. RECIRCULATION MODE ( ): The indicator light on the button is illuminated when the air intake control is recirculation mode. With the "Fresh" mode selected, air enters the
vehicle from the outside and is heated or cooled according to the function selected. With the "Recirculation" mode selected, air from within the passenger compartment
will be drawn
through the heating system and heated or cooledaccording to the function selected. NOTE:
o It should be noted that prolonged opera- tion of the heating in "Recirculation" modewill give rise to fogging of the windscreen and side windows and the air within the passenger compartment will become stale. In addition, prolonged use of the air con- ditioning with the "Recirculation" mode selected may result in the air within the passenger compartment becoming exces- sively dry.
o When the ignition switch is turned "ON" the air intake control will change to "Re- circulation" mode (regardless of switch position). It is normal operation.