transmission Hyundai Equus 2016 Owner's Manual
[x] Cancel search | Manufacturer: HYUNDAI, Model Year: 2016, Model line: Equus, Model: Hyundai Equus 2016Pages: 477, PDF Size: 16.25 MB
Page 4 of 477
F4
FOREWORD
HYUNDAI MOTOR
AMERICA
Note: When selling your used vehi-
cle in the used-auto market,
please pass this Owner’s
Guide to the next owner for
his or her use, because the
next owner will also need the
information in this manual.
Thank you. Thank you for purchasing EQUUS.
We are pleased to welcome you to the
growing number of discerning
EQUUS drivers. We are very proud of
our advanced engineering and high-
quality EQUUS construction.
This Owner’s Manual will introduce
you to the features and operation of
your new EQUUS. Please carefully
read this Owner’s Manual for your
information, so you could receive
great satisfaction from your new car.
We also recommend you to have
services and maintenance of your car
from an authorized EQUUS dealer.
Our EQUUS dealers are prepared to
provide high-quality maintenance
services and any other assistance,
which your vehicle may require.
Copyright 2015 HYUNDAI Motor
America. All rights reserved. No part
of this publication may be repro-
duced, stored in any retrieval system
or transmitted in any form or by any
means without the prior written per-
mission of HYUNDAI Motor America.
Poor-quality fuels and lubri-
cants, which fail to meet
HYUNDAI specification, may
severely damage an engine and
transmission. You must always
use the high-quality fuels and
lubricants that meet the specifi-
cations, listed in the Vehicle
Specifications and Consumer
Information chapter on page 8-4
and 8-8.
CAUTION
Page 17 of 477
Interior features...............3-145
Ashtray ...................................3-145
Cup holder..............................3-146
Sunvisor ..................................3-147
Rear vanity mirror ...............3-147
Power outlet ..........................3-148
Clock ........................................3-149
Clothes hanger......................3-150
Bag hanger ............................3-150
Floor mat anchor(s).............3-150
Luggage net (holder) ..........3-151
Rear curtain...........................3-152
AUX, USB and iPod
®port ..3-153
Multimedia system ...............4-2
Antenna.......................................4-2
Steering wheel audio
control .........................................4-3
Before driving ......................5-5
Before entering vehicle ..........5-5
Necessary inspections ............5-5
Before starting ........................5-5
Engine start/stop button ....5-7
Illuminated Engine Start/Stop
Button..........................................5-7
Engine Start/Stop Button
position........................................5-7
Starting the engine..............5-9
Automatic transmission.....5-11
Automatic transmission
operation ..................................5-12
Good driving practices ..........5-15
Brake system ......................5-17
Power brakes ..........................5-17
Electric parking brake
(EPB)..........................................5-19
Emergency braking ................5-22
AUTO HOLD .............................5-23
Anti-lock brake system
(ABS)..........................................5-26
Electronic stability control
(ESC) ..........................................5-28
Hill-start assist control
(HAC) .........................................5-32
Good braking practices.........5-32
Drive mode integrated
control system....................5-34
DRIVE mode / SNOW mode ..5-34
Electronic controlled
suspension (ECS) ...............5-36
To control the vehicle
height ........................................5-36
ECS (Electronic Controlled
Suspension) malfunction
warning message....................5-37
F17
4Multimedia system
5Driving your vehicle
Page 143 of 477
Programming HomeLink®
Information
• When programming a garage dooropener, it is advised to park the
vehicle outside of the garage.
• It is recommended to replace the hand-held transmitter battery of the
device being programmed to
HomeLink
®for quicker training
and accurate transmission of the
radio-frequency signal.
• Some vehicles may require the igni- tion switch to be turned to the sec-
ond (or "accessories") position for
programming and/or operation of
HomeLink.
• In the event that there are still pro- gramming difficulties or questions
after following the programming
steps listed below, contact
HomeLink
®at: www.homelink.com
or 1-800-355-3515. Programming
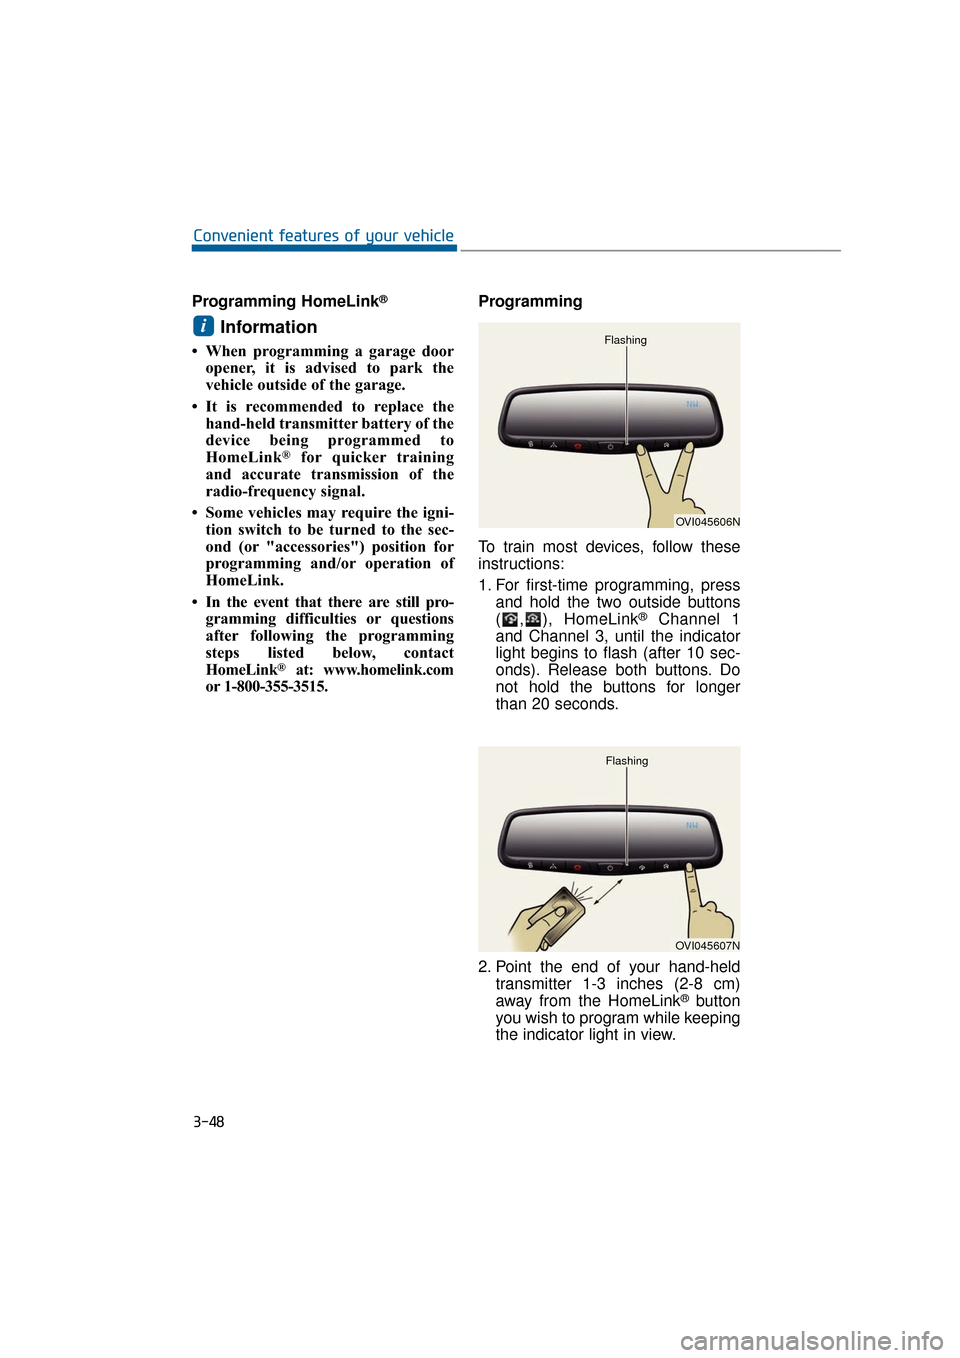
To train most devices, follow these
instructions:
1. For first-time programming, press
and hold the two outside buttons
( , ), HomeLink
®Channel 1
and Channel 3, until the indicator
light begins to flash (after 10 sec-
onds). Release both buttons. Do
not hold the buttons for longer
than 20 seconds.
2. Point the end of your hand-held transmitter 1-3 inches (2-8 cm)
away from the HomeLink
®button
you wish to program while keeping
the indicator light in view.
i
3-48
Convenient features of your vehicle
OVI045606N
Flashing
OVI045607N
Flashing
Page 150 of 477
Programming HomeLink®
Information
• When programming a garage dooropener, it is advised to park the
vehicle outside of the garage.
• It is recommended to replace the hand-held transmitter battery of the
device being programmed to
HomeLink
®for quicker training
and accurate transmission of the
radio-frequency signal.
• Some vehicles may require the igni- tion switch to be turned to the sec-
ond (or "accessories") position for
programming and/or operation of
HomeLink
®.
• In the event that there are still pro- gramming difficulties or questions
after following the programming
steps listed below, contact
HomeLink
®at: www.homelink.com
or 1-800-355-3515. Standard programming
To train most devices, follow these
instructions:
1. For first-time programming, press
and hold the two outside buttons,
HomeLink
®Channel 1 and
Channel 3 Buttons, until the indi-
cator light begins to flash (after 20
seconds). Release both buttons.
Do not hold the buttons for longer
than 30 seconds.
2. Point the end of your hand-held transmitter 1-3 inches (2-8 cm)
away from the HomeLink
®button
you wish to program while keeping
the indicator light in view.
3. Simultaneously press and hold both the HomeLink
®and handheld
transmitter buttons. DO NOT
release the buttons until step 4 is
completed.
4. When continuously pressing the buttons, the red Indicator Status
LED will flash slowly and then rap-
idly after HomeLink
®successfully
trains to the frequency signal from
the hand-held transmitter. Then,
release both buttons.
5. Press and hold the just-trained HomeLink
®button and observe
the red Status Indicator LED. If the
indicator light stays on constantly,
programming is complete and
your device will activate when the
HomeLink
®button is pressed and
released.
6. To program the remaining two HomeLink
®buttons, follow the
steps 2 to 5.
i
3-55
Convenient features of your vehicle03
Page 163 of 477
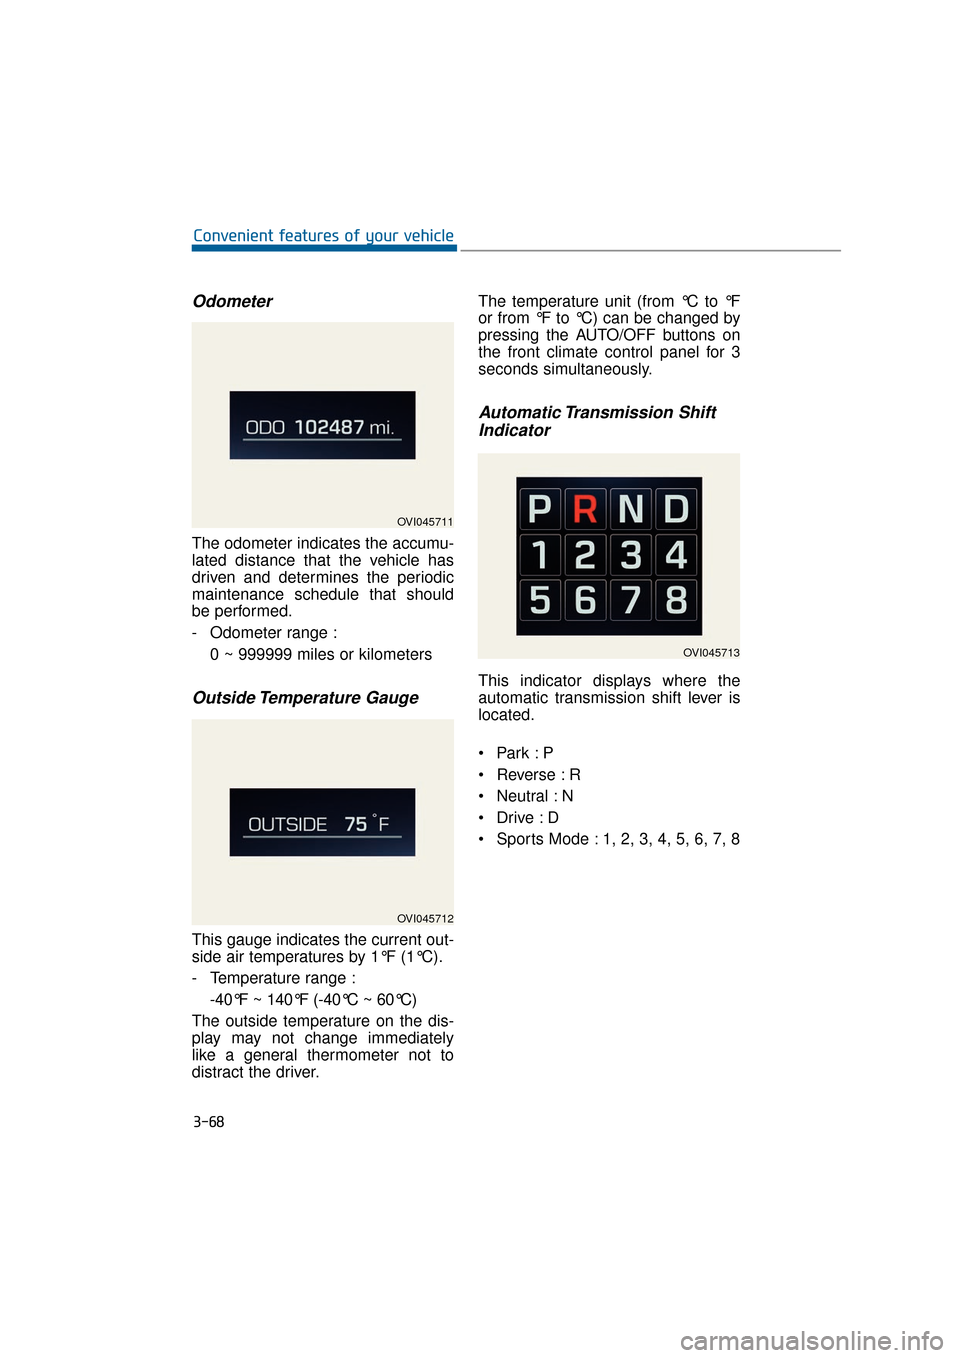
Odometer
The odometer indicates the accumu-
lated distance that the vehicle has
driven and determines the periodic
maintenance schedule that should
be performed.
- Odometer range :0 ~ 999999 miles or kilometers
Outside Temperature Gauge
This gauge indicates the current out-
side air temperatures by 1°F (1°C).
- Temperature range :-40°F ~ 140°F (-40°C ~ 60°C)
The outside temperature on the dis-
play may not change immediately
like a general thermometer not to
distract the driver. The temperature unit (from °C to °F
or from °F to °C) can be changed by
pressing the AUTO/OFF buttons on
the front climate control panel for 3
seconds simultaneously.
Automatic Transmission Shift
Indicator
This indicator displays where the
automatic transmission shift lever is
located.
Reverse : R
Neutral : N
Sports Mode : 1, 2, 3, 4, 5, 6, 7, 8
3-68
Convenient features of your vehicle
OVI045711
OVI045712
OVI045713
Page 170 of 477
3-75
Convenient features of your vehicle03
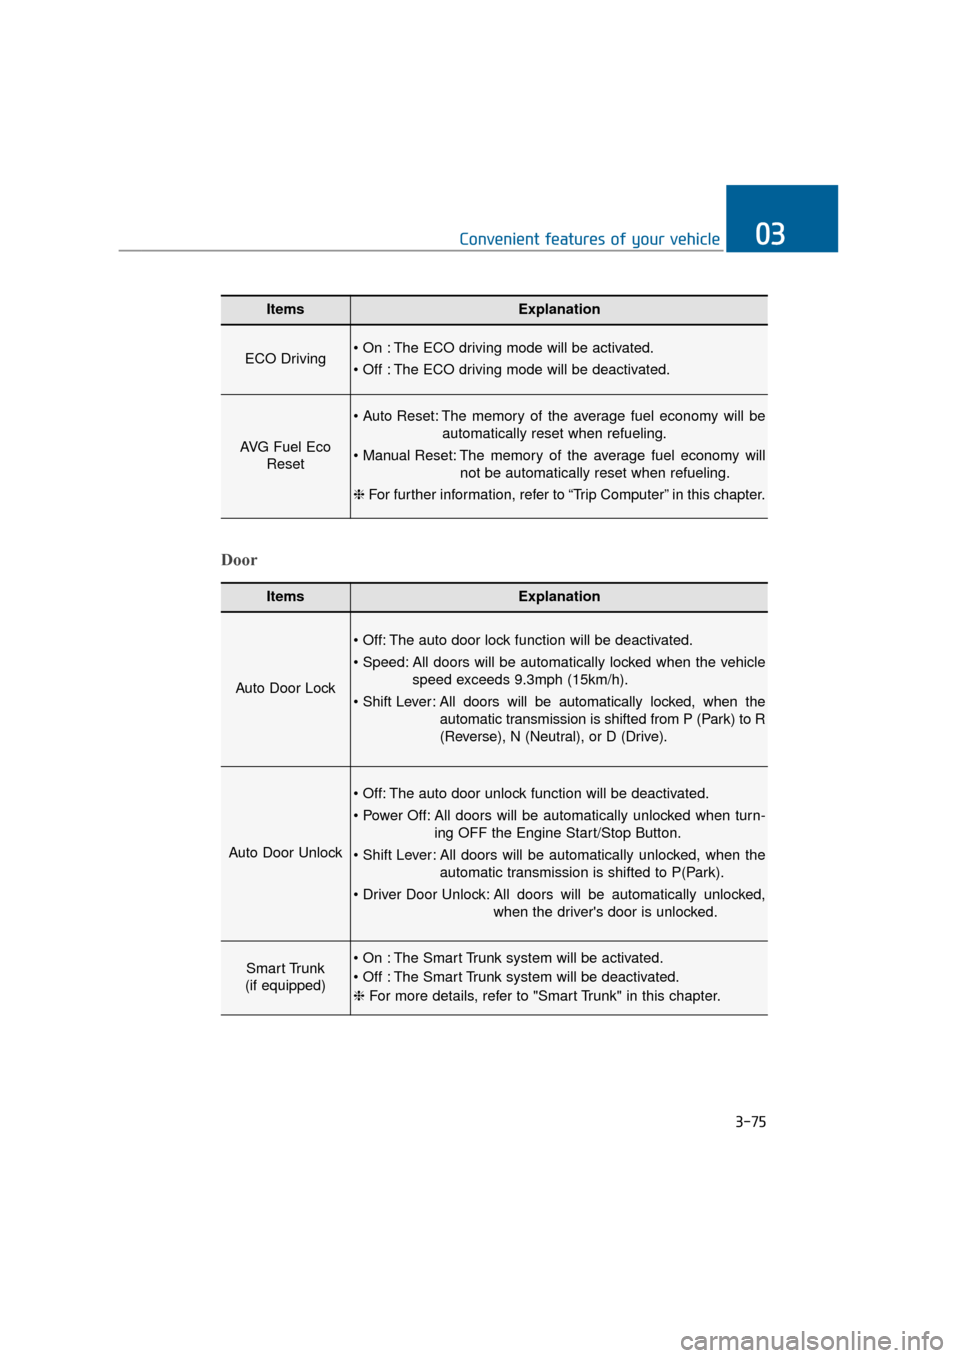
ItemsExplanation
ECO Driving The ECO driving mode will be activated.
The ECO driving mode will be deactivated.
AVG Fuel EcoReset
The memory of the average fuel economy will be
automatically reset when refueling.
The memory of the average fuel economy will not be automatically reset when refueling.
❈ For further information, refer to “Trip Computer” in this chapter.
ItemsExplanation
Auto Door Lock
The auto door lock function will be deactivated.
All doors will be automatically locked when the vehicle
speed exceeds 9.3mph (15km/h).
All doors will be automatically locked, when the
automatic transmission is shifted from P (Park) to R
(Reverse), N (Neutral), or D (Drive).
Auto Door Unlock
The auto door unlock function will be deactivated.
All doors will be automatically unlocked when turn- ing OFF the Engine Start/Stop Button.
All doors will be automatically unlocked, when the automatic transmission is shifted to P(Park).
All doors will be automatically unlocked, when the driver's door is unlocked.
Smart Trunk
(if equipped) The Smart Trunk system will be activated.
The Smart Trunk system will be deactivated.
❈ For more details, refer to "Smart Trunk" in this chapter.
Door
Page 252 of 477
Driving your vehicle
Before driving.........................................................5-5
Before entering vehicle ...................................................5-5
Necessary inspections .....................................................5-5
Before starting .................................................................5-5
Engine start/stop button ......................................5-7
Illuminated Engine Start/Stop Button ..........................5-7
Engine Start/Stop Button position ...............................5-7
Starting the engine ................................................5-9
Automatic transmission .......................................5-11
Automatic transmission operation ..............................5-12
Good driving practices ...................................................5-15
Brake system ........................................................5-17
Power brakes ...................................................................5-17
Electric parking brake (EPB) ........................................5-19
Emergency braking .........................................................5-22
AUTO HOLD ......................................................................5-\
23
Anti-lock brake system (ABS) .....................................5-26
Electronic stability control (ESC) ................................5-28
Hill-start assist control (HAC) ......................................5-32
Good braking practices..................................................5-32
Drive mode integrated control system .............5-34
DRIVE mode / SNOW mode ..........................................5-34
Electronic controlled suspension (ECS) ...........5-36
To control the vehicle height .......................................5-36
ECS (Electronic Controlled Suspension) malfunction
warning message.............................................................5-37
Page 263 of 477
Automatic transmission opera-
tion
The automatic transmission has 8
forward speed levels and 1 reverse
speed level. Vehicle speed is auto-
matically selected, depending on the
shift lever position.
Information
A new vehicle may experience some-
what abrupt movement during the
first few shifts.
Always depress the brake pedalwhen moving the shift lever from N(Neutral) to a forward or reverse gear.
To avoid damage to your trans- mission, do not depress the
accelerator, when the shift lever
is in R (Reverse) or any forward
gear positions, and when the
brake is set.
(Continued)(Continued)
When a vehicle stops on a
slope, do not stop the vehicle
with the engine power.
Set the service brake or the
parking brake.
Do not shift from N(Neutral)/P(Park) to
D(Drive)/R(Reverse), when the
engine runs faster than the idle
speed.
Transmission ranges
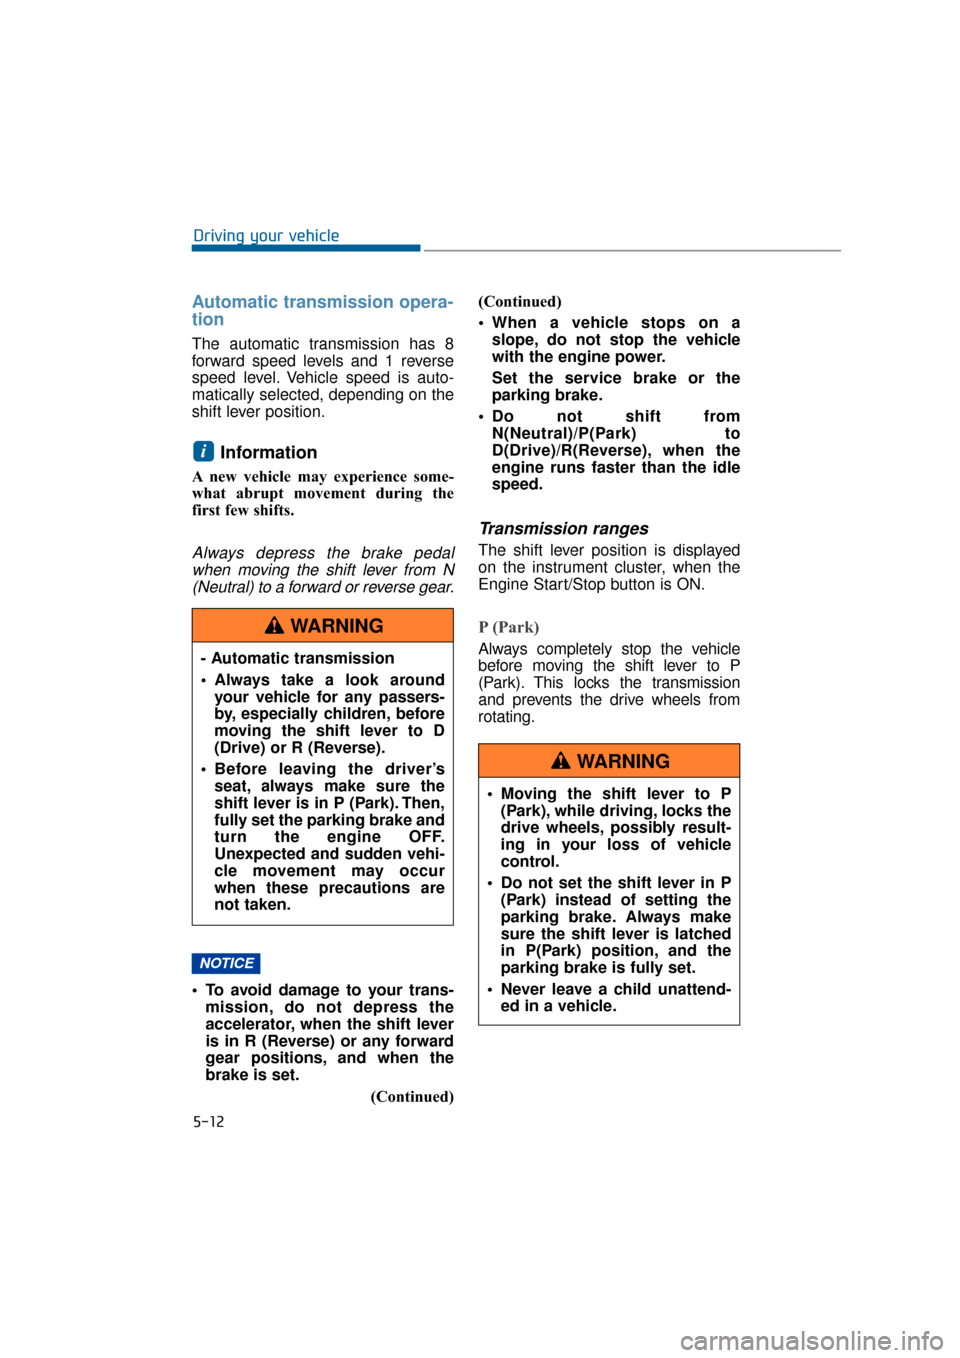
The shift lever position is displayed
on the instrument cluster, when the
Engine Start/Stop button is ON.
P (Park)
Always completely stop the vehicle
before moving the shift lever to P
(Park). This locks the transmission
and prevents the drive wheels from
rotating.
NOTICE
i
5-12
Driving your vehicle
- Automatic transmission
Always take a look around your vehicle for any passers-
by, especially children, before
moving the shift lever to D
(Drive) or R (Reverse).
Before leaving the driver’s seat, always make sure the
shift lever is in P (Park). Then,
fully set the parking brake and
turn the engine OFF.
Unexpected and sudden vehi-
cle movement may occur
when these precautions are
not taken.
WARNING
Moving the shift lever to P(Park), while driving, locks the
drive wheels, possibly result-
ing in your loss of vehicle
control.
Do not set the shift lever in P (Park) instead of setting the
parking brake. Always make
sure the shift lever is latched
in P(Park) position, and the
parking brake is fully set.
Never leave a child unattend- ed in a vehicle.
WARNING
Page 264 of 477
R (Reverse)
Set the shift lever in this position to
drive backwards.
Always completely stop the vehi-
cle before changing the shift lever
to or out of R (Reverse). You may
damage the transmission when
changing the shift lever to R while
driving, except as explained in
"Rocking the Vehicle" in this chap-
ter.
N (Neutral)
The wheels and transmission are not
engaged. The vehicle rolls freely
even on the slightest slope, unless
the parking brake or service brake is
applied.
D (Drive)
This is for the forward driving posi-
tion. The transmission will automati-
cally shift in a 8-gear sequence, pro-
viding the best fuel economy and
power.
For extra power to pass ahead
another vehicle or to climb a slope,
fully depress the accelerator. Then,
the transmission will automatically
downshift to the next lower gear (or
gears, as appropriate).
Information
Always come to a complete stop before
changing the shift lever to D (Drive).
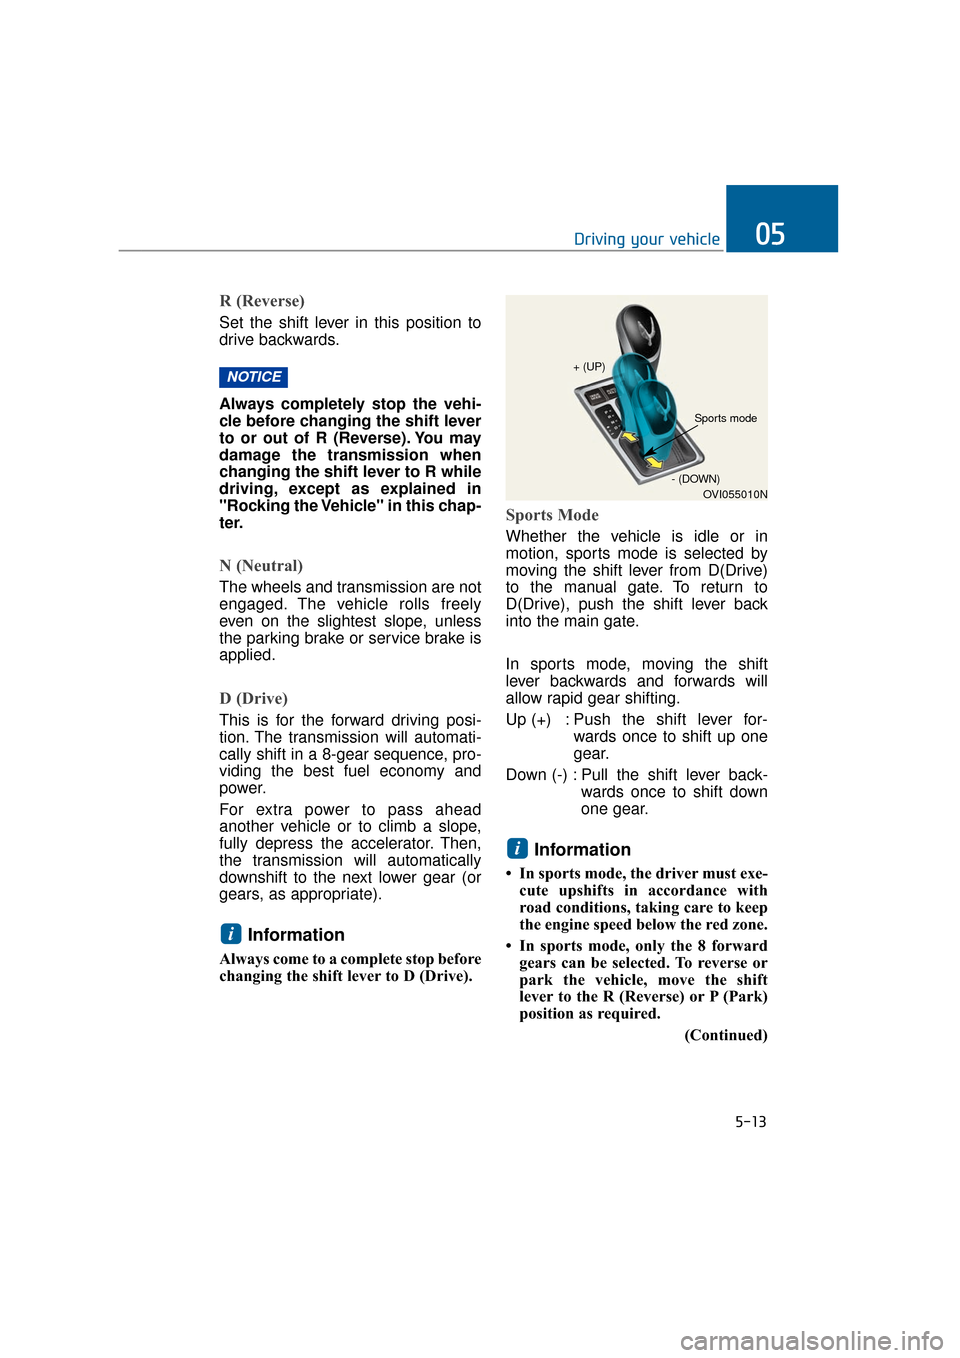
Sports Mode
Whether the vehicle is idle or in
motion, sports mode is selected by
moving the shift lever from D(Drive)
to the manual gate. To return to
D(Drive), push the shift lever back
into the main gate.
In sports mode, moving the shift
lever backwards and forwards will
allow rapid gear shifting.
Up (+) : Push the shift lever for-wards once to shift up one
gear.
Down (-) : Pull the shift lever back- wards once to shift down
one gear.
Information
• In sports mode, the driver must exe-cute upshifts in accordance with
road conditions, taking care to keep
the engine speed below the red zone.
• In sports mode, only the 8 forward gears can be selected. To reverse or
park the vehicle, move the shift
lever to the R (Reverse) or P (Park)
position as required.
(Continued)
i
i
NOTICE
5-13
Driving your vehicle05
OVI055010N
+ (UP)
- (DOWN)
Sports mode
Page 265 of 477
(Continued)
• In sports mode, the transmissionwill automatically downshift, when
it slows down. When the vehicle
stops, the transmission automatical-
ly selects the 1st gear.
• In sports mode, the transmission will automatically upshift, when the
engine rpm approaches toward the
red zone.
• Even though the driver moves the shift lever to a +(up) or -(down)
position, the transmission may not
make the manually-requested gear
change, if the requested gear is out
of the allowable engine RPM range.
• When driving on a slippery road, set the shift lever in the 2nd gear, which
is better for smooth acceleration on
a slippery road.Shift lock system
For your safety, the automatic trans-
mission has a shift lock system to
prevent the transmission shifting
from P(Park) to R (Reverse), unless
the brake pedal is depressed.
To shift the transmission from
P(Park) into R(Reverse):
1. Depress the brake pedal.
2. Start the engine or turn the Engine Start/Stop button ON.
3. Move the shift lever.
When the brake pedal is repeatedly
depressed and released with the
shift lever in P(Park), you may expe-
rience chattering noises near the
shift lever. This is a normal condition.
5-14
Driving your vehicle
Always fully depress the brake
pedal before and while moving
the shift lever out of P (Park) to
another position to avoid inad-
vertent movement of the vehi-
cle. This may injure persons in
or around the car.
WARNING