warning Hyundai H-1 (Grand Starex) 2003 Owner's Manual
[x] Cancel search | Manufacturer: HYUNDAI, Model Year: 2003, Model line: H-1 (Grand Starex), Model: Hyundai H-1 (Grand Starex) 2003Pages: 173, PDF Size: 3.68 MB
Page 5 of 173

A090A01P-GATSAFETY AND VEHICLE DAMAGE WARNING
This manual includes information titled as WARNING, CAUTION and NOTE. These titles indicate the following: WARNING: This indicates that a condition may result in harm or injury to you or other persons if the warning is not heeded. Follow the advice provided with the warning. CAUTION: This indicates that a condition may result in damage to your vehicle or its equipment if the caution is not heeded. Follow the advice provided with the caution. NOTE: This indicates that interesting or helpful information is being provided.
Page 8 of 173
1-1
BEFORE DRIVING YOUR VEHICLE
BEFORE DRIVING YOUR VEHICLE BEFORE DRIVING YOUR VEHICLE
BEFORE DRIVING YOUR VEHICLE
BEFORE DRIVING YOUR VEHICLE
B000A01P-GAT 1.1.
1.1.
1.
BEFORE DRIVING
BEFORE DRIVING BEFORE DRIVING
BEFORE DRIVING
BEFORE DRIVING
YY
YY
Y
OUR
OUR OUR
OUR
OUR VEHICLE
VEHICLE VEHICLE
VEHICLE
VEHICLE
B010B01P-GAT Before entering the vehicle
Before entering the vehicle Before entering the vehicle
Before entering the vehicle
Before entering the vehicle
o Check that windows, mirrors and lights are clean.
o Check if any tire is low or flat.
o Look for fluid leaks.
o Check that area is clear if you’re about to back up.
B010C03P-GAT After entering the vehicle
After entering the vehicle After entering the vehicle
After entering the vehicle
After entering the vehicle
o Lock all doors.
o The driver and passengers are wearing prop- erly adjusted seat belts.
o The head restraints are properly adjusted, if so equipped.
o Adjust inside and outside mirrors.
o Check warning lights for correct operation, with the ignition key in the position "ON".
o Check all gauges, for normal operation.
B010A01P-GAT
BEFORE DRIVING YOUR VEHICLE
BEFORE DRIVING YOUR VEHICLE BEFORE DRIVING YOUR VEHICLE
BEFORE DRIVING YOUR VEHICLE
BEFORE DRIVING YOUR VEHICLE
SAFETY CHECKS
SAFETY CHECKS SAFETY CHECKS
SAFETY CHECKS
SAFETY CHECKS
Be sure you know your vehicle and its equip-
ment and how to use it safely.
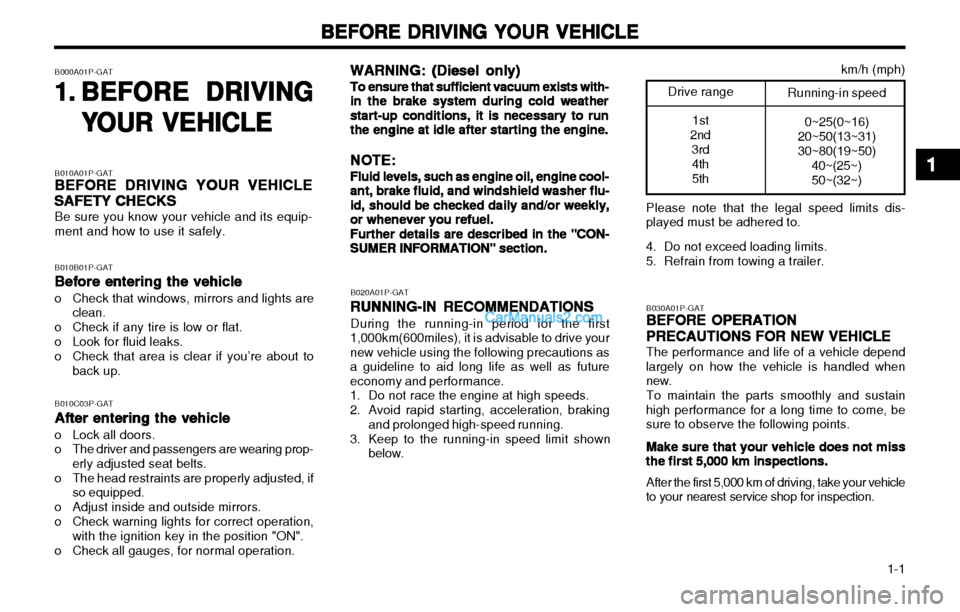
B020A01P-GATRUNNING-IN RECOMMENDATIONS
RUNNING-IN RECOMMENDATIONS RUNNING-IN RECOMMENDATIONS
RUNNING-IN RECOMMENDATIONS
RUNNING-IN RECOMMENDATIONS During the running-in period for the first
1,000km(600miles), it is advisable to drive your new vehicle using the following precautions asa guideline to aid long life as well as futureeconomy and performance.
1. Do not race the engine at high speeds.
2. Avoid rapid starting, acceleration, braking and prolonged high-speed running.
3. Keep to the running-in speed limit shown below. B030A01P-GAT
BEFORE OPERATION
BEFORE OPERATION BEFORE OPERATION
BEFORE OPERATION
BEFORE OPERATION
PRECAUTIONS FOR NEW VEHICLE
PRECAUTIONS FOR NEW VEHICLE PRECAUTIONS FOR NEW VEHICLE
PRECAUTIONS FOR NEW VEHICLE
PRECAUTIONS FOR NEW VEHICLE The performance and life of a vehicle depend
largely on how the vehicle is handled when new.
To maintain the parts smoothly and sustain
high performance for a long time to come, besure to observe the following points.
Make sure that your vehicle does not miss
Make sure that your vehicle does not miss Make sure that your vehicle does not miss
Make sure that your vehicle does not miss
Make sure that your vehicle does not miss the first 5,000 km inspections.
the first 5,000 km inspections. the first 5,000 km inspections.
the first 5,000 km inspections.
the first 5,000 km inspections.
After the first 5,000 km of driving, take your vehicle
to your nearest service shop for inspection.
Drive range
1st
2nd 3rd4th 5thRunning-in speed
0~25(0~16)
20~50(13~31) 30~80(19~50)
40~(25~)50~(32~) km/h (mph)
WARNING: (Diesel only)
WARNING: (Diesel only) WARNING: (Diesel only)
WARNING: (Diesel only)
WARNING: (Diesel only)
To ensure that sufficient vacuum exists with-
To ensure that sufficient vacuum exists with- To ensure that sufficient vacuum exists with-
To ensure that sufficient vacuum exists with-
To ensure that sufficient vacuum exists with-in the brake system during cold weather
in the brake system during cold weather in the brake system during cold weather
in the brake system during cold weather
in the brake system during cold weather
start-up conditions, it is necessary to run
start-up conditions, it is necessary to run start-up conditions, it is necessary to run
start-up conditions, it is necessary to run
start-up conditions, it is necessary to run
the engine at idle after starting the engine.
the engine at idle after starting the engine. the engine at idle after starting the engine.
the engine at idle after starting the engine.
the engine at idle after starting the engine.
NOTE:
NOTE: NOTE:
NOTE:
NOTE:
Fluid levels, such as engine oil, engine cool-
Fluid levels, such as engine oil, engine cool- Fluid levels, such as engine oil, engine cool-
Fluid levels, such as engine oil, engine cool-
Fluid levels, such as engine oil, engine cool-ant, brake fluid, and windshield washer flu-
ant, brake fluid, and windshield washer flu- ant, brake fluid, and windshield washer flu-
ant, brake fluid, and windshield washer flu-
ant, brake fluid, and windshield washer flu-
id, should be checked daily and/or weekly,
id, should be checked daily and/or weekly, id, should be checked daily and/or weekly,
id, should be checked daily and/or weekly,
id, should be checked daily and/or weekly,
or whenever you refuel.
or whenever you refuel. or whenever you refuel.
or whenever you refuel.
or whenever you refuel.
Further details are described in the "CON-
Further details are described in the "CON- Further details are described in the "CON-
Further details are described in the "CON-
Further details are described in the "CON-SUMER INFORMATION" section.
SUMER INFORMATION" section. SUMER INFORMATION" section.
SUMER INFORMATION" section.
SUMER INFORMATION" section.
11
11
1
Please note that the legal speed limits dis-
played must be adhered to.
4. Do not exceed loading limits.
5. Refrain from towing a trailer.
Page 9 of 173
BEFORE DRIVING YOUR VEHICLE
BEFORE DRIVING YOUR VEHICLE BEFORE DRIVING YOUR VEHICLE
BEFORE DRIVING YOUR VEHICLE
BEFORE DRIVING YOUR VEHICLE
1-2
B040A01P-GAT OPERATION IN FOREIGN COUNTRIES
OPERATION IN FOREIGN COUNTRIES OPERATION IN FOREIGN COUNTRIES
OPERATION IN FOREIGN COUNTRIES
OPERATION IN FOREIGN COUNTRIES If you are going to drive your Hyundai in another
country, be sure to:
o Observe all regulations regarding registra- tion and insurance.
o Determine that acceptable fuel is available.
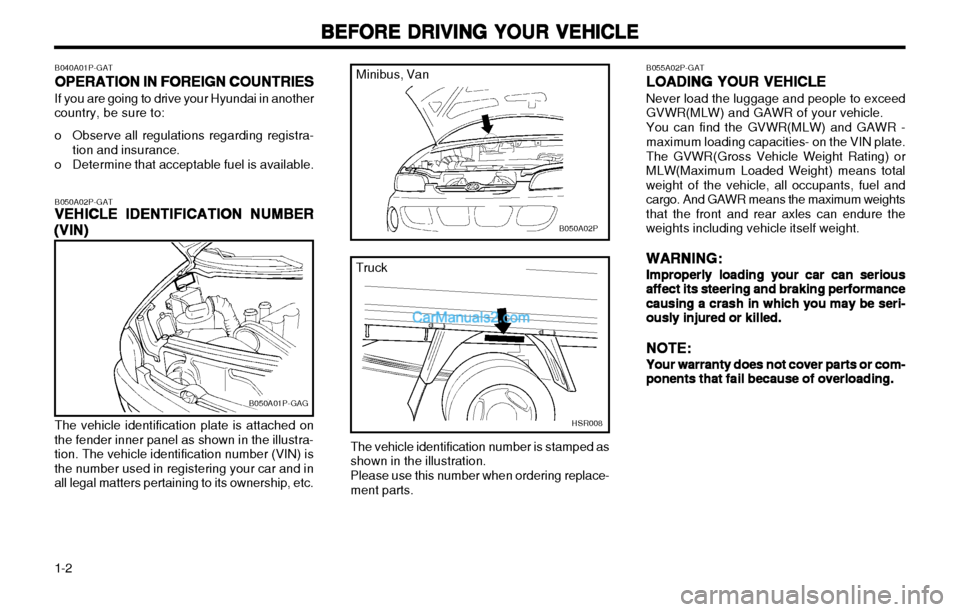
B050A02P-GAT VEHICLE IDENTIFICATION NUMBER
VEHICLE IDENTIFICATION NUMBER VEHICLE IDENTIFICATION NUMBER
VEHICLE IDENTIFICATION NUMBER
VEHICLE IDENTIFICATION NUMBER
(VIN)
(VIN) (VIN)
(VIN)
(VIN)
B050A01P-GAG
The vehicle identification plate is attached on
the fender inner panel as shown in the illustra- tion. The vehicle identification number (VIN) isthe number used in registering your car and inall legal matters pertaining to its ownership, etc.
B050A02P
Minibus, Van
HSR008
Truck
The vehicle identification number is stamped as shown in the illustration. Please use this number when ordering replace- ment parts.
B055A02P-GAT LOADING YOUR VEHICLE
LOADING YOUR VEHICLE LOADING YOUR VEHICLE
LOADING YOUR VEHICLE
LOADING YOUR VEHICLE Never load the luggage and people to exceed GVWR(MLW) and GAWR of your vehicle. You can find the GVWR(MLW) and GAWR - maximum loading capacities- on the VIN plate. The GVWR(Gross Vehicle Weight Rating) or MLW(Maximum Loaded Weight) means totalweight of the vehicle, all occupants, fuel andcargo. And GAWR means the maximum weightsthat the front and rear axles can endure theweights including vehicle itself weight.
WARNING:
WARNING: WARNING:
WARNING:
WARNING:
Improperly loading your car can serious
Improperly loading your car can serious Improperly loading your car can serious
Improperly loading your car can serious
Improperly loading your car can serious
affect its steering and braking performance
affect its steering and braking performance affect its steering and braking performance
affect its steering and braking performance
affect its steering and braking performance
causing a crash in which you may be seri-
causing a crash in which you may be seri- causing a crash in which you may be seri-
causing a crash in which you may be seri-
causing a crash in which you may be seri-
ously injured or killed.
ously injured or killed. ously injured or killed.
ously injured or killed.
ously injured or killed.
NOTE:
NOTE: NOTE:
NOTE:
NOTE:
Your warranty does not cover parts or com-
Your warranty does not cover parts or com- Your warranty does not cover parts or com-
Your warranty does not cover parts or com-
Your warranty does not cover parts or com-
ponents that fail because of overloading.
ponents that fail because of overloading. ponents that fail because of overloading.
ponents that fail because of overloading.
ponents that fail because of overloading.
Page 14 of 173

1-7
BEFORE DRIVING YOUR VEHICLE
BEFORE DRIVING YOUR VEHICLE BEFORE DRIVING YOUR VEHICLE
BEFORE DRIVING YOUR VEHICLE
BEFORE DRIVING YOUR VEHICLE
B885D01A-GATLimp
Limp Limp
Limp
Limp HH
HH
H ome
ome ome
ome
ome
PP
PP
P
rocedures
rocedures rocedures
rocedures
rocedures
B880D01P
In case the immobilizer warning indicator blinks for five seconds when the ignition key is turnedto "ON" position, this indicates that the immobi-lizer system is out of order. And you cannotstart the engine without the limp home proce-dures with ignition key.
Hyundai dealer by quoting the relevant key number. In the interest of security, the metal tag at-
tached to the keys which bears the key numbershould be removed from the key ring after youreceive your new vehicle. In addition, key num-bers cannot be provided by Hyundai for secu-rity reasons.
If you need additional keys or if you should lose
your keys, your authorized Hyundai dealer canmake new keys.
B885C02A-GAT
Key Numbers
Key Numbers Key Numbers
Key Numbers
Key Numbers
B885C01B
All of the locks fitted to the vehicle are operated
by the same key. However, since it is possible to lock the doors without the use of the key,care should be exercised to ensure that the keydoes not become locked inside the vehicle bymistake. If your vehicle is equipped with Theft-alarm system, the master keys with the function oftransmitter will be provided. (E.C only)
NOTE:
NOTE: NOTE:
NOTE:
NOTE:
If you make your own duplicate key, you will
If you make your own duplicate key, you will If you make your own duplicate key, you will
If you make your own duplicate key, you will
If you make your own duplicate key, you will not be able to cancel the system or start the
not be able to cancel the system or start the not be able to cancel the system or start the
not be able to cancel the system or start the
not be able to cancel the system or start the
engine.
engine. engine.
engine.
engine.
CAUTION:
CAUTION: CAUTION:
CAUTION:
CAUTION:
oo
oo
o
The password should be recorded and
The password should be recorded and The password should be recorded and
The password should be recorded and
The password should be recorded and
kept in a safe place in case the need to
kept in a safe place in case the need to kept in a safe place in case the need to
kept in a safe place in case the need to
kept in a safe place in case the need to
order further keys arises.
order further keys arises. order further keys arises.
order further keys arises.
order further keys arises.
oo
oo
o
If you forget the password, consult your
If you forget the password, consult your If you forget the password, consult your
If you forget the password, consult your
If you forget the password, consult your
authorized Hyundai dealer.
authorized Hyundai dealer. authorized Hyundai dealer.
authorized Hyundai dealer.
authorized Hyundai dealer. Without Theft-alarm system
The vehicle key number is recorded upon a metal tag attached to the keys when the vehicleis first delivered to you. The key number should be recorded and kept in a safe place in case the need to order furtherkeys arises. New keys are available from any
B885C02P
With Theft-alarm system
Page 15 of 173
BEFORE DRIVING YOUR VEHICLE
BEFORE DRIVING YOUR VEHICLE BEFORE DRIVING YOUR VEHICLE
BEFORE DRIVING YOUR VEHICLE
BEFORE DRIVING YOUR VEHICLE
1-8
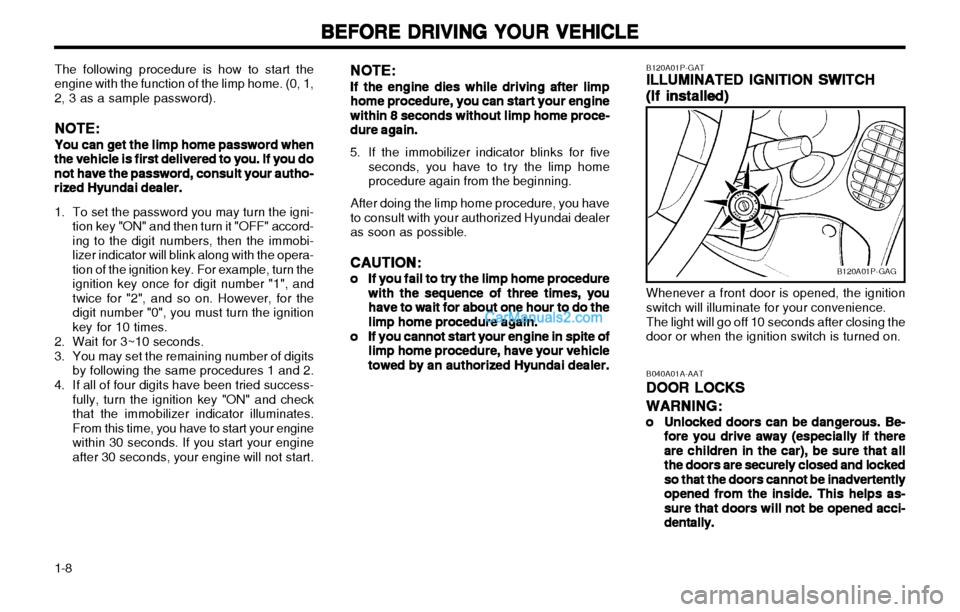
B120A01P-GAG
Whenever a front door is opened, the ignition switch will illuminate for your convenience. The light will go off 10 seconds after closing the door or when the ignition switch is turned on.
B120A01P-GAT
ILLUMINATED IGNITION SWITCH
ILLUMINATED IGNITION SWITCH ILLUMINATED IGNITION SWITCH
ILLUMINATED IGNITION SWITCH
ILLUMINATED IGNITION SWITCH
(If installed)
(If installed) (If installed)
(If installed)
(If installed) B040A01A-AAT
DOOR LOCKS
DOOR LOCKS DOOR LOCKS
DOOR LOCKS
DOOR LOCKS
WARNING:
WARNING: WARNING:
WARNING:
WARNING:
oo
oo
o Unlocked doors can be dangerous. Be-
Unlocked doors can be dangerous. Be- Unlocked doors can be dangerous. Be-
Unlocked doors can be dangerous. Be-
Unlocked doors can be dangerous. Be-
fore you drive away (especially if there
fore you drive away (especially if there fore you drive away (especially if there
fore you drive away (especially if there
fore you drive away (especially if there
are children in the car), be sure that all
are children in the car), be sure that all are children in the car), be sure that all
are children in the car), be sure that all
are children in the car), be sure that all
the doors are securely closed and locked
the doors are securely closed and locked the doors are securely closed and locked
the doors are securely closed and locked
the doors are securely closed and locked
so that the doors cannot be inadvertently
so that the doors cannot be inadvertently so that the doors cannot be inadvertently
so that the doors cannot be inadvertently
so that the doors cannot be inadvertently
opened from the inside. This helps as-
opened from the inside. This helps as- opened from the inside. This helps as-
opened from the inside. This helps as-
opened from the inside. This helps as-
sure that doors will not be opened acci-
sure that doors will not be opened acci- sure that doors will not be opened acci-
sure that doors will not be opened acci-
sure that doors will not be opened acci-
dentally.
dentally. dentally.
dentally.
dentally.
The following procedure is how to start the
engine with the function of the limp home. (0, 1, 2, 3 as a sample password).
NOTE:
NOTE: NOTE:
NOTE:
NOTE:
You can get the limp home password when
You can get the limp home password when You can get the limp home password when
You can get the limp home password when
You can get the limp home password when the vehicle is first delivered to you. If you do
the vehicle is first delivered to you. If you do the vehicle is first delivered to you. If you do
the vehicle is first delivered to you. If you do
the vehicle is first delivered to you. If you do
not have the password, consult your autho-
not have the password, consult your autho- not have the password, consult your autho-
not have the password, consult your autho-
not have the password, consult your autho-
rized Hyundai dealer.
rized Hyundai dealer. rized Hyundai dealer.
rized Hyundai dealer.
rized Hyundai dealer.
1. To set the password you may turn the igni-
tion key "ON" and then turn it "OFF" accord- ing to the digit numbers, then the immobi-lizer indicator will blink along with the opera-tion of the ignition key. For example, turn theignition key once for digit number "1", andtwice for "2", and so on. However, for thedigit number "0", you must turn the ignitionkey for 10 times.
2. Wait for 3~10 seconds.
3. You may set the remaining number of digits by following the same procedures 1 and 2.
4. If all of four digits have been tried success- fully, turn the ignition key "ON" and check that the immobilizer indicator illuminates.From this time, you have to start your enginewithin 30 seconds. If you start your engineafter 30 seconds, your engine will not start. NOTE:
NOTE: NOTE:
NOTE:
NOTE:
If the engine dies while driving after limp
If the engine dies while driving after limp If the engine dies while driving after limp
If the engine dies while driving after limp
If the engine dies while driving after limp
home procedure, you can start your engine
home procedure, you can start your engine home procedure, you can start your engine
home procedure, you can start your engine
home procedure, you can start your engine
within 8 seconds without limp home proce-
within 8 seconds without limp home proce- within 8 seconds without limp home proce-
within 8 seconds without limp home proce-
within 8 seconds without limp home proce-
dure again.
dure again. dure again.
dure again.
dure again.
5. If the immobilizer indicator blinks for five seconds, you have to try the limp homeprocedure again from the beginning.
After doing the limp home procedure, you haveto consult with your authorized Hyundai dealeras soon as possible.
CAUTION:
CAUTION: CAUTION:
CAUTION:
CAUTION:
oo
oo
o If you fail to try the limp home procedure
If you fail to try the limp home procedure If you fail to try the limp home procedure
If you fail to try the limp home procedure
If you fail to try the limp home procedure
with the sequence of three times, you
with the sequence of three times, you with the sequence of three times, you
with the sequence of three times, you
with the sequence of three times, you
have to wait for about one hour to do the
have to wait for about one hour to do the have to wait for about one hour to do the
have to wait for about one hour to do the
have to wait for about one hour to do the
limp home procedure again.
limp home procedure again. limp home procedure again.
limp home procedure again.
limp home procedure again.
oo
oo
o If you cannot start your engine in spite of
If you cannot start your engine in spite of If you cannot start your engine in spite of
If you cannot start your engine in spite of
If you cannot start your engine in spite of
limp home procedure, have your vehicle
limp home procedure, have your vehicle limp home procedure, have your vehicle
limp home procedure, have your vehicle
limp home procedure, have your vehicle
towed by an authorized Hyundai dealer.
towed by an authorized Hyundai dealer. towed by an authorized Hyundai dealer.
towed by an authorized Hyundai dealer.
towed by an authorized Hyundai dealer.
Page 21 of 173

BEFORE DRIVING YOUR VEHICLE
BEFORE DRIVING YOUR VEHICLE BEFORE DRIVING YOUR VEHICLE
BEFORE DRIVING YOUR VEHICLE
BEFORE DRIVING YOUR VEHICLE
1-14 B191A01P-GAT
REAR GATE (For Truck)
REAR GATE (For Truck) REAR GATE (For Truck)
REAR GATE (For Truck)
REAR GATE (For Truck)
To open the rear gate
To open the rear gate To open the rear gate
To open the rear gate
To open the rear gate
1. Push the rear gate handle inside and pull it
toward you.
B191A01P
B191A02P
2. Lower the rear gate slowly. NOTE:
NOTE: NOTE:
NOTE:
NOTE:
When you step on the cargo deck, use the
When you step on the cargo deck, use the When you step on the cargo deck, use the
When you step on the cargo deck, use the
When you step on the cargo deck, use the
foothold.
foothold. foothold.
foothold.
foothold.
WARNING:
WARNING: WARNING:
WARNING:
WARNING:
When the rear combination lamps are hid-
When the rear combination lamps are hid- When the rear combination lamps are hid-
When the rear combination lamps are hid-
When the rear combination lamps are hid-
den, other road users should be warned by
den, other road users should be warned by den, other road users should be warned by
den, other road users should be warned by
den, other road users should be warned by
the means of warning triangle or other de-
the means of warning triangle or other de- the means of warning triangle or other de-
the means of warning triangle or other de-
the means of warning triangle or other de-
vices.
vices. vices.
vices.
vices.
To close the rear gate
To close the rear gate To close the rear gate
To close the rear gate
To close the rear gate Lift the rear gate up and lock the rear gate handle in place.
B191A03P
B190E01P.GAG
lock
unlock
Outside Inside
B190D01P.GAG
B190C01P.GAG
B190C01P-GAT
Tail gate - Twin swing door type (Van)
Tail gate - Twin swing door type (Van) Tail gate - Twin swing door type (Van)
Tail gate - Twin swing door type (Van)
Tail gate - Twin swing door type (Van) To open from outside, lift the door handle up. To open from inside, pull the inside door handle.1 : unlock2 : lock When opening the left door, pull the lever to- ward your side.
Page 22 of 173
1-15
BEFORE DRIVING YOUR VEHICLE
BEFORE DRIVING YOUR VEHICLE BEFORE DRIVING YOUR VEHICLE
BEFORE DRIVING YOUR VEHICLE
BEFORE DRIVING YOUR VEHICLE
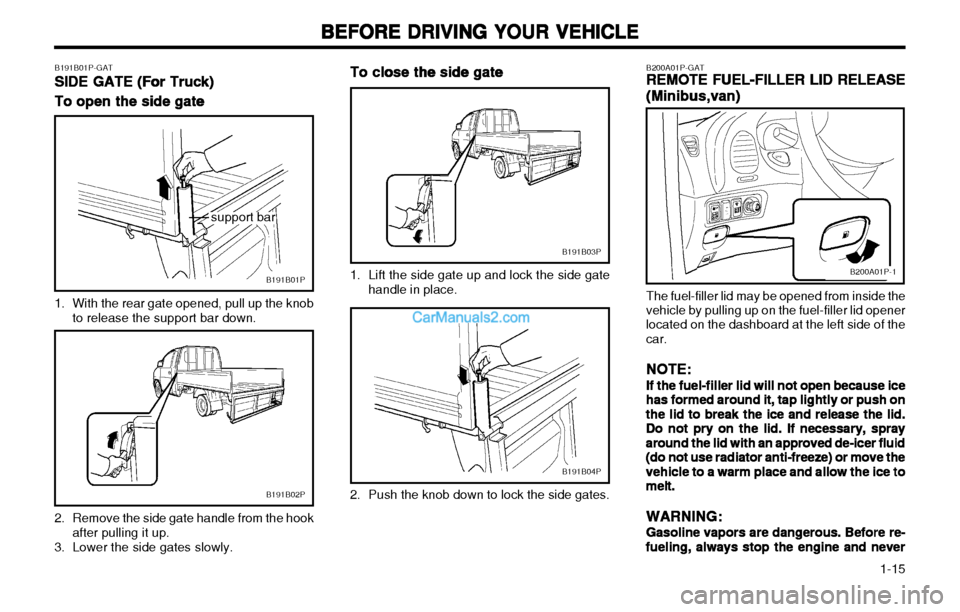
The fuel-filler lid may be opened from inside the
vehicle by pulling up on the fuel-filler lid opener located on the dashboard at the left side of thecar.
NOTE:
NOTE: NOTE:
NOTE:
NOTE:
If the fuel-filler lid will not open because ice
If the fuel-filler lid will not open because ice If the fuel-filler lid will not open because ice
If the fuel-filler lid will not open because ice
If the fuel-filler lid will not open because ice has formed around it, tap lightly or push on
has formed around it, tap lightly or push on has formed around it, tap lightly or push on
has formed around it, tap lightly or push on
has formed around it, tap lightly or push on
the lid to break the ice and release the lid.
the lid to break the ice and release the lid. the lid to break the ice and release the lid.
the lid to break the ice and release the lid.
the lid to break the ice and release the lid.
Do not pry on the lid. If necessary, spray
Do not pry on the lid. If necessary, spray Do not pry on the lid. If necessary, spray
Do not pry on the lid. If necessary, spray
Do not pry on the lid. If necessary, spray
around the lid with an approved de-icer fluid
around the lid with an approved de-icer fluid around the lid with an approved de-icer fluid
around the lid with an approved de-icer fluid
around the lid with an approved de-icer fluid
(do not use radiator anti-freeze) or move the
(do not use radiator anti-freeze) or move the (do not use radiator anti-freeze) or move the
(do not use radiator anti-freeze) or move the
(do not use radiator anti-freeze) or move the
vehicle to a warm place and allow the ice to
vehicle to a warm place and allow the ice to vehicle to a warm place and allow the ice to
vehicle to a warm place and allow the ice to
vehicle to a warm place and allow the ice to
melt.
melt. melt.
melt.
melt.
WARNING:
WARNING: WARNING:
WARNING:
WARNING:
Gasoline vapors are dangerous. Before re-
Gasoline vapors are dangerous. Before re- Gasoline vapors are dangerous. Before re-
Gasoline vapors are dangerous. Before re-
Gasoline vapors are dangerous. Before re-fueling, always stop the engine and never
fueling, always stop the engine and never fueling, always stop the engine and never
fueling, always stop the engine and never
fueling, always stop the engine and neverB200A01P-GAT
REMOTE FUEL-FILLER LID RELEASE
REMOTE FUEL-FILLER LID RELEASE REMOTE FUEL-FILLER LID RELEASE
REMOTE FUEL-FILLER LID RELEASE
REMOTE FUEL-FILLER LID RELEASE
(Minibus,van)
(Minibus,van) (Minibus,van)
(Minibus,van)
(Minibus,van)
B200A01P-1
To close the side gate
To close the side gate To close the side gate
To close the side gate
To close the side gate
1. Lift the side gate up and lock the side gate handle in place.
B191B03P
B191B04P
2. Push the knob down to lock the side gates.
B191B01P-GAT SIDE GATE (For Truck)
SIDE GATE (For Truck) SIDE GATE (For Truck)
SIDE GATE (For Truck)
SIDE GATE (For Truck)
To open the side gate
To open the side gate To open the side gate
To open the side gate
To open the side gate
1. With the rear gate opened, pull up the knob to release the support bar down.
B191B01P
2. Remove the side gate handle from the hookafter pulling it up.
3. Lower the side gates slowly.
B191B02P
support bar
Page 24 of 173

1-17
BEFORE DRIVING YOUR VEHICLE
BEFORE DRIVING YOUR VEHICLE BEFORE DRIVING YOUR VEHICLE
BEFORE DRIVING YOUR VEHICLE
BEFORE DRIVING YOUR VEHICLE
B250A01P-GATPOWER WINDOW (If installed)
POWER WINDOW (If installed) POWER WINDOW (If installed)
POWER WINDOW (If installed)
POWER WINDOW (If installed) Power window operates when the ignition key is in the "ON" position. The main switches are located on the driver's armrest and control the front windows on therespective sides of the vehicle. The windows may be opened by depressing the appropriate window switch. To stop at the desired opening, release the switch. The window may be closed by pullingthe front portion of the switch.
Auto-Down window (Driver's Side)
Auto-Down window (Driver's Side) Auto-Down window (Driver's Side)
Auto-Down window (Driver's Side)
Auto-Down window (Driver's Side) The Auto-Down window is moved to its fully open position by push on the switch, and pushin on the switch again to stop at the desireposition.
B230A01P-GAT
FRONT DOOR WINDOW GLASS
FRONT DOOR WINDOW GLASS FRONT DOOR WINDOW GLASS
FRONT DOOR WINDOW GLASS
FRONT DOOR WINDOW GLASS
CLOSE
GT10260A
OPEN
Turn the window regulator handle to raise or
lower the window.
WARNING:
WARNING: WARNING:
WARNING:
WARNING:
When opening or closing the windows, make
When opening or closing the windows, make When opening or closing the windows, make
When opening or closing the windows, make
When opening or closing the windows, make sure your passenger's arms and hands are
sure your passenger's arms and hands are sure your passenger's arms and hands are
sure your passenger's arms and hands are
sure your passenger's arms and hands are
safely out of the way.
safely out of the way. safely out of the way.
safely out of the way.
safely out of the way.
Pull the center of the lever toward you. When
the window is closed, lock the lever securely.
B220A01P-GAT SLIDING WINDOW GLASS (Van)
SLIDING WINDOW GLASS (Van) SLIDING WINDOW GLASS (Van)
SLIDING WINDOW GLASS (Van)
SLIDING WINDOW GLASS (Van)
GT10250A
OPEN CLOSE
To open
To open To open
To open
To open Slide the window glass while pressing the lock
knob.
To close
To close To close
To close
To closeSlide the window glass all the way and it will
automatically lock.
Close Open
HSR2307
Page 25 of 173

BEFORE DRIVING YOUR VEHICLE
BEFORE DRIVING YOUR VEHICLE BEFORE DRIVING YOUR VEHICLE
BEFORE DRIVING YOUR VEHICLE
BEFORE DRIVING YOUR VEHICLE
1-18 B080C01A-AAT
Adjusting Seatback Angle
Adjusting Seatback Angle Adjusting Seatback Angle
Adjusting Seatback Angle
Adjusting Seatback Angle
B080C01A-AAG
To recline the seatback, lean forward to take
your weight off it, then pull up on the recliner control lever at the outside edge of the seat.Now lean back until the desired seatback angleis achieved. To lock the seatback into position,release the recliner control lever.
WARNING:
WARNING: WARNING:
WARNING:
WARNING:
To minimize risk of personal injury in the
To minimize risk of personal injury in the To minimize risk of personal injury in the
To minimize risk of personal injury in the
To minimize risk of personal injury in the event of a collision
event of a collision event of a collision
event of a collision
event of a collision
or a sudden stop, both
or a sudden stop, both or a sudden stop, both
or a sudden stop, both
or a sudden stop, both
the driver and passenger seatbacks should
the driver and passenger seatbacks should the driver and passenger seatbacks should
the driver and passenger seatbacks should
the driver and passenger seatbacks should
always be
always be always be
always be
always be
in an upright position while the
in an upright position while the in an upright position while the
in an upright position while the
in an upright position while the
vehicle is in motion. The protection provid-
vehicle is in motion. The protection provid- vehicle is in motion. The protection provid-
vehicle is in motion. The protection provid-
vehicle is in motion. The protection provid-
ed ed
ed ed
ed
by the seat belts and airbags may be
by the seat belts and airbags may be by the seat belts and airbags may be
by the seat belts and airbags may be
by the seat belts and airbags may be
reduced significantly when the seatbacks
reduced significantly when the seatbacks reduced significantly when the seatbacks
reduced significantly when the seatbacks
reduced significantly when the seatbacks
are reclined. There is greater risk that the
are reclined. There is greater risk that the are reclined. There is greater risk that the
are reclined. There is greater risk that the
are reclined. There is greater risk that the
driver and passenger will slide
driver and passenger will slide driver and passenger will slide
driver and passenger will slide
driver and passenger will slide under the
under the under the
under the
under the
belt resulting in serious injury if a crash
belt resulting in serious injury if a crash belt resulting in serious injury if a crash
belt resulting in serious injury if a crash
belt resulting in serious injury if a crash
occurs when the seatbacks
occurs when the seatbacks occurs when the seatbacks
occurs when the seatbacks
occurs when the seatbacks are reclined.
are reclined. are reclined.
are reclined.
are reclined.
B080A01A-AAT
ADJUSTABLE FRONT SEATS
ADJUSTABLE FRONT SEATS ADJUSTABLE FRONT SEATS
ADJUSTABLE FRONT SEATS
ADJUSTABLE FRONT SEATS
WARNING:
WARNING: WARNING:
WARNING:
WARNING:
Never attempt to adjust the seat while the
Never attempt to adjust the seat while the Never attempt to adjust the seat while the
Never attempt to adjust the seat while the
Never attempt to adjust the seat while thevehicle is moving. This could result in loss
vehicle is moving. This could result in loss vehicle is moving. This could result in loss
vehicle is moving. This could result in loss
vehicle is moving. This could result in loss
of control, and an accident causing death,
of control, and an accident causing death, of control, and an accident causing death,
of control, and an accident causing death,
of control, and an accident causing death,
serious injury, or property damage.
serious injury, or property damage. serious injury, or property damage.
serious injury, or property damage.
serious injury, or property damage.
B080B01A-AAT Adjusting Seat Forward and Rearward
Adjusting Seat Forward and Rearward Adjusting Seat Forward and Rearward
Adjusting Seat Forward and Rearward
Adjusting Seat Forward and Rearward
B080B01A-AAG
To move the seat toward the front or rear, pull
the lock release lever upward. This releases the seat on its track so you can move it forward
or rearward to the desired position. When you
find the position you want, release the lever andslide the seat forward or rearward on its trackuntil it locks into the position and cannot bemoved further.
CAUTION:
CAUTION: CAUTION:
CAUTION:
CAUTION:
Never try to operate the main switch and
Never try to operate the main switch and Never try to operate the main switch and
Never try to operate the main switch and
Never try to operate the main switch and sub switch in opposing directions at the
sub switch in opposing directions at the sub switch in opposing directions at the
sub switch in opposing directions at the
sub switch in opposing directions at the
same time. If this is done, the window will
same time. If this is done, the window will same time. If this is done, the window will
same time. If this is done, the window will
same time. If this is done, the window will
stop and cannot be opened or closed.
stop and cannot be opened or closed. stop and cannot be opened or closed.
stop and cannot be opened or closed.
stop and cannot be opened or closed.
WARNING:
WARNING: WARNING:
WARNING:
WARNING:
oo
oo
o
Be careful that head or hands and body
Be careful that head or hands and body Be careful that head or hands and body
Be careful that head or hands and body
Be careful that head or hands and body
are not trapped by a closing window.
are not trapped by a closing window. are not trapped by a closing window.
are not trapped by a closing window.
are not trapped by a closing window.
oo
oo
o If passengers remain in the car when you
If passengers remain in the car when you If passengers remain in the car when you
If passengers remain in the car when you
If passengers remain in the car when you
leave, especially if a child remains alone,
leave, especially if a child remains alone, leave, especially if a child remains alone,
leave, especially if a child remains alone,
leave, especially if a child remains alone,
always remove the ignition key for their
always remove the ignition key for their always remove the ignition key for their
always remove the ignition key for their
always remove the ignition key for their
safety.
safety. safety.
safety.
safety.
HSR2308
Close
Open
Page 27 of 173

BEFORE DRIVING YOUR VEHICLE
BEFORE DRIVING YOUR VEHICLE BEFORE DRIVING YOUR VEHICLE
BEFORE DRIVING YOUR VEHICLE
BEFORE DRIVING YOUR VEHICLE
1-20 oo
oo
o When the seat is rotated, be sure that the
When the seat is rotated, be sure that the When the seat is rotated, be sure that the
When the seat is rotated, be sure that the
When the seat is rotated, be sure that the
seat is securely locked in position.
seat is securely locked in position. seat is securely locked in position.
seat is securely locked in position.
seat is securely locked in position.
oo
oo
o
While driving, ensure the seat is locked
While driving, ensure the seat is locked While driving, ensure the seat is locked
While driving, ensure the seat is locked
While driving, ensure the seat is locked
facing forward.
facing forward. facing forward.
facing forward.
facing forward.
If the seat is not facing forward, this may
If the seat is not facing forward, this may If the seat is not facing forward, this may
If the seat is not facing forward, this may
If the seat is not facing forward, this may
result in serious injury in the event of a
result in serious injury in the event of a result in serious injury in the event of a
result in serious injury in the event of a
result in serious injury in the event of a
sudden stop.
sudden stop. sudden stop.
sudden stop.
sudden stop.
B310A01P-GAT THIRD SEAT (Minibus)
THIRD SEAT (Minibus) THIRD SEAT (Minibus)
THIRD SEAT (Minibus)
THIRD SEAT (Minibus)
Folding the third seat
Folding the third seat Folding the third seat
Folding the third seat
Folding the third seat
B310A01P-GAG
By folding the third seat, larger articles can be stowed in the vehicle.
1. Remove the headrest and tilt the seatback fully backward.
2. Pull the belt for raising and fold the seat sideways.
B310A02P-GAG
3. Hook the securing band to the assist handleto secure the seat, and fold the legs of the seat.
B310A03P-GAG
4. Pull the loop of the securing bands to takeoff any slackness.
1. Pull the reclining lever and fold the seatback
of the front seat forward.
2. Fold the auxiliary seat.
3. Pull the lever (a) and slide the seat at the end of rearward.
4. Pull the lever (b) and incline the seatback forward.
5. Rotate the seat clockwise
6. After rotating the seat 90° or 180°, the seat can be fixed, if its back is pulled rearward ateach position.
7. Reverse the above procedure to return the seat to the original position.
B290C03P-GAT To rotate (Second seats: type 2)
To rotate (Second seats: type 2) To rotate (Second seats: type 2)
To rotate (Second seats: type 2)
To rotate (Second seats: type 2)
B290C01P-GAG
Pull the lever and rotate the seat clockwise.
WARNING:
WARNING: WARNING:
WARNING:
WARNING:
oo
oo
o
Never rotate the seat while the vehicle is
Never rotate the seat while the vehicle is Never rotate the seat while the vehicle is
Never rotate the seat while the vehicle is
Never rotate the seat while the vehicle is
in motion.
in motion. in motion.
in motion.
in motion.