Hyundai H-1 (Grand Starex) 2006 Workshop Manual
Manufacturer: HYUNDAI, Model Year: 2006, Model line: H-1 (Grand Starex), Model: Hyundai H-1 (Grand Starex) 2006Pages: 284, PDF Size: 12.21 MB
Page 51 of 284
1
BEFORE DRIVING YOUR VEHICLE
37
CAUTION
When you return the seatback to its upright position, always be sure it is locked into position by pullingand pushing the top of seatback.
WARNING
o Be careful not the caught by hand or foot under the seat while ad-justing the seat.
o Never attempt to adjust the seat while the vehicle is moving. Thiscould result in loss of control,and an accident causing death, serious injury or damage.
!
!
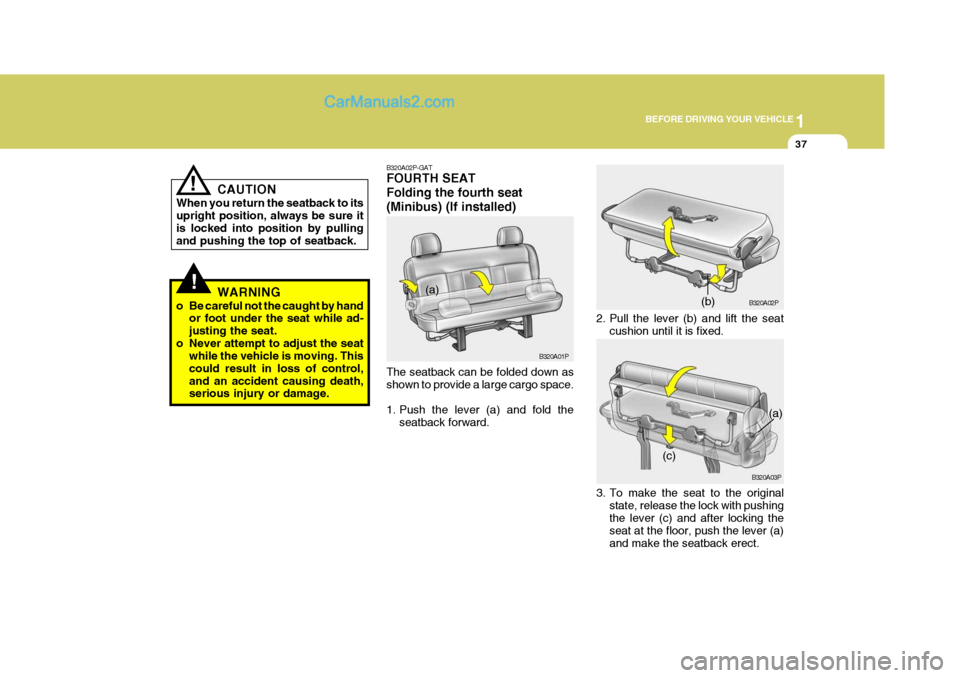
2. Pull the lever (b) and lift the seat
cushion until it is fixed.
B320A02P-GAT FOURTH SEAT Folding the fourth seat(Minibus) (If installed) The seatback can be folded down as shown to provide a large cargo space.
1. Push the lever (a) and fold the
seatback forward. B320A01P
B320A02P
B320A03P
(c) (b)
(a)
3. To make the seat to the originalstate, release the lock with pushing the lever (c) and after locking the seat at the floor, push the lever (a) and make the seatback erect.
(a)
Page 52 of 284
1BEFORE DRIVING YOUR VEHICLE
38
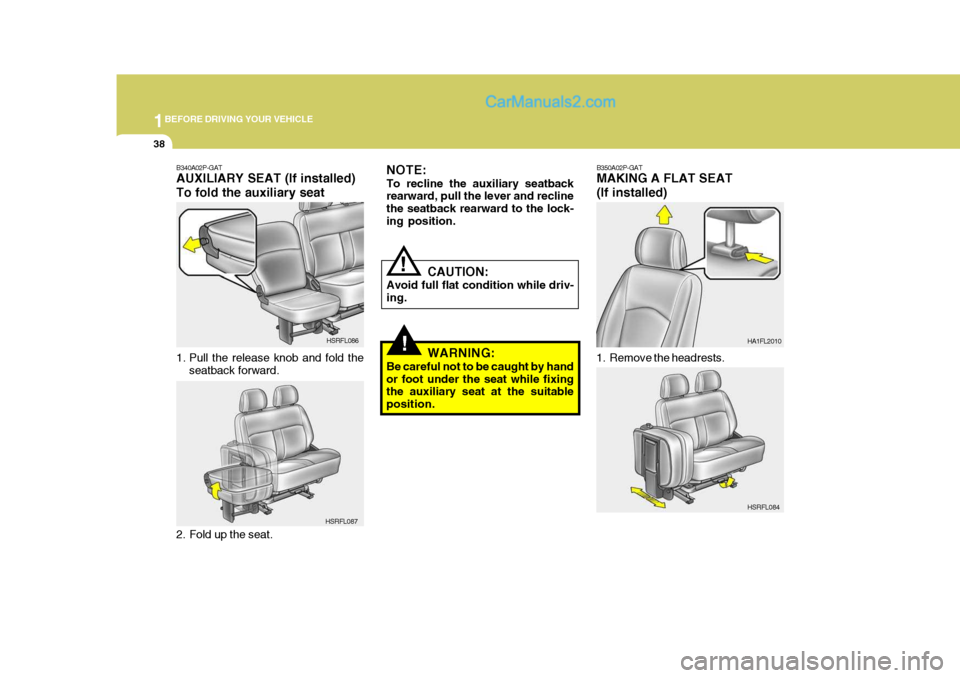
B350A02P-GAT MAKING A FLAT SEAT (If installed)
1. Remove the headrests. HA1FL2010
!
NOTE: To recline the auxiliary seatback rearward, pull the lever and recline the seatback rearward to the lock-ing position.
CAUTION:
Avoid full flat condition while driv-ing.
!
WARNING:
Be careful not to be caught by hand or foot under the seat while fixing the auxiliary seat at the suitable position.
HSRFL084
B340A02P-GAT AUXILIARY SEAT (If installed) To fold the auxiliary seat
1. Pull the release knob and fold theseatback forward. HSRFL086
HSRFL087
2. Fold up the seat.
Page 53 of 284
1
BEFORE DRIVING YOUR VEHICLE
39
HSRFL088
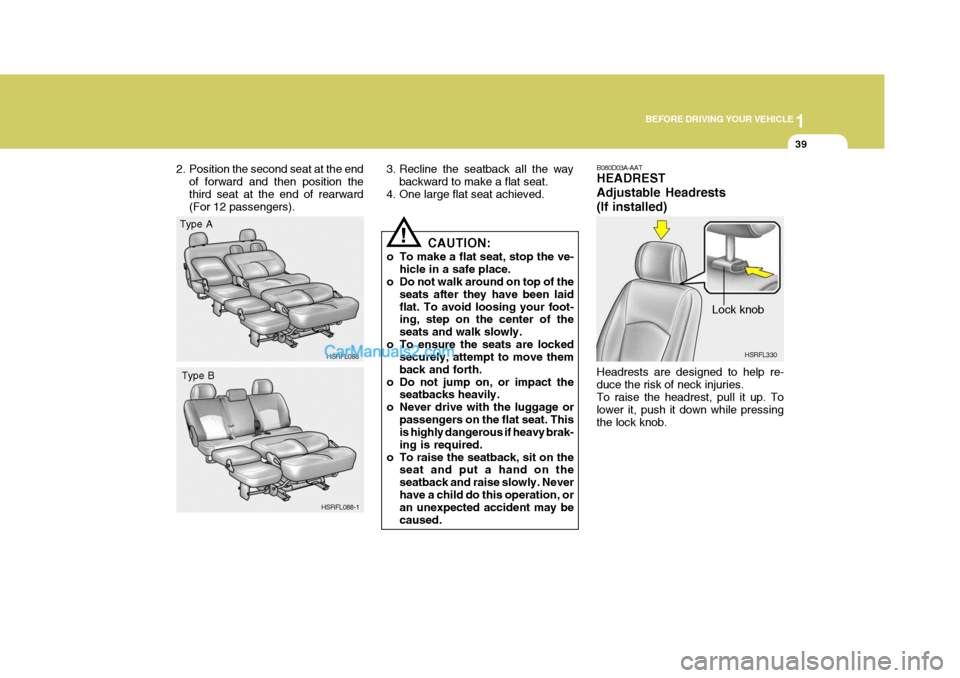
2. Position the second seat at the end
of forward and then position the third seat at the end of rearward (For 12 passengers). 3. Recline the seatback all the way
backward to make a flat seat.
4. One large flat seat achieved.
CAUTION:
o To make a flat seat, stop the ve- hicle in a safe place.
o Do not walk around on top of the
seats after they have been laid flat. To avoid loosing your foot- ing, step on the center of the seats and walk slowly.
o To ensure the seats are locked securely, attempt to move themback and forth.
o Do not jump on, or impact the seatbacks heavily.
o Never drive with the luggage or
passengers on the flat seat. This is highly dangerous if heavy brak- ing is required.
o To raise the seatback, sit on the seat and put a hand on theseatback and raise slowly. Neverhave a child do this operation, or an unexpected accident may be caused.
!
HSRFL088-1
Type A
Type B
B080D03A-AAT HEADREST Adjustable Headrests(If installed) Headrests are designed to help re- duce the risk of neck injuries. To raise the headrest, pull it up. To lower it, push it down while pressingthe lock knob. Lock knob
HSRFL330
Page 54 of 284
1BEFORE DRIVING YOUR VEHICLE
40
!
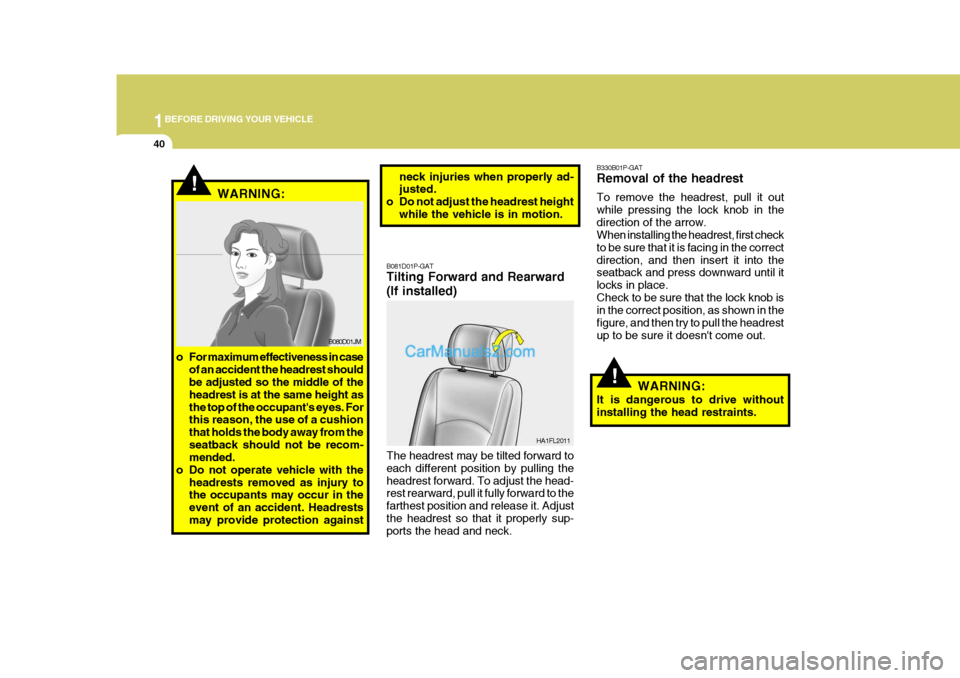
B330B01P-GAT Removal of the headrest To remove the headrest, pull it out while pressing the lock knob in thedirection of the arrow. When installing the headrest, first check to be sure that it is facing in the correctdirection, and then insert it into the seatback and press downward until it locks in place.Check to be sure that the lock knob is in the correct position, as shown in the figure, and then try to pull the headrestup to be sure it doesn't come out.
WARNING:
It is dangerous to drive without installing the head restraints.neck injuries when properly ad- justed.
o Do not adjust the headrest height while the vehicle is in motion.
B081D01P-GAT Tilting Forward and Rearward (If installed) The headrest may be tilted forward to each different position by pulling theheadrest forward. To adjust the head- rest rearward, pull it fully forward to the farthest position and release it. Adjustthe headrest so that it properly sup- ports the head and neck. HA1FL2011
!
B080D01JM
WARNING:
o For maximum effectiveness in case of an accident the headrest should be adjusted so the middle of the headrest is at the same height asthe top of the occupant's eyes. For this reason, the use of a cushion that holds the body away from theseatback should not be recom- mended.
o Do not operate vehicle with the headrests removed as injury tothe occupants may occur in the event of an accident. Headrestsmay provide protection against
Page 55 of 284
1
BEFORE DRIVING YOUR VEHICLE
41
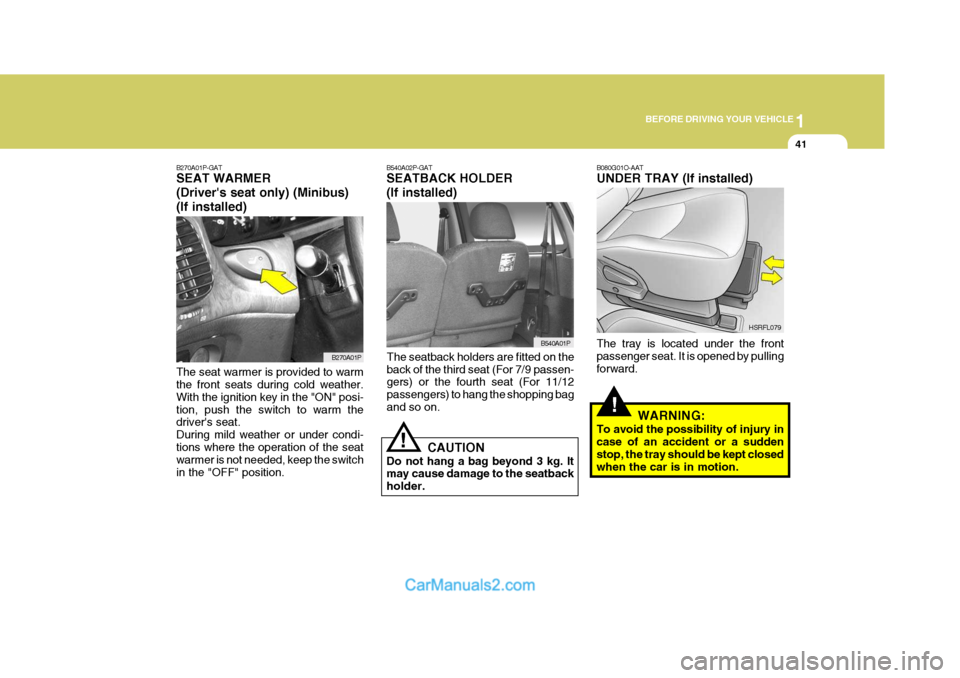
B270A01P-GAT SEAT WARMER (Driver's seat only) (Minibus)(If installed) The seat warmer is provided to warm the front seats during cold weather. With the ignition key in the "ON" posi-tion, push the switch to warm the driver's seat. During mild weather or under condi-tions where the operation of the seat warmer is not needed, keep the switch in the "OFF" position.
B270A01P
!
B080G01O-AAT UNDER TRAY (If installed) The tray is located under the front passenger seat. It is opened by pullingforward.
WARNING:
To avoid the possibility of injury incase of an accident or a sudden stop, the tray should be kept closed when the car is in motion. HSRFL079
The seatback holders are fitted on theback of the third seat (For 7/9 passen- gers) or the fourth seat (For 11/12 passengers) to hang the shopping bagand so on. B540A01P
B540A02P-GAT SEATBACK HOLDER (If installed)
!
CAUTION
Do not hang a bag beyond 3 kg. It may cause damage to the seatback holder.
Page 56 of 284
1BEFORE DRIVING YOUR VEHICLE
42
o A dirty belt should be cleaned
with neutral detergent in warm water. After rinsing in water, let itdry in the shade. Do not attempt to bleach or re-dye the belts because this affects their char-acteristics.
o Seat belts worn at the time of an
accident should not be reusedeven if they appear flawless, be- cause deteriorated belts cannot withstand another accident. Besure to replace the seat belt and mounting bolts with new ones.
o Never adjust the driver's seat while the vehicle is in motion.
o For technical reasons, the sec-
ond seat and third seat should not be folded down to make a bed while the vehicle is being driven.
o To protect you and your passen- gers in the event of an accident,it is most important that the seatbelts be worn correctly when you drive. o The seat belt will provide maxi-
mum protection for its wearer ifthe recliner seatback is placed in fully upright position.When the seatback is reclined, there is greater risk that the pas- senger will slide under the belt,especially in a forward impact accident, and may be injured by the belt or by striking the instru-ment panel or seatbacks.
!
SEAT BELTS
B360A01P-GAT To protect you and your passengers in the event of an accident, it is most important that the seat belts be worn correctly when you drive.
WARNING:
o One seat belt should be used by only one person. Doing other-wise can be dangerous.
o When driving with children, they
should be seated in the secondand third seats, and wear lap belts. For an infant, a children safety seat should be used.The regulations concerning driv- ing with children in the front seat may differ from country to coun-try. It is recommended that you obey the pertinent regulations.
o The seat belts must not be twisted
when worn.
o Check the belts for cuts, worn or
frayed webbing and for checked or deformed metallic parts. Re- place the belts if defective.
Page 57 of 284
1
BEFORE DRIVING YOUR VEHICLE
43
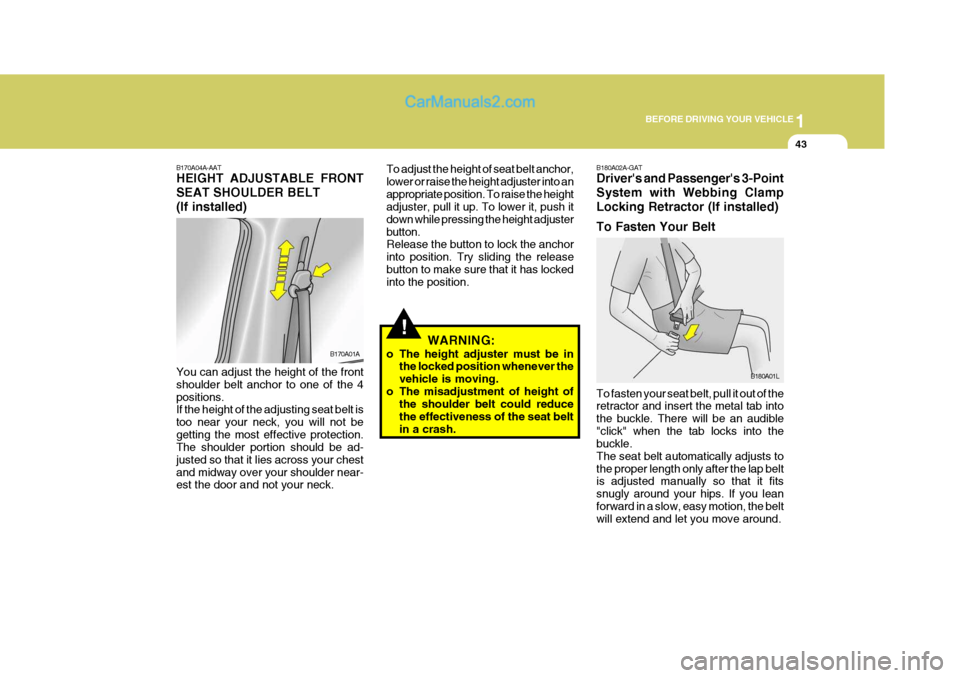
B170A04A-AAT HEIGHT ADJUSTABLE FRONT SEAT SHOULDER BELT(If installed) You can adjust the height of the front shoulder belt anchor to one of the 4positions. If the height of the adjusting seat belt is too near your neck, you will not begetting the most effective protection. The shoulder portion should be ad- justed so that it lies across your chestand midway over your shoulder near- est the door and not your neck. B170A01A
!
To adjust the height of seat belt anchor, lower or raise the height adjuster into anappropriate position. To raise the height adjuster, pull it up. To lower it, push it down while pressing the height adjusterbutton. Release the button to lock the anchor into position. Try sliding the releasebutton to make sure that it has locked into the position.
B180A02A-GAT Driver's and Passenger's 3-Point System with Webbing ClampLocking Retractor (If installed) To Fasten Your Belt To fasten your seat belt, pull it out of the retractor and insert the metal tab into the buckle. There will be an audible"click" when the tab locks into the buckle. The seat belt automatically adjusts tothe proper length only after the lap belt is adjusted manually so that it fits snugly around your hips. If you leanforward in a slow, easy motion, the belt will extend and let you move around.B180A01L
WARNING:
o The height adjuster must be in the locked position whenever the vehicle is moving.
o The misadjustment of height of the shoulder belt could reducethe effectiveness of the seat beltin a crash.
Page 58 of 284
1BEFORE DRIVING YOUR VEHICLE
44
B200A01S-GAT Adjusting Your Seat Belt
B200A01L
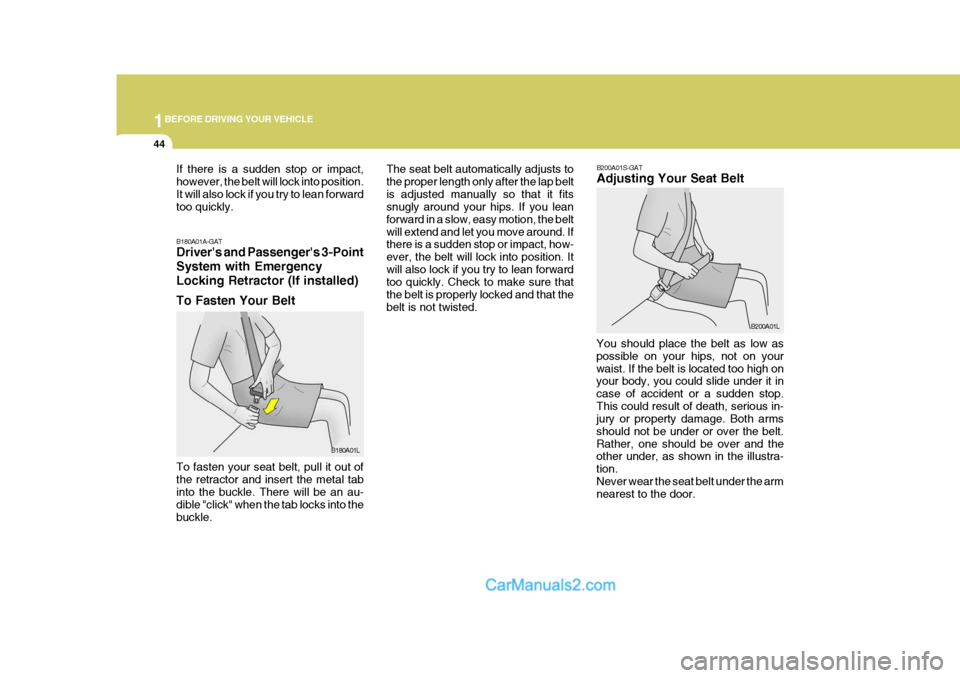
You should place the belt as low as possible on your hips, not on yourwaist. If the belt is located too high on your body, you could slide under it in case of accident or a sudden stop.This could result of death, serious in- jury or property damage. Both arms should not be under or over the belt.Rather, one should be over and the other under, as shown in the illustra- tion.Never wear the seat belt under the arm nearest to the door.
The seat belt automatically adjusts to the proper length only after the lap beltis adjusted manually so that it fits snugly around your hips. If you lean forward in a slow, easy motion, the beltwill extend and let you move around. If there is a sudden stop or impact, how- ever, the belt will lock into position. Itwill also lock if you try to lean forward too quickly. Check to make sure that the belt is properly locked and that thebelt is not twisted.
B180A01A-GAT Driver's and Passenger's 3-Point System with EmergencyLocking Retractor (If installed) To Fasten Your Belt To fasten your seat belt, pull it out of the retractor and insert the metal tabinto the buckle. There will be an au- dible "click" when the tab locks into the buckle.
If there is a sudden stop or impact,however, the belt will lock into position.It will also lock if you try to lean forward too quickly.
B180A01L
Page 59 of 284
1
BEFORE DRIVING YOUR VEHICLE
45
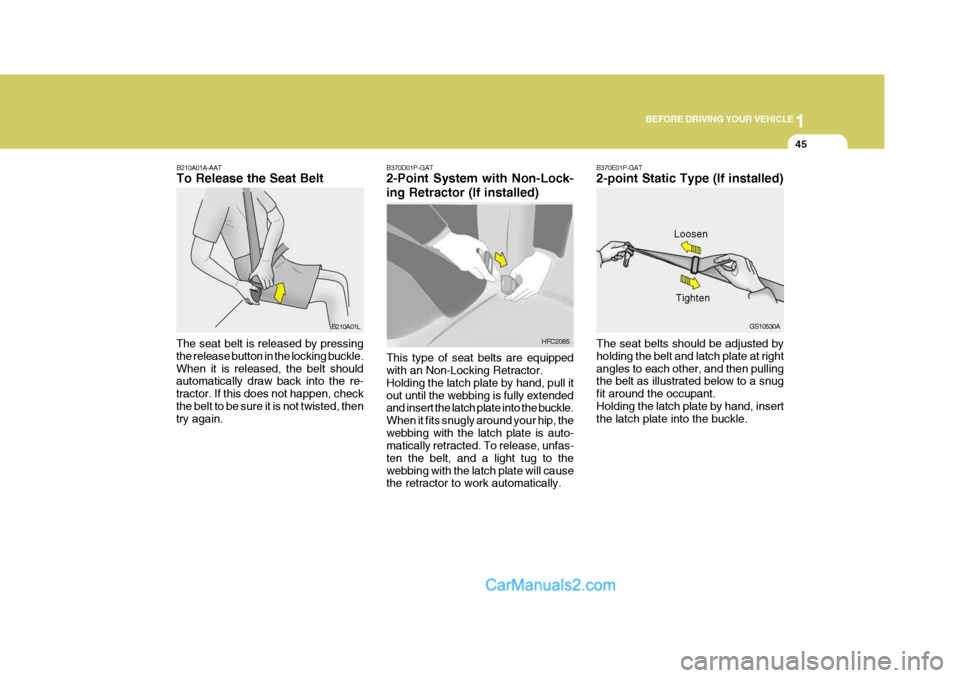
B210A01A-AAT To Release the Seat Belt
The seat belt is released by pressing the release button in the locking buckle.When it is released, the belt should automatically draw back into the re- tractor. If this does not happen, checkthe belt to be sure it is not twisted, then try again. B210A01LB370D01P-GAT 2-Point System with Non-Lock- ing Retractor (If installed) This type of seat belts are equipped with an Non-Locking Retractor. Holding the latch plate by hand, pull itout until the webbing is fully extended and insert the latch plate into the buckle. When it fits snugly around your hip, thewebbing with the latch plate is auto- matically retracted. To release, unfas- ten the belt, and a light tug to thewebbing with the latch plate will cause the retractor to work automatically.HFC2085B370E01P-GAT 2-point Static Type (If installed) The seat belts should be adjusted by holding the belt and latch plate at rightangles to each other, and then pulling the belt as illustrated below to a snug fit around the occupant.Holding the latch plate by hand, insert the latch plate into the buckle. Loosen
GS10530A
Tighten
Page 60 of 284
1BEFORE DRIVING YOUR VEHICLE
46CHILD RESTRAINT SYSTEM
B230A03A-GAT (Minibus/Van) (If installed) Children riding in the car should sit in the rear seat and must always berestrained to minimize the risk of injury in an accident, sudden stop or sudden maneuver. According to accident sta-tistics, children are safer when prop- erly restrained in the rear seats than in the front seat. Larger children shoulduse one of the seat belts provided. You are required by law to use safety restraints for children. If small childrenride in your vehicle you must put them in a child restraint system (safety seat). Children could be injured in a crash iftheir restraints are not properly se- cured. For small children and babies, a child seat or infant seat must be used.Before buying a particular child re- straint system, make sure it fits your car seat and seat belts, and fits yourchild. Follow all the instructions pro- vided by the manufacturer when in- stalling the child restraint system.
!
NOTE:
o When the pre-tensioner seat belt is activated, there may be an ex- plosion noise. This noise is nor-mal and is not hazardous.
o Pre-tensioner seat belt is de-
signed to operate only when asufficiently severe impact occurs and it will be only operated once.
WARNING:
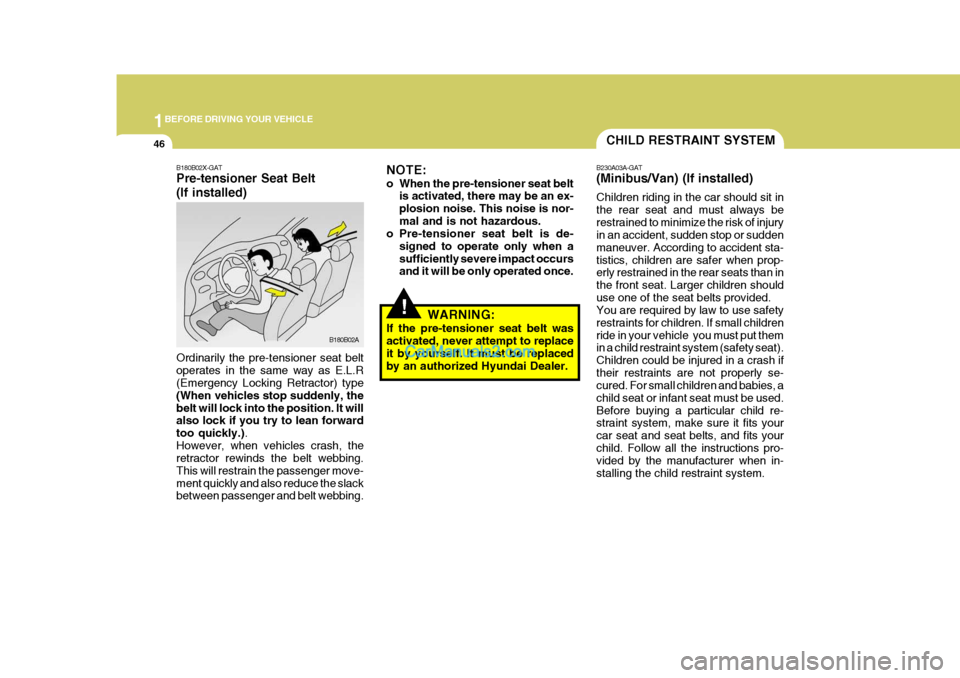
If the pre-tensioner seat belt was activated, never attempt to replace it by yourself. It must be replaced by an authorized Hyundai Dealer.B180B02X-GAT Pre-tensioner Seat Belt (If installed) Ordinarily the pre-tensioner seat belt operates in the same way as E.L.R (Emergency Locking Retractor) type (When vehicles stop suddenly, thebelt will lock into the position. It will also lock if you try to lean forward too quickly.) .
However, when vehicles crash, the retractor rewinds the belt webbing. This will restrain the passenger move-ment quickly and also reduce the slack between passenger and belt webbing. B180B02A