Hyundai H-1 (Grand Starex) 2006 Repair Manual
Manufacturer: HYUNDAI, Model Year: 2006, Model line: H-1 (Grand Starex), Model: Hyundai H-1 (Grand Starex) 2006Pages: 284, PDF Size: 12.21 MB
Page 61 of 284
1
BEFORE DRIVING YOUR VEHICLE
47
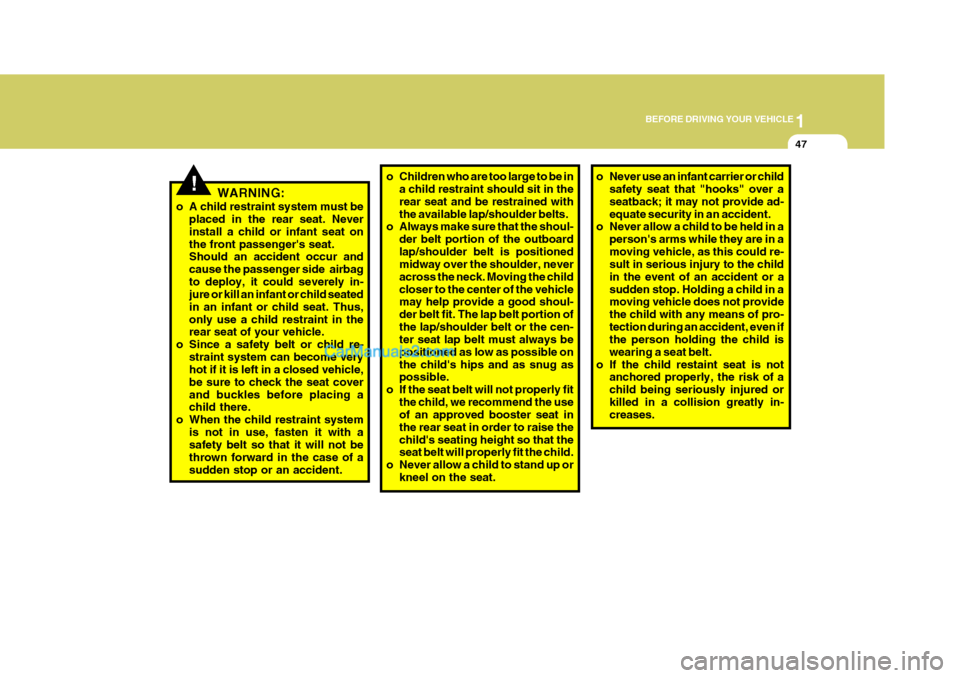
!WARNING:
o A child restraint system must be placed in the rear seat. Never install a child or infant seat onthe front passenger's seat. Should an accident occur and cause the passenger side airbagto deploy, it could severely in- jure or kill an infant or child seated in an infant or child seat. Thus,only use a child restraint in the rear seat of your vehicle.
o Since a safety belt or child re- straint system can become veryhot if it is left in a closed vehicle, be sure to check the seat coverand buckles before placing a child there.
o When the child restraint system is not in use, fasten it with asafety belt so that it will not be thrown forward in the case of asudden stop or an accident.
o Children who are too large to be ina child restraint should sit in the rear seat and be restrained withthe available lap/shoulder belts.
o Always make sure that the shoul-
der belt portion of the outboardlap/shoulder belt is positioned midway over the shoulder, never across the neck. Moving the childcloser to the center of the vehicle may help provide a good shoul- der belt fit. The lap belt portion ofthe lap/shoulder belt or the cen- ter seat lap belt must always be positioned as low as possible onthe child's hips and as snug as possible.
o If the seat belt will not properly fit the child, we recommend the useof an approved booster seat in the rear seat in order to raise thechild's seating height so that the seat belt will properly fit the child.
o Never allow a child to stand up or kneel on the seat.o Never use an infant carrier or child safety seat that "hooks" over a seatback; it may not provide ad-equate security in an accident.
o Never allow a child to be held in a
person's arms while they are in amoving vehicle, as this could re- sult in serious injury to the child in the event of an accident or asudden stop. Holding a child in a moving vehicle does not provide the child with any means of pro-tection during an accident, even if the person holding the child is wearing a seat belt.
o If the child restaint seat is not anchored properly, the risk of achild being seriously injured orkilled in a collision greatly in- creases.
Page 62 of 284
1BEFORE DRIVING YOUR VEHICLE
48
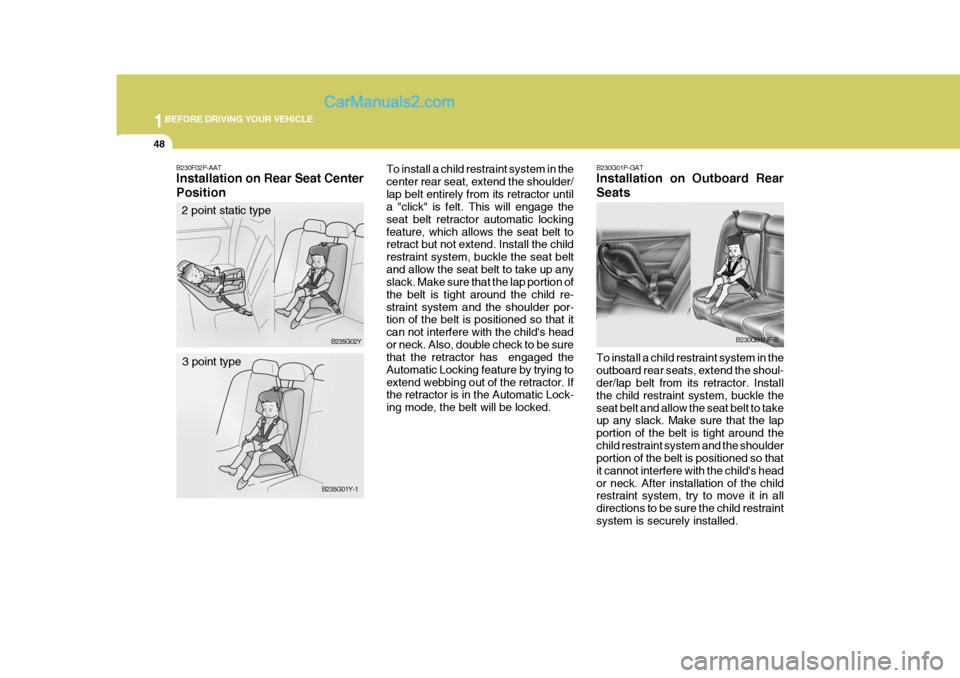
B230G01P-GAT Installation on Outboard Rear Seats To install a child restraint system in the outboard rear seats, extend the shoul- der/lap belt from its retractor. Install the child restraint system, buckle theseat belt and allow the seat belt to take up any slack. Make sure that the lap portion of the belt is tight around thechild restraint system and the shoulder portion of the belt is positioned so that it cannot interfere with the child's heador neck. After installation of the child restraint system, try to move it in all directions to be sure the child restraintsystem is securely installed. B230G01NF-B
To install a child restraint system in thecenter rear seat, extend the shoulder/lap belt entirely from its retractor until a "click" is felt. This will engage the seat belt retractor automatic lockingfeature, which allows the seat belt to retract but not extend. Install the child restraint system, buckle the seat beltand allow the seat belt to take up any slack. Make sure that the lap portion of the belt is tight around the child re-straint system and the shoulder por- tion of the belt is positioned so that it can not interfere with the child's heador neck. Also, double check to be sure that the retractor has engaged the Automatic Locking feature by trying toextend webbing out of the retractor. If the retractor is in the Automatic Lock- ing mode, the belt will be locked.B230F02P-AAT Installation on Rear Seat Center Position
2 point static type
B235G02Y
B235G01Y-1
3 point type
Page 63 of 284
1
BEFORE DRIVING YOUR VEHICLE
49
!
If you need to tighten the belt, pull more webbing toward the retractor. When youunbuckle the seat belt and allow it to retract, the retractor will automatically revert back to its normal seated pas-senger emergency locking usage con- dition. NOTE:
o Before installing the child re-
straint system, read the instruc- tions supplied by the child re- straint system manufacturer.
o If the seat belt does not operate as described, have the systemchecked immediately by yourauthorized Hyundai dealer.
WARNING:
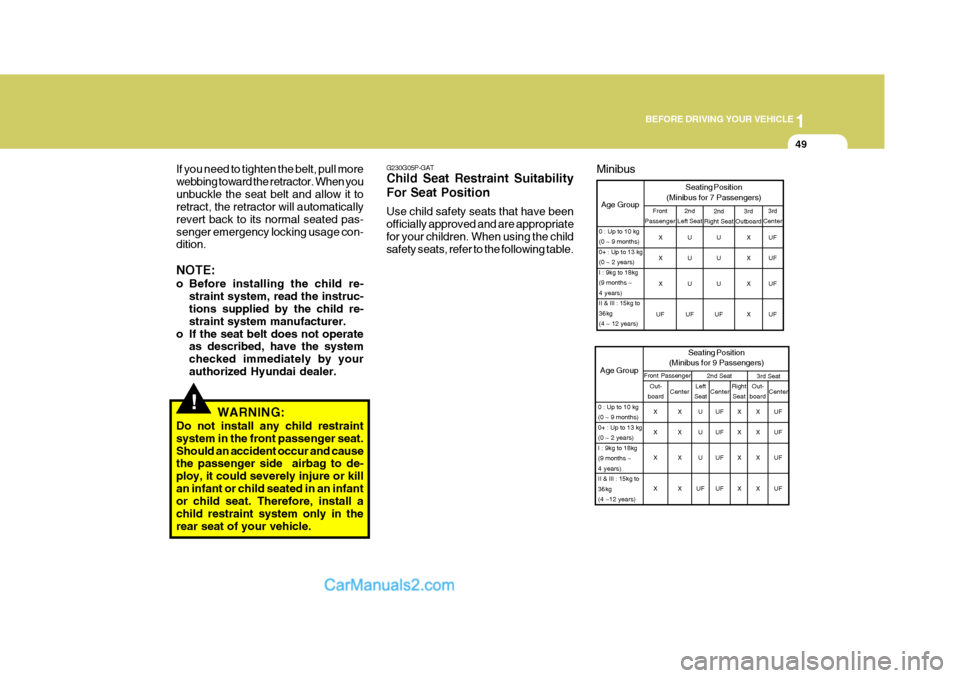
Do not install any child restraintsystem in the front passenger seat.Should an accident occur and cause the passenger side airbag to de- ploy, it could severely injure or killan infant or child seated in an infant or child seat. Therefore, install a child restraint system only in therear seat of your vehicle. G230G05P-GAT Child Seat Restraint Suitability For Seat Position Use child safety seats that have been officially approved and are appropriatefor your children. When using the child safety seats, refer to the following table.
UF UF UF UF
0 : Up to 10 kg (0 ~ 9 months)0+ : Up to 13 kg(0 ~ 2 years)I : 9kg to 18kg(9 months ~4 years)II & III : 15kg to36kg(4 ~ 12 years) 3rd
Center
3rd
Outboard
Age Group Seating Position
(Minibus for 7 Passengers)2nd
Left Seat2nd
Right Seat
U U U
UF U U U
UF X X X X
Front
Passenger
X X X
UF
3rd SeatAge Group Seating Position
(Minibus for 9 Passengers)Front Passenger 2nd Seat
0 : Up to 10 kg (0 ~ 9 months)0+ : Up to 13 kg(0 ~ 2 years)I : 9kg to 18kg(9 months ~4 years)II & III : 15kg to36kg(4 ~12 years)Out-
board Center Left
Seat Right
Seat
Center Out-
board Center
X X X X X X X XU U U
UF UF UF UF UF X X X XX X X XUF UF UF UF
Minibus
Page 64 of 284
1BEFORE DRIVING YOUR VEHICLE
50STEERING WHEEL TILT LEVER
!
B600A01A-AAT (If installed)
To adjust the steering wheel:
1. Push the lever downward to unlock.
2. Raise or lower the steering wheel to the desired position.
3. After adjustment, securely tighten
the lever by pulling it upward.
WARNING:
Do not attempt to adjust the steer-ing wheel while driving as this may result in loss of control of the ve- hicle and serious injury or death. HSRFL600
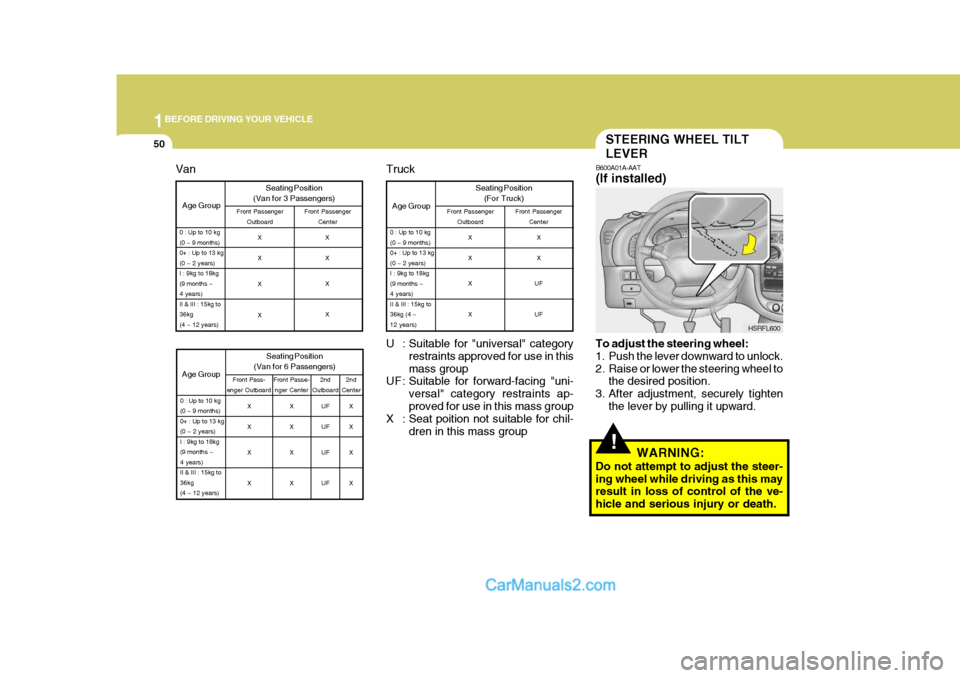
U : Suitable for "universal" category restraints approved for use in thismass group
UF : Suitable for forward-facing "uni-
versal" category restraints ap-proved for use in this mass group
X : Seat poition not suitable for chil-
dren in this mass group
Age Group
0 : Up to 10 kg (0 ~ 9 months)0+ : Up to 13 kg(0 ~ 2 years)I : 9kg to 18kg(9 months ~4 years)II & III : 15kg to36kg (4 ~12 years)
Truck Seating Position(For Truck)
Front Passenger Outboard Front Passenger
Center
X X X X X X
UF UF
Age Group Seating Position
(Van for 3 Passengers)Front Passenger Outboard Front Passenger
Center
0 : Up to 10 kg (0 ~ 9 months)0+ : Up to 13 kg(0 ~ 2 years)I : 9kg to 18kg(9 months ~4 years)II & III : 15kg to36kg(4 ~ 12 years)
X X X X X X X X
Age Group
0 : Up to 10 kg (0 ~ 9 months)0+ : Up to 13 kg(0 ~ 2 years)I : 9kg to 18kg(9 months ~4 years)II & III : 15kg to36kg(4 ~ 12 years)
Van
2nd
Center
2nd
Outboard
Seating Position
(Van for 6 Passengers)
Front Pass-
enger Outboard Front Passe-
nger Center
X X X X X X X XUF UF UF UFX X X X
Page 65 of 284
1
BEFORE DRIVING YOUR VEHICLE
51SUPPLEMENTAL RESTRAINT (AIRBAG) SYSTEM
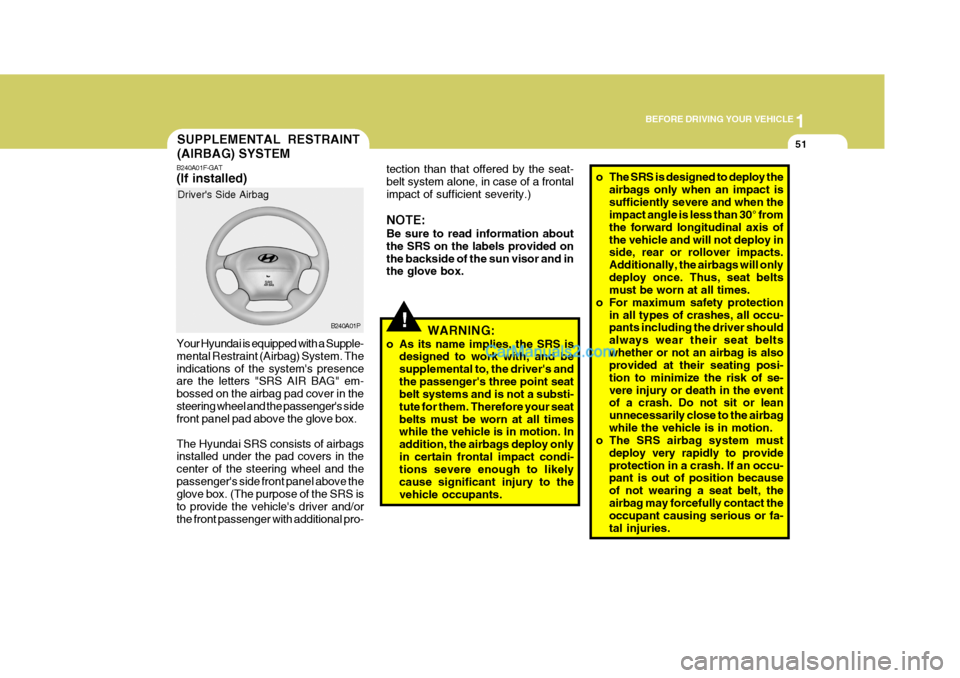
B240A01F-GAT (If installed) Your Hyundai is equipped with a Supple- mental Restraint (Airbag) System. Theindications of the system's presence are the letters "SRS AIR BAG" em- bossed on the airbag pad cover in thesteering wheel and the passenger's side front panel pad above the glove box. The Hyundai SRS consists of airbags installed under the pad covers in the center of the steering wheel and thepassenger's side front panel above the glove box. (The purpose of the SRS is to provide the vehicle's driver and/orthe front passenger with additional pro- Driver's Side Airbag
B240A01P
!
tection than that offered by the seat- belt system alone, in case of a frontalimpact of sufficient severity.) NOTE: Be sure to read information about the SRS on the labels provided onthe backside of the sun visor and in the glove box.WARNING:
o As its name implies, the SRS is designed to work with, and be supplemental to, the driver's andthe passenger's three point seat belt systems and is not a substi- tute for them. Therefore your seatbelts must be worn at all times while the vehicle is in motion. In addition, the airbags deploy onlyin certain frontal impact condi- tions severe enough to likely cause significant injury to thevehicle occupants.o The SRS is designed to deploy the
airbags only when an impact is sufficiently severe and when the impact angle is less than 30° from the forward longitudinal axis ofthe vehicle and will not deploy in side, rear or rollover impacts. Additionally, the airbags will onlydeploy once. Thus, seat belts must be worn at all times.
o For maximum safety protection
in all types of crashes, all occu-pants including the driver should always wear their seat beltswhether or not an airbag is also provided at their seating posi- tion to minimize the risk of se-vere injury or death in the event of a crash. Do not sit or lean unnecessarily close to the airbagwhile the vehicle is in motion.
o The SRS airbag system must
deploy very rapidly to provideprotection in a crash. If an occu- pant is out of position because of not wearing a seat belt, theairbag may forcefully contact the occupant causing serious or fa- tal injuries.
Page 66 of 284
1BEFORE DRIVING YOUR VEHICLE
52
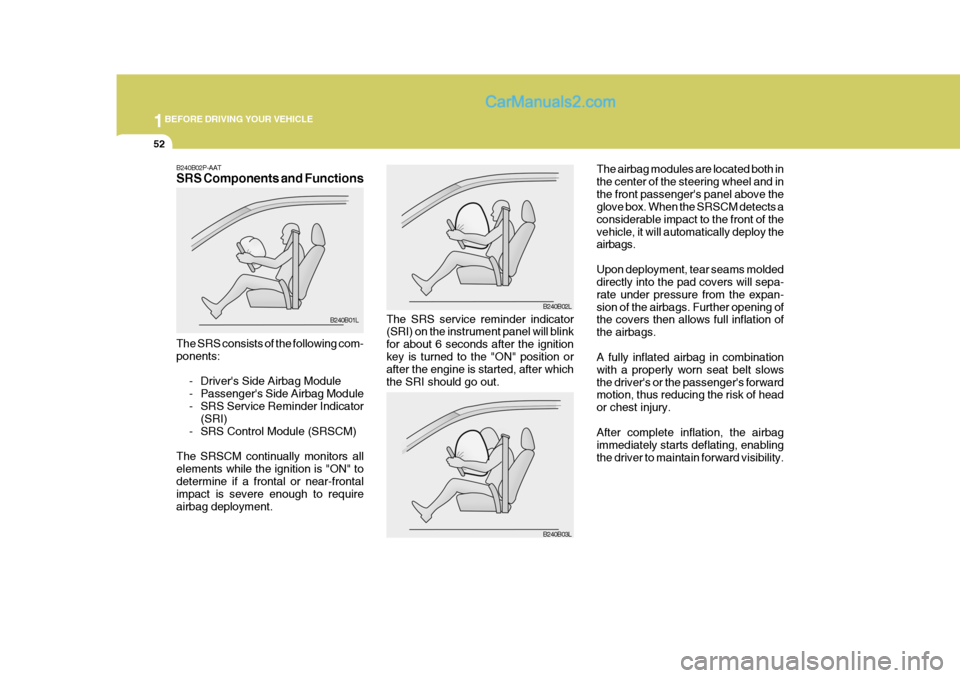
The airbag modules are located both in the center of the steering wheel and inthe front passenger's panel above the glove box. When the SRSCM detects a considerable impact to the front of thevehicle, it will automatically deploy the airbags. Upon deployment, tear seams molded directly into the pad covers will sepa- rate under pressure from the expan-sion of the airbags. Further opening of the covers then allows full inflation of the airbags. A fully inflated airbag in combination with a properly worn seat belt slowsthe driver's or the passenger's forward motion, thus reducing the risk of head or chest injury. After complete inflation, the airbag immediately starts deflating, enablingthe driver to maintain forward visibility.
The SRS service reminder indicator (SRI) on the instrument panel will blink for about 6 seconds after the ignitionkey is turned to the "ON" position or after the engine is started, after which the SRI should go out.B240B02L
B240B03L
B240B02P-AAT SRS Components and Functions The SRS consists of the following com- ponents:
- Driver's Side Airbag Module
- Passenger's Side Airbag Module
- SRS Service Reminder Indicator(SRI)
- SRS Control Module (SRSCM)
The SRSCM continually monitors allelements while the ignition is "ON" todetermine if a frontal or near-frontal impact is severe enough to require airbag deployment. B240B01L
Page 67 of 284
1
BEFORE DRIVING YOUR VEHICLE
53
CAUTION:
When installing the container of liquid air refresher inside a vehicle, do not place it near the instrumentcluster nor on the crash pad sur- face. If there is any leakage from the air refresher onto these areas (In-strument cluster, crash pad or air ventilator), it may damage these parts. If the liquid from air refresherdoes leak onto these areas, wash them with water immediately.!
Passenger's Airbag
B240B04P!WARNING:
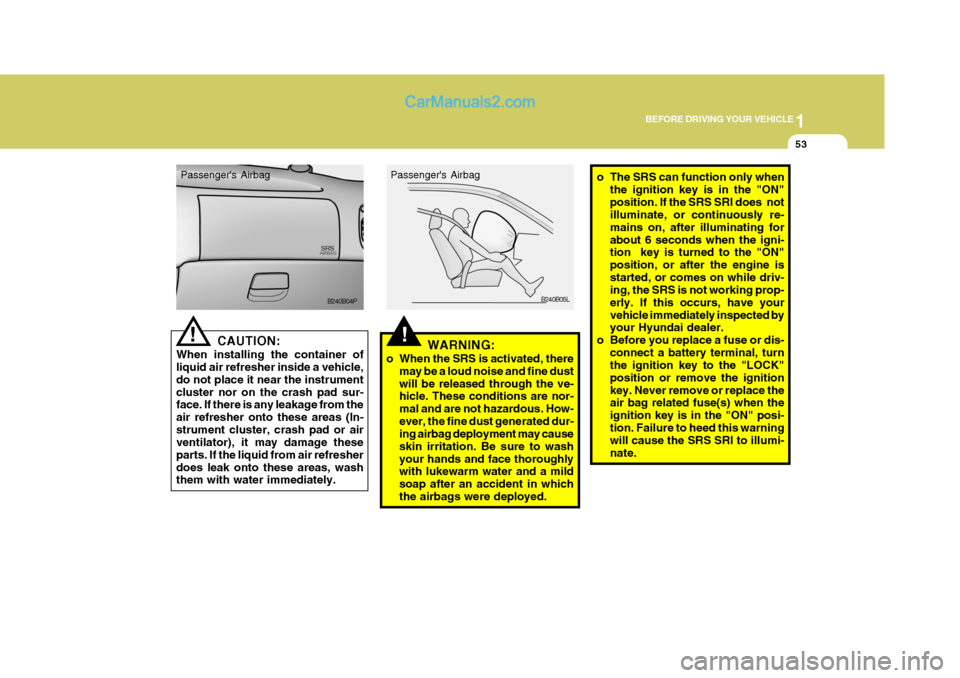
o When the SRS is activated, there may be a loud noise and fine dust will be released through the ve- hicle. These conditions are nor- mal and are not hazardous. How-ever, the fine dust generated dur- ing airbag deployment may cause skin irritation. Be sure to washyour hands and face thoroughly with lukewarm water and a mild soap after an accident in whichthe airbags were deployed. B240B05L
Passenger's Airbag
o The SRS can function only when
the ignition key is in the "ON" position. If the SRS SRI does not illuminate, or continuously re- mains on, after illuminating forabout 6 seconds when the igni- tion key is turned to the "ON" position, or after the engine isstarted, or comes on while driv- ing, the SRS is not working prop- erly. If this occurs, have yourvehicle immediately inspected by your Hyundai dealer.
o Before you replace a fuse or dis-
connect a battery terminal, turnthe ignition key to the "LOCK" position or remove the ignitionkey. Never remove or replace the air bag related fuse(s) when the ignition key is in the "ON" posi-tion. Failure to heed this warning will cause the SRS SRI to illumi- nate.
Page 68 of 284
1BEFORE DRIVING YOUR VEHICLE
54
o For cleaning the airbag pad cov-
ers, use only a soft, dry cloth or one which has been moistened with plain water. Solvents orcleaners could adversely affect the airbag covers and proper deployment of the system.
o No objects should be placed over or near the airbag modules onthe steering wheel, instrumentpanel, and the front passenger's panel above the glove box, be- cause any such object couldcause harm if the vehicle is in a crash severe enough to cause the airbags to inflate.
o If the airbags inflate, they must be replaced by an authorizedHyundai dealer.
o Do not tamper with or discon- nect SRS wiring, or other com-ponents of the SRS system. Do-ing so could result in injury, due to accidental inflation of the airbags or by rendering the SRSinoperative.
!WARNING:
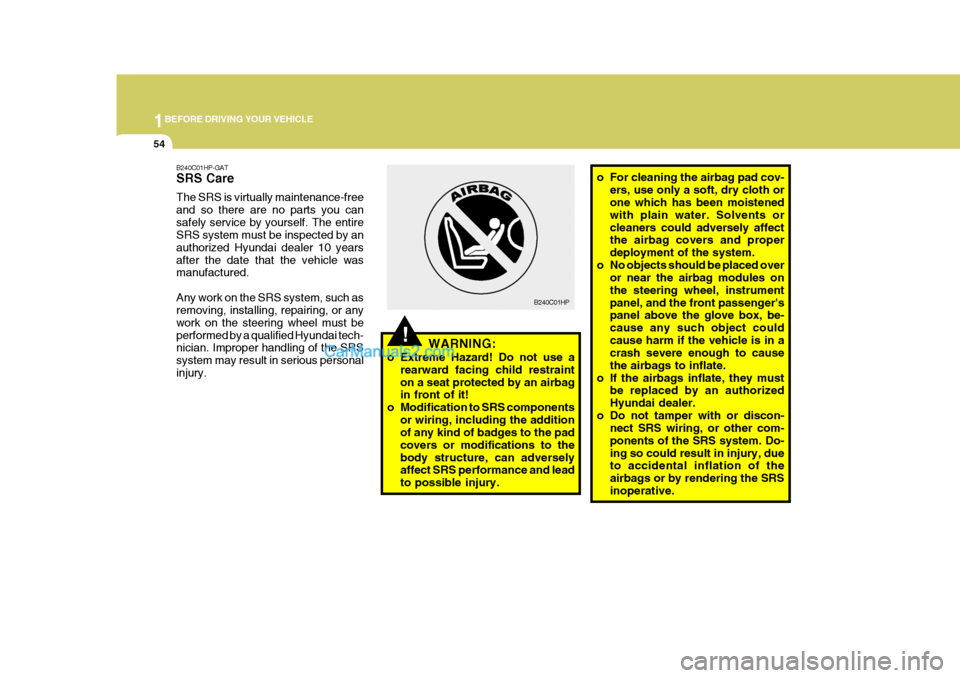
o Extreme Hazard! Do not use a rearward facing child restraint on a seat protected by an airbag in front of it!
o Modification to SRS components
or wiring, including the additionof any kind of badges to the pad covers or modifications to thebody structure, can adversely affect SRS performance and lead to possible injury. B240C01HP
B240C01HP-GAT SRS Care The SRS is virtually maintenance-free and so there are no parts you cansafely service by yourself. The entire SRS system must be inspected by an authorized Hyundai dealer 10 yearsafter the date that the vehicle was manufactured. Any work on the SRS system, such as removing, installing, repairing, or any work on the steering wheel must beperformed by a qualified Hyundai tech- nician. Improper handling of the SRS system may result in serious personalinjury.
Page 69 of 284
1
BEFORE DRIVING YOUR VEHICLE
55
o Do not install a child restraint sys-
tem in the front passenger seat position. A child restraint system mustnever be placed in the front seat. The infant or child could be se- verely injured by an airbag de-ployment in case of an accident.
o If components of the airbag sys-
tem must be discarded, or if thevehicle must be scrapped, cer- tain safety precautions must be observed. Your Hyundai dealerknows these precautions and can give you the necessary informa- tion. Failure to follow these pre-cautions and procedures could increase the risk of personal in- jury.
o If you sell your vehicle, be sure to inform the new owner of theseimportant points and make cer-tain that this manual is trans- ferred to the new owner.o If your car was flooded and has
soaked carpeting or water on flooring, you shouldn't try to startengine; have the car towed to authorized Hyundai dealer.
o Do not replace the bumper or the
bumper guard with other thanHyundai genuine parts. Other- wise, it can adversely affect SRSperformance and lead to unex- pected injury.
Page 70 of 284
2
Instrument Cluster And Indicator Lights ....................... 2-2
Warning And Indicator Lights ........................................ 2-8
Instrument Cluster....................................................... 2-12
Odometer/Trip odmeter ................................................ 2-14
Multimeter .................................................................... 2-16
Muti-funition Light Switch ............................................. 2-19
Windshield Wiper And Washer Switch ........................2-21
Headlamp Leveling Device System .............................2-23
Instrument Panel Light Control (Rheostat) ..................2-24
Engine Rpm Adjustment Knob ..................................... 2-24
Fog Lamp Switch ......................................................... 2-25
Front/Rear Window Defroster Switch ..........................2-26
Interior Light ....................... .......................................... 2-28
Sunroof ........................................................................ 2-30
Mirror ........................................................................... 2-34
Drink H older ................................................................ 2-35
Ashtray ........................................................................ 2-36
Digital Clock ................................................................ 2-37
Horn ............................................................................. 2-37
Heating And Cooling Control .......................................2-38
Rear Heater And Air Conditioner ................................. 2-45
Overhead Air C onditioning ........................................... 2-47
Climate Control Air Filter .............................................. 2-47
Stereo Sound System ................................................. 2-49
Audio System .............................................................. 2-51
Antenna ....................................................................... 2-73
INSTRUMENTS AND CONTROLS
2