brake Hyundai Ioniq Electric 2017 Owner's Manual
[x] Cancel search | Manufacturer: HYUNDAI, Model Year: 2017, Model line: Ioniq Electric, Model: Hyundai Ioniq Electric 2017Pages: 582, PDF Size: 37.73 MB
Page 9 of 582
Trickle Charge (For Europe) ................................H52How to Connect Portable Charger
(ICCB: In-Cable Control Box) ..........................................H52Unlock Charging Door in Emergency ..........................H56
Checking Charging Status ...............................................H56
Charging Status Indicator Lamp for
Portable Charger ...............................................................H58
How to Disconnect Portable Charger
(ICCB: In-Cable Control Box) ..........................................H61 Unlock Charging Connector in Emergency ................H62
Precautions for Portable Charger
(ICCB: In-Cable Control Box) ..........................................H62
How to Start the Vehicle ......................................H63
How to Stop the Vehicle.......................................H64
Virtual Engine Sound System ..............................H64
Distance to Empty .................................................H65 When destination is not set ...........................................H65
When destination is set...................................................H66
Tips for Improving Distance to Empty ...............H66
ECO Guide ...............................................................H67
State of charge (SOC) gauge for high voltage
battery.....................................................................H67
Warning and Indicator Lights
(related to electric vehicle) .................................H68 Ready Indicator ................................................................H68
Service Warning Light .....................................................H68
This warning light illuminates : ......................................H68
Power Down Warning Light ...........................................H69
Charging Indicator Light..................................................H69
High Voltage Battery Level Warning Light .................H69
Regenerative Brake Warning Light ..............................H70 LCD Display Messages ..........................................H70
Shift to P to charge .........................................................H70
Remaining time ..................................................................H70
Charging Door Open ........................................................H71
Charger Error! / Quick Charger Error!........................H71
Stop vehicle and check brakes .....................................H71
Check brakes......................................................................H72
Low Battery........................................................................H72
Charge immediately. Power limited ..............................H72
Low Battery. Charge immediately.................................H73
Low Battery Temp. Power limited.................................H73
Battery Overheated! Stop vehicle ................................H73
Power limited .....................................................................H74
Stop vehicle and check power supply .........................H74
Check Active Air Flap System........................................H75
Check Virtual Engine Sound System............................H75
Check electric vehicle system .......................................H75
Energy flow ...........................................................H76 Vehicle Stop........................................................................H76
EV Propulsion ....................................................................H76
Regeneration ......................................................................H77
Aux. Battery Saver+ .............................................H77 Mode ....................................................................................H77
System Setting...................................................................H78
LCD Message .....................................................................H78
If an Accident Occurs ...........................................H79
Other Precautions for Electric Vehicle ..............H81
Service Plug ...........................................................H81
Page 27 of 582
H20
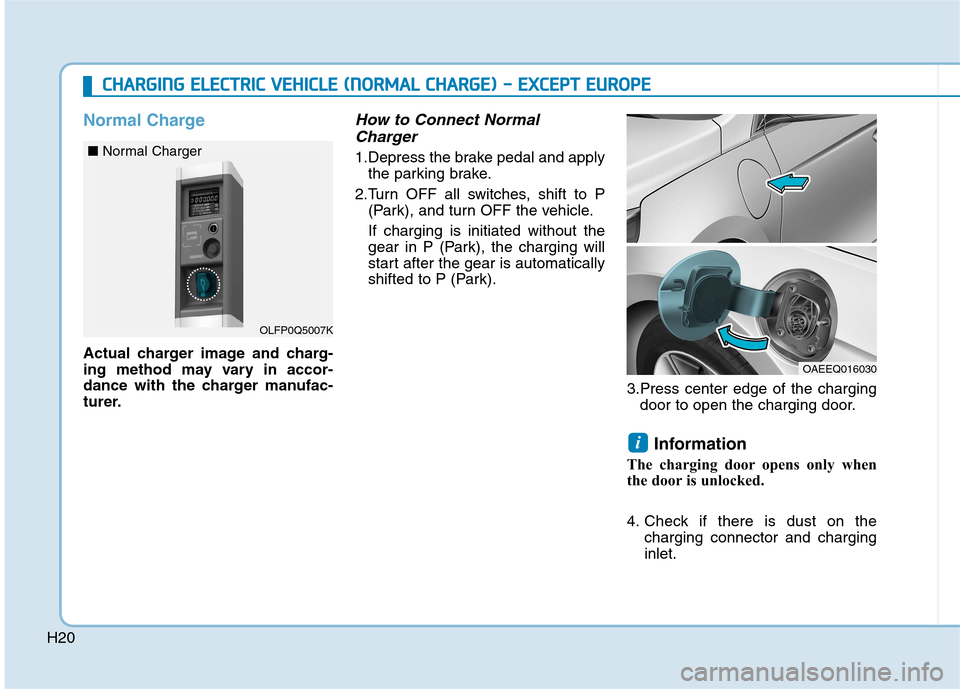
Normal Charge
Actual charger image and charg-
ing method may vary in accor-
dance with the charger manufac-
turer.
How to Connect NormalCharger
1.Depress the brake pedal and apply the parking brake.
2.Turn OFF all switches, shift to P (Park), and turn OFF the vehicle. If charging is initiated without the
gear in P (Park), the charging will
start after the gear is automatically
shifted to P (Park).
3.Press center edge of the chargingdoor to open the charging door.
Information
The charging door opens only when
the door is unlocked.
4. Check if there is dust on the charging connector and charging inlet.
i
CCHH AARRGG IINN GG EE LLEE CCTT RR IICC VV EEHH IICC LLEE (( NN OO RRMM AALL CC HH AARRGG EE)) -- EE XX CCEE PP TT EE UU RROO PPEE
OLFP0Q5007K
■
Normal Charger
OAEEQ016030
Page 33 of 582
H26
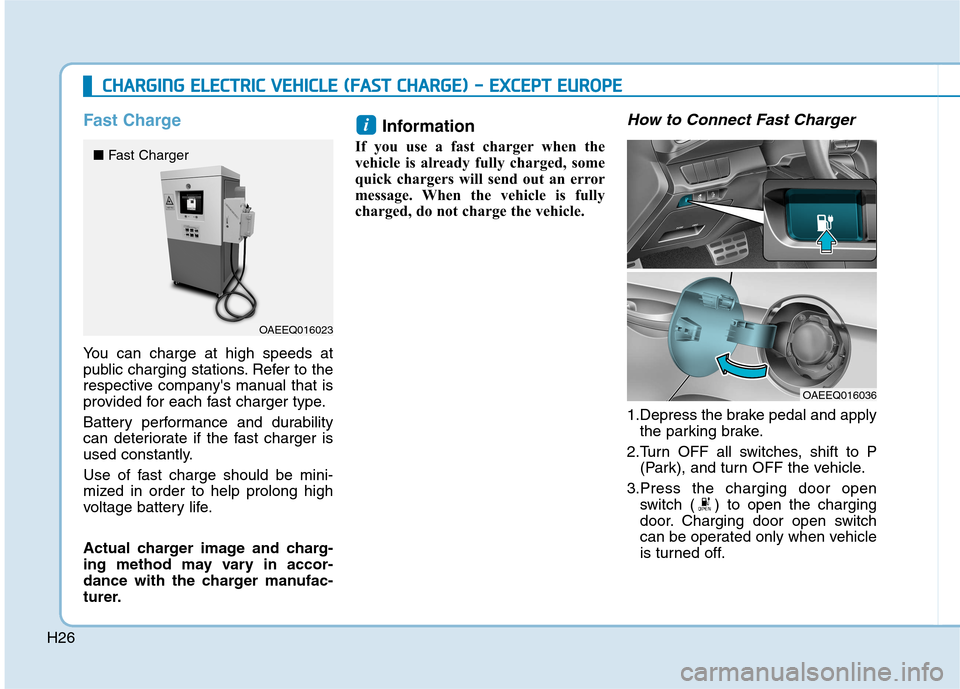
Fast Charge
You can charge at high speeds at
public charging stations. Refer to the
respective company's manual that is
provided for each fast charger type.
Battery performance and durability
can deteriorate if the fast charger is
used constantly.
Use of fast charge should be mini-
mized in order to help prolong high
voltage battery life.
Actual charger image and charg-
ing method may vary in accor-
dance with the charger manufac-
turer.Information
If you use a fast charger when the
vehicle is already fully charged, some
quick chargers will send out an error
message. When the vehicle is fully
charged, do not charge the vehicle.
How to Connect Fast Charger
1.Depress the brake pedal and apply the parking brake.
2.Turn OFF all switches, shift to P (Park), and turn OFF the vehicle.
3.Press the charging door open switch ( ) to open the charging
door. Charging door open switch
can be operated only when vehicle
is turned off.
i
CCHH AARRGG IINN GG EE LLEE CCTT RR IICC VV EEHH IICC LLEE (( FF AA SSTT CC HH AARRGG EE)) -- EE XX CCEE PP TT EE UU RROO PPEE
OAEEQ016023
■
Fast Charger
OAEEQ016036
Page 39 of 582
H323.Depress the brake pedal and apply
the parking brake.
4.Turn OFF all switches, shift to P (Park), and turn OFF the vehicle. If charging is initiated without the
gear in P (Park), the charging will
start after the gear is automatically
shifted to P (Park).
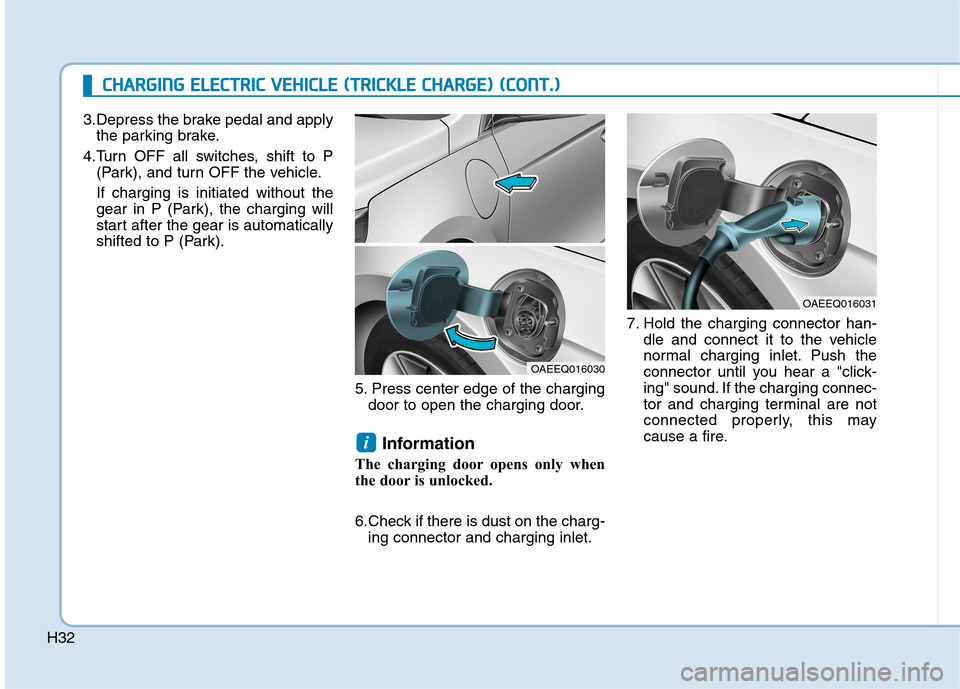
5. Press center edge of the chargingdoor to open the charging door.
Information
The charging door opens only when
the door is unlocked.
6.Check if there is dust on the charg- ing connector and charging inlet. 7. Hold the charging connector han-
dle and connect it to the vehicle
normal charging inlet. Push the
connector until you hear a "click-
ing" sound. If the charging connec-
tor and charging terminal are not
connected properly, this may
cause a fire.
i
CCHH AARRGG IINN GG EE LLEE CCTT RR IICC VV EEHH IICC LLEE (( TT RR IICC KK LLEE CC HH AARRGG EE)) (( CC OO NNTT..))
OAEEQ016030
OAEEQ016031
Page 48 of 582
H41
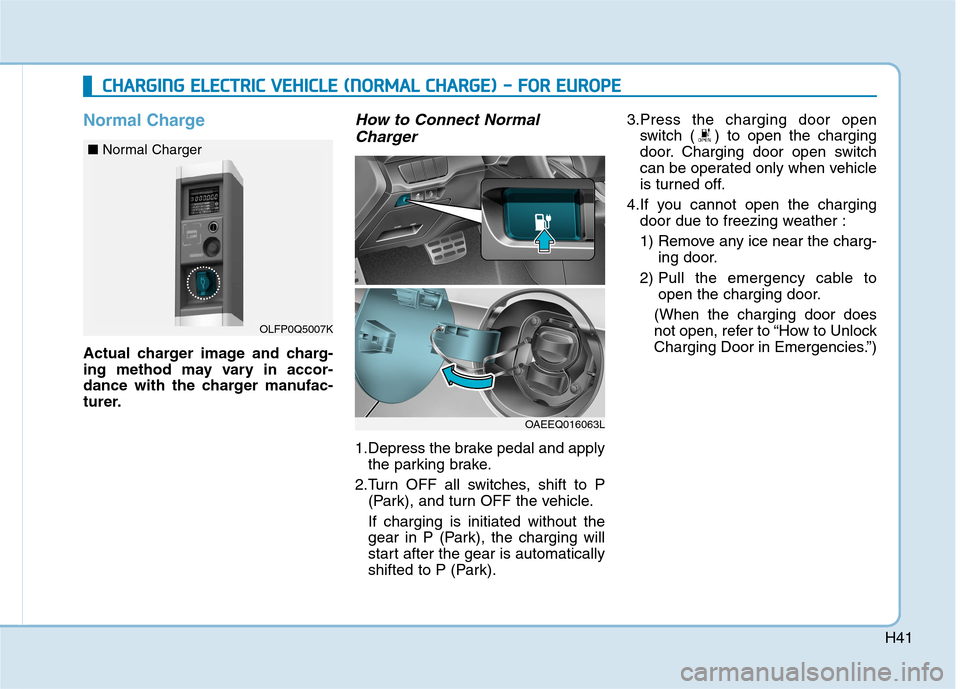
Normal Charge
Actual charger image and charg-
ing method may vary in accor-
dance with the charger manufac-
turer.
How to Connect NormalCharger
1.Depress the brake pedal and apply the parking brake.
2.Turn OFF all switches, shift to P (Park), and turn OFF the vehicle. If charging is initiated without the
gear in P (Park), the charging will
start after the gear is automatically
shifted to P (Park). 3.Press the charging door open
switch ( ) to open the charging
door. Charging door open switch
can be operated only when vehicle
is turned off.
4.If you cannot open the charging door due to freezing weather :
1) Remove any ice near the charg- ing door.
2) Pull the emergency cable to open the charging door.
(When the charging door does
not open, refer to “How to Unlock
Charging Door in Emergencies.”)
CC HH AARRGG IINN GG EE LLEE CCTT RR IICC VV EEHH IICC LLEE (( NN OO RRMM AALL CC HH AARRGG EE)) -- FF OO RR EE UU RROO PPEE
OLFP0Q5007K
■
Normal Charger
OAEEQ016063L
Page 55 of 582
H48
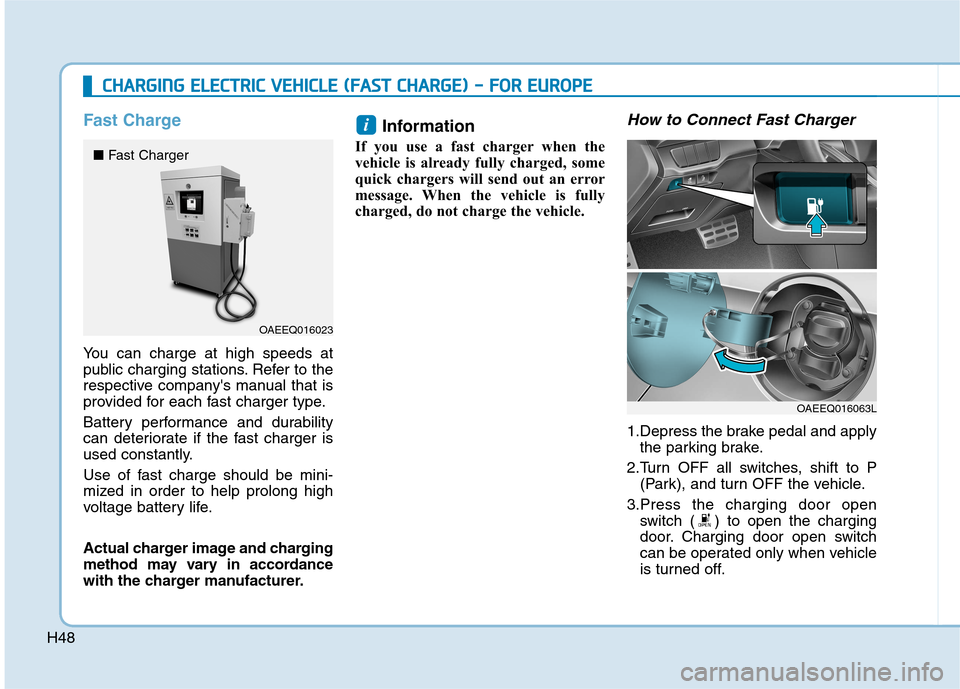
Fast Charge
You can charge at high speeds at
public charging stations. Refer to the
respective company's manual that is
provided for each fast charger type.
Battery performance and durability
can deteriorate if the fast charger is
used constantly.
Use of fast charge should be mini-
mized in order to help prolong high
voltage battery life.
Actual charger image and charging
method may vary in accordance
with the charger manufacturer.Information
If you use a fast charger when the
vehicle is already fully charged, some
quick chargers will send out an error
message. When the vehicle is fully
charged, do not charge the vehicle.
How to Connect Fast Charger
1.Depress the brake pedal and apply the parking brake.
2.Turn OFF all switches, shift to P (Park), and turn OFF the vehicle.
3.Press the charging door open switch ( ) to open the charging
door. Charging door open switch
can be operated only when vehicle
is turned off.
i
CCHH AARRGG IINN GG EE LLEE CCTT RR IICC VV EEHH IICC LLEE (( FF AA SSTT CC HH AARRGG EE)) -- FF OO RR EE UU RROO PPEE
OAEEQ016023
■
Fast Charger
OAEEQ016063L
Page 60 of 582
H53
3.Depress the brake pedal and applythe parking brake.
4.Turn OFF all switches, shift to P (Park), and turn OFF the vehicle. If charging is initiated without the
gear in P (Park), the charging will
start after the gear is automatically
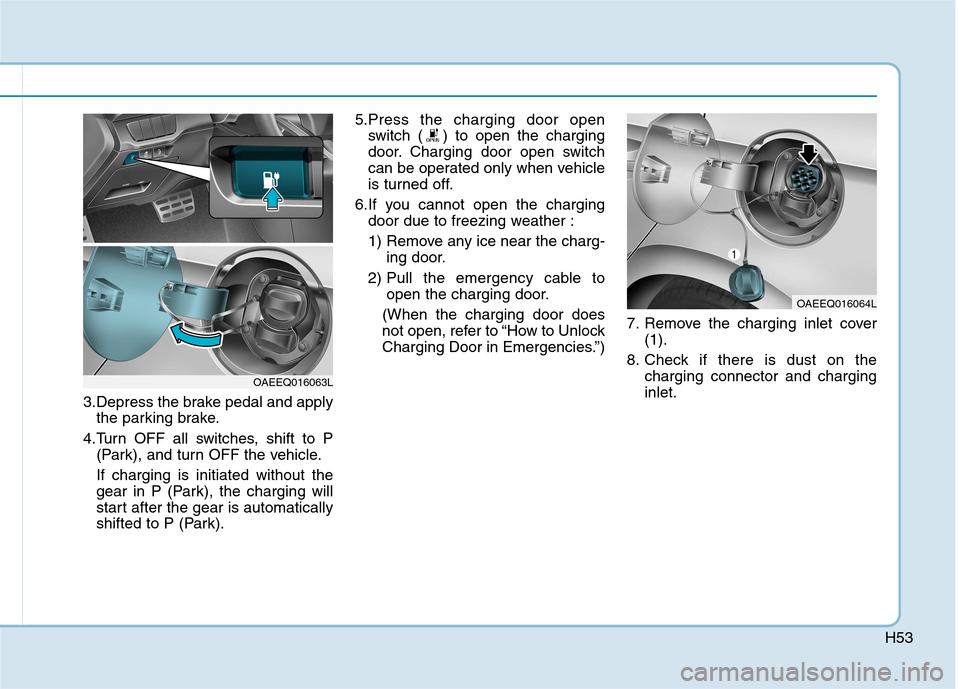
shifted to P (Park). 5.Press the charging door open
switch ( ) to open the charging
door. Charging door open switch
can be operated only when vehicle
is turned off.
6.If you cannot open the charging door due to freezing weather :
1) Remove any ice near the charg- ing door.
2) Pull the emergency cable to open the charging door.
(When the charging door does
not open, refer to “How to Unlock
Charging Door in Emergencies.”) 7. Remove the charging inlet cover
(1).
8. Check if there is dust on the charging connector and charginginlet.
OAEEQ016064L
OAEEQ016063L
Page 70 of 582
H63
How to Start the Vehicle
1.Holding the smart key, sit in the dri-ver's seat.
2.Fasten the seat belt before starting the vehicle.
3.Make sure to engage the parking brake.
4.Turn OFF all electrical devices.
5.Make sure to depress and hold the brake pedal.
6.While depressing the brake pedal, shift to P (Park).
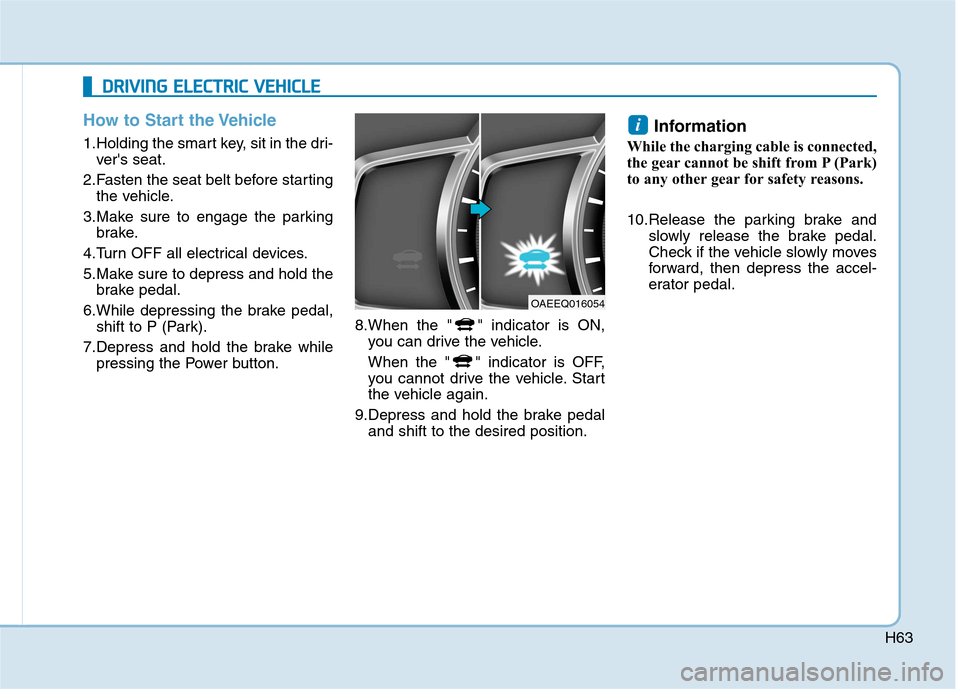
7.Depress and hold the brake while pressing the Power button. 8.When the " " indicator is ON,
you can drive the vehicle.
When the " " indicator is OFF,
you cannot drive the vehicle. Start
the vehicle again.
9.Depress and hold the brake pedal and shift to the desired position. Information
While the charging cable is connected,
the gear cannot be shift from P (Park)
to any other gear for safety reasons.
10.Release the parking brake and slowly release the brake pedal.
Check if the vehicle slowly moves
forward, then depress the accel-
erator pedal.
i
DDRRIIVV IINN GG EE LLEE CCTT RR IICC VV EEHH IICC LLEE
OAEEQ016054
Page 71 of 582
H64
DDRRIIVV IINN GG EE LLEE CCTT RR IICC VV EEHH IICC LLEE (( CC OO NNTT..))
How to Stop the Vehicle
1. Hold down the brake pedal while
the vehicle is parked.
2. While depressing the brake pedal, shift to P (Park).
3. While depressing the brake pedal, engage the parking brake.
4. While depressing the brake pedal, press the POWER button and turn
off the vehicle.
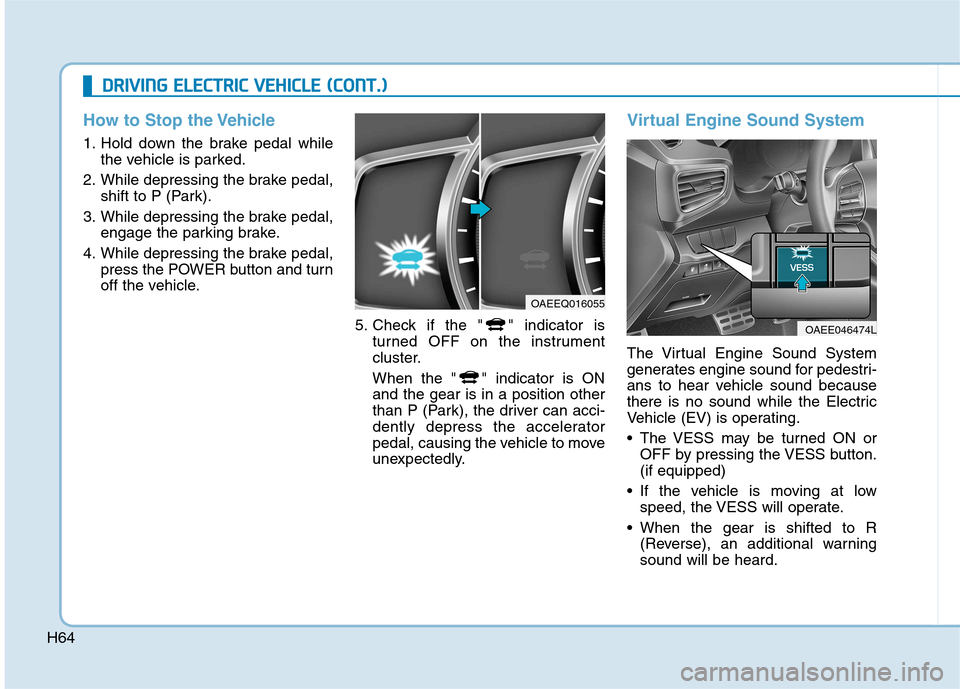
5. Check if the " " indicator isturned OFF on the instrument
cluster.
When the " " indicator is ON and the gear is in a position other
than P (Park), the driver can acci-
dently depress the accelerator
pedal, causing the vehicle to move
unexpectedly.
Virtual Engine Sound System
The Virtual Engine Sound System
generates engine sound for pedestri-
ans to hear vehicle sound because
there is no sound while the Electric
Vehicle (EV) is operating.
The VESS may be turned ON orOFF by pressing the VESS button. (if equipped)
If the vehicle is moving at low speed, the VESS will operate.
When the gear is shifted to R (Reverse), an additional warningsound will be heard.
OAEEQ016055
OAEE046474L
Page 74 of 582
H67
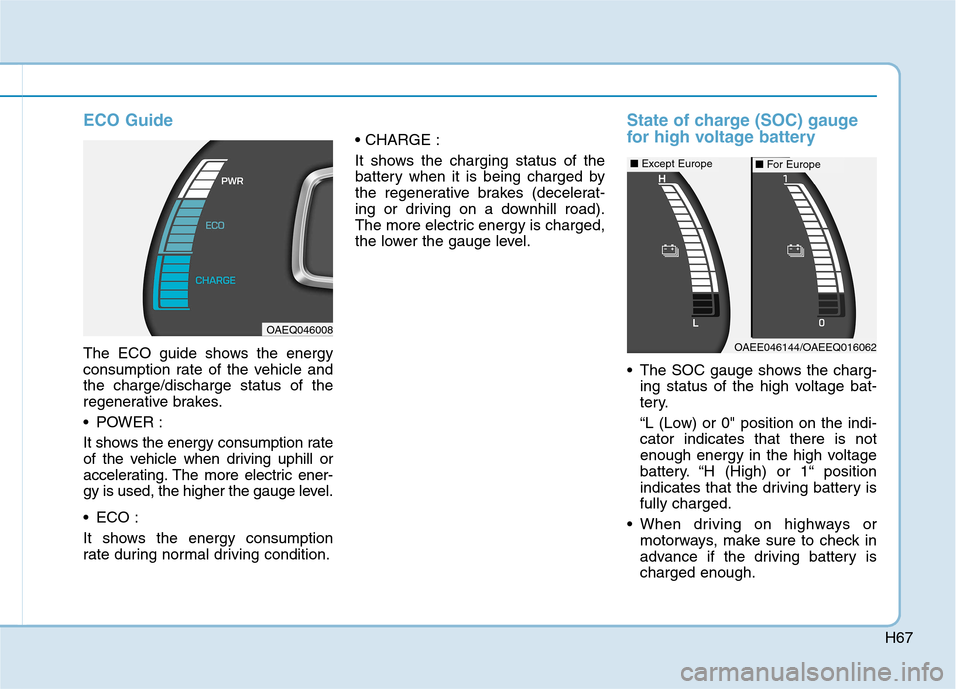
ECO Guide
The ECO guide shows the energy
consumption rate of the vehicle andthe charge/discharge status of the
regenerative brakes.
POWER :
It shows the energy consumption rate
of the vehicle when driving uphill or
accelerating. The more electric ener-
gy is used, the higher the gauge level.
ECO :
It shows the energy consumption
rate during normal driving condition.
It shows the charging status of the
battery when it is being charged by
the regenerative brakes (decelerat-
ing or driving on a downhill road).
The more electric energy is charged,
the lower the gauge level.
State of charge (SOC) gauge
for high voltage battery
The SOC gauge shows the charg-
ing status of the high voltage bat-
tery.
“L (Low) or 0" position on the indi- cator indicates that there is not
enough energy in the high voltage
battery. “H (High) or 1“ position
indicates that the driving battery isfully charged.
When driving on highways or motorways, make sure to check in
advance if the driving battery ischarged enough.
OAEE046144/OAEEQ016062
■Except Europe■For Europe
OAEQ046008