hood open Hyundai Ioniq Electric 2017 Owner's Manual
[x] Cancel search | Manufacturer: HYUNDAI, Model Year: 2017, Model line: Ioniq Electric, Model: Hyundai Ioniq Electric 2017Pages: 582, PDF Size: 37.73 MB
Page 32 of 582
H25
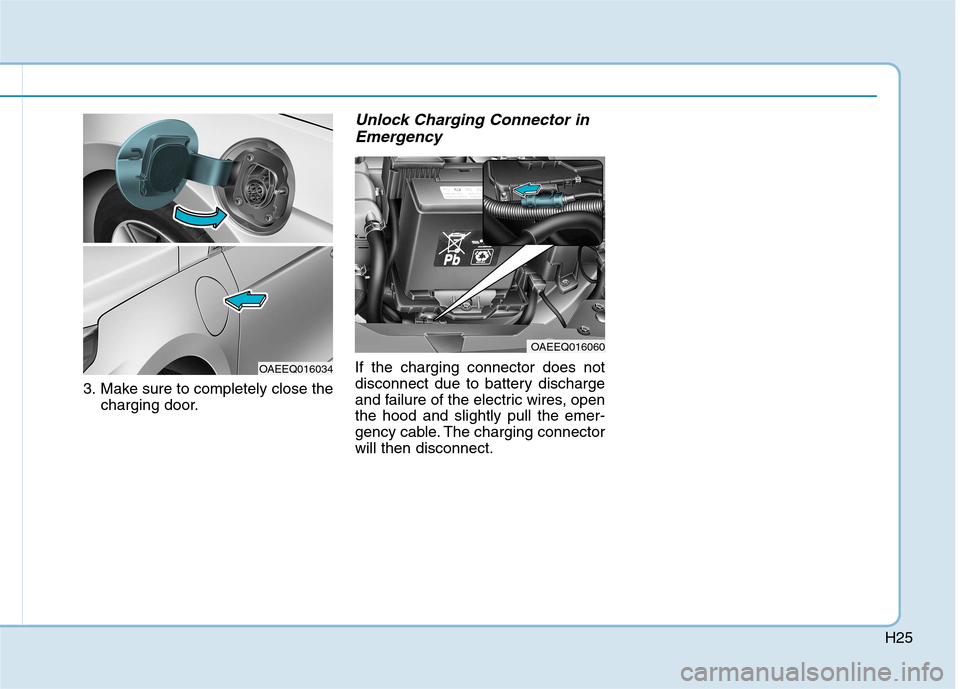
3. Make sure to completely close thecharging door.
Unlock Charging Connector in
Emergency
If the charging connector does not
disconnect due to battery discharge
and failure of the electric wires, openthe hood and slightly pull the emer-
gency cable. The charging connectorwill then disconnect.
OAEEQ016060
OAEEQ016034
Page 47 of 582
H40
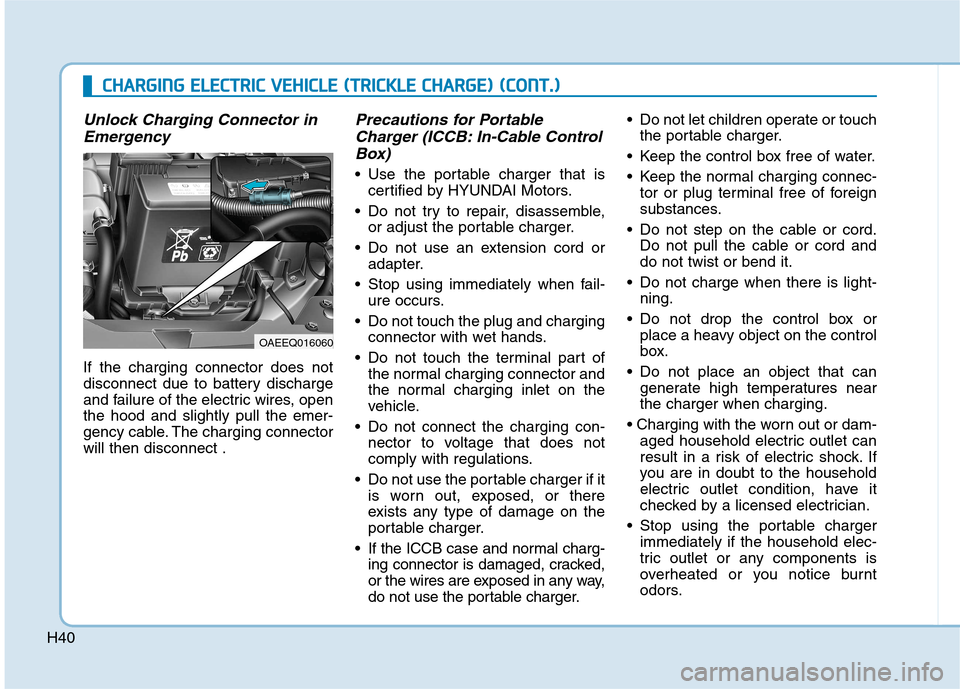
Unlock Charging Connector inEmergency
If the charging connector does not
disconnect due to battery discharge
and failure of the electric wires, openthe hood and slightly pull the emer-
gency cable. The charging connectorwill then disconnect .
Precautions for PortableCharger (ICCB: In-Cable Control
Box)
Use the portable charger that is certified by HYUNDAI Motors.
Do not try to repair, disassemble, or adjust the portable charger.
Do not use an extension cord or adapter.
Stop using immediately when fail- ure occurs.
Do not touch the plug and charging connector with wet hands.
Do not touch the terminal part of the normal charging connector and
the normal charging inlet on the
vehicle.
Do not connect the charging con- nector to voltage that does not
comply with regulations.
Do not use the portable charger if it is worn out, exposed, or there
exists any type of damage on the
portable charger.
If the ICCB case and normal charg- ing connector is damaged, cracked,
or the wires are exposed in any way,
do not use the portable charger. Do not let children operate or touch
the portable charger.
Keep the control box free of water.
Keep the normal charging connec- tor or plug terminal free of foreign
substances.
Do not step on the cable or cord. Do not pull the cable or cord anddo not twist or bend it.
Do not charge when there is light- ning.
Do not drop the control box or place a heavy object on the control
box.
Do not place an object that can generate high temperatures nearthe charger when charging.
aged household electric outlet can
result in a risk of electric shock. If
you are in doubt to the household
electric outlet condition, have it
checked by a licensed electrician.
Stop using the portable charger immediately if the household elec-
tric outlet or any components is
overheated or you notice burnt
odors.
CCHH AARRGG IINN GG EE LLEE CCTT RR IICC VV EEHH IICC LLEE (( TT RR IICC KK LLEE CC HH AARRGG EE)) (( CC OO NNTT..))
OAEEQ016060
Page 94 of 582
1-6
Your vehicle at a glance
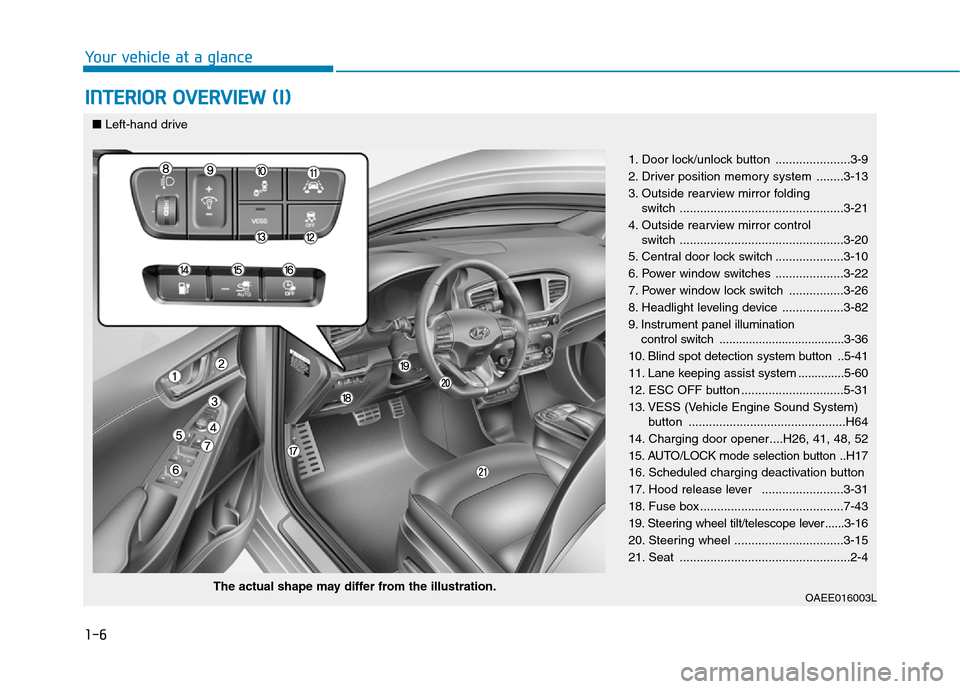
INTERIOR OVERVIEW (I)
1. Door lock/unlock button ......................3-9
2. Driver position memory system ........3-13
3. Outside rearview mirror folding switch ................................................3-21
4. Outside rearview mirror control switch ................................................3-20
5. Central door lock switch ....................3-10
6. Power window switches ....................3-22
7. Power window lock switch ................3-26
8. Headlight leveling device ..................3-82
9. Instrument panel illumination control switch ......................................3-36
10. Blind spot detection system button ..5-41
11. Lane keeping assist system ..............5-60
12. ESC OFF button ..............................5-31
13. VESS (Vehicle Engine Sound System) button ..............................................H64
14. Charging door opener....H26, 41, 48, 52
15. AUTO/LOCK mode selection button ..H17
16. Scheduled charging deactivation button
17. Hood release lever ........................3-31
18. Fuse box ..........................................7-43
19. Steering wheel tilt/telescope lever ......3-16
20. Steering wheel ................................3-15
21. Seat ..................................................2-4
OAEE016003L
The actual shape may differ from the illustration.
■
Left-hand drive
Page 95 of 582
1-7
Your vehicle at a glance
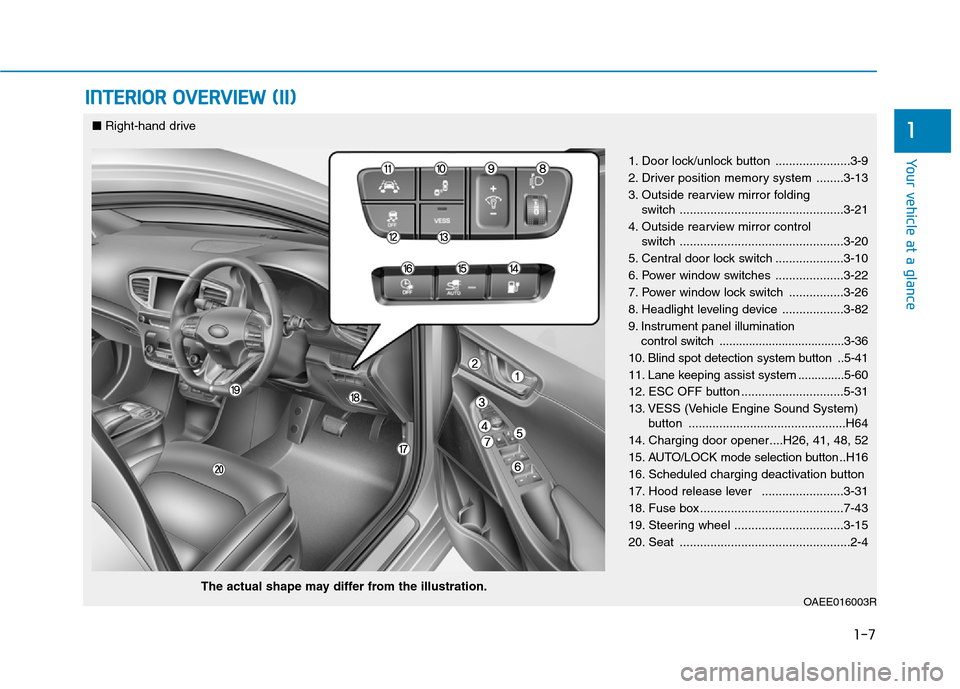
INTERIOR OVERVIEW (II)
1
1. Door lock/unlock button ......................3-9
2. Driver position memory system ........3-13
3. Outside rearview mirror folding switch ................................................3-21
4. Outside rearview mirror control switch ................................................3-20
5. Central door lock switch ....................3-10
6. Power window switches ....................3-22
7. Power window lock switch ................3-26
8. Headlight leveling device ..................3-82
9. Instrument panel illumination control switch ......................................3-36
10. Blind spot detection system button ..5-41
11. Lane keeping assist system ..............5-60
12. ESC OFF button ..............................5-31
13. VESS (Vehicle Engine Sound System) button ..............................................H64
14. Charging door opener....H26, 41, 48, 52
15. AUTO/LOCK mode selection button ..H16
16. Scheduled charging deactivation button
17. Hood release lever ........................3-31
18. Fuse box ..........................................7-43
19. Steering wheel ................................3-15
20. Seat ..................................................2-4
OAEE016003R
■ Right-hand drive
The actual shape may differ from the illustration.
Page 170 of 582
Convenient features of your vehicle
Accessing your vehicle .........................................3-3Smart key ............................................................................3-3
Immobilizer system ..........................................................3-7
Door locks ...............................................................3-8 Operating door locks from outside the vehicle .......3-8
Operating door locks from inside the vehicle ..........3-9
Auto door lock/unlock features ................................3-11
Child-protector rear door locks ..................................3-11
Theft-alarm system.............................................3-12
Driver position memory system ........................3-13 Storing memory positions .............................................3-13
Easy access function ....................................................3-14
Steering wheel......................................................3-15 Electric power steering (EPS) ......................................3-15
Tilt steering / Telescope steering...............................3-16
Heated steering wheel .................................................3-16
Horn ....................................................................................3-17
Mirrors ...................................................................3-17 Inside rearview mirror....................................................3-17
Outside rearview mirror ................................................3-19
Windows ................................................................3-22 Power windows ..............................................................3-22 Sunroof..................................................................3-28
Sunroof opening and closing .......................................3-28
Sliding the sunroof .........................................................3-28
Tilting the sunroof ..........................................................3-29
Sunshade ...........................................................................3-30
Resetting the sunroof ....................................................3-30
Exterior features .................................................3-31 Hood ...................................................................................3-31
Tailgate...............................................................................3-33
Instrument cluster................................................3-35 Instrument cluster control ............................................3-36
Gauges and meters .........................................................3-37
Warning and indicator lights ........................................3-42
LCD display messages ..................................................3-52
LCD Display ..........................................................3-65 LCD display control.........................................................3-65
LCD modes .....................................................................3-66
Trip computer .......................................................3-73
3
Page 172 of 582
3-3
Convenient features of your vehicle
Smart key
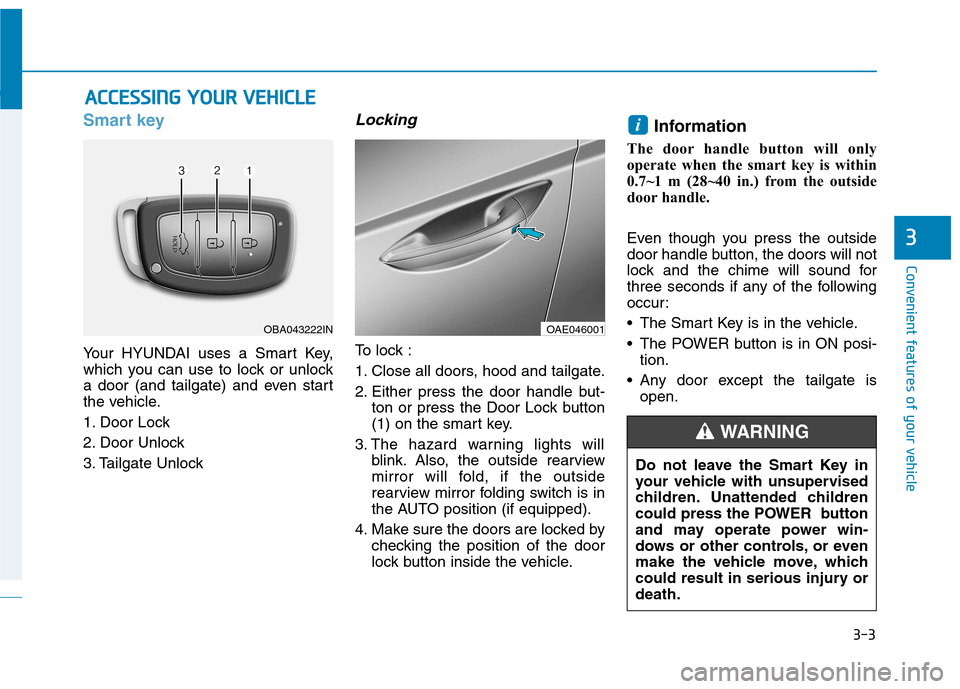
Your HYUNDAI uses a Smart Key,
which you can use to lock or unlock
a door (and tailgate) and even start
the vehicle.
1. Door Lock
2. Door Unlock
3. Tailgate Unlock
Locking
To lock :
1. Close all doors, hood and tailgate.
2. Either press the door handle but-ton or press the Door Lock button
(1) on the smart key.
3. The hazard warning lights will blink. Also, the outside rearview
mirror will fold, if the outside
rearview mirror folding switch is in
the AUTO position (if equipped).
4. Make sure the doors are locked by checking the position of the door
lock button inside the vehicle. Information
The door handle button will only
operate when the smart key is within
0.7~1 m (28~40 in.) from the outside
door handle.
Even though you press the outside
door handle button, the doors will not
lock and the chime will sound for
three seconds if any of the following
occur:
• The Smart Key is in the vehicle.
The POWER button is in ON posi- tion.
Any door except the tailgate is open.
i
AACCCCEE SSSSIINN GG YY OO UURR VV EEHH IICC LLEE
3
OBA043222INOAE046001
Do not leave the Smart Key in
your vehicle with unsupervised
children. Unattended children
could press the POWER button
and may operate power win-
dows or other controls, or even
make the vehicle move, which
could result in serious injury ordeath.
WARNING
Page 181 of 582
3-12
Convenient features of your vehicle
This system helps to protect your
vehicle and valuables. The horn will
sound and the hazard warning lights
will blink continuously if any of the
following occurs:
- A door is opened without using thesmart key.
- The tailgate is opened without using the smart key.
- The hood is opened.
The alarm continues for 30 seconds,
then the system resets. To turn off
the alarm, unlock the doors with the
smart key.
The Theft Alarm System automati-
cally sets 30 seconds after you lock
the doors and the tailgate. For the
system to activate, you must lock thedoors and the tailgate from outside
the vehicle with the smart key or by
pressing the button on the outside of
the door handles with the smart key
in your possession.
The hazard warning lights will blink and the chime will sound once to
indicate the system is armed. Once the security system is set, open-
ing any door, the tailgate, or the hood
without using the smart key will cause
the alarm to activate.
The Theft Alarm System will not set if
the hood, the tailgate, or any door is
not fully closed. If the system will not
set, check the hood, the tailgate, orthe doors are fully closed. Do not attempt to alter this system or
add other devices to it.
Information
Do not lock the doors until all pas- sengers have left the vehicle. If the
remaining passenger leaves the
vehicle when the system is armed,
the alarm will be activated.
If the vehicle is not disarmed with the smart key, open the doors by
using the mechanical key, start the
vehicle and wait for 30 seconds.
When the system is disarmed but a door or tailgate is not opened within
30 seconds, the system will be
rearmed. Information
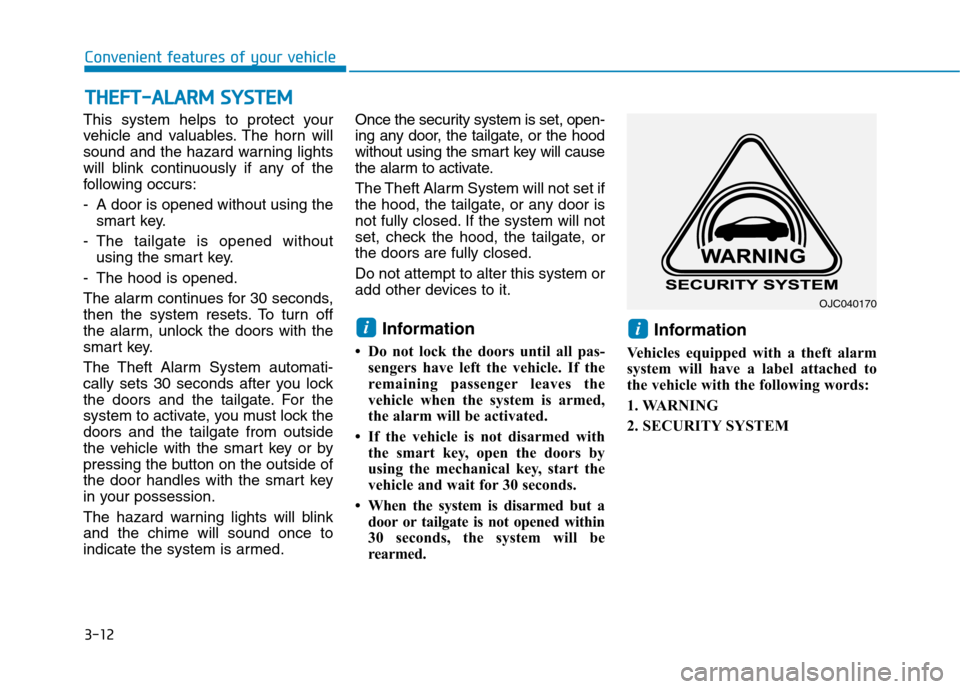
Vehicles equipped with a theft alarm
system will have a label attached to
the vehicle with the following words:
1. WARNING
2. SECURITY SYSTEM
ii
TT HH EEFFTT --AA LLAA RRMM SS YY SSTT EEMM
OJC040170
Page 200 of 582
3-31
Convenient features of your vehicle
3
EEXX TTEERR IIOO RR FF EE AA TTUU RREESS
4. Push the control lever forward
about 10 seconds.
- When the sunroof is in the close position :
The glass will tilt and slightly move up and down.
- When the sunroof is in the tilt posi- tion:
The glass will slightly move up and down.
Do not release the lever until the
operation is completed.
If you release the lever during opera-
tion, try again from step 2.
5. Within 3 seconds, push the control lever forward until the sunroof
operates as follows:
Tilt down �Slide Open �Slide
Close.
Do not release the lever until the
operation is completed.
If you release the lever during opera-
tion, try again from step 2. 6. Release the sunroof control lever
after all operation has completed.(The sunroof system has beenreset.)
Information
If the sunroof does not reset when the vehicle battery is disconnected
or discharged, or related fuse is
blown, the sunroof may not operate
normally.
For more detailed information, we recommend that you contact an
authorized HYUNDAI dealer.Hood
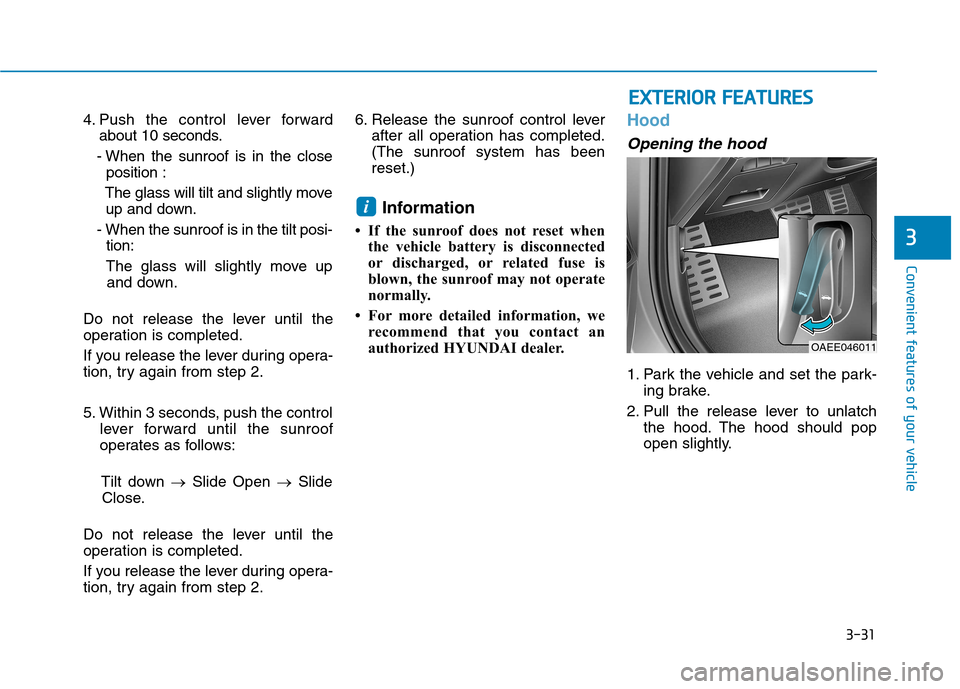
Opening the hood
1. Park the vehicle and set the park- ing brake.
2. Pull the release lever to unlatch the hood. The hood should pop
open slightly.
i
OAEE046011
Page 201 of 582
3-32
Convenient features of your vehicle
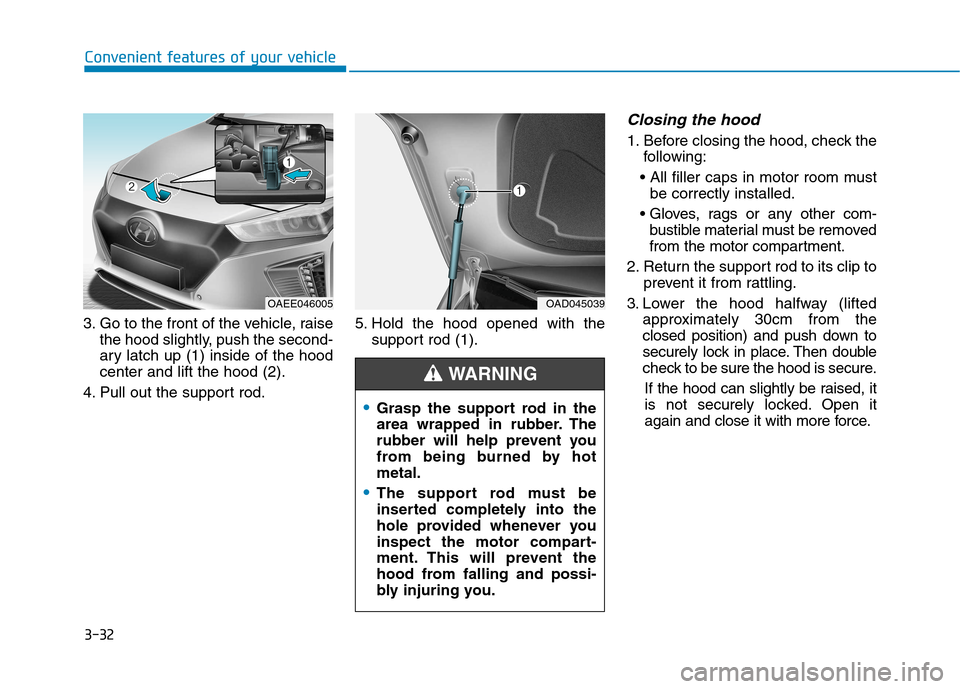
3. Go to the front of the vehicle, raisethe hood slightly, push the second-
ary latch up (1) inside of the hoodcenter and lift the hood (2).
4. Pull out the support rod. 5. Hold the hood opened with the
support rod (1).
Closing the hood
1. Before closing the hood, check thefollowing:
be correctly installed.
bustible material must be removed
from the motor compartment.
2. Return the support rod to its clip to prevent it from rattling.
3. Lower the hood halfway (lifted approximately 30cm from the
closed position) and push down to
securely lock in place. Then double
check to be sure the hood is secure.
If the hood can slightly be raised, it
is not securely locked. Open it
again and close it with more force.
OAEE046005
Grasp the support rod in the
area wrapped in rubber. The
rubber will help prevent you
from being burned by hotmetal.
The support rod must be
inserted completely into the
hole provided whenever you
inspect the motor compart-
ment. This will prevent the
hood from falling and possi-
bly injuring you.
WARNING
OAD045039
Page 202 of 582
3-33
Convenient features of your vehicle
3
Tailgate
Opening the tailgate
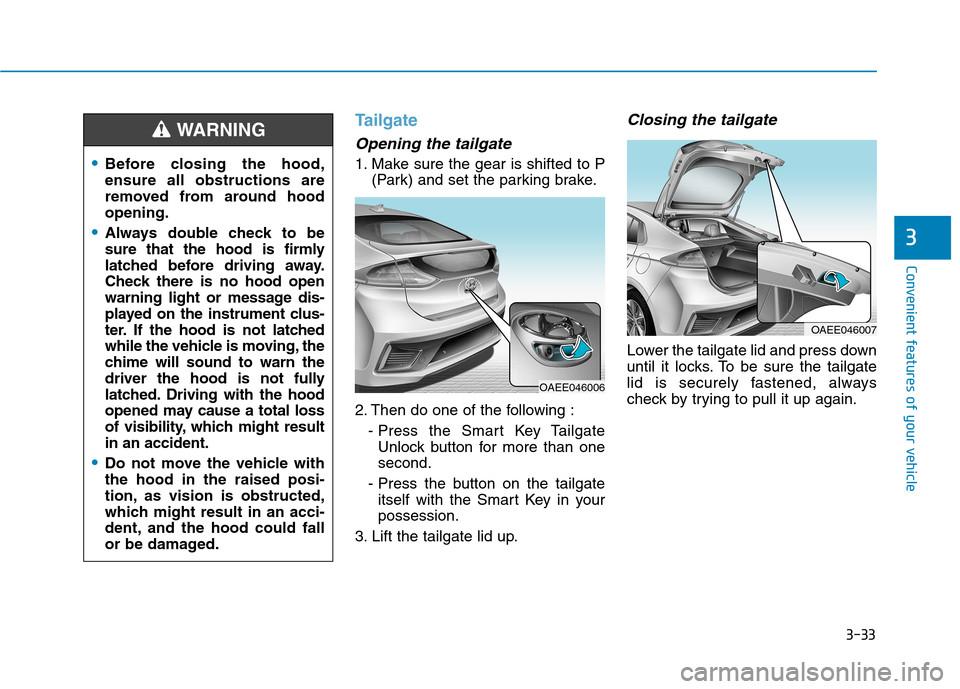
1. Make sure the gear is shifted to P(Park) and set the parking brake.
2. Then do one of the following : - Press the Smart Key TailgateUnlock button for more than one second.
- Press the button on the tailgate itself with the Smart Key in yourpossession.
3. Lift the tailgate lid up.
Closing the tailgate
Lower the tailgate lid and press down
until it locks. To be sure the tailgate
lid is securely fastened, always
check by trying to pull it up again.
Before closing the hood, ensure all obstructions are
removed from around hoodopening.
Always double check to be
sure that the hood is firmly
latched before driving away.
Check there is no hood open
warning light or message dis-
played on the instrument clus-
ter. If the hood is not latched
while the vehicle is moving, the
chime will sound to warn the
driver the hood is not fully
latched. Driving with the hood
opened may cause a total loss
of visibility, which might resultin an accident.
Do not move the vehicle with the hood in the raised posi-
tion, as vision is obstructed,
which might result in an acci-
dent, and the hood could fall
or be damaged.
WARNING
OAEE046006
OAEE046007