Hyundai Ioniq Electric 2019 Owner's Manual - RHD (UK, Australia)
Manufacturer: HYUNDAI, Model Year: 2019, Model line: Ioniq Electric, Model: Hyundai Ioniq Electric 2019Pages: 526, PDF Size: 16.63 MB
Page 271 of 526
![Hyundai Ioniq Electric 2019 Owners Manual - RHD (UK, Australia) 3-124
Convenient features of your vehicle
Clock
Vehicles with Audio system
Select the [SETUP]button on the
audio system ➟ Select [Date/Time].
Set time: Set the time displayed on the audio screen.
Hyundai Ioniq Electric 2019 Owners Manual - RHD (UK, Australia) 3-124
Convenient features of your vehicle
Clock
Vehicles with Audio system
Select the [SETUP]button on the
audio system ➟ Select [Date/Time].
Set time: Set the time displayed on the audio screen.](/img/35/14899/w960_14899-270.png)
3-124
Convenient features of your vehicle
Clock
Vehicles with Audio system
Select the [SETUP]button on the
audio system ➟ Select [Date/Time].
Set time: Set the time displayed on the audio screen.
Time format: Choose between 12- hour and 24-hour time formats.
Vehicles with Navigation system
Select the Settings menu on the
Navigation system ➟Select
[Date/Time].
GPS time: Displays time according to the received GNSS time.
24-hour: Switches to 12 hour or 24 hour.
Clothes hanger (if equipped)
These hangers are not designed to
hold large or heavy items.
Do not adjust the clock whilst
driving. You may lose your steer-
ing control and cause severe
personal injury or accidents.
WARNING
OAEE046434
Do not hang other objects such
as hangers or hard objects
except clothes. Also, do not put
heavy, sharp or breakable
objects in the clothes pockets.
In an accident or when the cur-
tain air bag is inflated, it may
cause vehicle damage or per-
sonal injury.
WARNING
OGSB047265L
Page 272 of 526
3-125
Convenient features of your vehicle
3
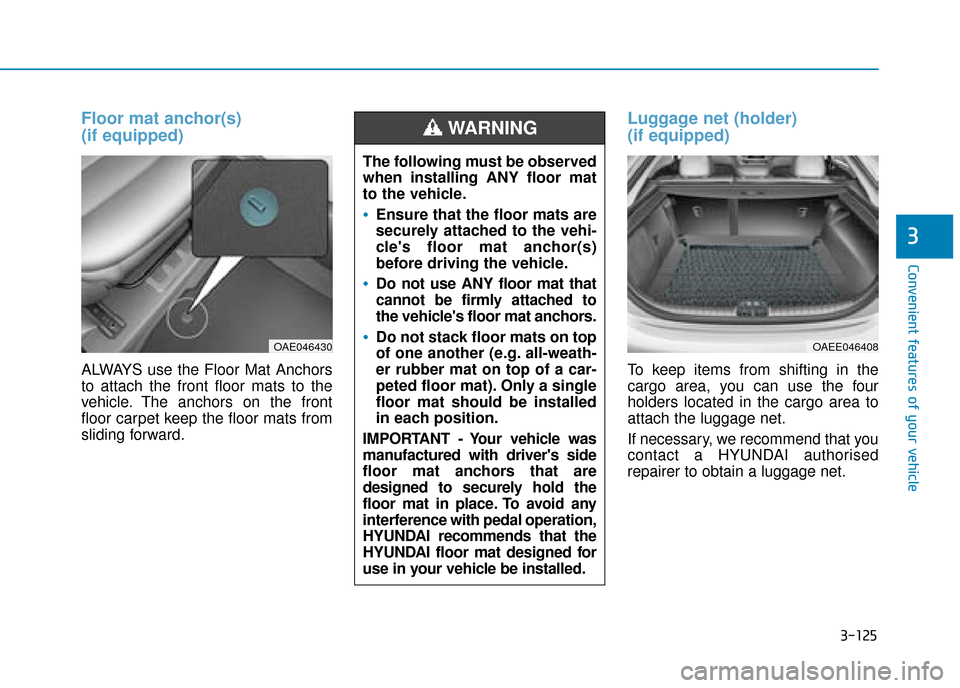
Floor mat anchor(s)
(if equipped)
ALWAYS use the Floor Mat Anchors
to attach the front floor mats to the
vehicle. The anchors on the front
floor carpet keep the floor mats from
sliding forward.
Luggage net (holder)
(if equipped)
To keep items from shifting in the
cargo area, you can use the four
holders located in the cargo area to
attach the luggage net.
If necessary, we recommend that you
contact a HYUNDAI authorised
repairer to obtain a luggage net.
The following must be observed
when installing ANY floor mat
to the vehicle.
Ensure that the floor mats are
securely attached to the vehi-
cle's floor mat anchor(s)
before driving the vehicle.
Do not use ANY floor mat that
cannot be firmly attached to
the vehicle's floor mat anchors.
Do not stack floor mats on top
of one another (e.g. all-weath-
er rubber mat on top of a car-
peted floor mat). Only a single
floor mat should be installed
in each position.
IMPORTANT - Your vehicle was
manufactured with driver's side
floor mat anchors that are
designed to securely hold the
floor mat in place. To avoid any
interference with pedal operation,
HYUNDAI recommends that the
HYUNDAI floor mat designed for
use in your vehicle be installed.
WARNING
OAE046430OAEE046408
Page 273 of 526
3-126
Convenient features of your vehicle
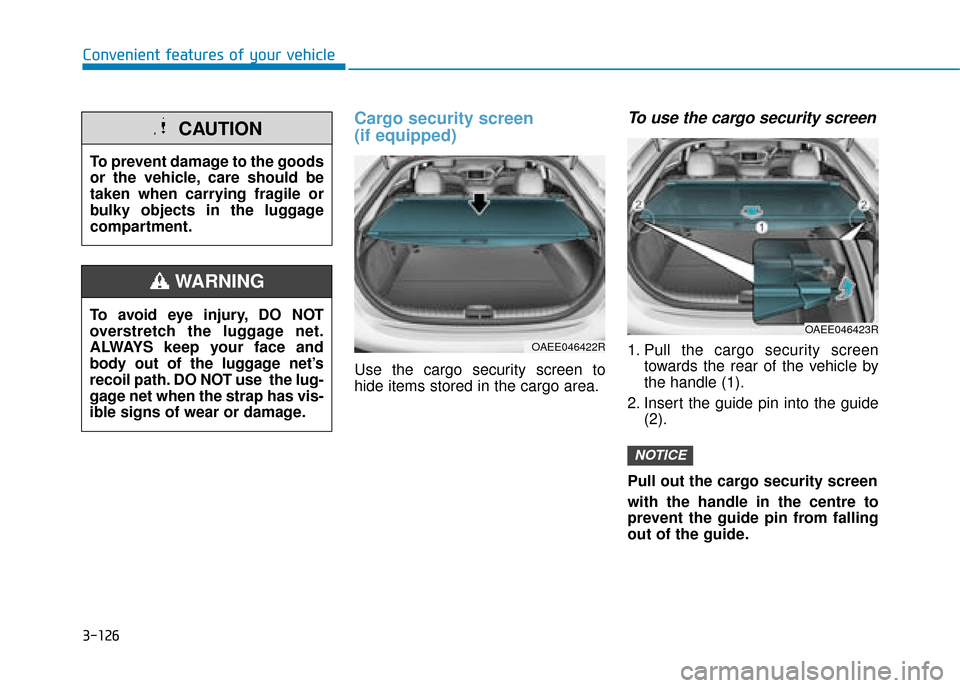
Cargo security screen
(if equipped)
Use the cargo security screen to
hide items stored in the cargo area.
To use the cargo security screen
1. Pull the cargo security screentowards the rear of the vehicle by
the handle (1).
2. Insert the guide pin into the guide (2).
Pull out the cargo security screen
with the handle in the centre to
prevent the guide pin from falling
out of the guide.
NOTICE
To avoid eye injury, DO NOT
overstretch the luggage net.
ALWAYS keep your face and
body out of the luggage net’s
recoil path. DO NOT use the lug-
gage net when the strap has vis-
ible signs of wear or damage.
WARNING
OAEE046422R
OAEE046423R
To prevent damage to the goods
or the vehicle, care should be
taken when carrying fragile or
bulky objects in the luggage
compartment.
CAUTION
Page 274 of 526
3-127
Convenient features of your vehicle
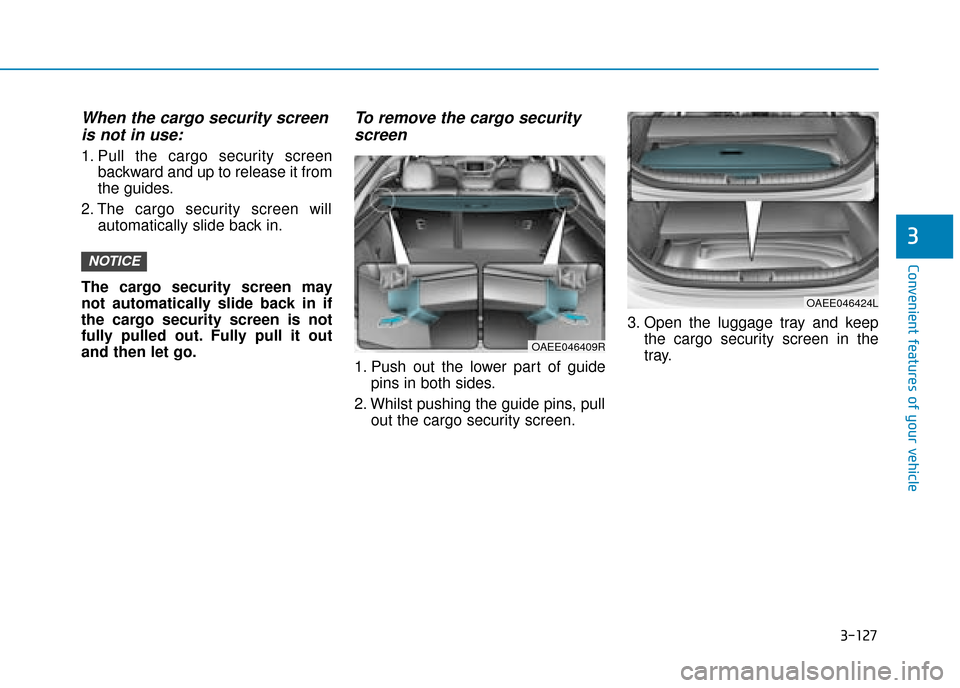
When the cargo security screenis not in use:
1. Pull the cargo security screen
backward and up to release it from
the guides.
2. The cargo security screen will automatically slide back in.
The cargo security screen may
not automatically slide back in if
the cargo security screen is not
fully pulled out. Fully pull it out
and then let go.
To remove the cargo security screen
1. Push out the lower part of guide
pins in both sides.
2. Whilst pushing the guide pins, pull out the cargo security screen. 3. Open the luggage tray and keep
the cargo security screen in the
tray.
NOTICE
3
OAEE046409R
OAEE046424L
Page 275 of 526
Multimedia System
Multimedia system .................................................4-2
AUX, USB and iPod®port ...............................................4-2
Antenna ........................................................................\
.......4-2
Steering wheel audio control .........................................4-3
Bluetooth
®Wireless Technology hands-free ...........4-4
Audio / Video / Navigation system (AVN) ..................4-5
How vehicle radio works .................................................4-5
AUDIO (With Touch Screen) .................................4-8
Feature of Your Audio .....................................................4-9
Radio........................................................................\
...........4-16
Media........................................................................\
..........4-18
Information - Using MP3 ..............................................4-20
Phone ........................................................................\
.........4-32
Setup ........................................................................\
..........4-40
Declaration of Conformity ..................................4-42
CE for EU ........................................................................\
..4-42
4
Page 276 of 526
4-2
Multimedia System
Information
• If you install an aftermarket HIDheadlamp, your vehicle’s audio and
electronic device may malfunction.
• Prevent chemicals such as perfume, cosmetic oil, sun cream, hand clean-
er, and air freshener from contacting
the interior parts because they may
cause damage or discolouration.
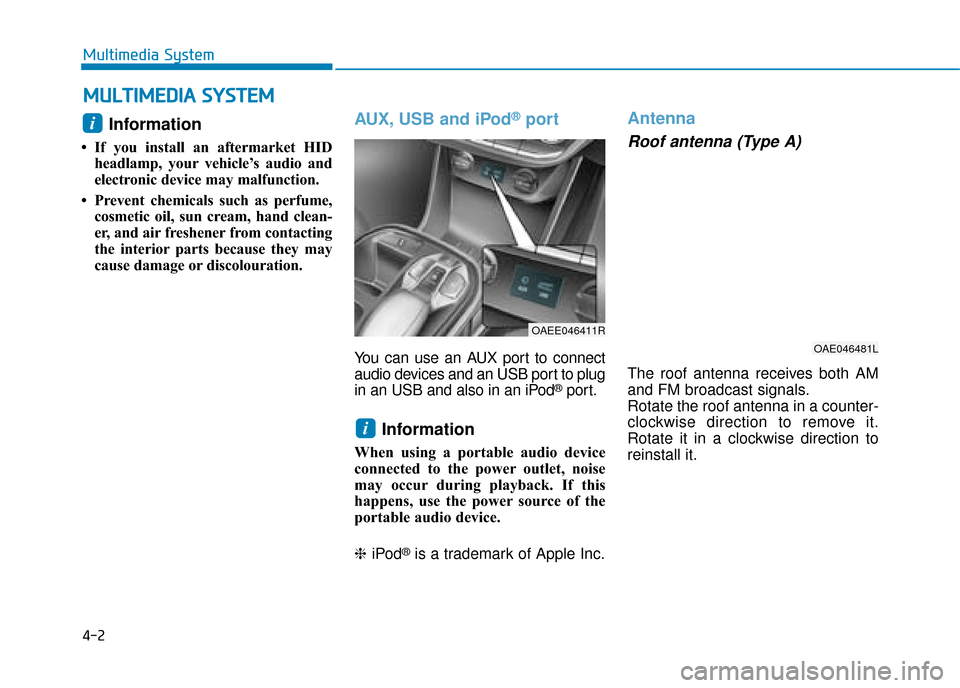
AUX, USB and iPod®port
You can use an AUX port to connect
audio devices and an USB port to plug
in an USB and also in an iPod
®port.
Information
When using a portable audio device
connected to the power outlet, noise
may occur during playback. If this
happens, use the power source of the
portable audio device.
❈ iPod
®is a trademark of Apple Inc.
Antenna
Roof antenna (Type A)
The roof antenna receives both AM
and FM broadcast signals.
Rotate the roof antenna in a counter-
clockwise direction to remove it.
Rotate it in a clockwise direction to
reinstall it.
i
OAEE046411R
i
M
MU
UL
LT
T I
IM
M E
ED
D I
IA
A
S
S Y
Y S
ST
T E
EM
M
OAE046481L
Page 277 of 526
4-3
Multimedia System
4
Before entering a place with a lowheight clearance or a car wash,
remove the antenna by rotating it
counterclockwise. If not, the
antenna may be damaged.
When reinstalling your antenna, it is important that it is fully
tightened and adjusted to the
upright position to ensure prop-
er reception.
Shark fin antenna (Type B)
The shark fin antenna receives
transmitted data. (for example:
AM/FM, DAB, GPS/ GNSS)
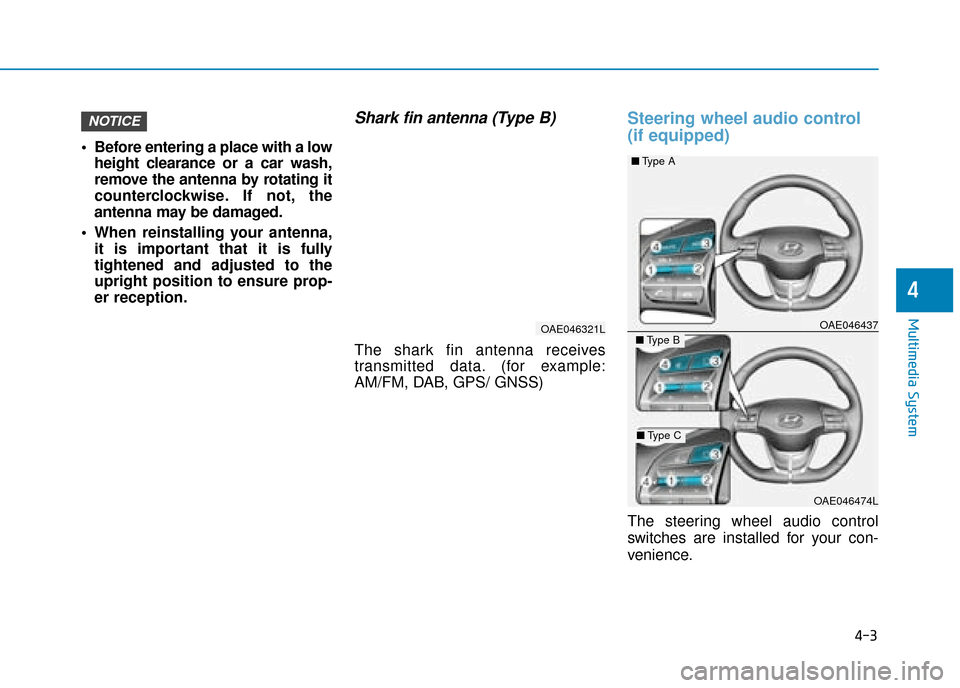
Steering wheel audio control
(if equipped)
The steering wheel audio control
switches are installed for your con-
venience.
OAE046437
OAE046474L
NOTICE
■ Type A
■Type B
■Type C
OAE046321L
Page 278 of 526
Do not operate audio remote con-
trol buttons simultaneously.
VOLUME (VOL + / - ) (1)
Move the VOLUME toggle switchup to increase volume.
Move the VOLUME toggle switch down to decrease volume.
SEEK/PRESET ( / ) (2)
If the SEEK/PRESET toggle switch
is moved up or down and held for 0.8
second or more, it will function in the
following modes.
RADIO mode
It will function as the AUTO SEEK
select switch. It will SEEK until you
release the switch.
MEDIA mode
It will function as the FF/REW switch. If the SEEK/PRESET toggle switch
is moved up or down, it will function
in the following modes.
RADIO mode
It will function as the PRESET STA-
TION UP/DOWN switch.
MEDIA mode
It will function as the TRACK UP/
DOWN switch.
MODE ( ) (3)
Press the MODE button to select
Radio, Disc, or AUX.
MUTE ( ) (4)
Press the button to mute the
sound.
Press the button again to activate the sound.
Information
Detailed information for audio control
buttons are described in the following
pages in this chapter.
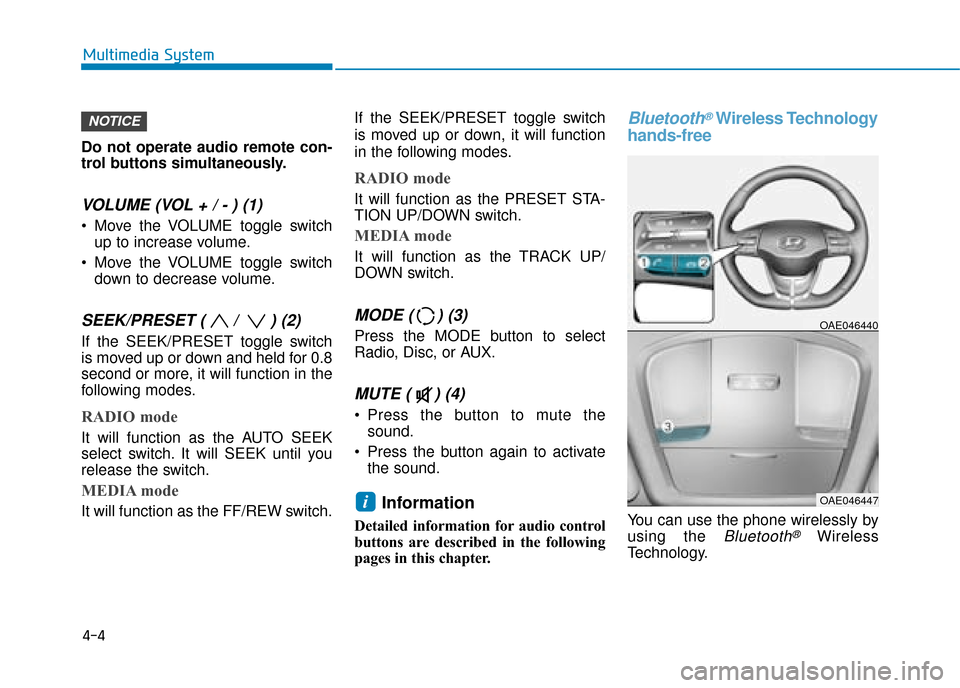
Bluetooth®Wireless Technology
hands-free
You can use the phone wirelessly by
using the
Bluetooth®Wireless
Technology.
OAE046440
OAE046447i
NOTICE
4-4
Multimedia System
Page 279 of 526
(1) Call / Answer button
(2) Call end button
(3) Microphone
Audio : For detailed information,refer to “AUDIO” in this chapter.
AVN : Detailed information for the
Bluetooth® Wireless Technology
hands-free is described in the man-
ual supplied separately.
Audio / Video / Navigation sys-
tem (AVN) (if equipped)
Detailed information for the AVN sys-
tem is described in a separately sup-
plied manual.
How vehicle radio works
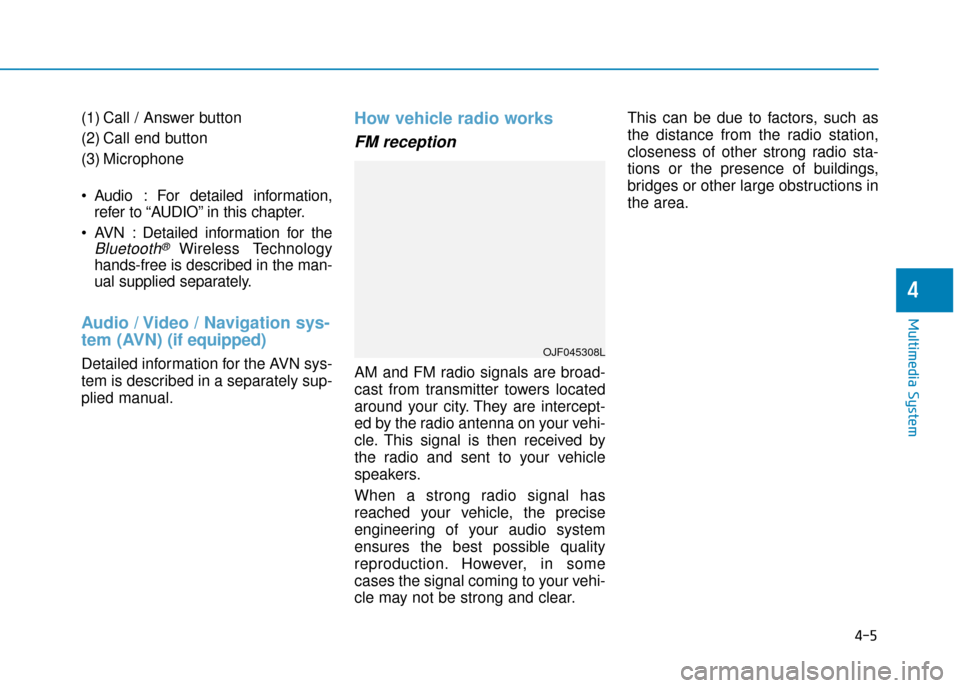
FM reception
AM and FM radio signals are broad-
cast from transmitter towers located
around your city. They are intercept-
ed by the radio antenna on your vehi-
cle. This signal is then received by
the radio and sent to your vehicle
speakers.
When a strong radio signal has
reached your vehicle, the precise
engineering of your audio system
ensures the best possible quality
reproduction. However, in some
cases the signal coming to your vehi-
cle may not be strong and clear. This can be due to factors, such as
the distance from the radio station,
closeness of other strong radio sta-
tions or the presence of buildings,
bridges or other large obstructions in
the area.
OJF045308L
4-5
Multimedia System
4
Page 280 of 526
4-6
Multimedia System
AM (MW, LW) reception
AM broadcasts can be received at
greater distances than FM broad-
casts. This is because AM radio
waves are transmitted at low fre-
quencies. These long, low frequency
radio waves can follow the curvature
of the earth rather than travelling
straight out into the atmosphere. In
addition, they curve around obstruc-
tions so that they can provide better
signal coverage.
FM radio station
FM broadcasts are transmitted at
high frequencies and do not bend to
follow the earth's surface. Because
of this, FM broadcasts generally
begin to fade at short distances from
the station. Also, FM signals are eas-
ily affected by buildings, mountains,
or other obstructions. These can
result in certain listening conditions
which might lead you to believe a
problem exists with your radio. The
following conditions are normal and
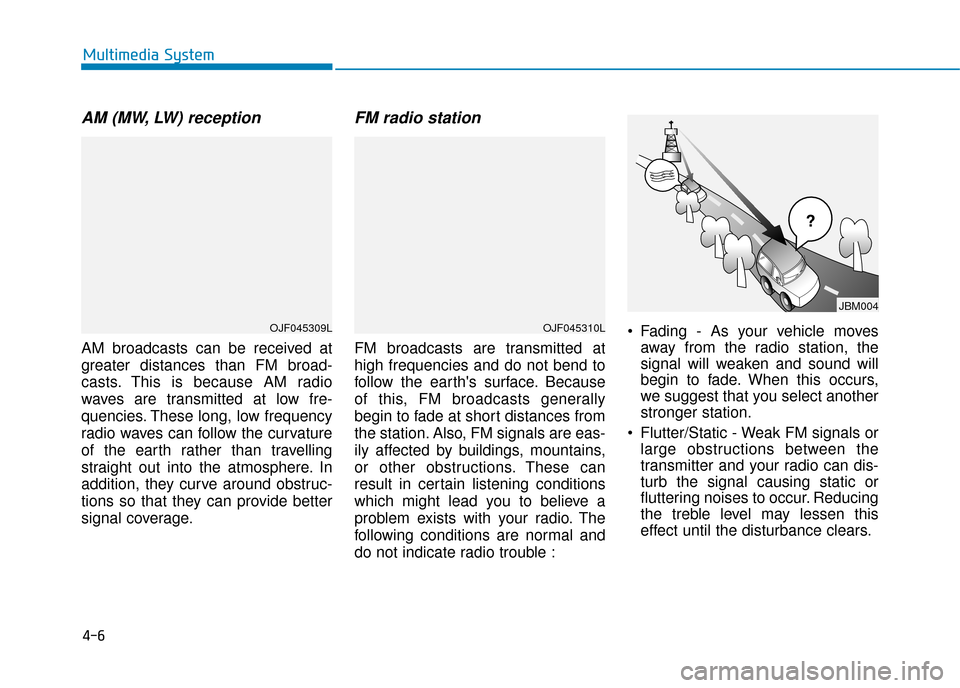
do not indicate radio trouble : Fading - As your vehicle moves
away from the radio station, the
signal will weaken and sound will
begin to fade. When this occurs,
we suggest that you select another
stronger station.
Flutter/Static - Weak FM signals or large obstructions between the
transmitter and your radio can dis-
turb the signal causing static or
fluttering noises to occur. Reducing
the treble level may lessen this
effect until the disturbance clears.
¢¢¢
JBM004
OJF045310LOJF045309L