instrument Hyundai Kona 2018 - RHD (UK, Australia) Owner's Guide
[x] Cancel search | Manufacturer: HYUNDAI, Model Year: 2018, Model line: Kona, Model: Hyundai Kona 2018Pages: 497, PDF Size: 11.7 MB
Page 161 of 497
3-83
Convenient features of your vehicle
3
Exterior lights
Lighting control
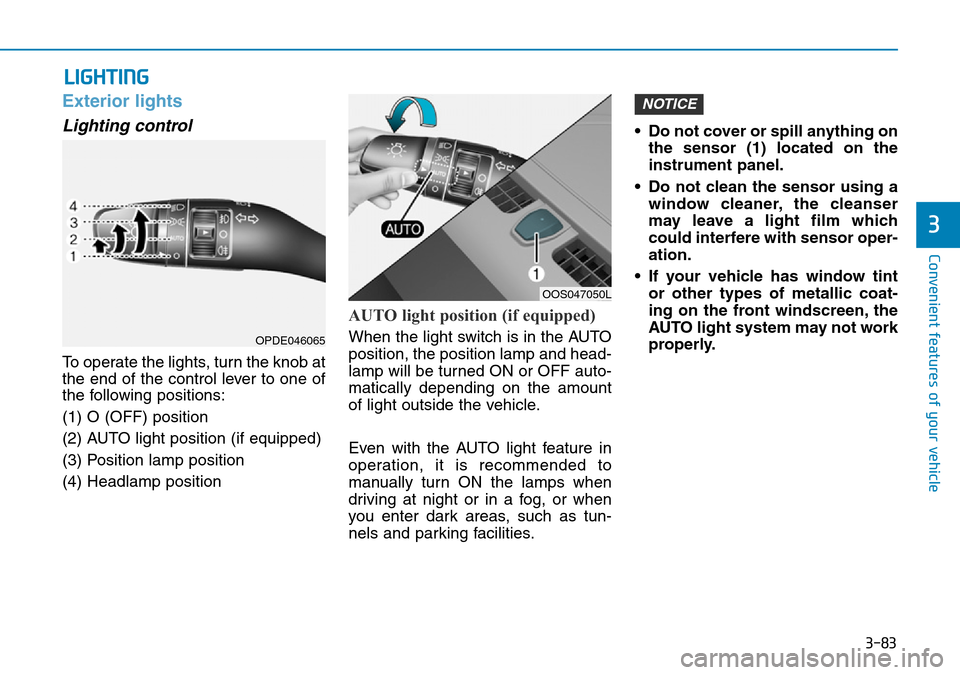
To operate the lights, turn the knob at
the end of the control lever to one of
the following positions:
(1) O (OFF) position
(2) AUTO light position (if equipped)
(3) Position lamp position
(4) Headlamp position
AUTO light position (if equipped)
When the light switch is in the AUTO
position, the position lamp and head-
lamp will be turned ON or OFF auto-
matically depending on the amount
of light outside the vehicle.
Even with the AUTO light feature in
operation, it is recommended to
manually turn ON the lamps when
driving at night or in a fog, or when
you enter dark areas, such as tun-
nels and parking facilities.• Do not cover or spill anything on
the sensor (1) located on the
instrument panel.
• Do not clean the sensor using a window cleaner, the cleanser
may leave a light film which
could interfere with sensor oper-
ation.
• If your vehicle has window tint or other types of metallic coat-
ing on the front windscreen, the
AUTO light system may not work
properly.
NOTICE
LIGHTING
OOS047050L
OPDE046065
Page 162 of 497
3-84
Convenient features of your vehicle
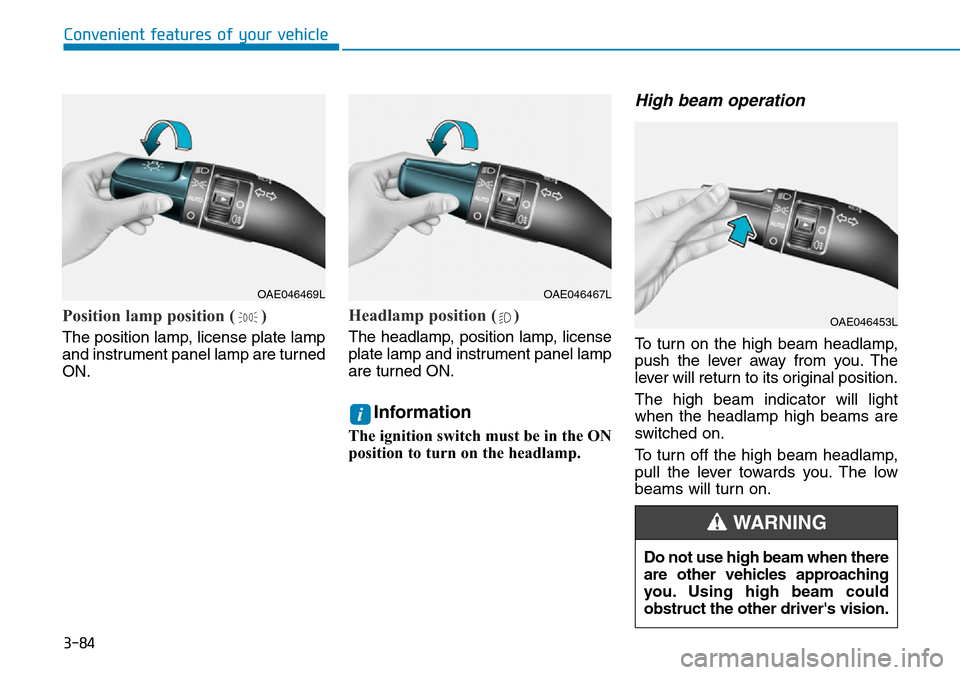
Position lamp position ( )
The position lamp, license plate lamp
and instrument panel lamp are turned
ON.
Headlamp position ( )
The headlamp, position lamp, license
plate lamp and instrument panel lamp
are turned ON.
Information
The ignition switch must be in the ON
position to turn on the headlamp.
High beam operation
To turn on the high beam headlamp,
push the lever away from you. The
lever will return to its original position.
The high beam indicator will light
when the headlamp high beams are
switched on.
To turn off the high beam headlamp,
pull the lever towards you. The low
beams will turn on.
i
OAE046469LOAE046467L
OAE046453L
Do not use high beam when there
are other vehicles approaching
you. Using high beam could
obstruct the other driver's vision.
WARNING
Page 185 of 497
3-107
Convenient features of your vehicle
3
DEFROSTER
To prevent damage to the conduc-
tors bonded to the inside surface
of the rear window, never use
sharp instruments or window
cleaners containing abrasives to
clean the window.
Information
If you want to defrost and defog the
front windscreen, refer to
“Windscreen Defrosting and
Defogging” in this chapter.
Rear window defroster
The defroster heats the window to
remove frost, fog and thin ice from
the interior and exterior of the rear
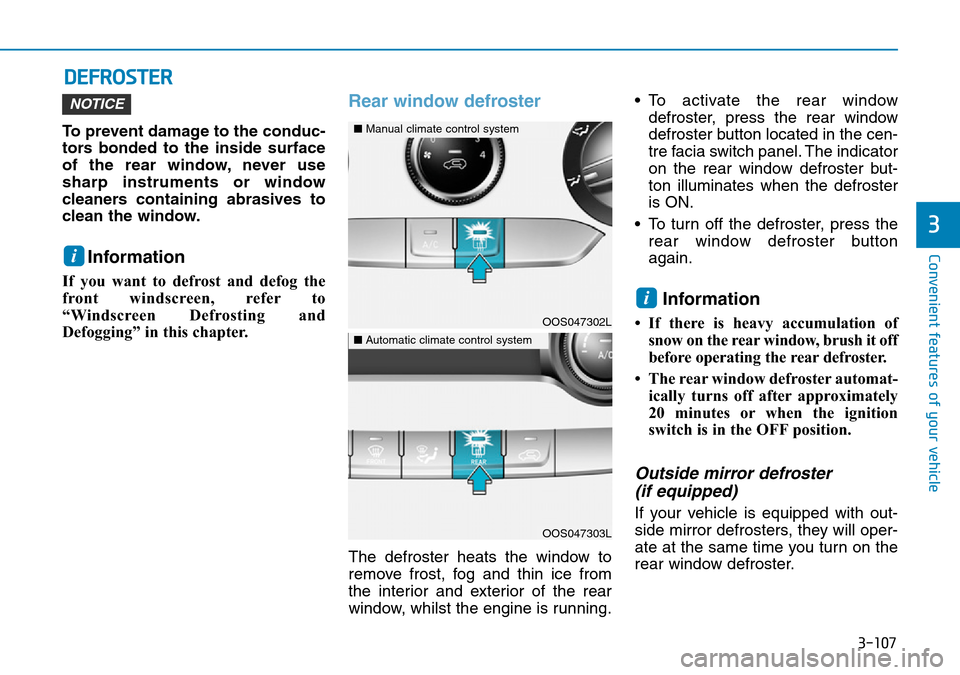
window, whilst the engine is running.• To activate the rear window
defroster, press the rear window
defroster button located in the cen-
tre facia switch panel. The indicator
on the rear window defroster but-
ton illuminates when the defroster
is ON.
• To turn off the defroster, press the rear window defroster button
again.
Information
• If there is heavy accumulation ofsnow on the rear window, brush it off
before operating the rear defroster.
• The rear window defroster automat- ically turns off after approximately
20 minutes or when the ignition
switch is in the OFF position.
Outside mirror defroster (if equipped)
If your vehicle is equipped with out-
side mirror defrosters, they will oper-
ate at the same time you turn on the
rear window defroster.
i
NOTICE
i
OOS047302L
■ Manual climate control system
OOS047303L
■Automatic climate control system
Page 188 of 497
3-110
Convenient features of your vehicle
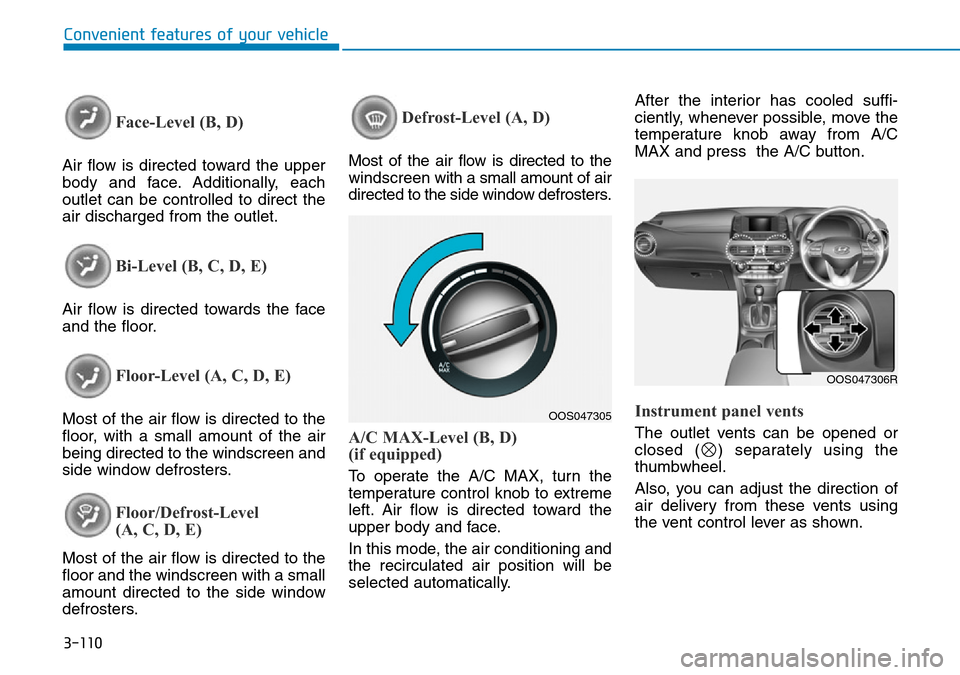
Face-Level (B, D)
Air flow is directed toward the upper
body and face. Additionally, each
outlet can be controlled to direct the
air discharged from the outlet.
Bi-Level (B, C, D, E)
Air flow is directed towards the face
and the floor.
Floor-Level (A, C, D, E)
Most of the air flow is directed to the
floor, with a small amount of the air
being directed to the windscreen and
side window defrosters.
Floor/Defrost-Level
(A, C, D, E)
Most of the air flow is directed to the
floor and the windscreen with a small
amount directed to the side window
defrosters.
Defrost-Level (A, D)
Most of the air flow is directed to the
windscreenwith a small amount of air
directed to the side window defrosters.
A/C MAX-Level (B, D)
(if equipped)
To operate the A/C MAX, turn the
temperature control knob to extreme
left. Air flow is directed toward the
upper body and face.
In this mode, the air conditioning and
the recirculated air position will be
selected automatically. After the interior has cooled suffi-
ciently, whenever possible, move the
temperature knob away from A/C
MAX and press the A/C button.
Instrument panel vents
The outlet vents can be opened or
closed ( ) separately using the
thumbwheel.
Also, you can adjust the direction of
air delivery from these vents using
the vent control lever as shown.
OOS047305
OOS047306R
Page 197 of 497
3-119
Convenient features of your vehicle
3
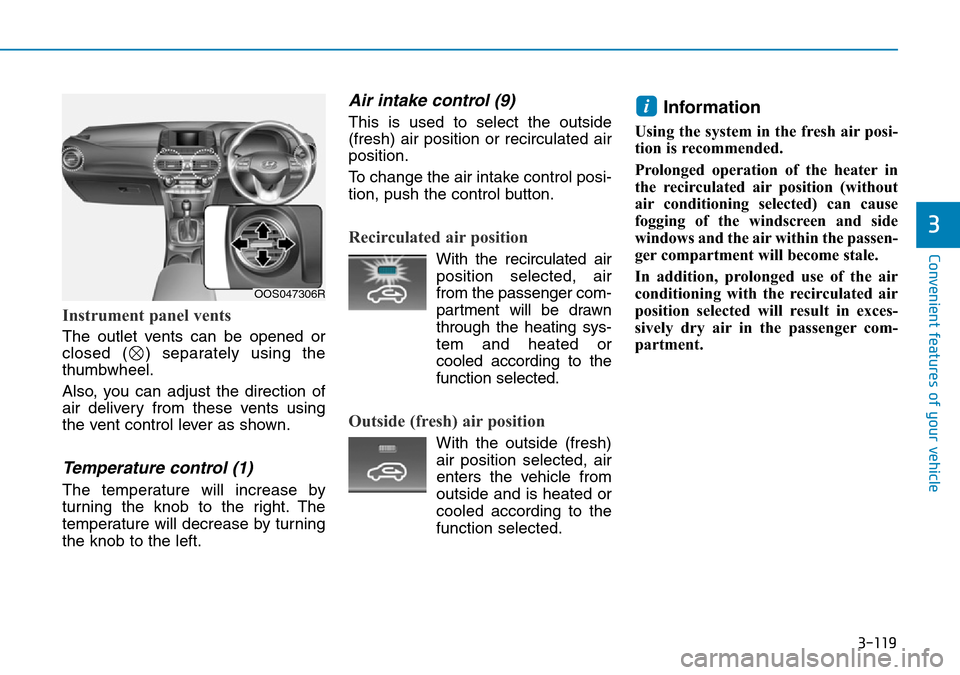
Instrument panel vents
The outlet vents can be opened or
closed ( ) separately using the
thumbwheel.
Also, you can adjust the direction of
air delivery from these vents using
the vent control lever as shown.
Temperature control (1)
The temperature will increase by
turning the knob to the right. The
temperature will decrease by turning
the knob to the left.
Air intake control (9)
This is used to select the outside
(fresh) air position or recirculated air
position.
To change the air intake control posi-
tion, push the control button.
Recirculated air position
With the recirculated airposition selected, air
from the passenger com-
partment will be drawn
through the heating sys-
tem and heated or
cooled according to the
function selected.
Outside (fresh) air position
With the outside (fresh) air position selected, air
enters the vehicle from
outside and is heated or
cooled according to the
function selected.
Information
Using the system in the fresh air posi-
tion is recommended.
Prolonged operation of the heater in
the recirculated air position (without
air conditioning selected) can cause
fogging of the windscreen and side
windows and the air within the passen-
ger compartment will become stale.
In addition, prolonged use of the air
conditioning with the recirculated air
position selected will result in exces-
sively dry air in the passenger com-
partment.
i
OOS047306R
Page 211 of 497
3-133
Convenient features of your vehicle
3
• Some electronic devices cancause electronic interference
when plugged into a vehicle’s
power outlet. These devices may
cause excessive audio static
and malfunctions in other elec-
tronic systems or devices used
in your vehicle.
• Push the plug in as far as it will go. If good contact is not made,
the plug may overheat and the
fuse may open.
• Plug in battery equipped electrical/ electronic devices with reverse
current protection. The current
from the battery may flow into the
vehicle's electrical/electronic sys-
tem and cause system malfunc-
tion.Wireless mobile phone charg-
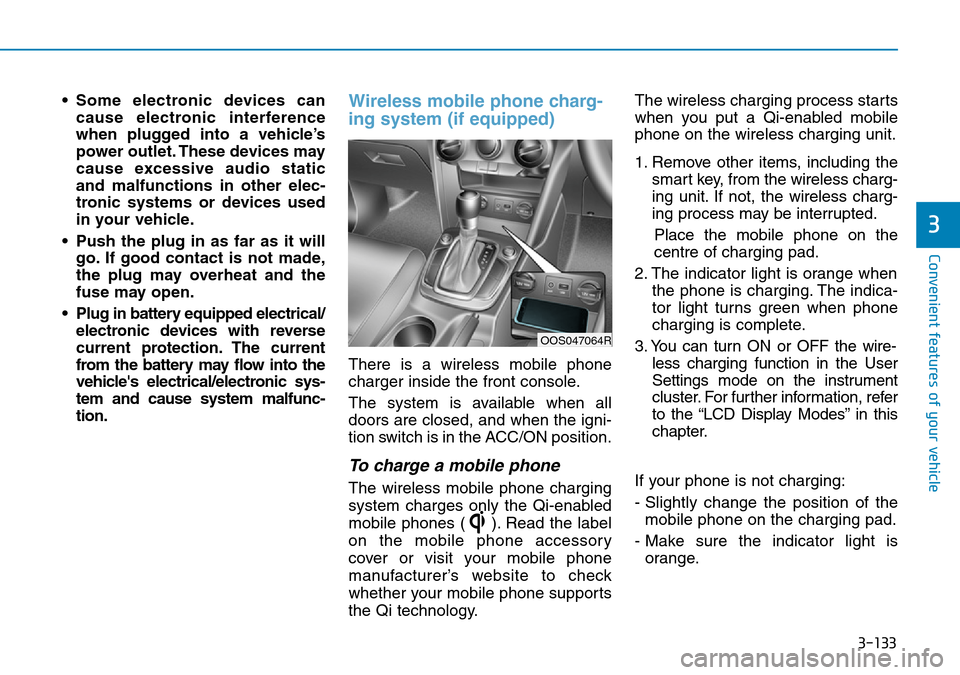
ing system (if equipped)
There is a wireless mobile phone
charger inside the front console.
The system is available when all
doors are closed, and when the igni-
tion switch is in the ACC/ON position.
To charge a mobile phone
The wireless mobile phone charging
system charges only the Qi-enabled
mobile phones ( ). Read the label
on the mobile phone accessory
cover or visit your mobile phone
manufacturer’s website to check
whether your mobile phone supports
the Qi technology. The wireless charging process starts
when you put a Qi-enabled mobile
phone on the wireless charging unit.
1. Remove other items, including the
smart key, from the wireless charg-
ing unit. If not, the wireless charg-
ing process may be interrupted.
Place the mobile phone on the
centre of charging pad.
2. The indicator light is orange when the phone is charging. The indica-
tor light turns green when phone
charging is complete.
3. You can turn ON or OFF the wire- less charging function in the User
Settings mode on the instrument
cluster. For further information, refer
to the “LCD Display Modes” in this
chapter.
If your phone is not charging:
- Slightly change the position of the mobile phone on the charging pad.
- Make sure the indicator light is orange.
OOS047064R
Page 252 of 497
5-3
Driving your vehicle
5
Carbon monoxide (CO) gas is toxic. Breathing CO can cause unconsciousness and death.
Engine exhaust contains carbon monoxide which cannot be seen or smelled.
Do not inhale engine exhaust.
If at any time you smell engine exhaust inside the vehicle, open the windows immediately. Exposure to CO can cause
unconsciousness and death by asphyxiation.
Be sure the exhaust system does not leak.
The exhaust system should be checked whenever the vehicle is raised to change the oil or for any other purpose. If
you hear a change in the sound of the exhaust or if you drive over something that strikes the underneath side of the
vehicle, we recommend that the exhaust system be checked as soon as possible by a HYUNDAI authorised repairer.
Do not run the engine in an enclosed area.
Letting the engine idle in your garage, even with the garage door open, is a hazardous practice. Run the engine only
long enough to start the engine and to move the vehicle out of the garage.
Avoid idling the engine for prolonged periods with people inside the vehicle.
If it is necessary to idle the engine for a prolonged period with people inside the vehicle, be sure to do so only in an
open area with the air intake set at "Fresh" and fan control set to high so fresh air is drawn into the interior.
Keep the air intakes clear.
To assure proper operation of the ventilation system, keep the ventilation air intakes located in front of the windscreen
clear of snow, ice, leaves, or other obstructions.
If you must drive with the tailgate open:
Close all windows.
Open instrument panel air vents.
Set the air intake control at "Fresh", the air flow control at "Floor" or "Face", and the fan control set to high.
WARNING
Page 253 of 497
5-4
Driving your vehicle
Before entering the vehicle
• Be sure all windows, outside mir-ror(s), and outside lights are clean
and unobstructed.
• Remove frost, snow, or ice.
• Visually check the tyres for uneven wear and damage.
• Check under the vehicle for any sign of leaks.
• Be sure there are no obstacles behind you if you intend to back up.
Before starting
• Make sure the bonnet, the tailgate,and the doors are securely closed
and locked.
• Adjust the position of the seat and steering wheel.
• Adjust the inside and outside rearview mirrors.
• Verify all the lights work.
• Fasten your seat belt. Check that all passengers have fastened their
seat belt.
• Check the gauges and indicators in the instrument panel and the mes-
sages on the instrument display
when the ignition switch is in the
ON position.
• Check that any items you are car- rying are stored properly or fas-
tened down securely.
BEFORE DRIVING
To reduce the risk of SERIOUS
INJURY or DEATH, take the fol-
lowing precautions:
•ALWAYS wear your seat belt.
All passengers must be prop-
erly belted whenever the vehi-
cle is moving. For more infor-
mation, refer to "Seat Belts" in
chapter 2.
•Always drive defensively.
Assume other drivers or pedes-
trians may be careless and
make mistakes.
•Stay focused on the task of
driving. Driver distraction can
cause accidents.
•Leave plenty of space between
you and the vehicle in front of
you.
WARNING
Page 270 of 497
5-21
Driving your vehicle
5
• Always come to a complete stopbefore shifting into D (Drive) or
R (Reverse).
• Do not put the shift lever in N (Neutral) whilst driving.
DCT warning messages
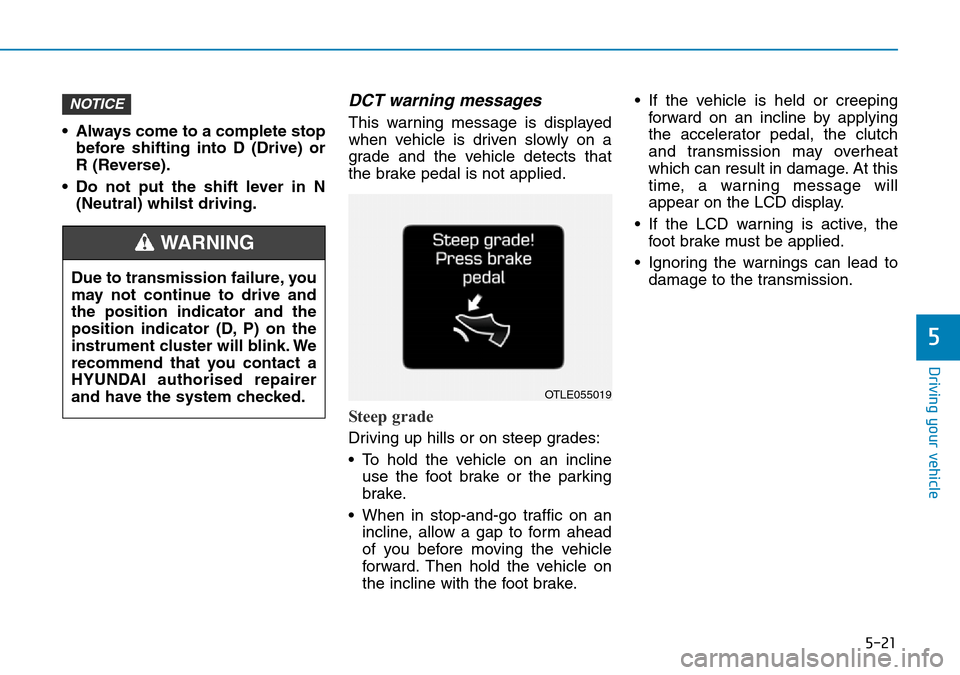
This warning message is displayed
when vehicle is driven slowly on a
grade and the vehicle detects that
the brake pedal is not applied.
Steep grade
Driving up hills or on steep grades:
• To hold the vehicle on an inclineuse the foot brake or the parking
brake.
• When in stop-and-go traffic on an incline, allow a gap to form ahead
of you before moving the vehicle
forward. Then hold the vehicle on
the incline with the foot brake. • If the vehicle is held or creeping
forward on an incline by applying
the accelerator pedal, the clutch
and transmission may overheat
which can result in damage. At this
time, a warning message will
appear on the LCD display.
• If the LCD warning is active, the foot brake must be applied.
• Ignoring the warnings can lead to damage to the transmission.
NOTICE
OTLE055019
Due to transmission failure, you
may not continue to drive and
the position indicator and the
position indicator (D, P) on the
instrument cluster will blink. We
recommend that you contact a
HYUNDAI authorised repairer
and have the system checked.
WARNING
Page 272 of 497
5-23
Driving your vehicle
5
• When the message "Transmissioncooled down. Resume driving."
appears you can continue to drive
your vehicle.
• When possible, drive the vehicle smoothly.
If any of the warning messages in
the LCD display continue to blink, for
your safety, we recommend that you
contact a HYUNDAI authorised
repairer and have the system
checked.
Transmission ranges
The indicator in the instrument clus-
ter displays the shift lever position
when the ignition switch is in the ON
position.
P (Park)
Always come to a complete stop
before shifting into P (Park).
To shift from P (Park), you must
depress firmly on the brake pedal
and make sure your foot is off the
accelerator pedal.
If you have done all of the above
and still cannot shift the lever out
of P (Park), see "Shift-Lock
Release" in this chapter.
The shift lever must be in P (Park)
before turning the engine off.
•Shifting into P (Park) whilst
the vehicle is in motion may
cause you to lose control of
the vehicle.
•After the vehicle has stopped,
always make sure the shift
lever is in P (Park), apply the
parking brake, and turn the
engine off.
•When parking on an incline,
place the shift lever in P (Park)
and apply the parking brake to
prevent the vehicle from
rolling downhill.
•For safety, always engage the
parking brake with the shift
lever in the P (Park) position
except for the case of emer-
gency parking.
WARNING