brake Hyundai Kona 2018 Owner's Manual - RHD (UK, Australia)
[x] Cancel search | Manufacturer: HYUNDAI, Model Year: 2018, Model line: Kona, Model: Hyundai Kona 2018Pages: 497, PDF Size: 11.7 MB
Page 9 of 497
This vehicle should not be modified.
Modification of your vehicle could
affect its performance, safety or
durability and may even violate gov-
ernmental safety and vehicle regula-
tions.
In addition, damage or performance
problems resulting from any modifi-
cation may not be covered under
warranty.
• If you use unauthorised electronicdevices, it may cause the vehicle to
operate abnormally, wire damage,
battery discharge and fire. For your
safety, do not use unauthorised
electronic devices. By following a few simple precau-
tions for the first 600 miles (1,000
km) you may add to the perform-
ance, economy and life of your vehi-
cle.
• Do not race the engine.
• Whilst driving, keep your engine
speed (rpm, or revolutions per
minute) between 2,000 rpm and
4,000 rpm.
• Do not maintain a single speed for long periods of time, either fast or
slow. Varying engine speed is
needed to properly break-in the
engine.
• Avoid hard stops, except in emer- gencies, to allow the brakes to seat
properly.
• Don't tow a trailer during the first 1,200 miles (2,000 km) of opera-
tion. HYUNDAI promotes an environmen-
tally sound treatment for end of life
vehicles and offers to take back your
HYUNDAI end of life vehicles in
accordance with the European Union
(EU) End of Life Vehicles Directive.
You can get detailed information
from your national HYUNDAI home-
page.
F9
Introduction
VEHICLE MODIFICATIONS
RETURNING USED VEHICLES
VEHICLE BREAK-IN
PROCESS
Page 16 of 497
1-6
Your vehicle at a glance
ENGINE COMPARTMENT
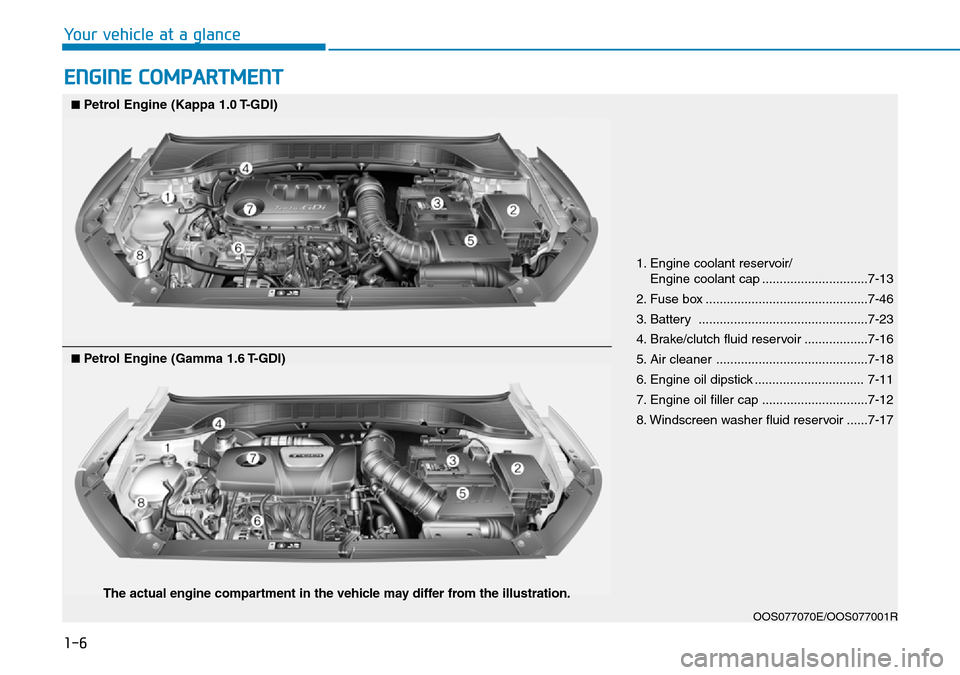
1. Engine coolant reservoir/Engine coolant cap ..............................7-13
2. Fuse box ..............................................7-46
3. Battery ................................................7-23
4. Brake/clutch fluid reservoir ..................7-16
5. Air cleaner ...........................................7-18
6. Engine oil dipstick ............................... 7-11
7. Engine oil filler cap ..............................7-12
8. Windscreen washer fluid reservoir ......7-17
OOS077070E/OOS077001R
■Petrol Engine (Kappa 1.0 T-GDI)
■Petrol Engine (Gamma 1.6 T-GDI)
The actual engine compartment in the vehicle may differ from the illustration.
Page 29 of 497
2-13
Safety system of your vehicle
2
Armrest (if equipped)
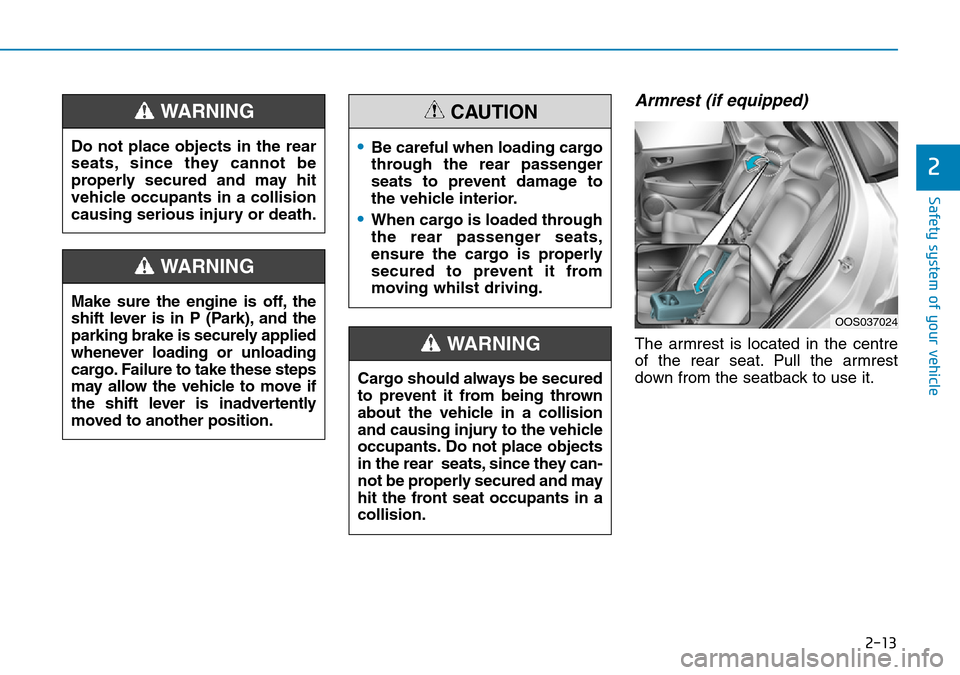
The armrest is located in the centre
of the rear seat. Pull the armrest
down from the seatback to use it.
Do not place objects in the rear
seats, since they cannot be
properly secured and may hit
vehicle occupants in a collision
causing serious injury or death.
WARNING
Make sure the engine is off, the
shift lever is in P (Park), and the
parking brake is securely applied
whenever loading or unloading
cargo. Failure to take these steps
may allow the vehicle to move if
the shift lever is inadvertently
moved to another position.
WARNING
OOS037024
Cargo should always be secured
to prevent it from being thrown
about the vehicle in a collision
and causing injury to the vehicle
occupants. Do not place objects
in the rear seats, since they can-
not be properly secured and may
hit the front seat occupants in a
collision.
WARNING
•Be careful when loading cargo
through the rear passenger
seats to prevent damage to
the vehicle interior.
•When cargo is loaded through
the rear passenger seats,
ensure the cargo is properly
secured to prevent it from
moving whilst driving.
CAUTION
Page 76 of 497
2-60
Safety system of your vehicle
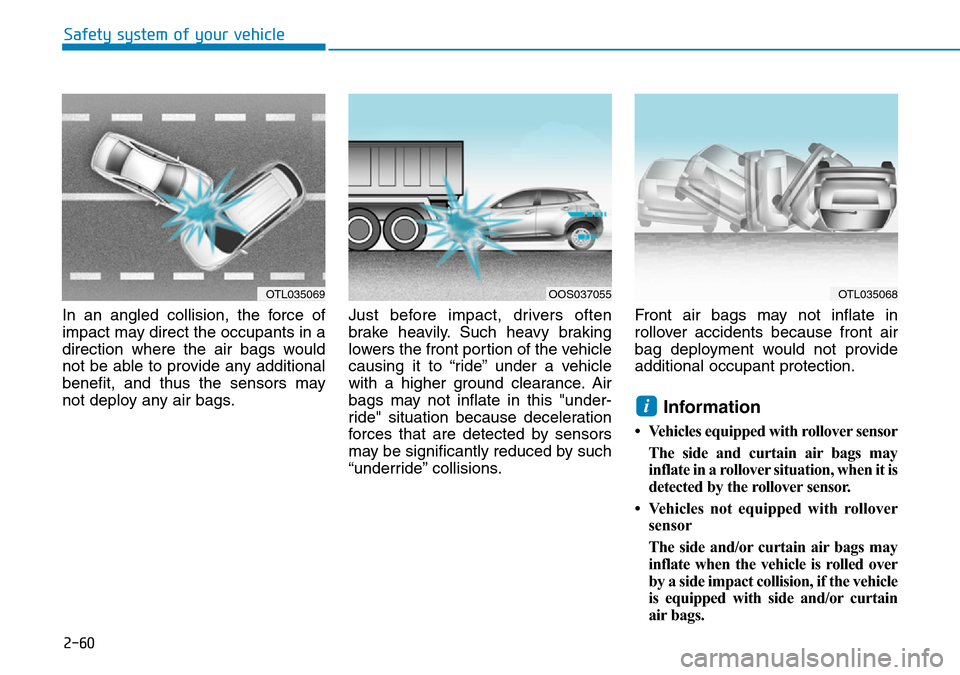
In an angled collision, the force of
impact may direct the occupants in a
direction where the air bags would
not be able to provide any additional
benefit, and thus the sensors may
not deploy any air bags. Just before impact, drivers often
brake heavily. Such heavy braking
lowers the front portion of the vehicle
causing it to “ride” under a vehicle
with a higher ground clearance. Air
bags may not inflate in this "under-
ride" situation because deceleration
forces that are detected by sensors
may be significantly reduced by such
“underride” collisions.Front air bags may not inflate in
rollover accidents because front air
bag deployment would not provide
additional occupant protection.
Information
• Vehicles equipped with rollover sensor
The side and curtain air bags may
inflate in a rollover situation, when it is
detected by the rollover sensor.
• Vehicles not equipped with rollover sensor
The side and/or curtain air bags may
inflate when the vehicle is rolled over
by a side impact collision, if the vehicle
is equipped with side and/or curtain
air bags.
i
OTL035069OOS037055OTL035068
Page 92 of 497
3-14
Convenient features of your vehicle
Deadlocks (if equipped)
Some vehicles are equipped with a
deadlock system. Deadlocks prevent
opening of a door from either inside
or outside the vehicle once the dead-
locks have been activated providing
an additional measure of vehicle
security.
To lock the vehicle using the dead-
lock function, the doors must be
locked by using the remote key or
smart key. To unlock the vehicle, the
transmitter or smart key must be
used again.Do not lock the doors with the
remote key or the smart key with
anybody left in the vehicle. The
passenger in the vehicle cannot
unlock the doors with the door
lock button. For example, if the
door is locked with the remote
key, the passenger in the vehicle
cannot unlock the door without
the transmitter.
WARNING
Leaving your vehicle unlocked
increases the potential risk to
you or others from someone
hiding in your vehicle.
To secure your vehicle, whilst
depressing the brake, move the
shift lever to the P (Park, posi-
tion (for dual clutch transmis-
sion) or first g ear or R (Reverse,
for manual transaxle), engage
the parking brake, and place the
ignition switch in the LOCK/OFF
position, close all windows,
lock all doors, and always take
the key with you.
WARNING
Opening a door when something
is approaching may cause dam-
age or injury. Be careful when
opening doors and watch for
vehicles, motorcycles, bicycles
or pedestrians approaching the
vehicle in the path of the door.
WARNING
If you stay in the vehicle for a
long time whilst the weather is
very hot or cold, there are risks
of injuries or danger to life. Do
not lock the vehicle from the out-
side when someone is in the
vehicle.
WARNING
Page 109 of 497
3-31
Convenient features of your vehicle
3
EXTERIOR FEATURES
Bonnet
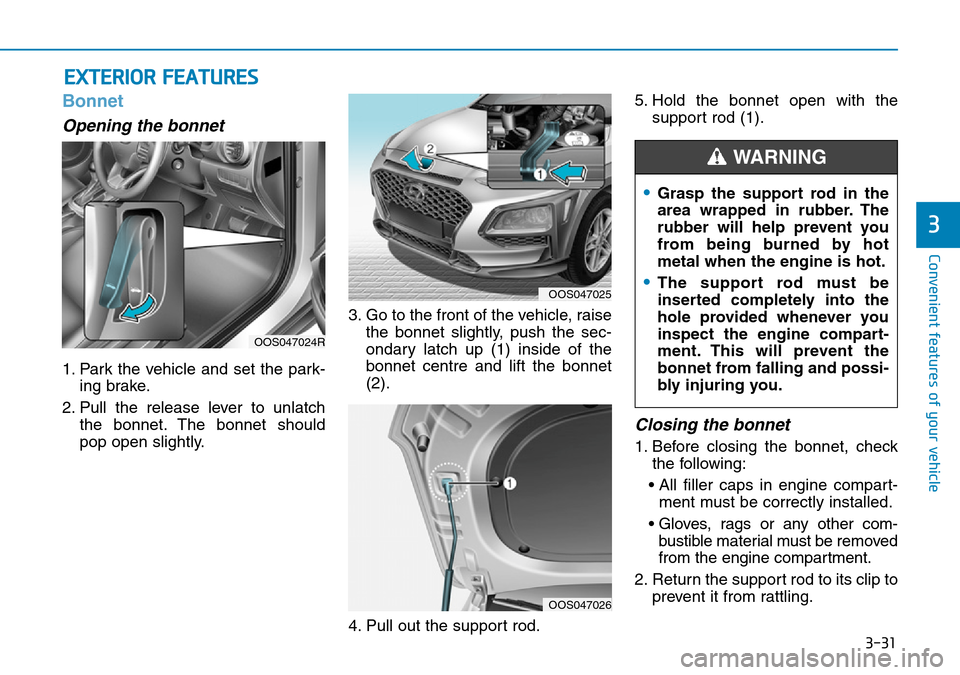
Opening the bonnet
1. Park the vehicle and set the park-ing brake.
2. Pull the release lever to unlatch the bonnet. The bonnet should
pop open slightly. 3. Go to the front of the vehicle, raise
the bonnet slightly, push the sec-
ondary latch up (1) inside of the
bonnet centre and lift the bonnet
(2).
4. Pull out the support rod. 5. Hold the bonnet open with the
support rod (1).
Closing the bonnet
1. Before closing the bonnet, checkthe following:
• All filler caps in engine compart- ment must be correctly installed.
• Gloves, rags or any other com- bustible material must be removed
from the engine compartment.
2. Return the support rod to its clip to prevent it from rattling.
OOS047024R
OOS047025
•Grasp the support rod in the
area wrapped in rubber. The
rubber will help prevent you
from being burned by hot
metal when the engine is hot.
•The support rod must be
inserted completely into the
hole provided whenever you
inspect the engine compart-
ment. This will prevent the
bonnet from falling and possi-
bly injuring you.
WARNING
OOS047026
Page 110 of 497
3-32
Convenient features of your vehicle
3. Lower the bonnet halfway (lifted approximately 30cm from the
closed position) and push down to
securely lock in place. Then double
check to be sure the bonnet is
secure.
If the bonnet can be raised slightly, it
is not securely locked. Open it again
and close it with more force.
Tailgate
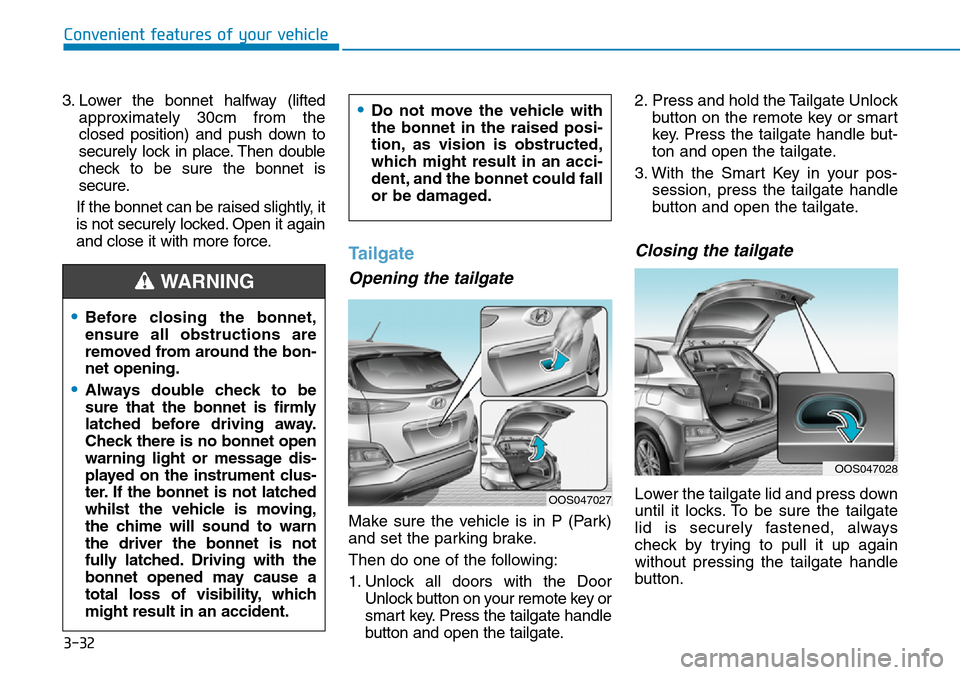
Opening the tailgate
Make sure the vehicle is in P (Park)
and set the parking brake.
Then do one of the following:
1. Unlock all doors with the Door Unlock button on your remote key or
smart key. Press the tailgate handle
button and open the tailgate. 2. Press and hold the Tailgate Unlock
button on the remote key or smart
key. Press the tailgate handle but-
ton and open the tailgate.
3. With the Smart Key in your pos- session, press the tailgate handle
button and open the tailgate.
Closing the tailgate
Lower the tailgate lid and press down
until it locks. To be sure the tailgate
lid is securely fastened, always
check by trying to pull it up again
without pressing the tailgate handle
button.
•Before closing the bonnet,
ensure all obstructions are
removed from around the bon-
net opening.
•Always double check to be
sure that the bonnet is firmly
latched before driving away.
Check there is no bonnet open
warning light or message dis-
played on the instrument clus-
ter. If the bonnet is not latched
whilst the vehicle is moving,
the chime will sound to warn
the driver the bonnet is not
fully latched. Driving with the
bonnet opened may cause a
total loss of visibility, which
might result in an accident.
•Do not move the vehicle with
the bonnet in the raised posi-
tion, as vision is obstructed,
which might result in an acci-
dent, and the bonnet could fall
or be damaged.
WARNING
OOS047027
OOS047028
Page 114 of 497
3-36
Convenient features of your vehicle
•Use only approved portable
plastic fuel containers
designed to carry and store
petrol.
•Do not use matches or a
lighter and do not smoke or
leave a lit cigarette in your
vehicle whilst at a gas station,
especially during refuelling.
•Do not over-fill or top-off your
vehicle tank, which can cause
petrol spillage.
•If a fire breaks out during refu-
elling, leave the vicinity of the
vehicle, and immediately con-
tact the manager of the gas
station and then contact the
local fire department. Follow
any safety instructions they
provide.
•When refuelling, always move
the shift lever to the P (Park,
for dual clutch transmission)
or first gear or R (Reverse, for
manual transmission) posi-
tion, set the parking brake, and
place the ignition switch to the
LOCK/OFF position. Sparks
produced by electrical compo-
nents related to the engine can
ignite fuel
vapourscausing a
fire.
•When using an approved
portable fuel container, be
sure to place the container on
the ground prior to refuelling.
Static electricity discharge
from the container can ignite
fuel vapours causing a fire.
Once refuelling has begun,
contact between your bare
hand and the vehicle should
be maintained until the filling
is complete.
•Do not use mobile phones
whilst refuelling. Electric cur-
rent and/or electronic interfer-
ence from mobile phones can
potentially ignite fuel vapours
and cause a fire.
•Do not get back into a vehicle
once you have begun refu-
elling. You can generate a
build-up of static electricity by
touching, rubbing or sliding
against any item or fabric
capable of producing static
electricity.
Static electricity discharge
can ignite fuel vapours caus-
ing a fire. If you must re-enter
the vehicle, you should once
again eliminate potentially
dangerous static electricity
discharge by touching a metal
part of the vehicle, away from
the fuel filler neck, nozzle or
other petrol source, with your
bare hand.
Page 123 of 497
3-45
Convenient features of your vehicle
3
Warning and indicator lightsInformation
Make sure that all warning lights are
OFF after starting the engine. If any
light is still ON, this indicates a situa-
tion that needs attention.
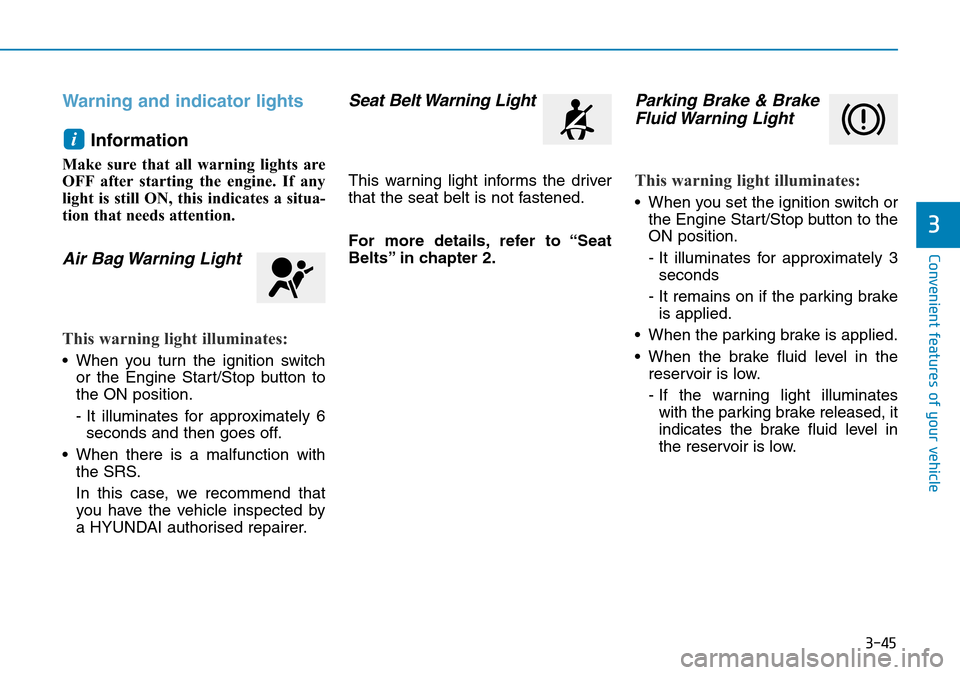
Air Bag Warning Light
This warning light illuminates:
• When you turn the ignition switchor the Engine Start/Stop button to
the ON position.
- It illuminates for approximately 6seconds and then goes off.
• When there is a malfunction with the SRS.
In this case, we recommend that
you have the vehicle inspected by
a HYUNDAI authorised repairer.
Seat Belt Warning Light
This warning light informs the driver
that the seat belt is not fastened.
For more details, refer to “Seat
Belts” in chapter 2.
Parking Brake & BrakeFluid Warning Light
This warning light illuminates:
• When you set the ignition switch or
the Engine Start/Stop button to the
ON position.
- It illuminates for approximately 3seconds
- It remains on if the parking brake is applied.
• When the parking brake is applied.
• When the brake fluid level in the reservoir is low.
- If the warning light illuminateswith the parking brake released, it
indicates the brake fluid level in
the reservoir is low.
i
Page 124 of 497
3-46
Convenient features of your vehicle
If the brake fluid level in the reser-
voir is low:
1. Drive carefully to the nearest safelocation and stop your vehicle.
2. With the engine stopped, check the brake fluid level immediately and
add fluid as required (For more
details, refer to “Brake Fluid” in
chapter 7). After adding brake
fluid, check all brake components
for fluid leaks. If a brake fluid leak is
found, or if the warning light
remains on, or if the brakes do not
operate properly, do not drive the
vehicle. We recommend that you
have the vehicle inspected by a
HYUNDAI authorised repairer.
Dual-diagonal braking system
Your vehicle is equipped with dual-
diagonal braking systems. This
means you still have braking on two
wheels even if one of the dual sys-
tems should fail.
With only one of the dual systems
working, more than normal pedal
travel and greater pedal pressure are
required to stop the vehicle. Also, the vehicle will not stop in as
short a distance with only a portion
of the brake system working.
If the brakes fail whilst you are driv-
ing, shift to a lower gear for addition-
al engine braking and stop the vehi-
cle as soon as it is safe to do so.
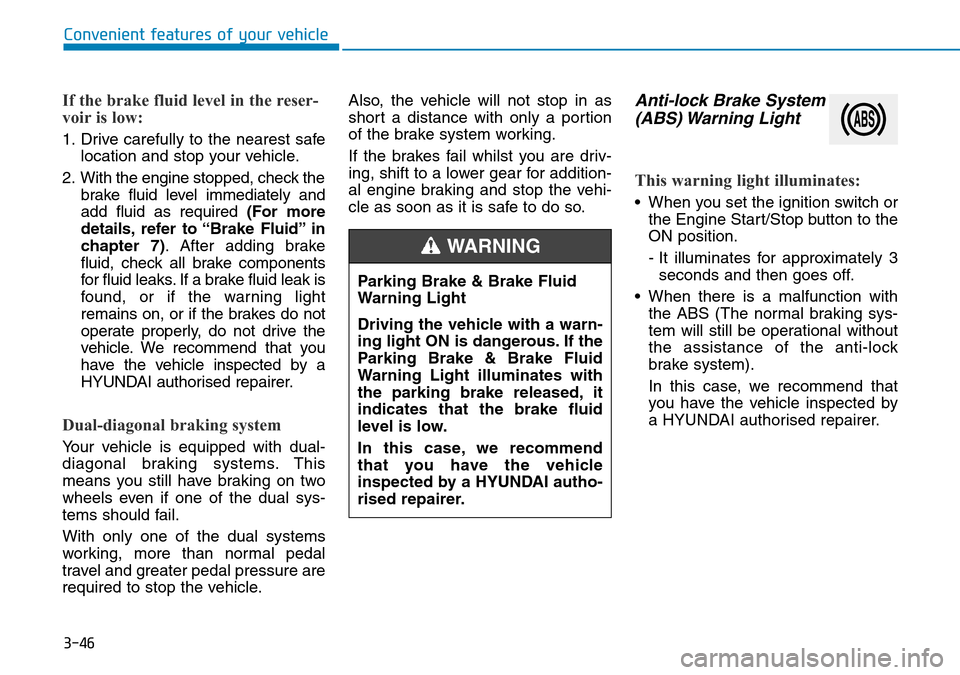
Anti-lock Brake System
(ABS) Warning Light
This warning light illuminates:
• When you set the ignition switch or
the Engine Start/Stop button to the
ON position.
- It illuminates for approximately 3seconds and then goes off.
• When there is a malfunction with the ABS (The normal braking sys-
tem will still be operational without
the assistance of the anti-lock
brake system).
In this case, we recommend that
you have the vehicle inspected by
a HYUNDAI authorised repairer.
Parking Brake & Brake Fluid
Warning Light
Driving the vehicle with a warn-
ing light ON is dangerous. If the
Parking Brake & Brake Fluid
Warning Light illuminates with
the parking brake released, it
indicates that the brake fluid
level is low.
In this case, we recommend
that you have the vehicle
inspected by a HYUNDAI autho-
rised repairer.
WARNING