ECO mode Hyundai Kona EV 2019 Owner's Manual
[x] Cancel search | Manufacturer: HYUNDAI, Model Year: 2019, Model line: Kona EV, Model: Hyundai Kona EV 2019Pages: 540, PDF Size: 21.84 MB
Page 2 of 540
F2
Your HYUNDAI should not be modified in any way.
Such modifications may adversely affect the per-
formance, safety or durability of your HYUNDAI
and may, in addition, violate conditions of the limit-
ed warranties covering the vehicle. Certain modifi-
cations may also be in violation of regulations estab-
lished by the U.S. Department of Transportation and
other federal or state agencies.
Your vehicle is equipped with electronic fuel injec-
tion and other electronic components. It is possible
for an improperly installed/adjusted two-way radio
or cellular telephone to adversely affect electronic
systems. For this reason, we recommend that you
carefully follow the radio manufacturer’s instructions
or consult your HYUNDAI dealer for precautionary
measures or special instructions if you choose to
install one of these devices.
CAUTION: MODIFICATIONS TO YOUR HYUNDAI
TWO-WAY RADIO OR CELLULARTELEPHONE INSTALLATION
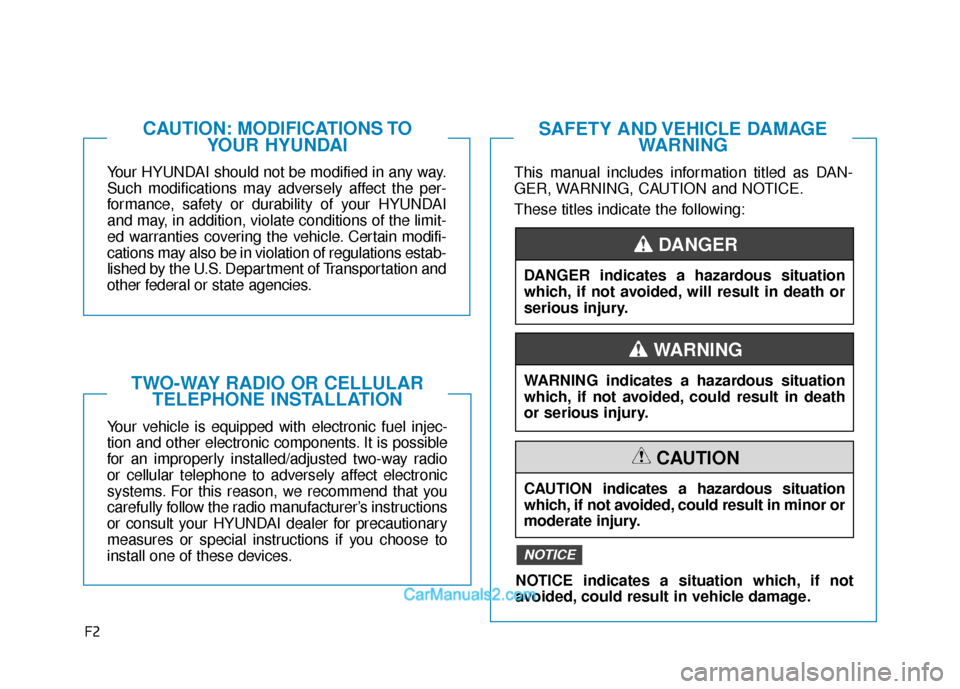
This manual includes information titled as DAN-
GER, WARNING, CAUTION and NOTICE.
These titles indicate the following:
SAFETY AND VEHICLE DAMAGE WARNING
DANGER indicates a hazardous situation
which, if not avoided, will result in death or
serious injury.
DANGER
WARNING indicates a hazardous situation
which, if not avoided, could result in death
or serious injury.
CAUTION indicates a hazardous situation
which, if not avoided, could result in minor or
moderate injury.
CAUTION
NOTICE indicates a situation which, if not
avoided, could result in vehicle damage.
NOTICE
WARNING
Page 36 of 540
2-21
Safety system of your vehicle
2
To prevent damage to the seat
heaters and seats:
Never use a solvent such aspaint thinner, benzene, alcohol
or gasoline to clean the seats.
Do not place heavy or sharp objects on seats equipped with
seat heaters.
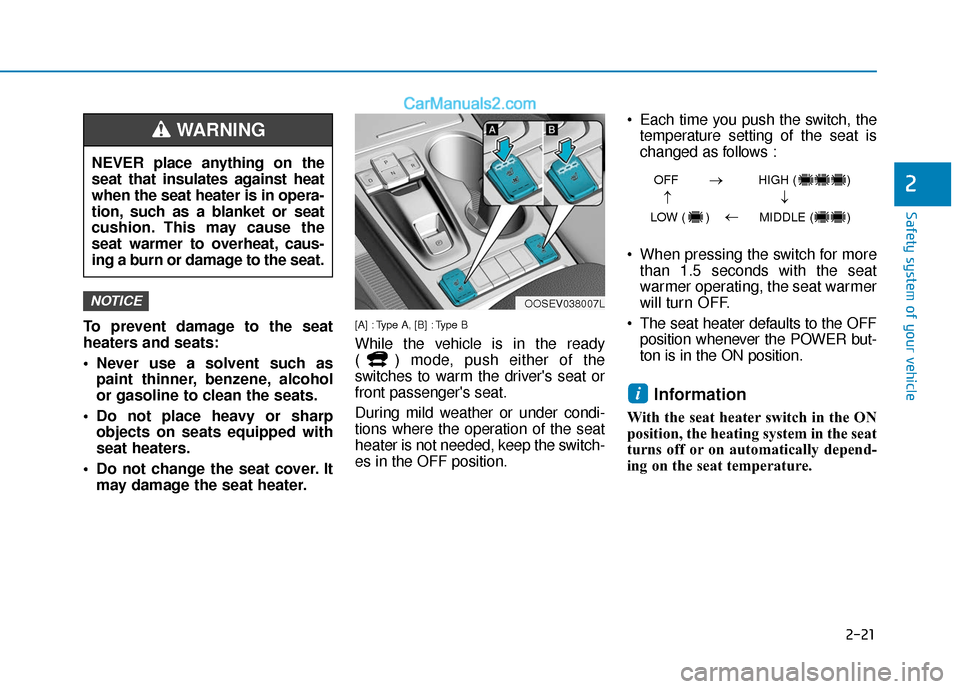
Do not change the seat cover. It may damage the seat heater.[A] : Type A, [B] : Type B
While the vehicle is in the ready
( ) mode, push either of the
switches to warm the driver's seat or
front passenger's seat.
During mild weather or under condi-
tions where the operation of the seat
heater is not needed, keep the switch-
es in the OFF position. Each time you push the switch, the
temperature setting of the seat is
changed as follows :
When pressing the switch for more than 1.5 seconds with the seat
warmer operating, the seat warmer
will turn OFF.
The seat heater defaults to the OFF position whenever the POWER but-
ton is in the ON position.
Information
With the seat heater switch in the ON
position, the heating system in the seat
turns off or on automatically depend-
ing on the seat temperature.
i
NOTICE
NEVER place anything on the
seat that insulates against heat
when the seat heater is in opera-
tion, such as a blanket or seat
cushion. This may cause the
seat warmer to overheat, caus-
ing a burn or damage to the seat.
WARNING
OOSEV038007L
OFF HIGH ( )
LOW ( ) MIDDLE ( )
→→
→
→
Page 37 of 540
2-22
Safety system of your vehicle
Ventilated front seats(if equipped)
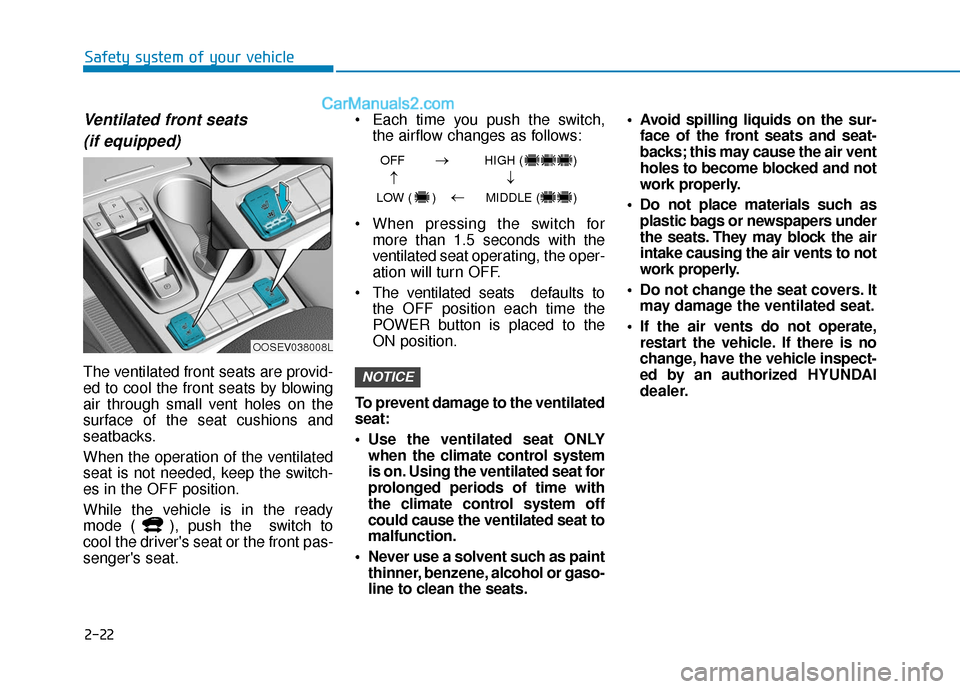
The ventilated front seats are provid-
ed to cool the front seats by blowing
air through small vent holes on the
surface of the seat cushions and
seatbacks.
When the operation of the ventilated
seat is not needed, keep the switch-
es in the OFF position.
While the vehicle is in the ready
mode ( ), push the switch to
cool the driver's seat or the front pas-
senger's seat. Each time you push the switch,
the airflow changes as follows:
When pressing the switch for more than 1.5 seconds with the
ventilated seat operating, the oper-
ation will turn OFF.
The v entilated seats def aults to
the OFF position each time the
POWER button is placed to the
ON position.
To prevent damage to the ventilated
seat:
Use the ventilated seat ONLY when the climate control system
is on. Using the ventilated seat for
prolonged periods of time with
the climate control system off
could cause the ventilated seat to
malfunction.
Never use a solvent such as paint thinner, benzene, alcohol or gaso-
line to clean the seats. Avoid spilling liquids on the sur-
face of the front seats and seat-
backs; this may cause the air vent
holes to become blocked and not
work properly.
Do not place materials such as plastic bags or newspapers under
the seats. They may block the air
intake causing the air vents to not
work properly.
Do not change the seat covers. It may damage the ventilated seat.
If the air vents do not operate, restart the vehicle. If there is no
change, have the vehicle inspect-
ed by an authorized HYUNDAI
dealer.NOTICE
OOSEV038008L
OFF HIGH ( )
LOW ( ) MIDDLE ( )
→→
→
→
Page 61 of 540
2-46
Safety system of your vehicle
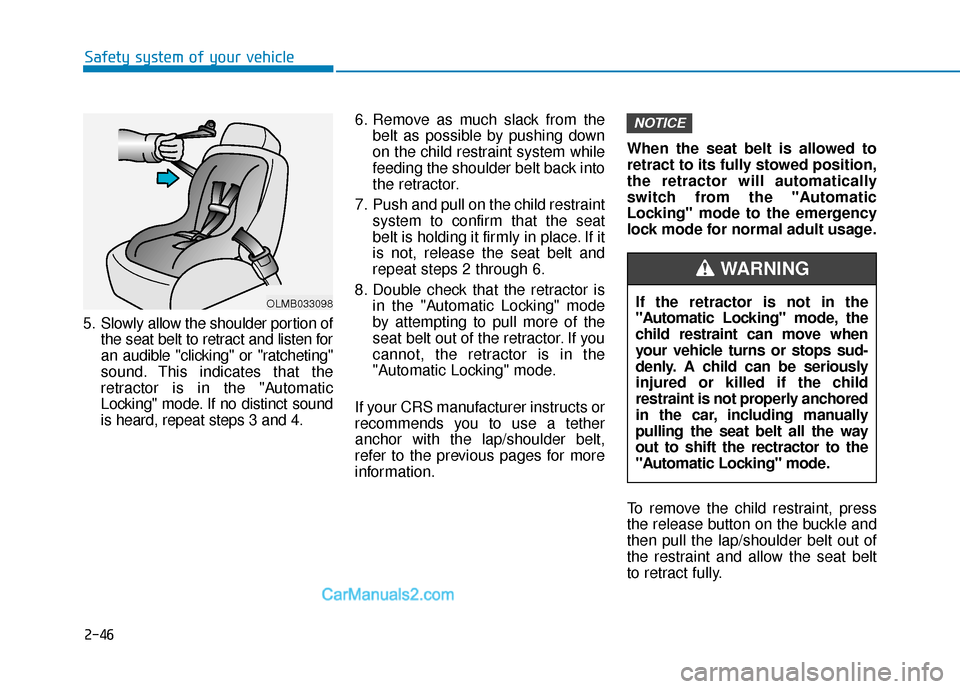
5. Slowly allow the shoulder portion of the seat belt to retract and listen for
an audible "clicking" or "ratcheting"
sound. This indicates that the
retractor is in the "Automatic
Locking" mode. If no distinct sound
is heard, repeat steps 3 and 4. 6. Remove as much slack from the
belt as possible by pushing down
on the child restraint system while
feeding the shoulder belt back into
the retractor.
7. Push and pull on the child restraint system to confirm that the seat
belt is holding it firmly in place. If it
is not, release the seat belt and
repeat steps 2 through 6.
8. Double check that the retractor is in the "Automatic Locking" mode
by attempting to pull more of the
seat belt out of the retractor. If you
cannot, the retractor is in the
"Automatic Locking" mode.
If your CRS manufacturer instructs or
recommends you to use a tether
anchor with the lap/shoulder belt,
refer to the previous pages for more
information. When the seat belt is allowed to
retract to its fully stowed position,
the retractor will automatically
switch from the "Automatic
Locking" mode to the emergency
lock mode for normal adult usage.
To remove the child restraint, press
the release button on the buckle and
then pull the lap/shoulder belt out of
the restraint and allow the seat belt
to retract fully.
NOTICE
If the retractor is not in the
"Automatic Locking" mode, the
child restraint can move when
your vehicle turns or stops sud-
denly. A child can be seriously
injured or killed if the child
restraint is not properly anchored
in the car, including manually
pulling the seat belt all the way
out to shift the rectractor to the
"Automatic Locking" mode.
WARNING
OLMB033098
Page 64 of 540
2-49
Safety system of your vehicle
2
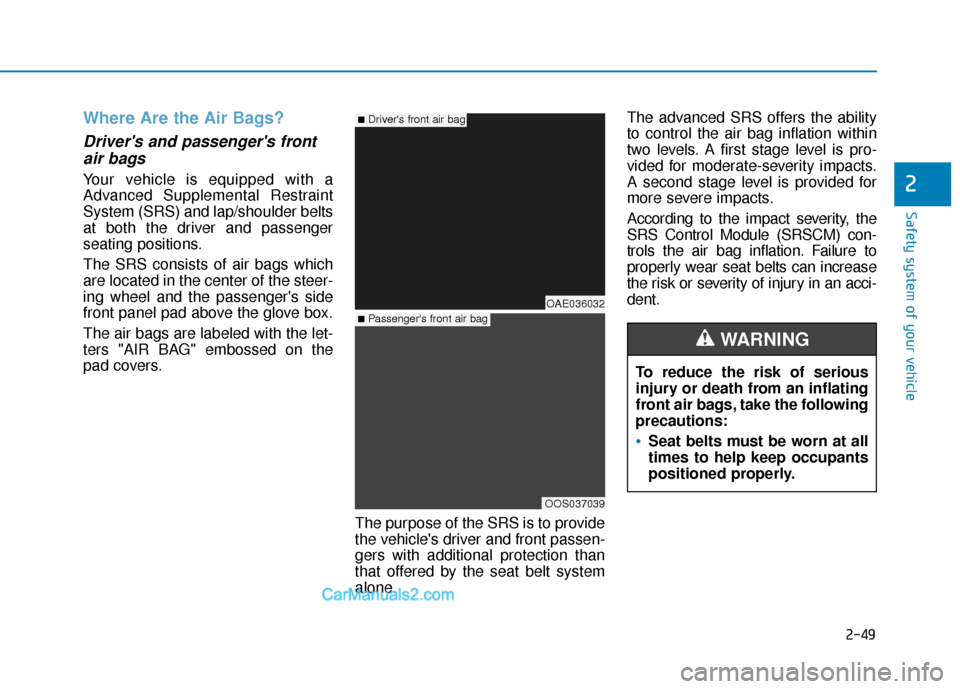
Where Are the Air Bags?
Driver's and passenger's frontair bags
Your vehicle is equipped with a
Advanced Supplemental Restraint
System (SRS) and lap/shoulder belts
at both the driver and passenger
seating positions.
The SRS consists of air bags which
are located in the center of the steer-
ing wheel and the passenger's side
front panel pad above the glove box.
The air bags are labeled with the let-
ters "AIR BAG" embossed on the
pad covers.
The purpose of the SRS is to provide
the vehicle's driver and front passen-
gers with additional protection than
that offered by the seat belt system
alone.The advanced SRS offers the ability
to control the air bag inflation within
two levels. A first stage level is pro-
vided for moderate-severity impacts.
A second stage level is provided for
more severe impacts.
According to the impact severity, the
SRS Control Module (SRSCM) con-
trols the air bag inflation. Failure to
properly wear seat belts can increase
the risk or severity of injury in an acci-
dent.
OAE036032
OOS037039
■Driver's front air bag
■Passenger's front air bag
To reduce the risk of serious
injury or death from an inflating
front air bags, take the following
precautions:
Seat belts must be worn at all
times to help keep occupants
positioned properly.
WARNING
Page 68 of 540
2-53
Safety system of your vehicle
2
9. Side pressure sensors
10. Emergency Fastening DeviceSystem
11. Occupant classification system
The SRSCM (Supplemental Restraint
System Control Module) continually
monitors all SRS components while
the POWER button is in the ON posi-
tion to determine if a crash impact is
severe enough to require air bag
deployment or pre-tensioner seat belt
deployment.SRS warning light
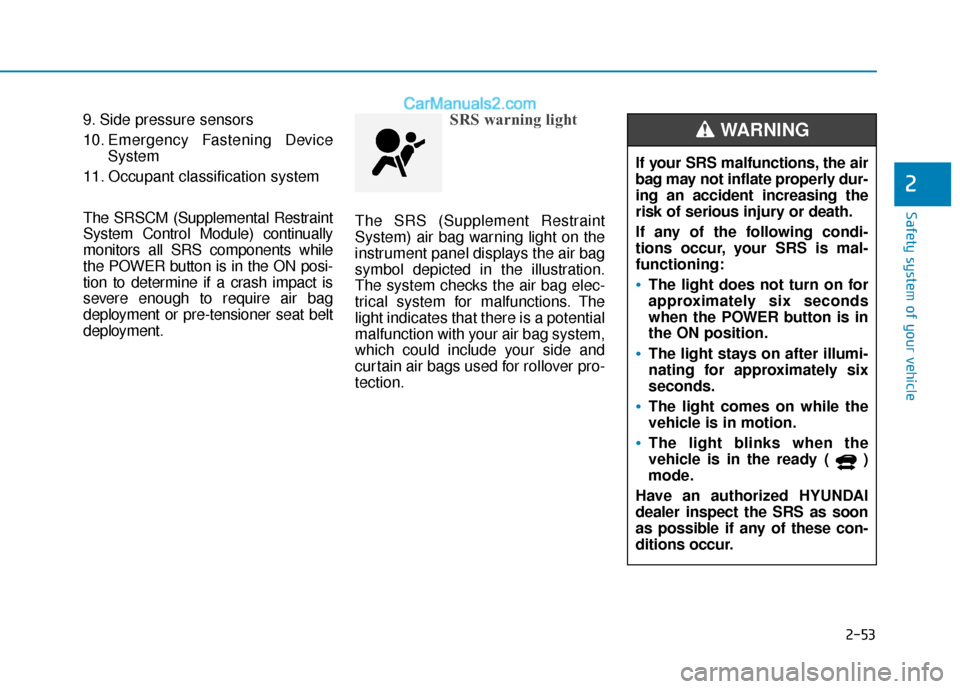
The SRS (Supplement Restraint
System) air bag warning light on the
instrument panel displays the air bag
symbol depicted in the illustration.
The system checks the air bag elec-
trical system for malfunctions. The
light indicates that there is a potential
malfunction with your air bag system,
which could include your side and
curtain air bags used for rollover pro-
tection.
If your SRS malfunctions, the air
bag may not inflate properly dur-
ing an accident increasing the
risk of serious injury or death.
If any of the following condi-
tions occur, your SRS is mal-
functioning:
The light does not turn on for
approximately six seconds
when the POWER button is in
the ON position.
The light stays on after illumi-
nating for approximately six
seconds.
The light comes on while the
vehicle is in motion.
The light blinks when the
vehicle is in the ready ( )
mode.
Have an authorized HYUNDAI
dealer inspect the SRS as soon
as possible if any of these con-
ditions occur.
WARNING
Page 77 of 540
2-62
Safety system of your vehicle
Proper seated position for OCS
If the "PASSENGER AIR BAG OFF"
indicator is on when an adult is seat-
ed in the front passenger seat, place
the POWER button in the OFF posi-
tion and ask the passenger to sit
properly (sitting upright with the seat
back in an upright position, centered
on the seat cushion with their seat
belt on, legs comfortably extended
and their feet on the floor). Restart
the vehicle and have the person
remain in that position. This will allow
the system to detect the person and
to enable the passenger air bag. If
the "PASSENGER AIR BAG OFF"
indicator is still on, ask the passen-
ger to move to the rear seat.The "PASSENGER AIR BAG OFF"
indicator illuminates for approxi-
mately 4 seconds after the POWER
button is in the ON position or after
the vehicle is in the ready ( )
mode. If the front passenger seat is
occupied, the OCS will then classi-
fy the front passenger after several
more seconds.
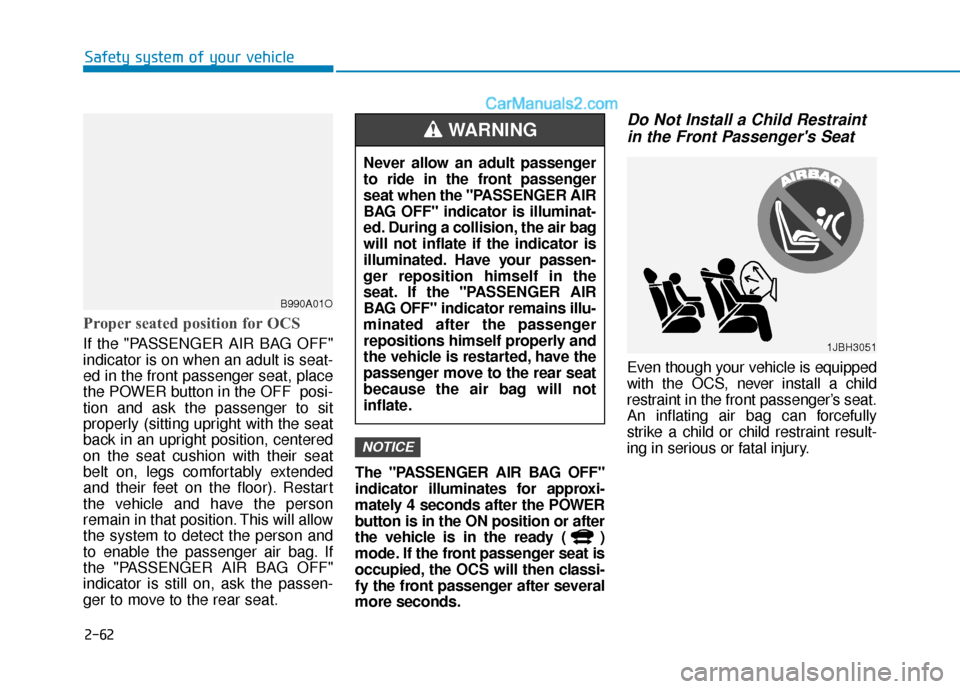
Do Not Install a Child Restraint
in the Front Passenger's Seat
Even though your vehicle is equipped
with the OCS, never install a child
restraint in the front passenger’s seat.
An inflating air bag can forcefully
strike a child or child restraint result-
ing in serious or fatal injury.
NOTICE
B990A01O
Never allow an adult passenger
to ride in the front passenger
seat when the "PASSENGER AIR
BAG OFF" indicator is illuminat-
ed. During a collision, the air bag
will not inflate if the indicator is
illuminated. Have your passen-
ger reposition himself in the
seat. If the "PASSENGER AIR
BAG OFF" indicator remains illu-
minated after the passenger
repositions himself properly and
the vehicle is restarted, have the
passenger move to the rear seat
because the air bag will not
inflate.
WARNING
1JBH3051
Page 89 of 540
3-5
Convenient features of your vehicle
3
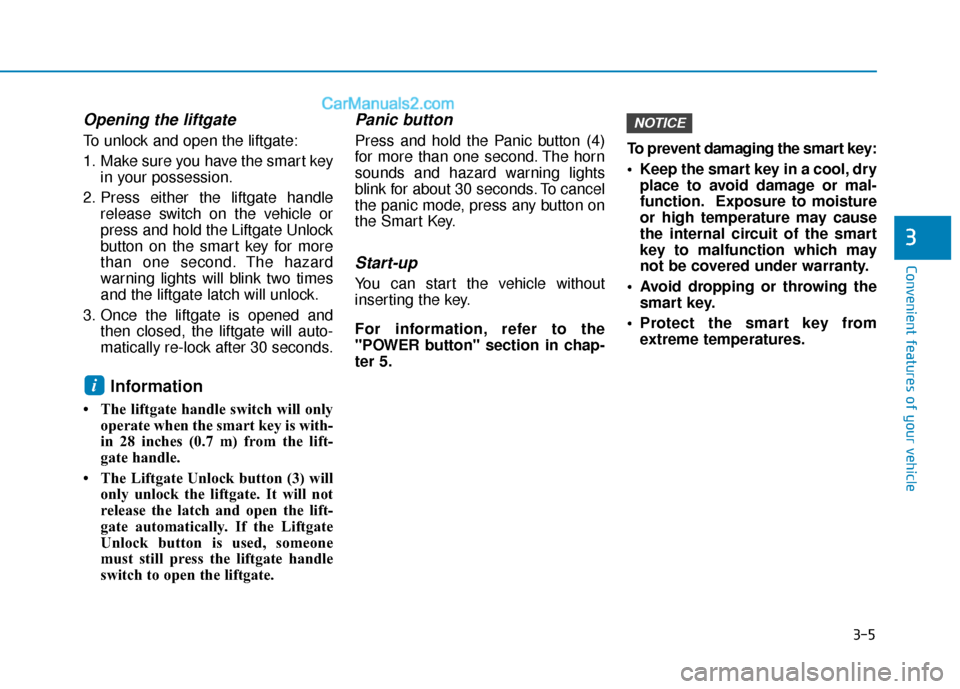
Opening the liftgate
To unlock and open the liftgate:
1. Make sure you have the smart keyin your possession.
2. Press either the liftgate handle release switch on the vehicle or
press and hold the Liftgate Unlock
button on the smart key for more
than one second. The hazard
warning lights will blink two times
and the liftgate latch will unlock.
3. Once the liftgate is opened and then closed, the liftgate will auto-
matically re-lock after 30 seconds.
Information
• The liftgate handle switch will onlyoperate when the smart key is with-
in 28 inches (0.7 m) from the lift-
gate handle.
• The Liftgate Unlock button (3) will only unlock the liftgate. It will not
release the latch and open the lift-
gate automatically. If the Liftgate
Unlock button is used, someone
must still press the liftgate handle
switch to open the liftgate.
Panic button
Press and hold the Panic button (4)
for more than one second. The horn
sounds and hazard warning lights
blink for about 30 seconds. To cancel
the panic mode, press any button on
the Smart Key.
Start-up
You can start the vehicle without
inserting the key.
For information, refer to the
"POWER button" section in chap-
ter 5. To prevent damaging the smart key:
• Keep the smart key in a cool, dry
place to avoid damage or mal-
function. Exposure to moisture
or high temperature may cause
the internal circuit of the smart
key to malfunction which may
not be covered under warranty.
Avoid dropping or throwing the smart key.
Protect the smart key from extreme temperatures.
NOTICE
i
Page 107 of 540
3-23
Convenient features of your vehicle
3
If you need to recalibrate the com-
pass:
1.Press and hold the Control Buttonfor more than 6 seconds. When the
compass memory is cleared, a "C"
will appear in the display.
2.Drive the vehicle in 2 complete cir- cles at less than 5 mph (8 km/h).Integrated HomeLink®Wireless
Control System
The HomeLink®Wireless Control
System can replace up to three
hand-held radio-frequency (RF)
transmitters with a single built-in
device. This innovative feature will
learn the radio frequency codes of
most current transmitters to operate
devices such as gate operators,
garage door openers, entry door
locks, security systems, even home
lighting. Both standard and rolling
code-equipped transmitters can be
programmed by following the out-
lined procedures.
Additional HomeLink
®information
can be found at: www.homelink.com,
www.youtube.com/HomeLinkGentex
or by calling 1-800-355-3515.
Retain the original transmitter of the
RF device you are programming for
use in other vehicles as well as for
future HomeLink
®programming. It is
also suggested that upon the sale of
the vehicle, the programmed
HomeLink
®buttons be erased for
security purposes. Before programming HomeLink
®
to a garage door opener or gate
operator, make sure people and
objects are out of the way of the
device to prevent potential harm
or damage. Do not use the
HomeLink
®with any garage door
opener that lacks the safety stop
and reverse features required by
U.S. federal safety standards
(this includes any garage door
opener model manufactured
before April 1, 1982). A garage
door that cannot detect an object
- signaling the door to stop and
reverse - does not meet current
U.S. federal safety standards.
Using a garage door opener
without these features increases
the risk of serious injury or
death.
WARNING
Page 109 of 540
3-25
Convenient features of your vehicle
3
• The indicator (4) is turned ON inOrange and flashes for about 60sec-
onds, during the programing mode
and if a programing is not succeed-
ed within the 60 seconds, the pro-
graming mode will be abort.
HomeLink
®should now activate your
rolling code equipped device.
Gate operator & Canadian program- ming
During programming, your handheld
transmitter may automatically stop
transmitting. Continue to press the
Integrated HomeLink
®Wireless
Control System button while you
press and re-press ("cycle") your
handheld transmitter every two sec-
onds until the frequency signal has
been learned. The indicator light will
flash slowly and then rapidly after
several seconds upon successful
training.
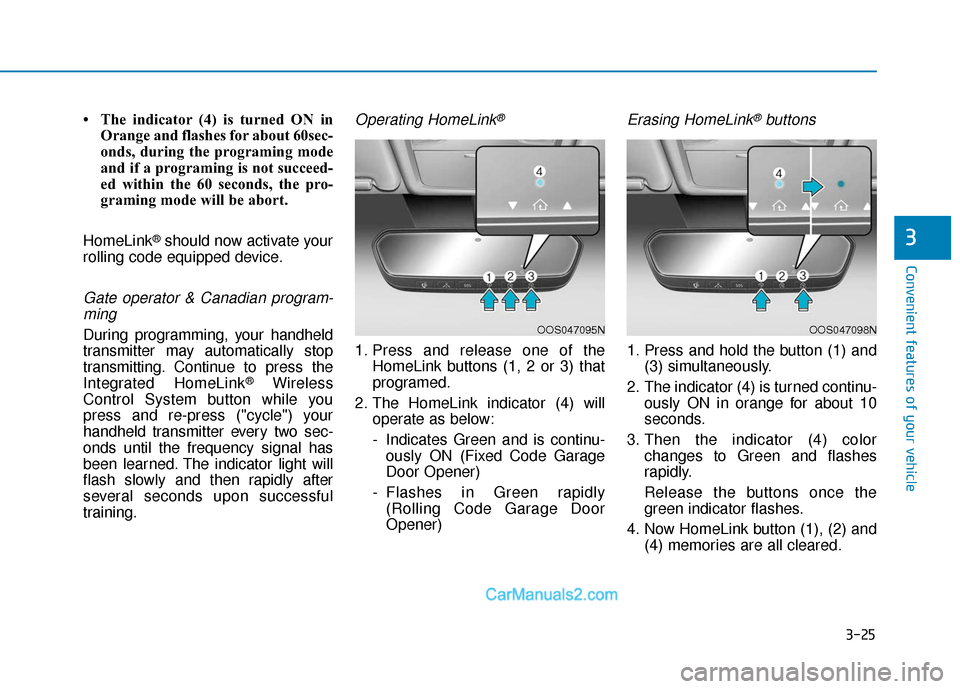
Operating HomeLink®
1. Press and release one of the HomeLink buttons (1, 2 or 3) that
programed.
2. The HomeLink indicator (4) will operate as below:
- Indicates Green and is continu-ously ON (Fixed Code Garage
Door Opener)
- Flashes in Green rapidly (Rolling Code Garage Door
Opener)
Erasing HomeLink®buttons
1. Press and hold the button (1) and (3) simultaneously.
2. The indicator (4) is turned continu- ously ON in orange for about 10
seconds.
3. Then the indicator (4) color changes to Green and flashes
rapidly.
Release the buttons once the green indicator flashes.
4. Now HomeLink button (1), (2) and (4) memories are all cleared.
OOS047095NOOS047098N