tow Hyundai Matrix 2003 Owner's Guide
[x] Cancel search | Manufacturer: HYUNDAI, Model Year: 2003, Model line: Matrix, Model: Hyundai Matrix 2003Pages: 312, PDF Size: 4.1 MB
Page 186 of 312
1- 5
CONTROLS AND EQUIPMENT
SB040G1-F
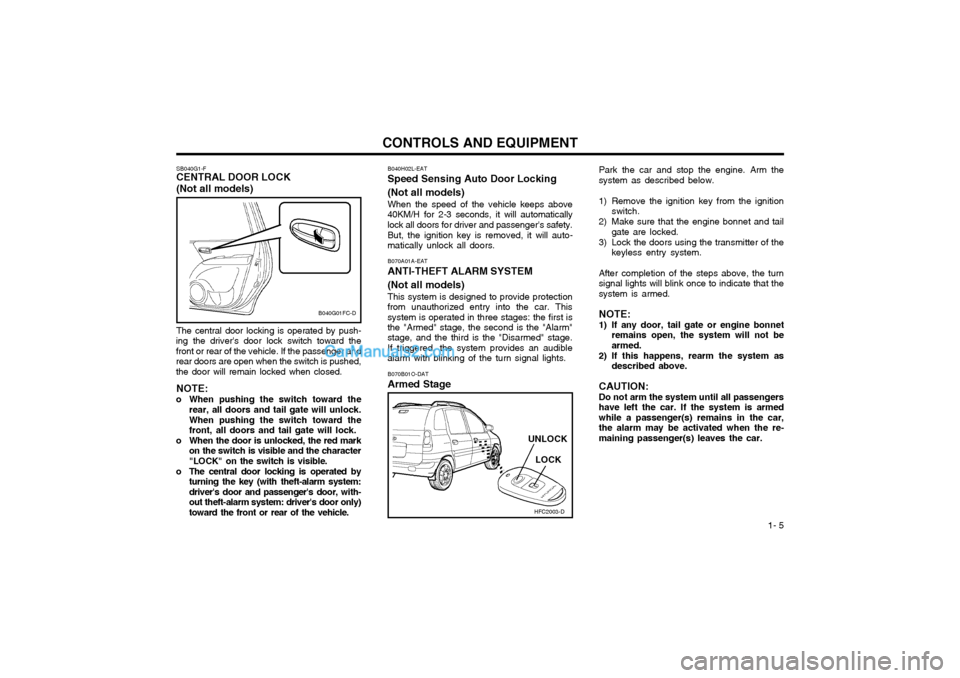
CENTRAL DOOR LOCK (Not all models) The central door locking is operated by push-
ing the driver's door lock switch toward the front or rear of the vehicle. If the passenger andrear doors are open when the switch is pushed,the door will remain locked when closed.
NOTE:
o When pushing the switch toward the rear, all doors and tail gate will unlock. When pushing the switch toward the front, all doors and tail gate will lock.
o When the door is unlocked, the red mark on the switch is visible and the character"LOCK" on the switch is visible.
o The central door locking is operated by turning the key (with theft-alarm system:driver's door and passenger's door, with-out theft-alarm system: driver's door only)toward the front or rear of the vehicle. B070A01A-EAT
ANTI-THEFT ALARM SYSTEM (Not all models)
This system is designed to provide protection
from unauthorized entry into the car. This system is operated in three stages: the first isthe "Armed" stage, the second is the "Alarm" stage, and the third is the "Disarmed" stage. If triggered, the system provides an audiblealarm with blinking of the turn signal lights.
HFC2003-D
LOCK
UNLOCK
B040G01FC-D
B070B01O-DAT
Armed Stage Park the car and stop the engine. Arm the system as described below.
1) Remove the ignition key from the ignition
switch.
2) Make sure that the engine bonnet and tail gate are locked.
3) Lock the doors using the transmitter of the keyless entry system.
After completion of the steps above, the turn signal lights will blink once to indicate that thesystem is armed. NOTE:
1) If any door, tail gate or engine bonnet remains open, the system will not be armed.
2) If this happens, rearm the system as described above.
CAUTION: Do not arm the system until all passengers have left the car. If the system is armedwhile a passenger(s) remains in the car,the alarm may be activated when the re-maining passenger(s) leaves the car.
B040H02L-EAT
Speed Sensing Auto Door Locking (Not all models)
When the speed of the vehicle keeps above
40KM/H for 2-3 seconds, it will automatically lock all doors for driver and passenger's safety.
But, the ignition key is removed, it will auto-
matically unlock all doors.
Page 191 of 312
CONTROLS AND EQUIPMENT
1- 10
HFC2060
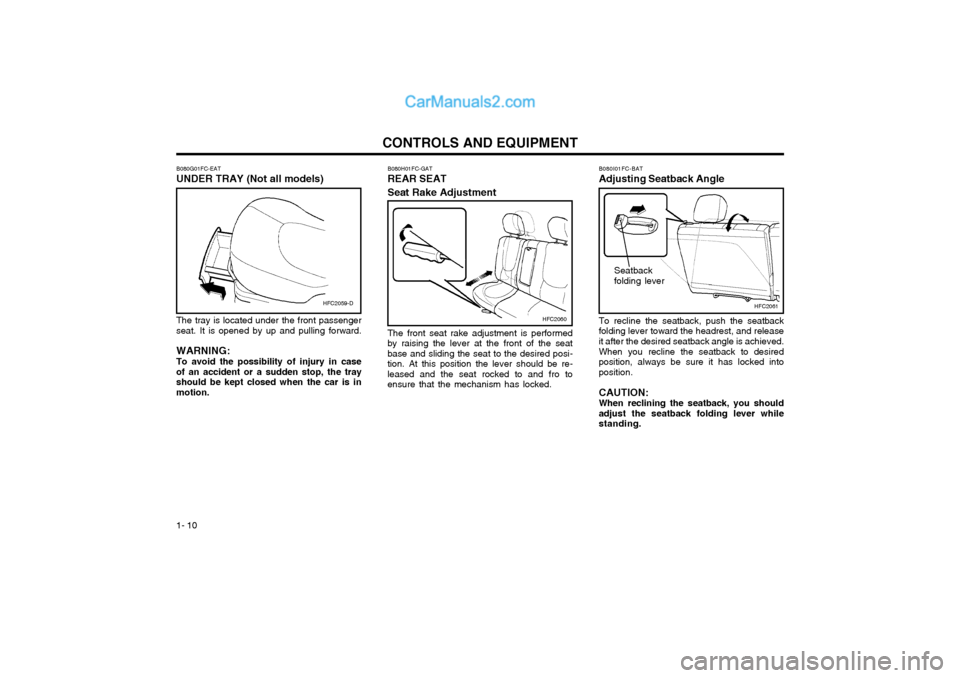
The front seat rake adjustment is performed
by raising the lever at the front of the seat base and sliding the seat to the desired posi-tion. At this position the lever should be re-leased and the seat rocked to and fro toensure that the mechanism has locked. B080H01FC-GAT
REAR SEAT Seat Rake Adjustment B080I01FC-BAT Adjusting Seatback Angle
HFC2061
To recline the seatback, push the seatback folding lever toward the headrest, and releaseit after the desired seatback angle is achieved. When you recline the seatback to desired position, always be sure it has locked intoposition. CAUTION: When reclining the seatback, you shouldadjust the seatback folding lever whilestanding.Seatback folding lever
B080G01FC-EAT UNDER TRAY (Not all models) The tray is located under the front passenger seat. It is opened by up and pulling forward. WARNING: To avoid the possibility of injury in case of an accident or a sudden stop, the trayshould be kept closed when the car is inmotion.
HFC2059-D
Page 192 of 312

1- 11
CONTROLS AND EQUIPMENTCAUTION: To prevent damage, ensure that the rear
drinkholder, located in the rear console, is closed before folding the rear seatbackand seat cushion.
4. Pull the seat cushion release lever up-
ward, then fold up the seat cushion.
HFC2075
HFC2076
Seat cushion release lever
Securing strap
B090A01FC
Lock Knob
SB070D2-E
Head Restraint Adjustment
To raise the head restraint, pull it up. To lower
it, push it down while pressing the lock knob. For maximum effectiveness in the event of anaccident, the restraint must be adjusted sothat the restraint is approximately at the levelof the seat occupant's ears. The restraintmust never be so adjusted that it is centredabout the level of the seat occupant's neck.
WARNING:Do not operate the vehicle with the re-
straints removed. The restraints provideprotection against neck injury when in-stalled and correctly adjusted. B090B01FC-GAT
Folding Rear Seatback and Seat Cushion
For greater convenience, the entire seatback
and seat cushion may be folded down and up.
HFC2074
Seatback folding lever
1. Move the rear seat to the rearmost posi- tion.
2. Remove the headrests.
3. To fold down the seatback , push and hold the seatback folding lever toward the head- rest, then push down the seatback.
Page 195 of 312
CONTROLS AND EQUIPMENT
1- 14 of movement whilst the belt is being worn. However, in the event of rapid deceleration orimpact, the belt mechanism will automaticallylock.
The mechanism will also lock if the seat belt
webbing is withdrawn too quickly when thebelt is being fastened or if attempts are madeto withdraw the webbing whilst the vehicle isnot on level ground. Should the seat belt lockunder these conditions, it will be possible torelease the mechanism by allowing a smallamount of webbing to be retracted and thebelt withdrawn again.
SSD1090Q
B200A01S-GAT
Adjusting Your Seat Belt
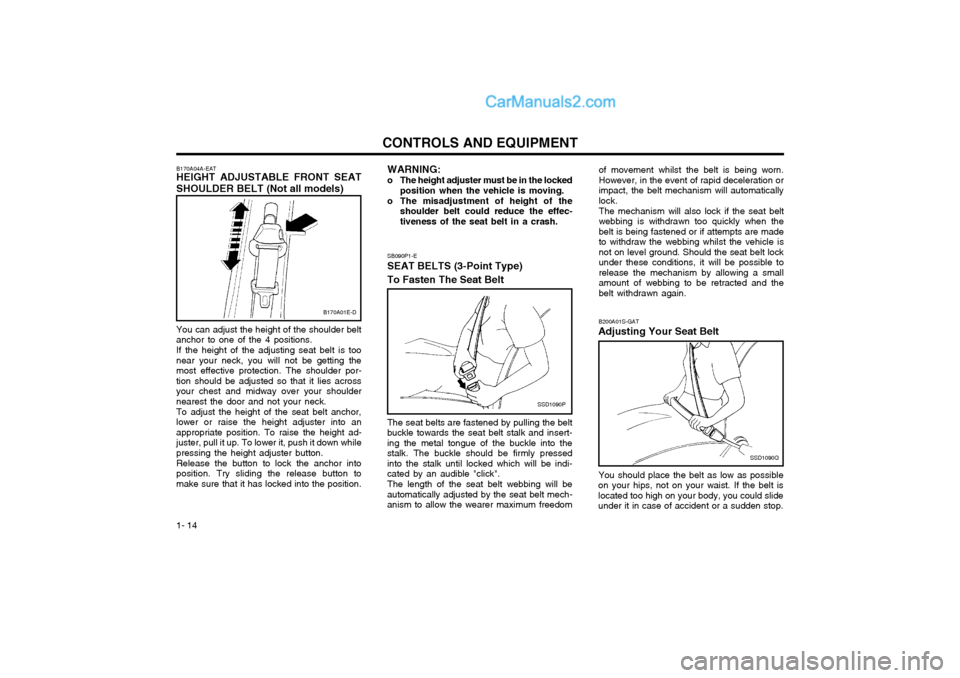
You should place the belt as low as possible
on your hips, not on your waist. If the belt is located too high on your body, you could slideunder it in case of accident or a sudden stop.
SB090P1-E
SEAT BELTS (3-Point Type) To Fasten The Seat Belt
SSD1090P
The seat belts are fastened by pulling the belt
buckle towards the seat belt stalk and insert- ing the metal tongue of the buckle into thestalk. The buckle should be firmly pressedinto the stalk until locked which will be indi-cated by an audible "click".
The length of the seat belt webbing will be
automatically adjusted by the seat belt mech-anism to allow the wearer maximum freedom WARNING:
o The height adjuster must be in the locked position when the vehicle is moving.
o The misadjustment of height of the shoulder belt could reduce the effec-tiveness of the seat belt in a crash.
B170A01E-D
B170A04A-EAT HEIGHT ADJUSTABLE FRONT SEAT SHOULDER BELT (Not all models) You can adjust the height of the shoulder belt anchor to one of the 4 positions. If the height of the adjusting seat belt is too near your neck, you will not be getting themost effective protection. The shoulder por-tion should be adjusted so that it lies acrossyour chest and midway over your shouldernearest the door and not your neck. To adjust the height of the seat belt anchor, lower or raise the height adjuster into anappropriate position. To raise the height ad-juster, pull it up. To lower it, push it down whilepressing the height adjuster button. Release the button to lock the anchor into position. Try sliding the release button tomake sure that it has locked into the position.
Page 199 of 312
CONTROLS AND EQUIPMENT
1- 18 WARNING:
o Do not install a child restraint seat at
the rear centre seating position using the vehicle's ISOFIX anchors. The ISOFIXanchors are only provided for the leftand right outboard rear seating posi-tions. Do not misuse the ISOFIX an-chors by attempting to attach a childrestraint seat in the middle rear seatingposition to the ISOFIX anchors. In acrash, the child restraint seat ISOFIXattachments may not be strong enoughto secure the child restraint seat prop-erly in the centre seating position andmay break, causing serious injury ordeath.
o Do not mount more than one child re- straint to a child restraint lower anchor-age point. The improper increased loadmay cause the anchorage points ortether anchor to break, causing seriousinjury or death.
o Attach the ISOFIX or ISOFIX-compatible child restraint seat only to the appropri-ate locations shown in the illustration.
o Always follow the installation and use instructions provided by the manufac-turer of the child restraint.
the lap portion of the belt is tight around thechild restraint system and the shoulder por-tion of the belt is positioned so that it cannotinterfere with the child's head or neck. Afterinstallation of the child restraint system, try tomove it in all directions to be sure the childrestraint system is securely installed. If you need to tighten the belt, pull more webbing toward the retractor. When you un-buckle the seat belt and allow it to retract, theretractor will automatically revert back to itsnormal seated passenger emergency lockingusage condition. NOTE:
o Before installing the child restraint sys-
tem, read the instructions supplied by the child restraint system manufacturer.
o If the seat belt does not operate as described, have the system checkedimmediately by your authorized Hyundaidealer.
WARNING: Do not install any child restraint system in the front passenger seat. Should an acci-dent occur and cause the passenger sideairbag to deploy, it could severely injure orkill an infant or child seated in an infant orchild seat. Therefore, only use a child re-straint system in the rear seat of yourvehicle. B230D01FC-EAT
Securing the Child Restraint Seat with
the "ISOFIX" System (Not all models)
B230F01FC
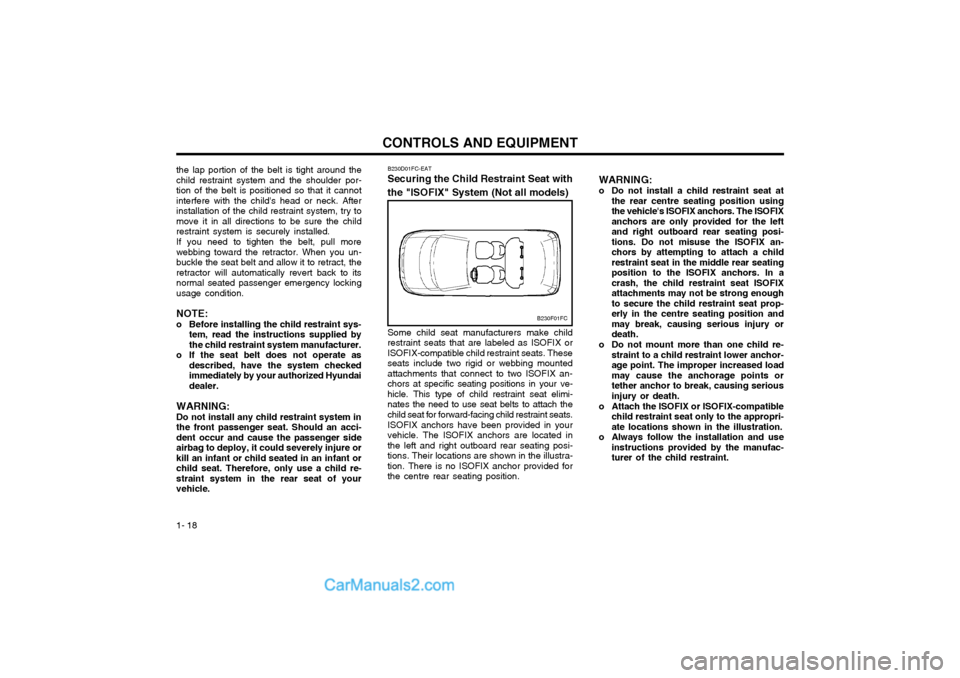
Some child seat manufacturers make child restraint seats that are labeled as ISOFIX orISOFIX-compatible child restraint seats. Theseseats include two rigid or webbing mountedattachments that connect to two ISOFIX an-chors at specific seating positions in your ve-hicle. This type of child restraint seat elimi-nates the need to use seat belts to attach thechild seat for forward-facing child restraint seats. ISOFIX anchors have been provided in your vehicle. The ISOFIX anchors are located inthe left and right outboard rear seating posi-tions. Their locations are shown in the illustra-tion. There is no ISOFIX anchor provided forthe centre rear seating position.
Page 206 of 312
1- 25
CONTROLS AND EQUIPMENT
o For cleaning the airbag pad covers, use only a soft, dry cloth or one which has been moistened with plain water.Solvents or cleaners could adverselyaffect the airbag covers and properdeployment of the system.
o No objects should be placed over or near the airbag modules on the steeringwheel, instrument panel, and the frontpassenger's panel above the glove box,because any such object could causeharm if the vehicle is in a crash severeenough to cause the airbags to inflate.
o If the airbags inflate, they must be re- placed by an authorized Hyundai dealer.
o Do not tamper with or disconnect SRS wiring, or other components of the SRSsystem. Doing so could result in injury,due to accidental firing of the airbags orby rendering the SRS inoperative.
o If components of the airbag system must be discarded, or if the vehicle must bescrapped, certain safety precautionsmust be observed. Your Hyundai dealerknows these precautions and can giveyou the necessary information. Failureto follow these precautions and proce-dures could increase the risk of per-sonal injury. o If you sell your vehicle, be sure to
inform the new owner of these impor-tant points and make certain that thismanual is transferred to the new owner.
o If your car was flooded and has soaked carpeting or water on flooring, youshouldn't try to start engine; have thecar towed to authorized Hyundaidealer.
o Do not replace the bumper or the bumper guard with the one other thanthe Hyundai genuine parts. Otherwise,it can adversely affect SRS performanceand lead to unexpected injury.
Page 211 of 312
CONTROLS AND EQUIPMENT
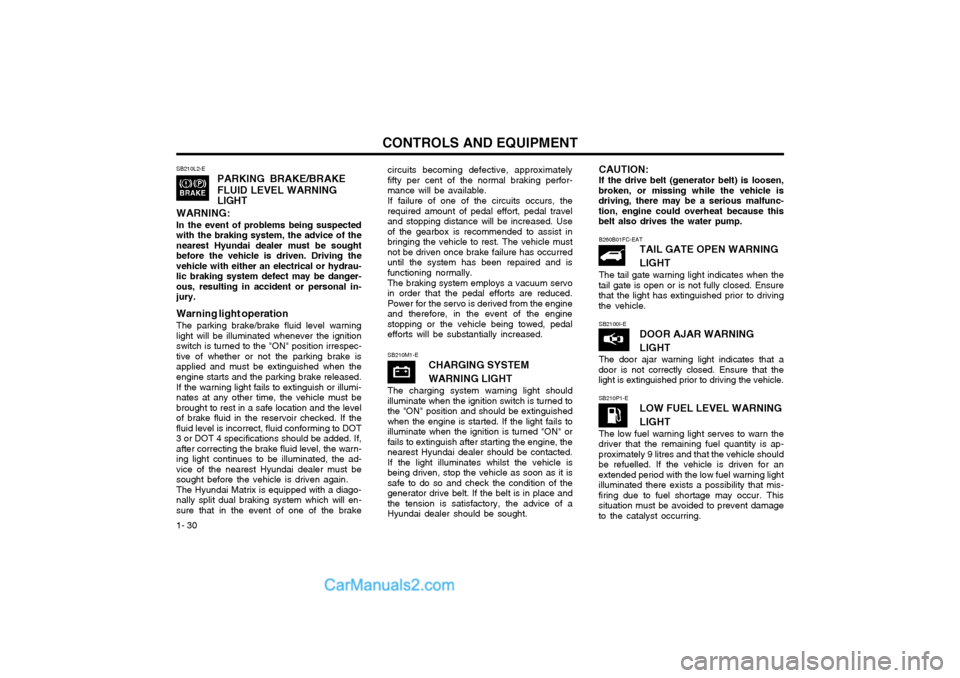
1- 30 circuits becoming defective, approximately fifty per cent of the normal braking perfor-mance will be available.
If failure of one of the circuits occurs, the
required amount of pedal effort, pedal traveland stopping distance will be increased. Useof the gearbox is recommended to assist inbringing the vehicle to rest. The vehicle mustnot be driven once brake failure has occurreduntil the system has been repaired and isfunctioning normally.
The braking system employs a vacuum servo
in order that the pedal efforts are reduced.Power for the servo is derived from the engineand therefore, in the event of the enginestopping or the vehicle being towed, pedalefforts will be substantially increased.
SB210L2-E
PARKING BRAKE/BRAKE FLUID LEVEL WARNING LIGHT
WARNING: In the event of problems being suspected with the braking system, the advice of thenearest Hyundai dealer must be soughtbefore the vehicle is driven. Driving thevehicle with either an electrical or hydrau-lic braking system defect may be danger-ous, resulting in accident or personal in-jury. Warning light operation The parking brake/brake fluid level warning light will be illuminated whenever the ignitionswitch is turned to the "ON" position irrespec-tive of whether or not the parking brake isapplied and must be extinguished when theengine starts and the parking brake released. If the warning light fails to extinguish or illumi- nates at any other time, the vehicle must bebrought to rest in a safe location and the levelof brake fluid in the reservoir checked. If thefluid level is incorrect, fluid conforming to DOT3 or DOT 4 specifications should be added. If,after correcting the brake fluid level, the warn-ing light continues to be illuminated, the ad-vice of the nearest Hyundai dealer must besought before the vehicle is driven again.The Hyundai Matrix is equipped with a diago-nally split dual braking system which will en-sure that in the event of one of the brake
CAUTION: If the drive belt (generator belt) is loosen,
broken, or missing while the vehicle is driving, there may be a serious malfunc-tion, engine could overheat because thisbelt also drives the water pump.
SB210M1-E CHARGING SYSTEM WARNING LIGHT
The charging system warning light should
illuminate when the ignition switch is turned to the "ON" position and should be extinguishedwhen the engine is started. If the light fails toilluminate when the ignition is turned "ON" orfails to extinguish after starting the engine, thenearest Hyundai dealer should be contacted.If the light illuminates whilst the vehicle isbeing driven, stop the vehicle as soon as it issafe to do so and check the condition of thegenerator drive belt. If the belt is in place andthe tension is satisfactory, the advice of aHyundai dealer should be sought.
B260B01FC-EAT
TAIL GATE OPEN WARNING LIGHT
The tail gate warning light indicates when the
tail gate is open or is not fully closed. Ensure that the light has extinguished prior to drivingthe vehicle.
SB2100I-E DOOR AJAR WARNING LIGHT
The door ajar warning light indicates that a
door is not correctly closed. Ensure that the light is extinguished prior to driving the vehicle.
SB210P1-E
LOW FUEL LEVEL WARNING LIGHT
The low fuel warning light serves to warn the
driver that the remaining fuel quantity is ap- proximately 9 litres and that the vehicle shouldbe refuelled. If the vehicle is driven for anextended period with the low fuel warning lightilluminated there exists a possibility that mis-firing due to fuel shortage may occur. Thissituation must be avoided to prevent damageto the catalyst occurring.
Page 216 of 312

1- 35
CONTROLS AND EQUIPMENTThe vehicle sidelights and headlights are op-
erated by rotating the end of the turn signal switch barrel. To operate the parking lights,rotating the switch to the first detent withignition switch at the "OFF" position will causethe lights to illuminate. To operate the head-lights, the turn signal switch barrel should berotated to the second detent. The headlightswill only operate when the ignition switch is atthe "On" position. If the ignition switch isturned to the "Off" position, only the parkinglights will function. Parking light auto cut (Not all models)
If you do not turn the parking lights "OFF"
after driving, the parking light will automati- cally shut "OFF" when the driver's door isopened.
To turn them "ON" again you must simply turn
the ignition key to the "ON" position.
B340C01FC-EAT LIGHTING SWITCH
SB220A1-E
MULTI FUNCTION SWITCH Turn Signal Operation
To signal an intention to turn right, the switch
lever should be pressed down. To signal an intention to turn left, the switch lever should bepushed upwards. In both instances, the turnsignal lights on one side of the car will flash andthe warning light located in the instrumentcluster will flash in sympathy. Upon completionof the manoeuvre, the lever will, under normalcircumstances, return to the "Off" position.However, if the manoeuvre involved only asmall movement of the steering wheel, thesignal may need to be cancelled manually. Ifeither turn signal indicator flashes more rapidlythan normal or refuses to flash at all, a mal-function of the turn signal system may exist. SB220B1-E Lane Change Signal To indicate an intention to change lanes, moving the lever slightly towards the directionof the relevant turn signal will cause the turnsignal lights to flash. When the lever is re-leased, it will return to the "off" position.
3. DRIVE TIME
Drive time symbol
Drive timeHFC2054
o This mode indicates the drive time trav- elled since the last drive time reset.
o Pressing the reset switch for more than 1 second, when the drive time is being dis- played, clears the drive time to zero. B340C01FC-D
B340B01FC-D
Page 217 of 312

CONTROLS AND EQUIPMENT
1- 36 The windscreen wiper switch, dependent upon
model, has three operating positions.
1. Intermittent wiper operation.
(Not all models)
2. Low speed operation.
3. High speed operation.
NOTE: To prevent damage to the wiper system,
do not attempt to wipe away heavy accu-mulations of snow or ice.
Accumulated snow and ice should be
removed manually. If there is only a lightlayer of snow or ice, operate the heater inthe defrost mode to melt the snow or icebefore using the wiper. SB230A1-E
WINDSCREEN WIPER/WASHER SWITCH
SB220E1-E HEADLIGHT FLASH The headlights may be flashed by pulling the turn signal switch lever towards the steeringwheel. The headlights will be extinguishedwhen the switch is released.
SB220D1-E HIGH AND LOW BEAM To turn on the headlight high beams, push the lever forward (away from you). For low beams,pull the lever back (toward you). The appropri-ate headlight beam indicator light will come onat the same time.
B340E01FC-D
B350A01O-D
(1)
(2)
(3)
B350B01O-EAT
Windscreen Washer Operation
To use the windscreen washer, pull the wiper/
washer lever toward the steering wheel. When the washer lever is operated, the wipers auto-matically make two passes across thewindscreen. The washer continues to operateuntil the lever is released.
NOTE:
o Do not operate the washer more than 15 seconds at a time or when the fluidreservoir is empty.
o In icy or freezing weather, be sure the wiper blades are not frozen to the glassprior to operating the wipers.
o In areas where water freezes in winter, use windscreen washer antifreeze. B350B01O-DAG
Page 226 of 312

1- 45
CONTROLS AND EQUIPMENT
SB360C1-F FOLDING THE OUTSIDE REAR VIEW MIRRORS To fold the outside rear view mirrors, push
them towards the rear.
The outside rear view mirrors can be folded
rearward for parking in restricted areas.
WARNING: Do not adjust or fold the outside rear view
mirrors while the vehicle is moving. This could result in loss of control, and anaccident causing death, serious injury orproperty damage.
B510D01E
CAUTION:
o Do not leave the switch on for an unneces-sary length of time.
o Scraping ice from the mirror face could cause permanent damage. To remove any ice, use a sponge, soft cloth orapproved deicer.
o Be careful when judging the size or dis- tance of any object seen in the passen-ger side rear view mirror. It is a convexmirror with a curved surface, any ob-jects seen in this mirror are closer thanthey appear.
B510C01FC-D
B510D01HP-EAT
OUTSIDE REARVIEW MIRROR HEATER (Not all models)
The outside rearview mirror heater is actuated
in connection with the rear window defroster. To heat the outside rearview mirror glass,push in the switch for the rear window de-froster. The rearview mirror glass will be heatedfor defrosting or defogging and will give youimproved rear vision in inclement weatherconditions. Push the switch again to turn theheater off. The outside rearview mirror heaterautomatically turns itself off after 20 minutes. HFC2080-D