warning Hyundai Matrix 2004 Repair Manual
[x] Cancel search | Manufacturer: HYUNDAI, Model Year: 2004, Model line: Matrix, Model: Hyundai Matrix 2004Pages: 317, PDF Size: 5.12 MB
Page 142 of 317
DO-IT-YOURSELF MAINTENANCE
6-8
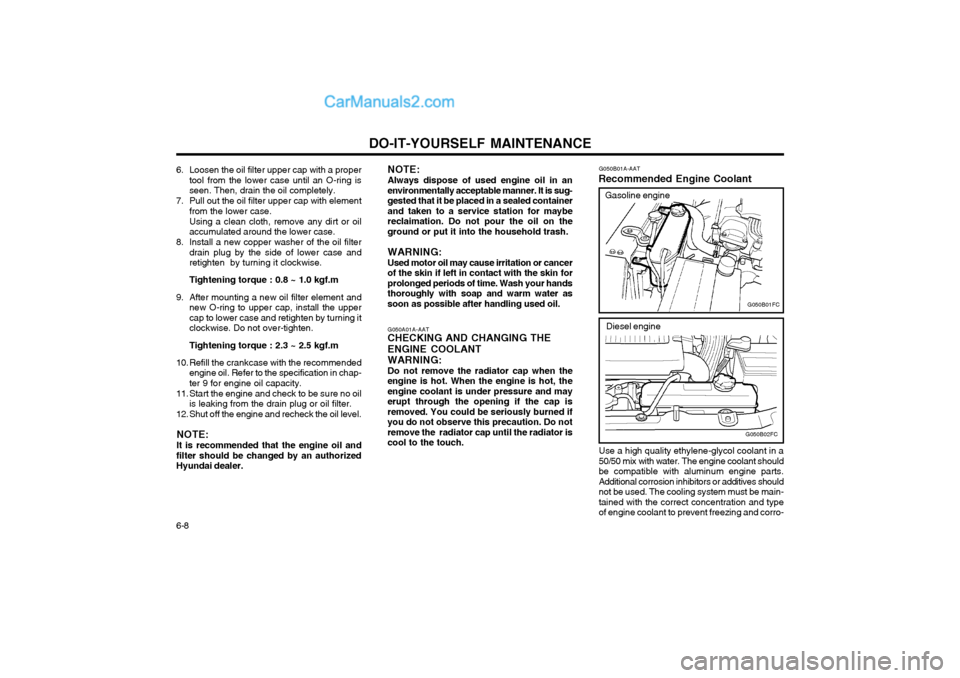
G050B01A-AAT
Recommended Engine Coolant
Use a high quality ethylene-glycol coolant in a 50/50 mix with water. The engine coolant shouldbe compatible with aluminum engine parts.Additional corrosion inhibitors or additives shouldnot be used. The cooling system must be main-tained with the correct concentration and typeof engine coolant to prevent freezing and corro-
G050B01FC
G050B02FC
Gasoline engine
Diesel engine
6. Loosen the oil filter upper cap with a proper tool from the lower case until an O-ring is seen. Then, drain the oil completely.
7. Pull out the oil filter upper cap with element from the lower case. Using a clean cloth, remove any dirt or oil accumulated around the lower case.
8. Install a new copper washer of the oil filter drain plug by the side of lower case andretighten by turning it clockwise.
Tightening torque : 0.8 ~ 1.0 kgf.m
9. After mounting a new oil filter element and new O-ring to upper cap, install the upper cap to lower case and retighten by turning itclockwise. Do not over-tighten.
Tightening torque : 2.3 ~ 2.5 kgf.m
10. Refill the crankcase with the recommended engine oil. Refer to the specification in chap- ter 9 for engine oil capacity.
11. Start the engine and check to be sure no oil is leaking from the drain plug or oil filter.
12. Shut off the engine and recheck the oil level.
NOTE: It is recommended that the engine oil and
filter should be changed by an authorized Hyundai dealer. G050A01A-AAT
CHECKING AND CHANGING THE ENGINE COOLANT
WARNING: Do not remove the radiator cap when the
engine is hot. When the engine is hot, the engine coolant is under pressure and mayerupt through the opening if the cap isremoved. You could be seriously burned ifyou do not observe this precaution. Do notremove the radiator cap until the radiator iscool to the touch. NOTE: Always dispose of used engine oil in an environmentally acceptable manner. It is sug-gested that it be placed in a sealed containerand taken to a service station for maybereclaimation. Do not pour the oil on theground or put it into the household trash. WARNING: Used motor oil may cause irritation or
cancer
of the skin if left in contact with the skin for prolonged periods of time. Wash your handsthoroughly with soap and warm water assoon as possible after handling used oil.
Page 144 of 317
DO-IT-YOURSELF MAINTENANCE
6-10
CHAMPION NGK RC10YC BKR5ES
Unleaded
engine Leaded
engine
RC10YC4 BKR5ES-11
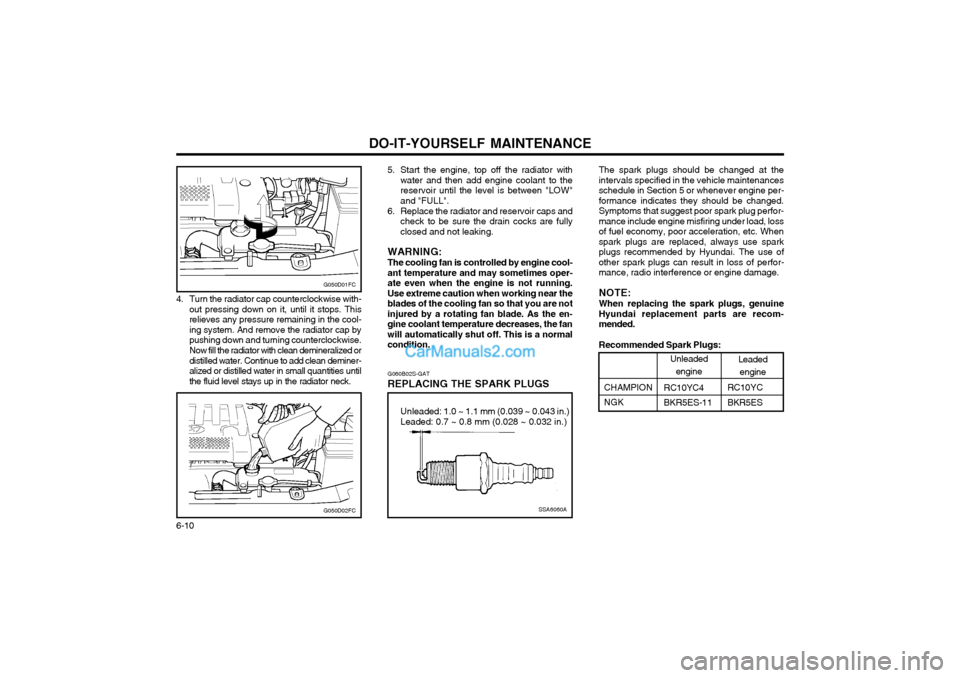
4. Turn the radiator cap counterclockwise with-
out pressing down on it, until it stops. This relieves any pressure remaining in the cool-ing system. And remove the radiator cap bypushing down and turning counterclockwise. Now fill the radiator with clean demineralized or distilled water. Continue to add clean deminer-alized or distilled water in small quantities untilthe fluid level stays up in the radiator neck. G060B02S-GAT
REPLACING THE SPARK PLUGS The spark plugs should be changed at theintervals specified in the vehicle maintenancesschedule in Section 5 or whenever engine per-formance indicates they should be changed.Symptoms that suggest poor spark plug perfor-mance include engine misfiring under load, lossof fuel economy, poor acceleration, etc. Whenspark plugs are replaced, always use sparkplugs recommended by Hyundai. The use ofother spark plugs can result in loss of perfor-mance, radio interference or engine damage. NOTE: When replacing the spark plugs, genuine Hyundai replacement parts are recom-mended. Recommended Spark Plugs:
SSA6060A
Unleaded: 1.0 ~ 1.1 mm (0.039 ~ 0.043 in.) Leaded: 0.7 ~ 0.8 mm (0.028 ~ 0.032 in.)
G050D01FC
5. Start the engine, top off the radiator with
water and then add engine coolant to the reservoir until the level is between "LOW"and "FULL".
6. Replace the radiator and reservoir caps and check to be sure the drain cocks are fullyclosed and not leaking.
WARNING: The cooling fan is controlled by engine cool- ant temperature and may sometimes oper-ate even when the engine is not running.Use extreme caution when working near theblades of the cooling fan so that you are notinjured by a rotating fan blade. As the en-gine coolant temperature decreases, the fanwill automatically shut off. This is a normalcondition.
G050D02FC
Page 145 of 317
DO-IT-YOURSELF MAINTENANCE 6-11
NOTE: Spark plugs should be tightened firmly. Over- tightening can damage the threads in thealuminum cylinder head. Leaving them tooloose can cause the spark plugs to get veryhot and possibly result in damage to theengine.
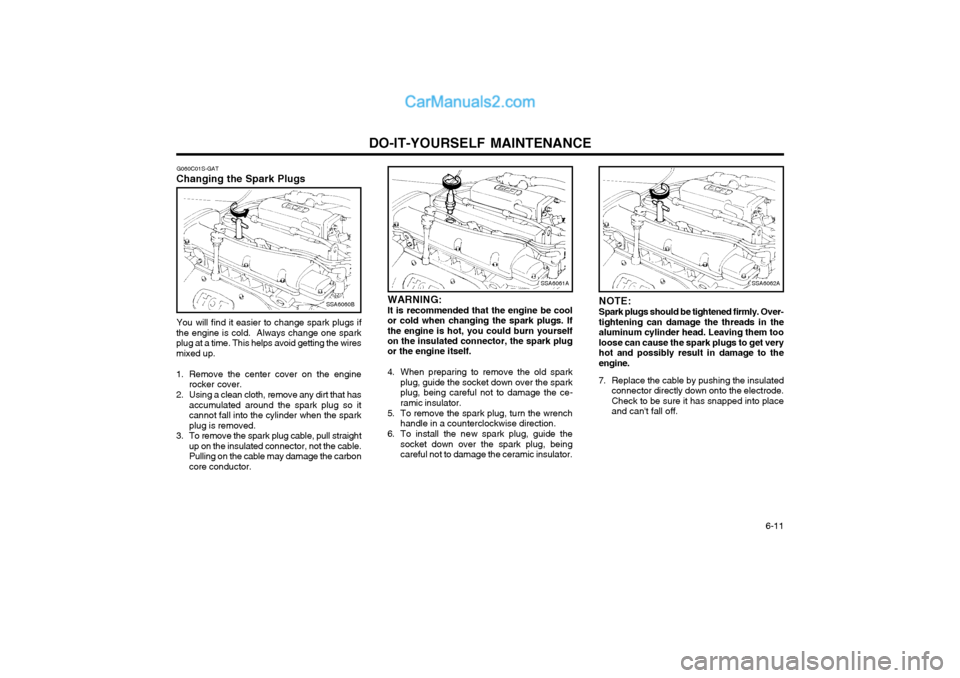
7. Replace the cable by pushing the insulated connector directly down onto the electrode.Check to be sure it has snapped into placeand can't fall off.
SSA6061ASSA6062A
WARNING: It is recommended that the engine be cool
or cold when changing the spark plugs. If the engine is hot, you could burn yourself on the insulated connector, the spark plug or the engine itself.
4. When preparing to remove the old spark plug, guide the socket down over the spark plug, being careful not to damage the ce-ramic insulator.
5. To remove the spark plug, turn the wrench handle in a counterclockwise direction.
6. To install the new spark plug, guide the socket down over the spark plug, beingcareful not to damage the ceramic insulator.
G060C01S-GAT
Changing the Spark Plugs
You will find it easier to change spark plugs if
the engine is cold. Always change one sparkplug at a time. This helps avoid getting the wiresmixed up.
1. Remove the center cover on the engine rocker cover.
2. Using a clean cloth, remove any dirt that has accumulated around the spark plug so it cannot fall into the cylinder when the sparkplug is removed.
3. To remove the spark plug cable, pull straight up on the insulated connector, not the cable.Pulling on the cable may damage the carboncore conductor.
SSA6060B
Page 147 of 317
DO-IT-YOURSELF MAINTENANCE 6-13
CAUTION:
o Radiator antifreeze (engine coolant) should not be used in the washer system because it will damage the car's finish.
o The washer lever should not be pulled and the washer should not be operated ifthe washer reservoir is empty. This candamage the washer fluid pump.
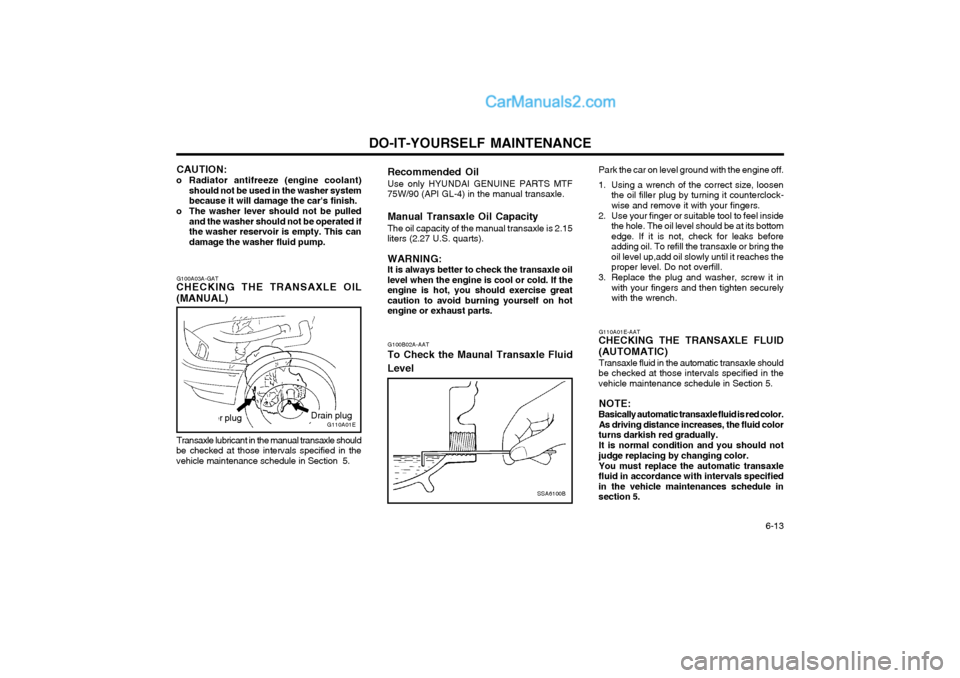
G100B02A-AAT
To Check the Maunal Transaxle Fluid Level
SSA6100B
Park the car on level ground with the engine off.
1. Using a wrench of the correct size, loosen the oil filler plug by turning it counterclock- wise and remove it with your fingers.
2. Use your finger or suitable tool to feel inside the hole. The oil level should be at its bottomedge. If it is not, check for leaks beforeadding oil. To refill the transaxle or bring theoil level up,add oil slowly until it reaches theproper level. Do not overfill.
3. Replace the plug and washer, screw it in with your fingers and then tighten securelywith the wrench.
Filler plugG110A01E
Transaxle lubricant in the manual transaxle should
be checked at those intervals specified in the vehicle maintenance schedule in Section 5. G100A03A-GAT
CHECKING THE TRANSAXLE OIL (MANUAL)Drain plug Recommended Oil
Use only HYUNDAI GENUINE PARTS MTF
75W/90 (API GL-4) in the manual transaxle. Manual Transaxle Oil Capacity
The oil capacity of the manual transaxle is 2.15
liters (2.27 U.S. quarts).
WARNING: It is always better to check the transaxle oil
level when the engine is cool or cold. If the engine is hot, you should exercise greatcaution to avoid burning yourself on hotengine or exhaust parts.
G110A01E-AAT
CHECKING THE TRANSAXLE FLUID (AUTOMATIC)
Transaxle fluid in the automatic transaxle should
be checked at those intervals specified in the vehicle maintenance schedule in Section 5.
NOTE:
Basically automatic transaxle fluid is red color. As driving distance increases, the fluid color
turns darkish red gradually.
It is normal condition and you should not
judge replacing by changing color.
You must replace the automatic transaxle
fluid in accordance with intervals specifiedin the vehicle maintenances schedule insection 5.
Page 148 of 317
DO-IT-YOURSELF MAINTENANCE
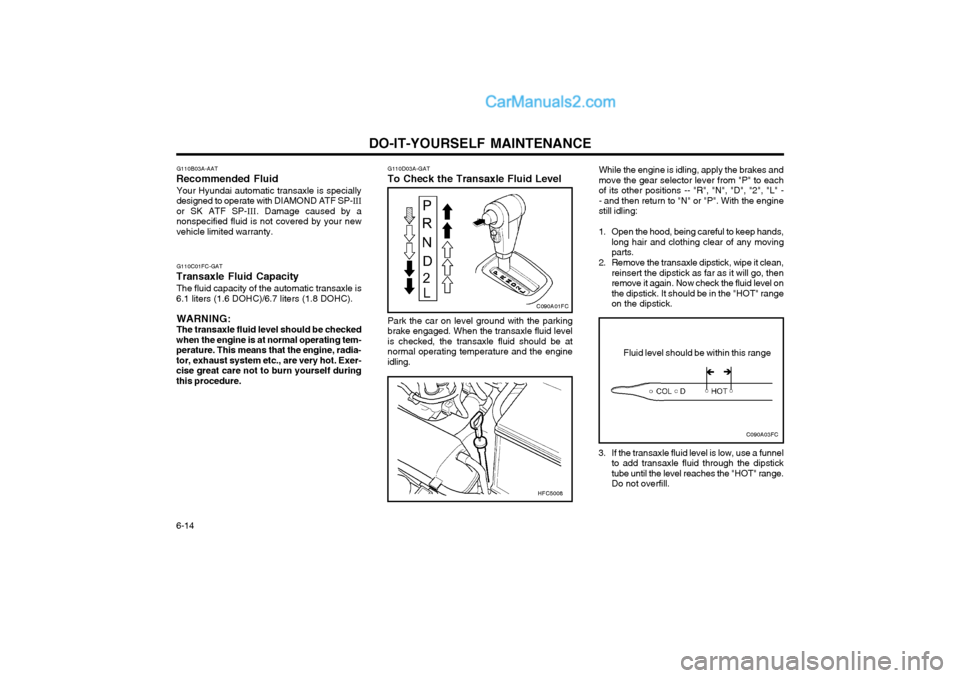
6-14 While the engine is idling, apply the brakes and move the gear selector lever from "P" to eachof its other positions -- "R", "N", "D", "2", "L" -- and then return to "N" or "P". With the enginestill idling:
1. Open the hood, being careful to keep hands,
long hair and clothing clear of any moving parts.
2. Remove the transaxle dipstick, wipe it clean, reinsert the dipstick as far as it will go, thenremove it again. Now check the fluid level onthe dipstick. It should be in the "HOT" rangeon the dipstick.
3. If the transaxle fluid level is low, use a funnel to add transaxle fluid through the dipsticktube until the level reaches the "HOT" range.Do not overfill.Fluid level should be within this range
C090A03FC
�Î�Î
HFC5008
G110D03A-GAT
To Check the Transaxle Fluid Level
Park the car on level ground with the parking brake engaged. When the transaxle fluid levelis checked, the transaxle fluid should be atnormal operating temperature and the engineidling.
C090A01FC
G110B03A-AAT
Recommended Fluid
Your Hyundai automatic transaxle is specially designed to operate with DIAMOND ATF SP- III
or SK ATF SP- III. Damage caused by a
nonspecified fluid is not covered by your newvehicle limited warranty. G110C01FC-GAT
Transaxle Fluid Capacity The fluid capacity of the automatic transaxle is
6.1 liters (1.6 DOHC)/6.7 liters (1.8 DOHC).
WARNING: The transaxle fluid level should be checked
when the engine is at normal operating tem- perature. This means that the engine, radia-tor, exhaust system etc., are very hot. Exer-cise great care not to burn yourself duringthis procedure.
Page 149 of 317
DO-IT-YOURSELF MAINTENANCE 6-15
WARNING: The cooling fan is controlled by engine cool-
ant temperature and may sometimes oper- ate even when the engine is not running.Use extreme caution when working near theblades of the cooling fan, so that you are notinjured by a rotating fan blade. As the en-gine coolant temperature decreases, the fanwill automatically shut off. This is a normalcondition.
WARNING (Diesel only): Never work on injection system with engine
running or within 30 seconds after shutting off engine. High pressure pump, rail, injec-tors and high pressure pipes are subject tohigh pressure even after the engine stopped.The fuel jet produced by fuel leaks maycause serious injury, if it touch the body.People using pacemakers should not movethan 30cm closer to the ECU or wiring har-ness within the engine room while engine isrunning, since the high currents in the Com-mon Rail system produce considerable mag-netic fields.
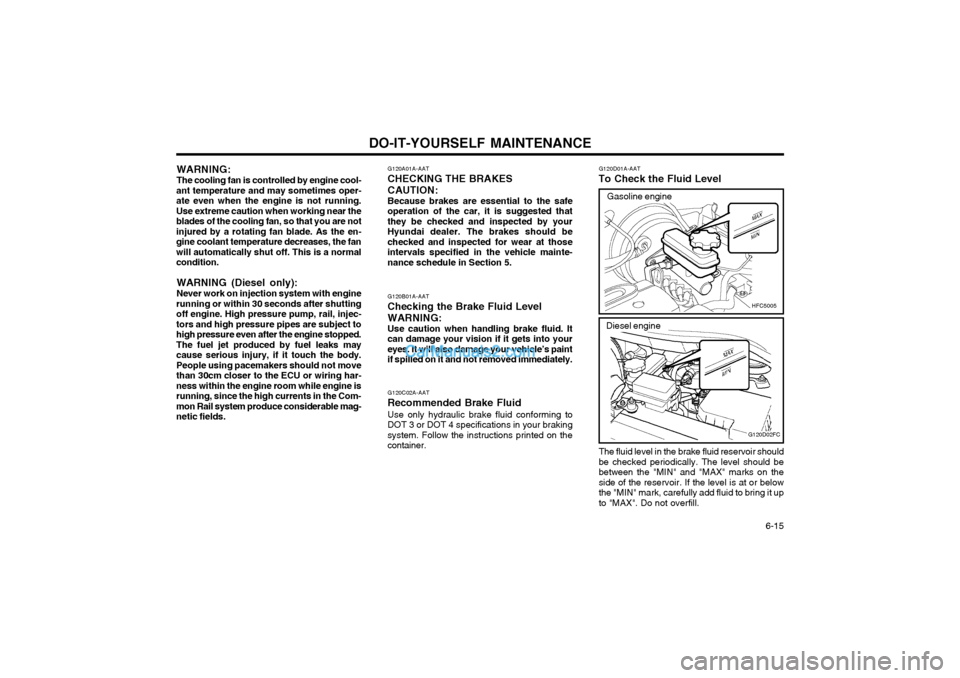
The fluid level in the brake fluid reservoir shouldbe checked periodically. The level should bebetween the "MIN" and "MAX" marks on theside of the reservoir. If the level is at or belowthe "MIN" mark, carefully add fluid to bring it upto "MAX". Do not overfill.
G120D01A-AAT
To Check the Fluid Level
G120C02A-AAT
Recommended Brake Fluid Use only hydraulic brake fluid conforming to
DOT 3 or DOT 4 specifications in your braking system. Follow the instructions printed on thecontainer. G120A01A-AAT
CHECKING THE BRAKES
CAUTION: Because brakes are essential to the safe
operation of the car, it is suggested that they be checked and inspected by yourHyundai dealer. The brakes should bechecked and inspected for wear at thoseintervals specified in the vehicle mainte-nance schedule in Section 5.
G120B01A-AAT
Checking the Brake Fluid Level WARNING: Use caution when handling brake fluid. It
can damage your vision if it gets into your eyes. It will also damage your vehicle’s paintif spilled on it and not removed immediately.
HFC5005
G120D02FC
Gasoline engine
Diesel engine
Page 150 of 317
DO-IT-YOURSELF MAINTENANCE
6-16 G130B02A-AAT
To Replace the Fluid
Recommended brake fluid conforming to DOT 3 or DOT 4 specification should be used. Thereservoir cap must be fully tightened to avoidcontamination from foreign matter or moisture. NOTE: Do not allow any other liquids to contami-nate the brake fluid. Seal damage will result. WARNING: Use caution when handling brake fluid. It can damage your vision if you get it in youreyes. It will also damage your vehicle’s paintif spilled on it and not removed immediately. G140A01A-AAT
AIR CONDITIONING CARE Keeping the Condenser Clean
The air conditioning condenser (and engine radiator) should be checked periodically foraccumulation of dirt, dead insects, leaves, etc.These can interfere with maximum cooling effi-ciency. When removing such accumulations,brush or hose them away carefully to avoidbending the cooling fans.
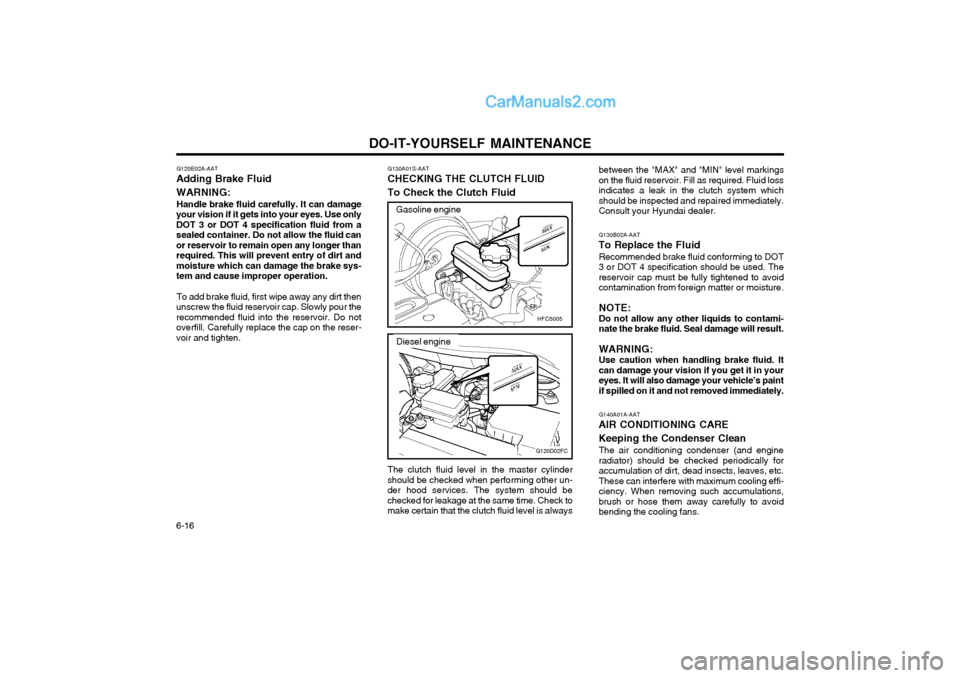
The clutch fluid level in the master cylinder
should be checked when performing other un- der hood services. The system should bechecked for leakage at the same time. Check tomake certain that the clutch fluid level is always
G120D02FC
Diesel engine
G130A01S-AAT
CHECKING THE CLUTCH FLUID To Check the Clutch Fluid
HFC5005
Gasoline engine
between the "MAX" and "MIN" level markings on the fluid reservoir. Fill as required. Fluid lossindicates a leak in the clutch system whichshould be inspected and repaired immediately.Consult your Hyundai dealer.
G120E02A-AAT
Adding Brake Fluid WARNING:
Handle brake fluid carefully. It can damage
your vision if it gets into your eyes. Use only DOT 3 or DOT 4 specification fluid from asealed container. Do not allow the fluid canor reservoir to remain open any longer thanrequired. This will prevent entry of dirt andmoisture which can damage the brake sys-tem and cause improper operation.
To add brake fluid, first wipe away any dirt then
unscrew the fluid reservoir cap. Slowly pour therecommended fluid into the reservoir. Do notoverfill. Carefully replace the cap on the reser-voir and tighten.
Page 155 of 317
DO-IT-YOURSELF MAINTENANCE 6-21
G210A01A-AAT
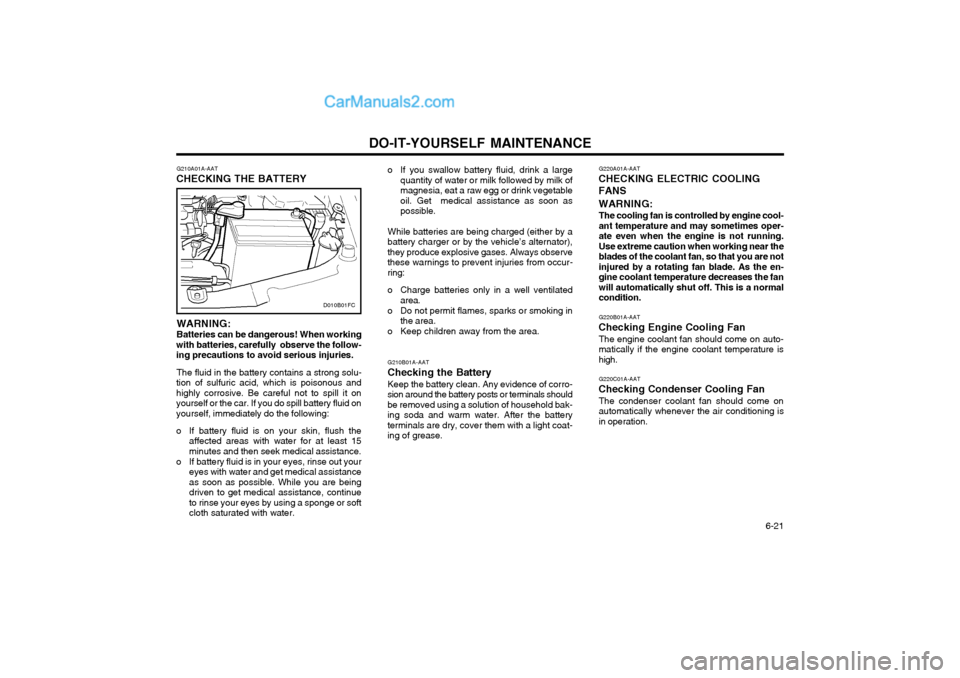
CHECKING THE BATTERY
WARNING: Batteries can be dangerous! When working
with batteries, carefully observe the follow- ing precautions to avoid serious injuries.
The fluid in the battery contains a strong solu-
tion of sulfuric acid, which is poisonous andhighly corrosive. Be careful not to spill it onyourself or the car. If you do spill battery fluid onyourself, immediately do the following:
o If battery fluid is on your skin, flush the affected areas with water for at least 15 minutes and then seek medical assistance.
o If battery fluid is in your eyes, rinse out your eyes with water and get medical assistanceas soon as possible. While you are beingdriven to get medical assistance, continueto rinse your eyes by using a sponge or softcloth saturated with water.
D010B01FC
G220A01A-AAT
CHECKING ELECTRIC COOLING FANS WARNING: The cooling fan is controlled by engine cool- ant temperature and may sometimes oper-ate even when the engine is not running.Use extreme caution when working near theblades of the coolant fan, so that you are notinjured by a rotating fan blade. As the en-gine coolant temperature decreases the fanwill automatically shut off. This is a normalcondition. G220B01A-AAT
Checking Engine Cooling Fan The engine coolant fan should come on auto- matically if the engine coolant temperature ishigh. G220C01A-AAT
Checking Condenser Cooling Fan The condenser coolant fan should come on automatically whenever the air conditioning isin operation.
G210B01A-AAT
Checking the Battery Keep the battery clean. Any evidence of corro-
sion around the battery posts or terminals shouldbe removed using a solution of household bak-ing soda and warm water. After the batteryterminals are dry, cover them with a light coat-ing of grease.
o If you swallow battery fluid, drink a large
quantity of water or milk followed by milk ofmagnesia, eat a raw egg or drink vegetableoil. Get medical assistance as soon aspossible.
While batteries are being charged (either by abattery charger or by the vehicle’s alternator),they produce explosive gases. Always observethese warnings to prevent injuries from occur-ring:
o Charge batteries only in a well ventilated area.
o Do not permit flames, sparks or smoking in the area.
o Keep children away from the area.
Page 156 of 317
DO-IT-YOURSELF MAINTENANCE
6-22
G240A01A-AAT
POWER STEERING HOSES
It is suggested that you check the power steer-
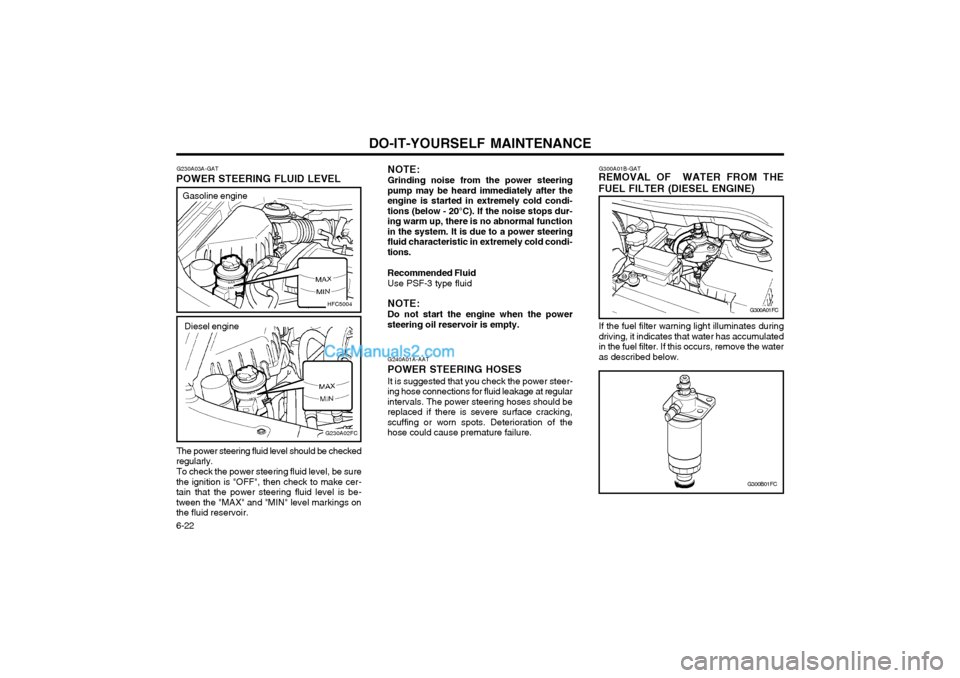
ing hose connections for fluid leakage at regular intervals. The power steering hoses should bereplaced if there is severe surface cracking,scuffing or worn spots. Deterioration of thehose could cause premature failure. NOTE: Grinding noise from the power steering
pump may be heard immediately after the engine is started in extremely cold condi-tions (below - 20°C). If the noise stops dur-ing warm up, there is no abnormal functionin the system. It is due to a power steeringfluid characteristic in extremely cold condi-tions.
Recommended Fluid Use PSF-3 type fluid NOTE: Do not start the engine when the power
steering oil reservoir is empty. G300A01B-GAT
REMOVAL OF WATER FROM THE FUEL FILTER (DIESEL ENGINE)
If the fuel filter warning light illuminates during driving, it indicates that water has accumulatedin the fuel filter. If this occurs, remove the wateras described below.
G300A01FC
G300B01FC
G230A03A-GAT
POWER STEERING FLUID LEVEL
HFC5004
Gasoline engine
The power steering fluid level should be checked
regularly.
To check the power steering fluid level, be sure
the ignition is "OFF", then check to make cer- tain that the power steering fluid level is be-tween the "MAX" and "MIN" level markings onthe fluid reservoir.
G230A02FC
Diesel engine
Page 157 of 317
DO-IT-YOURSELF MAINTENANCE 6-23
G260A03A-GAT
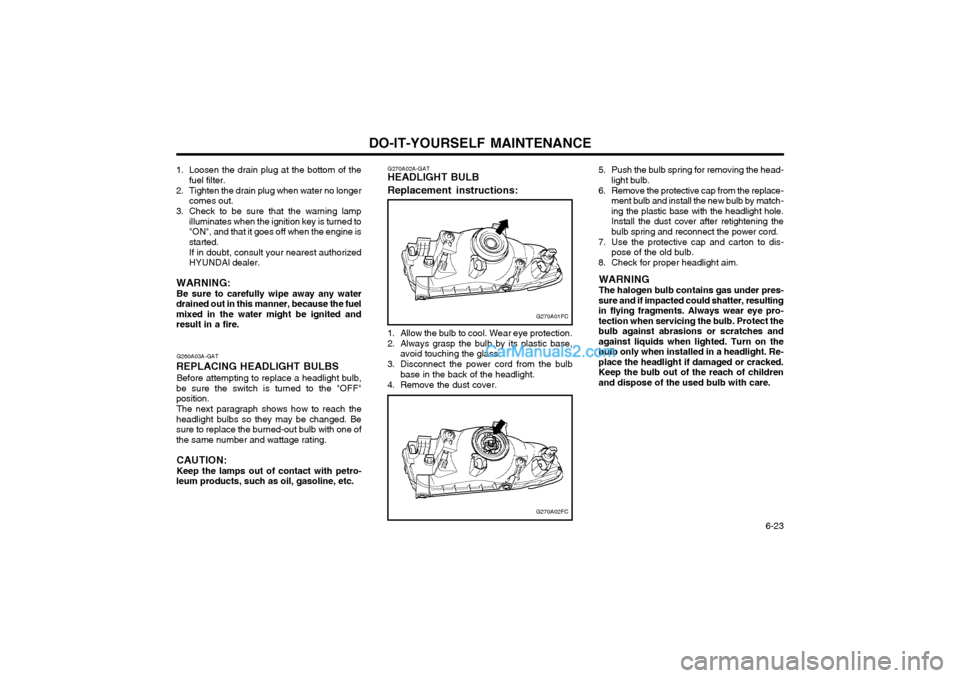
REPLACING HEADLIGHT BULBS Before attempting to replace a headlight bulb,
be sure the switch is turned to the "OFF" position.
The next paragraph shows how to reach the
headlight bulbs so they may be changed. Besure to replace the burned-out bulb with one ofthe same number and wattage rating.
CAUTION: Keep the lamps out of contact with petro-
leum products, such as oil, gasoline, etc.
1. Loosen the drain plug at the bottom of the
fuel filter.
2. Tighten the drain plug when water no longer comes out.
3. Check to be sure that the warning lamp illuminates when the ignition key is turned to "ON", and that it goes off when the engine isstarted. If in doubt, consult your nearest authorized HYUNDAI dealer.
WARNING: Be sure to carefully wipe away any water
drained out in this manner, because the fuelmixed in the water might be ignited andresult in a fire. 5. Push the bulb spring for removing the head-
light bulb.
6. Remove the protective cap from the replace- ment bulb and install the new bulb by match-ing the plastic base with the headlight hole.Install the dust cover after retightening thebulb spring and reconnect the power cord.
7. Use the protective cap and carton to dis- pose of the old bulb.
8. Check for proper headlight aim.
WARNING The halogen bulb contains gas under pres-
sure and if impacted could shatter, resulting in flying fragments. Always wear eye pro-tection when servicing the bulb. Protect thebulb against abrasions or scratches andagainst liquids when lighted. Turn on thebulb only when installed in a headlight. Re-place the headlight if damaged or cracked.Keep the bulb out of the reach of childrenand dispose of the used bulb with care.
G270A02FC
G270A02A-GAT
HEADLIGHT BULB Replacement instructions:
G270A01FC
1. Allow the bulb to cool. Wear eye protection.
2. Always grasp the bulb by its plastic base, avoid touching the glass.
3. Disconnect the power cord from the bulb base in the back of the headlight.
4. Remove the dust cover.