low Hyundai Sonata
[x] Cancel search | Manufacturer: HYUNDAI, Model Year: , Model line: , Model:Pages: 208, PDF Size: 16.93 MB
Page 133 of 208
2- 18 DRIVING YOUR HYUNDAI
CAUTION:If overheating should occur when towing,
(the temperature gauge reads near red zone),
taking the following action may reduce or
eliminate the problem.
1. Turn off the air conditioner.
2. Reduce highway speed.
3. Select a lower gear when going uphill.
4. While in stop and go traffic, place the
gear selector in park or neutral and idle
the engine at a higher speed.
!
C190F01S-AATTrailer or Vehicle Towing Tips
1. Before towing, check hitch and safety chain
connections as well as proper operation of
the trailer running lights, brake lights, and
turn signals.
2. Always drive your vehicle at a moderate
speed (Less than 60 mph)
3. Trailer towing requires more fuel than normal
conditions.
4. To maintain engine braking efficiency and
electrical charging performance, do not use
fifth gear (manual transaxle) or overdrive
(automatic transaxle).
5. Always secure items in the trailer to prevent
load shift while driving.
6. Check the condition and air pressure of all
tires on the trailer and your car. Low tire
pressure can seriously affect the handling.
Also check the spare tire.
7. The vehicle/trailer combination is more af-
fected by crosswind and buffeting.
When being passed by a large vehicle, keep
a constant speed and steer straight ahead.
If there is too much wind buffeting slow down
to get out of the other vehicle's air turbulence.
8. When parking your car and trailer, especially
on a hill, be sure to follow all the normal
precautions. Turn your front wheel into the
curb, set the parking brake firmly, and put the
transaxle in 1st or Reverse (manual) or Park
(automatic). In addition, place wheel chocks
at each of the trailer's tires.9. If the trailer has electric brakes, start your
vehicle and trailer moving, and then apply the
trailer brake controller by hand to be sure the
brakes are working. This lets you check
your electrical connection at the same time.
10.During your trip, check occasionally to be
sure that the load is secure, and that the
lights and any trailer brakes are still working.
11.Avoid jerky starts, sudden acceleration or
sudden stops.
12.Avoid sharp turns and rapid lane changes.
13.Avoid holding the brake pedal down too long
or too frequently. This could cause the brakes
to overheat, resulting in reduced braking
efficiency.
14.When going down a hill, shift into a lower gear
and use the engine braking effect.
When ascending a long grade, downshift the
transaxle to a lower gear and reduce speed
to reduce chances of engine overloading
and/or overheating.
15.If you have to stop while going uphill, do not
hold the vehicle in place by pressing on the
accelerator. This can cause the automatic
transaxle to overheat. Use the parking brake
or footbrake.
NOTE:When towing check transaxle fluid more
frequently.
Page 135 of 208
3- 2 WHAT TO DO IN AN EMERGENCY
!
!
D010A01A-AATIF THE ENGINE WILL NOT START
D010B01A-AATIf Engine Doesn't Turn Over or Turns
Over Slowly
D010C01Y-AATIf Engine Turns Over Normally but Does
Not Start
1. Check fuel level.
2. Check all connectors at ignition, coil and
spark plugs. Re-connect any that may be
disconnected or loose.
3. Check the fuel line in the engine room.
4. If engine still refuses to start, call a Hyundai
dealer or seek other qualified assistance.
D010D01A-AATIf Engine Stalls While Driving
1. Reduce your speed gradually, keeping a
straight line. Move cautiously off the road to
a safe place.
2. Turn on your emergency flashers.
3. Try to start the engine again. If your vehicle
will not start, contact a Hyundai dealer or
seek other qualified assistance.
WARNING:If the engine will not start, do not push or
pull the car to start it. This could result in a
collision or cause other damage. In addi-
tion, push or pull starting may cause the
catalytic converter to be overloaded and
create a fire hazard.
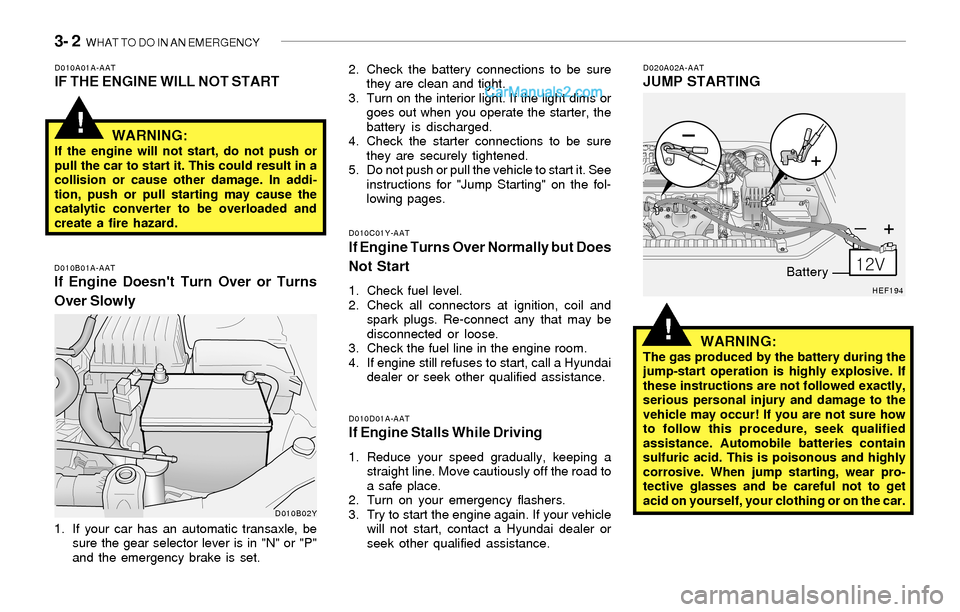
1. If your car has an automatic transaxle, be
sure the gear selector lever is in "N" or "P"
and the emergency brake is set.2. Check the battery connections to be sure
they are clean and tight.
3. Turn on the interior light. If the light dims or
goes out when you operate the starter, the
battery is discharged.
4. Check the starter connections to be sure
they are securely tightened.
5. Do not push or pull the vehicle to start it. See
instructions for "Jump Starting" on the fol-
lowing pages.
D020A02A-AATJUMP STARTING
WARNING:
The gas produced by the battery during the
jump-start operation is highly explosive. If
these instructions are not followed exactly,
serious personal injury and damage to the
vehicle may occur! If you are not sure how
to follow this procedure, seek qualified
assistance. Automobile batteries contain
sulfuric acid. This is poisonous and highly
corrosive. When jump starting, wear pro-
tective glasses and be careful not to get
acid on yourself, your clothing or on the car.
D010B02YHEF194
Battery
Page 136 of 208
WHAT TO DO IN AN EMERGENCY 3- 3
o If you should accidentally get acid on your
skin or in your eyes, immediately remove
any contaminated clothing and flush the area
with clear water for at least 15 minutes. Then
promptly obtain medical attention. If you
must be transported to an emergency facil-
ity, continue to apply water to the affected
area with a sponge or cloth.
o The gas produced by the battery during the
jump-start operation is highly explosive. Do
not smoke or allow a spark or an open flame
in the vicinity.
o The battery being used to provide the jump
start must be 12-volt. If you cannot deter-
mine that it is a 12-volt battery, do not attempt
to use it for the jump start.
o To jump start a car with a discharged battery,
follow this procedure exactly:
1. If the booster battery is installed in another
vehicle, be sure the two vehicles are not
touching.
2. Turn off all unnecessary lights and acces-
sories in both vehicles.
3. Attach the clamps of the jumper cable in the
exact location shown on the illustration. First,
attach one clamp of the jumper cable to the
positive (+) post or cable of the discharged
battery. Then attach the other end of the
same cable to the positive (+) post or cable
of the booster battery. Next, using the other
cable, attach one clamp to the negative (-)
post or cable of the booster battery. Then
attach the other end of that cable to a solidmetal part of the engine away from the
battery. Do not connect the cable to any
moving part.
4. Start the engine in the car with the booster
battery and let it run for a few minutes. This
will help to assure that the booster battery is
fully charged. During the jumping operation,
run the engine in this vehicle at about 2,000
rpm.
5. Start your engine using the normal starting
procedure. After the engine starts, leave the
jumper cables connected and let the engine
run at fast idle or about 2,000 rpm for several
minutes.
6. Carefully remove the jumper cables in the
reverse order of attachment.
If you do not know why your battery became
discharged (because the lights were left on,
etc.), have the charging system checked by
your Hyundai dealer.D030A01A-AATIF THE ENGINE OVERHEATS
If your temperature gauge indicates overheat-
ing, you experience a loss of power, or hear loud
pinging or knocking, the engine is probably too
hot. If this happens, you should:
1. Pull off the road and stop as soon as it is safe
to do so.
2. Place the gear selector lever in "P" (auto-
matic), or neutral (manual transaxle) and set
the parking brake. If the air conditioning is on,
turn it off.
3. If engine coolant is running out under the car
or steam is coming out from the hood, stop
the engine. Do not open the hood until the
coolant has stopped running or the steaming
has stopped. If there is no visible loss of
engine coolant and no steam, leave the
engine running and check to be sure the
engine cooling fan is operating. If the fan is
not running, turn the engine off.
4. Check to see if the water pump drive belt is
missing. If it is not missing, check to see that
it is tight. If the drive belt seems to be
satisfactory, check for coolant leaking from
the radiator, hoses or under the car. (If the
air conditioning had been in use, it is normal
for cold water to be draining from it when you
stop).
Page 137 of 208
3- 4 WHAT TO DO IN AN EMERGENCY
!
!WARNING:While the engine is running, keep hair,
hands and clothing away from moving parts
such as the fan and drive belts to prevent
injury.
D040A02Y-AATSPARE TIRE
The following instructions for the temporary
spare tire should be observed:
1. Check inflation pressure as soon as practi-
cal after installing the spare tire, and adjust
to the specified pressure. The tire pressure
should be periodically checked and main-
tained at the specified pressure while the tire
is stored.
Tire Size
Inflation Pressure
T125/70D15, T125/70R15
60 psi (420 kPa) 5. If the water pump drive belt is broken or
engine coolant is leaking out, stop the engine
immediately and call the nearest Hyundai
dealer for assistance.
WARNING:Do not remove the radiator cap when the
engine is hot. This can allow coolant to be
blown out of the opening and cause seri-
ous burns.
6. If you cannot find the cause of the overheat-
ing, wait until the engine temperature has
returned to normal. Then, if coolant has been
lost, carefully remove the radiator cap and
add coolant to bring the fluid level in the
reservoir up to the halfway mark.
7. Proceed with caution, keeping alert for fur-
ther signs of overheating. If overheating
happens again, call a Hyundai dealer for
assistance.
CAUTION:Serious loss of coolant indicates there is a
leak in the cooling system and this should
be checked as soon as possible by a Hyundai
dealer.
!
4. As the temporary spare tire is specifically
designed for your car, it should not be used
on any other vehicle.
5. The temporary spare tire should not be used
on any other wheels, nor should standard
tires, snow tires, wheel covers or trim rings
be used with the temporary spare wheel. If
such use is attempted, damage to these
items or other car components may occur.
6. The temporary spare tire pressure should
be checked once a month while the tire is
stored.
Spare Tire Pressure
2. The spare tire should only be used tempo-
rarily and should be returned to the luggage
compartment as soon as the original tire can
be repaired or replaced.
3. Continuous use at speeds of over 50 mph
(80 km/h) is not recommended.
CAUTION:o Do not use snow chains with your tem-
porary spare tire.
o Do not use more than one temporary
spare tire at a time.
!
Page 138 of 208
WHAT TO DO IN AN EMERGENCY 3- 5
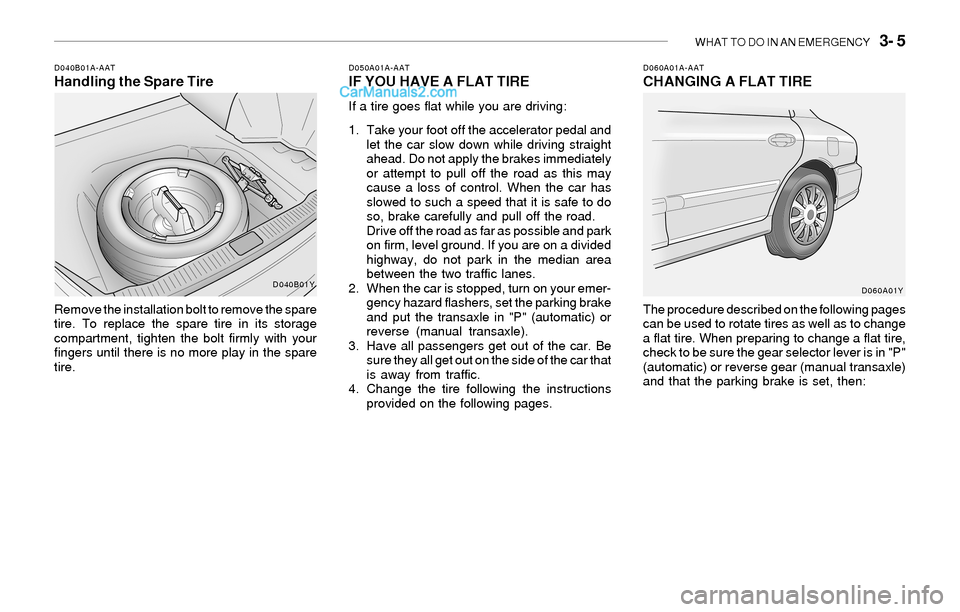
D040B01A-AATHandling the Spare Tire
Remove the installation bolt to remove the spare
tire. To replace the spare tire in its storage
compartment, tighten the bolt firmly with your
fingers until there is no more play in the spare
tire.
D050A01A-AATIF YOU HAVE A FLAT TIRE
If a tire goes flat while you are driving:
1. Take your foot off the accelerator pedal and
let the car slow down while driving straight
ahead. Do not apply the brakes immediately
or attempt to pull off the road as this may
cause a loss of control. When the car has
slowed to such a speed that it is safe to do
so, brake carefully and pull off the road.
Drive off the road as far as possible and park
on firm, level ground. If you are on a divided
highway, do not park in the median area
between the two traffic lanes.
2. When the car is stopped, turn on your emer-
gency hazard flashers, set the parking brake
and put the transaxle in "P" (automatic) or
reverse (manual transaxle).
3. Have all passengers get out of the car. Be
sure they all get out on the side of the car that
is away from traffic.
4. Change the tire following the instructions
provided on the following pages.
D060A01A-AATCHANGING A FLAT TIRE
The procedure described on the following pages
can be used to rotate tires as well as to change
a flat tire. When preparing to change a flat tire,
check to be sure the gear selector lever is in "P"
(automatic) or reverse gear (manual transaxle)
and that the parking brake is set, then:
D040B01Y
D060A01Y
Page 142 of 208
WHAT TO DO IN AN EMERGENCY 3- 9
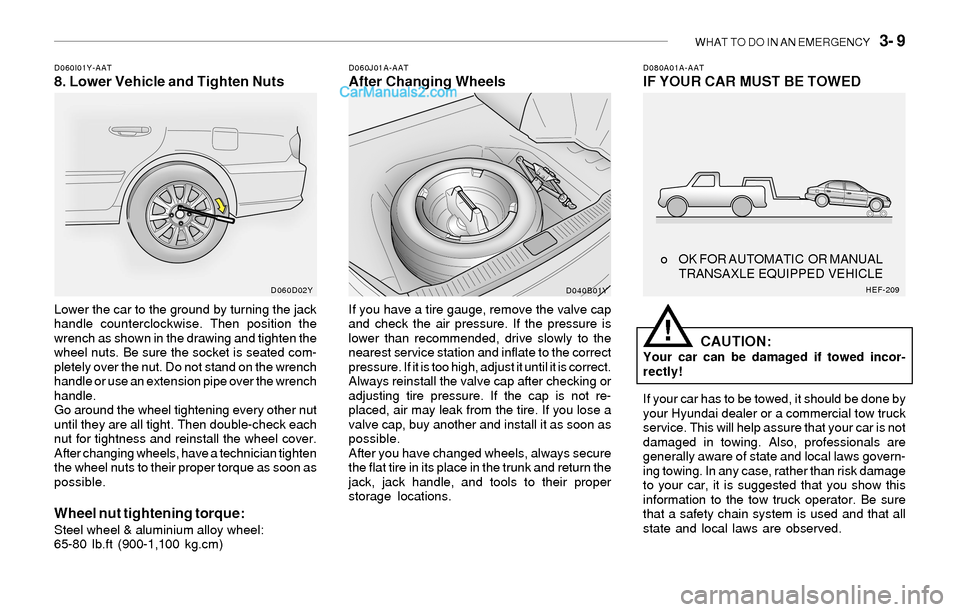
D080A01A-AATIF YOUR CAR MUST BE TOWEDD060I01Y-AAT8. Lower Vehicle and Tighten NutsD060J01A-AATAfter Changing Wheels
Lower the car to the ground by turning the jack
handle counterclockwise. Then position the
wrench as shown in the drawing and tighten the
wheel nuts. Be sure the socket is seated com-
pletely over the nut. Do not stand on the wrench
handle or use an extension pipe over the wrench
handle.
Go around the wheel tightening every other nut
until they are all tight. Then double-check each
nut for tightness and reinstall the wheel cover.
After changing wheels, have a technician tighten
the wheel nuts to their proper torque as soon as
possible.
Wheel nut tightening torque:Steel wheel & aluminium alloy wheel:
65-80 lb.ft (900-1,100 kg.cm)If you have a tire gauge, remove the valve cap
and check the air pressure. If the pressure is
lower than recommended, drive slowly to the
nearest service station and inflate to the correct
pressure. If it is too high, adjust it until it is correct.
Always reinstall the valve cap after checking or
adjusting tire pressure. If the cap is not re-
placed, air may leak from the tire. If you lose a
valve cap, buy another and install it as soon as
possible.
After you have changed wheels, always secure
the flat tire in its place in the trunk and return the
jack, jack handle, and tools to their proper
storage locations.
CAUTION:Your car can be damaged if towed incor-
rectly!
If your car has to be towed, it should be done by
your Hyundai dealer or a commercial tow truck
service. This will help assure that your car is not
damaged in towing. Also, professionals are
generally aware of state and local laws govern-
ing towing. In any case, rather than risk damage
to your car, it is suggested that you show this
information to the tow truck operator. Be sure
that a safety chain system is used and that all
state and local laws are observed.
!
o OK FOR AUTOMATIC OR MANUAL
TRANSAXLE EQUIPPED VEHICLE
D060D02Y
D040B01YHEF-209
Page 143 of 208
3- 10 WHAT TO DO IN AN EMERGENCY
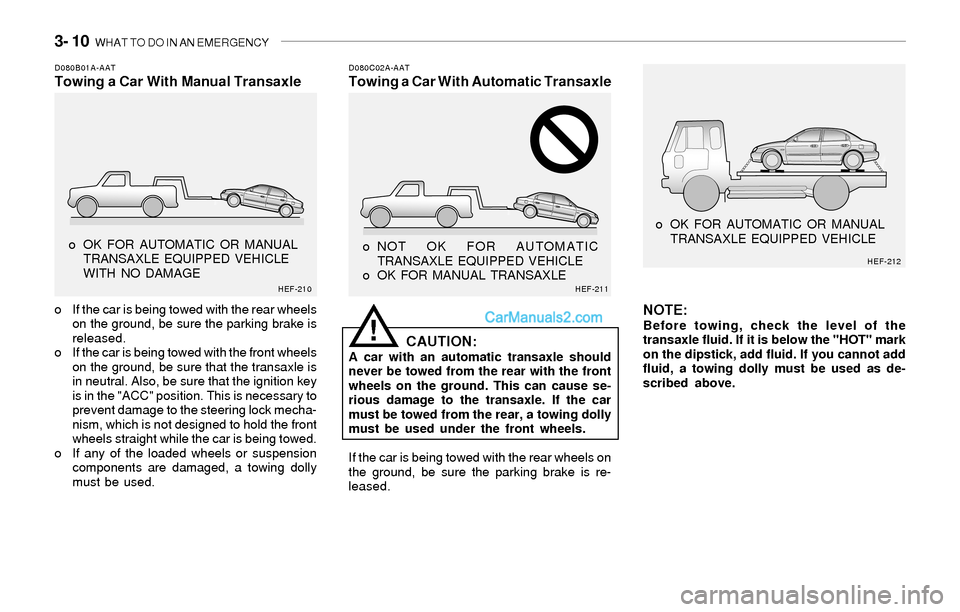
D080B01A-AATTowing a Car With Manual TransaxleD080C02A-AATTowing a Car With Automatic Transaxle
o If the car is being towed with the rear wheels
on the ground, be sure the parking brake is
released.
o If the car is being towed with the front wheels
on the ground, be sure that the transaxle is
in neutral. Also, be sure that the ignition key
is in the "ACC" position. This is necessary to
prevent damage to the steering lock mecha-
nism, which is not designed to hold the front
wheels straight while the car is being towed.
o If any of the loaded wheels or suspension
components are damaged, a towing dolly
must be used.
CAUTION:A car with an automatic transaxle should
never be towed from the rear with the front
wheels on the ground. This can cause se-
rious damage to the transaxle. If the car
must be towed from the rear, a towing dolly
must be used under the front wheels.
If the car is being towed with the rear wheels on
the ground, be sure the parking brake is re-
leased.
NOTE:Before towing, check the level of the
transaxle fluid. If it is below the "HOT" mark
on the dipstick, add fluid. If you cannot add
fluid, a towing dolly must be used as de-
scribed above.!
o OK FOR AUTOMATIC OR MANUAL
TRANSAXLE EQUIPPED VEHICLE
WITH NO DAMAGE o NOT OK FOR AUTOMATIC
TRANSAXLE EQUIPPED VEHICLE
o OK FOR MANUAL TRANSAXLE o OK FOR AUTOMATIC OR MANUAL
TRANSAXLE EQUIPPED VEHICLE
HEF-210HEF-211HEF-212
Page 146 of 208

4- 2 CORROSION PREVENTION AND APPEARANCE CARE
E020B01A-AATKeep Your Car Clean
The best way to prevent corrosion is to keep
your car clean and free of corrosive materials.
Attention to the underside of the car is particu-
larly important.
o If you live in a high-corrosion area — where
road salts are used, near the ocean, areas
with industrial pollution, acid rain, etc.—, you
should take extra care to prevent corrosion.
In winter, hose off the underside of your car
at least once a month and be sure to clean
the underside thoroughly when winter is
over.
o When cleaning underneath the car, give
particular attention to the components under
the fenders and other areas that are hidden
from view. Do a thorough job; just dampening
the accumulated mud rather than washing it
away will accelerate corrosion rather than
prevent it. Water under high pressure and
steam are particularly effective in removing
accumulated mud and corrosive materials.
o When cleaning lower door panels, rocker
panels and frame members, be sure that
drain holes are kept open so that moisture
can escape and not be trapped inside to ac-
celerate corrosion.
E020A01A-AAT
TO HELP PREVENT CORROSION
You can help prevent corrosion from getting
started by observing the following:
E010D01A-AATMoisture Breeds Corrosion
Moisture creates the conditions in which corro-
sion is most likely to occur. For example, cor-
rosion is accelerated by high humidity, particu-
larly when temperatures are just above freez-
ing. In such conditions, the corrosive material is
kept in contact with the car surfaces by mois-
ture that is slow to evaporate.
Mud is particularly corrosive because it is slow
to dry and holds moisture in contact with the
vehicle. Although the mud appears to be dry, it
can still retain the moisture and promote corro-
sion.
High temperatures can also accelerate corro-
sion of parts that are not properly ventilated so
the moisture can be dispersed. For all these
reasons, it is particularly important to keep your
car clean and free of mud or accumulations of
other materials. This applies not only to the
visible surfaces but particularly to the underside
of the car.
E010C01A-AATHigh-Corrosion Areas
If you live in an area where your car is regularly
exposed to corrosive materials, corrosion pro-
tection is particularly important. Some of the
common causes of accelerated corrosion are
road salts, dust control chemicals, ocean air
and industrial pollution.
E010B01A-AATCommon Causes of Corrosion
The most common causes of corrosion on your
car are:
o Road salt, dirt and moisture that is allowed to
accumulate underneath the car.
o Removal of paint or protective coatings by
stones, gravel, abrasion or minor scrapes
and dents which leave unprotected metal
exposed to corrosion.
E010A01A-AATCORROSION PROTECTION
Protecting Your Hyundai from Corro-
sion
By using the most advanced design and con-
struction practices to combat corrosion,
Hyundai produces cars of the highest quality.
However, this is only part of the job. To achieve
the long-term corrosion resistance your
Hyundai can deliver, the owner's cooperation
and assistance is also required.
Page 147 of 208
CORROSION PREVENTION AND APPEARANCE CARE 4- 3
E020E01A-AATDon't Neglect the Interior
Moisture can collect under the floor mats and
carpeting to cause corrosion. Check under the
mats periodically to be sure the carpeting is dry.
Use particular care if you carry fertilizers, clean-
ing materials or chemicals in the car.
These should be carried only in proper contain-
ers and any spills or leaks should be cleaned up,
flushed with clear water and thoroughly dried.
E020D01A-AATKeep Paint and Trim in Good Condition
Scratches or chips in the finish should be
covered with "touch-up" paint as soon as pos-
sible to reduce the possibility of corrosion. If
bare metal is showing through, the attention of
a qualified body and paint shop is recommended.
E020C01A-AATKeep Your Garage Dry
Don't park your car in a damp, poorly ventilated
garage. This creates a favorable environment
for corrosion. This is particularly true if you
wash your car in the garage or drive it into the
garage when it is still wet or covered with snow,
ice or mud. Even a heated garage can contrib-
ute to corrosion unless it is well ventilated so
moisture is dispersed.
E030A01A-AATWASHING AND WAXING
Washing Your Hyundai
Never wash your car when the surface is hot
from being in the sun. Always wash your car in
the shade.
Wash your car frequently. Dirt is abrasive and
can scratch the paint if it is not removed. Air
pollution or acid rain may damage the paint and
trim through chemical action if pollutants are
allowed to remain in contact with the surface. If
you live near the ocean or in an area where road
salts or dust control chemicals are used, you
should pay particular attention to the underside
of the car. Start by rinsing the car to remove dust
and loose dirt. In winter, or if you have driven
through mud or muddy water, be sure to thor-
oughly clean the underside as well. Use a hard
direct stream of water to remove accumulations
of mud or corrosive materials. Use a good
quality car-washing solution and follow the
manufacturer's directions on the package.
These are available at your Hyundai dealer or
auto parts outlet. Don't use strong household
detergents, gasoline, strong solvents or abra-
sive cleaning powders as these may damage
the finish.
Use a clean sponge or cloth, rinse it frequently
and don't damage the finish by rubbing too hard.
For stubborn spots, dampen them frequently
and remove them a little at a time.
To clean whitewall tires, use a stiff brush or
soapy steel-wool scouring pad.To clean plastic wheel covers, use a clean
sponge or soft cloth and water.
To clean cast aluminum alloy wheels, use a mild
soap or neutral detergent. Do not use abrasive
cleaners. Protect the bare-metal surfaces by
cleaning, polishing and waxing. Because alumi-
num is subject to corrosion, be sure to give
aluminum alloy wheels special attention in win-
ter. If you drive on salted roads, clean the
wheels thoroughly afterwards.
After washing, be sure to rinse thoroughly. If
soapy water dries on the finish, streaking will
result.
When the weather is warm and the humidity low,
you may find it necessary to rinse each section
immediately after washing to avoid streaking.
After rinsing, dry the car using a damp chamois
or soft, absorbent cloth. The reason for drying
the car is to remove water from the car so it will
dry without water spots. Don't rub, this can
damage the finish.
If you find any nicks or scratches in the paint,
use touch-up paint to cover them to prevent
corrosion. To protect the paintwork of the car
against corrosion, you must clean your Hyundai
(at least once a month). Give special attention
to the removal of salt, mud and other sub-
stances on the underside of the splashboards
of the car. Make sure that the outlets and the
Page 148 of 208

4- 4 CORROSION PREVENTION AND APPEARANCE CARE
E040B01A-AATTo Clean the Leather Upholstery
(If installed)
In the normal course of use, leather upholstered
surfaces will, like any material, pick-up dust and
dirt. This dust and dirt must be cleaned off or it
may work into the surface of the leather, caus-
ing damage.
Fine leather needs care, and should be cleaned
when necessary. Washing leather thoroughly
with soap and water will keep your leather
lustrous, beautiful and ensure you have many
years of wear.
E040A01A-AATCLEANING THE INTERIOR
To Clean the Vinyl Upholstery
To clean the vinyl upholstery, first remove loose
dirt and dust with a vacuum cleaner. Then apply
a solution of mild soap or detergent and water
using a clean sponge or soft cloth. Allow this to
stay on the surface to loosen the dirt, then wipe
with a clean damp sponge or cloth. If all the dirt
stains are not removed, repeat this procedure
until the upholstery is clean. Do not use gaso-
line, solvent, paint thinner or other strong clean-
ers.
E030E01A-AATMaintaining Bumpers
Special precautions must be observed to pre-
serve the appearance of the bumpers on your
Hyundai. They are:
o Be careful not to spill battery electrolyte or
hydraulic brake fluid on the bumpers. If you
do, wash it off immediately with clear water.
o Be gentle when cleaning the bumper sur-
faces. They are made of soft plastic and the
surface can be damaged if mistreated. Do
not use abrasive cleaners. Use warm water
and mild soap or car-washing solution.
o Do not expose the bumpers to high tem-
peratures. For example, if you have your car
repainted, do not leave the bumpers on the
car if the car is going to be placed in a high-
temperature paint booth.
E030D01A-AATWhen to Wax Again
You should polish and wax the car again when
water no longer beads on a clean surface but
spreads out over a larger area.
E030C01A-AATPolishing and Waxing
Always wash and dry the car before polishing
or waxing or using a combination cleaner and
wax. Use a good quality commercial product
and follow the manufacturer's directions on the
container. Polish and wax the bright trim pieces
as well as the paint.
E030B01A-AAT
Spot Cleaning
Don't use gasoline, strong solvents or corro-
sive cleaning agents. These can damage the
finish of the car. To remove road tar, use
turpentine on a clean, soft cloth. Be gentle.
To remove dead insects or tree sap, use warm
water and mild soap or car-washing solution.
Soak the spot and rub gently. If the paint has lost
its luster, use a commercial car-cleaning polish. underside of the doors are open. Paint damage
can be caused by small accumulation of tar,
industrial precipitation, tree resin, insects and
bird droppings, when not removed immediately.
If water alone is not strong enough to remove the
accumulated dirt, use a mild car washing solu-
tion. Be sure to rinse the surface after washing
to remove the solution. Never allow the solution
to dry on the painted surfaces.