warning light Hyundai Terracan 2005 Owner's Guide
[x] Cancel search | Manufacturer: HYUNDAI, Model Year: 2005, Model line: Terracan, Model: Hyundai Terracan 2005Pages: 539, PDF Size: 18.03 MB
Page 112 of 539
1FEATURES OF YOUR HYUNDAI
98
!WARNING:
Do not place the sun visor in such a manner that it obscures visibility of the roadway, traffic or other ob- jects.
HORNFRONT DOOR EDGE WARNING LIGHT
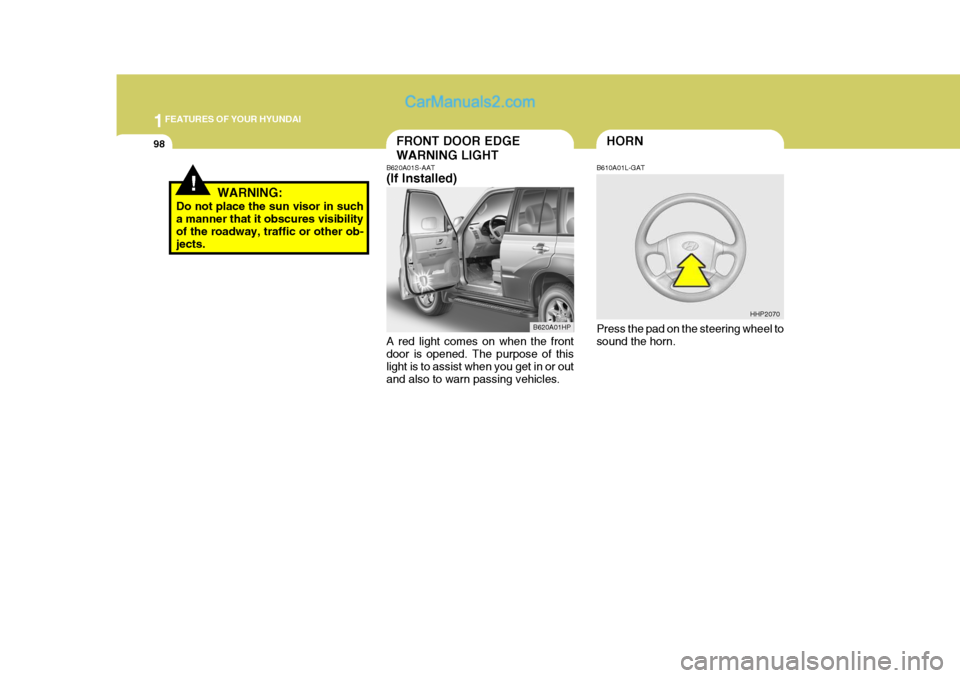
B620A01S-AAT (If Installed) A red light comes on when the front door is opened. The purpose of this light is to assist when you get in or outand also to warn passing vehicles. B610A01L-GAT Press the pad on the steering wheel to sound the horn.
B620A01HP
HHP2070
Page 113 of 539
1
FEATURES OF YOUR HYUNDAI
99HEADLIGHT LEVELING DE- VICE SYSTEMSTEERING WHEEL TILT LEVERREAR SEAT ARMREST
!
B611A01HP-AAT (If Installed) The rear seat armrest is located in the center of the rear seatback. A storage box and two drink holders are includedfor convenience. B600A01HP-GAT (If Installed) To adjust the steering wheel:
1. Pull the lever toward you and hold it
to unlock.
2. Raise or lower the steering wheel to
the desired position.
3. After adjustment, release the lever.
WARNING:
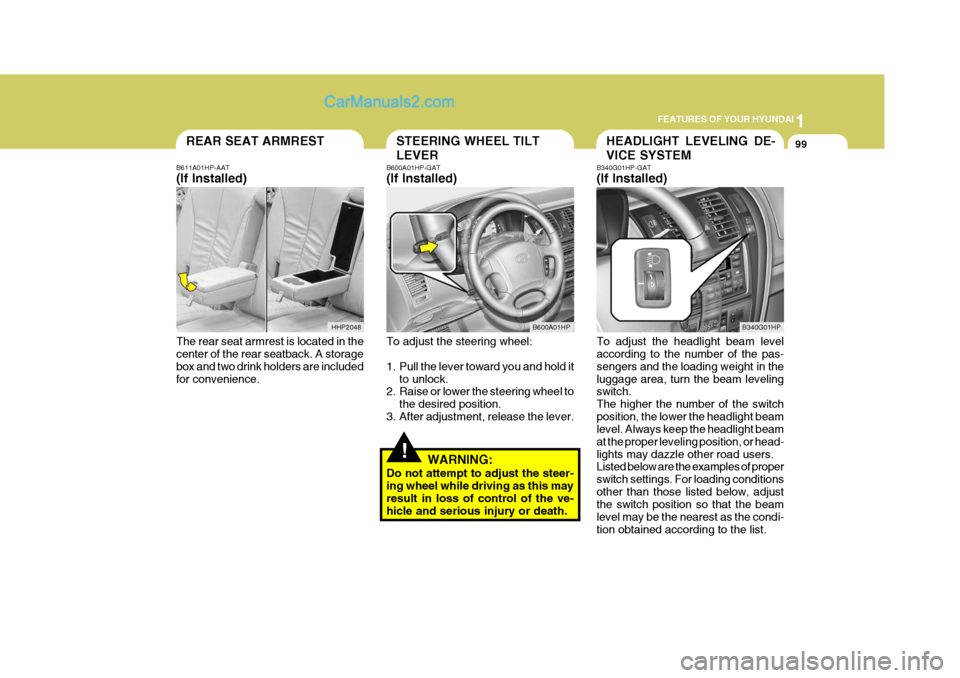
Do not attempt to adjust the steer- ing wheel while driving as this may result in loss of control of the ve- hicle and serious injury or death. B340G01HP-GAT (If Installed) To adjust the headlight beam level according to the number of the pas- sengers and the loading weight in theluggage area, turn the beam leveling switch. The higher the number of the switchposition, the lower the headlight beam level. Always keep the headlight beam at the proper leveling position, or head-lights may dazzle other road users. Listed below are the examples of proper switch settings. For loading conditionsother than those listed below, adjust the switch position so that the beam level may be the nearest as the condi-tion obtained according to the list.
B600A01HP
B340G01HP
HHP2048
Page 158 of 539
2
DRIVING YOUR HYUNDAI
3
!
TO START THE ENGINEBEFORE STARTING THE ENGINE
C020A01A-AAT Before you start the engine, you should always:
1. Look around the vehicle to be sure
there are no flat tires, puddles of oil, water or other indications of possible trouble.
2. After entering the car, check to be sure the parking brake is engaged.
3. Check that all windows, and lights are clean.
4. Check that the interior and exterior
mirrors are clean and in position.
5. Check your seat, seatback and headrest to be sure they are in theirproper positions.
6. Lock all the doors.
7. Fasten your seat belt and be sure
that all other occupants have fas- tened theirs.
8. Turn off all lights and accessories
that are not needed.
9. When you turn the ignition switch to "ON", check that all appropriatewarning lights are operating andthat you have sufficient fuel.
10. Check the operation of warning
lights and all bulbs when key is inthe "ON" position. C030A01HP-GAT Combination Ignition Switch
o If your Hyundai is equipped with a
manual transmission, place the shift lever in neutral and depress the clutch pedal fully.
o If your Hyundai has an automatic transmission, place the shift lever in"P" (park).
o To start the engine, insert the igni- tion key and turn it to the "START"position. Release it as soon as the engine starts. Do not hold the key inthe "START" position for more than 15 seconds.
NOTE: For safety, the engine will not start if the shift lever is not in "P" or "N" Position (Automatic Transmission).
WARNING:
Your vehicle is equipped with tires designed to provide for safe ride and handling capability.Do not use a size and type of tire and wheel that is different from the one that was originally installed onyour vehicle. It can affect the safety and performance of your vehicle, which could lead to handling fail-ure or rollover and serious injury. When replacing the tires, be sure to equip all four tires with the tire andwheel of the same size, type, tread, brand and load-carrying capacity. If you nevertheless decide to equipyour vehicle with any tire/wheel combination not recommended by Hyundai for off-road driving, youshould not use these tires for high- way driving.
Page 159 of 539
2 DRIVING YOUR HYUNDAI
4
!WARNING: (Diesel only)
To ensure that sufficient vacuum exists within the brake system dur- ing cold weather start-up condi- tions, it is necessary to run theengine at idle after starting accord- ing to the following table.
Ambient temp. Above -15°C (5°F) Below -15°C (5°F)
After starting the engine, do not drive the vehicle until the brake vacuum warning light has turn-ed off. Failure to carry out the above pro- cedure may result in the need toapply greater pedal pressure in or- der to effect the necessary braking effort. Warm up time 3 min. or longer 6 min. or longer
KEY POSITIONS
!
C040A01A-AAT
WARNING:
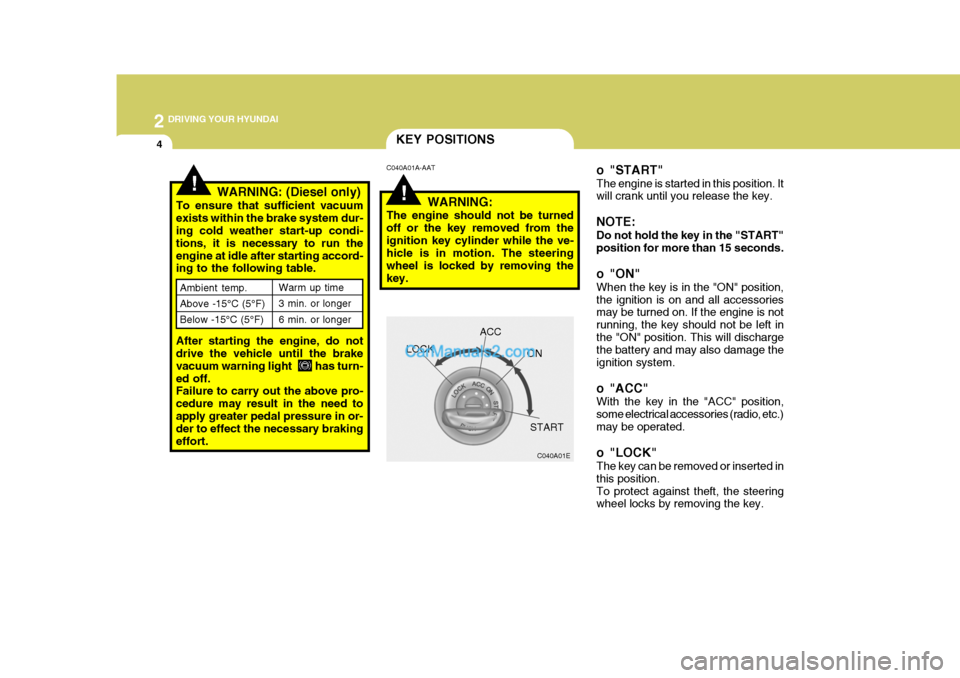
The engine should not be turned off or the key removed from theignition key cylinder while the ve- hicle is in motion. The steering wheel is locked by removing thekey. o "START" The engine is started in this position. It will crank until you release the key. NOTE: Do not hold the key in the "START" position for more than 15 seconds.
o "ON" When the key is in the "ON" position, the ignition is on and all accessories may be turned on. If the engine is not running, the key should not be left inthe "ON" position. This will discharge the battery and may also damage the ignition system.
o "ACC" With the key in the "ACC" position, some electrical accessories (radio, etc.)may be operated.
o "LOCK" The key can be removed or inserted in this position.To protect against theft, the steering wheel locks by removing the key.
C040A01E
LOCK
ACC
ON
START
Page 164 of 539
2
DRIVING YOUR HYUNDAI
9AUTOMATIC TRANSMIS- SION
!
o Exercise extreme caution when driv-
ing on a slippery surface. Be espe- cially careful when braking, acceler- ating or shifting gears. On a slippery surface, an abrupt change in ve-hicle speed can cause the drive wheels to lose traction and the ve- hicle to go out of control. o In the event your vehicle leaves
the roadway, do not steer sharply.Instead, slow down before pull- ing back into the travel lanes.
o Never exceed posted speed lim- its.
WARNING:
o Avoid high cornering speeds.
o Do not make quick steering wheel movements, such as sharp lanechanges or fast, sharp turns.
o Always wear your seat belts. In a collision crash, an unbeltedperson is significantly more likelyto die than a person wearing a seatbelt.
o The risk of rollover is greatly in-
creased if you lose control ofyour vehicle at highway speeds.
o Loss of control often occurs if
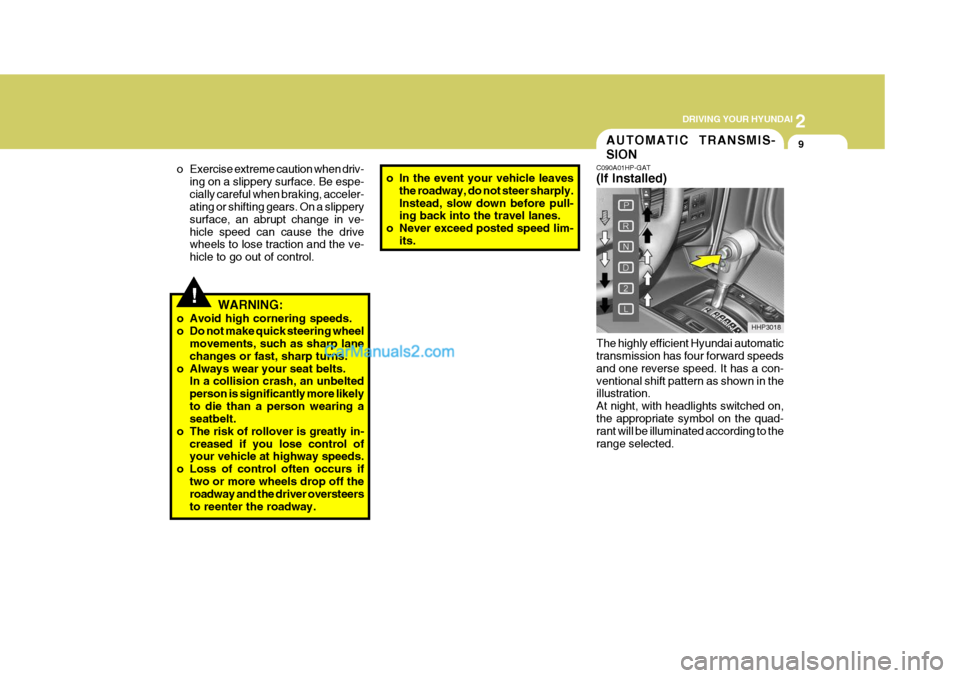
two or more wheels drop off theroadway and the driver oversteers to reenter the roadway. C090A01HP-GAT (If Installed) The highly efficient Hyundai automatic transmission has four forward speeds and one reverse speed. It has a con-ventional shift pattern as shown in the illustration. At night, with headlights switched on,the appropriate symbol on the quad- rant will be illuminated according to the range selected.
HHP3018
Page 176 of 539
2
DRIVING YOUR HYUNDAI
21ANTI-LOCK BRAKE SYSTEM (ABS)
!WARNING:
o Avoid high cornering speeds.
o Do not make quick steering wheel movements, such as sharp lane charges or fast, sharp turns.
o The risk of rollover is greatly in-
creased if you lose control ofyour vehicle at highway speeds.
o In a collision crash, an unbelted
person is significantly more likelyto die than a person wear a seatbelt.
o Loss of control often occurs if two or more wheels drop off theroadway and the driver oversteers to reenter the roadway.
o In the event your vehicle leaves the roadway, do not steer sharply.Instead, slow down before pull-ing back into the travel lanes. C120A02A-AAT (If Installed) The Anti-Lock Brake System (ABS) is designed to prevent wheel lock-upduring sudden braking or on hazard- ous road surfaces. The ABS control module monitors the wheel speed andcontrols the pressure applied to each brake. Thus, in emergency situations or on slick roads, ABS will increasevehicle control during braking. NOTE: During ABS operation, a slight pul- sation may be felt in the brake pedal when the brakes are applied. Also, a noise may be heard in the enginecompartment while braking. These conditions are normal and indicate that the anti-lock brake system isfunctioning properly.!WARNING:
ABS will not prevent accidents due to improper or dangerous drivingmaneuvers. Even though vehicle control is improved during emer- gency braking, always maintain asafe distance between you and ob- jects ahead. Vehicle speeds should always be reduced during extremeroad conditions. The braking distance for cars equipped with an anti-lock brakingsystem may be longer than for those without it in the following road con- ditions. During these conditions thevehicle should be driven at reduced speeds.
o Rough, gravel or snow-covered roads.
o With tire chains installed.
o Roads where the road surface is pitted or has different surfaceheight.
The safety features of an ABSequipped vehicle should not betested by high speed driving or cornering. This could endanger the safety of yourself or others.
Page 177 of 539
2 DRIVING YOUR HYUNDAI
22
!
C130A01HP-GAT
WARNING:
Nothing should be carried on top of the cargo area cover behind the rear seat. If there were an accident or a sudden stop, such objectscould move forward and cause dam- age to the vehicle or injure the oc- cupants.
o After being parked, check to be sure the parking brake is not engaged and that the parking brake indicator light is out before driving away.
o Driving through water may get the brakes wet. They can also get wetwhen the car is washed. Wet brakes can be dangerous! Your car will notstop as quickly if the brakes are wet. Wet brakes cause the car to pull to one side. To dry the brakes, applythe brakes lightly until the braking action returns to normal, taking care to keep the car under control at alltimes. If the braking action does not return to normal, stop as soon as it is safe to do so and call your Hyundaidealer for assistance.
GOOD BRAKING PRAC- TICES
LIMITED-SLIP DIFFEREN- TIAL (LSD)
D190A01HP-GAT (If Installed) A limited-slip differential, if equipped, is for the rear wheel differential only.The features of this limited-slip differ- ential are described below: Just as with a conventional differential,the wheel on one side is allowed to turn at a different speed from the wheel on the other side when the vehicle iscornering. The difference between the limited-slip differential and a conven- tional differential is that if the wheel onone side of the vehicle loses traction, a greater amount of torque is applied to the rear wheel on the other side toimprove traction. CAUTION:
o Never start the engine with the gearshift lever placed in the for-ward or reverse while one of therear wheels is jacked up and the other in contact with the ground; doing so may cause the vehicleto jump forward.
o Use only recommended oil for
LSD in the rear axle.See page 9-5 for the recom- mended oil descriptions.
!
Page 186 of 539
2
DRIVING YOUR HYUNDAI
31
C190F01HP-GAT Trailer or Vehicle Towing Tips
1. Before towing, check hitch and safety chain connections as well as proper operation of the trailer running lights, brake lights, and turn signals.
2. Always drive your vehicle at a mod- erate speed (Less than 100 km/h).
3. Trailer towing requires more fuel than normal conditions.
4. To maintain engine braking effi-
ciency, do not tow a trailer with thetransmission in fifth gear (manual transmission) or an overdrive gear (automatic transmission).
5. Always secure items in the trailer to prevent load shift while driving.
6. Check the condition and air pres- sure of all tires on the trailer and your car. Low tire pressure can seriously affect the handling. Alsocheck the spare tire.
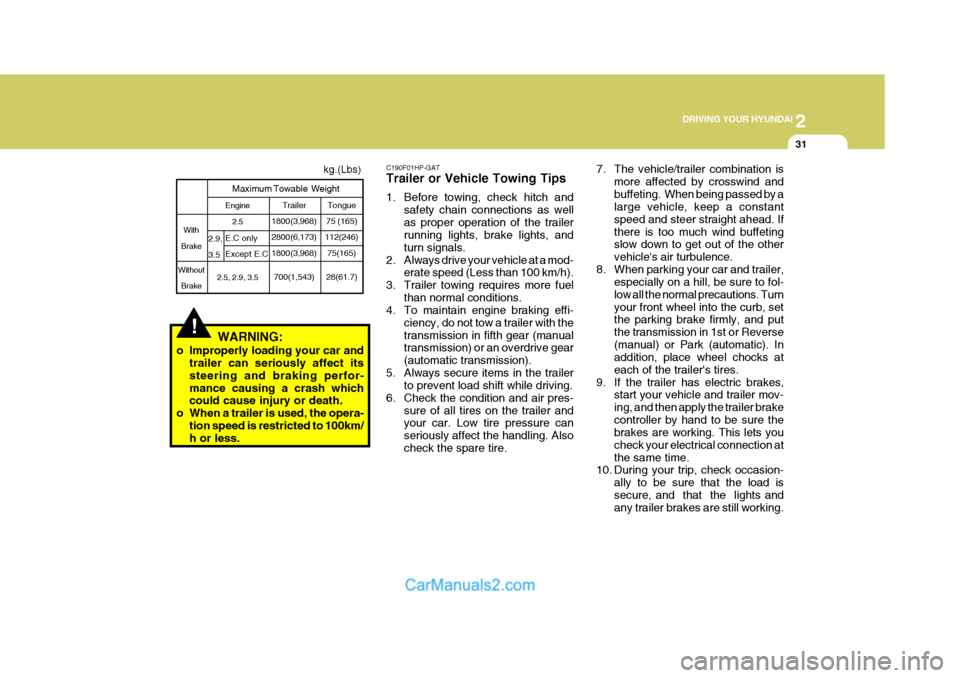
Tongue
75 (165)
112(246)
75(165)
28(61.7)
Engine
2.5
2.5, 2.9, 3.5
!WARNING:
o Improperly loading your car and trailer can seriously affect its steering and braking perfor-mance causing a crash which could cause injury or death.
o When a trailer is used, the opera- tion speed is restricted to 100km/h or less.
With
Brake
Without BrakeE.C only Except E.C
2.9,3.5
Maximum Towable Weight
Trailer
1800(3,968) 2800(6,173) 1800(3,968)
700(1,543)
7. The vehicle/trailer combination is more affected by crosswind and buffeting. When being passed by a large vehicle, keep a constant speed and steer straight ahead. Ifthere is too much wind buffeting slow down to get out of the other vehicle's air turbulence.
8. When parking your car and trailer, especially on a hill, be sure to fol-low all the normal precautions. Turnyour front wheel into the curb, set the parking brake firmly, and put the transmission in 1st or Reverse(manual) or Park (automatic). In addition, place wheel chocks at each of the trailer's tires.
9. If the trailer has electric brakes, start your vehicle and trailer mov-ing, and then apply the trailer brakecontroller by hand to be sure the brakes are working. This lets you check your electrical connection atthe same time.
10. During your trip, check occasion-
ally to be sure that the load issecure, and that the lights and any trailer brakes are still working.
kg.(Lbs)
Page 189 of 539
3 WHAT TO DO IN AN EMERGENCY
2
!
IF THE ENGINE WILL NOT START
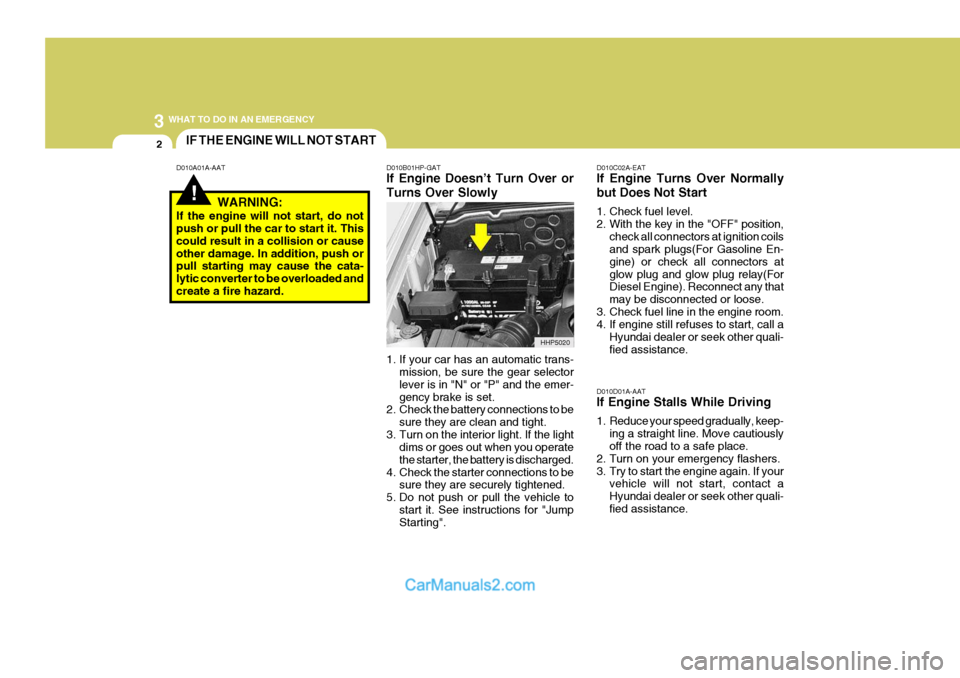
D010A01A-AAT D010B01HP-GAT If Engine Doesn’t Turn Over or Turns Over Slowly
1. If your car has an automatic trans- mission, be sure the gear selector lever is in "N" or "P" and the emer-gency brake is set.
2. Check the battery connections to be
sure they are clean and tight.
3. Turn on the interior light. If the light dims or goes out when you operatethe starter, the battery is discharged.
4. Check the starter connections to be sure they are securely tightened.
5. Do not push or pull the vehicle to start it. See instructions for "Jump Starting". D010C02A-EAT If Engine Turns Over Normally but Does Not Start
1. Check fuel level.
2. With the key in the "OFF" position,
check all connectors at ignition coils and spark plugs(For Gasoline En- gine) or check all connectors atglow plug and glow plug relay(For Diesel Engine). Reconnect any that may be disconnected or loose.
3. Check fuel line in the engine room.
4. If engine still refuses to start, call a
Hyundai dealer or seek other quali- fied assistance.
WARNING:
If the engine will not start, do not push or pull the car to start it. This could result in a collision or causeother damage. In addition, push or pull starting may cause the cata- lytic converter to be overloaded andcreate a fire hazard.
D010D01A-AAT If Engine Stalls While Driving
1. Reduce your speed gradually, keep-ing a straight line. Move cautiously off the road to a safe place.
2. Turn on your emergency flashers.
3. Try to start the engine again. If your vehicle will not start, contact aHyundai dealer or seek other quali-fied assistance.
HHP5020
Page 190 of 539
3
WHAT TO DO IN AN EMERGENCY
3JUMP STARTING
!
D020A02A-AAT
WARNING:
The gas produced by the battery during the jump-start operation is highly explosive. If these instruc- tions are not followed exactly, seri-ous personal injury and damage to the vehicle may occur! If you are not sure how to follow this proce-dure, seek qualified assistance. Automobile batteries contain sul- furic acid. This is poisonous andhighly corrosive. When jump start- ing, wear protective glasses and be careful not to get acid on yourself,your clothing or on the car. o If you should accidentally get acid
on your skin or in your eyes,immediately remove any contami- nated clothing and flush the area with clear water for at least 15 min-utes. Then promptly obtain medical attention. If you must be transported to an emergency facility, continue toapply water to the affected area with a sponge or cloth.
o The gas produced by the battery
during the jump-start operation ishighly explosive. Do not smoke or allow a spark or an open flame inthe vicinity.
o The battery being used to provide
the jump start must be 12-volt. If youcannot determine that it is a 12-volt battery, do not attempt to use it for the jump start.
o To jump start a car with a discharged battery, follow this procedure ex-actly:
1. If the booster battery is installed in another vehicle, be sure the twovehicles are not touching. 2. Turn off all unnecessary lights and
acces-sories in both vehicles.
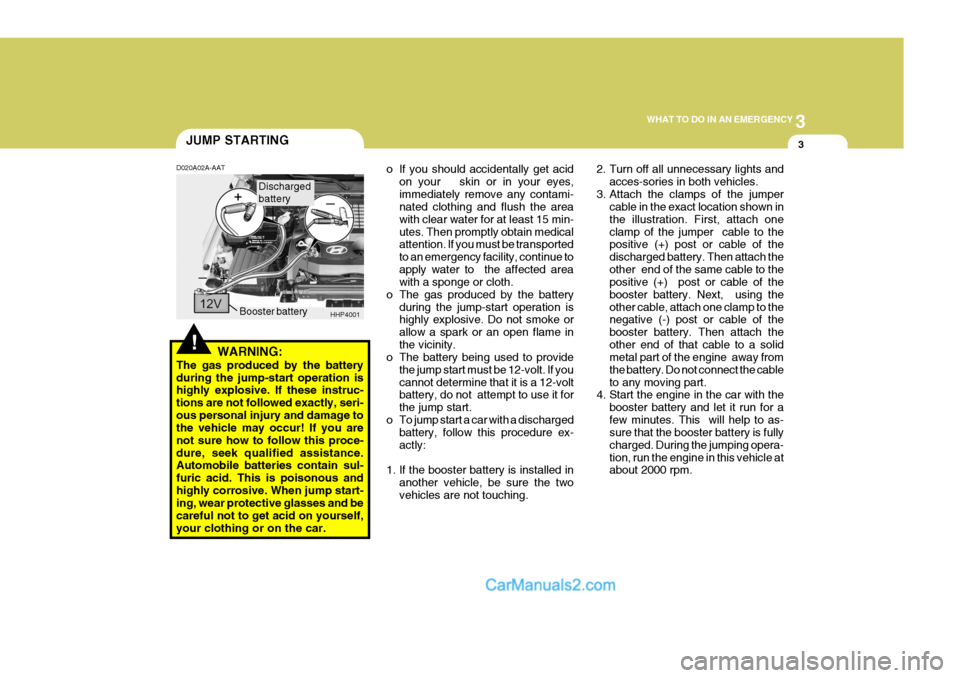
3. Attach the clamps of the jumper cable in the exact location shown inthe illustration. First, attach oneclamp of the jumper cable to the positive (+) post or cable of the discharged battery. Then attach theother end of the same cable to the positive (+) post or cable of the booster battery. Next, using theother cable, attach one clamp to the negative (-) post or cable of the booster battery. Then attach theother end of that cable to a solid metal part of the engine away from the battery. Do not connect the cableto any moving part.
4. Start the engine in the car with the
booster battery and let it run for afew minutes. This will help to as- sure that the booster battery is fully charged. During the jumping opera-tion, run the engine in this vehicle at about 2000 rpm.
HHP4001
Booster battery
Discharged battery