climate control INFINITI M 2010 Owners Manual
[x] Cancel search | Manufacturer: INFINITI, Model Year: 2010, Model line: M, Model: INFINITI M 2010Pages: 445, PDF Size: 6.15 MB
Page 6 of 445

Table of
ContentsIllustrated table of contents
Safety Ð Seats, seat belts and supplemental restraint system
Instruments and controls
Pre-driving checks and adjustments
Monitor, climate, audio, phone and voice recognition systems
Starting and driving
In case of emergency
Appearance and care
Maintenance and do-it-yourself
Technical and consumer information
Index
01
2 3
4 5
6 7
8 9
10
Page 12 of 445

1. Rear sunshade (if so equipped) (P. 2-47)
2. Rear personal lights (P. 2-49)
3. Coat hooks (P. 2-43)4. Mobile Entertainment System (MES)
(if so equipped)
Ð Flip-down screen (P. 4-63)
Ð Digital Versatile Disc (DVD) drive
(P. 4-62)
Ð Headphones (P. 4-64)
Ð DVD remote controller (P. 4-65) 5. Door armrest
Ð Power window switches (P. 2-43)
Ð Power door lock switch (P. 3-5)
6. Automatic drive positioner switch (if so equipped) (P. 3-26)
7. Sun visors (P. 3-22)
8. Front map lights (P. 2-49)
9. Moonroof switch (P. 2-46)
10. Sunglasses holder (P. 2-41)
11. Inside rearview mirror (P. 3-23) Ð HomeLink Tuniversal transceiver
(P. 2-51)
Ð Compass (if so equipped) (P. 2-9)
12. Trunk pass-through/Rear armrest (P. 1-11)
13. Rear seat controls (if so equipped) Ð Rear power seat adjust switch (P. 1-4)
Ð Heated seat switches (P. 2-34)
Ð Automatic return ON/CANCEL switch
(P. 1-4)
Ð Rear sunshade control switch
(P. 2-47)
14. Rear passenger control switches (if so equipped)
Ð For climate control (P. 4-33)
Ð For audio system (P. 4-60)
15. Rear cup holders (P. 2-40)
SSI0371
PASSENGER COMPARTMENT
Illustrated table of contents0-5
wÐ
Ð
05/19/09Ðtbrooks
X
Page 15 of 445

1. Side ventilator (P. 4-28)
2. Meters and gauges (P. 2-5)
3. Center ventilator (P. 4-28)
4. Security indicator light (P. 2-26)
5. Hazard warning flasher switch (P. 2-33)6. Automatic climate control system
(P. 4-29) 7. Center multi-function control panel
(P. 4-2)
Ð Navigation system* (if so equipped)
Ð Vehicle information and setting buttons
(P. 4-7)
Ð Phone system (P. 4-74, P. 4-84)
Ð Audio system (P. 4-34)
8. Front passenger supplemental air bag (P. 1-40)
9. Fuse box cover (P. 8-25)
10. Parking brake Ð Operation (P. 5-16)
Ð Parking (P. 5-48)
11. Push-button ignition switch (P. 5-8)
12. Clock (P. 2-38)
13. Climate controlled seat switch (if so equipped) (P. 2-35)
14. Snow mode switch (if so equipped) (P. 2-37)
15. Rear sunshade switch (if so equipped) (P. 2-47)
16. Rear control cancel switch (if so equipped) (P. 2-47) or Climate controlled
seat switch (if so equipped)
(P. 2-35)
17. Climate controlled seat switch (if so equipped) (P. 2-35)
18. Cigarette lighter and ashtrays (P. 2-39)
SIC3551
INSTRUMENT PANEL
0-8Illustrated table of contents
wÐ
Ð
05/19/09Ðtbrooks
X
Page 77 of 445

2 Instruments and controls
Cockpit........................................... 2-2
Instrument panel .................................. 2-3
Meters and gauges ................................ 2-5
Speedometer and odometer ..................... 2-6
Tachometer .................................... 2-6
Engine coolant temperature gauge ............... 2-7
Fuel gauge ..................................... 2-7
Meter/ring illumination and needle sweep ........ 2-8
Compass (if so equipped) .......................... 2-9
Zone variation change procedure ...............2-10
Warning/indicator lights and audible reminders .....2-12
Checking bulbs ............................... 2-13
Warning lights ................................ 2-13
Indicator lights ................................ 2-18
Audible reminders ............................. 2-20
Dot matrix liquid crystal display ...................2-21
Indicators for operation ........................ 2-22
Security systems ................................. 2-24
Vehicle security system ........................ 2-24
INFINITI Vehicle Immobilizer System ............2-25
Windshield wiper and washer switch ...............2-27
Rain-sensing auto wiper system ................2-28
Rear window and outside mirror defroster switch . . . 2-28 Headlight and turn signal switch
..................2-29
Xenon headlights ............................. 2-29
Headlight switch .............................. 2-29
Turn signal switch ............................. 2-33
Fog light switch ............................... 2-33
Hazard warning flasher switch .....................2-33
Horn ............................................ 2-34
Heated seats (rear seats) (if so equipped) ..........2-34
Climate controlled seats (front seats) ..............2-35
Lane Departure Warning (LDW) switch
(if so equipped) .................................. 2-36
SNOW mode switch (if so equipped) ...............2-37
Vehicle Dynamic Control (VDC) OFF switch ..........2-37
Clock ............................................ 2-38
Adjusting the time ............................. 2-38
Power outlets .................................... 2-38
Cigarette lighter and ashtrays .....................2-39
Front ......................................... 2-39
Rear ......................................... 2-39
Storage ......................................... 2-40
Cup holders .................................. 2-40
Sunglasses holder ............................. 2-41
Glove box .................................... 2-41
wÐ
Ð
05/19/09Ðtbrooks
X
Page 80 of 445

1. Side ventilator (P. 4-28)
2. Meters and gauges (P. 2-5)
3. Center ventilator (P. 4-28)
4. Security indicator light (P. 2-26)
5. Hazard warning flasher switch (P. 2-33)6. Automatic climate control system
(P. 4-29)
7. Center multi-function control panel Ð Navigation system* (if so equipped) Ð Vehicle information and setting buttons
(P. 4-7) Ð Phone system (P. 4-74, P. 4-84)
Ð Audio system (P. 4-34)
8. Front passenger supplemental air bag (P. 1-40)
9. Fuse box cover (P. 8-25)
10. Parking brake Ð Operation (P. 5-16)
Ð Parking (P. 5-48)
11. Push-button ignition switch (P. 5-8)
12. Clock (P. 2-38)
13. Climate controlled seat switch (if so equipped) (P. 2-35)
14. Snow mode switch (if so equipped) (P. 2-37)
15. Rear sunshade switch (if so equipped) (P. 2-47)
16. Rear control cancel switch (if so equipped) (P. 2-47) or Climate controlled
seat switch (if so equipped)
(P. 2-35)
17. Climate controlled seat switch (if so equipped) (P. 2-35)
18. Cigarette lighter and ashtrays (P. 2-39)
19. CompactFlash card slot (if so equipped) (P. 4-34)
SIC3551
INSTRUMENT PANEL
Instruments and controls2-3
wÐ
Ð
05/19/09Ðtbrooks
X
Page 93 of 445

After the ignition switch is pushed ON, this light
illuminates for about 1 second and turns off.
Low tire pressure warning :
If the vehicle is being driven with low tire
pressure, the warning light will illuminate. If
you select the tire pressure information in the
display, the LOW PRESSURE information will be
displayed. The tire pressure for each tire will
also be displayed.
When the low tire pressure warning light illumi-
nates, you should stop and adjust the tire
pressure to the recommended COLD tire pres-
sure shown on the Tire and Loading Information
label. The low tire pressure warning light does
not automatically turn off when the tire pres-
sure is adjusted. After the tire is inflated to the
recommended pressure, the vehicle must be
driven at speeds above 16 MPH (25 km/h) to
activate the TPMS and turn off the low tire
pressure warning light. Use a tire pressure
gauge to check the tire pressure.
For additional information, see ªTIRE PRESSURE
MONITORING SYSTEM (TPMS)º in the ª5. Start-
ing and drivingº section and ªTIRE PRESSURE
MONITORING SYSTEM (TPMS)º in the ª6. In case
of emergencyº section. For the tire pressure
information display, see ªHOW TO USE INFO
BUTTONº in the ª4. Monitor, climate, audio,
phone and voice recognition systemsº section.TPMS malfunction :
If the TPMS is not functioning properly, the low
tire pressure warning light will flash for approxi-
mately 1 minute when the ignition switch is
pushed ON. The light will remain on after 1
minute. Have the system checked by an INFINITI
retailer.
For additional information, see ªTIRE PRESSURE
MONITORING SYSTEM (TPMS)º in the ª5. Start-
ing and drivingº section.
WARNING
c
If the light does not illuminate with the igni-
tion switch pushed ON, have the vehicle
checked by an INFINITI retailer as soon as
possible. c
If the light illuminates while driving, avoid
sudden steering maneuvers or abrupt brak-
ing, reduce vehicle speed, pull off the road to
a safe location and stop the vehicle as soon
as possible. Driving with under-inflated tires
may permanently damage the tires and in-
crease the likelihood of tire failure. Serious
vehicle damage could occur and may lead to
an accident and could result in serious per-
sonal injury. Check the tire pressure for all
four tires. Adjust the tire pressure to the rec-
ommended COLD tire pressure shown on the
Tire and Loading Information label to turn
the low tire pressure warning light OFF. If the
light stays on after adjusting the tire pres-
sure and driving over 16 MPH (25 km/h), have
the system checked by an INFINITI retailer. If
you have a flat tire, replace it with a spare
tire as soon as possible.
c When a spare tire is mounted or a wheel is
replaced, tire pressure will not be indicated,
the TPMS will not function and the low tire
pressure warning light will flash for approxi-
mately 1 minute. The light will remain on
after 1 minute. Contact your INFINITI retailer
as soon as possible for tire replacement
and/or system resetting.
2-16Instruments and controls
wÐ
Ð
05/14/09Ðpattie
X
Page 107 of 445

Autolight system
The autolight system allows the headlights to
be set so they turn on and off automatically.
To set the autolight system:
1. Make sure the headlight switch is in theAUTO position
s1.
2. Push the ignition switch to the ON posi- tion.
3. The autolight system automatically turns the headlights on and off.
To turn the autolight system off, turn the switch
to the OFF,
orposition. The autolight system can turn on the headlights
automatically when it is dark and turn off the
headlights when it is light.
If the ignition switch is pushed to the LOCK
position and one of the doors is opened and
this condition is continued, the headlights re-
main on for 5 minutes.
Automatic headlights off delay :
You can keep the headlights on for up to 180
seconds after you push the ignition switch to
LOCK and open any door then close all the
doors.
You can adjust the period of the automatic
headlights off delay from 0 seconds (OFF) to 180
seconds.
For automatic headlights off delay setting, see
ªComfort & Conv. settingsº in the ª4. Monitor,
climate, audio, phone and voice recognition
systemsº section.
Be sure not to put anything on top of the photo
sensor
sAlocated on the top of the instrument
panel. The photo sensor controls the autolight;
if it is covered, the photo sensor reacts as if it is
dark and the headlights will illuminate.
SIC2412SAA0642A
2-30Instruments and controls
wÐ
Ð
05/14/09Ðpattie
X
Page 112 of 445

The rear outboard seats are warmed by built-in
heaters. The switches located on the inside of
the rear center armrest can be operated inde-
pendently of each other.
1. Start the engine.
2. Select heat range.
s1For high heat, push the HI (High) side ofthe switch.
s2For low heat, push the LO (Low) side of
the switch.
The indicator light in the switch
s3will
illuminate when low or high is selected.
3. To turn off the heater, push the HI or LO side (which is selected) of the switch.
Make sure the indicator light turns off.
The heater is controlled by a thermostat,
automatically turning the heater on and off.
The indicator light will remain on as long as
the switch is on.
When the vehicle's interior is warmed, or
before you leave the vehicle, be sure to turn
off the switch.
The climate controlled seat warms up or cools
down the front seats by blowing warm or cool
air from the surface of the seat. The switches
located on the center console can be operated
independently of each other.
1. Start the engine.
2. Turn the control knob
sAto the H (Heat)
side
s1or to the C (Cool) sides2. The
indicator light
sBon the control knob will
illuminate.
3. Adjust the desired amount of the air using the control knob
sA.
The climate controlled seat blower remains
on low speed for approximately 60 seconds
after turning the switch on or selecting the
desired temperature.
SIC2770SIC2771
CLIMATE CONTROLLED SEATS (front seats)
Instruments and controls2-35
wÐ
Ð
05/14/09Ðpattie
X
Page 113 of 445

4. When the vehicle's interior is warmed orcooled, and/or before you leave the ve-
hicle, be sure to turn the control knob to
the OFF position (center). The indicator
light
sBon the control knob goes off at
the OFF position.
To check the air filter for the climate con-
trolled seat, contact an INFINITI retailer.
CAUTION
c The battery could run down if the climate
controlled seat is operated while the engine
is not running.
c Do not use the climate controlled seat for
extended periods or when no one is using
the seat.
c Do not put anything on the seat which insu-
lates heat, such as a blanket, cushion, seat
cover, etc. Otherwise, the seat may become
overheated.
c Do not place anything hard or heavy on the
seat or pierce it with a pin or similar object.
This may result in damage to the climate
controlled seat.
c Any liquid spilled on the seat should be re-
moved immediately with a dry cloth. c
The climate controlled seat has an air filter.
Do not operate climate controlled seat with-
out an air filter. This may result in damage to
the system.
c When cleaning the seat, never use gasoline,
thinner, or any similar materials.
c If any malfunctions are found or the climate
controlled seat does not operate, turn the
switch off and have the system checked by
an INFINITI retailer.
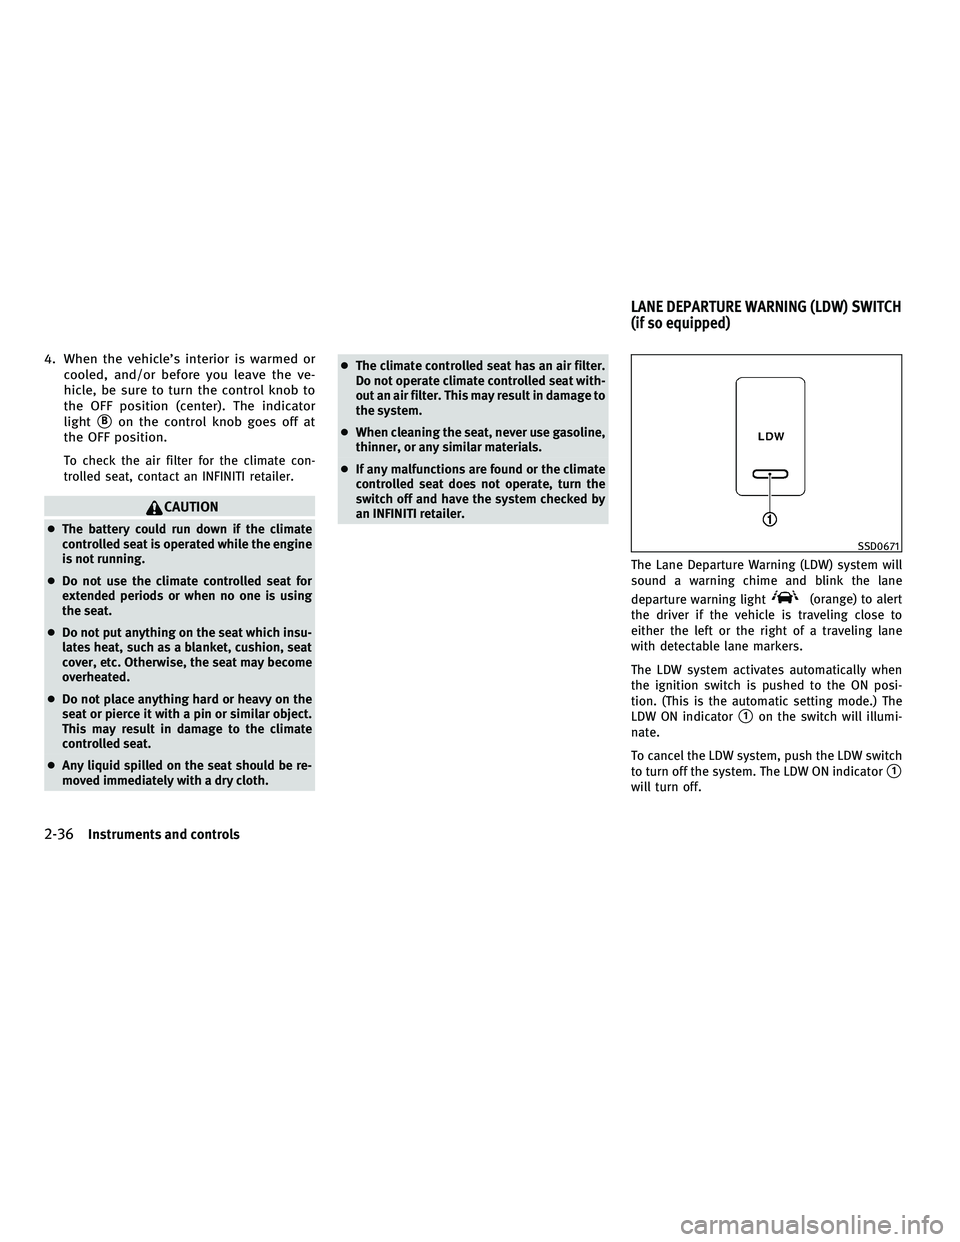
The Lane Departure Warning (LDW) system will
sound a warning chime and blink the lane
departure warning light
(orange) to alert
the driver if the vehicle is traveling close to
either the left or the right of a traveling lane
with detectable lane markers.
The LDW system activates automatically when
the ignition switch is pushed to the ON posi-
tion. (This is the automatic setting mode.) The
LDW ON indicator
s1on the switch will illumi-
nate.
To cancel the LDW system, push the LDW switch
to turn off the system. The LDW ON indicator
s1
will turn off.
SSD0671
LANE DEPARTURE WARNING (LDW) SWITCH
(if so equipped)
2-36Instruments and controls
wÐ
Ð
05/14/09Ðpattie
X
Page 115 of 445

If the power supply is disconnected, the clock
will not indicate the correct time. Readjust the
time.
ADJUSTING THE TIME
1. To set the clock forward, push the button
s1.
2. To set the clock backward, push the but- ton
s2.
3. To move forward or backward faster, push and hold the button more than 5 seconds.
For details about display clock adjustment (if so
equipped), see ªHOW TO USE SETTING BUTTONº
in the ª4. Monitor, climate, audio, phone and
voice recognition systemsº section. The power outlets are located on the back side
and inside (if equipped) of the center console
for powering electrical accessories such as a
cellular telephone.
CAUTION
c
The outlet and plug may be hot during or
immediately after use.
c Do not use with accessories that exceed a 12
volt, 120W (10A) power draw. Do not use
double adapters or more than one electrical
accessory.
c Use power outlet with the engine running to
avoid discharging the vehicle battery.
c Avoid using power outlet when the air condi-
tioner, headlights or rear window defroster
is on.
c This power outlet is not designed for use
with a cigarette lighter unit.
c Push the plug in as far as it will go. If good
contact is not made, the plug may overheat
or the internal temperature fuse may open.
c Before inserting or disconnecting a plug, be
sure the electrical accessory being used is
turned OFF.
c When not in use, be sure to close the cap. Do
not allow water to contact the outlet.
SIC2772SIC2773
Only for model without DVD player
SIC2774
CLOCK POWER OUTLETS
2-38Instruments and controls
wÐ
Ð
05/14/09Ðpattie
X