engine INFINITI M35 2006 Factory Service Manual
[x] Cancel search | Manufacturer: INFINITI, Model Year: 2006, Model line: M35, Model: INFINITI M35 2006Pages: 5621, PDF Size: 65.56 MB
Page 3006 of 5621
EI-1
EXTERIOR & INTERIOR
I BODY
CONTENTS
C
D
E
F
G
H
J
K
L
M
SECTION EI
A
B
EI
Revision: 2006 January2006 M35/M45
EXTERIOR & INTERIOR
PRECAUTIONS .......................................................... 3
Precautions for Supplemental Restraint System
(SRS) “AIR BAG” and “SEAT BELT PRE-TEN-
SIONER” .................................................................. 3
Precautions for Procedures without Cowl Top Cover ..... 3
Precautions for Work ...........................................
..... 3
PREPARATION ........................................................... 4
Special Service Tools ............................................... 4
Commercial Service Tools ........................................ 4
SQUEAK AND RATTLE TROUBLE DIAGNOSES ..... 5
Work Flow ................................................................ 5
CUSTOMER INTERVIEW ..................................... 5
DUPLICATE THE NOISE AND TEST DRIVE ....... 6
CHECK RELATED SERVICE BULLETINS ........... 6
LOCATE THE NOISE AND IDENTIFY THE
ROOT CAUSE ...................................................... 6
REPAIR THE CAUSE ........................................... 6
CONFIRM THE REPAIR ....................................... 7
Generic Squeak and Rattle Troubleshooting ........... 7
INSTRUMENT PANEL .......................................... 7
CENTER CONSOLE ............................................. 7
DOORS ................................................................. 7
TRUNK .................................................................. 8
SUNROOF/HEADLINING ..................................... 8
SEATS ................................................................... 8
UNDERHOOD ....................................................... 8
Diagnostic Worksheet .............................................. 9
FRONT BUMPER ......................................................11
Removal and Installation ......................................... 11
REMOVAL ........................................................
... 12
INSTALLATION ................................................... 12
Removal and Installation of Front Bumper Grille ... 13
REMOVAL ........................................................
... 13
INSTALLATION ................................................... 13
REAR BUMPER ....................................................
... 14
Removal and Installation ........................................ 14
REMOVAL ........................................................
... 15
INSTALLATION ................................................... 15FRONT GRILLE ........................................................ 16
Removal and Installation ........................................ 16
REMOVAL ........................................................
... 16
INSTALLATION ................................................... 16
HOOD ........................................................................ 17
Removal and Installation ........................................ 17
HOOD TOP MOLDING ........................................ 17
COWL TOP ............................................................... 18
Removal and Installation ........................................ 18
REMOVAL ........................................................
... 18
INSTALLATION ................................................
... 18
FENDER PROTECTOR ............................................ 20
Removal and Installation ........................................ 20
REMOVAL ........................................................
... 20
INSTALLATION ................................................... 20
Rear Wheel House Protector .................................. 21
REMOVAL AND INSTALLATION ........................ 21
REMOVAL ........................................................
... 21
INSTALLATION ................................................... 21
CENTER MUD GUARD ............................................ 22
Removal and Installation ........................................ 22
REMOVAL ........................................................
... 22
INSTALLATION ................................................... 22
FLOOR SIDE FAIRING ............................................. 23
Removal and Installation of Under Cover (for V6
Engine Models) ....................................................... 23
Removal and Installation of Under Cover (for V8
Engine Models) ....................................................... 23
FRONT UNDER COVER .................................... 23
FRONT UNDER COVER (REAR) ....................... 24
FLOOR UNDER COVER .................................... 24
REAR UNDER COVER ....................................... 24
REAR DIFFUSER ............................................... 24
ROOF SIDE MOLDING ............................................. 25
Removal and Installation ........................................ 25
REMOVAL ........................................................
... 25
INSTALLATION ................................................... 26
Page 3009 of 5621

EI-4
PREPARATION
Revision: 2006 January2006 M35/M45
PREPARATIONPFP:00002
Special Service ToolsNIS00248
The actual shapes of Kent-Moore tools may differ from those of special service tools illustrated here.
Commercial Service ToolsNIS00249
Tool number
(Kent-Moore No.)
Tool nameDescription
(J-39570)
Chassis earLocation the noise
(J-43980)
NISSAN Squeak and Rattle
KitRepairing the cause of noise
SIIA0993E
SIIA0994E
Tool nameDescription
Engine earLocation the noise
Power tool
SIIA0995E
PIIB1407E
Page 3011 of 5621
EI-6
SQUEAK AND RATTLE TROUBLE DIAGNOSES
Revision: 2006 January2006 M35/M45
DUPLICATE THE NOISE AND TEST DRIVE
If possible, drive the vehicle with the customer until the noise is duplicated. Note any additional information on
the Diagnostic Worksheet regarding the conditions or location of the noise. This information can be used to
duplicate the same conditions when you confirm the repair.
If the noise can be duplicated easily during the test drive, to help identify the source of the noise, try to dupli-
cate the noise with the vehicle stopped by doing one or all of the following:
1) Close a door.
2) Tap or push/pull around the area where the noise appears to be coming from.
3) Rev the engine.
4) Use a floor jack to recreate vehicle “twist”.
5) At idle, apply engine load (electrical load, half-clutch on M/T models, drive position on A/T models).
6) Raise the vehicle on a hoist and hit a tire with a rubber hammer.
Drive the vehicle and attempt to duplicate the conditions the customer states exist when the noise occurs.
If it is difficult to duplicate the noise, drive the vehicle slowly on an undulating or rough road to stress the
vehicle body.
CHECK RELATED SERVICE BULLETINS
After verifying the customer concern or symptom, check ASIST for Technical Service Bulletins (TSBs) related
to that concern or symptom.
If a TSB relates to the symptom, follow the procedure to repair the noise.
LOCATE THE NOISE AND IDENTIFY THE ROOT CAUSE
1. Narrow down the noise to a general area. To help pinpoint the source of the noise, use a listening tool
(Chassis Ear: J-39570, Engine Ear and mechanics stethoscope).
2. Narrow down the noise to a more specific area and identify the cause of the noise by:
removing the components in the area that you suspect the noise is coming from.
Do not use too much force when removing clips and fasteners, otherwise clips and fastener can be broken
or lost during the repair, resulting in the creation of new noise.
tapping or pushing/pulling the component that you suspect is causing the noise.
Do not tap or push/pull the component with excessive force, otherwise the noise will be eliminated only
temporarily.
feeling for a vibration with your hand by touching the component(s) that you suspect is (are) causing the
noise.
placing a piece of paper between components that you suspect are causing the noise.
looking for loose components and contact marks.
Refer to EI-7, "
Generic Squeak and Rattle Troubleshooting" .
REPAIR THE CAUSE
If the cause is a loose component, tighten the component securely.
If the cause is insufficient clearance between components:
–separate components by repositioning or loosening and retightening the component, if possible.
–insulate components with a suitable insulator such as urethane pads, foam blocks, felt cloth tape or ure-
thane tape. A Nissan Squeak and Rattle Kit (J-43980) is available through your authorized Nissan Parts
Department.
CAUTION:
Do not use excessive force as many components are constructed of plastic and may be damaged.
NOTE:
Always check with the Parts Department for the latest parts information.
The following materials are contained in the Nissan Squeak and Rattle Kit (J-43980). Each item can be
ordered separately as needed.
URETHANE PADS [1.5 mm (0.059 in) thick]
Insulates connectors, harness, etc.
76268-9E005: 100
135 mm (3.945.31 in)/76884-71L01: 6085 mm (2.363.35 in)/76884-
71L02: 15
25 mm (0.590.98 in)
INSULATOR (Foam blocks)
Insulates components from contact. Can be used to fill space behind a panel.
73982-9E000: 45 mm (1.77 in) thick, 50
50 mm (1.971.97 in)/73982-
50Y00: 10 mm (0.39 in) thick, 50
50 mm (1.971.97 in)
Page 3013 of 5621
EI-8
SQUEAK AND RATTLE TROUBLE DIAGNOSES
Revision: 2006 January2006 M35/M45
TRUNK
Trunk noises are often caused by a loose jack or loose items put into the trunk by the owner.
In addition look for:
1. Trunk lid dumpers out of adjustment
2. Trunk lid striker out of adjustment
3. The trunk lid torsion bars knocking together
4. A loose license plate or bracket
Most of these incidents can be repaired by adjusting, securing or insulating the item(s) or component(s) caus-
ing the noise.
SUNROOF/HEADLINING
Noises in the sunroof/headlining area can often be traced to one of the following:
1. Sunroof lid, rail, linkage or seals making a rattle or light knocking noise
2. Sunvisor shaft shaking in the holder
3. Front or rear windshield touching headlining and squeaking
Again, pressing on the components to stop the noise while duplicating the conditions can isolate most of these
incidents. Repairs usually consist of insulating with felt cloth tape.
SEATS
When isolating seat noise it's important to note the position the seat is in and the load placed on the seat when
the noise is present. These conditions should be duplicated when verifying and isolating the cause of the
noise.
Cause of seat noise include:
1. Headrest rods and holder
2. A squeak between the seat pad cushion and frame
3. The rear seatback lock and bracket
These noises can be isolated by moving or pressing on the suspected components while duplicating the con-
ditions under which the noise occurs. Most of these incidents can be repaired by repositioning the component
or applying urethane tape to the contact area.
UNDERHOOD
Some interior noise may be caused by components under the hood or on the engine wall. The noise is then
transmitted into the passenger compartment.
Causes of transmitted underhood noise include:
1. Any component mounted to the engine wall
2. Components that pass through the engine wall
3. Engine wall mounts and connectors
4. Loose radiator mounting pins
5. Hood bumpers out of adjustment
6. Hood striker out of adjustment
These noises can be difficult to isolate since they cannot be reached from the interior of the vehicle. The best
method is to secure, move or insulate one component at a time and test drive the vehicle. Also, engine RPM
or load can be changed to isolate the noise. Repairs can usually be made by moving, adjusting, securing, or
insulating the component causing the noise.
Page 3023 of 5621
EI-18
COWL TOP
Revision: 2006 January2006 M35/M45
COWL TOPPFP:66100
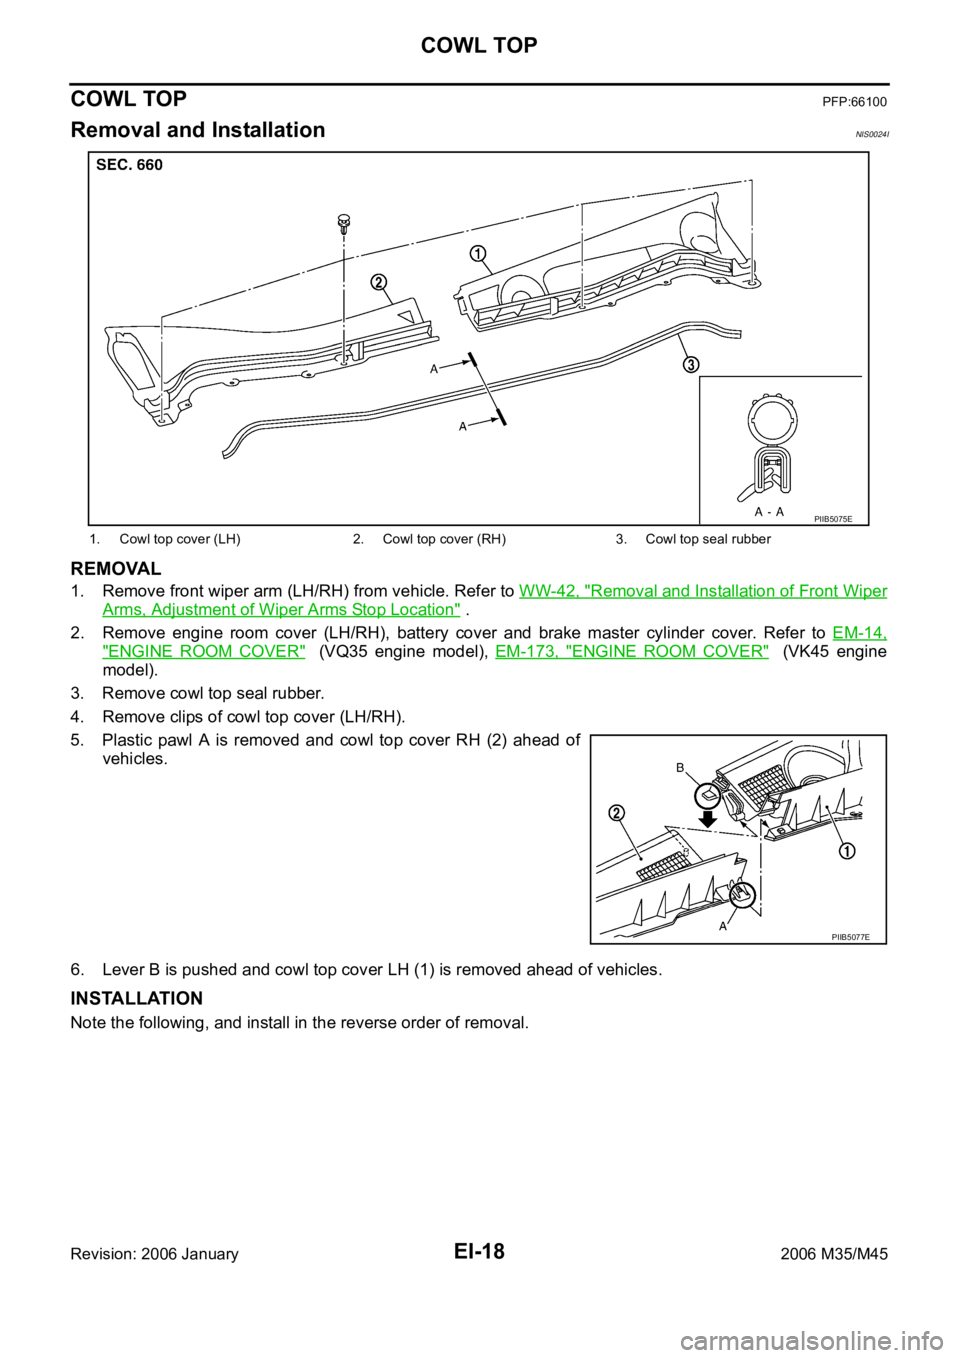
Removal and InstallationNIS0024I
REMOVAL
1. Remove front wiper arm (LH/RH) from vehicle. Refer to WW-42, "Removal and Installation of Front Wiper
Arms, Adjustment of Wiper Arms Stop Location" .
2. Remove engine room cover (LH/RH), battery cover and brake master cylinder cover. Refer to EM-14,
"ENGINE ROOM COVER" (VQ35 engine model), EM-173, "ENGINE ROOM COVER" (VK45 engine
model).
3. Remove cowl top seal rubber.
4. Remove clips of cowl top cover (LH/RH).
5. Plastic pawl A is removed and cowl top cover RH (2) ahead of
vehicles.
6. Lever B is pushed and cowl top cover LH (1) is removed ahead of vehicles.
INSTALLATION
Note the following, and install in the reverse order of removal.
1. Cowl top cover (LH) 2. Cowl top cover (RH) 3. Cowl top seal rubber
PIIB5075E
PIIB5077E
Page 3028 of 5621

FLOOR SIDE FAIRING
EI-23
C
D
E
F
G
H
J
K
L
MA
B
EI
Revision: 2006 January2006 M35/M45
FLOOR SIDE FAIRINGPFP:74586
Removal and Installation of Under Cover (for V6 Engine Models)NIS0024M
Removal and Installation of Under Cover (for V8 Engine Models)NIS0024N
FRONT UNDER COVER
Removal
1. Remove front under cover mounting bolts and clip.
2. Remove front under cover.
Installation
Install in the reverse order of removal.
1. Front under cover 2. Front under cover (rear) 3. Floor under cover (RH)
4. Floor under cover (LH) 5. Rear under cover (RH) 6. Rear under cover (LH)
7. Rear diffuser
PIIB6282E
1. Front under cover 2. Front under cover (rear) 3. Floor under cover (RH)
4. Floor under cover (LH) 5. Rear under cover (RH) 6. Rear under cover (LH)
7. Rear diffuser
PIIB6283E
Page 3064 of 5621

EM-1
ENGINE MECHANICAL
B ENGINE
CONTENTS
C
D
E
F
G
H
I
J
K
L
M
SECTION EM
A
EM
Revision: 2006 January2006 M35/M45
ENGINE MECHANICAL
VQ35DE
PRECAUTIONS .......................................................... 5
Precautions for Procedures without Cowl Top Cover ..... 5
Precautions Necessary for Steering Wheel Rotation
After Battery Disconnect .......................................... 5
OPERATION PROCEDURE ................................. 5
Precautions for Drain Engine Coolant and Engine
Oil ............................................................................. 5
Precautions for Disconnecting Fuel Piping .............. 5
Precautions for Removal and Disassembly ............. 5
Precautions for Inspection, Repair and Replace-
ment ......................................................................... 6
Precautions for Assembly and Installation ............... 6
Precautions for Angle Tightening ............................. 6
Precautions for Liquid Gasket .................................. 6
REMOVAL OF LIQUID GASKET SEALING .......... 6
LIQUID GASKET APPLICATION PROCEDURE ..... 7
PREPARATION ........................................................... 8
Special Service Tools ............................................... 8
Commercial Service Tools ...................................... 10
NOISE, VIBRATION AND HARSHNESS (NVH)
TROUBLESHOOTING .............................................. 12
NVH Troubleshooting — Engine Noise .................. 12
Use the Chart Below to Help You Find the Cause
of the Symptom. ..................................................... 13
ENGINE ROOM COVER .......................................... 14
Components ........................................................... 14
Removal and Installation ........................................ 14
REMOVAL ........................................................
... 14
INSTALLATION ................................................... 14
DRIVE BELTS ........................................................... 15
Checking Drive Belts .............................................. 15
Tension Adjustment ................................................ 15
ALTERNATOR AND POWER STEERING OIL
PUMP BELT ........................................................ 16
A/C COMPRESSOR BELT ................................. 16
Removal and Installation ........................................ 16
REMOVAL ........................................................
... 16
INSTALLATION ................................................... 16AIR CLEANER AND AIR DUCT ............................... 17
Components ........................................................... 17
Removal and Installation ........................................ 17
REMOVAL ........................................................
... 17
INSTALLATION ................................................... 17
Changing Air Cleaner Filter .................................... 18
REMOVAL ........................................................
... 18
INSTALLATION ................................................... 18
INTAKE MANIFOLD COLLECTOR .......................... 19
Components ........................................................... 19
Removal and Installation ........................................ 19
REMOVAL ........................................................
... 19
INSPECTION AFTER REMOVAL ....................... 21
INSTALLATION ................................................... 22
INTAKE MANIFOLD ................................................. 24
Components ........................................................... 24
Removal and Installation ........................................ 24
REMOVAL ........................................................
... 24
INSPECTION AFTER REMOVAL ....................... 25
INSTALLATION ................................................... 25
EXHAUST MANIFOLD ............................................. 26
Components ........................................................... 26
Removal and Installation ........................................ 26
REMOVAL ........................................................
... 26
INSPECTION AFTER REMOVAL ....................... 27
INSTALLATION ................................................... 27
OIL PAN AND OIL STRAINER ................................. 29
Components (2WD Models) ................................... 29
Removal and Installation (2WD Models) ................ 29
REMOVAL ........................................................
... 29
INSPECTION AFTER REMOVAL ....................... 31
INSTALLATION ................................................... 31
INSPECTION AFTER INSTALLATION ................ 34
Components (AWD Models) ................................... 35
Removal and Installation (AWD Models) ................ 36
REMOVAL ........................................................
... 36
INSPECTION AFTER REMOVAL ....................... 38
INSTALLATION ................................................... 38
INSPECTION AFTER INSTALLATION ................ 41
Page 3065 of 5621

EM-2Revision: 2006 January2006 M35/M45 IGNITION COIL ......................................................... 42
Components ........................................................... 42
Removal and Installation ........................................ 42
REMOVAL ........................................................
... 42
INSTALLATION .................................................... 42
SPARK PLUG (PLATINUM-TIPPED TYPE) ............. 43
Components ........................................................... 43
Removal and Installation ........................................ 43
REMOVAL ........................................................
... 43
INSPECTION AFTER REMOVAL ........................ 43
INSTALLATION .................................................... 44
FUEL INJECTOR AND FUEL TUBE ........................ 45
Components ........................................................... 45
Removal and Installation ........................................ 45
REMOVAL ........................................................
... 45
INSTALLATION .................................................... 47
INSPECTION AFTER INSTALLATION ................ 50
ROCKER COVER ..................................................... 51
Components ........................................................... 51
Removal and Installation ........................................ 51
REMOVAL ........................................................
... 51
INSTALLATION .................................................... 52
FRONT TIMING CHAIN CASE ................................. 54
Removal and Installation ........................................ 54
REMOVAL ........................................................
... 54
INSTALLATION .................................................... 58
INSPECTION AFTER INSTALLATION ................ 63
TIMING CHAIN .......................................................... 64
Components ........................................................... 64
Removal and Installation ........................................ 65
REMOVAL ........................................................
... 65
INSPECTION AFTER REMOVAL ........................ 72
INSTALLATION .................................................... 72
INSPECTION AFTER INSTALLATION ................ 82
CAMSHAFT ............................................................... 84
Components ........................................................... 84
Removal and Installation ........................................ 85
REMOVAL ........................................................
... 85
INSPECTION AFTER REMOVAL ........................ 86
INSTALLATION .................................................... 89
INSPECTION AFTER INSTALLATION ................ 92
Valve Clearance ...................................................... 93
INSPECTION ....................................................... 93
ADJUSTMENT .................................................... 96
OIL SEAL ......................................................
............ 98
Removal and Installation of Valve Oil Seal ............. 98
REMOVAL ........................................................
... 98
INSTALLATION .................................................... 98
Removal and Installation of Front Oil Seal ............. 99
REMOVAL ........................................................
... 99
INSTALLATION .................................................... 99
Removal and Installation of Rear Oil Seal .............. 99
REMOVAL ........................................................
... 99
INSTALLATION ..................................................100
CYLINDER HEAD .................................................. .101
On-Vehicle Service ...............................................101
CHECKING COMPRESSION PRESSURE .......101
Components .........................................................102Removal and Installation .......................................102
REMOVAL ..........................................................102
INSPECTION AFTER REMOVAL ......................103
INSTALLATION ..................................................104
INSPECTION AFTER INSTALLATION ..............105
Disassembly and Assembly ..................................106
COMPONENTS .................................................106
DISASSEMBLY ..................................................106
ASSEMBLY ........................................................107
Inspection after Disassembly ................................108
VALVE DIMENSIONS ........................................108
VALVE GUIDE CLEARANCE ............................108
VALVE GUIDE REPLACEMENT .......................109
VALVE SEAT CONTACT ....................................110
VALVE SEAT REPLACEMENT ..........................110
VALVE SPRING SQUARENESS ....................... 111
VALVE SPRING DIMENSIONS AND VALVE
SPRING PRESSURE LOAD ..............................112
ENGINE ASSEMBLY ...............................................113
Components (2WD Models) ..................................113
Removal and Installation (2WD Models) ...............113
REMOVAL ..........................................................114
INSTALLATION ..................................................116
INSPECTION AFTER INSTALLATION ..............117
Components (AWD Models) .................................118
Removal and Installation (AWD Models) ..............118
REMOVAL ..........................................................119
INSTALLATION ..................................................121
INSPECTION AFTER INSTALLATION ..............122
CYLINDER BLOCK .................................................123
Components ..........................................................123
Disassembly and Assembly ..................................124
DISASSEMBLY ..................................................124
ASSEMBLY ......................................................
..128
How to Select Piston and Bearing ........................135
DESCRIPTION ..................................................135
HOW TO SELECT PISTON ...............................135
HOW TO SELECT CONNECTING ROD BEAR-
ING .....................................................................136
HOW TO SELECT MAIN BEARING ..................137
Inspection after Disassembly ................................140
CRANKSHAFT END PLAY ................................140
CONNECTING ROD SIDE CLEARANCE .........140
PISTON TO PISTON PIN OIL CLEARANCE .....140
PISTON RING SIDE CLEARANCE ...................141
PISTON RING END GAP ..................................141
CONNECTING ROD BEND AND TORSION .....142
CONNECTING ROD BIG END DIAMETER ......142
CONNECTING ROD BUSHING OIL CLEAR-
ANCE .................................................................142
CYLINDER BLOCK DISTORTION ....................143
MAIN BEARING HOUSING INNER DIAMETER .144
PISTON TO CYLINDER BORE CLEARANCE ..144
CRANKSHAFT MAIN JOURNAL DIAMETER ...145
CRANKSHAFT PIN JOURNAL DIAMETER ......146
CRANKSHAFT OUT-OF-ROUND AND TAPER .146
CRANKSHAFT RUNOUT ..................................146
CONNECTING ROD BEARING OIL CLEAR-
Page 3066 of 5621
EM-3
C
D
E
F
G
H
I
J
K
L
M
EMA
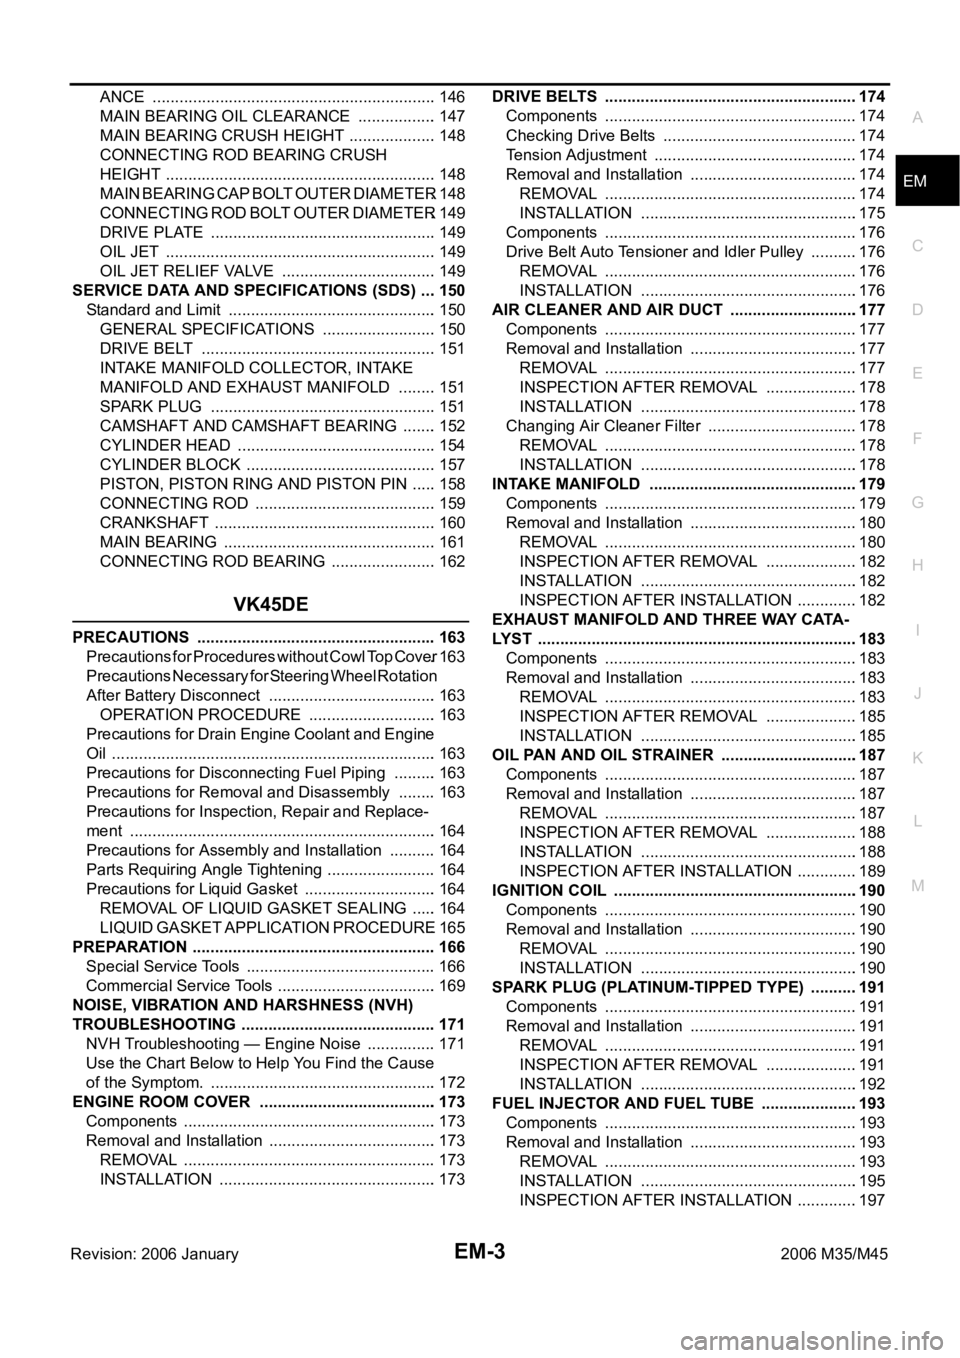
Revision: 2006 January2006 M35/M45 ANCE ................................................................146
MAIN BEARING OIL CLEARANCE ..................147
MAIN BEARING CRUSH HEIGHT ....................148
CONNECTING ROD BEARING CRUSH
HEIGHT .............................................................148
MAIN BEARING CAP BOLT OUTER DIAMETER .148
CONNECTING ROD BOLT OUTER DIAMETER .149
DRIVE PLATE ...................................................149
OIL JET .............................................................149
OIL JET RELIEF VALVE ...................................149
SERVICE DATA AND SPECIFICATIONS (SDS) ....150
Standard and Limit ...............................................150
GENERAL SPECIFICATIONS ..........................150
DRIVE BELT .....................................................151
INTAKE MANIFOLD COLLECTOR, INTAKE
MANIFOLD AND EXHAUST MANIFOLD .........151
SPARK PLUG ...................................................151
CAMSHAFT AND CAMSHAFT BEARING ........152
CYLINDER HEAD .............................................154
CYLINDER BLOCK ...........................................157
PISTON, PISTON RING AND PISTON PIN ......158
CONNECTING ROD .........................................159
CRANKSHAFT ..................................................160
MAIN BEARING ................................................161
CONNECTING ROD BEARING ........................162
VK45DE
PRECAUTIONS ......................................................163
Precautions for Procedures without Cowl Top Cover .163
Precautions Necessary for Steering Wheel Rotation
After Battery Disconnect ......................................163
OPERATION PROCEDURE .............................163
Precautions for Drain Engine Coolant and Engine
Oil .........................................................................163
Precautions for Disconnecting Fuel Piping ..........163
Precautions for Removal and Disassembly .........163
Precautions for Inspection, Repair and Replace-
ment .....................................................................164
Precautions for Assembly and Installation ...........164
Parts Requiring Angle Tightening .........................164
Precautions for Liquid Gasket ..............................164
REMOVAL OF LIQUID GASKET SEALING ......164
LIQUID GASKET APPLICATION PROCEDURE .165
PREPARATION .......................................................166
Special Service Tools ...........................................166
Commercial Service Tools ....................................169
NOISE, VIBRATION AND HARSHNESS (NVH)
TROUBLESHOOTING ............................................171
NVH Troubleshooting — Engine Noise ................171
Use the Chart Below to Help You Find the Cause
of the Symptom. ...................................................172
ENGINE ROOM COVER ........................................173
Components .........................................................173
Removal and Installation ......................................173
REMOVAL ........................................................
.173
INSTALLATION .................................................173DRIVE BELTS .........................................................174
Components .........................................................174
Checking Drive Belts ............................................174
Tension Adjustment .............................................
.174
Removal and Installation ......................................174
REMOVAL ........................................................
.174
INSTALLATION .................................................175
Components .........................................................176
Drive Belt Auto Tensioner and Idler Pulley ...........176
REMOVAL ........................................................
.176
INSTALLATION .................................................176
AIR CLEANER AND AIR DUCT .............................177
Components .........................................................177
Removal and Installation ......................................177
REMOVAL ........................................................
.177
INSPECTION AFTER REMOVAL .....................178
INSTALLATION .................................................178
Changing Air Cleaner Filter ..................................178
REMOVAL ........................................................
.178
INSTALLATION .................................................178
INTAKE MANIFOLD ..............................................
.179
Components .........................................................179
Removal and Installation ......................................180
REMOVAL ........................................................
.180
INSPECTION AFTER REMOVAL .....................182
INSTALLATION .................................................182
INSPECTION AFTER INSTALLATION ..............182
EXHAUST MANIFOLD AND THREE WAY CATA-
LYST ........................................................................183
Components .........................................................183
Removal and Installation ......................................183
REMOVAL ........................................................
.183
INSPECTION AFTER REMOVAL .....................185
INSTALLATION .................................................185
OIL PAN AND OIL STRAINER ...............................187
Components .........................................................187
Removal and Installation ......................................187
REMOVAL ........................................................
.187
INSPECTION AFTER REMOVAL .....................188
INSTALLATION .................................................188
INSPECTION AFTER INSTALLATION ..............189
IGNITION COIL .......................................................190
Components .........................................................190
Removal and Installation ......................................190
REMOVAL ........................................................
.190
INSTALLATION .................................................190
SPARK PLUG (PLATINUM-TIPPED TYPE) ...........191
Components .........................................................191
Removal and Installation ......................................191
REMOVAL ........................................................
.191
INSPECTION AFTER REMOVAL .....................191
INSTALLATION .................................................192
FUEL INJECTOR AND FUEL TUBE ......................193
Components .........................................................193
Removal and Installation ......................................193
REMOVAL ........................................................
.193
INSTALLATION .................................................195
INSPECTION AFTER INSTALLATION ..............197
Page 3067 of 5621
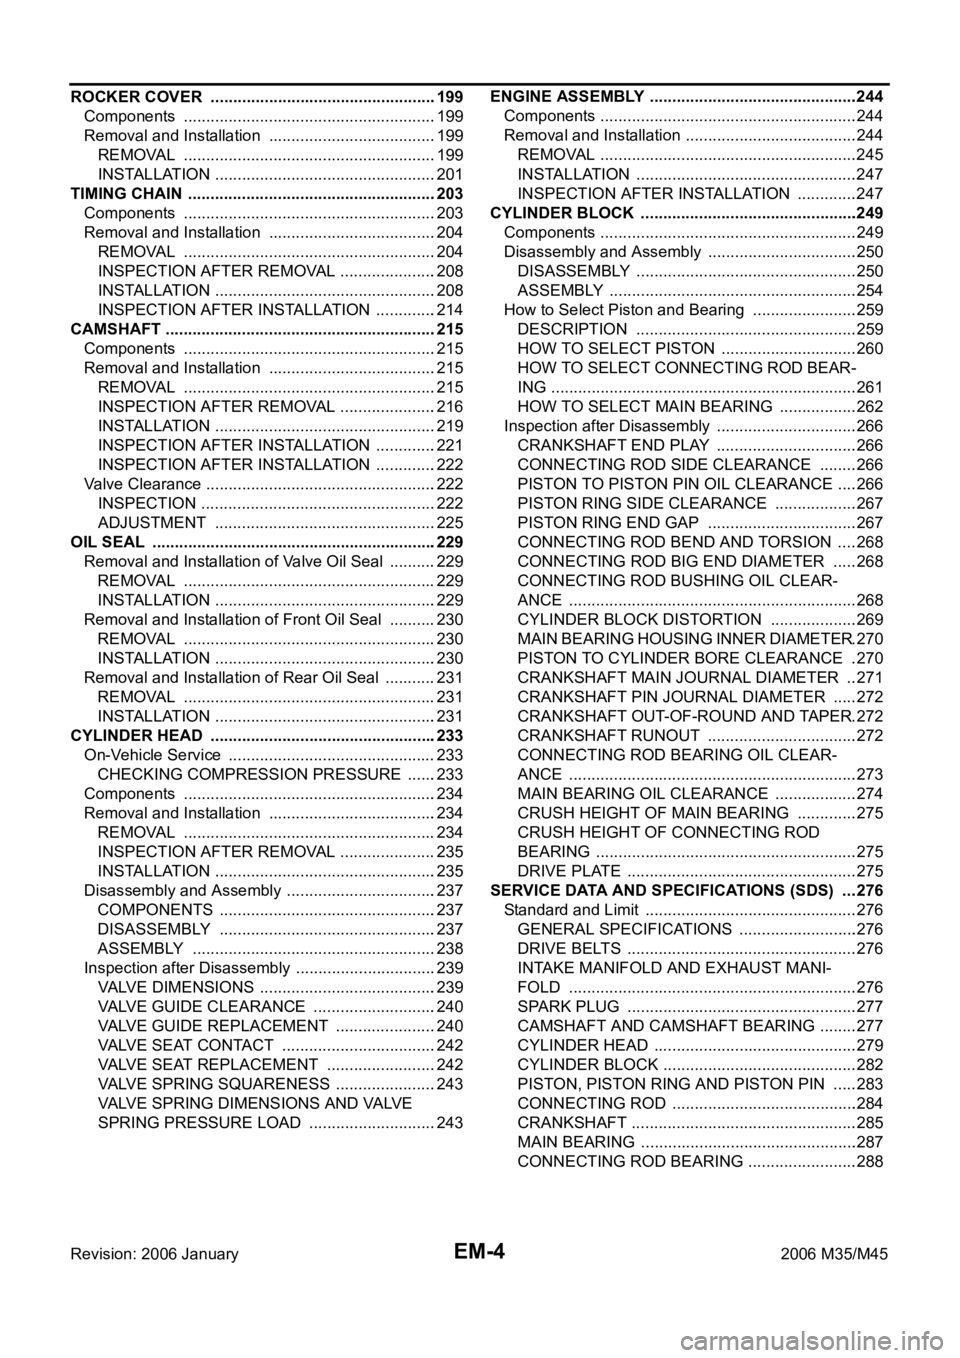
EM-4Revision: 2006 January2006 M35/M45 ROCKER COVER ...................................................199
Components .........................................................199
Removal and Installation ......................................199
REMOVAL ........................................................
.199
INSTALLATION ..................................................201
TIMING CHAIN ........................................................203
Components .........................................................203
Removal and Installation ......................................204
REMOVAL ........................................................
.204
INSPECTION AFTER REMOVAL ......................208
INSTALLATION ..................................................208
INSPECTION AFTER INSTALLATION ..............214
CAMSHAFT .............................................................215
Components .........................................................215
Removal and Installation ......................................215
REMOVAL ........................................................
.215
INSPECTION AFTER REMOVAL ......................216
INSTALLATION ..................................................219
INSPECTION AFTER INSTALLATION ..............221
INSPECTION AFTER INSTALLATION ..............222
Valve Clearance ....................................................222
INSPECTION .....................................................222
ADJUSTMENT ..................................................225
OIL SEAL ................................................................229
Removal and Installation of Valve Oil Seal ...........229
REMOVAL ........................................................
.229
INSTALLATION ..................................................229
Removal and Installation of Front Oil Seal ...........230
REMOVAL ........................................................
.230
INSTALLATION ..................................................230
Removal and Installation of Rear Oil Seal ............231
REMOVAL ........................................................
.231
INSTALLATION ..................................................231
CYLINDER HEAD .................................................. .233
On-Vehicle Service ...............................................233
CHECKING COMPRESSION PRESSURE .......233
Components .........................................................234
Removal and Installation ......................................234
REMOVAL ........................................................
.234
INSPECTION AFTER REMOVAL ......................235
INSTALLATION ..................................................235
Disassembly and Assembly ..................................237
COMPONENTS .................................................237
DISASSEMBLY .................................................237
ASSEMBLY ......................................................
.238
Inspection after Disassembly ................................239
VALVE DIMENSIONS ........................................239
VALVE GUIDE CLEARANCE ............................240
VALVE GUIDE REPLACEMENT .......................240
VALVE SEAT CONTACT ...................................242
VALVE SEAT REPLACEMENT .........................242
VALVE SPRING SQUARENESS .......................243
VALVE SPRING DIMENSIONS AND VALVE
SPRING PRESSURE LOAD .............................243ENGINE ASSEMBLY ...............................................244
Components ..........................................................244
Removal and Installation .......................................244
REMOVAL ..........................................................245
INSTALLATION ..................................................247
INSPECTION AFTER INSTALLATION ..............247
CYLINDER BLOCK .................................................249
Components ..........................................................249
Disassembly and Assembly ..................................250
DISASSEMBLY ..................................................250
ASSEMBLY ........................................................254
How to Select Piston and Bearing ........................259
DESCRIPTION ..................................................259
HOW TO SELECT PISTON ...............................260
HOW TO SELECT CONNECTING ROD BEAR-
ING .....................................................................261
HOW TO SELECT MAIN BEARING ..................262
Inspection after Disassembly ................................266
CRANKSHAFT END PLAY ................................266
CONNECTING ROD SIDE CLEARANCE .........266
PISTON TO PISTON PIN OIL CLEARANCE .....266
PISTON RING SIDE CLEARANCE ...................267
PISTON RING END GAP ..................................267
CONNECTING ROD BEND AND TORSION .....268
CONNECTING ROD BIG END DIAMETER ......268
CONNECTING ROD BUSHING OIL CLEAR-
ANCE .................................................................268
CYLINDER BLOCK DISTORTION ....................269
MAIN BEARING HOUSING INNER DIAMETER .270
PISTON TO CYLINDER BORE CLEARANCE ..270
CRANKSHAFT MAIN JOURNAL DIAMETER ...271
CRANKSHAFT PIN JOURNAL DIAMETER ......272
CRANKSHAFT OUT-OF-ROUND AND TAPER .272
CRANKSHAFT RUNOUT ..................................272
CONNECTING ROD BEARING OIL CLEAR-
ANCE .................................................................273
MAIN BEARING OIL CLEARANCE ...................274
CRUSH HEIGHT OF MAIN BEARING ..............275
CRUSH HEIGHT OF CONNECTING ROD
BEARING ...........................................................275
DRIVE PLATE ....................................................275
SERVICE DATA AND SPECIFICATIONS (SDS) ....276
Standard and Limit ................................................276
GENERAL SPECIFICATIONS ...........................276
DRIVE BELTS ....................................................276
INTAKE MANIFOLD AND EXHAUST MANI-
FOLD .................................................................276
SPARK PLUG ....................................................277
CAMSHAFT AND CAMSHAFT BEARING .........277
CYLINDER HEAD ..............................................279
CYLINDER BLOCK ............................................282
PISTON, PISTON RING AND PISTON PIN ......283
CONNECTING ROD ..........................................284
CRANKSHAFT ...................................................285
MAIN BEARING .................................................287
CONNECTING ROD BEARING .........................288