check INFINITI M35 2006 Factory Service Manual
[x] Cancel search | Manufacturer: INFINITI, Model Year: 2006, Model line: M35, Model: INFINITI M35 2006Pages: 5621, PDF Size: 65.56 MB
Page 5500 of 5621
TROUBLE DIAGNOSIS FOR SYMPTOMS
TF-35
C
E
F
G
H
I
J
K
L
MA
B
TF
Revision: 2006 January2006 M35/M45
4. CHECK AWD CONTROL UNIT
Check AWD control unit input/output signal. Refer to TF-20, "
AWD Control Unit Input/Output Signal Reference
Va l u e s" .
OK or NG
OK >> GO TO 5.
NG >> Check AWD control unit pin terminals for damage or loose connection with harness connector. If
any items are damaged, repair or replace damaged parts.
5. CHECK OUTPUT SIGNAL WITH UNIFIED METER AND A/C AMP.
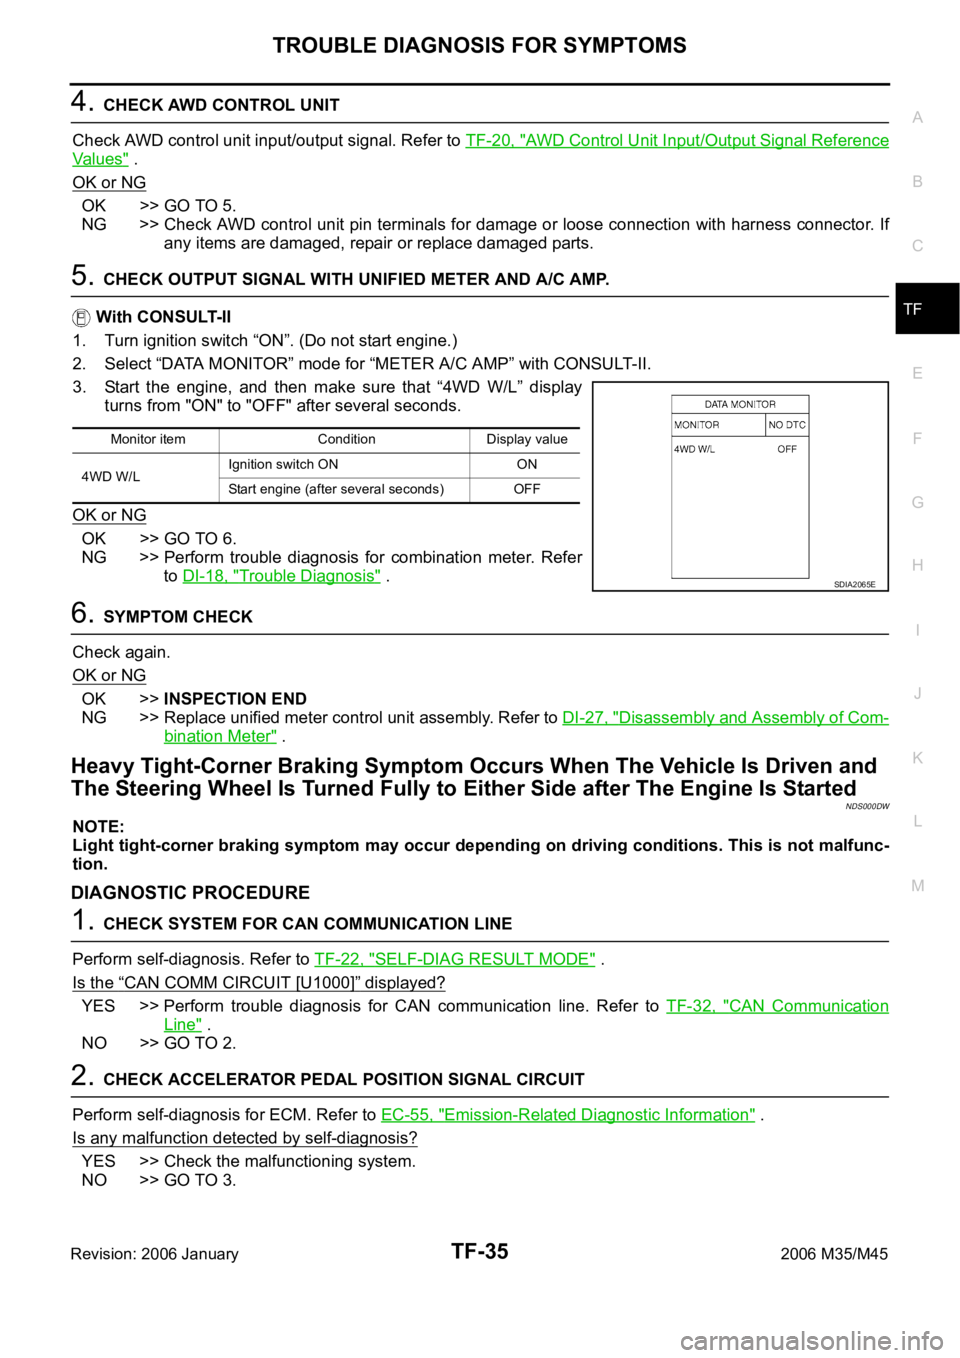
With CONSULT-II
1. Turn ignition switch “ON”. (Do not start engine.)
2. Select “DATA MONITOR” mode for “METER A/C AMP” with CONSULT-II.
3. Start the engine, and then make sure that “4WD W/L” display
turns from "ON" to "OFF" after several seconds.
OK or NG
OK >> GO TO 6.
NG >> Perform trouble diagnosis for combination meter. Refer
to DI-18, "
Trouble Diagnosis" .
6. SYMPTOM CHECK
Check again.
OK or NG
OK >>INSPECTION END
NG >> Replace unified meter control unit assembly. Refer to DI-27, "
Disassembly and Assembly of Com-
bination Meter" .
Heavy Tight-Corner Braking Symptom Occurs When The Vehicle Is Driven and
The Steering Wheel Is Turned Fully to Either Side after The Engine Is Started
NDS000DW
NOTE:
Light tight-corner braking symptom may occur depending on driving conditions. This is not malfunc-
tion.
DIAGNOSTIC PROCEDURE
1. CHECK SYSTEM FOR CAN COMMUNICATION LINE
Perform self-diagnosis. Refer to TF-22, "
SELF-DIAG RESULT MODE" .
Is the
“CAN COMM CIRCUIT [U1000]” displayed?
YES >> Perform trouble diagnosis for CAN communication line. Refer to TF-32, "CAN Communication
Line" .
NO >> GO TO 2.
2. CHECK ACCELERATOR PEDAL POSITION SIGNAL CIRCUIT
Perform self-diagnosis for ECM. Refer to EC-55, "
Emission-Related Diagnostic Information" .
Is any malfunction detected by self-diagnosis?
YES >> Check the malfunctioning system.
NO >> GO TO 3.
Monitor item Condition Display value
4WD W/LIgnition switch ON ON
Start engine (after several seconds) OFF
SDIA2065E
Page 5501 of 5621
TF-36
TROUBLE DIAGNOSIS FOR SYMPTOMS
Revision: 2006 January2006 M35/M45
3. CHECK SYSTEM FOR AWD SOLENOID
Perform trouble diagnosis for AWD solenoid system. Refer to TF-28, "
AWD Solenoid" .
OK or NG
OK >> GO TO 4.
NG >> Repair or replace damaged parts.
4. CHECK ELECTRIC CONTROLLED COUPLING
1. Turn ignition switch “OFF”.
2. Set the selector lever to “N” (neutral) position and disengage the parking brake.
3. Lift up the vehicle.
4. Rotate the rear propeller shaft by hand.
5. Hold front propeller shaft lightly.
Does front propeller shaft rotate?
YES >> Replace electric controlled coupling for mechanical malfunction (clutch sticking etc.). Refer to TF-
45, "Disassembly and Assembly" .
NO >> GO TO 5.
5. SYMPTOM CHECK
Check again.
OK or NG
OK >>INSPECTION END
NG >> GO TO 6.
6. CHECK AWD CONTROL UNIT
Check AWD control unit input/output signal. Refer to TF-20, "
AWD Control Unit Input/Output Signal Reference
Va l u e s" .
OK or NG
OK >>INSPECTION END
NG >> Check AWD control unit pin terminals for damage or loose connection with harness connector. If
any items are damaged, repair or replace damaged parts.
Vehicle Does Not Enter AWD Mode Even Though AWD Warning Lamp Turned to
OFF
NDS000DX
DIAGNOSTIC PROCEDURE
1. CHECK AWD WARNING LANP
Turn ignition switch “ON”. (Do not start engine.)
Does AWD warning lamp turn on?
YES >> GO TO 2.
NO >> Go to TF-33, "
AWD Warning Lamp Does Not Turn ON When The Ignition Switch Is Turned to ON"
.
2. CHECK SYSTEM FOR CAN COMMUNICATION LINE
Perform self-diagnosis. Refer to TF-22, "
SELF-DIAG RESULT MODE" .
Is the
“CAN COMM CIRCUIT [U1000]” displayed?
YES >> Perform trouble diagnosis for CAN communication line. Refer to TF-32, "CAN Communication
Line" .
NO >> GO TO 3.
Page 5502 of 5621
TROUBLE DIAGNOSIS FOR SYMPTOMS
TF-37
C
E
F
G
H
I
J
K
L
MA
B
TF
Revision: 2006 January2006 M35/M45
3. CHECK AWD SOLENOID
Check AWD solenoid. Refer to TF-30, "
COMPONENT INSPECTION" .
OK or NG
OK >> GO TO 4.
NG >> Replace electric controlled coupling for malfunction of AWD solenoid. Refer to TF-45, "
Disassem-
bly and Assembly" .
4. CHECK AWD CONTROL UNIT
Check AWD control unit input/output signal. Refer to TF-20, "
AWD Control Unit Input/Output Signal Reference
Va l u e s" .
OK or NG
OK >> GO TO 5.
NG >> Check AWD control unit pin terminals for damage or loose connection with harness connector. If
any items are damaged, repair or replace damaged parts.
5. SYMPTOM CHECK
Check again.
OK or NG
OK >>INSPECTION END
NG >> Replace electric controlled coupling for mechanical malfunction (mechanical engagement of
clutch is not possible.). Refer to TF-45, "
Disassembly and Assembly" .
While Driving, AWD Warning Lamp Flashes Rapidly (When Flashing in Approx.
1 Minute and Then Turning OFF)
NDS000DY
NOTE:
Rapid flashing: 2 times/second
This symptom protects drivetrain parts when a heavy load is applied to the electric controlled coupling and
multiple disc clutch temperature increases. Also, optional distribution of torque sometimes becomes rigid
before lamp flashes rapidly. Both cases are not malfunction.
When this symptom occurs, stop vehicle and allow it to idle for some times. Flashing will stop and system will
be restored.
While Driving, AWD Warning Lamp Flashes Slowly (When Continuing to Flash
until Turning Ignition Switch OFF)
NDS000DZ
NOTE:
Slow flashing: 1 time/2 seconds
DIAGNOSTIC PROCEDURE
1. CHECK TIRE
Check the following.
Tire pressure
Wear condition
Longitudinal tire size (There is no difference between longitudinal tires.)
OK or NG
OK >> GO TO 2.
NG >> Drive at vehicle speed of 20 km/h (12 MPH) or more for 5 seconds or more after repairing or
replacing damaged parts. (Initialize improper size tire information.)
Page 5503 of 5621
TF-38
TROUBLE DIAGNOSIS FOR SYMPTOMS
Revision: 2006 January2006 M35/M45
2. CHECK INPUT SIGNAL OF TIRE DIAMETER
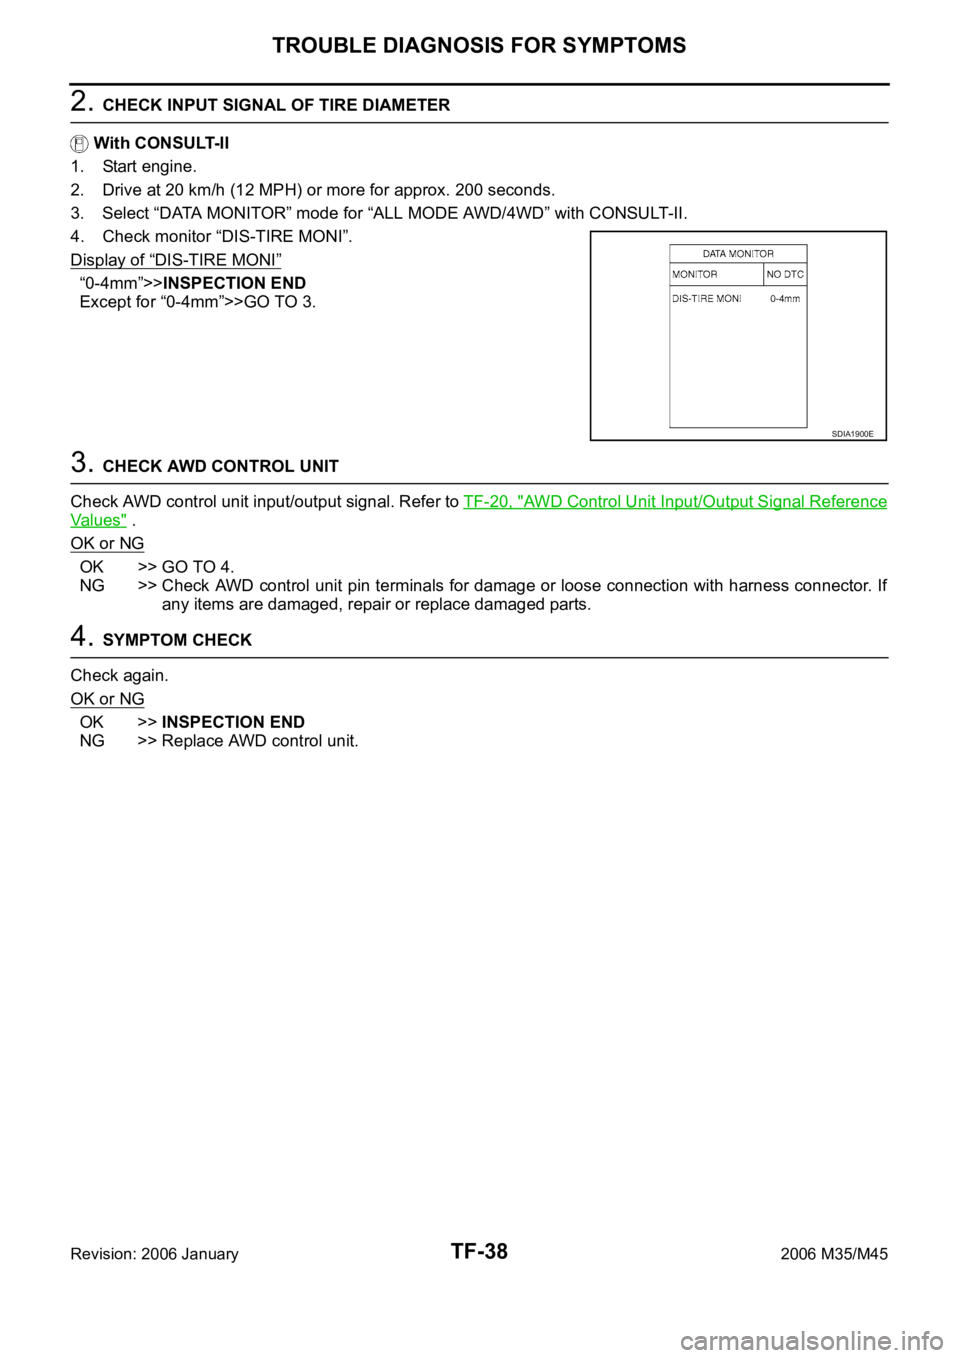
With CONSULT-II
1. Start engine.
2. Drive at 20 km/h (12 MPH) or more for approx. 200 seconds.
3. Select “DATA MONITOR” mode for “ALL MODE AWD/4WD” with CONSULT-II.
4. Check monitor “DIS-TIRE MONI”.
Display of
“DIS-TIRE MONI”
“0-4mm”>>INSPECTION END
Except for “0-4mm”>>GO TO 3.
3. CHECK AWD CONTROL UNIT
Check AWD control unit input/output signal. Refer to TF-20, "
AWD Control Unit Input/Output Signal Reference
Va l u e s" .
OK or NG
OK >> GO TO 4.
NG >> Check AWD control unit pin terminals for damage or loose connection with harness connector. If
any items are damaged, repair or replace damaged parts.
4. SYMPTOM CHECK
Check again.
OK or NG
OK >>INSPECTION END
NG >> Replace AWD control unit.
SDIA1900E
Page 5505 of 5621
TF-40
FRONT OIL SEAL
Revision: 2006 January2006 M35/M45
FRONT OIL SEALPFP:38189
Removal and InstallationNDS000E1
REMOVAL
1. Remove the drain plug to drain the transfer fluid. Refer to TF-9, "Replacement" .
2. Remove the front propeller shaft. Refer to PR-4, "
FRONT PROPELLER SHAFT" .
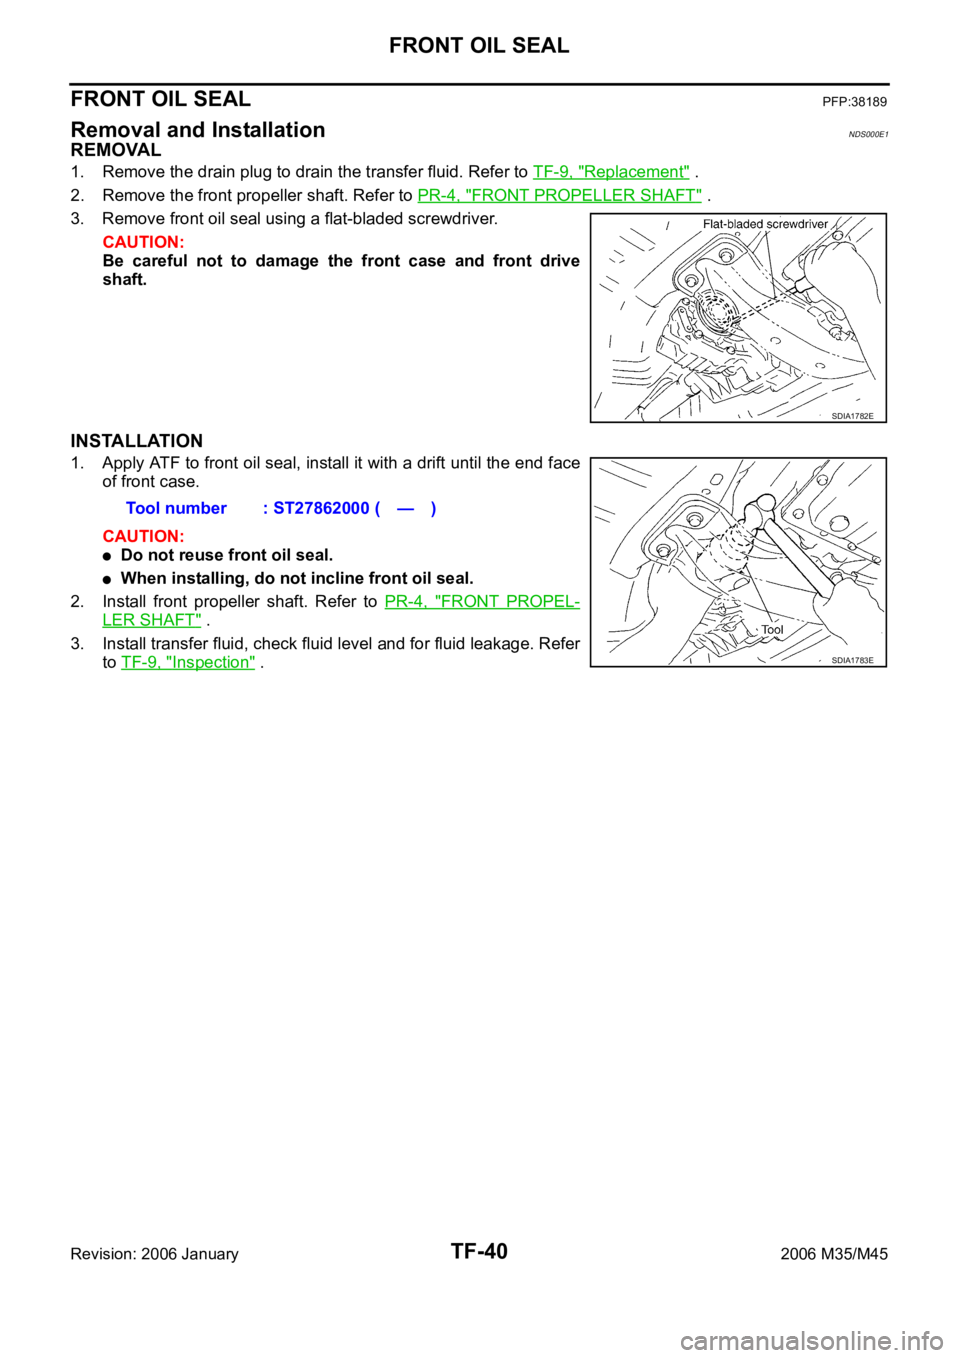
3. Remove front oil seal using a flat-bladed screwdriver.
CAUTION:
Be careful not to damage the front case and front drive
shaft.
INSTALLATION
1. Apply ATF to front oil seal, install it with a drift until the end face
of front case.
CAUTION:
Do not reuse front oil seal.
When installing, do not incline front oil seal.
2. Install front propeller shaft. Refer to PR-4, "
FRONT PROPEL-
LER SHAFT" .
3. Install transfer fluid, check fluid level and for fluid leakage. Refer
to TF-9, "
Inspection" .
SDIA1782E
Tool number : ST27862000 ( — )
SDIA1783E
Page 5507 of 5621
TF-42
REAR OIL SEAL
Revision: 2006 January2006 M35/M45
INSTALLATION
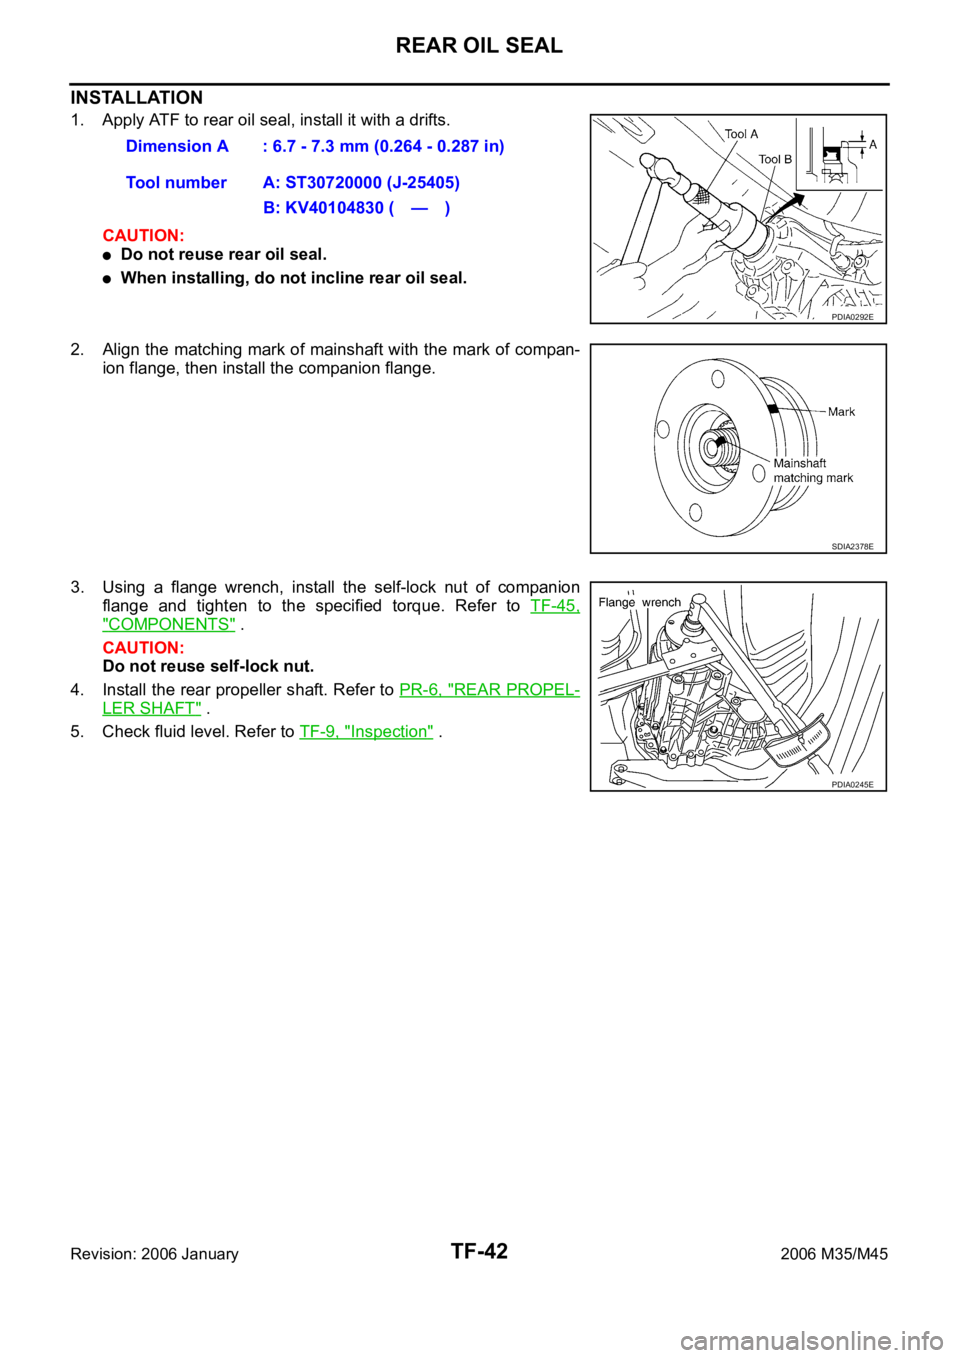
1. Apply ATF to rear oil seal, install it with a drifts.
CAUTION:
Do not reuse rear oil seal.
When installing, do not incline rear oil seal.
2. Align the matching mark of mainshaft with the mark of compan-
ion flange, then install the companion flange.
3. Using a flange wrench, install the self-lock nut of companion
flange and tighten to the specified torque. Refer to TF-45,
"COMPONENTS" .
CAUTION:
Do not reuse self-lock nut.
4. Install the rear propeller shaft. Refer to PR-6, "
REAR PROPEL-
LER SHAFT" .
5. Check fluid level. Refer to TF-9, "
Inspection" . Dimension A : 6.7 - 7.3 mm (0.264 - 0.287 in)
Tool number A: ST30720000 (J-25405)
B: KV40104830 ( — )
PDIA0292E
SDIA2378E
PDIA0245E
Page 5509 of 5621
TF-44
TRANSFER ASSEMBLY
Revision: 2006 January2006 M35/M45
TRANSFER ASSEMBLYPFP:33100
Removal and InstallationNDS000E4
REMOVAL
1. Remove exhaust front tube with power tool. Refer to EX-3, "EXHAUST SYSTEM" .
2. Remove front and rear propeller shaft. Refer to PR-4, "
FRONT PROPELLER SHAFT" and PR-6, "REAR
PROPELLER SHAFT" .
3. Disconnect transfer assembly harness connector and separate harness from transfer assembly.
4. Remove air breather hose. Refer to TF-43, "
AIR BREATHER HOSE" .
5. Remove control rod. Refer to AT-226, "
Control Rod Removal and Installation" .
6. Support transfer assembly and transmission assembly with a jack.
7. Remove rear engine mounting member and engine mounting insulator with power tool. Refer to EM-113,
"ENGINE ASSEMBLY" .
8. Lower jack to the position where the top transfer mounting bolts
can be removed.
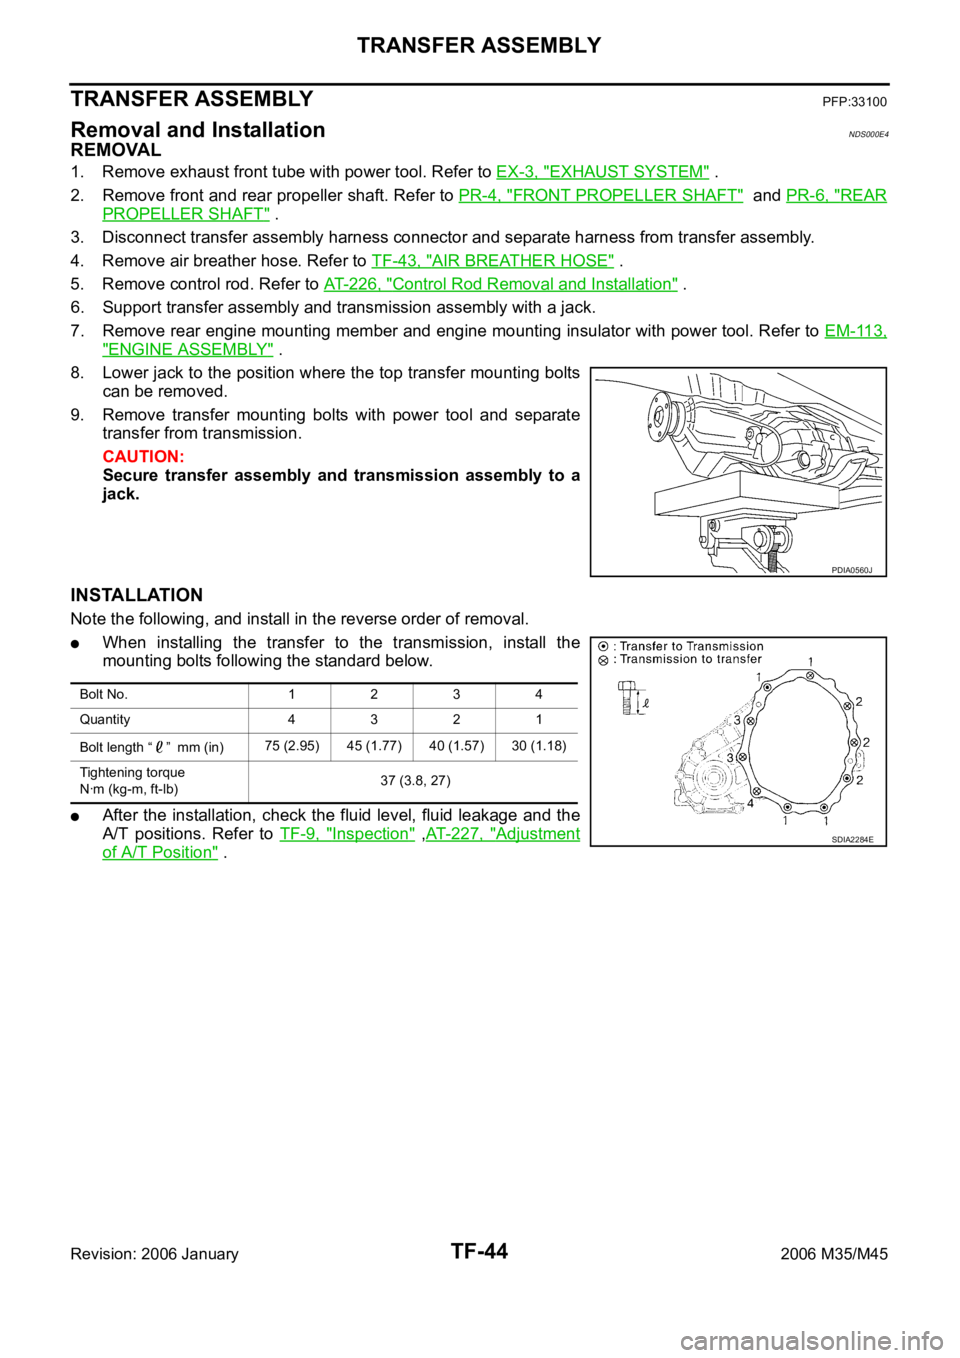
9. Remove transfer mounting bolts with power tool and separate
transfer from transmission.
CAUTION:
Secure transfer assembly and transmission assembly to a
jack.
INSTALLATION
Note the following, and install in the reverse order of removal.
When installing the transfer to the transmission, install the
mounting bolts following the standard below.
After the installation, check the fluid level, fluid leakage and the
A/T positions. Refer to TF-9, "
Inspection" ,AT- 2 2 7 , "Adjustment
of A/T Position" .
PDIA0560J
Bolt No. 1234
Quantity 4321
Bolt length “ ” mm (in)75 (2.95) 45 (1.77) 40 (1.57) 30 (1.18)
Tightening torque
Nꞏm (kg-m, ft-lb)37 (3.8, 27)
SDIA2284E
Page 5516 of 5621
TRANSFER ASSEMBLY
TF-51
C
E
F
G
H
I
J
K
L
MA
B
TF
Revision: 2006 January2006 M35/M45
INSPECTION
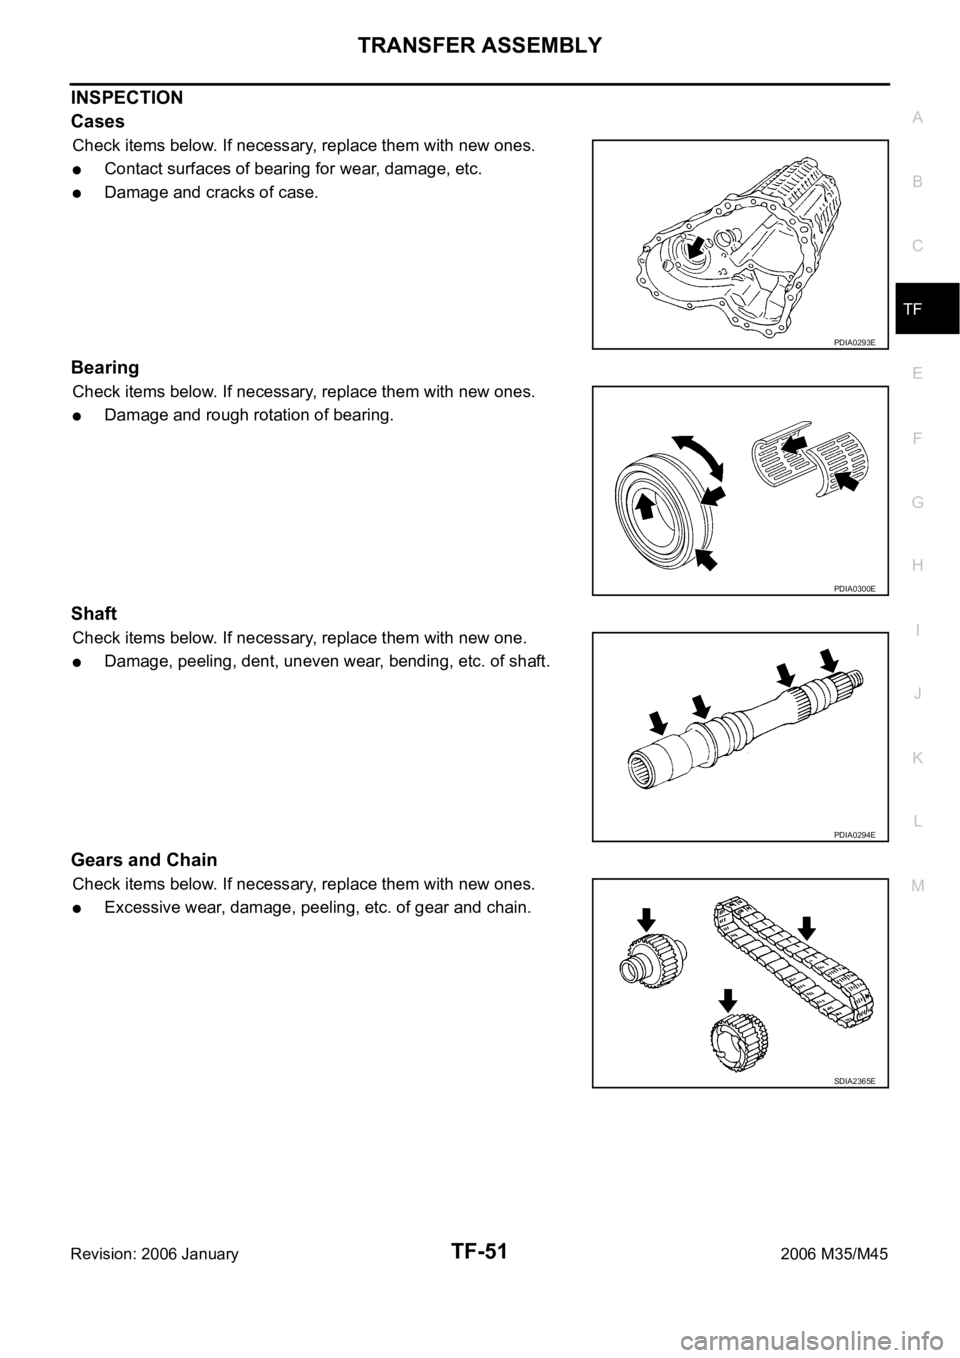
Cases
Check items below. If necessary, replace them with new ones.
Contact surfaces of bearing for wear, damage, etc.
Damage and cracks of case.
Bearing
Check items below. If necessary, replace them with new ones.
Damage and rough rotation of bearing.
Shaft
Check items below. If necessary, replace them with new one.
Damage, peeling, dent, uneven wear, bending, etc. of shaft.
Gears and Chain
Check items below. If necessary, replace them with new ones.
Excessive wear, damage, peeling, etc. of gear and chain.
PDIA0293E
PDIA0300E
PDIA0294E
SDIA2365E
Page 5526 of 5621

WT-1
ROAD WHEELS & TIRES
E SUSPENSION
CONTENTS
C
D
F
G
H
I
J
K
L
M
SECTION WT
A
B
WT
Revision: 2006 January2006 M35/M45
ROAD WHEELS & TIRES
PRECAUTIONS .......................................................... 3
Precautions .............................................................. 3
PREPARATION ........................................................... 4
Special Service Tools [SST] ..................................... 4
Commercial Service Tools ........................................ 4
NOISE, VIBRATION AND HARSHNESS (NVH)
TROUBLESHOOTING ................................................ 5
NVH Troubleshooting Chart ..................................... 5
ROAD WHEEL ............................................................ 6
Inspection ................................................................. 6
ALUMINUM WHEEL ............................................. 6
STEEL WHEEL ..................................................... 6
ROAD WHEEL TIRE ASSEMBLY .............................. 7
Balancing Wheels (Bonding Weight Type) ............... 7
REMOVAL ........................................................
..... 7
WHEEL BALANCE ADJUSTMENT ...................... 7
Rotation .................................................................... 8
LOW TIRE PRESSURE WARNING SYSTEM ............ 9
System Components ................................................ 9
System Description .................................................. 9
TRANSMITTER ..................................................... 9
RECEIVER .......................................................
... 10
LOW TIRE PRESSURE WARNING CONTROL
UNIT .................................................................... 10
LOW TIRE PRESSURE WARNING LAMP ......... 10
DISPLAY UNIT ..................................................... 11
CAN COMMUNICATION .......................................... 12
System Description ................................................ 12
TROUBLE DIAGNOSES .......................................... 13
How to Perform Trouble Diagnoses ....................... 13
BASIC CONCEPT ............................................... 13
Schematic .............................................................. 14
Wiring Diagram — T/WARN — .............................. 15
Control Unit Input/Output Signal Standard ............. 18
ID Registration Procedure ...................................... 19
ID REGISTRATION WITH ACTIVATION TOOL ... 19
ID REGISTRATION WITHOUT ACTIVATION
TOOL .................................................................. 20
Transmitter Wake Up Operation ............................. 21
WITH TRANSMITTER ACTIVATION TOOL ........ 21CONSULT-II Function (AIR PRESSURE MONI-
TOR) ....................................................................... 21
FUNCTION .......................................................
... 21
CONSULT-II SETTING PROCEDURE ................ 21
WORK SUPPORT MODE ................................... 22
SELF-DIAG RESULT MODE ............................... 22
DATA MONITOR MODE ...................................... 23
ACTIVE TEST MODE ......................................... 23
LOW TIRE PRESSURE WARNING CONTROL
UNIT PART NUMBER ......................................... 24
Diagnosis Procedure with Warning Lamp Function
(Without CONSULT-II) ............................................ 24
DESCRIPTION .................................................... 24
FUNCTION .......................................................
... 24
LOW TIRE PRESSURE WARNING LAMP DIAG-
NOSTIC CHART .................................................. 24
How to Perform Trouble Diagnosis for Quick and
Accurate Repair ...................................................... 26
INTRODUCTION ................................................. 26
WORK FLOW ...................................................... 26
Preliminary Check .................................................. 27
Trouble Diagnosis Chart ......................................... 28
SELF-DIAGNOSIS .............................................. 28
DIAGNOSIS CHART BY SYMPTOM .................. 29
TROUBLE DIAGNOSIS FOR SELF-DIAGNOSTIC
ITEMS ........................................................................ 30
Inspection 1: Transmitter no Data ........................... 30
MALFUNCTION CODE NO. 21, 22, 23, 24 ......... 30
Inspection 2: Receiver Data Error .......................... 31
MALFUNCTION CODE NO. 25, 26, 27, 28 ......... 31
Inspection 3: Transmitter Pressure Data Error ....... 32
MALFUNCTION CODE NO. 35, 36, 37, 38 ......... 32
Inspection 4: Transmitter Function Code Error ....... 32
MALFUNCTION CODE NO. 41, 42, 43, 44 ......... 32
Inspection 5: Transmitter Battery Voltage Low ....... 33
MALFUNCTION CODE NO. 45, 46, 47, 48 ......... 33
Inspection 6: Receiver ID No Registration .............. 33
MALFUNCTION CODE NO. 51 ........................... 33
Inspection 7: Vehicle Speed Signal ........................ 34
Page 5531 of 5621
WT-6
ROAD WHEEL
Revision: 2006 January2006 M35/M45
ROAD WHEELPFP:40300
InspectionNES000JO
ALUMINUM WHEEL
1. Check tires for wear and improper inflation.
2. Check wheels for deformation, cracks and other damage. If deformed, remove wheel and check wheel
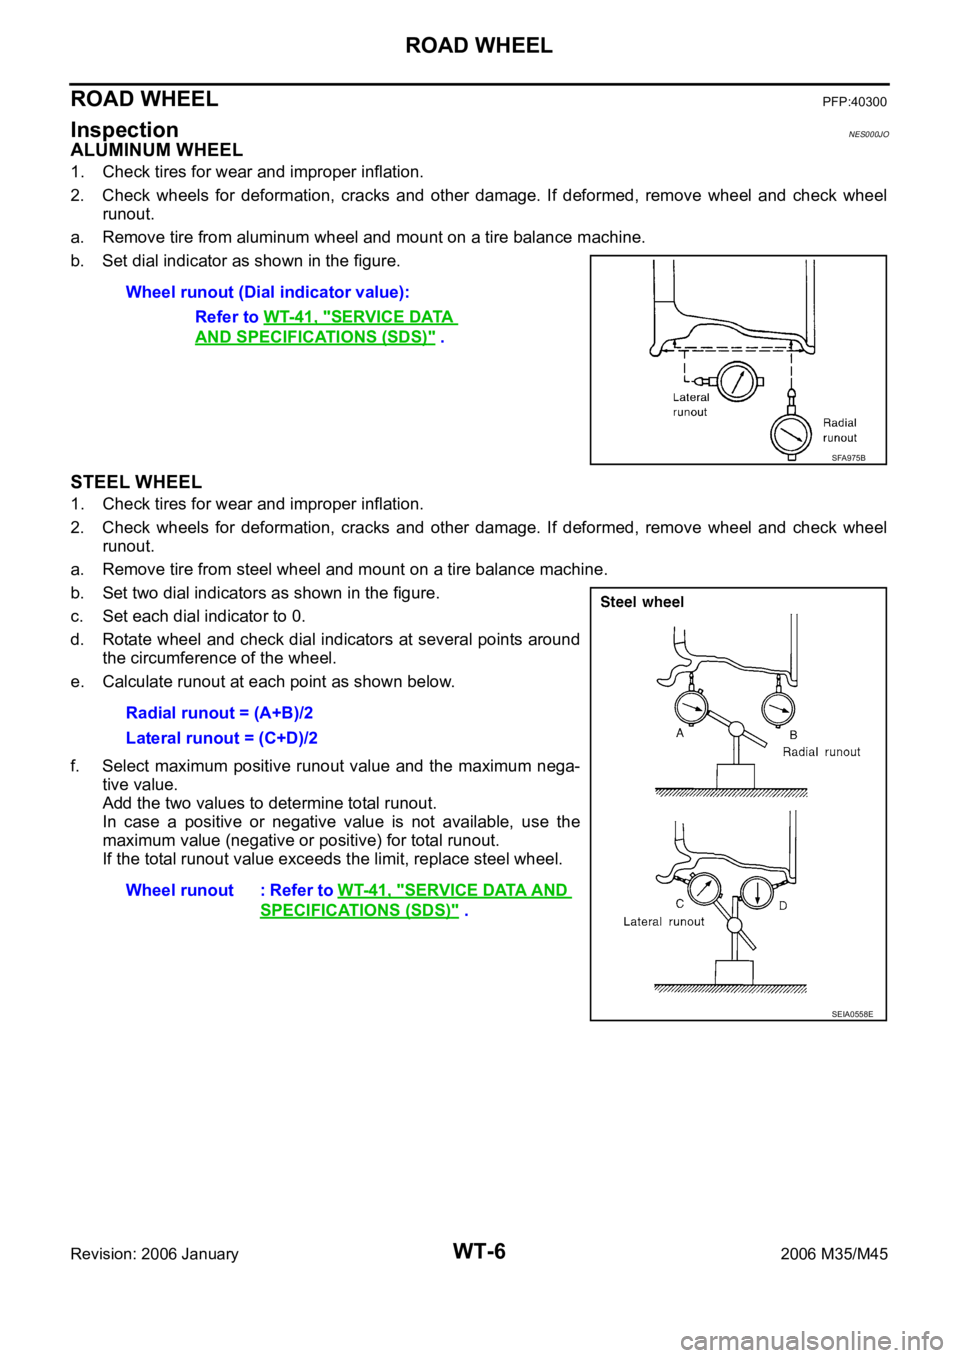
runout.
a. Remove tire from aluminum wheel and mount on a tire balance machine.
b. Set dial indicator as shown in the figure.
STEEL WHEEL
1. Check tires for wear and improper inflation.
2. Check wheels for deformation, cracks and other damage. If deformed, remove wheel and check wheel
runout.
a. Remove tire from steel wheel and mount on a tire balance machine.
b. Set two dial indicators as shown in the figure.
c. Set each dial indicator to 0.
d. Rotate wheel and check dial indicators at several points around
the circumference of the wheel.
e. Calculate runout at each point as shown below.
f. Select maximum positive runout value and the maximum nega-
tive value.
Add the two values to determine total runout.
In case a positive or negative value is not available, use the
maximum value (negative or positive) for total runout.
If the total runout value exceeds the limit, replace steel wheel. Wheel runout (Dial indicator value):
Refer to WT-41, "
SERVICE DATA
AND SPECIFICATIONS (SDS)" .
SFA975B
Radial runout = (A+B)/2
Lateral runout = (C+D)/2
Wheel runout : Refer to WT-41, "
SERVICE DATA AND
SPECIFICATIONS (SDS)" .
SEIA0558E