starting INFINITI M35 2006 Factory Service Manual
[x] Cancel search | Manufacturer: INFINITI, Model Year: 2006, Model line: M35, Model: INFINITI M35 2006Pages: 5621, PDF Size: 65.56 MB
Page 1 of 5621

A
B
C
D
E
F
G
H
I
J
K
M
L
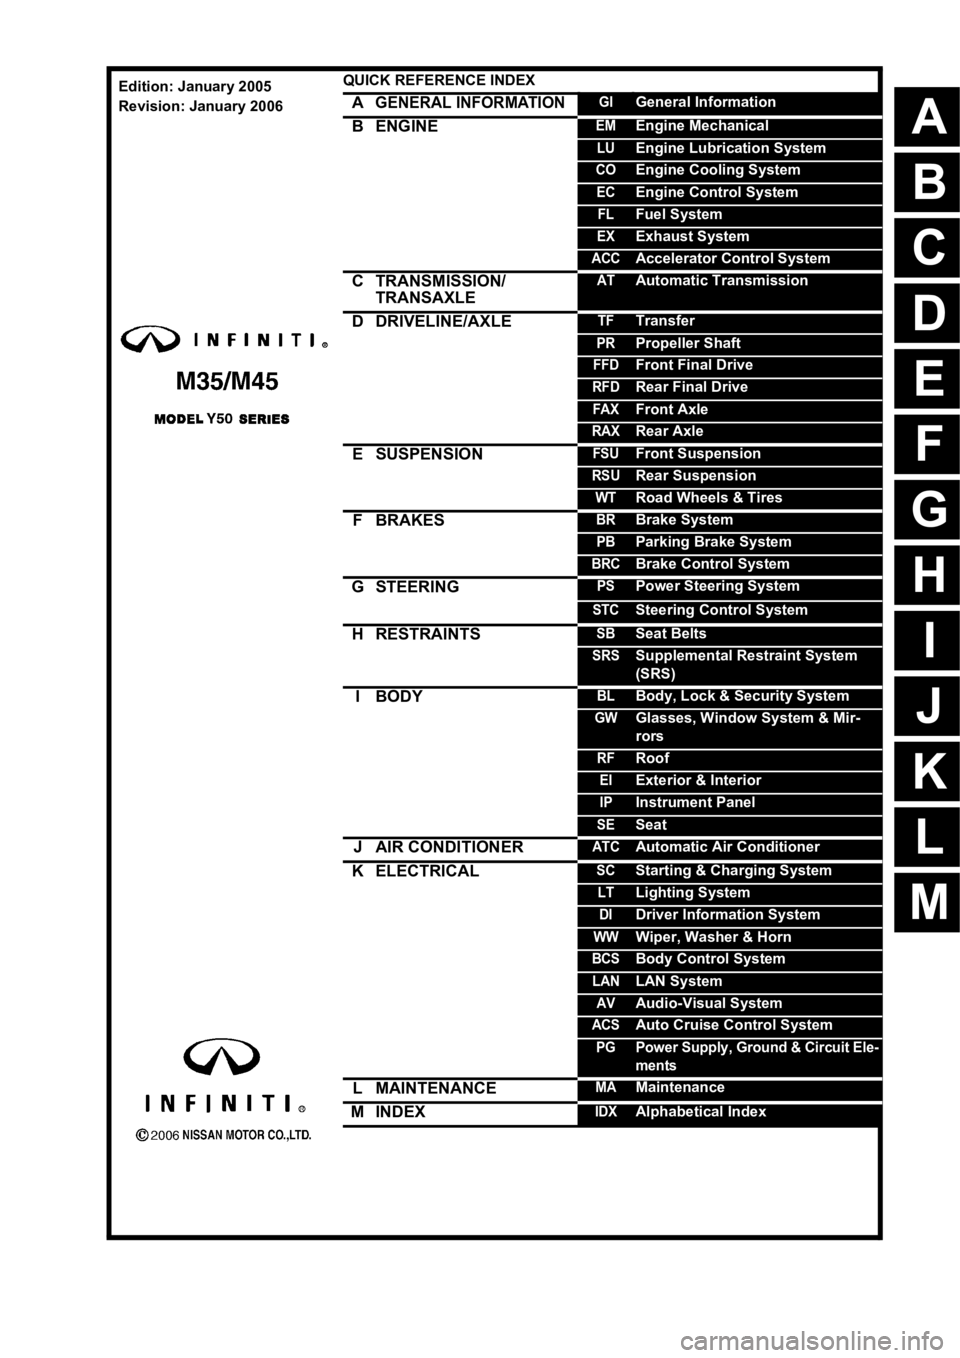
QUICK REFERENCE INDEX
AGENERAL INFORMATIONGIGeneral Information
BENGINEEMEngine Mechanical
LUEngine Lubrication System
COEngine Cooling System
ECEngine Control System
FLFuel System
EXExhaust System
ACCAccelerator Control System
CTRANSMISSION/
TRANSAXLEATAutomatic Transmission
DDRIVELINE/AXLETFTransfer
PRPropeller Shaft
FFDFront Final Drive
RFDRear Final Drive
FAXFront Axle
RAXRear Axle
ESUSPENSIONFSUFront Suspension
RSURear Suspension
WTRoad Wheels & Tires
FBRAKESBRBrake System
PBParking Brake System
BRCBrake Control System
GSTEERINGPSPower Steering System
STCSteering Control System
HRESTRAINTSSBSeat Belts
SRSSupplemental Restraint System
(SRS)
IBODYBLBody, Lock & Security System
GWGlasses, Window System & Mir-
rors
RFRoof
EIExterior & Interior
IPInstrument Panel
SESeat
JAIR CONDITIONERATCAutomatic Air Conditioner
KELECTRICALSCStarting & Charging System
LTLighting System
DIDriver Information System
WWWiper, Washer & Horn
BCSBody Control System
LANLAN System
AVAudio-Visual System
ACSAuto Cruise Control System
PGPower Supply, Ground & Circuit Ele-
ments
LMAINTENANCEMAMaintenance
MINDEXIDXAlphabetical Index
Edition: January 2005
Revision: January 2006
Page 22 of 5621
![INFINITI M35 2006 Factory Service Manual LASER BEAM AIMING ADJUSTMENT
ACS-13
[ICC]
C
D
E
F
G
H
I
J
L
MA
B
ACS
Revision: 2006 January2006 M35/M45
LASER BEAM AIMING ADJUSTMENTPFP:00026
OutlineNKS004CM
Adjust the laser beam aiming every time th INFINITI M35 2006 Factory Service Manual LASER BEAM AIMING ADJUSTMENT
ACS-13
[ICC]
C
D
E
F
G
H
I
J
L
MA
B
ACS
Revision: 2006 January2006 M35/M45
LASER BEAM AIMING ADJUSTMENTPFP:00026
OutlineNKS004CM
Adjust the laser beam aiming every time th](/img/42/57023/w960_57023-21.png)
LASER BEAM AIMING ADJUSTMENT
ACS-13
[ICC]
C
D
E
F
G
H
I
J
L
MA
B
ACS
Revision: 2006 January2006 M35/M45
LASER BEAM AIMING ADJUSTMENTPFP:00026
OutlineNKS004CM
Adjust the laser beam aiming every time the ICC sensor integrated unit is removed or installed.
CAUTION:
Adjust laser beam aiming at a horizontal place as far as 12 m (39 ft) forward the vehicle can be
seen.
Adjust laser beam aiming 5 seconds after starting engine.
Never view ICC sensor integrated unit body window directly during laser beam aiming adjustment.
Follow the CONSULT-II when adjusting the laser beam aiming (laser beam aiming adjustment can-
not be operated without CONSULT-II).
Never ride on vehicle during laser beam aiming adjustment.
Idle and turn headlamps OFF during laser beam aiming adjustment.
PreparationNKS004CN
Adjust the tire pressure to the specified value.
See that there is no load in the vehicle.
Coolant, engine oil filled up to correct level and full fuel tank.
Shift the gear into “P” position and release the parking brake.
Clean the ICC sensor integrated unit with a soft cloth.
Remove the front bumper grille. Refer to EI-13, "Removal and
Installation of Front Bumper Grille" .
Outline of Adjustment ProcedureNKS004CO
1. Set up the ICC target board [KV99110100 (J-45718)].
2. Adjust the sensor following the procedure on CONSULT-II. (Turn manually the screw for up-down position
adjustment. ICC sensor integrated unit automatically adjust the right-left position.)
Setting the ICC Target BoardNKS004CP
Accurate ICC target board setting is required for the laser beam aiming adjustment.
CAUTION:
ICC system does not function normally if laser beam aiming is not accurate.
ADJUSTING HEIGHT OF THE TARGET
1. Attach a triangle scale at 28 mm (1.10 in) below the center.
PKIB8350E
PKIB8351E
Page 99 of 5621

AT-20
A/T CONTROL SYSTEM
Revision: 2006 January2006 M35/M45
Shift MechanismNCS001JO
The A/T uses compact triple planetary gear systems to improve power transmission efficiency, simplify con-
struction and reduce weight.
It also employs an optimum shift control and super wide gear ratios. They improve starting performance and
acceleration during medium and high-speed operation.
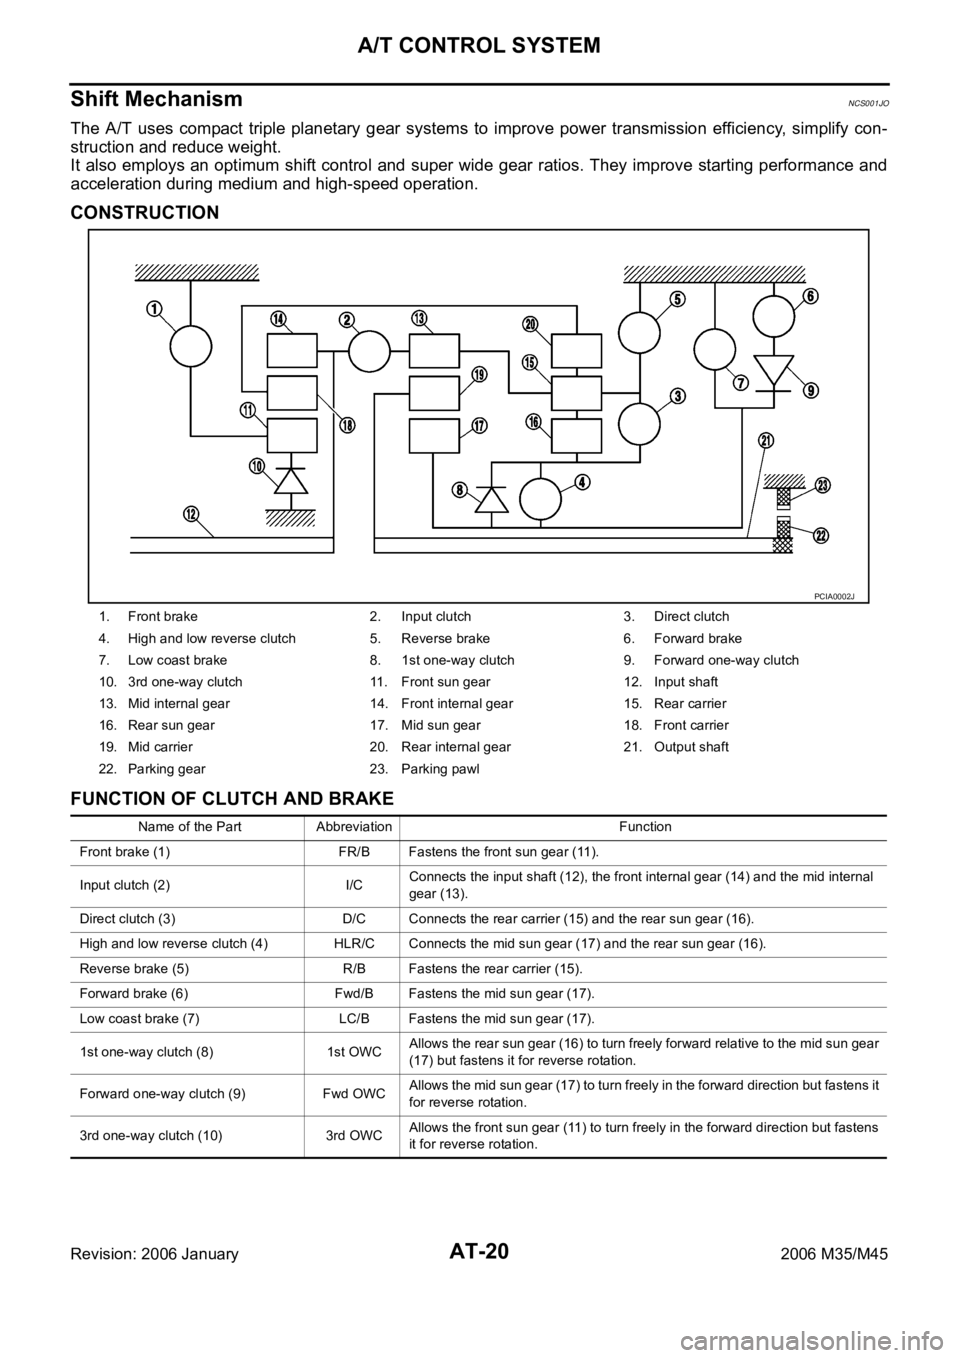
CONSTRUCTION
FUNCTION OF CLUTCH AND BRAKE
1. Front brake 2. Input clutch 3. Direct clutch
4. High and low reverse clutch 5. Reverse brake 6. Forward brake
7. Low coast brake 8. 1st one-way clutch 9. Forward one-way clutch
10. 3rd one-way clutch 11. Front sun gear 12. Input shaft
13. Mid internal gear 14. Front internal gear 15. Rear carrier
16. Rear sun gear 17. Mid sun gear 18. Front carrier
19. Mid carrier 20. Rear internal gear 21. Output shaft
22. Parking gear 23. Parking pawl
PCIA0002J
Name of the Part Abbreviation Function
Front brake (1) FR/B Fastens the front sun gear (11).
Input clutch (2) I/CConnects the input shaft (12), the front internal gear (14) and the mid internal
gear (13).
Direct clutch (3) D/C Connects the rear carrier (15) and the rear sun gear (16).
High and low reverse clutch (4) HLR/C Connects the mid sun gear (17) and the rear sun gear (16).
Reverse brake (5) R/B Fastens the rear carrier (15).
Forward brake (6) Fwd/B Fastens the mid sun gear (17).
Low coast brake (7) LC/B Fastens the mid sun gear (17).
1st one-way clutch (8) 1st OWCAllows the rear sun gear (16) to turn freely forward relative to the mid sun gear
(17) but fastens it for reverse rotation.
Forward one-way clutch (9) Fwd OWCAllows the mid sun gear (17) to turn freely in the forward direction but fastens it
for reverse rotation.
3rd one-way clutch (10) 3rd OWCAllows the front sun gear (11) to turn freely in the forward direction but fastens
it for reverse rotation.
Page 111 of 5621

AT-32
A/T CONTROL SYSTEM
Revision: 2006 January2006 M35/M45
CAN CommunicationNCS001JQ
SYSTEM DESCRIPTION
CAN (Controller Area Network) is a serial communication line for real time application. It is an on-vehicle mul-
tiplex communication line with high data communication speed and excellent error detection ability. Many elec-
tronic control units are equipped onto a vehicle, and each control unit shares information and links with other
control units during operation (not independent). In CAN communication, control units are connected with 2
communication lines (CAN H line, CAN L line) allowing a high rate of information transmission with less wiring.
Each control unit transmits/receives data but selectively reads required data only. Refer to LAN-34, "
CAN
Communication Unit" .
Input/Output Signal of TCMNCS001JR
*1: Spare for vehicle speed sensorꞏA/T (revolution sensor)
*2: Spare for accelerator pedal position signal
*3: If these input and output signals are different, the TCM triggers the fail-safe function.
*4: Used as a condition for starting self-diagnostics; if self-diagnostics are not started, it is judged that there is some kind of error.
*5: Input by CAN communications.
*6: Output by CAN communications.Control itemLine
pressure
controlVehicle
speed
controlShift
controlLock-up
controlEngine
brake
controlFail-safe
function
(*3)Self-diag-
nostics
function
InputAccelerator pedal position signal
(*5)XXXXXXX
Vehicle speed sensor A/T
(revolution sensor)XXXXXXX
Vehicle speed sensor MTR
(*1) (*5)X
Closed throttle position signal
(*5)X(*2) X X X X(*4)
Wide open throttle position signal
(*5)XX(*4)
Turbine revolution sensor 1 X X X X X
Turbine revolution sensor 2
(for 4th speed only)X XXXX
Engine speed signals
(*5)XXXXXXX
Stop lamp switch signal
(*5)XXX X(*4)
A/T fluid temperature sensors 1, 2XXXX XX
ASCD or ICC
sensor inte-
grated unitOperation signal
(*5)XXX
Overdrive cancel
signal
(*5)X
Out-
putDirect clutch solenoid
(ATF pressure switch 5)XX XX
Input clutch solenoid
(ATF pressure switch 3)XX XX
High and low reverse clutch solenoid
(ATF pressure switch 6)XX XX
Front brake solenoid
(ATF pressure switch 1)XX XX
Low coast brake solenoid
(ATF pressure switch 2)XX XXX
Line pressure solenoidXXXXXXX
TCC solenoid X X X
Self-diagnostics table
(*6)X
Starter relayXX
Page 123 of 5621

AT-44
TROUBLE DIAGNOSIS
Revision: 2006 January2006 M35/M45
TROUBLE DIAGNOSISPFP:00004
DTC Inspection Priority ChartNCS001K2
If some DTCs are displayed at the same time, perform inspections one by one based on the following priority
chart.
NOTE:
If DTC “U1000” is displayed with other DTC, first perform the trouble diagnosis for “DTC U1000 CAN
COMMUNICATION LINE”. Refer to AT- 1 0 5
.
Fail-safeNCS001K3
The TCM has an electrical fail-safe mode. This mode makes it possible to operate even if there is an error in a
main electronic control input/output signal circuit.
In fail-safe mode, even if the selector lever is “D” or “M” mode, the A/T is fixed in 2nd, 4th and 5th (depending
on the breakdown position), so the customer should feel “slipping” or “poor acceleration”.
Even when the electronic circuits are normal, under special conditions (for example, when slamming on the
brake with the wheels spinning drastically and stopping the tire rotation), the A/T can go into fail-safe mode. If
this happens, switch OFF the ignition switch for 10 seconds, then switch it ON again to return to the normal
shift pattern. Therefore, the customer's vehicle has returned to normal, so handle according to the “WORK
FLOW” (Refer to AT- 4 7
).
FAIL-SAFE FUNCTION
If any malfunction occurs in a sensor or solenoid, this function controls the A/T to mark driving possible.
Vehicle Speed Sensor
Signals are input from two systems - from vehicle speed sensor A/T (revolution sensor) installed on the A/
T and from combination meter so normal driving is possible even if there is a malfunction in one of the
systems. And if vehicle speed sensor A/T (revolution sensor) has unusual cases, 5th gear and manual
mode are prohibited.
Accelerator Pedal Position Sensor
If there is a malfunction in one of the systems, the accelerator opening angle is controlled by ECM accord-
ing to a pre-determined accelerator angle to make driving possible. And if there are malfunctions in tow
systems, the engine speed is fixed by ECM to a pre-determined engine speed to make driving possible.
Throttle Position Sensor
If there is a malfunction in one of the systems, the accelerator opening angle is controlled by ECM accord-
ing to a pre-determined accelerator angle to make driving possible. And if there are malfunctions in tow
systems, the accelerator opening angle is controlled by the idle signal sent from the ECM which is based
on input indicating either idle condition or off-idle condition (pre-determined accelerator opening) in order
to make driving possible.
PNP Switch
In the unlikely event that a malfunction signal enters the TCM, the position indicator is switched OFF, the
starter relay is switched OFF (starter starting is disabled), the back-up lamp relay switched OFF (back-up
lamp is OFF) and the position is fixed to the “D” position to make driving possible.
Starter Relay
The starter relay is switched OFF. (Starter starting is disabled.)
Priority Detected items (DTC)
1 U1000 CAN communication line
2 Except above
Page 136 of 5621

TROUBLE DIAGNOSIS
AT-57
D
E
F
G
H
I
J
K
L
MA
B
AT
Revision: 2006 January2006 M35/M45
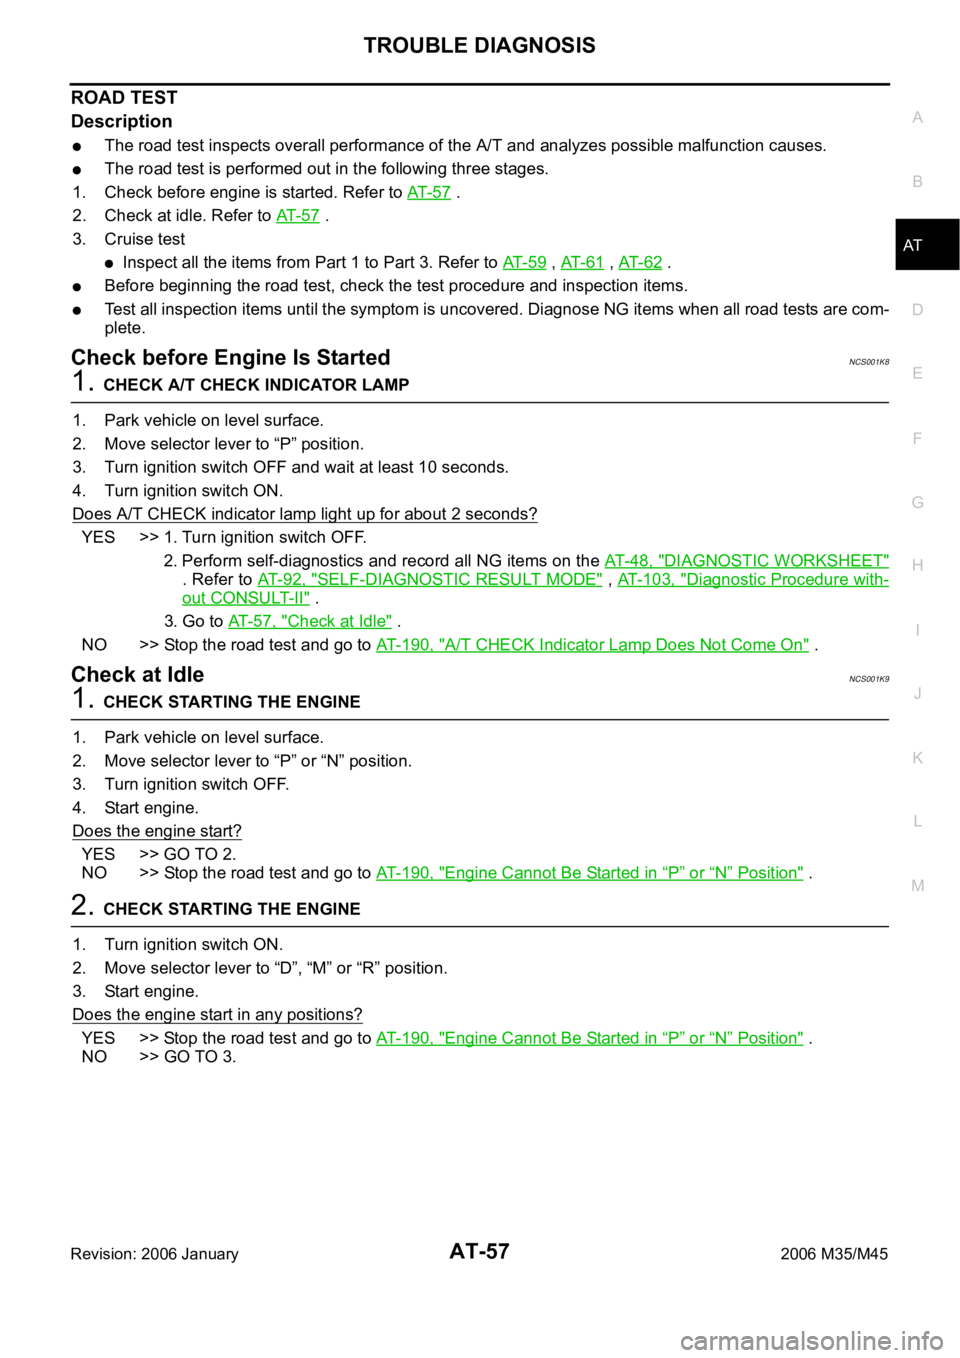
ROAD TEST
Description
The road test inspects overall performance of the A/T and analyzes possible malfunction causes.
The road test is performed out in the following three stages.
1. Check before engine is started. Refer to AT- 5 7
.
2. Check at idle. Refer to AT- 5 7
.
3. Cruise test
Inspect all the items from Part 1 to Part 3. Refer to AT- 5 9 , AT- 6 1 , AT- 6 2 .
Before beginning the road test, check the test procedure and inspection items.
Test all inspection items until the symptom is uncovered. Diagnose NG items when all road tests are com-
plete.
Check before Engine Is StartedNCS001K8
1. CHECK A/T CHECK INDICATOR LAMP
1. Park vehicle on level surface.
2. Move selector lever to “P” position.
3. Turn ignition switch OFF and wait at least 10 seconds.
4. Turn ignition switch ON.
Does A/T CHECK indicator lamp light up for about 2 seconds?
YES >> 1. Turn ignition switch OFF.
2. Perform self-diagnostics and record all NG items on the AT- 4 8 , "
DIAGNOSTIC WORKSHEET"
. Refer to AT- 9 2 , "SELF-DIAGNOSTIC RESULT MODE" , AT- 1 0 3 , "Diagnostic Procedure with-
out CONSULT-II" .
3. Go to AT- 5 7 , "
Check at Idle" .
NO >> Stop the road test and go to AT- 1 9 0 , "
A/T CHECK Indicator Lamp Does Not Come On" .
Check at IdleNCS001K9
1. CHECK STARTING THE ENGINE
1. Park vehicle on level surface.
2. Move selector lever to “P” or “N” position.
3. Turn ignition switch OFF.
4. Start engine.
Does the engine start?
YES >> GO TO 2.
NO >> Stop the road test and go to AT- 1 9 0 , "
Engine Cannot Be Started in “P” or “N” Position" .
2. CHECK STARTING THE ENGINE
1. Turn ignition switch ON.
2. Move selector lever to “D”, “M” or “R” position.
3. Start engine.
Does the engine start in any positions?
YES >> Stop the road test and go to AT- 1 9 0 , "Engine Cannot Be Started in “P” or “N” Position" .
NO >> GO TO 3.
Page 138 of 5621

TROUBLE DIAGNOSIS
AT-59
D
E
F
G
H
I
J
K
L
MA
B
AT
Revision: 2006 January2006 M35/M45
Cruise Test - Part 1NCS001KA
1. CHECK STARTING OUT FROM D1
1. Drive the vehicle for about 10 minutes to warm up the engine oil and A/T fluid.
Appropriate temperature for the A/T fluid: 50 to 80
C (122 to 176F)
2. Park the vehicle on a level surface.
3. Move selector lever to “P” position.
4. Start the engine.
5. Move selector lever to “D” position.
6. Press the accelerator pedal about half way down to accelerate the vehicle.
With CONSULT-II
Read the gear position. Refer to AT- 9 6 , "
DATA MONITOR MODE" .
Starts from D1?
YES >> GO TO 2.
NO >> Enter a check mark at “Vehicle Cannot Be Started from D1” on the AT- 4 8 , "
DIAGNOSTIC WORK-
SHEET" , then continue the road test.
2. CHECK SHIFT-UP D1 D2
Press down the accelerator pedal about half-way and inspect if the vehicle shifts up (D1
D2) at the appro-
priate speed.
Refer to AT- 6 3 , "Vehicle Speed at Which Gear Shifting Occurs" .
With CONSULT-II
Read the gear position, throttle degree of opening and vehicle speed. Refer to AT- 9 6 , "
DATA MONITOR
MODE" .
Does the A/T shift-up D1
D2 at the correct speed?
YES >> GO TO 3.
NO >> Enter a check mark at “A/T Does Not Shift: D1
D2” on the AT- 4 8 , "DIAGNOSTIC WORK-
SHEET" , then continue the road test.
3. CHECK SHIFT-UP D2 D3
Press down the accelerator pedal about half-way and inspect if the vehicle shifts up (D2
D3) at the appro-
priate speed.
Refer to AT- 6 3 , "Vehicle Speed at Which Gear Shifting Occurs" .
With CONSULT-II
Read the gear position, throttle degree of opening and vehicle speed. Refer to AT- 9 6 , "
DATA MONITOR
MODE" .
Does the A/T shift-up D2
D3 at the correct speed?
YES >> GO TO 4.
NO >> Enter a check mark at “A/T Does Not Shift: D2
D3” on the AT- 4 8 , "DIAGNOSTIC WORK-
SHEET" , then continue the road test.
4. CHECK SHIFT-UP D3 D4
Press down the accelerator pedal about half-way and inspect if the vehicle shifts up (D3
D4) at the appro-
priate speed.
Refer to AT- 6 3 , "Vehicle Speed at Which Gear Shifting Occurs" .
With CONSULT-II
Read the gear position, throttle degree of opening and vehicle speed. Refer to AT- 9 6 , "
DATA MONITOR
MODE" .
Does the A/T shift-up D3
D4 at the correct speed?
YES >> GO TO 5.
NO >> Enter a check mark at “A/T Does Not Shift: D3
D4” on the AT- 4 8 , "DIAGNOSTIC WORK-
SHEET" , then continue the road test.
Page 140 of 5621

TROUBLE DIAGNOSIS
AT-61
D
E
F
G
H
I
J
K
L
MA
B
AT
Revision: 2006 January2006 M35/M45
9. CHECK SHIFT-DOWN D5 D4
Decelerate by pressing lightly on the brake pedal.
With CONSULT-II
Read the gear position and engine speed. Refer to AT-96, "
DATA MONITOR MODE" .
When the A/T shift-down D5
D4, does the engine speed drop smoothly back to idle?
YES >> 1. Stop the vehicle.
2. Go to AT- 6 1 , "
Cruise Test - Part 2" .
NO >> Enter a check mark at “Engine Speed Does Not Return to Idle” on the AT- 4 8 , "
DIAGNOSTIC
WORKSHEET" , then continue the road test. Go to AT-61, "Cruise Test - Part 2" .
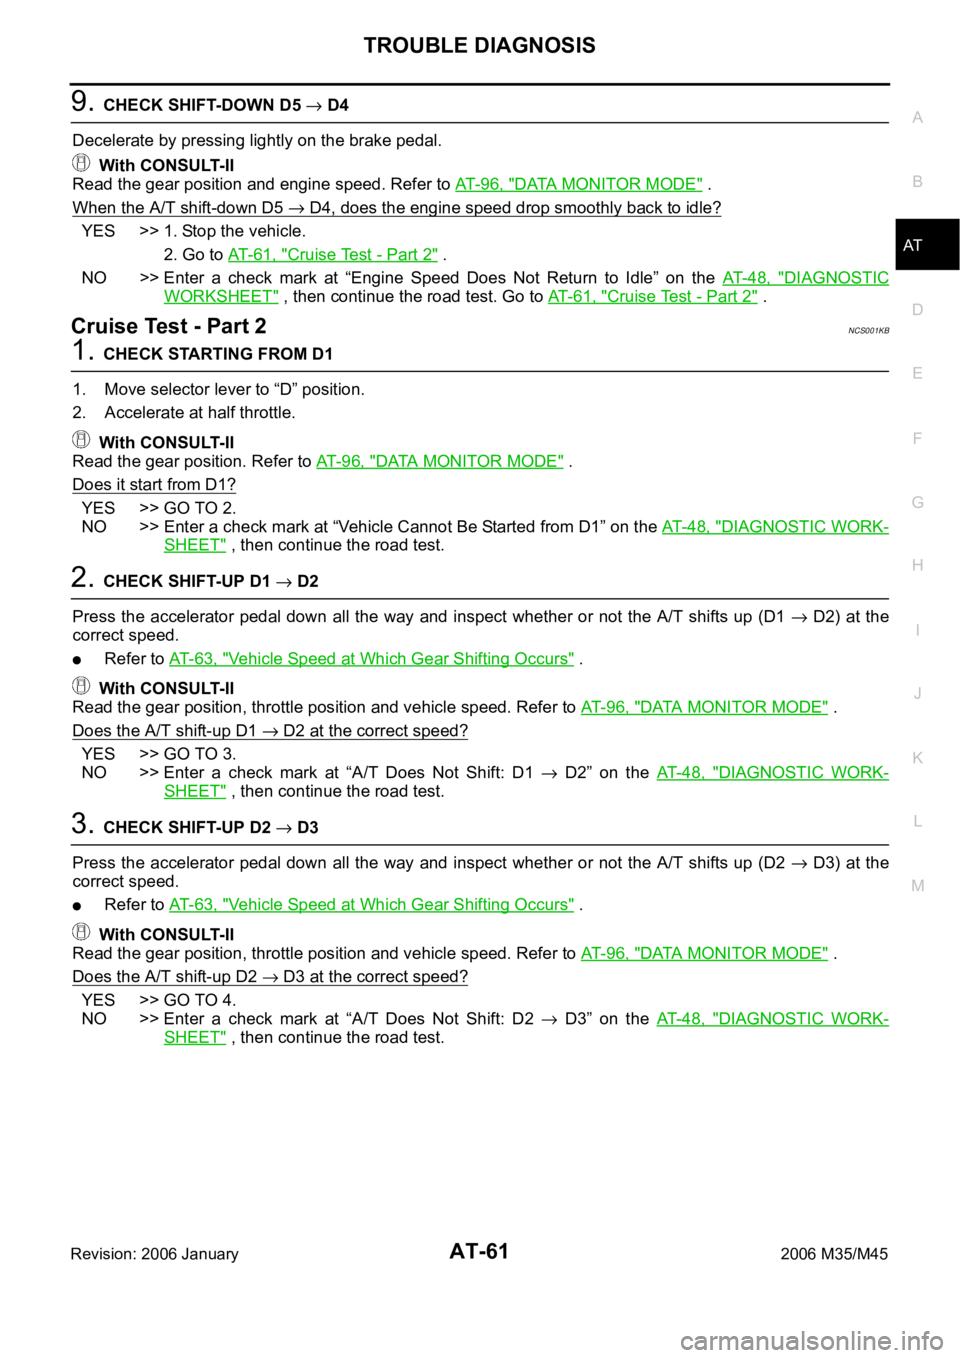
Cruise Test - Part 2NCS001KB
1. CHECK STARTING FROM D1
1. Move selector lever to “D” position.
2. Accelerate at half throttle.
With CONSULT-II
Read the gear position. Refer to AT- 9 6 , "
DATA MONITOR MODE" .
Does it start from D1?
YES >> GO TO 2.
NO >> Enter a check mark at “Vehicle Cannot Be Started from D1” on the AT- 4 8 , "
DIAGNOSTIC WORK-
SHEET" , then continue the road test.
2. CHECK SHIFT-UP D1 D2
Press the accelerator pedal down all the way and inspect whether or not the A/T shifts up (D1
D2) at the
correct speed.
Refer to AT- 6 3 , "Vehicle Speed at Which Gear Shifting Occurs" .
With CONSULT-II
Read the gear position, throttle position and vehicle speed. Refer to AT- 9 6 , "
DATA MONITOR MODE" .
Does the A/T shift-up D1
D2 at the correct speed?
YES >> GO TO 3.
NO >> Enter a check mark at “A/T Does Not Shift: D1
D2” on the AT- 4 8 , "DIAGNOSTIC WORK-
SHEET" , then continue the road test.
3. CHECK SHIFT-UP D2 D3
Press the accelerator pedal down all the way and inspect whether or not the A/T shifts up (D2
D3) at the
correct speed.
Refer to AT- 6 3 , "Vehicle Speed at Which Gear Shifting Occurs" .
With CONSULT-II
Read the gear position, throttle position and vehicle speed. Refer to AT- 9 6 , "
DATA MONITOR MODE" .
Does the A/T shift-up D2
D3 at the correct speed?
YES >> GO TO 4.
NO >> Enter a check mark at “A/T Does Not Shift: D2
D3” on the AT- 4 8 , "DIAGNOSTIC WORK-
SHEET" , then continue the road test.
Page 157 of 5621

AT-78
TROUBLE DIAGNOSIS
Revision: 2006 January2006 M35/M45
36
Slips/Will
Not
EngageWith selector lever in
“R” position, accelera-
tion is extremely poor.ON vehicle1. A/T fluid level and stateAT- 5 3
2. Line pressure testAT- 5 5
3. Accelerator pedal position sensorAT- 1 3 2
4. ATF pressure switch 6, high and low reverse clutch sole-
noid valveAT- 1 7 8,
AT- 1 5 9
5. CAN communication lineAT- 1 0 5
6. PNP switchAT- 11 3
7. Control linkage adjustmentAT- 2 2 7
8. Control valve with TCMAT- 2 3 6
OFF vehicle9. Gear systemAT- 2 7 810. Output shaft AT- 2 9 8
11. Reverse brakeAT- 2 9 8
37While starting off by
accelerating in 1st,
engine races or slip-
page occurs.ON vehicle1. A/T fluid level and stateAT- 5 3
2. Line pressure testAT- 5 5
3. Accelerator pedal position sensorAT- 1 3 2
4. CAN communication lineAT- 1 0 5
5. Control valve with TCMAT- 2 3 6
OFF vehicle6. Torque converterAT- 2 9 8
7. Oil pump assemblyAT- 3 1 8
8. 3rd one-way clutchAT- 3 2 1
9. 1st one-way clutchAT- 3 2 9
10. Gear systemAT- 2 7 8
11. Reverse brakeAT- 2 9 8
12. Forward one-way clutch (Parts behind drum support is
impossible to perform inspection by disassembly. Refer to
AT-17, "
Cross-Sectional View (VQ35DE Models for 2WD)" ,
AT-18, "
Cross-Sectional View (VK45DE Models for 2WD)" o r
AT-19, "
Cross-Sectional View (AWD Models)" .)AT- 2 9 8
13. Forward brake (Parts behind drum support is impossible
to perform inspection by disassembly. Refer to AT-17,
"Cross-Sectional View (VQ35DE Models for 2WD)" , AT-18,
"Cross-Sectional View (VK45DE Models for 2WD)" o r AT-19,
"Cross-Sectional View (AWD Models)" .)AT- 2 9 8
No. Item Symptom Condition Diagnostic ItemReference
page
Page 190 of 5621

DTC P0615 START SIGNAL CIRCUIT
AT-111
D
E
F
G
H
I
J
K
L
MA
B
AT
Revision: 2006 January2006 M35/M45
3. CHECK TERMINAL CORD ASSEMBLY
1. Remove control valve with TCM. Refer to AT-236, "
Control Valve With TCM and A/T Fluid Temperature
Sensor 2" .
2. Disconnect A/T assembly harness connector and TCM connector.
3. Check continuity between A/T assembly harness connector ter-
minal and TCM connector terminal.
4. If OK, check harness for short to ground and short to power.
5. Reinstall any part removed.
OK or NG
OK >> GO TO 4.
NG >> Replace open circuit or short to ground and short to power in harness or connectors.
4. DETECT MALFUNCTIONING ITEM
Check the following.
Starter relay, Refer to SC-10, "STARTING SYSTEM" .
IPDM E/R, Refer to PG-18, "IPDM E/R (INTELLIGENT POWER DISTRIBUTION MODULE ENGINE
ROOM)" .
OK or NG
OK >> Replace the control valve with TCM. Refer to AT- 2 3 6 , "Control Valve With TCM and A/T Fluid
Temperature Sensor 2" .
NG >> Repair or replace damaged parts.
5. CHECK DTC
Perform “DTC Confirmation Procedure”. Refer to AT- 1 0 8 , "
DTC Confirmation Procedure" .
OK or NG
OK >>INSPECTION END
NG >> GO TO 2.
Item Connector Terminal Continuity
A/T assembly harness con-
nectorF42 9
Ye s
TCM connector F502 8
SCIA5440E