elec INFINITI QX4 2001 Factory Service Manual
[x] Cancel search | Manufacturer: INFINITI, Model Year: 2001, Model line: QX4, Model: INFINITI QX4 2001Pages: 2395, PDF Size: 43.2 MB
Page 454 of 2395

G Sensor and Circuit
DIAGNOSTIC PROCEDURENBBR0114Malfunction code No. 17
1 INSPECTION START
G sensor inspection
SBR504E
©GO TO 2.
2 CHECK FUSE
Check 7.5A fuse No. 7 for ABS actuator and electric unit. For fuse layout, refer to EL-16, ªPOWER SUPPLY ROUTINGº.
Is fuse OK?
Ye s©GO TO 3.
No©Replace fuse.
3 CHECK CONNECTOR
1. Disconnect connectors from ABS actuator and electric unit and G sensor. Check terminals for damage or loose connec-
tion. Then reconnect connectors.
2. Carry out self-diagnosis again.
Does warning lamp activate again?
Ye s©GO TO 4.
No©INSPECTION END
4 CHECK G SENSOR
Refer to ªG SENSORº in ªElectrical Components Inspectionº, BR-67.
Is resistance within specifications?
Ye s©GO TO 5.
No©Replace G sensor.
GI
MA
EM
LC
EC
FE
AT
TF
PD
AX
SU
ST
RS
BT
HA
SC
EL
IDX
TROUBLE DIAGNOSES FOR SELF-DIAGNOSTIC ITEMSABS
G Sensor and Circuit
BR-65
Page 455 of 2395

5 CHECK G SENSOR POWER SUPPLY CIRCUIT
Check voltage between G sensor connector terminals 1, 2 and ground.
SBR861D
Does battery voltage exist?
Ye s©GO TO 6.
No©Check the following. If NG, repair harness or connectors.
IHarness connectors B58, B81
IHarness for open or short between G sensor and fuse
6 CHECK CIRCUIT
1. Disconnect harness connector from ABS actuator and electric unit.
2. Check continuity between ABS actuator and electric unit connector terminals 20, 10 and G sensor connector terminals
17, 51.
SBR505E
Does continuity exist?
Ye s©Check actuator and electric unit pin terminals for damage or the connection of actuator
and electric unit harness connector. Reconnect actuator and electric unit harness con-
nector. Then retest.
No©Check the following. If NG, repair harness or connectors.
IHarness connectors E111, B58, B81
IHarness for open or short between G sensor connector and actuator and electric unit
TROUBLE DIAGNOSES FOR SELF-DIAGNOSTIC ITEMSABS
G Sensor and Circuit (Cont'd)
BR-66
Page 456 of 2395

SBR844DF
ELECTRICAL COMPONENT INSPECTION=NBBR0115G Sensor (4WD models only)NBBR0115S01CAUTION:
The G sensor is easily damaged if it sustains an impact. Be
careful not to drop or bump it.
1. Measure resistance between terminals 2 and 51 of G sensor
unit connector.
G sensor conditionResistance between ter-
minals 2 and 51G sensor switch condi-
tion
Installed in vehicle 1.4 - 1.6 kWªONº
Tilted as shown in figure 4.7 - 5.5 kWªOFFº
2. Measure resistance between terminals 1 and 17 of the G sen-
sor unit connector.
Resistance: 70 - 124W
GI
MA
EM
LC
EC
FE
AT
TF
PD
AX
SU
ST
RS
BT
HA
SC
EL
IDX
TROUBLE DIAGNOSES FOR SELF-DIAGNOSTIC ITEMSABS
G Sensor and Circuit (Cont'd)
BR-67
Page 457 of 2395

Control Unit
DIAGNOSTIC PROCEDURE=NBBR0106Malfunction code No. 71
1 INSPECTION START
ABS actuator and electric unit power supply and ground circuit inspection
SBR497E
©GO TO 2.
2 CHECK CONNECTOR
1. Disconnect ABS actuator and electric unit connector.
Check terminals for damage or loose connection. Then reconnect connector.
2. Carry out self-diagnosis again.
Does warning lamp activate again?
Ye s©GO TO 3.
No©INSPECTION END
3 CHECK ABS ACTUATOR AND ELECTRIC UNIT POWER SUPPLY CIRCUIT
Check voltage. Refer to ª5. CHECK ABS ACTUATOR AND ELECTRIC UNIT POWER SUPPLY CIRCUITº in ªDIAGNOS-
TIC PROCEDUREº, ªLow Voltageº, BR-63.
Does battery voltage exist when ignition switch is turned ON?
Ye s©GO TO 4.
No©Repair.
4 CHECK WARNING LAMP INDICATION
Does warning lamp indicate code No. 71 again?
YesorNo
Ye s©Replace ABS actuator and electric unit.
No©Inspect the system according to the code No.
TROUBLE DIAGNOSES FOR SELF-DIAGNOSTIC ITEMSABS
Control Unit
BR-68
Page 459 of 2395

2 CHECK MECHANICAL BRAKE SYSTEM PERFORMANCE
Disconnect ABS actuator and electric unit connector and check whether brake is effective.
Does brake system function properly when brake pedal is depressed?
Ye s©GO TO 3.
No©Perform Preliminary Check. Refer to BR-50.
3 CHECK WARNING LAMP INDICATION
Ensure warning lamp remains off while driving.
SBR672E
Is warning lamp turned off?
Ye s©GO TO 4.
No©Carry out self-diagnosis. Refer to BR-41, BR-44.
4 CHECK WHEEL SENSOR
1. Check wheel sensor connector for terminal damage or loose connection.
2. Perform wheel sensor mechanical check. Refer to ª7. CHECK SENSOR ROTORº in ªDIAGNOSTIC PROCEDUREº,
ªWheel Sensor or Rotorº, BR-56.
Is wheel sensor mechanism OK?
Ye s©Check ABS actuator and electric unit pin terminals for damage or the connection of ABS
actuator and electric unit harness connector.
Reconnect ABS actuator and electric unit harness connector.
Then retest.
No©Repair.
3. Long Stopping DistanceNBBR0109
1 CHECK MECHANICAL BRAKE SYSTEM PERFORMANCE
Disconnect ABS actuator and electric unit connector and check whether stopping distance is still long.
Does brake system function properly when brake pedal is depressed?
Ye s©Perform Preliminary Check and air bleeding (if necessary).
No©Go to ª3. CHECK WARNING LAMP INDICATIONº in ª2. Unexpected Pedal Actionº,
BR-70.
TROUBLE DIAGNOSES FOR SYMPTOMSABS
2. Unexpected Pedal Action (Cont'd)
BR-70
Page 462 of 2395

3 CHECK WARNING LAMP ACTIVATE
Disconnect ABS actuator and electric unit connector.
SBR672E
Does the warning lamp activate?
Ye s©Replace ABS actuator and electric unit.
No©GO TO 4.
4 CHECK HARNESS FOR SHORT
1. Disconnect ABS actuator and electric unit connector and combination meter connector M24.
2. Check continuity between ABS actuator and electric unit connector E111 (body side) terminal 10 (2WD) or 21 (4WD)
and ground.
SBR499E
Continuity should not exist.
Does continuity exist?
Ye s©Repair harness or connectors.
No©Check combination meter.
Refer to EL-114, ªWARNING LAMPSº.
GI
MA
EM
LC
EC
FE
AT
TF
PD
AX
SU
ST
RS
BT
HA
SC
EL
IDX
TROUBLE DIAGNOSES FOR SYMPTOMSABS
6. Warning Lamp Does Not Come On When Ignition Switch Is Turned On (Cont'd)
BR-73
Page 463 of 2395

7. Warning Lamp Stays On When Ignition
Switch Is Turned On
=NBBR0113
1 INSPECTION START
ABS control unit inspection
SBR674E
©GO TO 2.
2 CHECK FUSE
Check 7.5A fuse No. 7. For fuse layout, refer to EL-16, ªPOWER SUPPLY ROUTINGº.
Is fuse OK?
Ye s©GO TO 3.
No©GO TO 8.
3 CHECK HARNESS CONNECTOR
Check ABS actuator and electric unit pin terminals for damage or bad connection of ABS actuator and electric unit harness
connector. Reconnect ABS actuator and electric unit harness connector. Then retest.
Does warning lamp stay on when ignition switch is turned ON?
Ye s©GO TO 4.
No©INSPECTION END
4 CHECK ABS ACTUATOR AND ELECTRIC UNIT GROUND CIRCUIT
Refer to ªABS ACTUATOR AND ELECTRIC UNIT GROUNDº in ªGround Circuit Checkº, BR-53.
Is ground circuit OK?
Ye s©GO TO 5.
No©Repair harness or connector.
TROUBLE DIAGNOSES FOR SYMPTOMSABS
7. Warning Lamp Stays On When Ignition Switch Is Turned On
BR-74
Page 464 of 2395

5 CHECK ABS ACTUATOR AND ELECTRIC UNIT POWER SUPPLY CIRCUIT
1. Disconnect ABS actuator and electric unit connector.
2. Check voltage between ABS actuator and electric unit connector E111 (body side) terminal 15 and ground.
SBR495E
Does battery voltage exist when ignition switch is turned ON?
Ye s©GO TO 6.
No©Check the following.
If NG, repair harness or connector.
IHarness connector E111
IHarness for open or short between ABS actuator and electric unit and fuse
6 CHECK WARNING LAMP
1. Disconnect ABS actuator and electric unit connector.
2. Connect suitable wire between ABS actuator and electric unit connector E111 (body side) terminal 10 (2WD) or 21
(4WD) and ground.
SBR502E
Does the warning lamp deactivate?
Ye s©Replace ABS actuator and electric unit.
No©GO TO 7.
GI
MA
EM
LC
EC
FE
AT
TF
PD
AX
SU
ST
RS
BT
HA
SC
EL
IDX
TROUBLE DIAGNOSES FOR SYMPTOMSABS
7. Warning Lamp Stays On When Ignition Switch Is Turned On (Cont'd)
BR-75
Page 465 of 2395

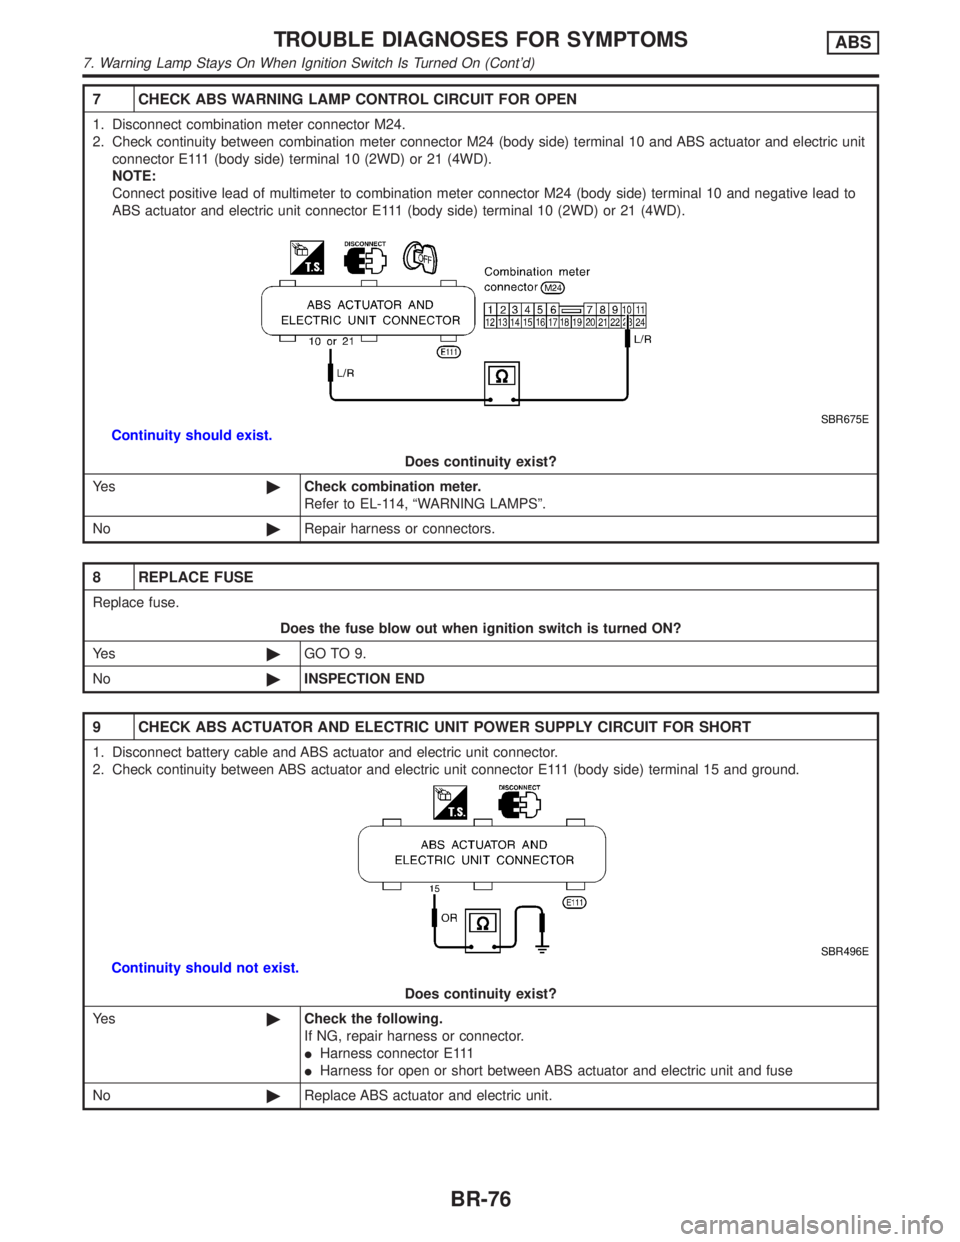
7 CHECK ABS WARNING LAMP CONTROL CIRCUIT FOR OPEN
1. Disconnect combination meter connector M24.
2. Check continuity between combination meter connector M24 (body side) terminal 10 and ABS actuator and electric unit
connector E111 (body side) terminal 10 (2WD) or 21 (4WD).
NOTE:
Connect positive lead of multimeter to combination meter connector M24 (body side) terminal 10 and negative lead to
ABS actuator and electric unit connector E111 (body side) terminal 10 (2WD) or 21 (4WD).
SBR675E
Continuity should exist.
Does continuity exist?
Ye s©Check combination meter.
Refer to EL-114, ªWARNING LAMPSº.
No©Repair harness or connectors.
8 REPLACE FUSE
Replace fuse.
Does the fuse blow out when ignition switch is turned ON?
Ye s©GO TO 9.
No©INSPECTION END
9 CHECK ABS ACTUATOR AND ELECTRIC UNIT POWER SUPPLY CIRCUIT FOR SHORT
1. Disconnect battery cable and ABS actuator and electric unit connector.
2. Check continuity between ABS actuator and electric unit connector E111 (body side) terminal 15 and ground.
SBR496E
Continuity should not exist.
Does continuity exist?
Ye s©Check the following.
If NG, repair harness or connector.
IHarness connector E111
IHarness for open or short between ABS actuator and electric unit and fuse
No©Replace ABS actuator and electric unit.
TROUBLE DIAGNOSES FOR SYMPTOMSABS
7. Warning Lamp Stays On When Ignition Switch Is Turned On (Cont'd)
BR-76
Page 466 of 2395

8. Vehicle Vibrates Excessively When ABS Is
Operating
=NBBR0078IWhile ABS is operating, brake pedal vibrates slightly. This is
not a problem.
IIf vehicle vibration is greater in the AUTO mode than in the
2WD mode, there is the possibility of failure in the communi-
cation line between the ABS control unit and transfer control
unit. Check and locate the cause of the problem.
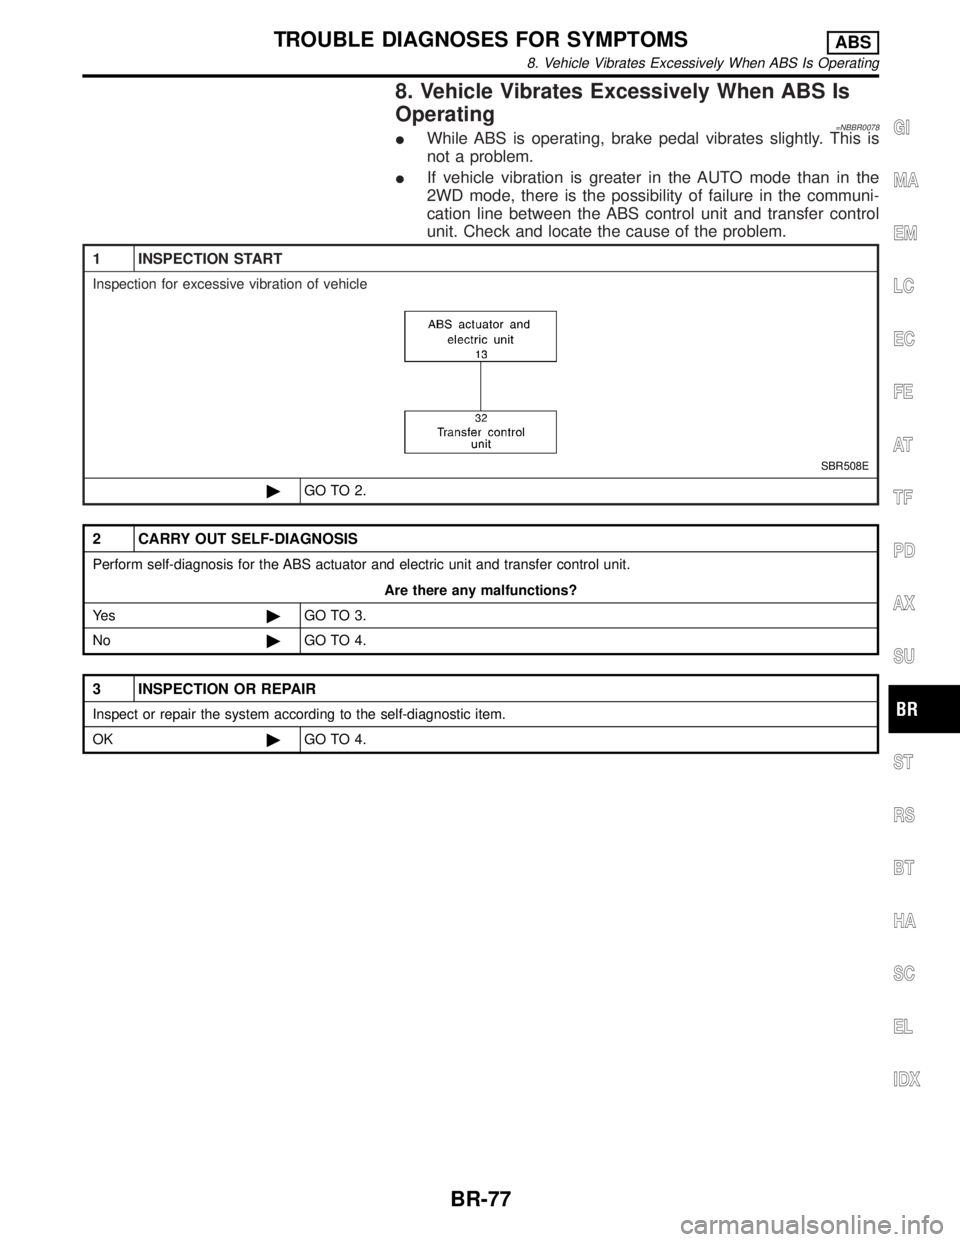
1 INSPECTION START
Inspection for excessive vibration of vehicle
SBR508E
©GO TO 2.
2 CARRY OUT SELF-DIAGNOSIS
Perform self-diagnosis for the ABS actuator and electric unit and transfer control unit.
Are there any malfunctions?
Ye s©GO TO 3.
No©GO TO 4.
3 INSPECTION OR REPAIR
Inspect or repair the system according to the self-diagnostic item.
OK©GO TO 4.
GI
MA
EM
LC
EC
FE
AT
TF
PD
AX
SU
ST
RS
BT
HA
SC
EL
IDX
TROUBLE DIAGNOSES FOR SYMPTOMSABS
8. Vehicle Vibrates Excessively When ABS Is Operating
BR-77