02 sensor INFINITI QX4 2001 Factory Service Manual
[x] Cancel search | Manufacturer: INFINITI, Model Year: 2001, Model line: QX4, Model: INFINITI QX4 2001Pages: 2395, PDF Size: 43.2 MB
Page 837 of 2395

On Board Diagnosis LogicNBEC0173With the Air/Fuel Mixture Ratio Self-Learning Control, the actual
mixture ratio can be brought closely to the theoretical mixture ratio
based on the mixture ratio feedback signal from the heated oxygen
sensors 1 (front). The ECM calculates the necessary compensation
to correct the offset between the actual and the theoretical ratios.
In case the amount of the compensation value is extremely large
(The actual mixture ratio is too rich.), the ECM judges the condi-
tion as the fuel injection system malfunction and light up the MIL
(2 trip detection logic).
Sensor Input Signal to ECMECM func-
tionActuator
Heated oxygen sensors 1 (front)Density of oxygen in exhaust gas
(Mixture ratio feedback signal)Fuel injec-
tion controlInjectors
Malfunction is detected when fuel injection system does not oper-
ate properly, the amount of mixture ratio compensation is too large.
(The mixture ratio is too rich.)
Possible CauseNBEC0488IHeated oxygen sensor 1 (front)
IInjectors
IExhaust gas leaks
IIncorrect fuel pressure
IMass air flow sensor
SEF968Y
DTC Confirmation ProcedureNBEC0174NOTE:
If ªDTC Confirmation Procedureº has been previously conducted,
always turn ignition switch ªOFFº and wait at least 10 seconds
before conducting the next test.
WITH CONSULT-IINBEC0174S011) Start engine and warm it up to normal operating temperature.
2) Turn ignition switch ªOFFº and wait at least 10 seconds.
3) Turn ignition switch ªONº and select ªSELF-LEARN CON-
TROLº in ªWORK SUPPORTº mode with CONSULT-II.
4) Clear the self-learning control coefficient by touching ªCLEARº.
5) Select ªDATA MONITORº mode with CONSULT-II.
6) Start engine again and let it idle for at least 10 minutes.
The 1st trip DTC P0172, P0175 should be detected at this
stage, if a malfunction exists. If so, go to ªDiagnostic
Procedureº, EC-306.
7) If it is difficult to start engine at step 6, the fuel injection sys-
tem has a malfunction, too.
8) Crank engine while depressing accelerator pedal.
If engine starts, go to ªDiagnostic Procedureº, EC-306. If
engine does not start, remove ignition plugs and check for
fouling, etc.
DTC P0172 (RIGHT, -B1), P0175 (LEFT, -B2) FUEL INJECTION SYSTEM
FUNCTION (RICH)
On Board Diagnosis Logic
EC-302
Page 838 of 2395

SEF960Y
WITH GSTNBEC0174S021) Start engine and warm it up to normal operating temperature.
2) Turn ignition switch ªOFFº and wait at least 10 seconds.
3) Disconnect mass air flow sensor harness connector. Then
restart and run engine for at least 5 seconds at idle speed.
4) Stop engine and reconnect mass air flow sensor harness con-
nector.
5) Select ªMODE 7º with GST. Make sure 1st trip DTC P0100 is
detected.
6) Select ªMODE 4º with GST and erase the 1st trip DTC P0100.
7) Start engine again and let it idle for at least 10 minutes.
8) Select ªMODE 7º with GST. The 1st trip DTC P0172 or P0175
should be detected at this stage, if a malfunction exists. If so,
go to ªDiagnostic Procedureº, EC-306.
9) If it is difficult to start engine at step 7, the fuel injection sys-
tem has a malfunction.
10) Crank engine while depressing accelerator pedal.
If engine starts, go to ªDiagnostic Procedureº, EC-306. If
engine does not start, check exhaust and intake air leak visu-
ally.
GI
MA
EM
LC
FE
AT
TF
PD
AX
SU
BR
ST
RS
BT
HA
SC
EL
IDX
DTC P0172 (RIGHT, -B1), P0175 (LEFT, -B2) FUEL INJECTION SYSTEM
FUNCTION (RICH)
DTC Confirmation Procedure (Cont'd)
EC-303
Page 841 of 2395

Diagnostic ProcedureNBEC0176
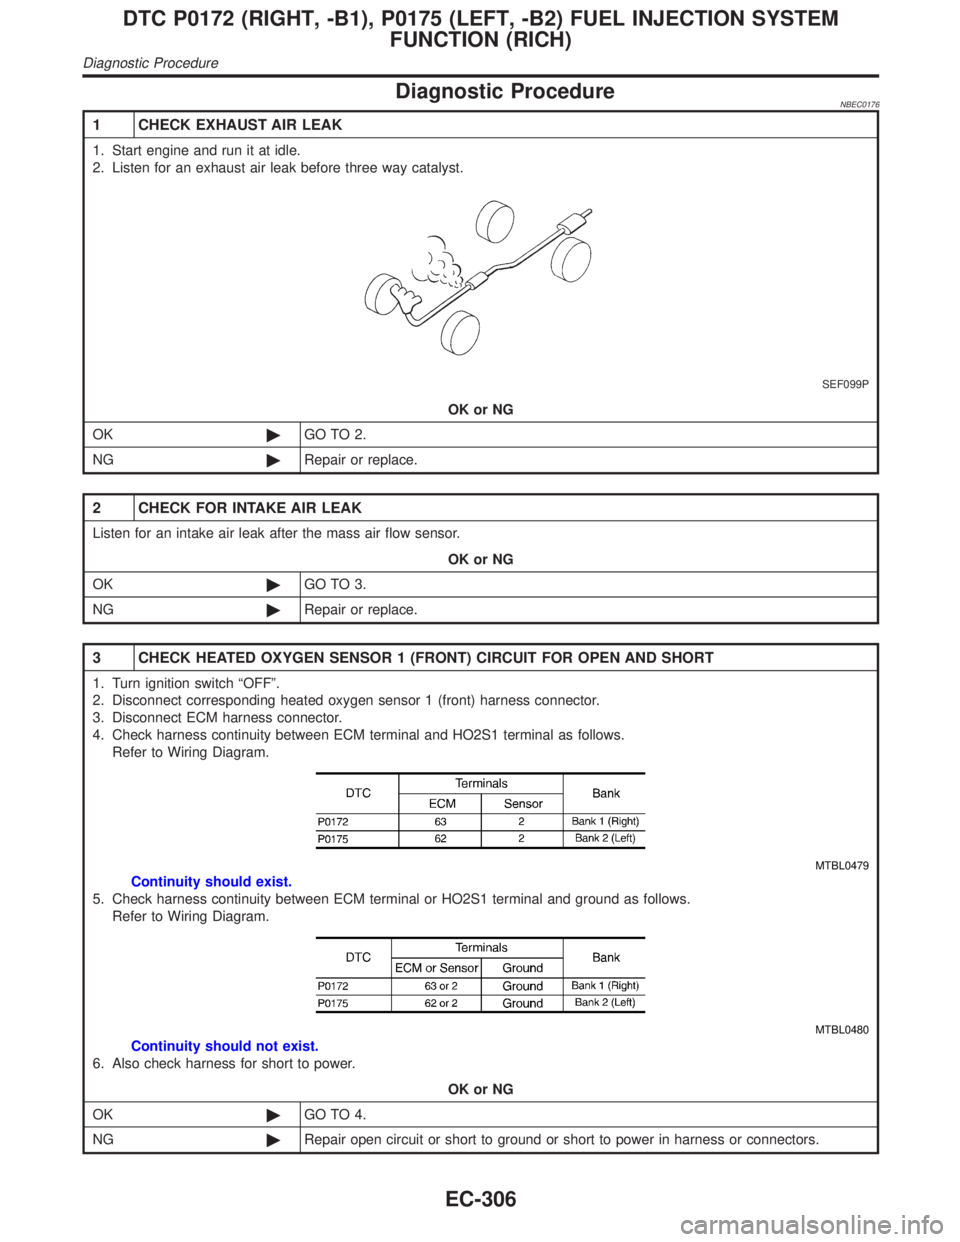
1 CHECK EXHAUST AIR LEAK
1. Start engine and run it at idle.
2. Listen for an exhaust air leak before three way catalyst.
SEF099P
OK or NG
OK©GO TO 2.
NG©Repair or replace.
2 CHECK FOR INTAKE AIR LEAK
Listen for an intake air leak after the mass air flow sensor.
OK or NG
OK©GO TO 3.
NG©Repair or replace.
3 CHECK HEATED OXYGEN SENSOR 1 (FRONT) CIRCUIT FOR OPEN AND SHORT
1. Turn ignition switch ªOFFº.
2. Disconnect corresponding heated oxygen sensor 1 (front) harness connector.
3. Disconnect ECM harness connector.
4. Check harness continuity between ECM terminal and HO2S1 terminal as follows.
Refer to Wiring Diagram.
MTBL0479
Continuity should exist.
5. Check harness continuity between ECM terminal or HO2S1 terminal and ground as follows.
Refer to Wiring Diagram.
MTBL0480
Continuity should not exist.
6. Also check harness for short to power.
OK or NG
OK©GO TO 4.
NG©Repair open circuit or short to ground or short to power in harness or connectors.
DTC P0172 (RIGHT, -B1), P0175 (LEFT, -B2) FUEL INJECTION SYSTEM
FUNCTION (RICH)
Diagnostic Procedure
EC-306
Page 842 of 2395

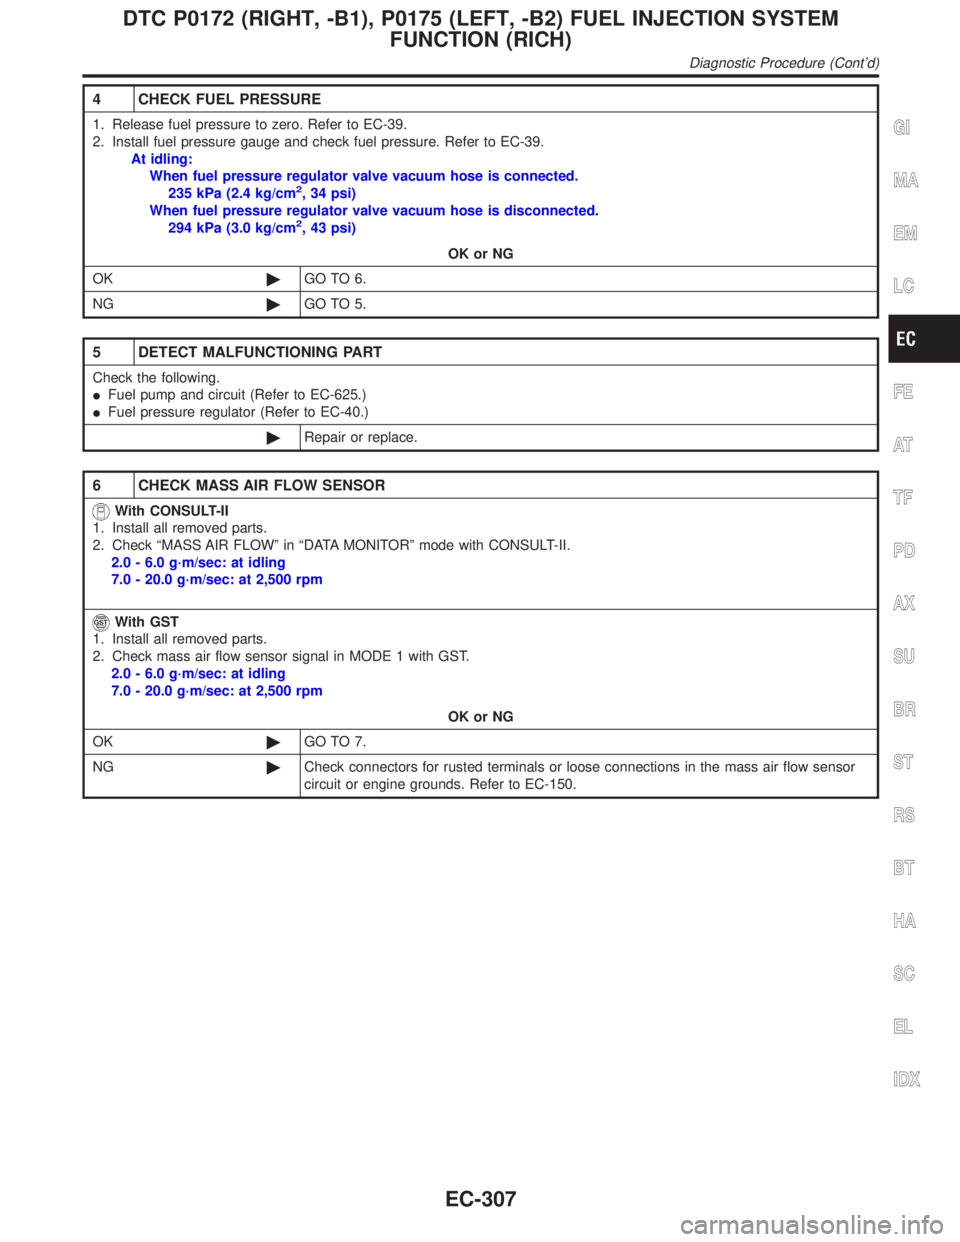
4 CHECK FUEL PRESSURE
1. Release fuel pressure to zero. Refer to EC-39.
2. Install fuel pressure gauge and check fuel pressure. Refer to EC-39.
At idling:
When fuel pressure regulator valve vacuum hose is connected.
235 kPa (2.4 kg/cm
2, 34 psi)
When fuel pressure regulator valve vacuum hose is disconnected.
294 kPa (3.0 kg/cm
2, 43 psi)
OK or NG
OK©GO TO 6.
NG©GO TO 5.
5 DETECT MALFUNCTIONING PART
Check the following.
IFuel pump and circuit (Refer to EC-625.)
IFuel pressure regulator (Refer to EC-40.)
©Repair or replace.
6 CHECK MASS AIR FLOW SENSOR
With CONSULT-II
1. Install all removed parts.
2. Check ªMASS AIR FLOWº in ªDATA MONITORº mode with CONSULT-II.
2.0 - 6.0 g´m/sec: at idling
7.0 - 20.0 g´m/sec: at 2,500 rpm
With GST
1. Install all removed parts.
2. Check mass air flow sensor signal in MODE 1 with GST.
2.0 - 6.0 g´m/sec: at idling
7.0 - 20.0 g´m/sec: at 2,500 rpm
OK or NG
OK©GO TO 7.
NG©Check connectors for rusted terminals or loose connections in the mass air flow sensor
circuit or engine grounds. Refer to EC-150.
GI
MA
EM
LC
FE
AT
TF
PD
AX
SU
BR
ST
RS
BT
HA
SC
EL
IDX
DTC P0172 (RIGHT, -B1), P0175 (LEFT, -B2) FUEL INJECTION SYSTEM
FUNCTION (RICH)
Diagnostic Procedure (Cont'd)
EC-307
Page 844 of 2395

SEF751UA
Component DescriptionNBEC0177The fuel tank temperature sensor is used to detect the fuel tem-
perature inside the fuel tank. The sensor modifies a voltage signal
from the ECM. The modified signal returns to the ECM as the fuel
temperature input. The sensor uses a thermistor which is sensitive
to the change in temperature. The electrical resistance of the ther-
mistor decreases as temperature increases.
SEF012P
Fuel temperature
ÉC (ÉF)Voltage* V Resistance kW
20 (68) 3.5 2.3 - 2.7
50 (122) 2.2 0.79 - 0.90
*: These data are reference values and are measured between ECM terminal 92
(Fuel tank temperature sensor) and body ground.
CAUTION:
Do not use ECM ground terminals when measuring input/
output voltage. Doing so may result in damage to the ECM's
transistor. Use a ground other than ECM terminals, such as
the ground.
On Board Diagnosis LogicNBEC0178Malfunction is detected when an excessively high or low voltage is
sent to ECM, rationally incorrect voltage is sent to ECM, compared
with the voltage signals from engine coolant temperature sensor
and intake air temperature sensor.
Possible CauseNBEC0489IHarness or connectors
(The sensor circuit is open or shorted.)
IFuel tank temperature sensor
GI
MA
EM
LC
FE
AT
TF
PD
AX
SU
BR
ST
RS
BT
HA
SC
EL
IDX
DTC P0180 FUEL TANK TEMPERATURE SENSOR
Component Description
EC-309
Page 845 of 2395

DTC Confirmation ProcedureNBEC0179NOTE:
If ªDTC Confirmation Procedureº has been previously conducted,
always turn ignition switch ªOFFº and wait at least 10 seconds
before conducting the next test.
SEF174Y
WITH CONSULT-IINBEC0179S011) Turn ignition switch ªONº.
2) Select ªDATA MONITORº mode with CONSULT-II.
3) Wait at least 10 seconds.
If the result is NG, go to ªDiagnostic Procedureº, EC-312.
If the result is OK, go to following step.
4) Check ªCOOLAN TEMP/Sº value.
If ªCOOLAN TEMP/Sº is less than 60ÉC (140ÉF), the result will
be OK.
If ªCOOLAN TEMP/Sº is above 60ÉC (140ÉF), go to the follow-
ing step.
5) Cool engine down until ªCOOLAN TEMP/Sº is less than 60ÉC
(140ÉF).
6) Wait at least 10 seconds.
7) If 1st trip DTC is detected, go to ªDiagnostic Procedureº,
EC-312.
WITH GSTNBEC0179S02Follow the procedure ªWith CONSULT-IIº above.
DTC P0180 FUEL TANK TEMPERATURE SENSOR
DTC Confirmation Procedure
EC-310
Page 846 of 2395

Wiring DiagramNBEC0180
MEC957C
GI
MA
EM
LC
FE
AT
TF
PD
AX
SU
BR
ST
RS
BT
HA
SC
EL
IDX
DTC P0180 FUEL TANK TEMPERATURE SENSOR
Wiring Diagram
EC-311
Page 847 of 2395

Diagnostic ProcedureNBEC0181
1 CHECK FUEL TANK TEMPERATURE SENSOR POWER SUPPLY CIRCUIT
1. Turn ignition switch ªOFFº.
2. Disconnect fuel level sensor unit and fuel pump harness connector.
SEF751UA
3. Turn ignition switch ªONº.
4. Check voltage between fuel level sensor unit terminal 1 and ground with CONSULT-II or tester.
SEF973Y
OK or NG
OK©GO TO 3.
NG©GO TO 2.
2 DETECT MALFUNCTIONING PART
Check the following.
IHarness connectors B1, M2
IHarness connectors M92, F27
IHarness for open or short between ECM and fuel level sensor unit and fuel pump
©Repair harness or connector.
3 CHECK FUEL TANK TEMPERATURE SENSOR GROUND CIRCUIT FOR OPEN AND SHORT
1. Turn ignition switch ªOFFº.
2. Check harness continuity between fuel level sensor unit and fuel pump terminal 2 and body ground. Refer to Wiring
Diagram.
Continuity should exist.
3. Also check harness for short to power.
OK or NG
OK©GO TO 4.
NG©Repair open circuit or short to power in harness or connectors.
DTC P0180 FUEL TANK TEMPERATURE SENSOR
Diagnostic Procedure
EC-312
Page 848 of 2395

4 CHECK FUEL TANK TEMPERATURE SENSOR
1. Remove fuel level sensor unit.
2. Check resistance between fuel level sensor unit and fuel pump terminals 1 and 2 by heating with hot water or heat gun
as shown in the figure.
SEF974Y
OK or NG
OK©GO TO 5.
NG©Replace fuel level sensor unit.
5 CHECK INTERMITTENT INCIDENT
Refer to ªTROUBLE DIAGNOSIS FOR INTERMITTENT INCIDENTº, EC-140.
©INSPECTION END
GI
MA
EM
LC
FE
AT
TF
PD
AX
SU
BR
ST
RS
BT
HA
SC
EL
IDX
DTC P0180 FUEL TANK TEMPERATURE SENSOR
Diagnostic Procedure (Cont'd)
EC-313
Page 849 of 2395

On Board Diagnosis LogicNBEC0610This diagnosis checks whether the engine coolant temperature is
extraordinary high, even when the load is not heavy.
When malfunction is detected, the malfunction indicator lamp (MIL)
will light up even in the first trip.
Malfunction is detected when engine coolant temperature is exces-
sively high under normal engine speed.
Possible CauseNBEC0611IThermostat
IImproper ignition timing
IEngine coolant temperature sensor
IBlocked radiator
IBlocked front end (Improper fitting of nose mask)
ICrushed vehicle frontal area (Vehicle frontal is collided but not
repaired)
IBlocked air passage by improper installation of front fog lamp
or fog lamps.
IImproper mixture ratio of coolant
IDamaged bumper
For more information, refer to ªMAIN 12 CAUSES OF
OVERHEATINGº, EC-319.
Overall Function CheckNBEC0612Use this procedure to check the overall function of the coolant
overtemperature enrichment protection check, a DTC might not be
confirmed.
WARNING:
Never remove the radiator cap when the engine is hot. Serious
burns could be caused by high-pressure fluid escaping from
the radiator.
Wrap a thick cloth around the cap. Carefully remove the cap
by turning it a quarter turn to allow built-up pressure to
escape. Then turn the cap all the way off.
SEF621W
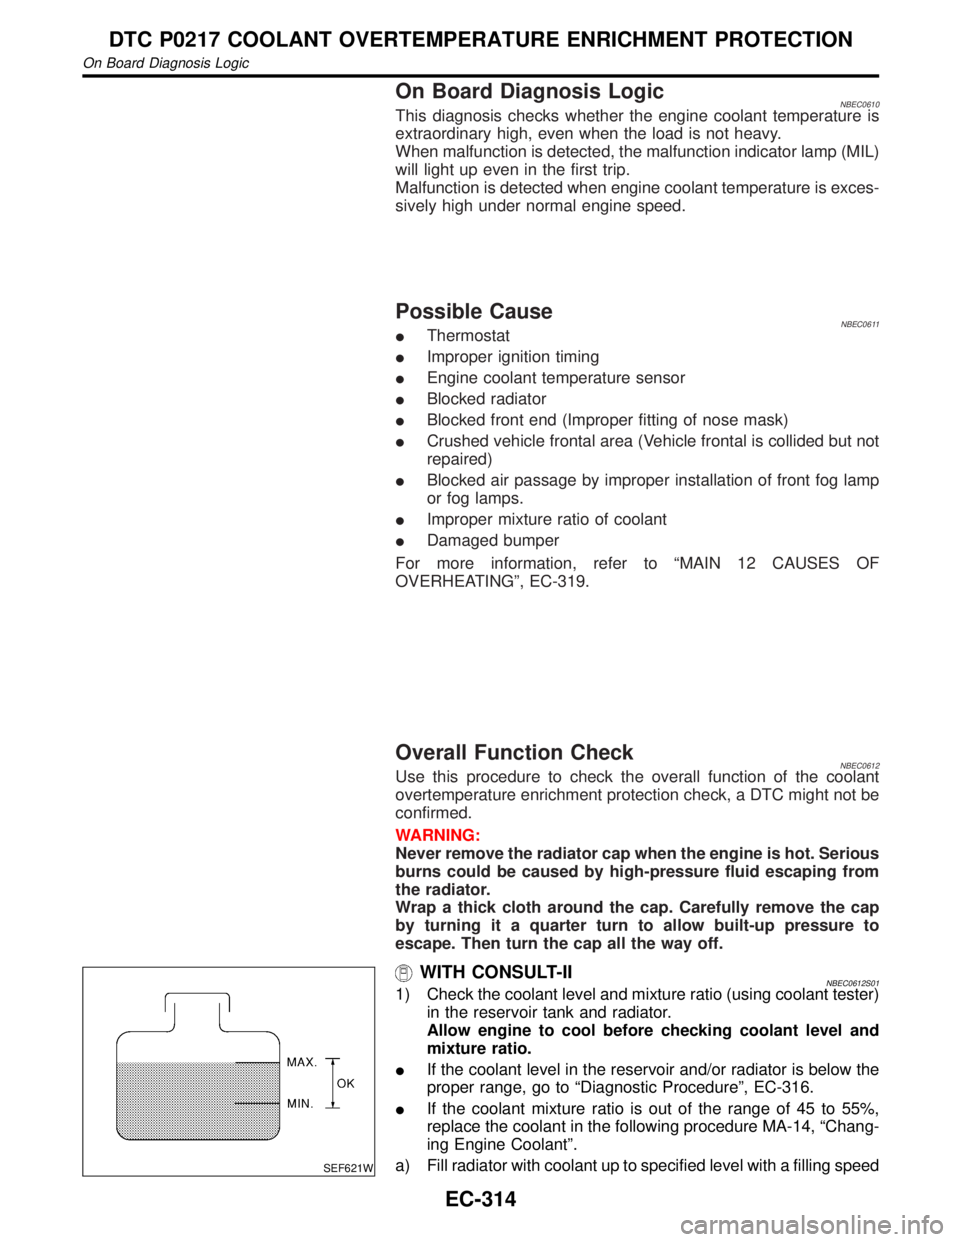
WITH CONSULT-IINBEC0612S011) Check the coolant level and mixture ratio (using coolant tester)
in the reservoir tank and radiator.
Allow engine to cool before checking coolant level and
mixture ratio.
IIf the coolant level in the reservoir and/or radiator is below the
proper range, go to ªDiagnostic Procedureº, EC-316.
IIf the coolant mixture ratio is out of the range of 45 to 55%,
replace the coolant in the following procedure MA-14, ªChang-
ing Engine Coolantº.
a) Fill radiator with coolant up to specified level with a filling speed
DTC P0217 COOLANT OVERTEMPERATURE ENRICHMENT PROTECTION
On Board Diagnosis Logic
EC-314