clutch INFINITI QX4 2001 Factory Repair Manual
[x] Cancel search | Manufacturer: INFINITI, Model Year: 2001, Model line: QX4, Model: INFINITI QX4 2001Pages: 2395, PDF Size: 43.2 MB
Page 192 of 2395

Wiring Diagram Ð AT Ð OVRCSVNBAT0200
MAT741A
GI
MA
EM
LC
EC
FE
TF
PD
AX
SU
BR
ST
RS
BT
HA
SC
EL
IDX
DTC P1760 OVERRUN CLUTCH SOLENOID VALVE
Wiring Diagram Ð AT Ð OVRCSV
AT-187
Page 193 of 2395

Diagnostic ProcedureNBAT0069
1 CHECK VALVE RESISTANCE
1. Turn ignition switch to ªOFFº position.
2. Disconnect terminal cord assembly connector on the right side of transfer assembly.
3. Check resistance between terminal 4 and ground.
SAT170J
Is resistance approx. 20 - 40W?
Ye s©GO TO 3.
No©GO TO 2.
2 CHECK VALVE OPERATION
1. Remove control valve assembly.
Refer to AT-273.
2. Check the following items:
IOverrun clutch solenoid valve
Refer to ªComponent Inspectionº, AT-189.
IHarness of terminal cord assembly for short or open
OK or NG
OK©GO TO 3.
NG©Repair or replace damaged parts.
3 CHECK POWER SOURCE CIRCUIT
1. Turn ignition switch to ªOFFº position.
2. Disconnect TCM harness connector.
3. Check resistance between terminal 4 and TCM harness connector terminal 20. Refer to wiring diagram Ð AT Ð
OVRCSV.
Continuity should exist.
If OK, check harness for short to ground and short to power.
4. Reinstall any part removed.
OK or NG
OK©GO TO 4.
NG©Repair open circuit or short to ground or short to power in harness or connectors.
4 CHECK DTC
Perform Diagnostic Trouble Code (DTC) confirmation procedure, AT-185.
OK or NG
OK©INSPECTION END
NG©GO TO 5.
DTC P1760 OVERRUN CLUTCH SOLENOID VALVE
Diagnostic Procedure
AT-188
Page 194 of 2395

5 CHECK TCM INSPECTION
1. Perform TCM input/output signal inspection.
2. If NG, recheck TCM pin terminals for damage or loose connection with harness connector.
OK or NG
OK©INSPECTION END
NG©Repair or replace damaged parts.
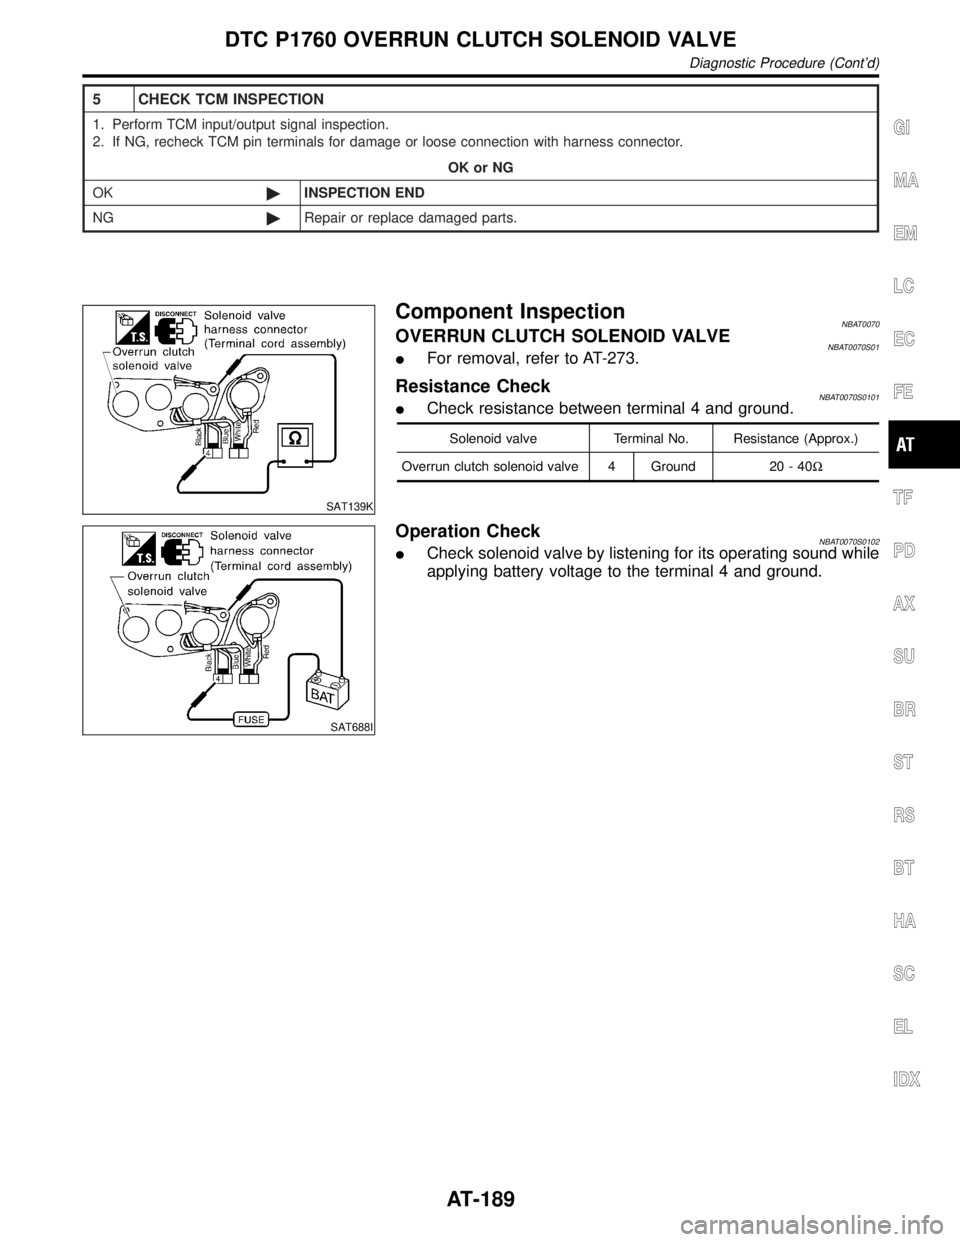
SAT139K
Component InspectionNBAT0070OVERRUN CLUTCH SOLENOID VALVENBAT0070S01IFor removal, refer to AT-273.
Resistance CheckNBAT0070S0101ICheck resistance between terminal 4 and ground.
Solenoid valve Terminal No. Resistance (Approx.)
Overrun clutch solenoid valve 4 Ground 20 - 40W
SAT688I
Operation CheckNBAT0070S0102ICheck solenoid valve by listening for its operating sound while
applying battery voltage to the terminal 4 and ground.
GI
MA
EM
LC
EC
FE
TF
PD
AX
SU
BR
ST
RS
BT
HA
SC
EL
IDX
DTC P1760 OVERRUN CLUTCH SOLENOID VALVE
Diagnostic Procedure (Cont'd)
AT-189
Page 229 of 2395

3 CHECK A/T FLUID LEVEL
Check A/T fluid level again.
SAT638A
OK or NG
OK©GO TO 4.
NG©Refill ATF.
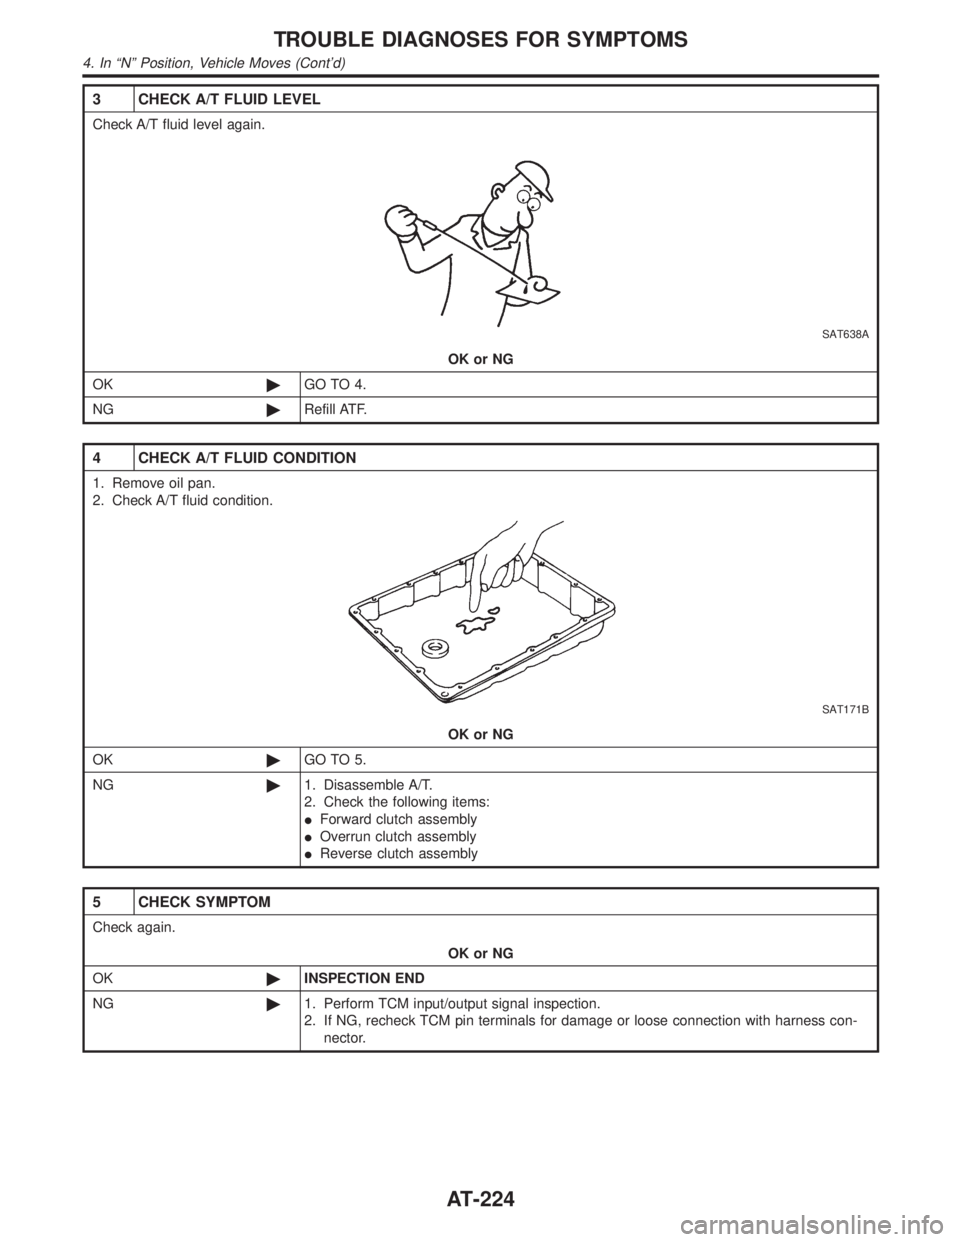
4 CHECK A/T FLUID CONDITION
1. Remove oil pan.
2. Check A/T fluid condition.
SAT171B
OK or NG
OK©GO TO 5.
NG©1. Disassemble A/T.
2. Check the following items:
IForward clutch assembly
IOverrun clutch assembly
IReverse clutch assembly
5 CHECK SYMPTOM
Check again.
OK or NG
OK©INSPECTION END
NG©1. Perform TCM input/output signal inspection.
2. If NG, recheck TCM pin terminals for damage or loose connection with harness con-
nector.
TROUBLE DIAGNOSES FOR SYMPTOMS
4. In ªNº Position, Vehicle Moves (Cont'd)
AT-224
Page 232 of 2395

6. Vehicle Does Not Creep Backward In ªRº
Position
=NBAT0078SYMPTOM:
Vehicle does not creep backward when selecting ªRº position.
1 CHECK A/T FLUID LEVEL
Check A/T fluid level again.
SAT638A
OK or NG
OK©GO TO 2.
NG©Refill ATF.
2 CHECK STALL TEST
Check stall revolution with selector lever in ª1º and ªRº positions.
Refer to AT-356.
SAT493G
OK or NG
OK©GO TO 3.
OK in ª1º position, NG in
ªRº position©1. Remove control valve assembly. Refer to ªON-VEHICLE SERVICEº, AT-273.
2. Check the following items:
IValves to control line pressure (Pressure regulator valve, pressure modifier valve, pilot
valve and pilot filter)
ILine pressure solenoid valve
3. Disassemble A/T.
4. Check the following items:
IOil pump assembly
ITorque converter
IReverse clutch assembly
IHigh clutch assembly
NG in both ª1º and ªRº
positions©GO TO 6.
GI
MA
EM
LC
EC
FE
TF
PD
AX
SU
BR
ST
RS
BT
HA
SC
EL
IDX
TROUBLE DIAGNOSES FOR SYMPTOMS
6. Vehicle Does Not Creep Backward In ªRº Position
AT-227
Page 234 of 2395

6 DETECT MALFUNCTIONING ITEM
1. Remove control valve assembly. Refer to ªON-VEHICLE SERVICEº, AT-273.
2. Check the following items:
IValves to control line pressure (Pressure regulator valve, pressure modifier valve, pilot valve and pilot filter)
ILine pressure solenoid valve
3. Disassemble A/T.
4. Check the following items:
IOil pump assembly
ITorque converter
IReverse clutch assembly
IHigh clutch assembly
ILow & reverse brake assembly
ILow one-way clutch
©Repair or replace damaged parts.GI
MA
EM
LC
EC
FE
TF
PD
AX
SU
BR
ST
RS
BT
HA
SC
EL
IDX
TROUBLE DIAGNOSES FOR SYMPTOMS
6. Vehicle Does Not Creep Backward In ªRº Position (Cont'd)
AT-229
Page 237 of 2395

6 DETECT MALFUNCTIONING ITEM
1. Remove control valve assembly. Refer to ªON-VEHICLE SERVICEº, AT-273.
2. Check the following items:
IValves to control line pressure (Pressure regulator valve, pressure modifier valve, pilot valve and pilot filter)
ILine pressure solenoid valve
3. Disassemble A/T.
4. Check the following items:
IOil pump assembly
IForward clutch assembly
IForward one-way clutch
ILow one-way clutch
ILow & reverse brake assembly
ITorque converter
©Repair or replace damaged parts.
TROUBLE DIAGNOSES FOR SYMPTOMS
7. Vehicle Does Not Creep Forward In ªDº, ª2º Or ª1º Position (Cont'd)
AT-232
Page 240 of 2395

7 CHECK SYMPTOM
Check again.
OK or NG
OK©INSPECTION END
NG©1. Perform TCM input/output signal inspection.
2. If NG, recheck TCM pin terminals for damage or loose connection with harness con-
nector.
8 DETECT MALFUNCTIONING ITEM
1. Remove control valve assembly.
Refer to AT-273.
2. Check the following items:
IShift valve A
IShift valve B
IShift solenoid valve A
IShift solenoid valve B
IPilot valve
IPilot filter
3. Disassemble A/T.
4. Check the following items:
IForward clutch assembly
IForward one-way clutch
ILow one-way clutch
IHigh clutch assembly
ITorque converter
IOil pump assembly
OK or NG
OK©GO TO 7.
NG©Repair or replace damaged parts.
GI
MA
EM
LC
EC
FE
TF
PD
AX
SU
BR
ST
RS
BT
HA
SC
EL
IDX
TROUBLE DIAGNOSES FOR SYMPTOMS
8. Vehicle Cannot Be Started From D1(Cont'd)
AT-235
Page 246 of 2395

7 DETECT MALFUNCTIONING ITEM
1. Remove control valve Assembly. Refer to AT-273.
2. Check the following items:
IShift valve B
IShift solenoid valve B
IPilot valve
IPilot filter
3. Disassemble A/T.
4. Check the following items:
IServo piston assembly
IHigh clutch assembly
IOil pump assembly
OK or NG
OK©GO TO 6.
NG©Repair or replace damaged parts.GI
MA
EM
LC
EC
FE
TF
PD
AX
SU
BR
ST
RS
BT
HA
SC
EL
IDX
TROUBLE DIAGNOSES FOR SYMPTOMS
10. A/T Does Not Shift: D2®D3(Cont'd)
AT-241
Page 248 of 2395

3 CHECK THROTTLE POSITION SENSOR
Check throttle position sensor. Refer to EC-174, ªDescriptionº.
SAT142K
OK or NG
OK©GO TO 4.
NG©Repair or replace throttle position sensor.
4 CHECK A/T FLUID CONDITION
1. Remove oil pan.
2. Check A/T fluid condition.
SAT171B
OK or NG
OK©GO TO 5.
NG©GO TO 7.
5 DETECT MALFUNCTIONING ITEM
1. Remove control valve Assembly. Refer to AT-273.
2. Check the following items:
IShift valve B
IOverrun clutch control valve
IShift solenoid valve B
IPilot valve
IPilot filter
OK or NG
OK©GO TO 6.
NG©Repair or replace damaged parts.
GI
MA
EM
LC
EC
FE
TF
PD
AX
SU
BR
ST
RS
BT
HA
SC
EL
IDX
TROUBLE DIAGNOSES FOR SYMPTOMS
11. A/T Does Not Shift: D3®D4(Cont'd)
AT-243