501 JAGUAR X308 1998 2.G Service Manual
[x] Cancel search | Manufacturer: JAGUAR, Model Year: 1998, Model line: X308, Model: JAGUAR X308 1998 2.GPages: 2490, PDF Size: 69.81 MB
Page 2119 of 2490

Rear View Mirrors - Interior Mirror Mounting Block
Removal and Installation
Removal
Installation
1. Remove battery cover and disc onnect ground cable from
battery terminal. Refer to 86.15.19.
2. Position a protective cover over top of facia.
3. Remove roof console for ac cess. Refer to 76.13.69.90.
4. Remove rain sensor unit. Refer to Section 501.16.
5. Remove mirror from mounting block. Refer to 76.10.51 or
76.10.56 (electrochromic).
6. Apply a suitable solvent around edge of mounting block.
7. Commencing at the top and exercising care to avoid windshield
damage, use a thin plastic knife to ease block free.
8. Using a suitable solvent, clean residual adhesive from block
mounting area.
1. Using masking tape, mark block mounting area on windshield.
2. Apply Permabond F Grade 5 Initiator to mounting area of
windshield.
3. Apply a bead of Permabond F246 to bottom and each vertical
side of block over 2/3 of block height.
Page 2120 of 2490

4. Press mounting block onto marked area and hold in position for one minute.
5. After a period of 15 minutes, remove and discard masking
tape.
6. Using a scraper, carefully re move any excess adhesive.
7. NOTE: The following time is the MINIMUM PERIOD required for
adhesive curing. Failure to allow th is period will result in bonding
failure, necessitating repeat of the complete procedure.
After a further period of at le ast 6 hours, install mirror on
mounting block. Refer to 76.10.51 or 76.10.56.
8. Install roof console. Refer to 76.13.69.90.
9. Install rain sensor unit. Refer to Section 501.16.
10. Remove protective cover from facia.
11. Connect ground cable to batter y terminal and install battery
cover. Refer to 86.15.15.
Page 2200 of 2490
Glass, Frames and Mechanisms - Rear Quarter Window Glass
Removal and Installation
Removal
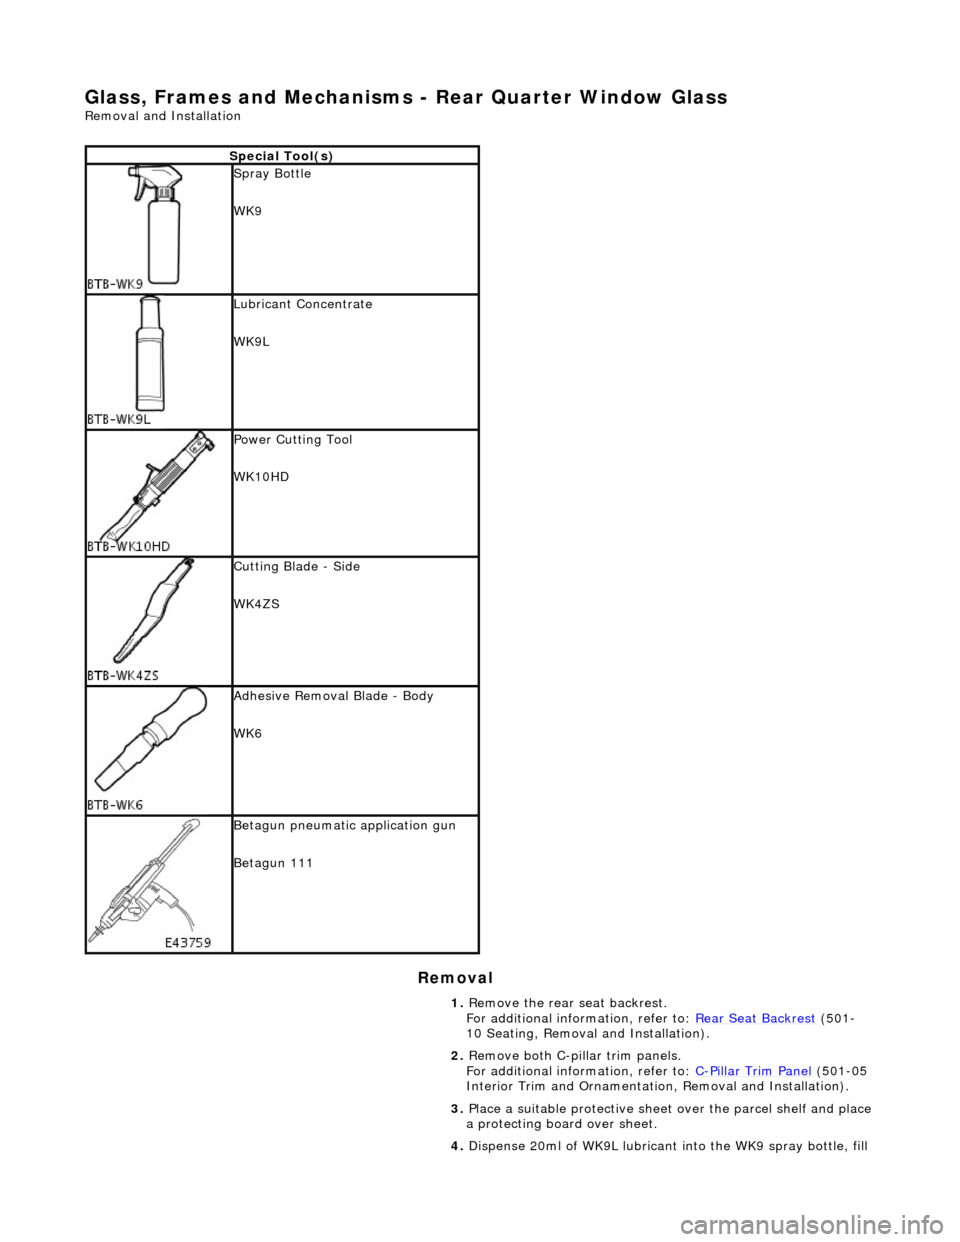
Special Tool(s)
Spray Bottle
WK9
Lubricant Concentrate
WK9L
Power Cutting Tool
WK10HD
Cutting Blade - Side
WK4ZS
Adhesive Removal Blade - Body
WK6
Betagun pneumatic application gun
Betagun 111
1. Remove the rear seat backrest.
For additional information, refer to: Rear Seat Backrest
(501-
10 Seating, Removal and Installation).
2. Remove both C-pill ar trim panels.
For additional information, refer to: C
-Pillar Trim Panel (501-05
Interior Trim and Ornamentatio n, Removal and Installation).
3. Place a suitable protective sheet over the parcel shelf and place
a protecting boar d over sheet.
4. Dispense 20ml of WK9L lubricant into the WK9 spray bottle, fill
Page 2203 of 2490
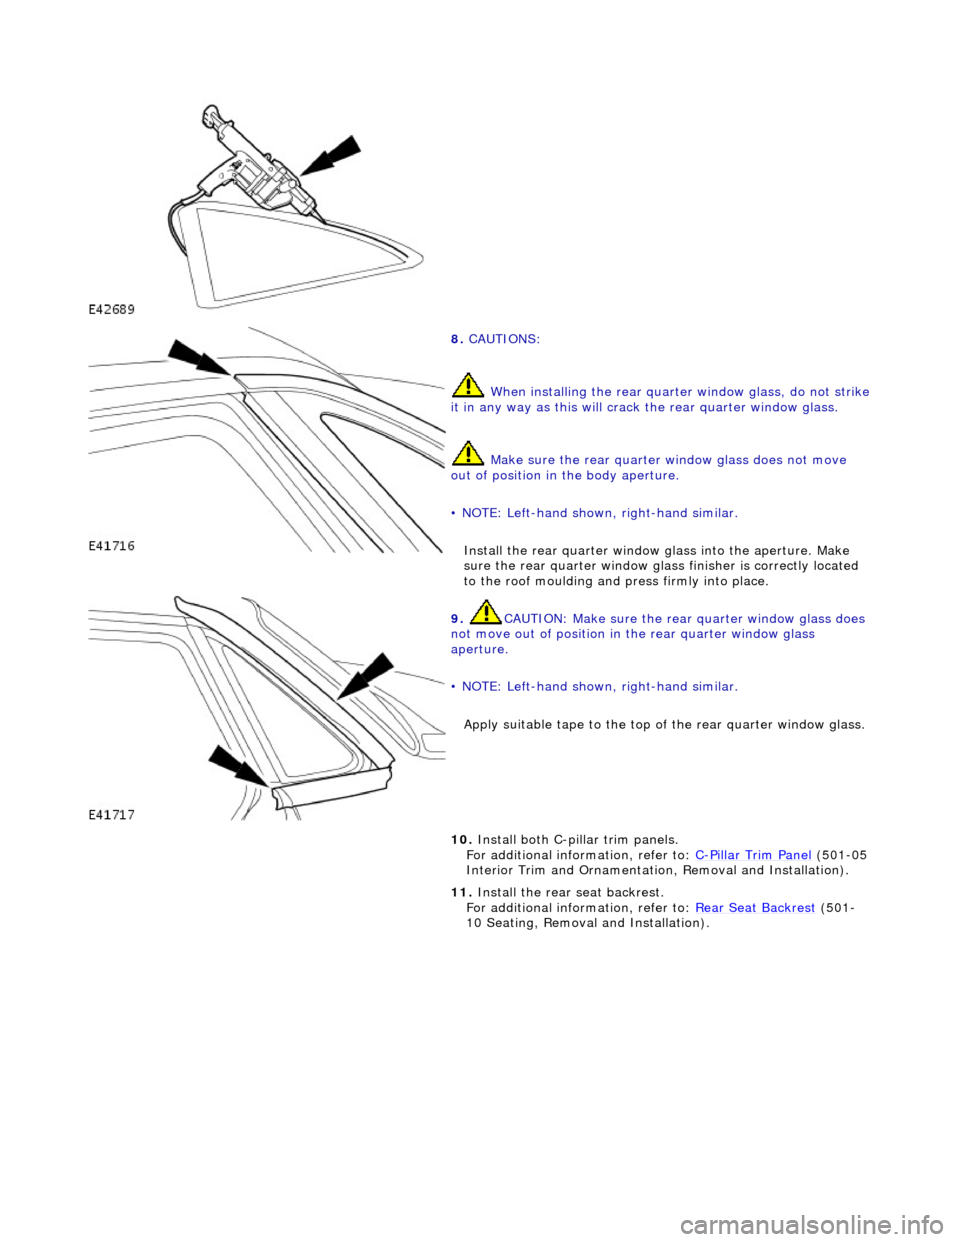
8. CAUTIONS:
When installing the rear quarte r window glass, do not strike it in any way as this will crack the rear quarter window glass.
Make sure the rear quarter window glass does not move
out of position in the body aperture.
• NOTE: Left-hand shown, right-hand similar.
Install the rear quar ter window glass into the aperture. Make
sure the rear quarter window glas s finisher is correctly located
to the roof moulding and press firmly into place.
9. CAUTION: Make sure the rear quarter window glass does
not move out of position in the rear quarter window glass
aperture.
• NOTE: Left-hand shown, right-hand similar.
Apply suitable tape to the top of the rear quarter window glass.
10. Install both C-pillar trim panels.
For additional information, refer to: C-Pillar Trim Panel (501-05
Interior Trim and Ornamentatio n, Removal and Installation).
11. Install the rear seat backrest.
For additional information, refer to: Rear Seat Backrest
(501-
10 Seating, Removal and Installation).
Page 2205 of 2490
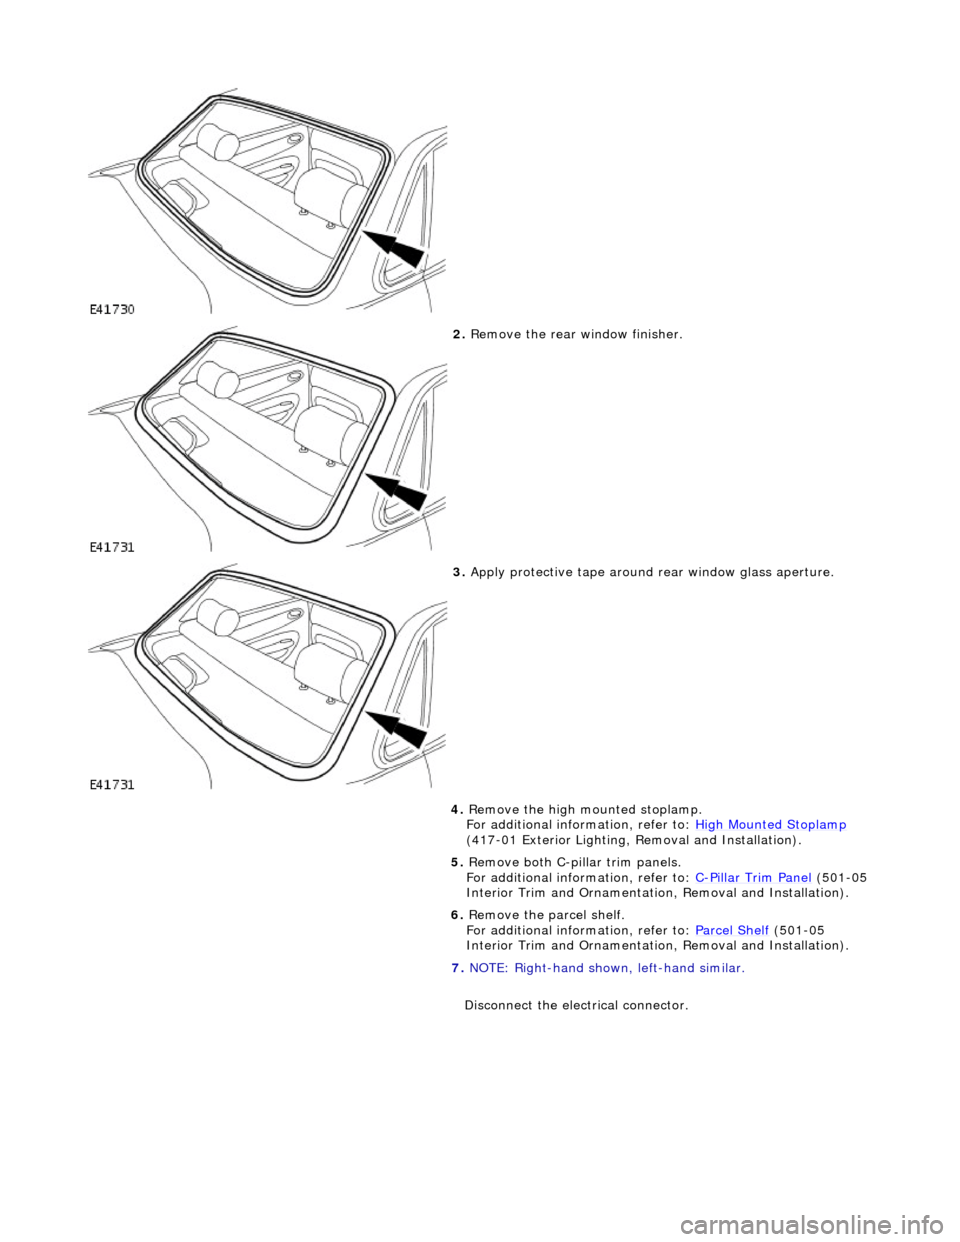
2. Remove the rear window finisher.
3. Apply protective tape around rear window glass aperture.
4. Remove the high mounted stoplamp.
For additional information, refer to: High Mounted Stoplamp
(417-01 Exterior Lighting, Removal and Installation).
5. Remove both C-pill ar trim panels.
For additional information, refer to: C
-Pillar Trim Panel (501-05
Interior Trim and Ornamentatio n, Removal and Installation).
6. Remove the parcel shelf.
For additional information, refer to: Parcel Shelf
(501-05
Interior Trim and Ornamentatio n, Removal and Installation).
7. NOTE: Right-hand shown, left-hand similar.
Disconnect the electrical connector.
Page 2210 of 2490
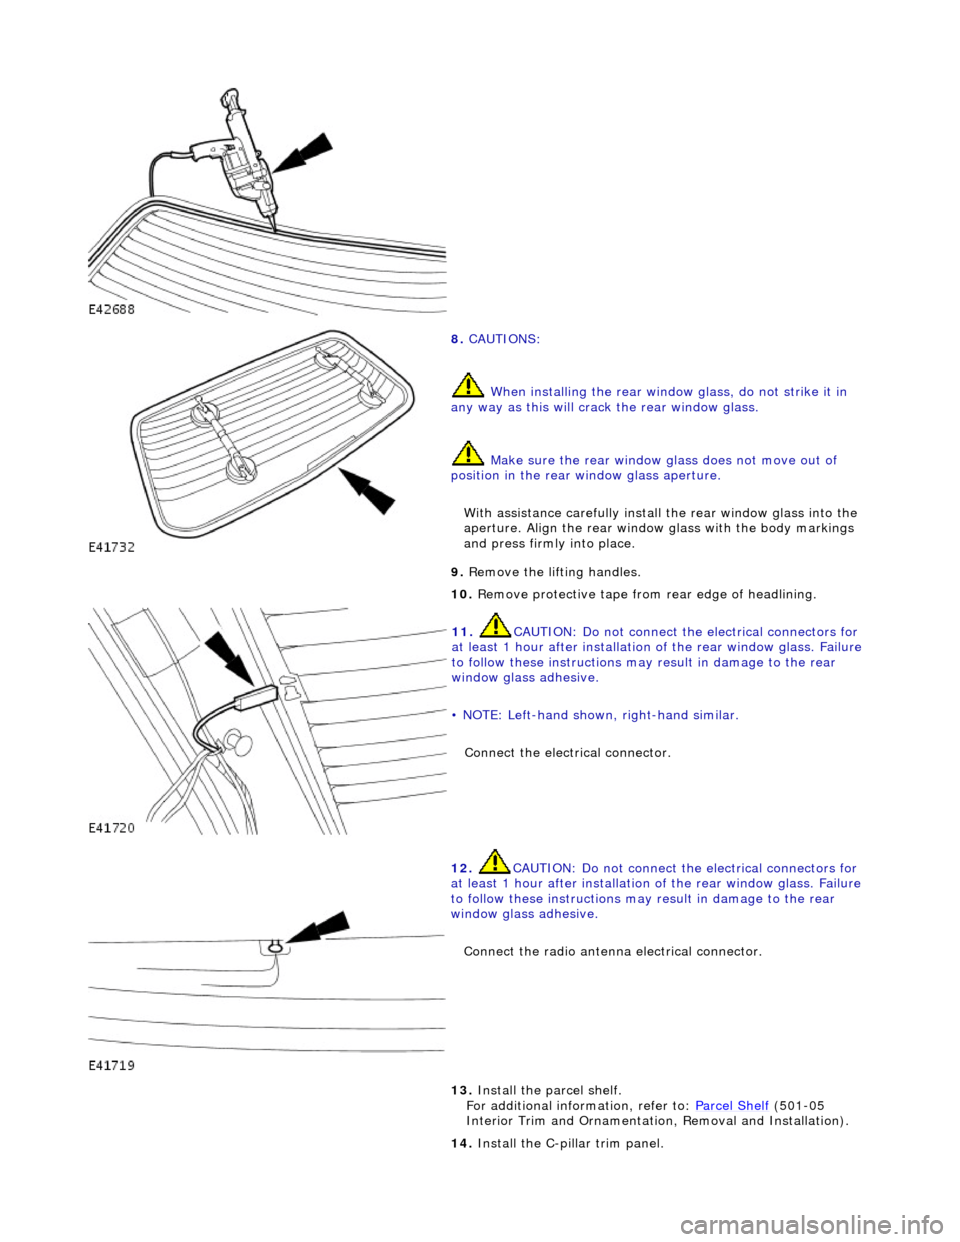
8. CAUTIONS:
When installing the rear window glass, do not strike it in
any way as this will crac k the rear window glass.
Make sure the rear window glass does not move out of
position in the rear window glass aperture.
With assistance carefully install the rear window glass into the
aperture. Align the rear window glass with the body markings
and press firmly into place.
9. Remove the lifting handles.
10. Remove protective tape from rear edge of headlining.
11. CAUTION: Do not connect the electrical connectors for
at least 1 hour after installation of the rear window glass. Failure
to follow these instructions may result in damage to the rear
window glass adhesive.
• NOTE: Left-hand shown, right-hand similar.
Connect the electrical connector.
12. CAUTION: Do not connect the electrical connectors for
at least 1 hour after installation of the rear window glass. Failure
to follow these instructions may result in damage to the rear
window glass adhesive.
Connect the radio antenna electrical connector.
13. Install the parcel shelf.
For additional information, refer to: Parcel Shelf (501-05
Interior Trim and Ornamentatio n, Removal and Installation).
14. Install the C-pillar trim panel.
Page 2211 of 2490

For additional information, refer to: C
-Pillar Trim Panel (501-05
Interior Trim and Ornamentatio n, Removal and Installation).
15. Install the high mounted stoplamp.
For additional information, refer to: High Mounted Stoplamp
(417-01 Exterior Lighting, Removal and Installation).
Page 2212 of 2490
Glass, Frames and Mechanisms - Windshield Glass
Removal and Installation
Removal
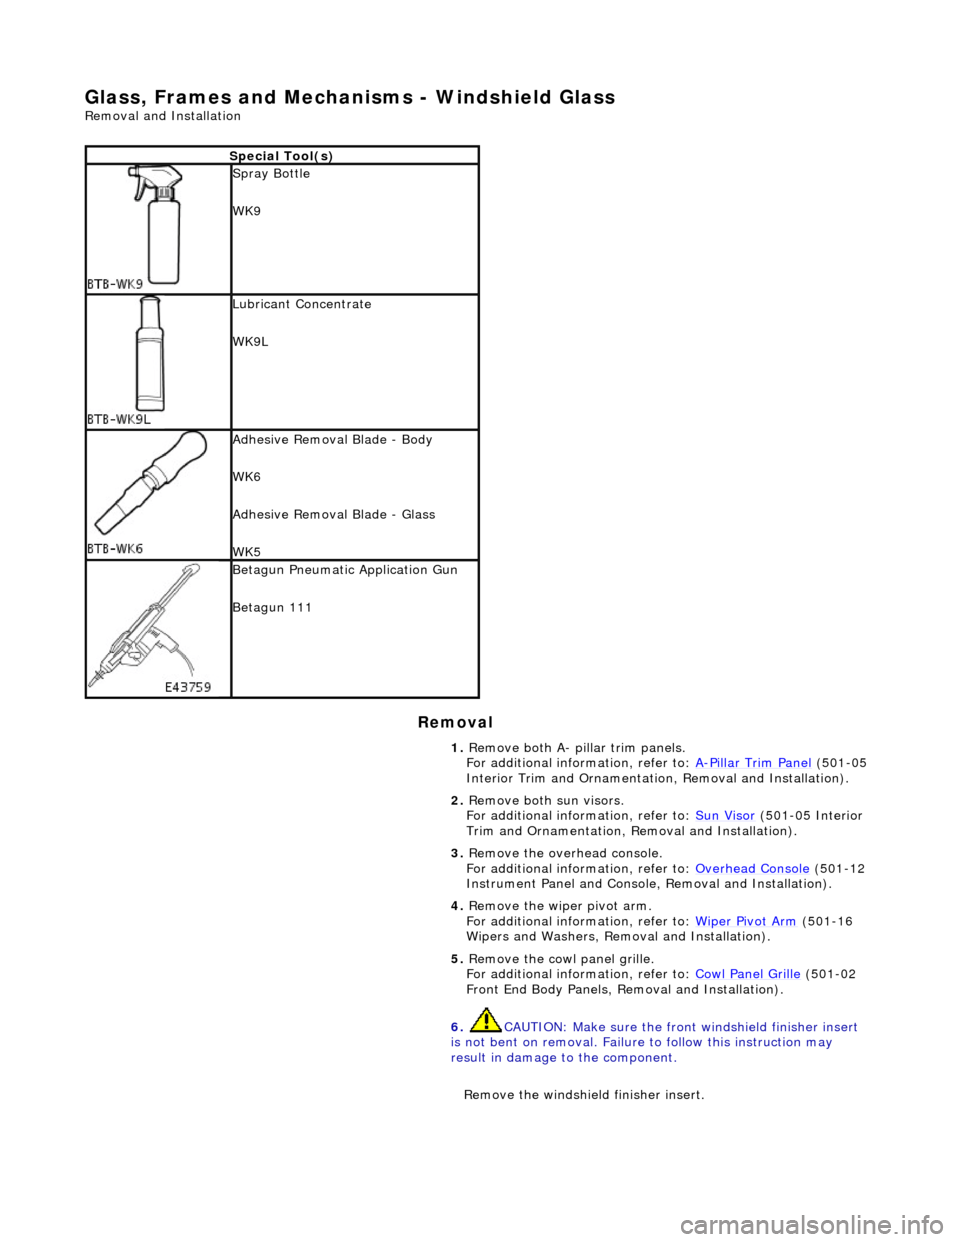
Special Tool(s)
Spray Bottle
WK9
Lubricant Concentrate
WK9L
Adhesive Removal Blade - Body
WK6
Adhesive Removal Blade - Glass
WK5
Betagun Pneumatic Application Gun
Betagun 111
1. Remove both A- pill ar trim panels.
For additional information, refer to: A
-Pillar Trim Panel (501-05
Interior Trim and Ornamentatio n, Removal and Installation).
2. Remove both sun visors.
For additional information, refer to: Sun Visor
(501-05 Interior
Trim and Ornamentation, Re moval and Installation).
3. Remove the overhead console.
For additional information, refer to: Overhead Console
(501-12
Instrument Panel and Console, Removal and Installation).
4. Remove the wiper pivot arm.
For additional information, refer to: Wiper Pivot Arm
(501-16
Wipers and Washers, Remo val and Installation).
5. Remove the cowl panel grille.
For additional information, refer to: Cowl Panel Grille
(501-02
Front End Body Panels, Removal and Installation).
6. CAUTION: Make sure the front windshield finisher insert
is not bent on removal. Failure to follow this instruction may
result in damage to the component.
Remove the windshield finisher insert.
Page 2217 of 2490
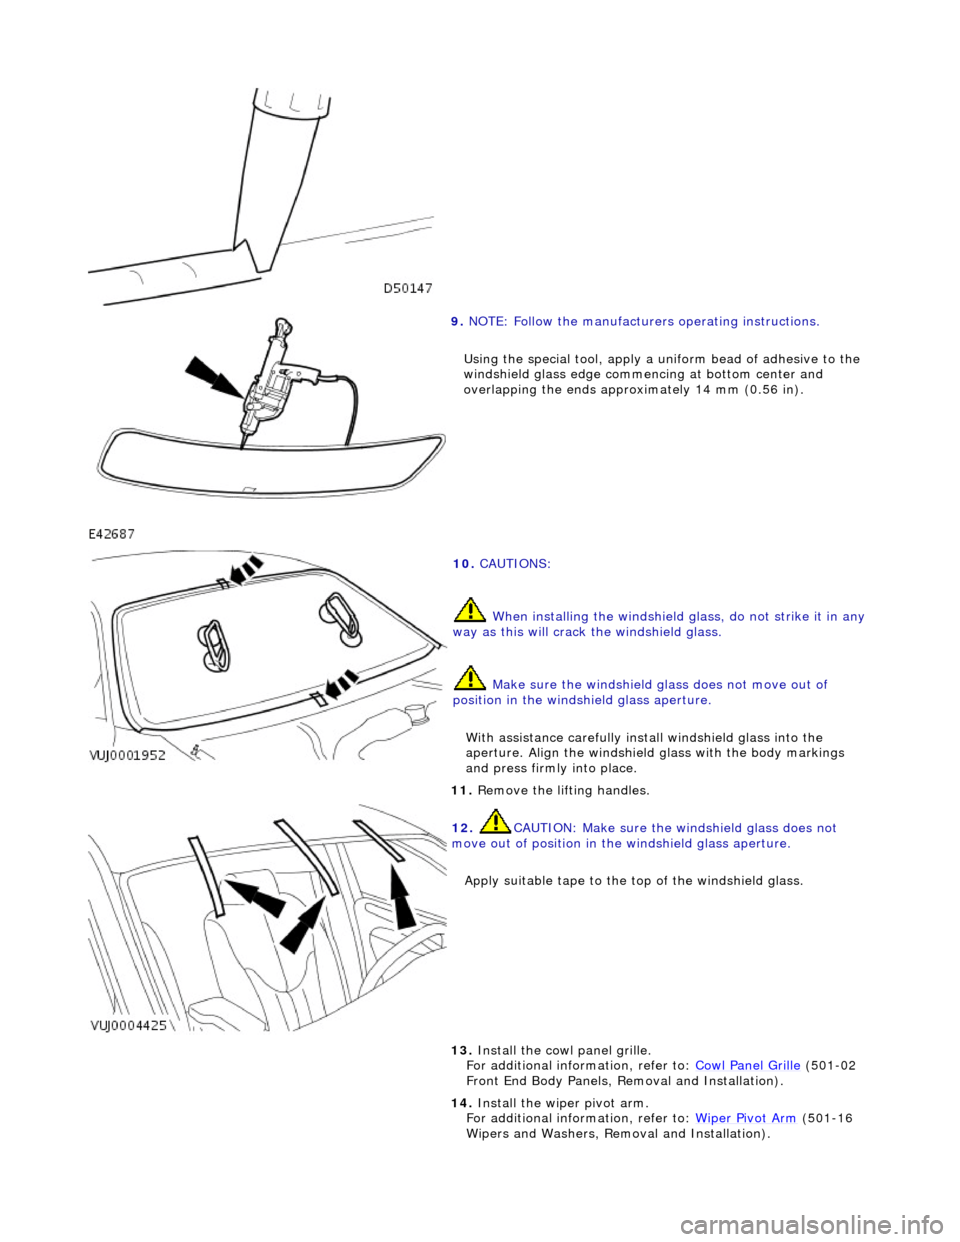
9. NOTE: Follow the manufacturers operating instructions.
Using the special tool, apply a uni form bead of adhesive to the
windshield glass edge commenc ing at bottom center and
overlapping the ends approximately 14 mm (0.56 in).
10. CAUTIONS:
When installing the windshield glass, do not strike it in any
way as this will crack the windshield glass.
Make sure the windshield glass does not move out of
position in the windshield glass aperture.
With assistance carefully install windshield glass into the
aperture. Align the windshield glass with the body markings
and press firmly into place.
11. Remove the lifting handles.
12. CAUTION: Make sure the windshield glass does not
move out of position in the windshield glass aperture.
Apply suitable tape to the to p of the windshield glass.
13. Install the cowl panel grille.
For additional information, refer to: Cowl Panel Grille (501-02
Front End Body Panels, Removal and Installation).
14. Install the wiper pivot arm.
For additional information, refer to: Wiper Pivot Arm
(501-16
Wipers and Washers, Remo val and Installation).
Page 2218 of 2490
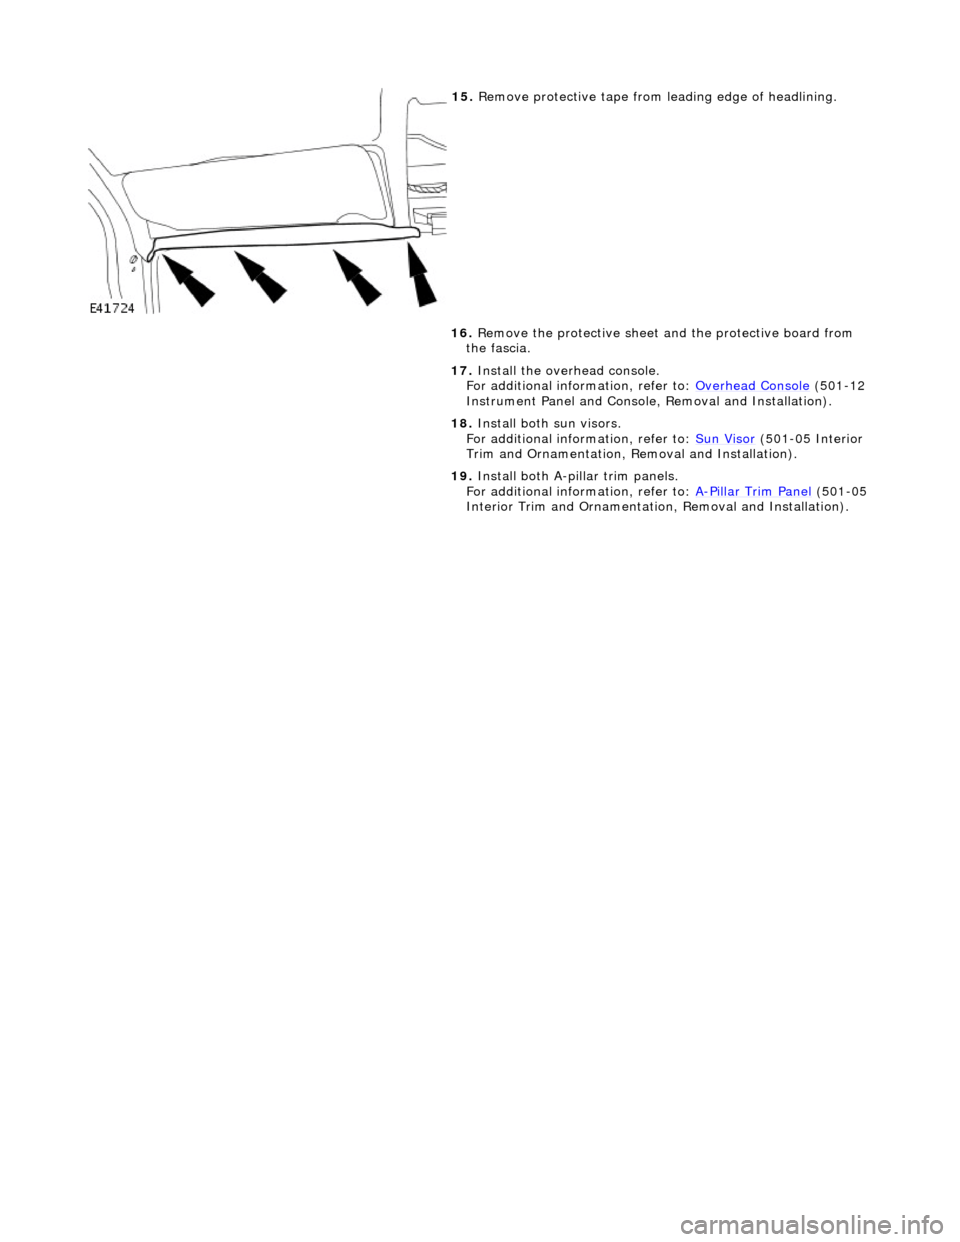
15. Remove protective tape from leading edge of headlining.
16. Remove the protective sheet and the protective board from
the fascia.
17. Install the overhead console.
For additional information, refer to: Overhead Console
(501-12
Instrument Panel and Console, Removal and Installation).
18. Install both sun visors.
For additional information, refer to: Sun Visor
(501-05 Interior
Trim and Ornamentation, Re moval and Installation).
19. Install both A-pillar trim panels.
For additional information, refer to: A
-Pillar Trim Panel (501-05
Interior Trim and Ornamentatio n, Removal and Installation).