JAGUAR X308 1998 2.G Repair Manual
X308 1998 2.G
JAGUAR
JAGUAR
https://www.carmanualsonline.info/img/21/7640/w960_7640-0.png
JAGUAR X308 1998 2.G Repair Manual
Page 1903 of 2490
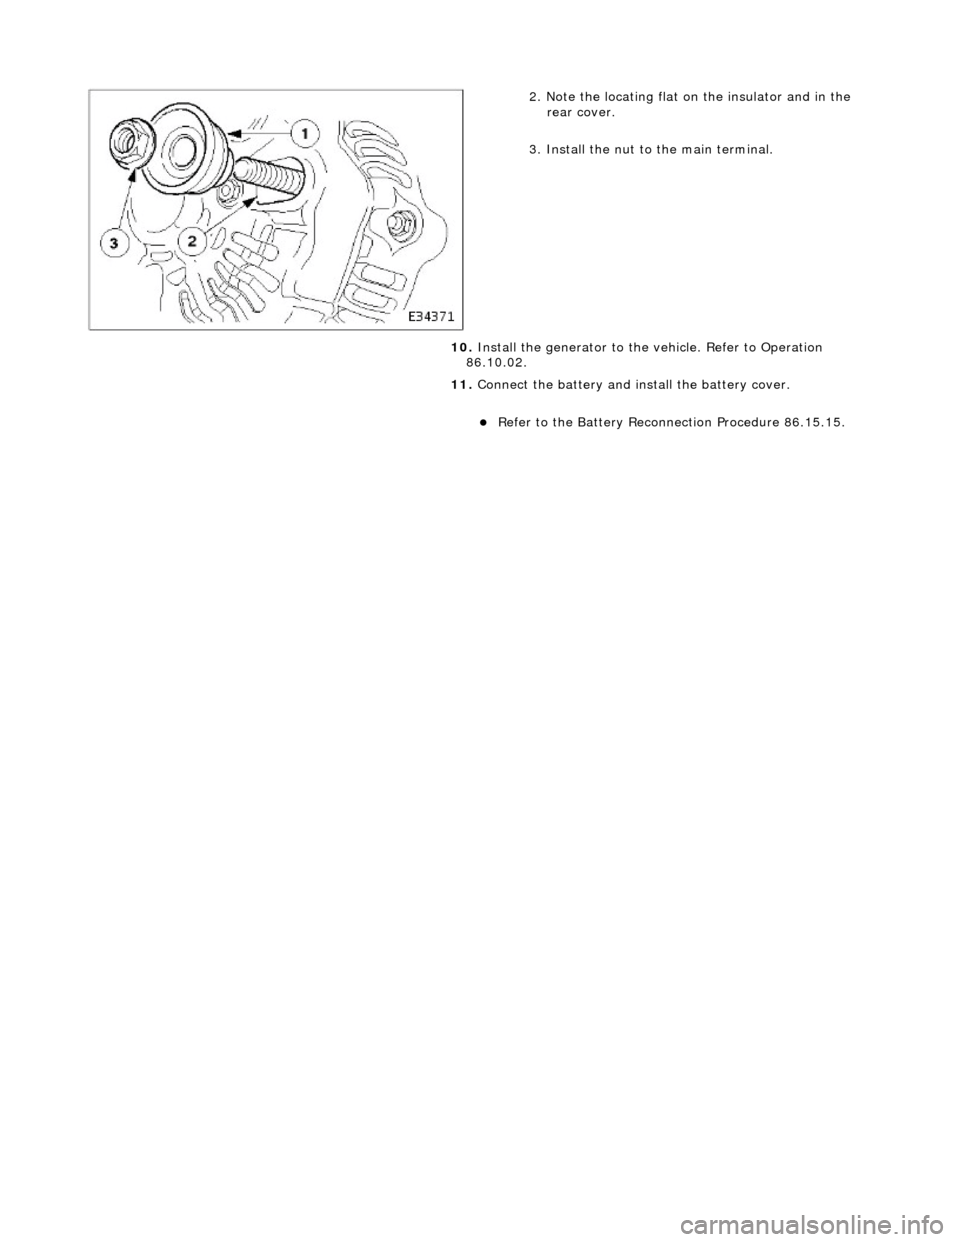
2. Note the locating flat on the insulator and in the rear cover.
3. Install the nut to the main terminal.
10. Install the generator to the vehicle. Refer to Operation
86.10.02.
11. Connect the battery and in stall the battery cover.
пЃ¬Refer to the Battery Reconnection Procedure 86.15.15.
Page 2361 of 2490

A pyrotechnic front seat belt pre-tensioning device with independent el ectronic sensing and retractor unit is installed at the
base of each 'B' post. In the event of se vere frontal impact, this provides additional front occupant protection by removing
any excess slack from the seat be lt. Seat belt pre-tensioning activates when a frontal impact of sufficient force occurs within
30 degrees of vehicle center line. Under such an impact, el ectronic sensors in the retractor unit fire, igniting the pre-
tensioner gas generator. The ga s generator initiates a chemical reaction, producing gases under pressure. Gas pressure
drives the piston/cable up a tube, rotating the retractor sp indle and removing excess slack from the seat belt. When the
pre-tensioner unit has been activated, the seat belt will lock and cannot be retracted or pulled from the reel.If a seat belt
pre-tensioner activates, a small quantity (less than 1 liter) of gas is produced containing nitrogen, oxygen and water vapor.
Page 2422 of 2490
8. Remove generator front cooling duct.
пЃ¬Remove bolt.
пЃ¬Move duct rearwards to rele ase tang from undertray.
пЃ¬Release front duct from rear vertical duct.
9. Remove scrivets or screws se curing undertray to bumper
cover. Discard scrivets.
10. Remove and discard tiestrap securing undertray to body
brace.
11. At each side of vehicle, remo ve and discard scrivet securing undertray to wheelarch liner.
12. Remove undertray from vehicle.
13. Remove both front road wheels. Refer to Section 100-02.
14. Remove both front road springs. Refer to 60. 20.02.
15. Disconnect wheel speed sensor harness connectors.
Page 2437 of 2490
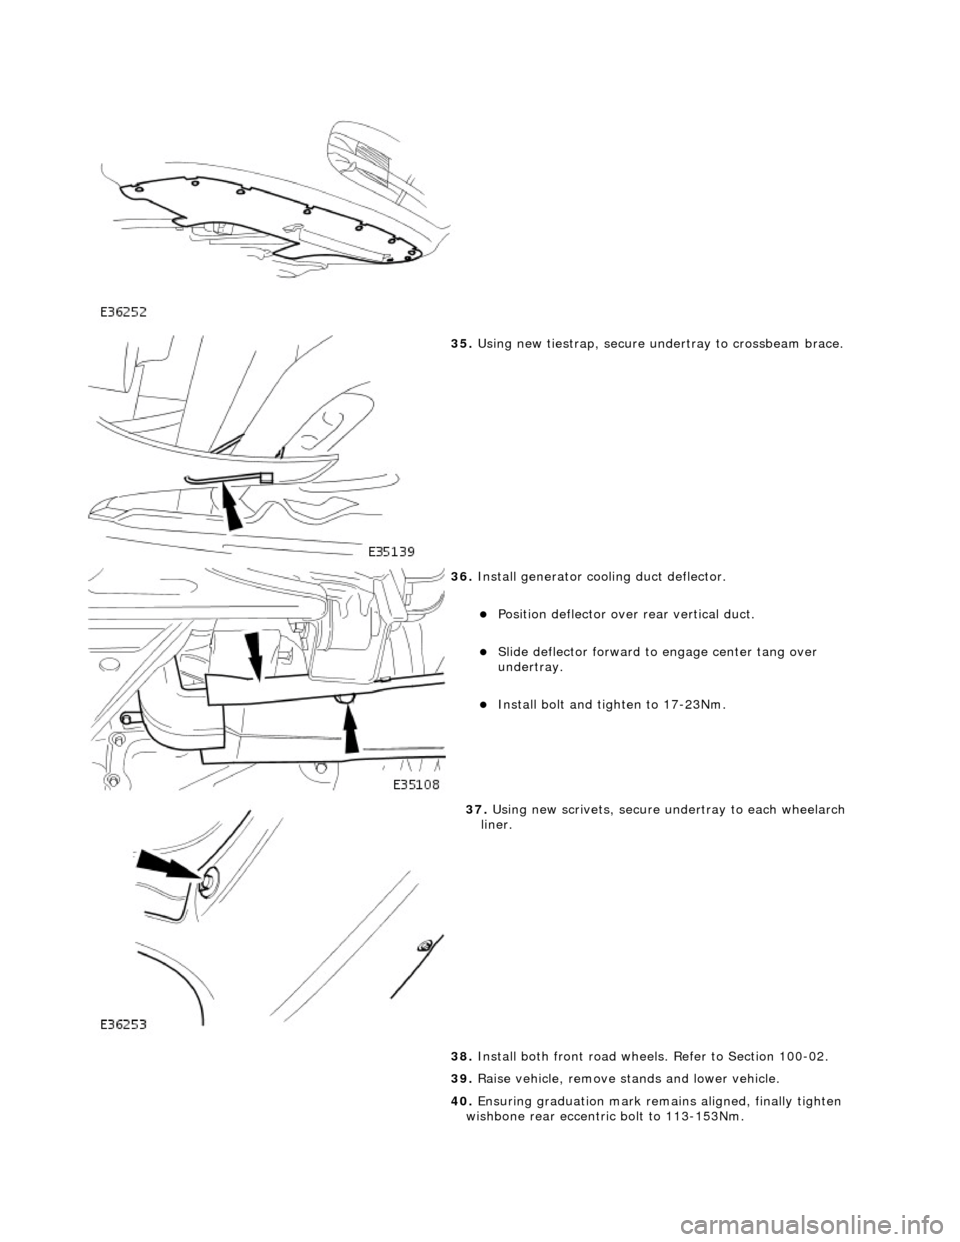
35. Using new tiestrap, secure undertray to crossbeam brace.
36. Install generator cool ing duct deflector.
пЃ¬Position deflector over rear vertical duct.
пЃ¬Slide deflector forward to engage center tang over
undertray.
пЃ¬Install bolt and ti ghten to 17-23Nm.
37. Using new scrivets, secure un dertray to each wheelarch
liner.
38. Install both front road wheels. Refer to Section 100-02.
39. Raise vehicle, remove st ands and lower vehicle.
40. Ensuring graduation mark remains aligned, finally tighten
wishbone rear eccentric bolt to 113-153Nm.
Page 2440 of 2490
9. Raise front of vehicle.
10. Remove generator cool ing duct deflector.
пЃ¬Remove bolt.
пЃ¬Move deflector rearwards to release tangs from undertray.
пЃ¬Release deflector from rear vertical duct.
11. Remove screws or scrivets securing undertray to bumper
cover. Discard scrivets.
12. Remove and discard tiestrap securing undertray to body
brace.
13. At each side of vehicle, remo ve and discard scrivet securing
undertray to wheelarch liner.
Page 2448 of 2490
15. Using screws or new scrivets , secure undertray to front
bumper cover.
16. Using new tiestrap, secure undertray to crossbeam brace.
17. Using new scrivets, secure un dertray to each wheelarch
liner.
18. Install generator cool ing duct deflector.
пЃ¬Position deflector over rear vertical duct.
пЃ¬Move deflector forward to engage center tang over
Page 2451 of 2490
9. Raise front of vehicle.
10. Remove generator cool ing duct deflector.
пЃ¬Remove bolt.
пЃ¬Move deflector rearwards to release tangs from undertray.
пЃ¬Release deflector from rear vertical duct.
11. Remove screws or scrivets securing undertray to bumper
cover. Discard scrivets.
12. Remove and discard tiestrap securing undertray to body
brace.
13. At each side of vehicle, remo ve and discard scrivet securing
undertray to wheelarch liner.
Page 2459 of 2490
15. Using screws or new scrivets , secure undertray to front
bumper cover.
16. Using new tiestrap, secure undertray to crossbeam brace.
17. Using new scrivets, secure un dertray to each wheelarch
liner.
18. Install generator cool ing duct deflector.
пЃ¬Position deflector over rear vertical duct.
пЃ¬Move deflector forward to engage center tang over
undertray.
Page 2462 of 2490
8. Remove generator front cooling duct.
пЃ¬Remove bolt.
пЃ¬Move duct rearwards to rele ase tang from undertray.
пЃ¬Release front duct from rear vertical duct.
9. Remove scrivets or screws se curing undertray to bumper
cover. Discard scrivets.
10. Remove and discard tiestrap securing undertray to crossbeam front brace.
11. At each side of vehicle, remo ve and discard scrivet securing
undertray to wheelarch liner.
Page 2479 of 2490
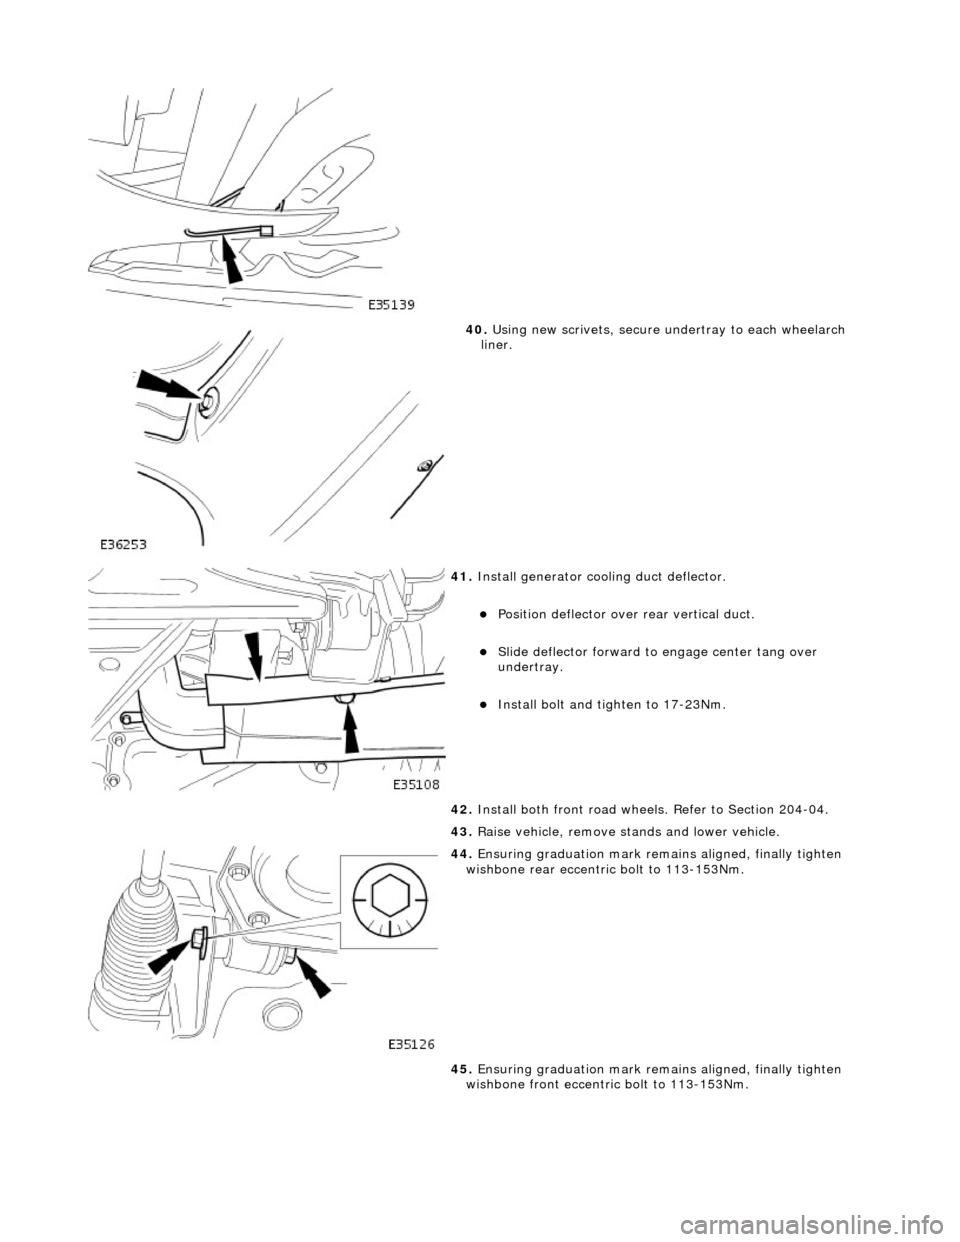
40. Using new scrivets, secure un dertray to each wheelarch
liner.
41. Install generator cool ing duct deflector.
пЃ¬Position deflector over rear vertical duct.
пЃ¬Slide deflector forward to engage center tang over
undertray.
пЃ¬Install bolt and ti ghten to 17-23Nm.
42. Install both front road wheels. Refer to Section 204-04.
43. Raise vehicle, remove st ands and lower vehicle.
44. Ensuring graduation mark remains aligned, finally tighten
wishbone rear eccentric bolt to 113-153Nm.
45. Ensuring graduation mark remains aligned, finally tighten
wishbone front eccentric bolt to 113-153Nm.


