draining the coolant system JAGUAR X308 1998 2.G Workshop Manual
[x] Cancel search | Manufacturer: JAGUAR, Model Year: 1998, Model line: X308, Model: JAGUAR X308 1998 2.GPages: 2490, PDF Size: 69.81 MB
Page 875 of 2490
Engine - Valve Springs LH
In-vehicle Repair
Removal
Special Tool(s)
Valve spring compressor
303-252 1. Open the engine compartment and fit paintwork protection
sheets.
2. Set the engine compartment cover to the service access
position.
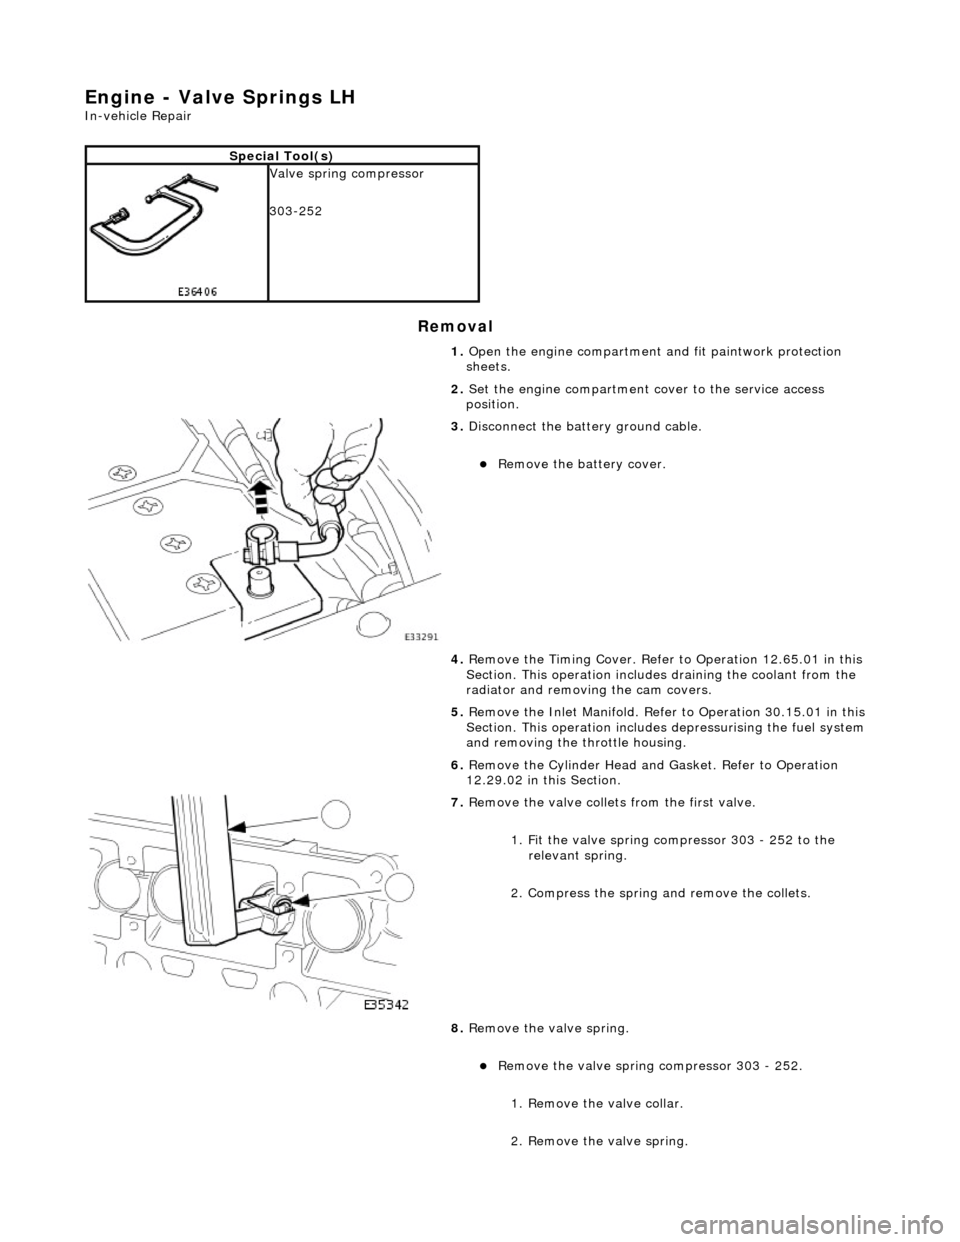
3. Disconnect the batt ery ground cable.
Remove the battery cover.
4. Remove the Timing Co ver. Refer to Operation 12.65.01 in this
Section. This operation includes draining the coolant from the
radiator and removing the cam covers.
5. Remove the Inlet Manifold. Refer to Operation 30.15.01 in this
Section. This operation includes depressurising the fuel system
and removing the throttle housing.
6. Remove the Cylinder Head an d Gasket. Refer to Operation
12.29.02 in this Section.
7. Remove the valve collets from the first valve.
1. Fit the valve spring compressor 303 - 252 to the relevant spring.
2. Compress the spring and remove the collets.
8. Remove the valve spring.
Remove the valve spring compressor 303 - 252.
1. Remove the valve collar.
2. Remove the valve spring.
Page 877 of 2490
Engine - Valve Springs RH
In-vehicle Repair
Removal
Special Tool(s)
Valve spring compressor
303-252 1. Open the engine compartment and fit paintwork protection
sheets.
2. Set the engine compartment cover to the service access
position.
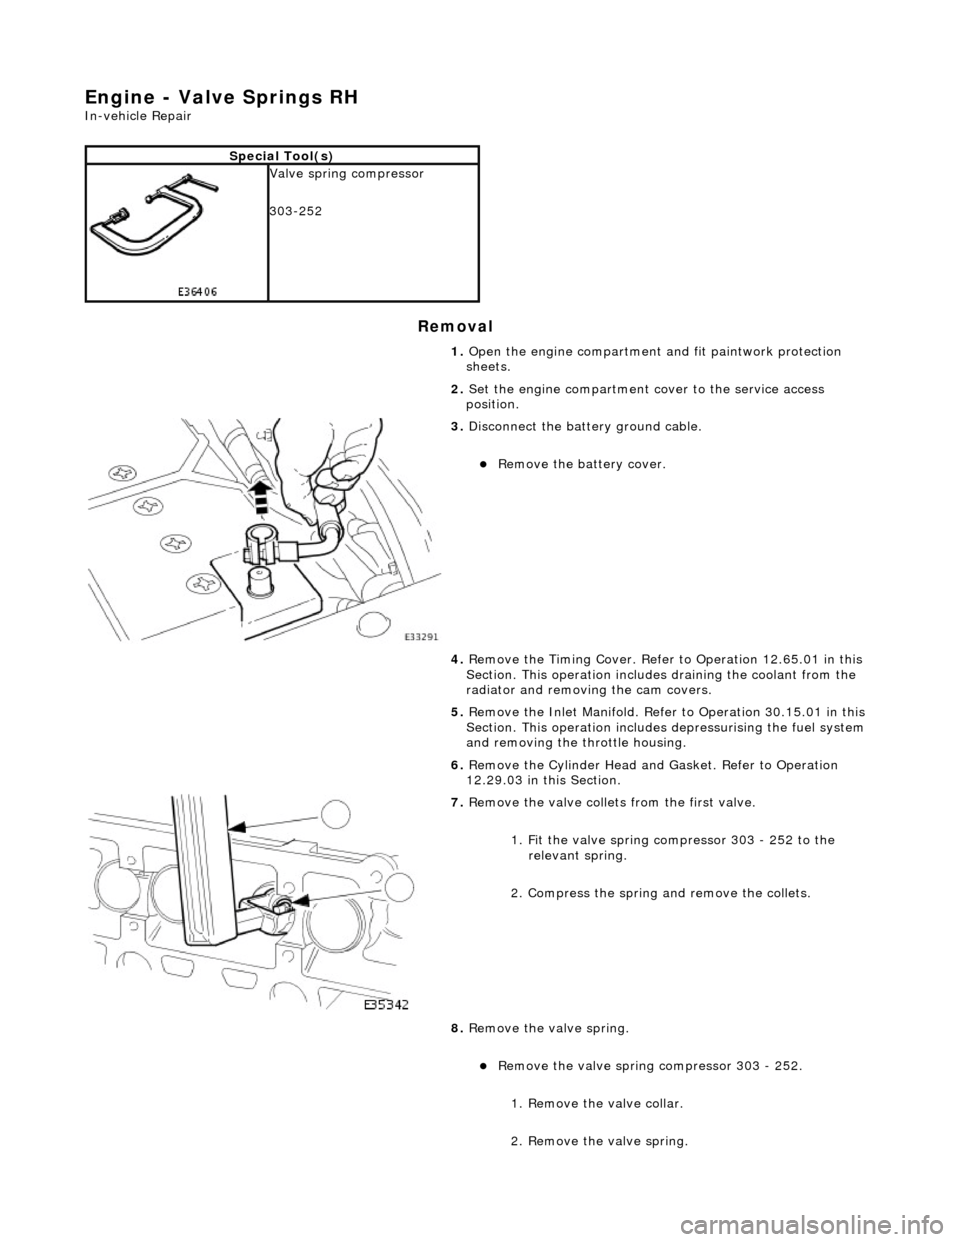
3. Disconnect the batt ery ground cable.
Remove the battery cover.
4. Remove the Timing Co ver. Refer to Operation 12.65.01 in this
Section. This operation includes draining the coolant from the
radiator and removing the cam covers.
5. Remove the Inlet Manifold. Refer to Operation 30.15.01 in this
Section. This operation includes depressurising the fuel system
and removing the throttle housing.
6. Remove the Cylinder Head an d Gasket. Refer to Operation
12.29.03 in this Section.
7. Remove the valve collets from the first valve.
1. Fit the valve spring compressor 303 - 252 to the relevant spring.
2. Compress the spring and remove the collets.
8. Remove the valve spring.
Remove the valve spring compressor 303 - 252.
1. Remove the valve collar.
2. Remove the valve spring.
Page 953 of 2490
Engine Cooling - Cooling System Draining,
Filling and Bleeding4.0L NA V8
- AJ27/3.2L NA V8 - AJ26
Gen
eral Procedures
Drain
Refill
1. O
pen the engine compartment and fit paintwork protection
sheets.
2. Ensure that the cooling system is cool and very carefully,
remove the pressure cap from the header tank.
3. Raise the vehicle.
4. Drain th
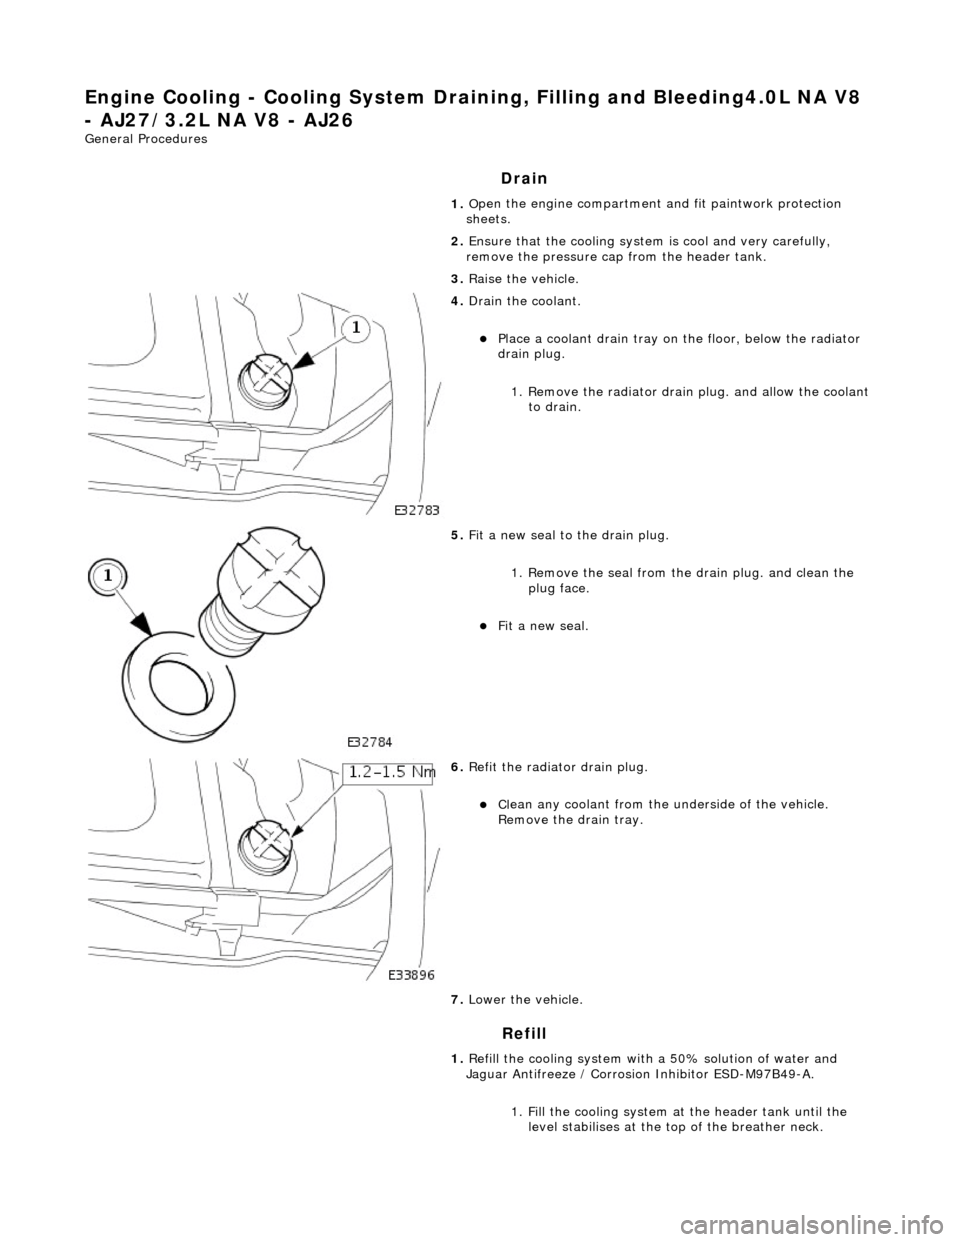
e coolant.
Pla
ce a coolant drain tray on
the floor, below the radiator
drain plug.
1. Remove the radiator drain plug. and allow the coolant to drain.
5. Fit a new seal to the
drain plug.
1. Remove the seal from the drain plug. and clean the plug face.
Fit a new seal.
6. Re
fit the radiator drain plug.
Cl
ean any coolant from the
underside of the vehicle.
Remove the drain tray.
7. Lower the vehicle.
1. Refill the cooling system with a 50% solution of water and
Jaguar Antifreeze / Corrosion Inhibitor ESD-M97B49-A.
1. Fill the cooling system at the header tank until the level stabilises at the top of the breather neck.
Page 955 of 2490
Engine Cooling - Cooling System Draining, Filling and Bleeding4.0L SC V8 -
AJ26
Gen
eral Procedures
Drain
Refill
1. O
pen the engine compartment and fit paintwork protection
sheets.
2. Ensure that the cooling system is cool and very carefully,
remove the pressure cap from the header tank.
3. Raise the vehicle.
4. Drain th
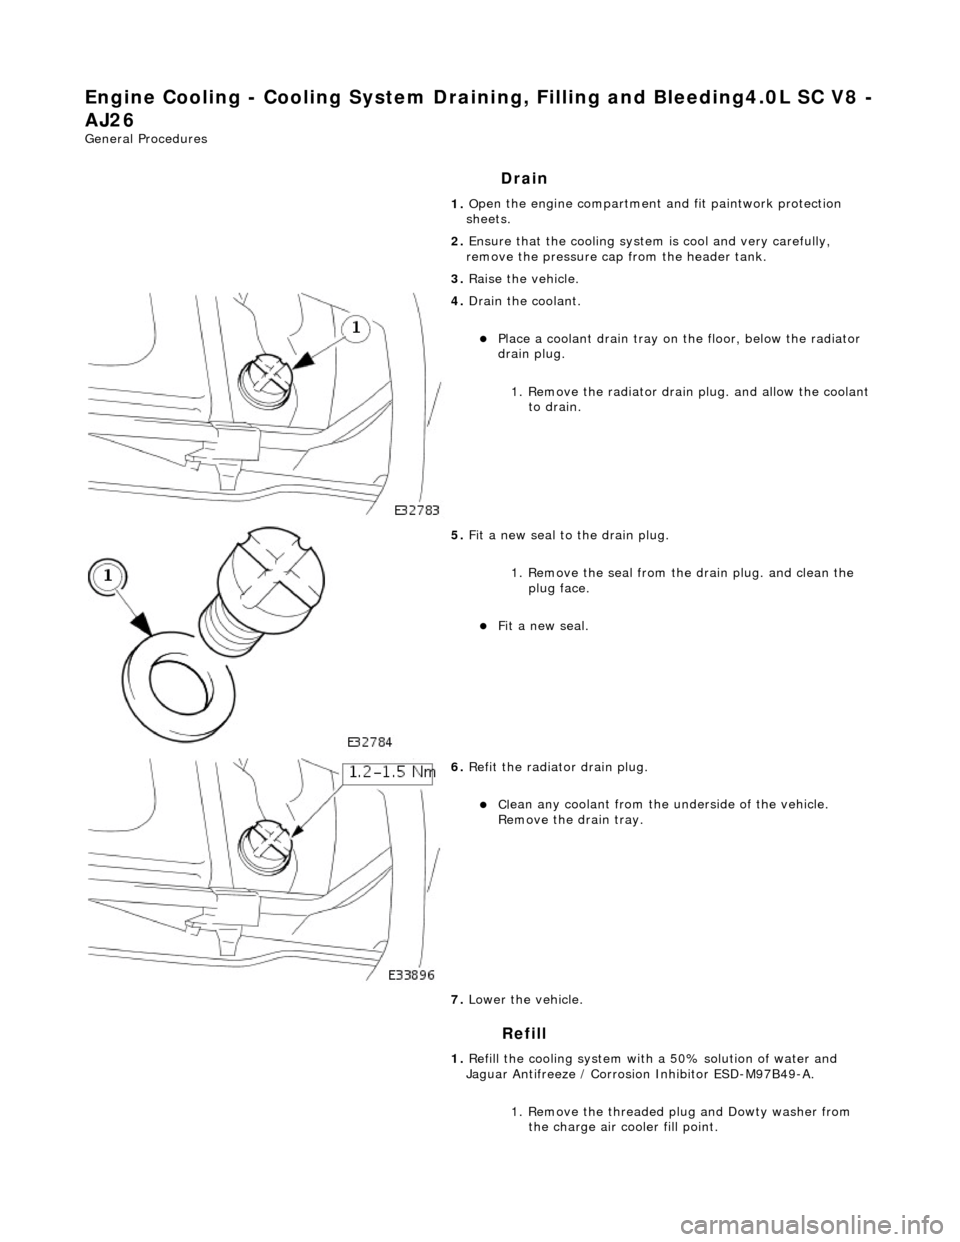
e coolant.
Pla
ce a coolant drain tray on
the floor, below the radiator
drain plug.
1. Remove the radiator drain plug. and allow the coolant to drain.
5. Fit a new seal to the
drain plug.
1. Remove the seal from the drain plug. and clean the plug face.
Fit a new seal.
6. Re
fit the radiator drain plug.
Cl
ean any coolant from the
underside of the vehicle.
Remove the drain tray.
7. Lower the vehicle.
1. Refill the cooling system with a 50% solution of water and
Jaguar Antifreeze / Corrosion Inhibitor ESD-M97B49-A.
1. Remove the threaded plug and Dowty washer from the charge air cooler fill point.
Page 958 of 2490
Engine Cooling - Cooling System Draining and Vacuum Filling
Gene
ral Procedures
WARNING: To avoid having scalding ho t coolant or steam blowing out of the cooling system, use extreme care when
removing the coolant pressure cap from a hot cooling system. Wait until the engine has cooled, then wrap a thick cloth
around the coolant pressure cap and turn it slowly until the pressure begins to release. Step ba ck while the pressure is
released from the system. When certain al l the pressure has been released (still with a cloth) turn and remove the coolant
pressure cap from the coolant expansion tank. Failure to fo llow these instructions may result in personal injury.
• CAUTIONS:
The engine cooling syst em must be maintained with the correct concentration and type of anti-freeze solution to
prevent corrosion and frost damage. Failure to follow th is instruction may result in damage to the vehicle.
Engine coolant will damage the paint finished surfaces. If spilt, immediately remove the coolant and clean the area
with water.
• NOTE: Vehicles fitted with supercharged engines shown, V8 NA engines similar.
All vehicles
1. Set
the heater controls to maximum HOT.
2. WARN
ING: Relieve the cooling system pressure by
unscrewing the coolant pressure cap. Failure to follow this
instruction may result in personal injury.
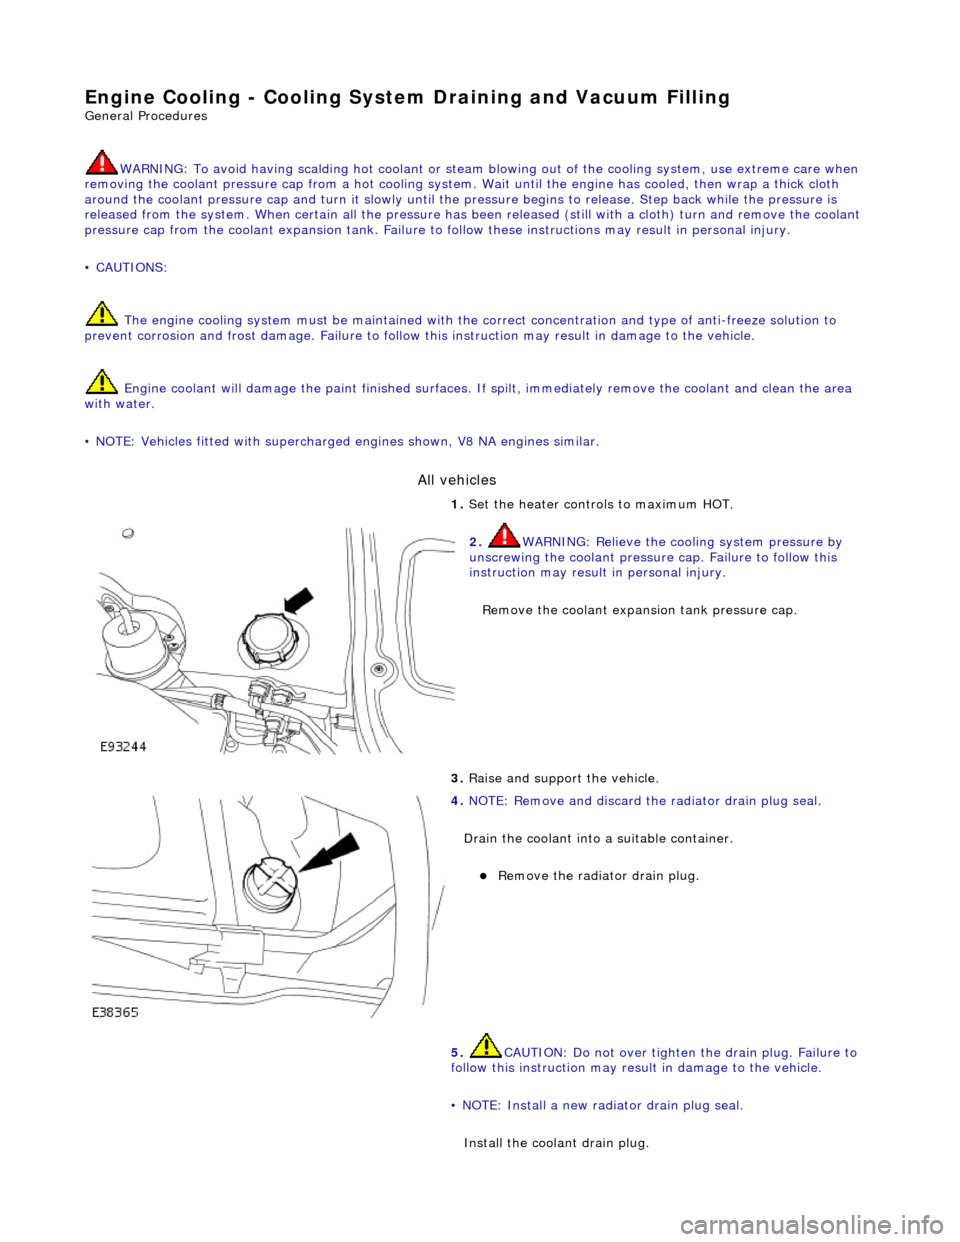
Remove the coolant expans ion tank pressure cap.
3. Raise a
nd support the vehicle.
4. NOTE : Remov
e and discard the
radiator drain plug seal.
Drain the coolant into a suitable container.
Remove the radiato
r drain plug.
5. CAUTION: Do not over tighten the drain plug. Failure to
follow this instruction may result in damage to the vehicle.
• NOTE: Install a new radiator drain plug seal.
Install the coolant drain plug.