warning light JAGUAR XF 2009 1.G Owners Manual
[x] Cancel search | Manufacturer: JAGUAR, Model Year: 2009, Model line: XF, Model: JAGUAR XF 2009 1.GPages: 391, PDF Size: 19.32 MB
Page 3 of 391
Contents
3
Introduction
SYMBOLS GLOSSARY ...................................... 9
LABEL LOCATIONS ........................................... 9
HEALTH AND SAFETY ..................................... 10
DATA RECORDING.......................................... 11
DISABILITY MODIFICATIONS ......................... 11
FASCIA AND CONTROLS ................................ 12
PARTS AND ACCESSORIES ............................ 14
Keys and remote controls
PRINCIPLE OF OPERATION ............................ 16
GENERAL INFORMATION ON RADIO
FREQUENCIES ................................................ 16
USING THE REMOTE CONTROL ..................... 17
UNLOCKING AND DISARMING THE VEHICLE. 18
LOCKING AND ARMING THE VEHICLE ........... 19
DOCKING/UNDOCKING THE JAGUAR SMART
KEY ................................................................. 20
PROGRAMMING THE REMOTE CONTROL...... 21
CHANGING THE REMOTE CONTROL BATTERY ...
24
EMERGENCY KEY BLADE ............................... 25
Locks
LOCKING AND UNLOCKING............................ 26
USING THE EMERGENCY KEY BLADE ............ 28
VALET MODE .................................................. 30
JAGUAR SMART KEY SYSTEM TRANSMITTERS
32
KEYLESS ENTRY ............................................ 33
GLOBAL OPENING AND CLOSING .................. 35
Alarm
ARMING THE ALARM ..................................... 37
DISARMING THE ALARM ............................... 38
SECURITY SENSORS ...................................... 39
Seats
SITTING IN THE CORRECT POSITION ............ 41
ELECTRIC SEATS ............................................ 42
HEAD RESTRAINTS ........................................ 44
REAR SEATS ................................................... 45
HEATED SEATS............................................... 47
CLIMATE SEATS ............................................. 48
Seat belts
PRINCIPLE OF OPERATION ............................ 49 SEAT BELT REMINDER .................................. 50
USING SEAT BELTS DURING PREGNANCY.... 51
FASTENING THE SEAT BELTS ........................ 51
SEAT BELT HEIGHT ADJUSTMENT ................ 52
Supplementary restraints system
PRINCIPLE OF OPERATION ............................ 53
AIRBAG WARNING LAMP .............................. 57
WHIPLASH PROTECTION ............................... 57
AIRBAG LABELS ............................................. 58
AIRBAG SERVICE INFORMATION................... 58
Child safety
CHILD SEATS ................................................. 59
CHILD SEAT POSITIONING ............................ 60
BOOSTER CUSHIONS ..................................... 61
CHILD SEAT ANCHOR POINTS ....................... 62
CHILD SAFETY LOCKS ................................... 65
Pedestrian protection
PRINCIPLE OF OPERATION ............................ 66
AFTER DEPLOYMENT OF THE PEDESTRIAN
PROTECTION SYSTEM ................................... 66
Steering wheel
ADJUSTING THE STEERING WHEEL .............. 67
HORN ............................................................. 68
HEATED STEERING WHEEL............................ 68
AUDIO CONTROL ........................................... 69
VOICE CONTROL ............................................ 69
CRUISE CONTROL.......................................... 74
Lighting
LIGHTING CONTROL ...................................... 75
AUTOLAMPS .................................................. 76
REAR FOG LAMPS.......................................... 77
HAZARD WARNING FLASHERS...................... 77
DIRECTION INDICATORS ............................... 78
HEADLAMPS - DRIVING ABROAD.................. 78
HEADLAMP LEVELLING ................................. 79
CORNERING OR STATIC BENDING LAMPS.... 79
INTERIOR LAMPS .......................................... 80
APPROACH LAMPS ........................................ 81
REMOVING A HEADLAMP .............................. 81
REMOVING A REAR LAMP ............................. 82
CHANGING A BULB ........................................ 83
HEADLAMP UNIT BULBS ............................... 83
Page 4 of 391
Contents
4
SIDE REPEATER LAMP .................................. 85
REAR LAMP BULBS ....................................... 85
BULB SPECIFICATION CHART ........................ 87
Wipers and washers
WINDSCREEN WIPERS .................................. 88
RAIN SENSOR ................................................ 89
WINDSCREEN WASHERS............................... 89
HEADLAMP WASHERS................................... 90
CHECKING THE WIPER BLADES .................... 90
CHANGING THE WIPER BLADES .................... 91
Windows and mirrors
ELECTRIC WINDOWS ..................................... 93
INTERIOR MIRROR ........................................ 94
EXTERIOR MIRRORS ..................................... 95
BLIND SPOT MONITOR .................................. 97
Instruments
INSTRUMENT PANEL OVERVIEW .................. 99
WARNING LAMPS AND INDICATORS .......... 100
AUDIBLE WARNINGS AND INDICATORS ..... 104
Information displays
GENERAL INFORMATION ............................. 105
WARNING AND INFORMATION MESSAGES. 106
TRIP COMPUTER ......................................... 107
TOUCH-SCREEN ........................................... 109
PERSONALISED SETTINGS .......................... 111
Climate control
AIR VENTS ................................................... 115
AUTOMATIC CLIMATE CONTROL ................. 116
ELECTRIC SUNROOF .................................... 121
Convenience features
SUN VISORS ................................................ 123
SUN BLINDS................................................. 123
INSTRUMENT LIGHTING DIMMER ............... 123
CLOCK .......................................................... 124
AUXILIARY POWER SOCKETS ..................... 125
GLOVE BOX .................................................. 125
CUP HOLDERS ............................................. 126
STORAGE COMPARTMENTS ........................ 127
GARAGE DOOR TRANSCEIVER .................... 128
PORTABLE AUDIO INTERFACE..................... 131
Starting the engine
GENERAL INFORMATION.............................. 132
KEYLESS STARTING ..................................... 133
SWITCHING OFF THE ENGINE....................... 134
DIESEL PARTICULATE FILTER (DPF)............ 135
Transmission
AUTOMATIC TRANSMISSION ....................... 137
Brakes
PRINCIPLE OF OPERATION .......................... 144
HINTS ON DRIVING WITH ABS ..................... 144
ELECTRIC PARKING BRAKE (EPB) ............... 146
Parking aid
PRINCIPLE OF OPERATION .......................... 148
USING THE PARKING AID ............................. 148
Rear view camera
PRINCIPLE OF OPERATION .......................... 152
Driving hints
RUNNING-IN ................................................. 154
ECONOMICAL DRIVING ................................ 155
Cruise control
PRINCIPLE OF OPERATION .......................... 156
USING CRUISE CONTROL............................. 156
Adaptive cruise control (ACC)
PRINCIPLE OF OPERATION .......................... 159
USING ACC ................................................... 159
FORWARD ALERT FUNCTION ....................... 164
ADVANCED EMERGENCY BRAKE ASSIST..... 165
Automatic speed limiter (ASL)
PRINCIPLE OF OPERATION .......................... 167
USING THE ASL ............................................ 167
Driving dynamics
GENERAL INFORMATION.............................. 169
WINTER MODE ............................................. 169
DYNAMIC MODE ........................................... 170
STABILITY CONTROL.................................... 170
Fuel and refuelling
SAFETY PRECAUTIONS................................. 174
Page 13 of 391
13
Introduction
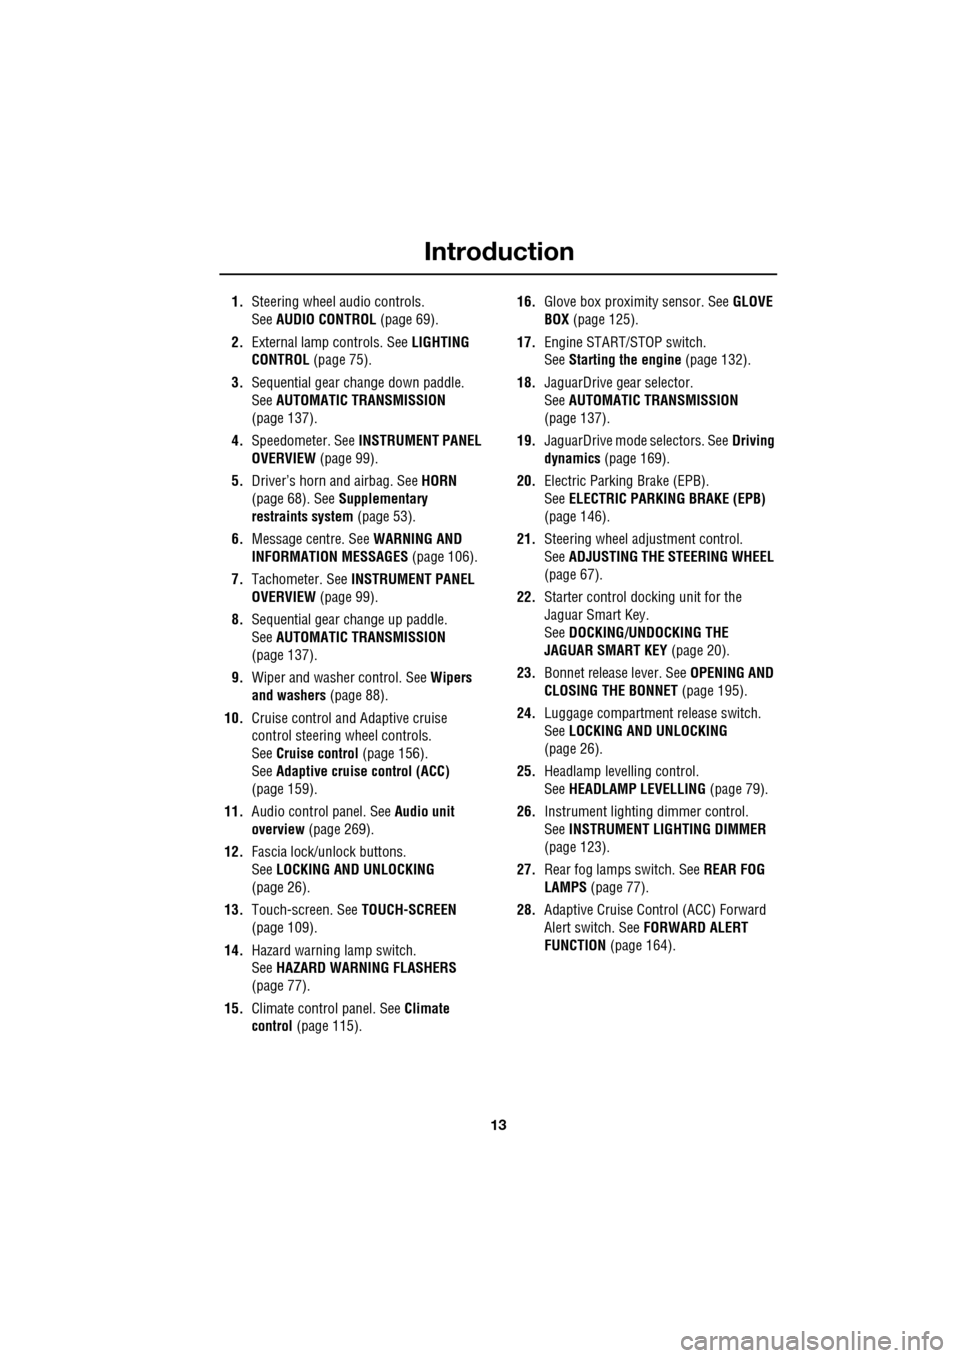
1.Steering wheel audio controls.
See AUDIO CONTROL (page 69).
2. External lamp controls. See LIGHTING
CONTROL (page 75).
3. Sequential gear change down paddle.
See AUTOMATIC TRANSMISSION
(page 137).
4. Speedometer. See INSTRUMENT PANEL
OVERVIEW (page 99).
5. Driver’s horn and airbag. See HORN
(page 68). See Supplementary
restraints system (page 53).
6. Message centre. See WARNING AND
INFORMATION MESSAGES (page 106).
7. Tachometer. See INSTRUMENT PANEL
OVERVIEW (page 99).
8. Sequential gear change up paddle.
See AUTOMATIC TRANSMISSION
(page 137).
9. Wiper and washer control. See Wipers
and washers (page 88).
10. Cruise control and Adaptive cruise
control steering wheel controls.
SeeCruise control (page 156).
See Adaptive cruise control (ACC)
(page 159).
11. Audio control panel. See Audio unit
overview (page 269).
12. Fascia lock/unlock buttons.
SeeLOCKING AND UNLOCKING
(page 26).
13. Touch-screen. See TOUCH-SCREEN
(page 109).
14. Hazard warning lamp switch.
SeeHAZARD WARNING FLASHERS
(page 77).
15. Climate contro l panel. SeeClimate
control (page 115). 16.
Glove box proximity sensor. See GLOVE
BOX (page 125).
17. Engine START/STOP switch.
SeeStarting the engine (page 132).
18. JaguarDrive gear selector.
SeeAUTOMATIC TRANSMISSION
(page
137).
19. JaguarDrive mode selectors. See Driving
dynamics (page 169).
20. Electric Parking Brake (EPB).
SeeELECTRIC PARKIN G BRAKE (EPB)
(page 146).
21. Steering wheel adju stment control.
See ADJUSTING THE STEERING WHEEL
(page 67).
22. Starter control docking unit for the
Jaguar Smart Key.
SeeDOCKING/UNDOCKING THE
JAGUAR SMART KEY (page 20).
23. Bonnet release lever. See OPENING AND
CLOSING THE BONNET (page 195).
24. Luggage compartment release switch.
SeeLOCKING AND UNLOCKING
(page 26).
25. Headlamp levelling control.
SeeHEADLAMP LEVELLING (page 79).
26. Instrument lighting dimmer control.
SeeINSTRUMENT LIGHTING DIMMER
(page 123).
27. Rear fog lamps switch. See REAR FOG
LAMPS (page 77).
28. Adaptive Cruise Control (ACC) Forward
Alert switch. See FORWARD ALERT
FUNCTION (page 164).
Page 18 of 391
Keys and remote controls
18
The emergency alarm will also be cancelled if
the Jaguar Smart Key is inserted into the
starter control unit and the START/STOP
button is pressed or if the vehicle detects a
valid Jaguar Smart Key when the START/STOP
button is pressed.
Care of the Jaguar Smart Key
Do not expose to extr emes of heat, dust,
humidity or allow contac t with fluids. Do not
leave the transmitter exposed to direct
sunlight.
Irregular operation
If difficulty is experienced with remote keyless
entry, keyless entry, keyless starting or Jaguar
Smart Key operation, it may be caused by:
• Internal battery low voltage. Replace the
battery. See CHANGING THE REMOTE
CONTROL BATTERY (page 24).
• High levels of localised external electrical
interference, e.g. a radio transmitter.
• Until the battery can be replaced, or until
the vehicle is outside the area of electrical
interference, the Jaguar Smart Key must
be inserted into the starter control unit.
UNLOCKING AND DISARMING THE
VEHICLE
Your vehicle can be unlocked using
either Single or Multi-point entry.
Single-point entry is a security
feature that only unlocks the driver's door
when the unlock button is pressed.
To change from Single to Multi-point entry (or
vice versa), press both the lock and unlock
buttons simultaneously for three seconds. The
hazard warning lamps will flash twice to
confirm the change.
The change can also be achieved using the
vehicle touch-screen. See PROGRAMMING
THE REMOTE CONTROL (page 21).
Single-point entry
First press: Unlocks the driver's door and
enables the other doors to be opened from the
inside (unless the child safety locks have been
activated on the rear doors). The hazard
warning lamps will flash twice, to indicate that
the vehicle is unlocked and the alarm has been
disarmed. The interior lamps will illuminate to
assist entry to the vehicle.
Note: In some markets, an audible warning will
sound.
Second press: Unlocks the passenger doors
and the luggage compartment.
Multi-point entry
Press briefly to unlock all the doors and
luggage compartment and to disarm the alarm.
The hazard warning lamp s will flash twice to
indicate that the vehicle is unlocked and the
alarm has been disarmed . The interior lamps
will illuminate to assist entry to the vehicle.
Note: In some markets, an audible warning will
sound.
Power-fold mirrors
If automatic power-fold is enabled, the door
mirrors will unfold when the vehicle is
unlocked. The power-fold feature can be
enabled/disabled using the touch-screen.
See EXTERIOR MIRRORS (page 95).
Global opening
Press and hold the unlock button for three
seconds. The vehicle w ill unlock (either single
or multi-point) and the alarm will be disarmed
immediately. After the three seconds, all of the
windows and sunroof will open. This feature
can be enabled/disabl ed using the vehicle
touch-screen. See PROGRAMMING THE
REMOTE CONTROL (page 21).
Page 19 of 391
19
Keys and remote controls
LOCKING AND ARMING THE VEHICLE
Press the lock button to secure the
vehicle. The vehicle can be Single
or Double locked, as follows:
Single locking
Press the lock button briefly. Single locking
secures the vehicle and prevents the doors
being opened from outside of the vehicle. The
doors can be unlocked and opened from inside
the vehicle. The haza rd warning lamps will
flash once as confirmation.
Note: In some markets, an audible warning will
sound.
Double locking
Press the lock button twice within three
seconds. Double locki ng secures the vehicle
and prevents the doors being unlocked or
opened from inside or outside of the vehicle,
except with the correct Jaguar Smart Key. The
hazard warning lamps w ill flash twice (with a
long second flash) and an audible warning will
sound, as confirmation. Double locking provides a
dditional security if
the vehicle is left una ttended. The vehicle
cannot be opened by breaking a window and
operating the door locks from inside the
vehicle.
Power-fold mirrors
If automatic power-fold is enabled, the door
mirrors will fold in towards the vehicle body
when the vehicle is locked. The power-fold
feature can be enable d/disabled using the
touch-screen. See PROGRAMMING THE
REMOTE CONTROL (page 21).
Lock confirmation
If you are uncertain whether the vehicle is
locked and armed (either by single or double
locking), press the lock button again. The
hazard warning lights will flash to indicate and
confirm the current lock status.
Note: If the vehicle is not already locked and
armed, pressing the lock button will single lock
the vehicle. Press again to double lock, if
required.
Global closing
Press and hold the lock button for three
seconds. The vehicle wi ll single lock and the
alarm will be fully arme d immediately. After the
three seconds, all the windows and the sunroof
will close.
WARNING
The vehicle will only lock, if all door,
luggage compartment and bonnet
apertures are closed. If a lock attempt
is made when an aperture is open, the vehicle
will not lock and two audible error warnings
will sound.
WARNING
Never double lock the vehicle with
people, children, or pets inside. In the
event of an emergency they would be
unable to escape, and the emergency services
would be unable to release them quickly.
WARNING
Ensure that no children, pets, or
obstructions are in any open aperture
before operating global closing.
Safety mechanisms are in place to prevent
serious injury, however, injuries can still
occur.
Page 34 of 391
Locks
34
Keyless locking
The vehicle will not lock automatically.
The vehicle will only lock if all doors, luggage
compartment and bonnet are closed. If a lock
attempt is made with an open aperture, the
vehicle will not lock and two audible error
warnings will sound.
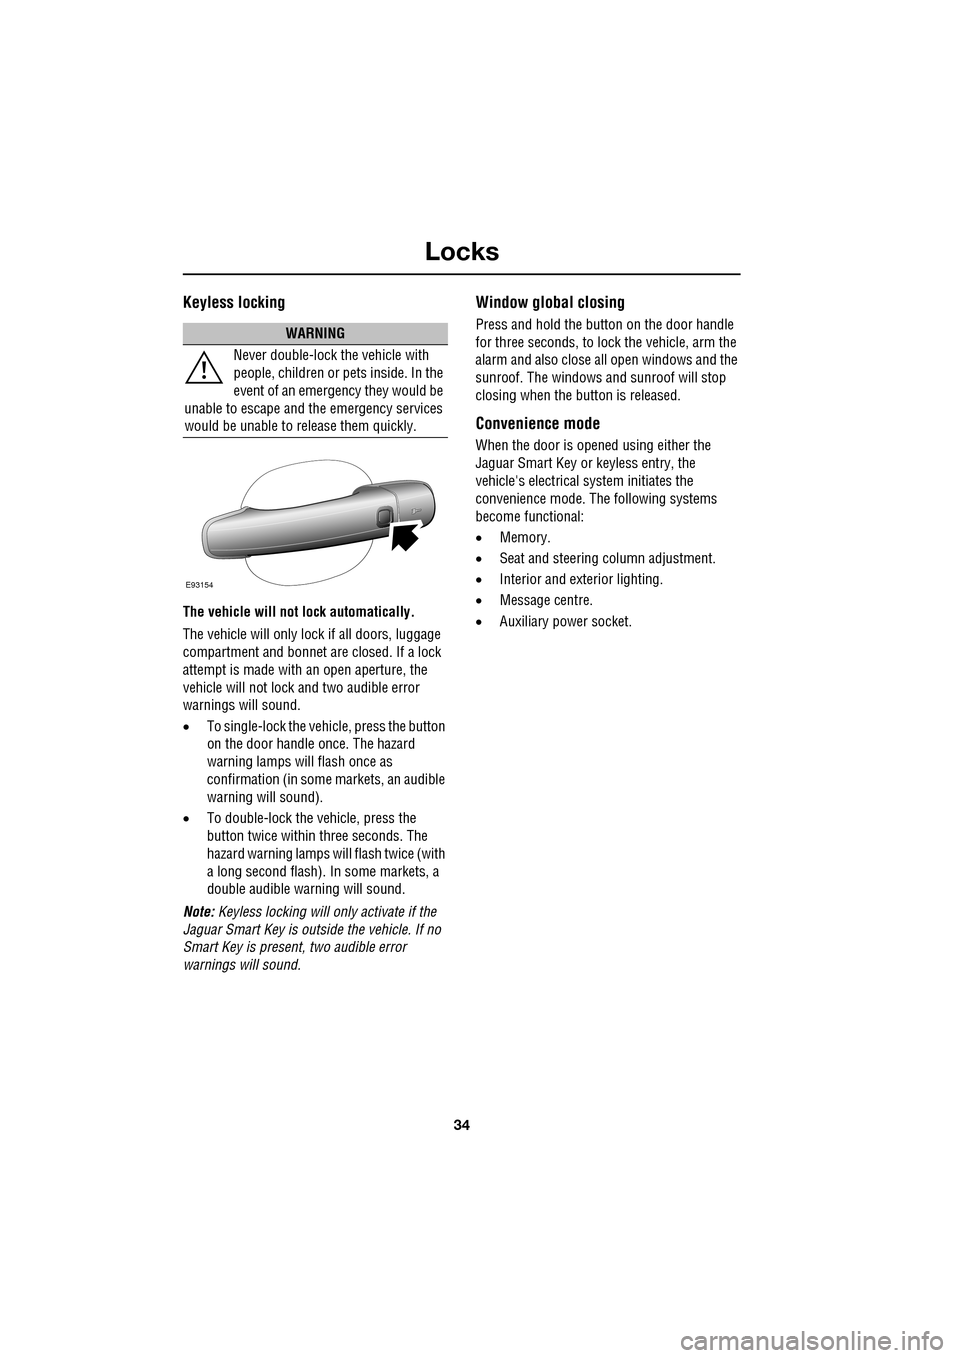
• To single-lock the vehicle, press the button
on the door handle once. The hazard
warning lamps will flash once as
confirmation (in some markets, an audible
warning will sound).
• To double-lock the ve hicle, press the
button twice within three seconds. The
hazard warning lamps will flash twice (with
a long second flash). In some markets, a
double audible warning will sound.
Note: Keyless locking will only activate if the
Jaguar Smart Key is outside the vehicle. If no
Smart Key is present, two audible error
warnings will sound.
Window global closing
Press and hold the button on the door handle
for three seconds, to lock the vehicle, arm the
alarm and also close all open windows and the
sunroof. The windows and sunroof will stop
closing when the button is released.
Convenience mode
When the door is opened using either the
Jaguar Smart Key or keyless entry, the
vehicle's electrical system initiates the
convenience mode. The following systems
become functional:
• Memory.
• Seat and steering column adjustment.
• Interior and exterior lighting.
• Message centre.
• Auxiliary power socket.
WARNING
Never double-lock the vehicle with
people, children or pets inside. In the
event of an emergency they would be
unable to escape and the emergency services
would be unable to release them quickly.
E93154
Page 37 of 391
37
Alarm
ARMING THE ALARM
The engine is automatically
immobilised when the Jaguar
Smart Key is removed from the
vehicle. The alarm system is armed when the
lock button on the Jaguar Smart Key is pressed
or the button on the ex terior door handle is
pressed with a valid Jaguar Smart Key in close
proximity. The hazard lamps will flash to
indicate that the alarm is armed (in certain
markets, an audible tone will sound). The alarm
can also arm automatically (known as passive
arming), 30 seconds afte r all doors, luggage
compartment and bonnet apertures are closed,
and the Jaguar Smart Key is removed from the
vehicle. Passive arming does not lock the
vehicle.
This feature can be enab led/disabled using the
vehicle touch-screen. See PROGRAMMING
THE REMOTE CONTROL (page 21).
Full alarm
To set full alarm protection, ensure that all the
windows and the sunroof are closed. Then, on
vehicles fitted with doubl e-locking, press the
lock button twice within three seconds. The
hazard warning lights will flash twice to
confirm the alarm state and, in some markets,
an audible tone will sound.
Once fully armed the alarm will sound if:-
• The bonnet, luggage compartment, or a
door are opened.
• If a front door is unlocked using the
emergency key blade or the interior door
lock release levers and then opened.
• Movement is detected within the vehicle
interior.
• A window, front or rear windscreen, or
sunroof glass are broken.
• The vehicle is raised or tilted.
• The vehicle battery is disconnected. •
An attempt is made to disconnect the
alarm siren.
• An attempt is made to start the vehicle,
without a valid Jaguar Smart Key present.
Note: If the alarm is armed and a window or the
sunroof are left open, the alarm may sound due
to movement of air currents.
Note: Some of the above conditions are market
or option dependent a nd therefore may not
apply to your vehicle.
Perimeter alarm
To set perimeter alarm pr otection, briefly press
the lock button once. The hazard warning lights
will flash once to confirm the alarm state.
Once armed the perimeter alarm will sound if:-
• The bonnet, luggage compartment, or a
door are opened.
• If a front door is unlocked using the
emergency key blade or the interior door
lock release levers and then opened.
• The vehicle battery is disconnected.
• An attempt is made to disconnect the
alarm siren.
• An attempt is made to start the vehicle,
without a valid Jaguar Smart Key present.
Note: This setting should be used in
circumstances such as travelling on a ferry,
when pets are to be left in the vehicle, when a
window must be left open etc.
Note: Some of the above conditions are market
or option dependent a nd therefore may not
apply to your vehicle.
Page 41 of 391
41
Seats
SITTING IN THE CORRECT POSITION
The seat, head restraint, seat belt and airbags,
all contribute to the protection of the user.
Correct use of these components will give you
greater protection, therefore you should
observe the following points:
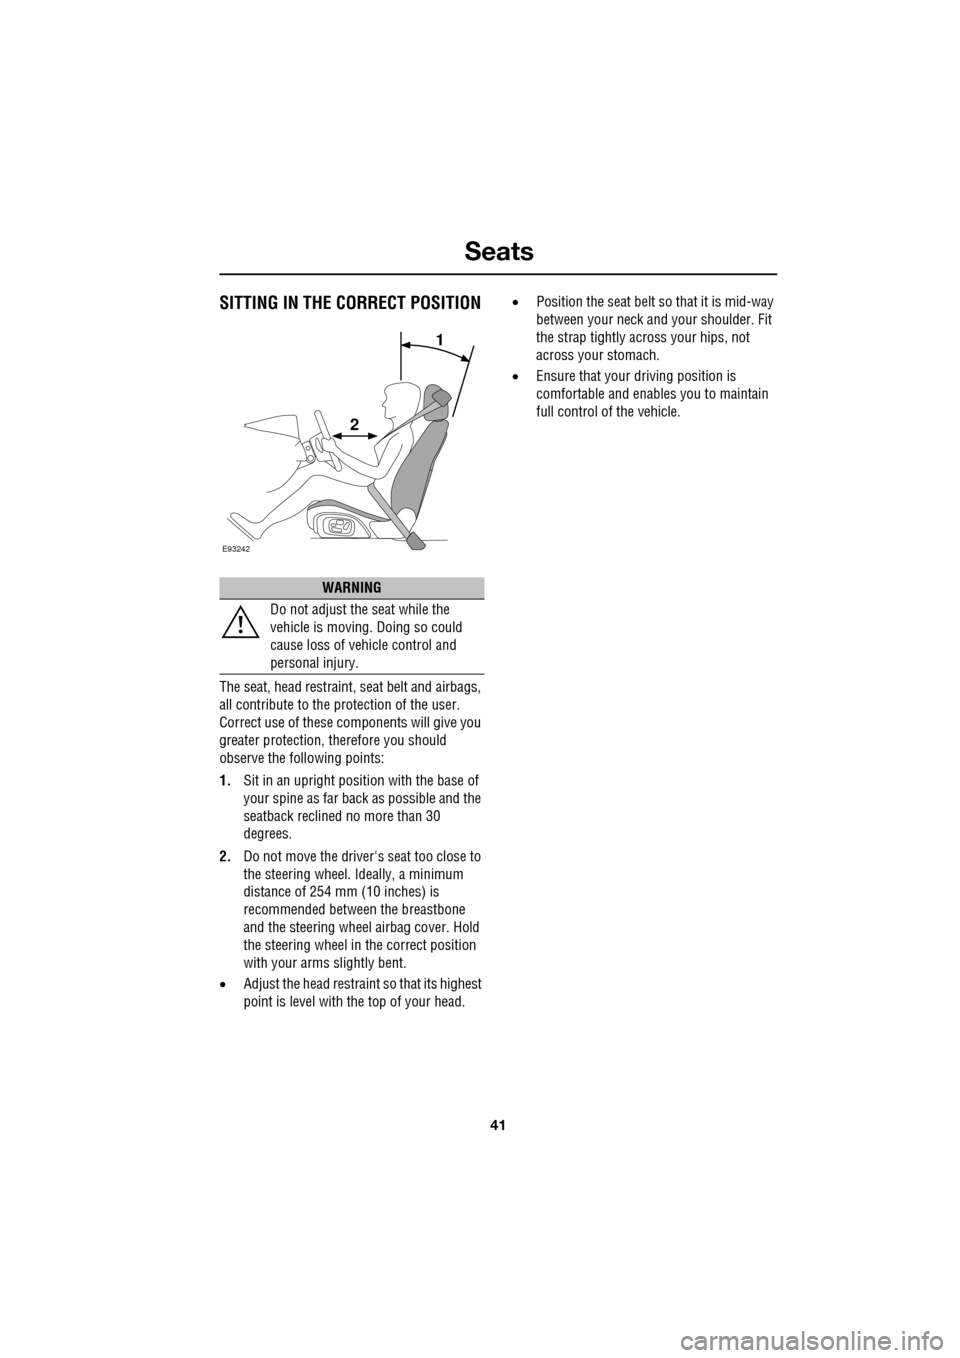
1. Sit in an upright position with the base of
your spine as far back as possible and the
seatback reclined no more than 30
degrees.
2. Do not move the driver's seat too close to
the steering wheel. Ideally, a minimum
distance of 254 mm (10 inches) is
recommended betwee n the breastbone
and the steering wheel airbag cover. Hold
the steering wheel in the correct position
with your arms slightly bent.
• Adjust the head restraint so that its highest
point is level with the top of your head. •
Position the seat belt so that it is mid-way
between your neck an d your shoulder. Fit
the strap tightly across your hips, not
across your stomach.
• Ensure that your driving position is
comfortable and enables you to maintain
full control of the vehicle.
WARNING
Do not adjust the seat while the
vehicle is moving. Doing so could
cause loss of vehicle control and
personal injury.
E93242
1
2
Page 43 of 391
43
Seats
1.Cushion length adjustment.
2. Bolster adjustment:
A. Bolster inflate.
B. Bolster deflate.
3. Lumbar support adjustment.
4. Seat back angle adjustment.
5. Head restraint height adjustment.
6. Height adjustment.
7. Fore and aft adjustment.
8. Cushion front tilt adjustment.
To adjust the seats, the Jaguar Smart Key must
be in the vehicle and the ignition turned on.Driving position memory
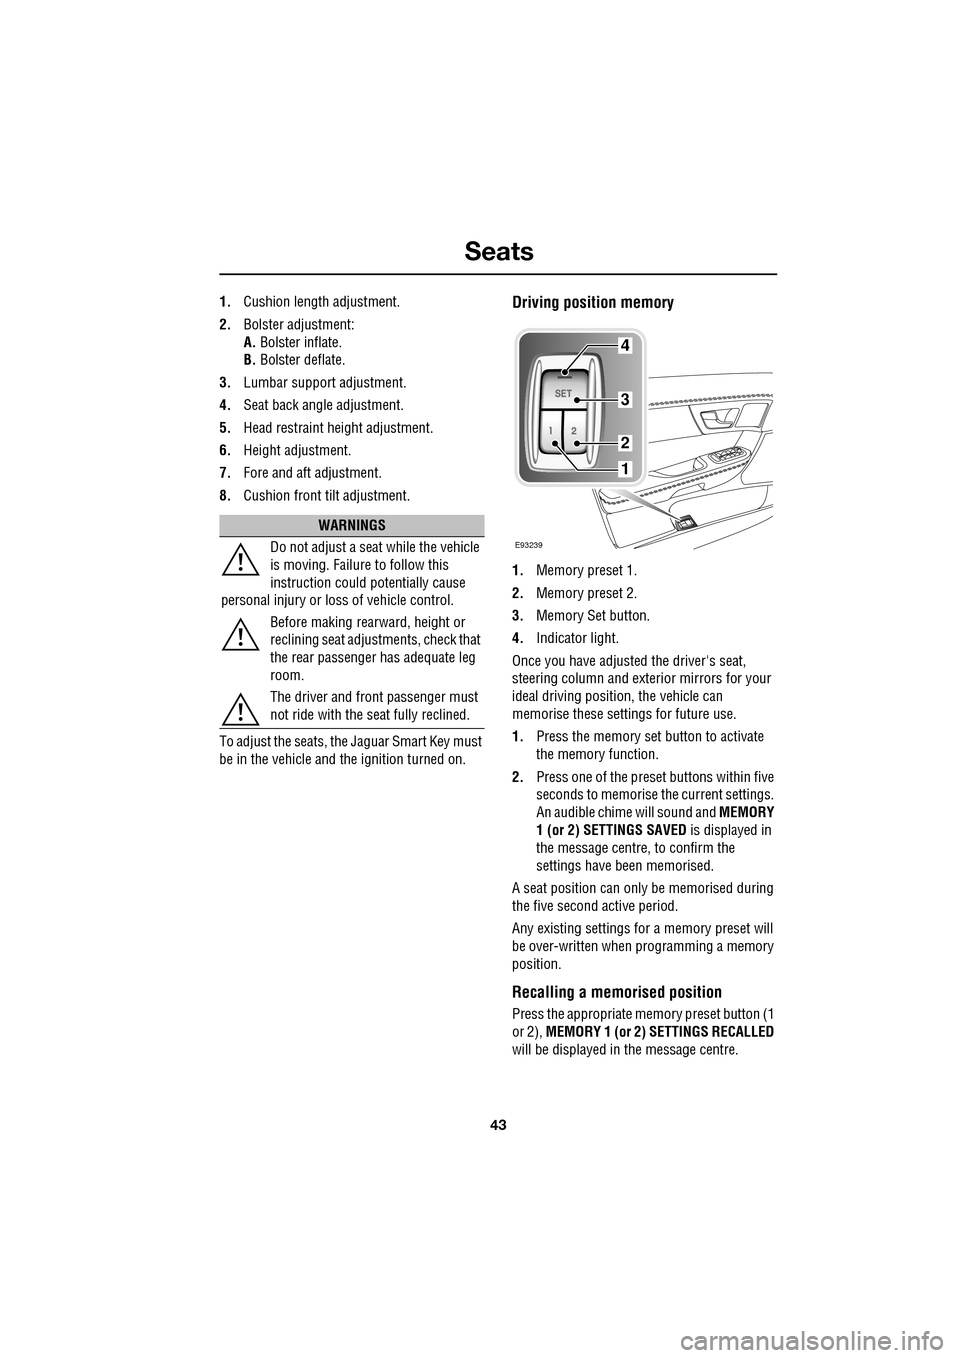
1. Memory preset 1.
2. Memory preset 2.
3. Memory Set button.
4. Indicator light.
Once you have adjusted the driver's seat,
steering column and exte rior mirrors for your
ideal driving position, the vehicle can
memorise these settings for future use.
1. Press the memory set button to activate
the memory function.
2. Press one of the preset buttons within five
seconds to memorise the current settings.
An audible chime will sound and MEMORY
1 (or 2) SETTINGS SAVED is displayed in
the message centre, to confirm the
settings have been memorised.
A seat position can onl y be memorised during
the five second active period.
Any existing settings for a memory preset will
be over-written when programming a memory
position.
Recalling a memorised position
Press the appropriate memory preset button (1
or 2), MEMORY 1 (or 2) SETTINGS RECALLED
will be displayed in the message centre.
WARNINGS
Do not adjust a seat while the vehicle
is moving. Failure to follow this
instruction could potentially cause
personal injury or loss of vehicle control.
Before making rearward, height or
reclining seat adjustments, check that
the rear passenger has adequate leg
room.
The driver and front passenger must
not ride with the seat fully reclined.
E93239
4
3
2
1
Page 75 of 391
75
Lighting
LIGHTING CONTROL
Note: If the ignition system is switched off and
the lamps are left on, the message centre will
display LIGHTS ON.
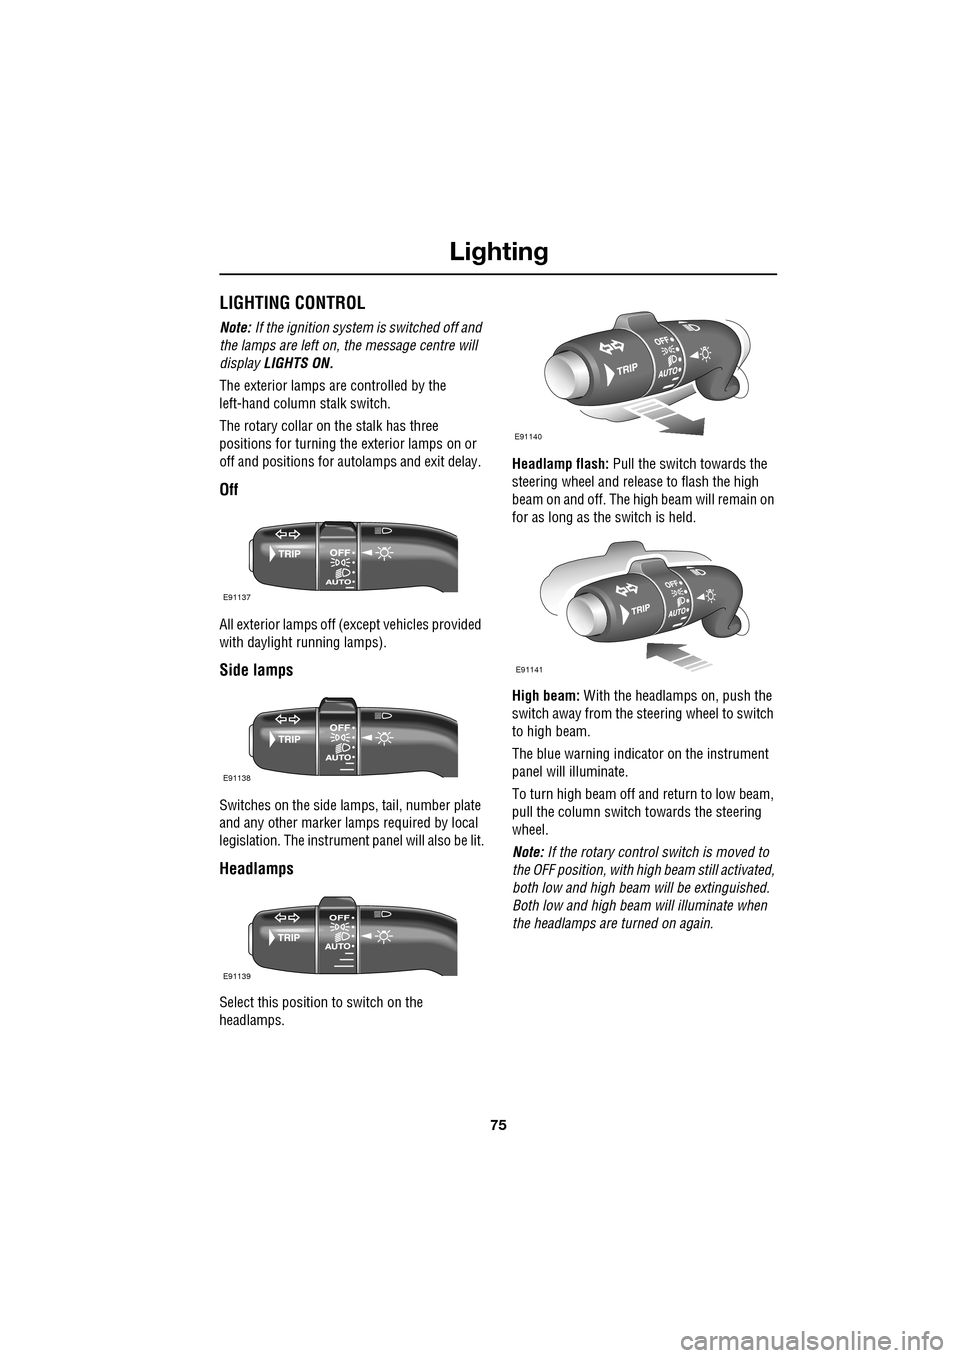
The exterior lamps are controlled by the
left-hand column stalk switch.
The rotary collar on the stalk has three
positions for turning the exterior lamps on or
off and positions for auto lamps and exit delay.
Off
All exterior lamps off (except vehicles provided
with daylight running lamps).
Side lamps
Switches on the side lamps, tail, number plate
and any other marker lamps required by local
legislation. The instrument panel will also be lit.
Headlamps
Select this positi on to switch on the
headlamps. Headlamp flash:
Pull the switch towards the
steering wheel and release to flash the high
beam on and off. The high beam will remain on
for as long as the switch is held.
High beam: With the headlamps on, push the
switch away from the steering wheel to switch
to high beam.
The blue warning indicator on the instrument
panel will illuminate.
To turn high beam off and return to low beam,
pull the column switch towards the steering
wheel.
Note: If the rotary control switch is moved to
the OFF position, with hi gh beam still activated,
both low and high beam will be extinguished.
Both low and high beam will illuminate when
the headlamps are turned on again.
E91137
E91138
E91139
E91140
E91141