display JAGUAR XJ 2004 X350 / 3.G Owners Manual
[x] Cancel search | Manufacturer: JAGUAR, Model Year: 2004, Model line: XJ, Model: JAGUAR XJ 2004 X350 / 3.GPages: 227, PDF Size: 4.22 MB
Page 19 of 227
2 - 4 Security and Locks
Vehicle Security
When the vehicle is unoccupied or
unattended, you are advised to do the
following:
• Apply the electronic parkbrake and move the gear selector to the
Park ‘P’ position.
• Do not leave children or pets in the vehicle unattended.
• Do not leave luggage or valuables on display.
• Remove all keys, including remote transmitters, from the vehicle prior to
locking the doors, even when the
vehicle is in your garage.
• Close all windows, hood, luggage compartment and glove
compartment, and lock all the doors.
• Park the vehicle where it can be seen. At night, park in a well-lit area.
• It is important to keep your keys in safe places at all times. Leaving them
in conspicuous places is an invitation
for a thief to steal them and,
consequently, your vehicle or
belongings. Keep them as secure as
you would your wallet or purse, both
at home and away.
Key Transmitter
The security system is controlled
remotely by a radio frequency, battery-
operated, integrated transmitter key.
The transmitter is ac tivated by pressing
one of the operating buttons.
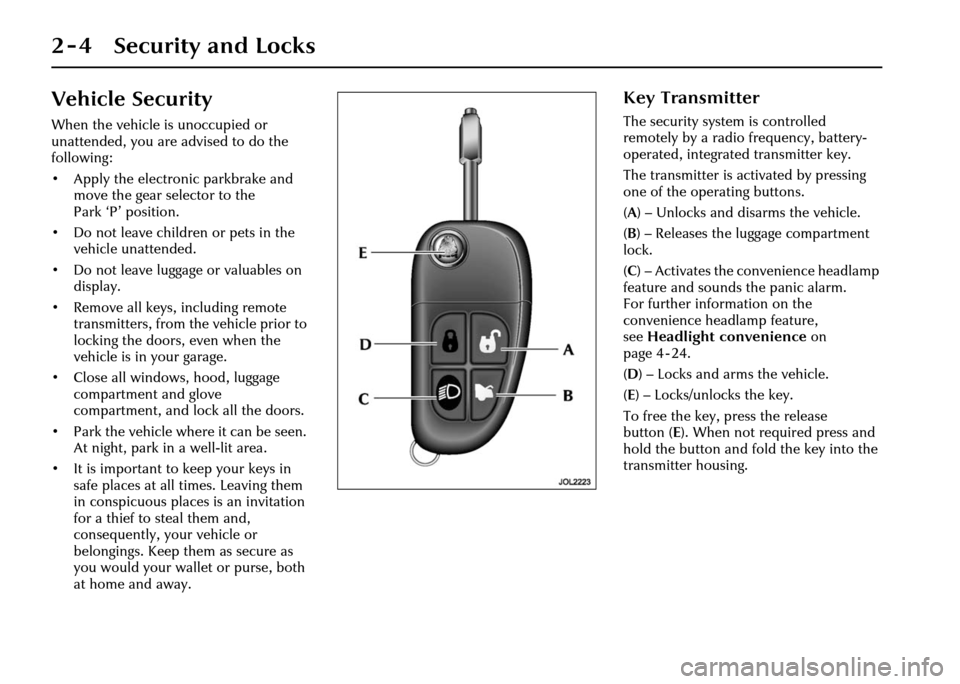
( A ) – Unlocks and disarms the vehicle.
( B ) – Releases the luggage compartment
lock.
( C ) – Activates the convenience headlamp
feature and sounds the panic alarm.
For further information on the
convenience headlamp feature,
see Headlight convenience on
page 4 - 24.
( D ) – Locks and arms the vehicle.
( E ) – Locks/unlocks the key.
To free the key, press the release
button ( E). When not required press and
hold the button and fold the key into the
transmitter housing.
Page 29 of 227
2 - 14 Security and Locks
Child Safety Locks
Child safety locks are fitted to the rear
doors.
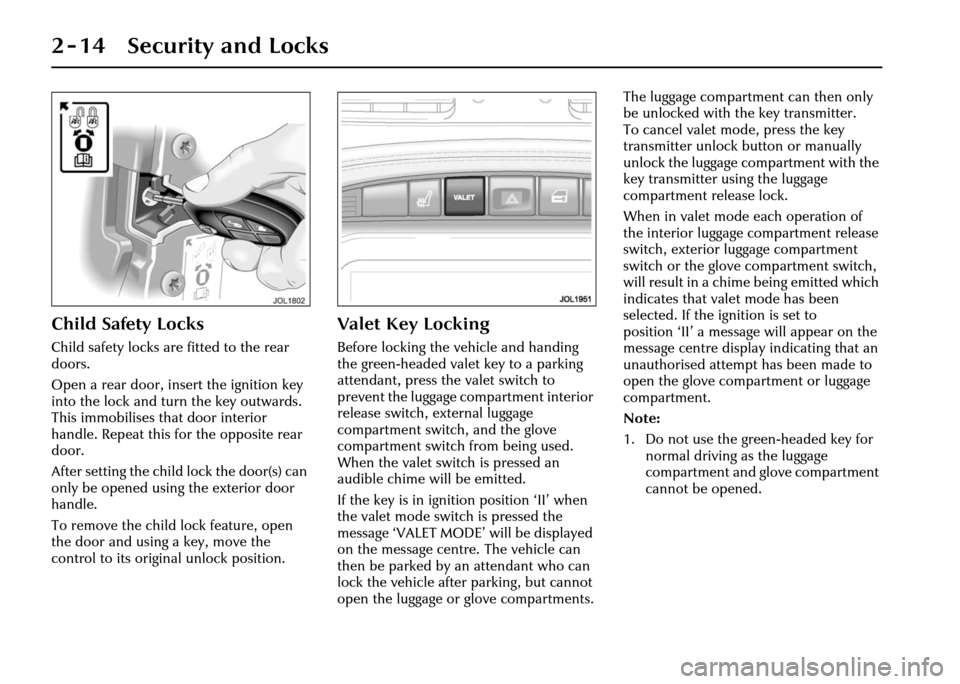
Open a rear door, insert the ignition key
into the lock and turn the key outwards.
This immobilises that door interior
handle. Repeat this for the opposite rear
door.
After setting the child lock the door(s) can
only be opened using the exterior door
handle.
To remove the child lock feature, open
the door and using a key, move the
control to its original unlock position.
Valet Key Locking
Before locking the vehicle and handing
the green-headed valet key to a parking
attendant, press the valet switch to
prevent the luggage co mpartment interior
release switch, external luggage
compartment switch, and the glove
compartment switch from being used.
When the valet switch is pressed an
audible chime will be emitted.
If the key is in ignition position ‘II’ when
the valet mode switch is pressed the
message ‘VALET MODE’ will be displayed
on the message centre. The vehicle can
then be parked by an attendant who can
lock the vehicle after parking, but cannot
open the luggage or glove compartments. The luggage compartment can then only
be unlocked with th
e key transmitter.
To cancel valet mode, press the key
transmitter unlock button or manually
unlock the luggage compartment with the
key transmitter us ing the luggage
compartment release lock.
When in valet mode each operation of
the interior luggage compartment release
switch, exterior lu ggage compartment
switch or the glove compartment switch,
will result in a chim e being emitted which
indicates that vale t mode has been
selected. If the ignition is set to
position ‘II’ a message will appear on the
message centre display indicating that an
unauthorised attempt has been made to
open the glove compartment or luggage
compartment.
Note:
1. Do not use the green-headed key for normal driving as the luggage
compartment and glove compartment
cannot be opened.
Page 43 of 227
3 - 4 Before Driving
Head Restraint Adjustment
!WARNING:
Adjust the head restraint so that it is
just behind your head and never
behind your neck.
All headrests may be manually tilted,
except those fitted with rear display
screens. Rear head restraint adjustment
The rear head restraints on vehicles
without electrically operated rear seats
may be manually adjusted.
To raise the outer rear seat headrests,
pull the headrest upwards. To lower,
press the lever in the escutcheon (shown
in the upper illustra
tion) and push the
headrest into the seat back.
Rear Seat Adjustment
Seats with individual backrests may be
adjusted electrically using the switches on
the sides of the seat cushions. Adjustment
can be made with or without the ignition
key inserted.
Seat adjustments are:
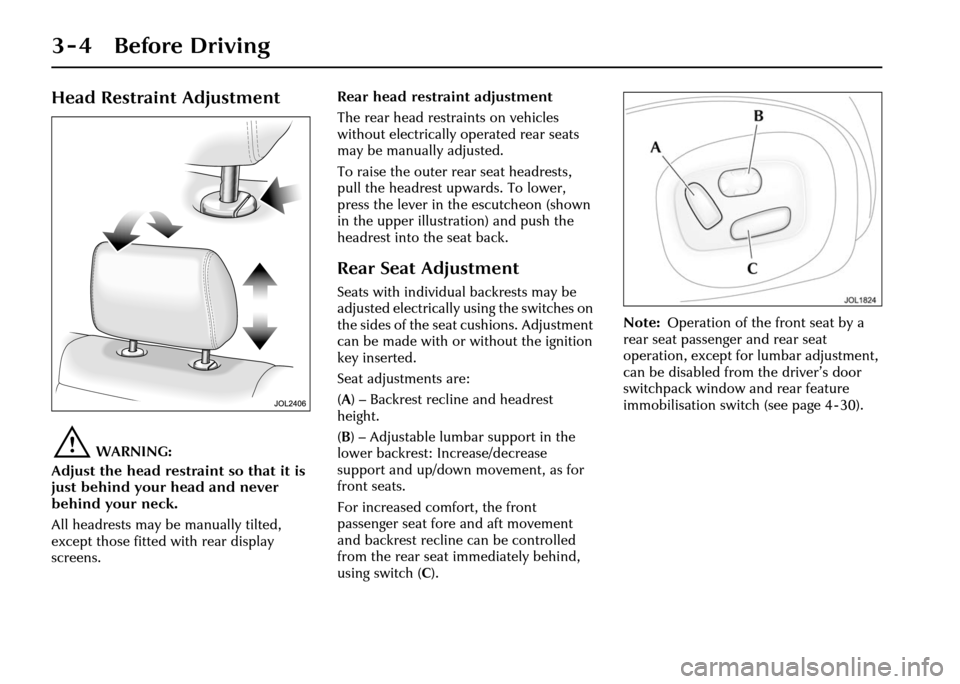
( A ) – Backrest recline and headrest
height.
( B ) – Adjustable lumbar support in the
lower backrest: Increase/decrease
support and up/down movement, as for
front seats.
For increased comfort, the front
passenger seat fore and aft movement
and backrest recline can be controlled
from the rear seat immediately behind,
using switch ( C). Note:
Operation of the front seat by a
rear seat passenger and rear seat
operation, except for lumbar adjustment,
can be disabled from the driver’s door
switchpack window and rear feature
immobilisation switch (see page 4 - 30).
Page 48 of 227
Before Driving 3 - 9
Interior Rear View Mirror
The interior rear view mirror is of the
electrochromic type but electrochromic
operation may be switched on or off at
the mirror.
When switched on, the mirror darkens
automatically to prevent glare from a
following vehicle’s headlamps, and clears
when light levels return to normal or
when reverse gear is selected.
Electrochromic door mirrors are operated
in conjunction with the interior mirror by
the same buttons an d function in the
same manner.
Note:
1. Should a mirror assembly become detached from the windscreen, it must
be refitted by a Jaguar Retailer.
2. Ensure that the windscreen in front of the mirror is kept clean. Where fitted,
the moisture sensor for wiper
operation is located to the front of the
mirror casing. Any dirt may affect the
operation of this sensor. Electronic road toll systems
If you have an E-ZPass or other electronic
road toll transponder, it is advisable to
mount the transmitter
on the windscreen
about 1 inch (2.5 cm) from the mirror
mount and headlining and to the side of
the mirror ensuring that it does not cover
the forward-facing light sensor. This also
keeps it away from any metal which may
affect it’s operation.
Do not move the tag more often than
need be as it can affect the calibration of
the compass.
Electrochromic operation
To switch on, press the MIRROR button.
An LED lights up to indicate that
automatic operation is selected.
Press again to switch off. Compass operation
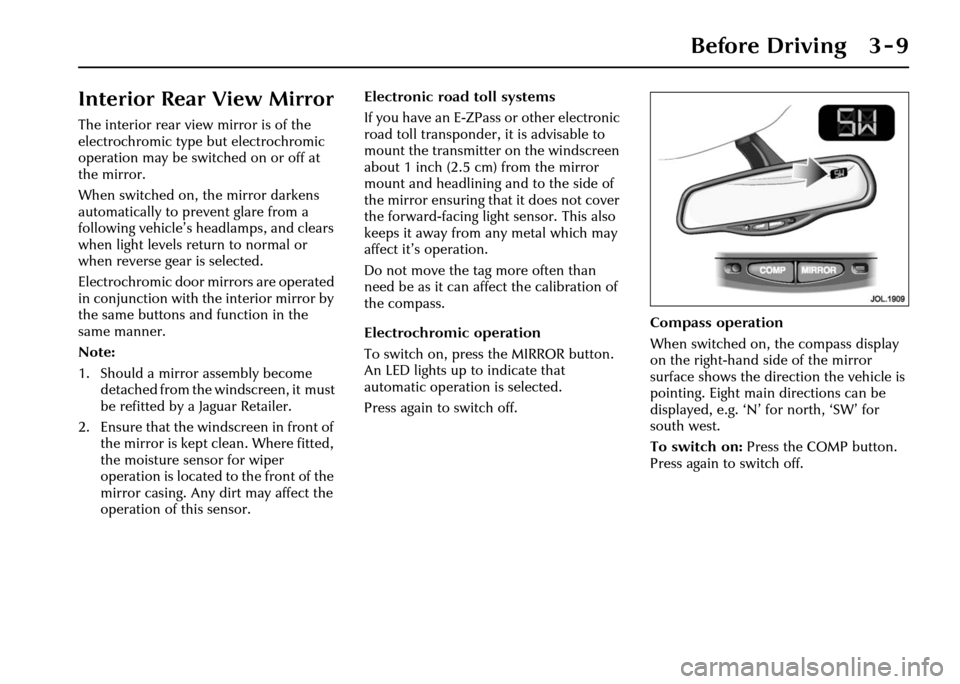
When switched on, the compass display
on the right-hand side of the mirror
surface shows the direction the vehicle is
pointing. Eight main directions can be
displayed, e.g. ‘N’ for north, ‘SW’ for
south west.
To switch on:
Press the COMP button.
Press again to switch off.
Page 49 of 227
3 - 10 Before Driving
‘C’ displayed: If ‘C’ is displayed in the compass window,
the compass must be calibrated. Drive the vehicle in a circle at
less than 5 mph (8 km/h) until the display shows a direction.
The compass will be calibrated once it has tracked a complete
circle.
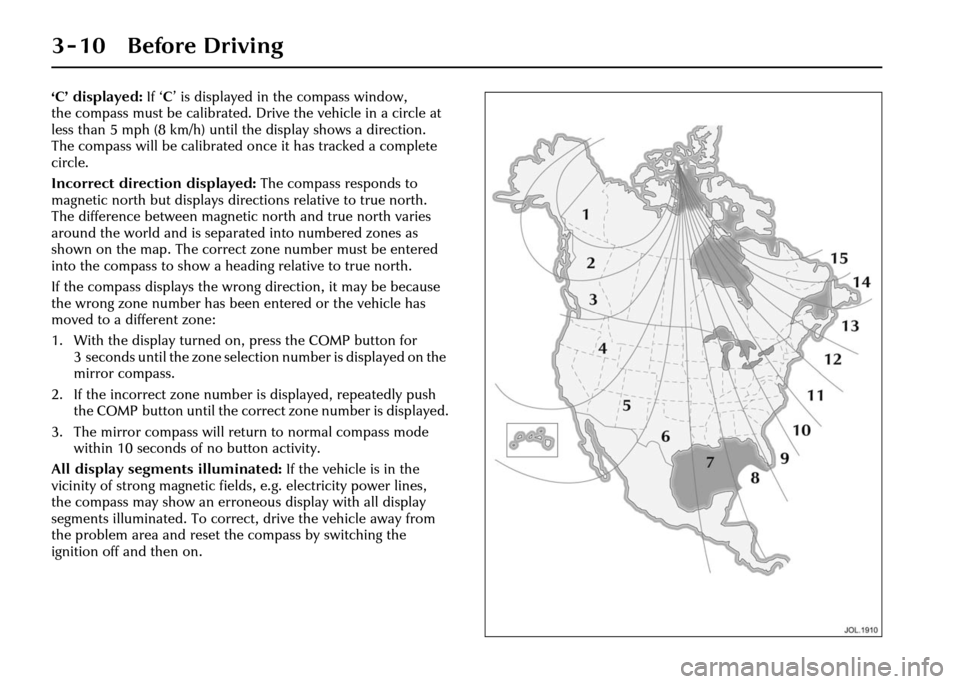
Incorrect direction displayed: The compass responds to
magnetic north but displays direct ions relative to true north.
The difference between magnetic north and true north varies
around the world and is separated into numbered zones as
shown on the map. The correct zone number must be entered
into the compass to show a heading relative to true north.
If the compass displays the wrong direction, it may be because
the wrong zone number has been entered or the vehicle has
moved to a different zone:
1. With the display turned on , press the COMP button for
3 seconds until the zone selection number is displayed on the
mirror compass.
2. If the incorrect zone number is displayed, repeatedly push the COMP button until the correct zone number is displayed.
3. The mirror compass will retu rn to normal compass mode
within 10 seconds of no button activity.
All display segments illuminated: If the vehicle is in the
vicinity of strong magnetic fields, e.g. electricity power lines,
the compass may show an erroneous display with all display
segments illuminated. To correct, drive the vehicle away from
the problem area and reset th e compass by switching the
ignition off and then on.
Page 62 of 227
Before Driving 3 - 23
Child Safety
JAGUARCARSLTD. STRONGLY RECOMMEND
THAT AT ALL TIMES CHILDREN SHOULD BE
CARRIED IN THE REAR SEATS.
!WARNING:
Children must be restrained by a
child safety restraint that is suitable
for their weight and size.
In many countries legislation governs
how and where children should be
carried when travelling in a vehicle.
It is the responsibility of the driver to
comply with all regulations in force in the
country where the vehicle is being used. Note:
It is important to read and
understand all the information contained
in this handbook rela ting to child safety
before carrying a child in your vehicle.
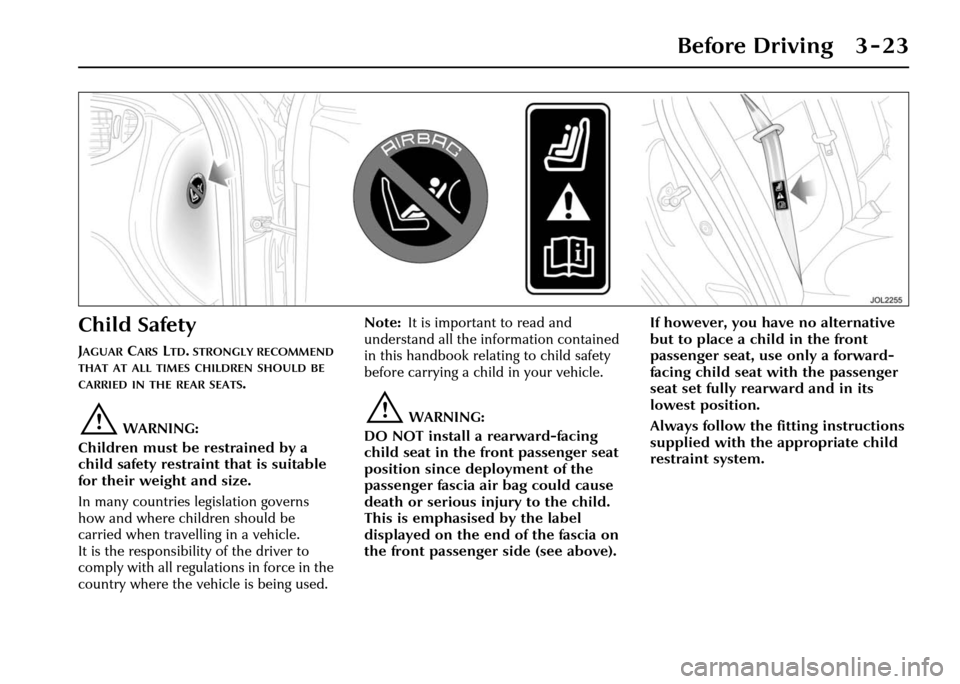
!WARNING:
DO NOT install a rearward-facing
child seat in the fr ont passenger seat
position since deployment of the
passenger fascia air bag could cause
death or serious injury to the child.
This is emphasised by the label
displayed on the end of the fascia on
the front passenger side (see above). If however, you hav
e no alternative
but to place a child in the front
passenger seat, use only a forward-
facing child seat with the passenger
seat set fully rearward and in its
lowest position.
Always follow the fitting instructions
supplied with the appropriate child
restraint system.
Page 74 of 227
On the Road 4 - 3
4 On the Road
Instruments
None of the instruments will show
correct indications until the ignition is
switched ON (position ‘II’).
If the exterior light switch is ON and the
ignition is ON, the display brightness can
be varied using the dimmer switch
(page 4 - 25).
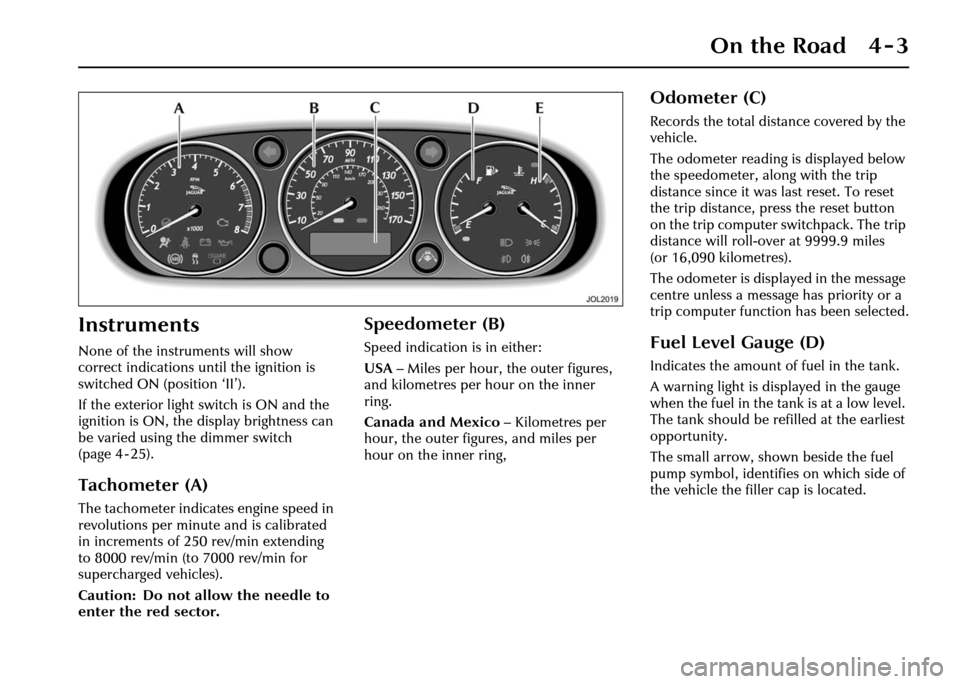
Tachometer (A)
The tachometer indicates engine speed in
revolutions per minute and is calibrated
in increments of 250 rev/min extending
to 8000 rev/min (to 7000 rev/min for
supercharged vehicles).
Caution: Do not allow the needle to
enter the red sector.
Speedometer (B)
Speed indication is in either:
USA– Miles per hour, the outer figures,
and kilometres per hour on the inner
ring.
Canada and Mexico – Kilometres per
hour, the outer figures, and miles per
hour on the inner ring,
Odometer (C)
Records the total distance covered by the
vehicle.
The odometer reading is displayed below
the speedometer, al ong with the trip
distance since it was last reset. To reset
the trip distance, press the reset button
on the trip computer switchpack. The trip
distance will roll-over at 9999.9 miles
(or 16,090 kilometres).
The odometer is displayed in the message
centre unless a message has priority or a
trip computer function has been selected.
Fuel Level Gauge (D)
Indicates the amount of fuel in the tank.
A warning light is displayed in the gauge
when the fuel in the tank is at a low level.
The tank should be refilled at the earliest
opportunity.
The small arrow, shown beside the fuel
pump symbol, identifies on which side of
the vehicle the filler cap is located.
Page 76 of 227
On the Road 4 - 5
Warning Lights
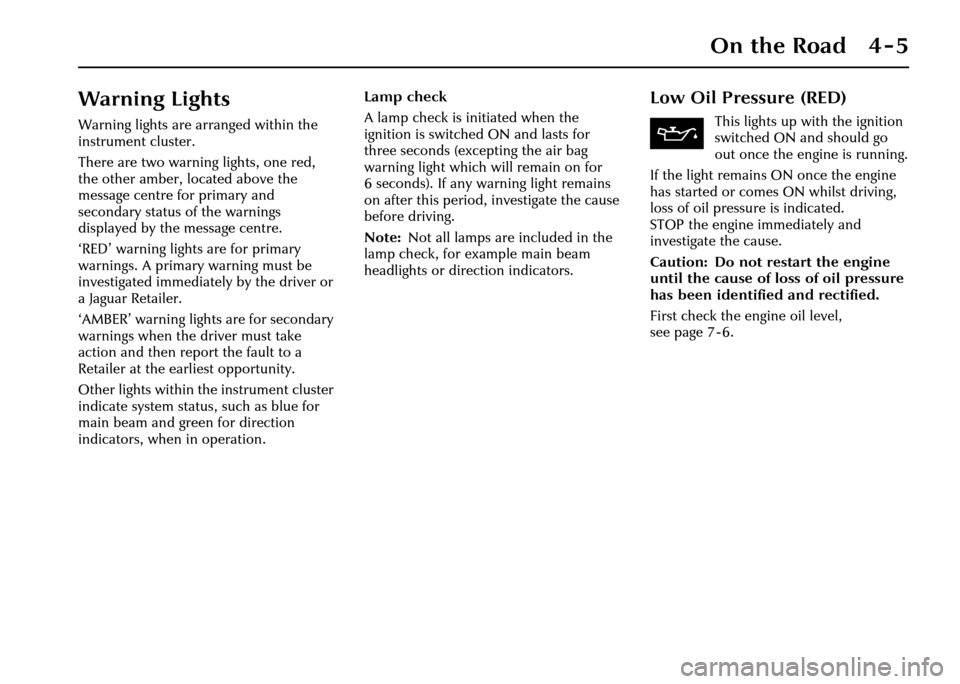
Warning lights are arranged within the
instrument cluster.
There are two warning lights, one red,
the other amber, located above the
message centre for primary and
secondary status of the warnings
displayed by the message centre.
‘RED’ warning lights are for primary
warnings. A primary warning must be
investigated immediately by the driver or
a Jaguar Retailer.
‘AMBER’ warning lights are for secondary
warnings when the driver must take
action and then report the fault to a
Retailer at the earliest opportunity.
Other lights within the instrument cluster
indicate system status, such as blue for
main beam and green for direction
indicators, when in operation. Lamp check
A lamp check is initiated when the
ignition is switched ON and lasts for
three seconds (excepting the air bag
warning light which will remain on for
6seconds). Ifany wa
rning light remains
on after this period, investigate the cause
before driving.
Note: Not all lamps are included in the
lamp check, for example main beam
headlights or direction indicators.
Low Oil Pressure (RED)
This lights up with the ignition
switched ON and should go
out once the engine is running.
If the light remains ON once the engine
has started or comes ON whilst driving,
loss of oil pressure is indicated.
STOP the engine immediately and
investigate the cause.
Caution: Do not restart the engine
until the cause of loss of oil pressure
has been identified and rectified.
First check the engine oil level,
seepage7-6.
Page 78 of 227
On the Road 4 - 7
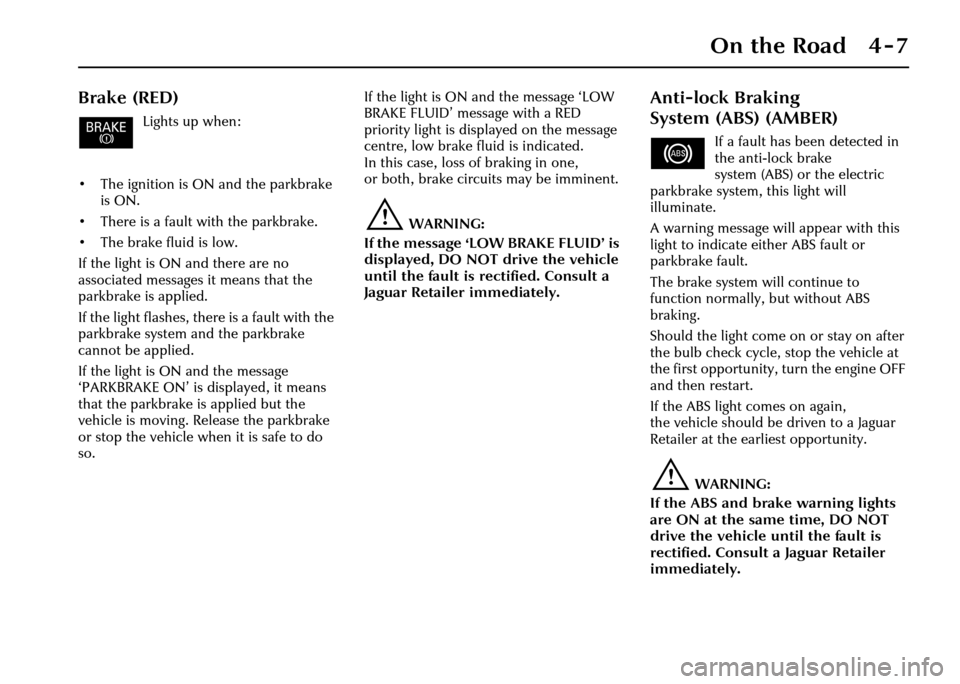
Brake (RED)
Lights up when:
• The ignition is ON and the parkbrake is ON.
• There is a fault with the parkbrake.
• The brake fluid is low.
If the light is ON and there are no
associated messages it means that the
parkbrake is applied.
If the light flashes, th ere is a fault with the
parkbrake system and the parkbrake
cannot be applied.
If the light is ON and the message
‘PARKBRAKE ON’ is displayed, it means
that the parkbrake is applied but the
vehicle is moving. Release the parkbrake
or stop the vehicle when it is safe to do
so. If the light is ON and the message ‘LOW
BRAKE FLUID’ message with a RED
priority light is displayed on the message
centre, low brake fluid is indicated.
In this case, loss of braking in one,
or both, brake circuits may be imminent.
!WARNING:
If the message ‘LOW BRAKE FLUID’ is
displayed, DO NOT drive the vehicle
until the fault is rectified. Consult a
Jaguar Retailer immediately.
Anti-lock Braking
System (ABS) (AMBER)
If a fault has been detected in
the anti-lock brake
system (ABS) or the electric
parkbrake system, this light will
illuminate.
A warning message will appear with this
light to indicate either ABS fault or
parkbrake fault.
The brake system will continue to
function normally, but without ABS
braking.
Should the light come on or stay on after
the bulb check cycle, stop the vehicle at
the first opportunity, turn the engine OFF
and then restart.
If the ABS light comes on again,
the vehicle should be driven to a Jaguar
Retailer at the earliest opportunity.
!WARNING:
If the ABS and brake warning lights
are ON at the same time, DO NOT
drive the vehicle until the fault is
rectified. Consult a Jaguar Retailer
immediately.
Page 79 of 227
4-8 On the Road
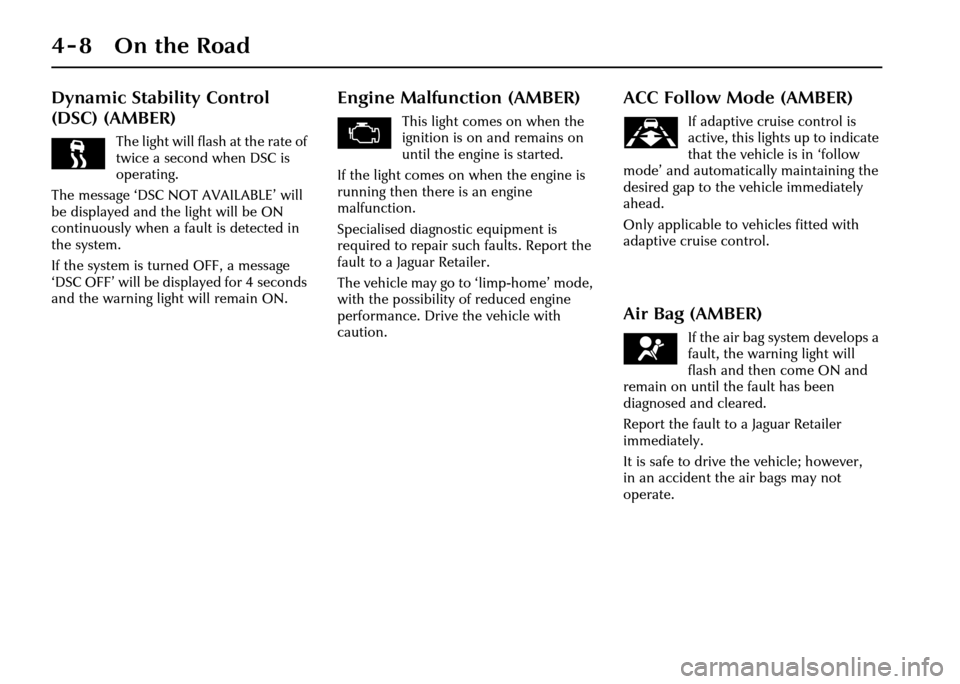
Dynamic Stability Control
(DSC) (AMBER)
The light will flash at the rate of
twice a second when DSC is
operating.
The message ‘DSC NOT AVAILABLE’ will
be displayed and the light will be ON
continuously when a fault is detected in
the system.
If the system is turned OFF, a message
‘DSC OFF’ will be displayed for 4 seconds
and the warning light will remain ON.
Engine Malfunction (AMBER)
This light comes on when the
ignition is on and remains on
until the engine is started.
If the light comes on when the engine is
running then there is an engine
malfunction.
Specialised diagnostic equipment is
required to repair such faults. Report the
fault to a Jaguar Retailer.
The vehicle may go to ‘limp-home’ mode,
with the possibility of reduced engine
performance. Drive the vehicle with
caution.
ACC Follow Mode (AMBER)
If adaptive cruise control is
active, this lights up to indicate
that the vehicle is in ‘follow
mode’ and automatically maintaining the
desired gap to the vehicle immediately
ahead.
Only applicable to vehicles fitted with
adaptive cruise control.
Air Bag (AMBER)
If the air bag system develops a
fault, the warning light will
flash and then come ON and
remain on until the fault has been
diagnosed and cleared.
Report the fault to a Jaguar Retailer
immediately.
It is safe to drive the vehicle; however,
in an accident the air bags may not
operate.