display JAGUAR XJ 2004 X350 / 3.G Owner's Guide
[x] Cancel search | Manufacturer: JAGUAR, Model Year: 2004, Model line: XJ, Model: JAGUAR XJ 2004 X350 / 3.GPages: 227, PDF Size: 4.22 MB
Page 146 of 227
Climate Control 5 - 7
To Switch the System On
The climate control system operates in
position ‘II’ (run) of the ignition switch.
With the ignition key turned to the run
position, the system will switch on in the
operating mode last set.
For normal usage select AUTO mode.
AUTO Mode
Automatic operation provides a
controlled environment over a
temperature range of 61°F to 89°F (17°C
to 31°C) and should be regarded as the
normal operating mode.To select automatic climate
control press the AUTO
button; the word AUTO
appears on the LCD screen to confirm
selection.
Select the required temperature.
Front and rear screen heating and timed
air recirculation may be selected in AUTO
mode. Selecting any other control will
cancel AUTO operation.
Automatic operation cannot be
deselected using the AUTO button.
To exit AUTO mode, select another mode
or press the blower control knob to
switch the system off.
Temperature Selection
Separate controls allow
the driver and front
passenger zone
temperatures to be independently
adjusted. Press the red buttons to
increase temperature and the blue
buttons to decrease temperature.
Both driver and front passenger selected
temperatures are always displayed.
Pressing the driver’s buttons to select the
maximum or minimum temperature
settings causes the display to change
to HI or LO respectively and cancel
AUTO mode.
To quickly jump from HI or LO to a
convenient midrange temperature of 73°F
(23°C), press and hold AUTO for a few
seconds.
Dual Temperature Zones
With the DUAL button LED
illuminated, the system provides
separate temperature control of
the driver and front passenger zones.
Press DUAL to deselect dual temperature
control (LED off); the front passenger
temperature will change to that of the
driver side. Using the driver side
temperature control buttons will now
change both zone temperatures together.
To select dual temperature control, press
either the DUAL button or one of the
front passenger side red/blue
temperature control buttons. The DUAL
LED is illuminated.
External Temperature
The external (EXT) temperature is
displayed at the top of the screen.
Fahrenheit/Celsius Selection
Press the button to change the
scale between degrees
Fahrenheit (°F) and degrees
Celsius (°C) for the displayed
internal and external (EXT)
temperatures.
Page 147 of 227
5 - 8 Climate Control
Windscreen Defrost/Demist
Frost and heavy mistingTo remove frost or heavy
misting from the windscreen,
press the DEF button.
• The blower switches on automatically at a high speed but the speed can be
increased or decrea sed manually if
required.
• Air conditioning switches on automatically and cannot be
deselected.
• Recirculation is ca ncelled and cannot
be selected.
• The front screen heater and the rear screen heater/door mirror heaters
switch on automatically, provided the
engine is running.
To deselect defrost mode, press AUTO
(recommended operating mode).
Light misting To prevent or remove light
windscreen misting, select
manual air distribution to
windscreen and feet
(see page 5 - 9).
Heated Screens and Door
Mirrors
The front ( F) and
rear ( R) screen heaters
may be switched on and
off in any mode, including system off,
but only operate when the engine is
running. The door mirror heaters are also
controlled by the rear screen heater
button.
The front screen heater (if fitted) switches
off automatically after 6½ minutes.
The rear screen and door mirror heaters
switch off automatica lly after 21 minutes.
The windscreen heaters may be manually
deselected during the timed period using
the push buttons.
In cold ambient conditions, at the start of
a journey, the front and rear screen
heaters may switch on automatically for
the timed period.
Where a front screen he ater is not fitted,
the windscreen has a wiper park zone
heater which operates automatically with
no manual control.
Note: The top three lines of the rear
screen pattern are a concealed antenna
system and do not defrost the rear screen.
Air Conditioning
Press to switch the air
conditioning on or off.
The air conditioning system is
controlled automatically in AUTO mode.
Deselecting A/C cancels AUTO mode.
The air conditioning system is also
switched on automatically in defrost
mode (DEF) but cann ot be deselected.
Blower Speed
Set the blower speed as
required with the rotary
control knob. Blower speed is
shown as a series of bars on the
LCD screen.
When operating in AUTO mode, blower
speed is controlled automatically (but not
displayed) and any adjustment of the
knob will cancel AUTO mode.
Note: In AUTO mode, the blower only
operates at low speed, if heating is
required, until the engine is warm.
Page 148 of 227
Climate Control 5 - 9
Manual Air Distribution
Air distribution is automatically
controlled in AUTO and defrost modes.Press MODE to select manual air
distribution.
Four air distribution modes are
available and are selected in succession
by pressing the MODE button. A symbol
is displayed for the selected mode.
To Switch the System Off
Press in the blower rotary
control knob to switch the
climate control system off.
If the blower control knob is
pressed again, the system will switch on
in the previous mode set.
4-zone climate control system
If 4-zone climate control is fitted,
switching off front climate control (above)
will also cause the rear climate control
system to be switched off. Switching the
front system on again will not switch the
rear system on.
Ram Air
With the climate control system switched
off, air recirculation is automatically
selected (intake flap closed). To select
fresh air with the system off, press the
MODE button to select one of the air
distribution modes.
With the blower switched off, the fresh
airflow results from the forward motion
of the vehicle (ram air effect).
Smog sensing
Where fitted, the smog sensor detects
road traffic pollutants and automatically
selects air recirculation when the level of
pollution outside the vehicle reaches a
certain level. The level of pollution at
which the smog sensor will respond can
be adjusted.
Once the level of pollutants decreases,
air recirculation will switch off (subject to
the normal operation of the automatic
climate control system).
To adjust smog sensitivity: Press the
air recirculation and AUTO buttons
simultaneously. The display will show a
number between 0 and 5: 0 indicates
that the smog sensor is switched off, and
5 shows that the sensor is set to its most
sensitive setting. Use the driver’s
temperature control bu ttons to increase
or decrease the smog sensitivity.
Caution: Don’t set the smog sensor to
a needlessly high level in cold and
damp conditions: This could result in
interior condensation.
Airflow distributed to the
windscreen and feet; select to
prevent or remove light misting
and when heating the interior.
Airflow directed to foot level;
select to heat the interior.
Airflow distributed to the face
and feet.
Airflow directed at face level
only; select to cool the interior.
Page 149 of 227
5 - 10 Climate Control
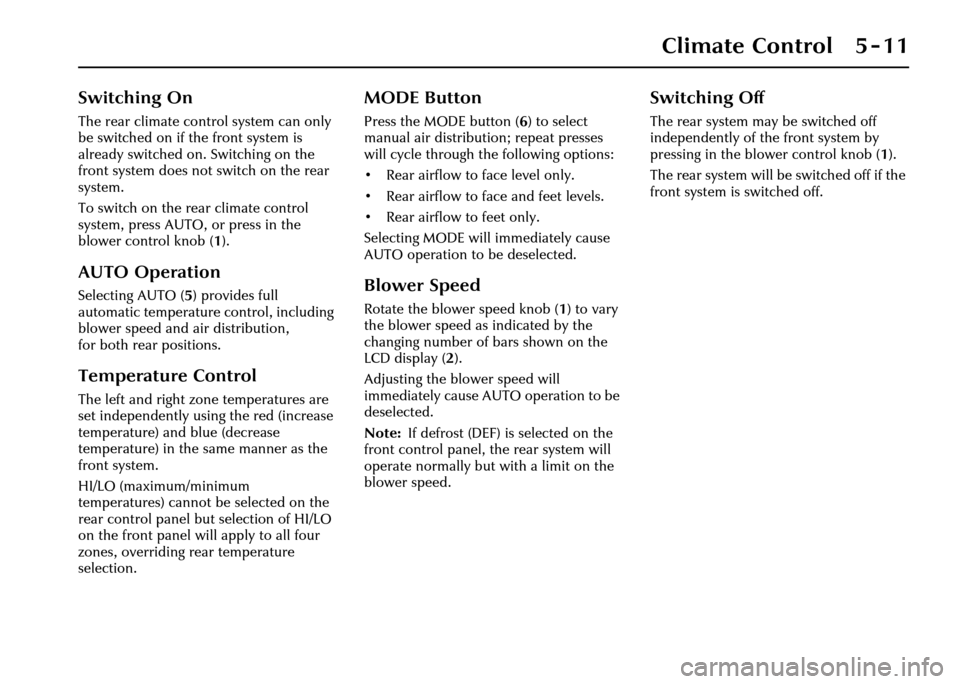
Rear Controls (4-zone)
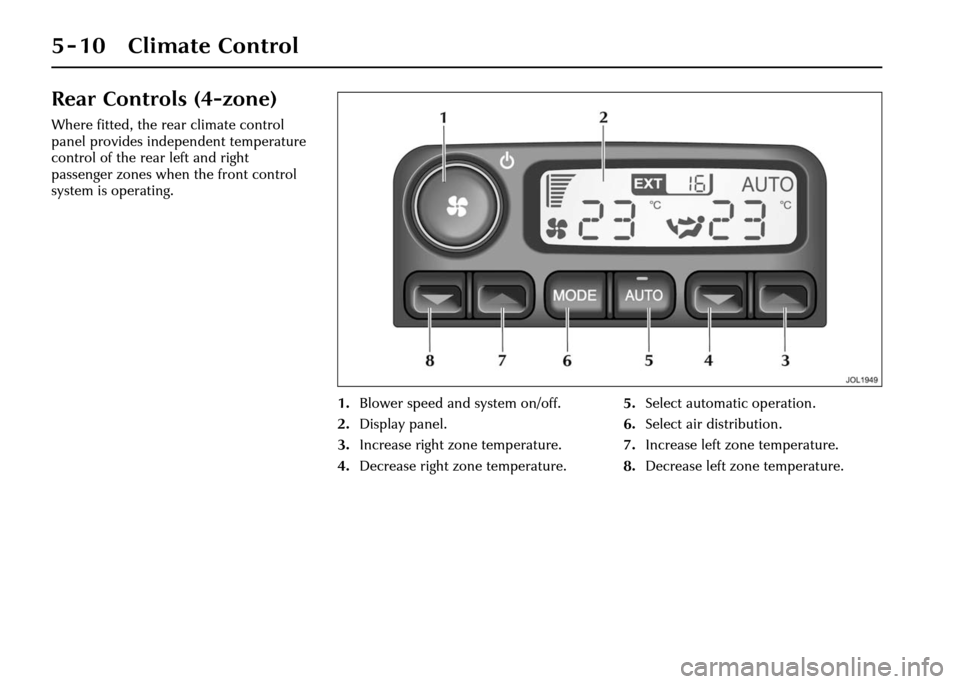
Where fitted, the rear climate control
panel provides independent temperature
control of the rear left and right
passenger zones when the front control
system is operating.1.Blower speed and system on/off.
2. Display panel.
3. Increase right zone temperature.
4. Decrease right zone temperature. 5.
Select automatic operation.
6. Select air distribution.
7. Increase left zone temperature.
8. Decrease left zone temperature.
Page 150 of 227
Climate Control 5 - 11
Switching On
The rear climate control system can only
be switched on if the front system is
already switched on. Switching on the
front system does not switch on the rear
system.
To switch on the rear climate control
system, press AUTO, or press in the
blower control knob (1).
AUTO Operation
Selecting AUTO ( 5) provides full
automatic temperature control, including
blower speed and air distribution,
for both rear positions.
Temperature Control
The left and right zone temperatures are
set independently using the red (increase
temperature) and blue (decrease
temperature) in the same manner as the
front system.
HI/LO (maximum/minimum
temperatures) cannot be selected on the
rear control panel but selection of HI/LO
on the front panel will apply to all four
zones, overriding rear temperature
selection.
MODE Button
Press the MODE button (6 ) to select
manual air distribution; repeat presses
will cycle through the following options:
• Rear airflow to face level only.
• Rear airflow to face and feet levels.
• Rear airflow to feet only.
Selecting MODE will immediately cause
AUTO operation to be deselected.
Blower Speed
Rotate the blower speed knob ( 1) to vary
the blower speed as indicated by the
changing number of bars shown on the
LCD display (2 ).
Adjusting the blower speed will
immediately cause AUTO operation to be
deselected.
Note: If defrost (DEF) is selected on the
front control panel, the rear system will
operate normally but with a limit on the
blower speed.
Switching Off
The rear system may be switched off
independently of th e front system by
pressing in the blower control knob ( 1).
The rear system will be switched off if the
front system is switched off.
Page 157 of 227
6 - 6 Roadside Emergency
Wheel Changing and
Jacking
Be prepared for a flat tyre. Know where
equipment is stowed and read the wheel
changing and jacking instructions
carefully. Keep the jack screw threads
clean and greased to ensure it is always
ready for an emergency.
Park off the road, clear of all traffic and
on as level, solid ground as possible.
Switch on hazard warning lights and,
where legally required, display the
warning triangle.
!WARNING:
It can be dangerous to change a
wheel when the vehicle is on a slope
or soft, uneven ground.
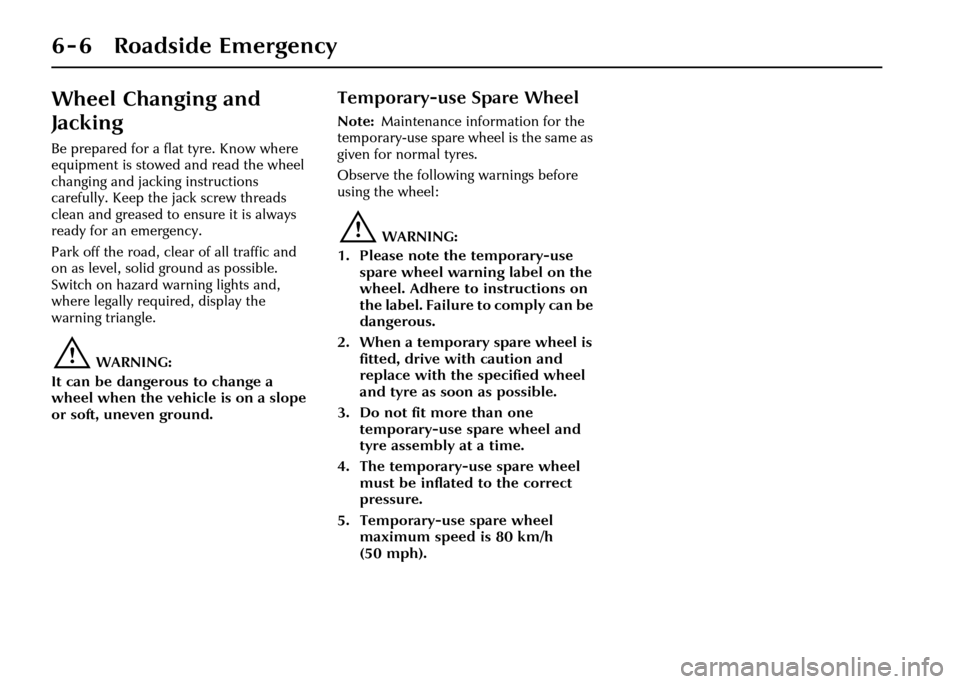
Temporary-use Spare Wheel
Note: Maintenance information for the
temporary-use spare wheel is the same as
given for normal tyres.
Observe the following warnings before
using the wheel:
!WARNING:
1. Please note th e temporary-use
spare wheel warning label on the
wheel. Adhere to instructions on
the label. Failure to comply can be
dangerous.
2. When a temporary spare wheel is fitted, drive with caution and
replace with the specified wheel
and tyre as soon as possible.
3. Do not fit more than one temporary-use spare wheel and
tyre assembly at a time.
4. The temporary-use spare wheel must be inflated to the correct
pressure.
5. Temporary-use spare wheel maximum speed is 80 km/h
(50 mph).
Page 163 of 227
6 - 12 Roadside Emergency
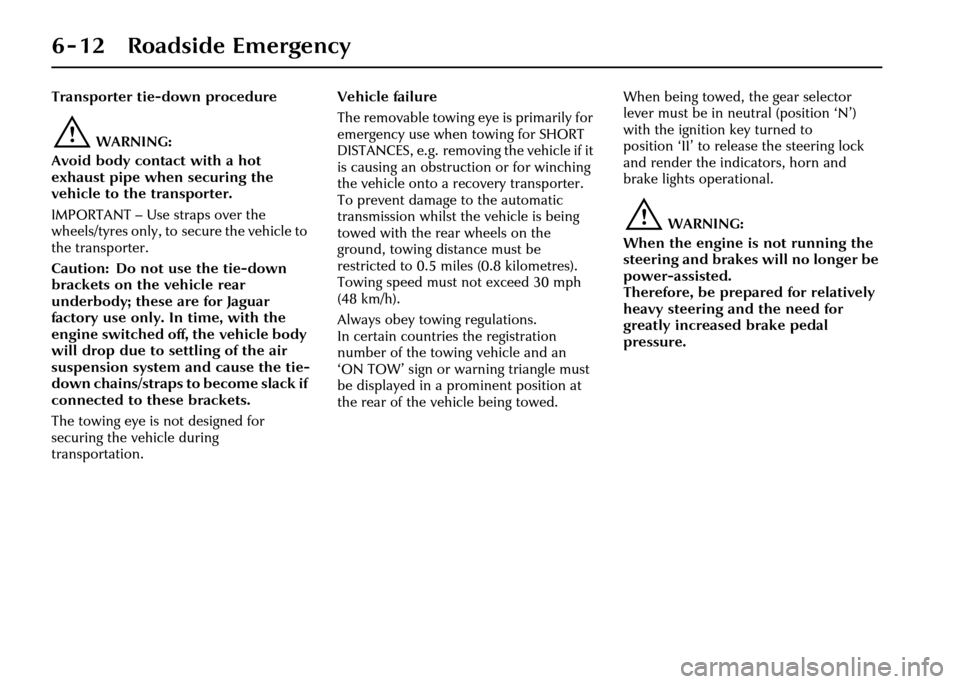
Transporter tie-down procedure
!WARNING:
Avoid body contact with a hot
exhaust pipe when securing the
vehicle to the transporter.
IMPORTANT – Use straps over the
wheels/tyres only, to secure the vehicle to
the transporter.
Caution: Do not use the tie-down
brackets on the vehicle rear
underbody; these are for Jaguar
factory use only. In time, with the
engine switched off, the vehicle body
will drop due to settling of the air
suspension system and cause the tie-
down chains/straps to become slack if
connected to these brackets.
The towing eye is not designed for
securing the vehicle during
transportation. Vehicle failure
The removable towing eye is primarily for
emergency use when towing for SHORT
DISTANCES, e.g. removing the vehicle if it
is causing an obstruct
ion or for winching
the vehicle onto a re covery transporter.
To prevent damage to the automatic
transmission whilst the vehicle is being
towed with the rear wheels on the
ground, towing distance must be
restricted to 0.5 miles (0.8 kilometres).
Towing speed must not exceed 30 mph
(48 km/h).
Always obey towing regulations.
In certain countries the registration
number of the towing vehicle and an
‘ON TOW’ sign or warning triangle must
be displayed in a prominent position at
the rear of the vehicle being towed. When being towed, the gear selector
lever must be in neutral (position ‘N’)
with the ignition key turned to
position ‘II’ to release the steering lock
and render the indicators, horn and
brake lights operational.
!WARNING:
When the engine is not running the
steering and brakes will no longer be
power-assisted.
Therefore, be prepared for relatively
heavy steering and the need for
greatly increased brake pedal
pressure.
Page 199 of 227
7-16 Maintenance
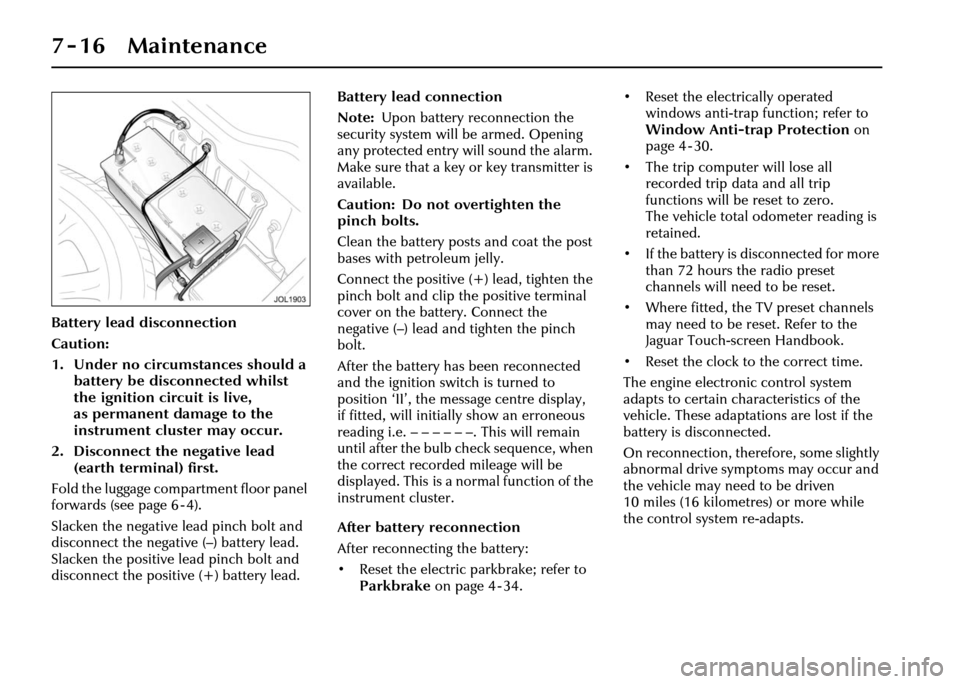
Battery lead disconnection
Caution:
1. Under no circumstances should a battery be discon nected whilst
the ignition circuit is live,
as permanent damage to the
instrument cluster may occur.
2. Disconnect the negative lead (earth terminal) first.
Fold the luggage compartment floor panel
forwards (see page 6 - 4).
Slacken the negative lead pinch bolt and
disconnect the negative (–) battery lead.
Slacken the positive lead pinch bolt and
disconnect the positive (+) battery lead. Battery lead connection
Note:
Upon battery reconnection the
security system will be armed. Opening
any protected entry will sound the alarm.
Make sure that a key or key transmitter is
available.
Caution: Do not overtighten the
pinch bolts.
Clean the battery posts and coat the post
bases with petroleum jelly.
Connect the positive (+) lead, tighten the
pinch bolt and clip the positive terminal
cover on the battery. Connect the
negative (–) lead and tighten the pinch
bolt.
After the battery ha s been reconnected
and the ignition swit ch is turned to
position ‘II’, the message centre display,
if fitted, will initially show an erroneous
reading i.e.––––––. Thiswill remain
until after the bulb check sequence, when
the correct recorded mileage will be
displayed. This is a normal function of the
instrument cluster.
After battery reconnection
After reconnecting the battery:
• Reset the electric parkbrake; refer to Parkbrake on page 4 - 34. • Reset the electrically operated
windows anti-trap function; refer to
Window Anti-trap Protection on
page 4 - 30.
• The trip computer will lose all recorded trip data and all trip
functions will be reset to zero.
The vehicle total odometer reading is
retained.
• If the battery is disconnected for more than 72 hours the radio preset
channels will need to be reset.
• Where fitted, the TV preset channels may need to be reset. Refer to the
Jaguar Touch-screen Handbook.
• Reset the clock to the correct time.
The engine electronic control system
adapts to certain characteristics of the
vehicle. These adaptations are lost if the
battery is disconnected.
On reconnection, therefore, some slightly
abnormal drive symptoms may occur and
the vehicle may need to be driven
10 miles (16 kilometres) or more while
the control system re-adapts.