ECU JAGUAR XJ6 1994 2.G Workshop Manual
[x] Cancel search | Manufacturer: JAGUAR, Model Year: 1994, Model line: XJ6, Model: JAGUAR XJ6 1994 2.GPages: 521, PDF Size: 17.35 MB
Page 515 of 521

1
Security System - RESTRICTED /SSUE
AS. 9.14 Trunk lid release switches
Check harness wiring continuity from multi-plug 12-way connector pin 2 to external trunk
release switch connector pin 10. Ensure secure ground connection from switch pin
5.
Check harness wiring continuity from multi-plug 22-way connector pin 8 to internal trunk
release switch connector pin 1. Ensure secure ground connection from switch pin
2.
Test continuity across switch pins, operate switch and ensure short circuit occurs. 3.
X300 VSM Issue 1 August 1994 38
*
J88- 1919
Fig. 1 Trunk Lid Release Switches
X300 VSM
Page 517 of 521

Security System - RESTRICTED ISSUE 84
-
AS. 10 INCLINATION SENSOR - RENEW
SRO 86.52.21
. Remove the trunk floor carpet.
. Remove the trunk front liner.
. Remove the trunk seal retainer. See SRO 76.19.44, Section
. Remove the trunk side liner.
. Disconnect the inclination sensor multiplug. (1 Fig. 1).
. Undo and remove the sensor mounting bracket securing
nuts
(2 Fig. 1). Remove the sensor (3 Fig. 1) complete with
mounting bracket (4 Fig. 1).
. Displace the mounting bracket retaining tang and remove
the sensor.
. Fitting a new inclination sensor is the reverse of the re- moval procedure.
13.
AS. 11
SRO 86.52.01
. Open
the trunk and remove the battery cover.
. Disconnect the battery ground lead.
. Remove the trunk floor carpet.
9 Remove the trunk front liner.
Remove the trunk seal retainer. See SRO 76.19.44, Section
. Remove the trunk side liner.
. Undo and remove the inclination sensor securing nuts (2 Fig. 1) and displace the sensor (3 Fig. 1) to gain access to
the SLCM (1 Fig. 2).
SECURIN & L OCKlNG CONTROL MODULE
(SLCM)
- RENEW
13.
. Undo and remove the SLCM securing nuts (5 Fig. 1).
. Displace the SLCM. Identify the SLCM multi-plugs (2 Fig. 2) for subsequent reconnection. Disconnect the mult- plugs and remove the SLCM.
9 Fitting a new SLCM is the reverse of the removal pro- cedure. Makesure thatthe multi-plugs are reconnected as
removed from the old SLCM.
The
arrowson Fig. 2 showthe position ofthe mount- ing bolts and mounting holes. U:
3
I 1 J86 1882
Fig. 1
Fig.
2
Issue 1 August 1994 40 X300 VSM
Page 518 of 521

Security System - RiESTRICTED ISSUE
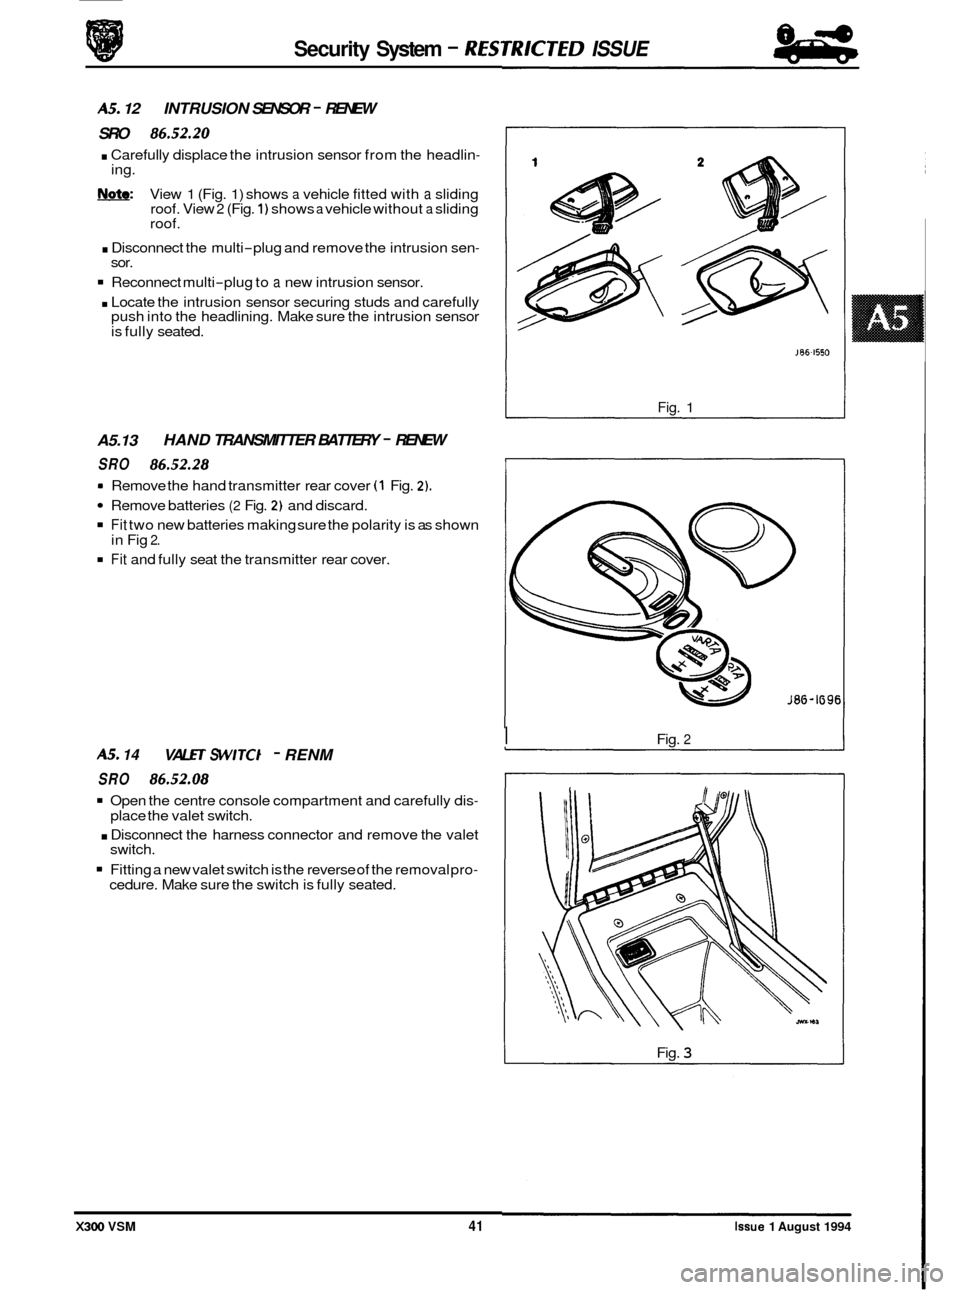
AS. 12 INTRUSION SENSOR - RENEW
SRO
86.52.20
. Carefully displace the intrusion sensor from the headlin- ing.
W: View 1 (Fig. 1) shows a vehicle fitted with a sliding
roof. View 2 (Fig. 1) shows a vehicle without a sliding
roof.
. Disconnect the multi-plug and remove the intrusion sen-
Reconnect multi-plug to a new intrusion sensor.
. Locate the intrusion sensor securing studs and carefully
push into the headlining. Make sure the intrusion sensor
is fully seated.
sor.
A5.13
HAND
TRANSMITTER BATTERY - RENEW
SRO 86.52.28
Remove batteries (2 Fig. 2) and discard.
Fit two new batteries making sure the polarity is as shown
Fit and fully seat the transmitter rear cover.
rn Remove the hand transmitter rear cover (1 Fig. 2).
in Fig 2.
AS. 14
SRO 86.52.08
VAL El S WITCI - RENM
J86-I550
Fig. 1
I
I Fig. 2
Open the centre console compartment and carefully dis-
. Disconnect the harness connector and remove the valet
Fitting a new valet switch is the reverse of the removal pro-
place the valet switch.
switch.
cedure. Make sure the switch is fully seated.
Fig.
3
X300 VSM 41 Issue 1 August 1994
Page 519 of 521

Security System - RESTRICTED ISSUE 84
4!sw
A5.15 SECURITY SIREN
(12 CYL) - RENEW
SRO 86.52.03
= Open the trunk and remove the battery cover.
Disconnect the battery ground lead.
Open the hood and remove the headlamp
/ relay cover.
See
SRO 76.1 1.22, Section 13.
Remove the RH air cleaner element. See SRO 19.10.11, Section 5.2.
Remove the RH air cleaner assembly. See SRO 19.10.02, Section 5.2.
. Identify the RH forward harness relays (1 Fig. 1) for subse- quent refitting. Remove the relays and relay bases from
the mounting bracket.
. Disconnect the siren harness multi-plug (2 Fig. 1).
rn Reposition the side harness (3 Fig. 1) to gain access to the
. Undo the siren securing bolts (1 Fig. 2) and remove the
Note:
. Remove the captive washers and the siren securing bolts.
. Fit the siren securing bolts to a new siren.
. Fit and fully seat the captive washers.
. Align the siren securing bolts to the vehicle chassis.
Refitting the remaining components is the reverse of the re
-
moval procedure.
siren securing bolts.
siren
(2 Fig. 2).
The siren securing bolts remain captive.
Tighten the siren securing bolts.
AS. 16 SECURIN SIREN (6 CYL) - RENEW
SRO 8652.03
. Open the trunk and remove the battery cover.
rn Disconnect the battery ground lead.
. Open the hood and remove the headlamp / relay cover.
See SRO 76.1 1.22, Section 13.
. Identify the RH forward harness relays for subsequent re- fitting. Removethe relays and relay bases from the mount- ing bracket.
. Disconnect the siren harness multi-plug.
Reposition the side harness to gain access to the siren se-
. Undo the siren securing bolts and remove the siren.
curing
bolts.
The siren securing bolts remain captive.
Remove the captive washers and the siren securing bolts.
. Fit the siren securing bolts to a new siren.
. Fit and fully seat the captive washers.
= Align the siren securing bolts to the vehicle chassis.
Refitting the remaining components is the reverse of the re
-
moval procedure.
Tighten
the siren securing bolts.
Fig. 1
Fig. 2
X300 VSM Issue 1 August 1994 42
Page 520 of 521

Security System - RESTRICTED ISSUE
-
A5.17 FRONT DOOR LOCK ASS€MBLY - RENEW
SRO
86.25.45
Remove the veneer trim pad. See Section 13 of the VSM.
. Remove the upper trim pad. See Section 13 of the VSM.
Remove the lower trim pad. See Section 13 of the VSM.
. Using a suitable plastic knife, cut through the weather- shield to door sealant and pull back the weathershield (1 Fig. 1) for access to the door lock assembly.
. Disconnect the door handle link rod (2 Fig. 1).
. Disconnect the door sill button link rod (3 Fig. 1).
. Disconnect the key barrel link rod (4 Fig. 1).
. Displace and reposition the door lock assembly multi-
Undo and remove the lower securing bolt (5 Fig. 1) from
. Undo and remove the door lock assembly securing bolts
. Displace and reposition the glass frame.
. Displace and reposition the door lock assembly (7 Fig. 1).
Displace and remove the edge clip from the door handle
. Displace and reposition the door handle release cable
. Displace and remove the door lock assembly.
. Position the new door lock assembly to the door.
. Position and fit door handle release cable to abutments.
. Fit and fully seat the cable retaining edge clip.
. Fit and tighten the door lock assembly securing bolts.
. Reposition glass frame. Fit and tighten frame securing
. Connect the multi-plug and fit to the mounting bracket.
. Connect the key barrel link rod.
. Connect the door sill button link rod.
. Connect the door handle link rod.
. Reposition the weathershield to the door. Using a suitable
tool, apply pressure to the weathershield edge to ensure
adhesion to the door.
plug
from the mounting bracket and disconnect.
the glass frame.
(6 Fig. 1 ).
release cable (8 Fig. 1).
from the abutments.
bolt.
. Refit the lower trim pad, upper trim pad and the veneer
0 trim pad.
I I J86-1923
Fig. 1
Issue 1 August 1994 X300 VSM 43
Page 521 of 521

Security System - RESTRICTED ISSUE 84
-
A5.18 REAR DOOR LOCKASS€MBLY - RENEW
SRO 86.25.47
. Remove the veneer trim pad. See Section 13 of the VSM.
. Remove the upper trim pad. See Section 13 of the VSM.
. Remove the lower trim pad. See Section 13 of the VSM.
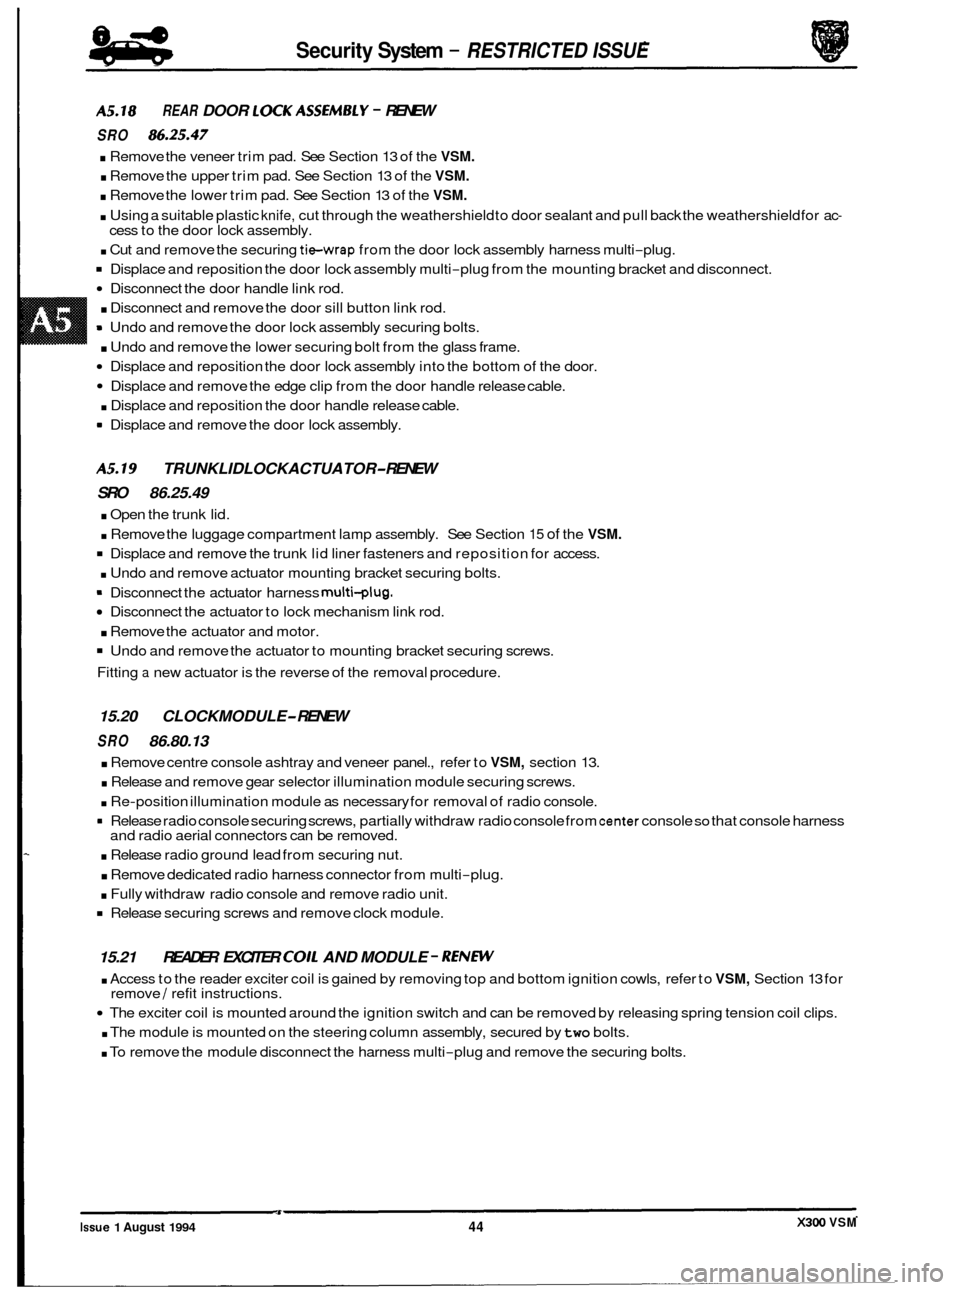
. Using a suitable plastic knife, cut through the weathershield to door sealant and pull back the weathershield for ac-
. Cut and remove the securing tie-wrap from the door lock assembly harness multi-plug.
Displace and reposition the door lock assembly multi-plug from the mounting bracket and disconnect.
Disconnect the door handle link rod.
. Disconnect and remove the door sill button link rod.
= Undo and remove the door lock assembly securing bolts.
. Undo and remove the lower securing bolt from the glass frame.
Displace and reposition the door lock assembly into the bottom of the door.
Displace and remove the edge clip from the door handle release cable.
. Displace and reposition the door handle release cable.
9 Displace and remove the door lock assembly.
cess
to the door lock assembly.
A5.19 TRUNKLIDLOCKACTUATOR- RENEW
SRO 86.25.49
. Open the trunk lid.
. Remove the luggage compartment lamp assembly. See Section 15 of the VSM.
Displace and remove the trunk lid liner fasteners and reposition for access.
. Undo and remove actuator mounting bracket securing bolts.
Disconnect the actuator to lock mechanism link rod.
. Remove the actuator and motor.
Undo and remove the actuator to mounting bracket securing screws.
Fitting
a new actuator is the reverse of the removal procedure.
Disconnect
the actuator harness
multi-plug.
15.20 CLOCKMODULE- RENEW
SRO 86.80.13
. Remove centre console ashtray and veneer panel., refer to VSM, section 13.
. Release and remove gear selector illumination module securing screws.
. Re-position illumination module as necessary for removal of radio console.
= Release radio console securing screws, partially withdraw radio console from center console so that console harness
and radio aerial connectors can be removed.
. Release radio ground lead from securing nut.
. Remove dedicated radio harness connector from multi-plug.
. Fully withdraw radio console and remove radio unit.
Release securing screws and remove clock module.
15.21 READER EXCITER COIL AND MODULE - RENW
. Access to the reader exciter coil is gained by removing top and bottom ignition cowls, refer to VSM, Section 13 for
The exciter coil is mounted around the ignition switch and can be removed by releasing spring tension coil clips.
. The module is mounted on the steering column assembly, secured by two bolts.
. To remove the module disconnect the harness multi-plug and remove the securing bolts.
remove
/ refit instructions.
X300 VSM Issue 1 August 1994 44