check engine light JEEP CJ 1953 User Guide
[x] Cancel search | Manufacturer: JEEP, Model Year: 1953, Model line: CJ, Model: JEEP CJ 1953Pages: 376, PDF Size: 19.96 MB
Page 28 of 376
c
TUNE-UP
C-13. Replacement and Adjustment of
Delco
Distributor Point Set
When
inspection of the contact points show re placement to be advisable, the following procedure
should be used. See Fig. C-13.
Note:
The service replacement contact point set
has the breaker spring tension and point alignment
adjusted at the factory.
Removal
of
Contact Point
Set
a.
Remove distributor cap by inserting a screw
driver
in upper slotted end of cap retainers,
press
down and turn 90° counterclockwise. Push distri
butor cap aside and remove rotor. Disconnect the condenser and primary leads from their terminal
by loosening the retaining screw. If there is no
retaining
screw, simply slip leads out.
b. Loosen two screws and lock
washers
which hold
the contact point set in place. Then remove point
set.
Installation
of
Contact Point
Set.
a.
Slide contact point set over
boss
on breaker
plate and under the two screw heads. Tighten two
screws and lock washers.
b.
Install
condenser and primary leads.
Note:
Leads must be properly positioned so they
will
not
come
in contact with
bottom
of weight
base or rotor.
c.
If
engine
does
not start readily, position contact
arm
rubbing block on peak of cam lobe, insert
V%"
[3,86 mm.] Allen wrench in adjusting screw and
turn
screw in (clockwise) until contact points
just
close. Then back screw out (counterclockwise)
V2
turn
(180°)
to obtain a point gap of approxi
mately .016" [0,406 mm.] for a preliminary setting.
Adjustment
of
Contact Points
—
Engine Running
Note:
When adjusting contact point dwell angle,
always follow the instructions which
come
with the
dwell
meter.
a.
Connect dwell tester leads: red to distributor
side of coil, black to ground.
b. Turn
selector switch to position for
6-lobe
cam.
Turn
ignition switch on.
c.
Start engine.
Lift
adjustment window and insert
Vs"
[3,86 mm.] Allen wrench in adjusting screw.
Set dwell angle at 30 degrees. See Fig. C-14.
d.
After adjusting dwell angle, always check
ignition timing.
C-14.
Check
Ignition
Timing
a.
Hurricane F4 Engine.
If
a neon timing light is available, use it to check
igntion timing following the instructions of the
timing light manufacturer.
In
the absence of a timing light, remove No. 1
spark
plug and turn the
engine
over until No. 1
piston is on compression stroke as indicated by
air
being forced from No. 1 spark plug opening.
Turn
the
engine
slowly until the specified
degree
mark
on the timing gear cover is in alignment with
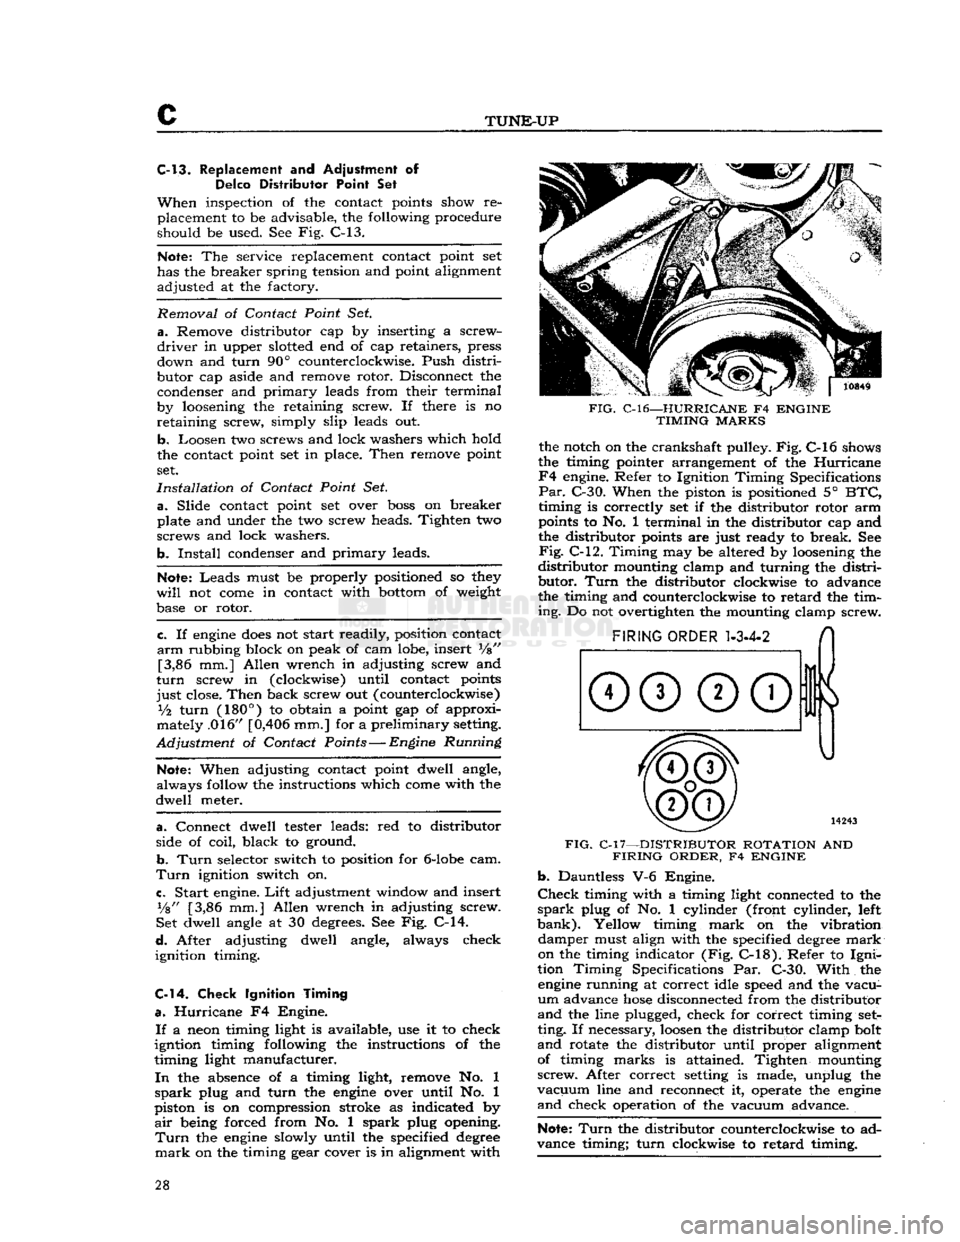
FIG.
C-l6—HURRICANE
F4
ENGINE
TIMING
MARKS
the notch on the crankshaft pulley. Fig. C-l6 shows
the timing pointer arrangement of the Hurricane
F4
engine. Refer to Ignition Timing Specifications
Par.
C-30. When the piston is positioned 5°
BTC,
timing is correctly set if the distributor rotor arm
points to No. 1 terminal in the distributor cap and
the distributor points are just ready to break. See
Fig.
C-12. Timing may be altered by loosening the
distributor
mounting clamp and turning the distri
butor.
Turn
the distributor clockwise to advance
the timing and counterclockwise to retard the tim
ing.
Do not overtighten the mounting clamp screw.
FIG.
C-l7—DISTRIBUTOR ROTATION
AND
FIRING
ORDER,
F4
ENGINE b.
Dauntless V-6 Engine.
Check
timing with a timing light connected to the
spark
plug of No. 1 cylinder (front cylinder, left
bank).
Yellow timing
mark
on the vibration damper must align with the specified
degree
mark
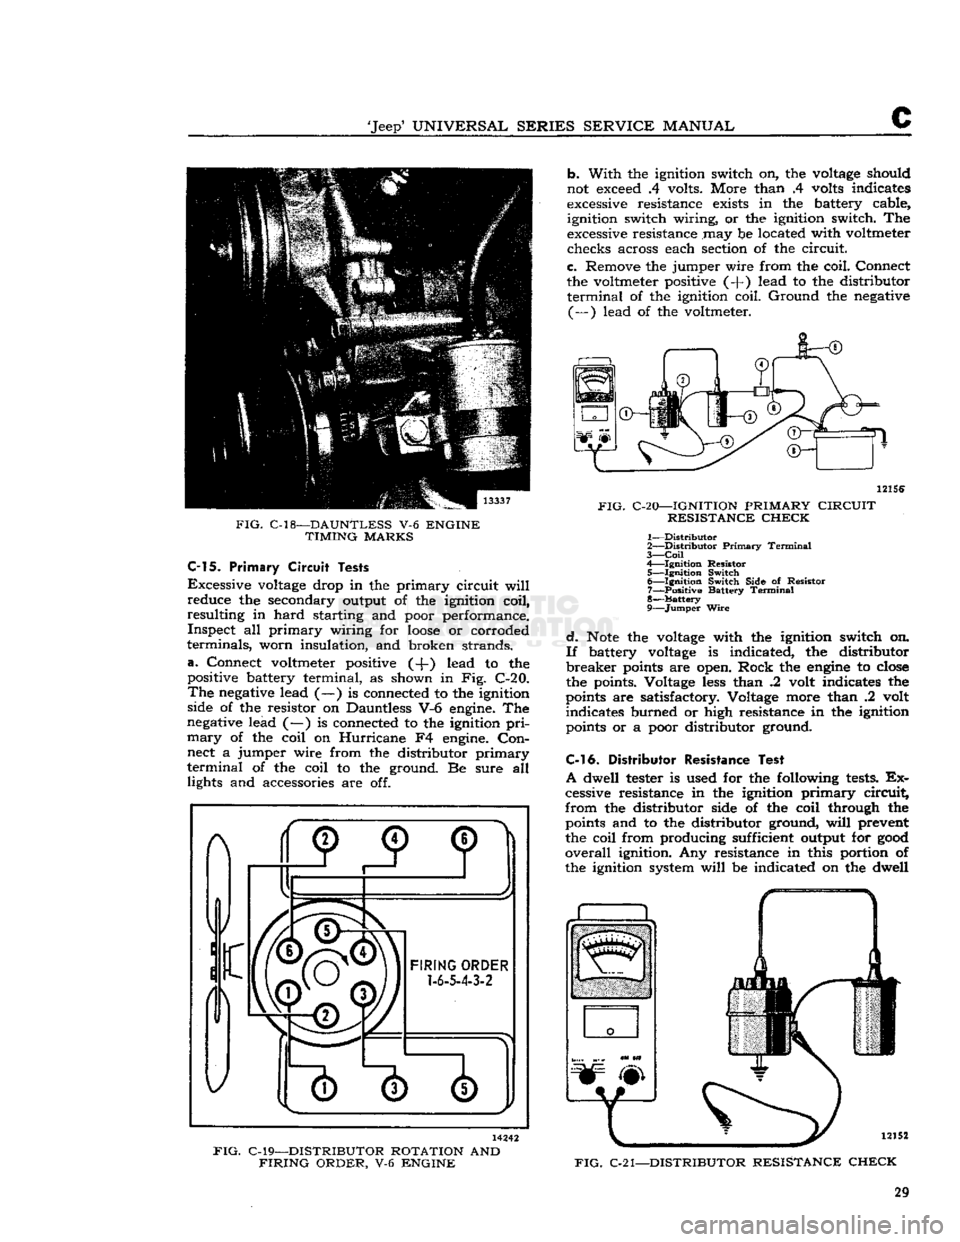
on the timing indicator (Fig.
C-18).
Refer to
Igni
tion Timing Specifications Par. C-30. With the
engine
running at correct idle speed and the vacu
um
advance
hose
disconnected from the distributor
and
the line plugged, check for correct timing
set
ting. If necessary,
loosen
the distributor clamp bolt
and
rotate the distributor until proper alignment of timing marks is attained. Tighten mounting
screw.
After correct setting is made, unplug the
vacuum
line and reconnect it, operate the
engine
and
check operation of the vacuum advance.
Note:
Turn
the distributor counterclockwise to ad
vance timing; turn clockwise to retard timing. 28
Page 29 of 376
'Jeep'
UNIVERSAL
SERIES
SERVICE
MANUAL
C
FIG.
C-18—DAUNTLESS
V-6
ENGINE
TIMING
MARKS
C-15.
Primary
Circuit
Tests
Excessive
voltage
drop in the primary circuit
will
reduce the secondary output of the ignition coil,
resulting in hard starting and poor performance. Inspect all primary wiring for
loose
or corroded
terminals, worn insulation, and broken strands,
a.
Connect voltmeter positive (-J-) lead to the
positive battery terminal, as shown in Fig. C-20.
The
negative
lead (—) is connected to the ignition
side of the resistor on Dauntless V-6
engine.
The
negative
lead (—) is connected to the ignition
pri
mary
of the coil on Hurricane F4
engine.
Con
nect a jumper wire from the distributor primary
terminal
of the coil to the ground. Be sure all lights and accessories are off. b. With the ignition switch on, the
voltage
should
not
exceed
.4 volts. More than .4
volts
indicates
excessive
resistance
exists
in the battery cable, ignition switch wiring, or the ignition switch. The
excessive
resistance may be located with voltmeter checks across each section of the circuit.
c. Remove the jumper wire from the coil. Connect
the voltmeter positive (-f) lead to the distributor
terminal
of the ignition coil. Ground the
negative
(—) lead of the voltmeter.
12156
FIG.
C-20—IGNITION
PRIMARY
CIRCUIT
RESISTANCE
CHECK
1—
Distributor
2—
Distributor
Primary
Terminal
3—
Coil
4— Ignition Resistor 5— Ignition Switch 6— Ignition Switch Side of Resistor 7— Positive Battery
Terminal
8—
Battery
9—
Jumper
Wire
d.
Note
the
voltage
with the ignition switch on.
If
battery
voltage
is indicated, the distributor
breaker
points
are open. Rock the
engine
to
close
the points. Voltage
less
than .2 volt indicates the
points
are satisfactory. Voltage more than .2 volt indicates burned or high resistance in the ignition
points
or a poor distributor ground.
C-l
6. Distributor
Resistance
Test
A
dwell tester is used for the following
tests.
Ex
cessive resistance in the ignition primary circuit,
from the distributor side of the coil through the
points
and to the distributor ground,
will
prevent
the coil from producing sufficient output for
good
overall
ignition. Any resistance in this portion of
the ignition system
will
be indicated on the dwell
FIG.
C-21—DISTRIBUTOR
RESISTANCE
CHECK
14242
FIG.
C-19—DISTRIBUTOR
ROTATION
AND
FIRING
ORDER,
V-6
ENGINE
29
Page 30 of 376
c
TUNE-UP
meter during this
test
Connect the red lead
tc*
dis
tributor
primary
lead at the coil as shown in Fig.
C-21.
Connect black lead to the ground.
Turn
ignition switch on; with
engine
stopped, observe
dwell
meter. If the meter reads zero,
crank
the
engine
a fraction of a revolution to
close
the
breaker
points.
Distributor
resistance is normal, if dwell meter
pointer is within range of
black
bar. Distributor resistance is high, if
dwell
meter pointer is not
within
the black bar.
Remove test lead from
distri
butor terminal of coil and
connect
to
each
of the
following points to determine
where
the excessive resistance is:
Distributor
primary
terminal
Distributor
primary
terminal in the distributor
Breaker
point bracket
Ground
side of points
Distributor
housing
Where
a noticeable change occurs in the meter
reading
in
these
steps, make the necessary correc
tion and repeat the
test.
C-l 7. Distributor
Point
Dwell
Using
a dwell tester, connect red
lead
to the
distri
butor terminal at coil. Connect black lead to
ground.
Set selector switch to the number of
cylin
ders in the
engine
being tested. Operate
engine
speed at specified rpm. and
note
readings. Cam
dwell
angle must be 30° for the Dauntless V-6
Delco equipped engine, 29° ±: 3° Prestolite equipped
engine
and 42° for the
Hurricane
F4 engine. If the dwell reading is not to specifications,
trouble could be improper point spacing, point
rubbing,
defective block or breaker arm, or mis
aligned and worn distributor cam.
Adjust
dwell
as shown in Fig. C-14 for the Delco equipped
Dauntless V-6 engine. For cam dwell adjustment
of the Prestolite equipped V6 and
Hurricane
F4 engine, refer to Par. C-10,
step
a.
Dwell
variation is determined by noting any
dwell
change as the
engine
is operated at different
speeds.
Excessive
variation indicates a change in point opening that can result from shaft or bushing wear,
or
from the distributor plate shifting because of
wear
or
looseness.
Measure
dwell variation at idle speed, using same
test
hookup for checking dwell. Increase speed to 1750 rpm.;
note
dwell reading.
Then
slowly reduce
speed to idle while observing dwell meter. Dwell
variation
should not exceed 3°. If dwell variation
exceeds
3°
between
idle speed and 1750 rpm.,
probable wear in the distributor shaft, bushings, or
breaker
plate is indicated. Distributor should then be checked more thoroughly.
C-l8. Check Ignition Wires
and
Connections
Examine
and clean the insulation on all ignition
wires
and check all connections. Wires should be
firm,
flexible, and free from roughness and minute
cracks.
Bend wires to check for brittle,
cracked,
or
loose
insulation. Since defective insulation
will
per
mit
crossfiring or missing of the engine, defective
wires
should be replaced.
C-l9. Test Ignition
Cables
To
remove cables from
spark
plugs, use
Spark
Plug
Cable
Remover
Tool
W-274.
Twist
the
boot
slightly to break the seal and, grasping the rubber
protector
boot,
lift straight up with a steady even
pull.
Do not grasp the cable and
jerk
the cable off; this
will
damage the cables. Do not use a probe
on
these
wires; puncturing them may cause a
separation in the conductor. To remove ignition cables from the distributor cap or coil tower,
loosen
the nipple first, then grasp the upper part of the nipple and the cable and gently
pull
straight up.
Test
the cable with an ohmmeter. Resistance value
per
foot
is
3000-7000
ohms. The ignition cables
can
be checked for
circuit
continuity by removing
the cable from the
spark
plug and holding the cable
end Vi" [6,35 mm.] from the engine. A strong
spark
indicates
good
conductor continuity.
When
connecting the cable to the
spark
plug, be
certain
a
good
connection is made and that the
protector
boot
fits tight on the
spark
plug. A
partially
seated cable creates an additional gap in
the
circuit
and the resulting
spark
jump
will
cause
terminal
corrosion and cable damage.
C-20. Coil
When
an ignition coil is suspected of being defec tive, it should be checked on the car. A coil may
break
down after it has reached operating tempera
ture.
It is important that the coil be at operating
temperature when
tests
are made.
Note:
The ignition coil and ballast resistor for the
V-6
engine
must be of the same manufacturer.
Ballast
resistors and ignition coils of one manufac
turer
are interchangeable with both units of the
other.
C-21.
Service Air
Cleaner
Refer
to Par.
B-2 2
for the correct service of the
air
cleaner.
C-22.
Check Fuel Lines and
Screens
Check
all fuel line connections to guard against
leakage.
Check
fuel pump filter F4
engine
and
fuel
line filter V-6 engine. Replace fuel filter if
necessary.
C-23. Check Fuel Pump a.
Fuel
pump pressure is important, for low pres
sure
will
seriously affect
engine
operation and high
pressure
will
cause excessive fuel consumption and
possibly flood the carburetor. Should there be any doubt of normal operation, check the pressure with
a
gauge
as shown in Fig.
C-2 2.
The minimum and
maximum
allowable pressures are 2% to 3% lbs. [0,176 a
0,264
kg-cm2], for the
Hurricane
F4 en
gine.
Fuel
pump pressure at carburetor (inlet) on
the Dauntless V6-225
engine
should be 3% lbs.
[0,264
kg-cm2] minimum at specified
R.P.M.
idle
with
the vapor
return
hose
squeezed off.
With
the
vapor
return
hose
open pump pressure should be
2
V2
lbs. [0,176 kg-cm2] minimum.
b.
Test for volume, as a pump may build up suffi
cient pressure but
fail
to produce sufficient volume.
Turn
down the carburetor fuel line fitting on the
pump and with the tank line connected, pump out
30
Page 31 of 376
'Jeep'
UNIVERSAL
SERIES
SERVICE
MANUAL
C
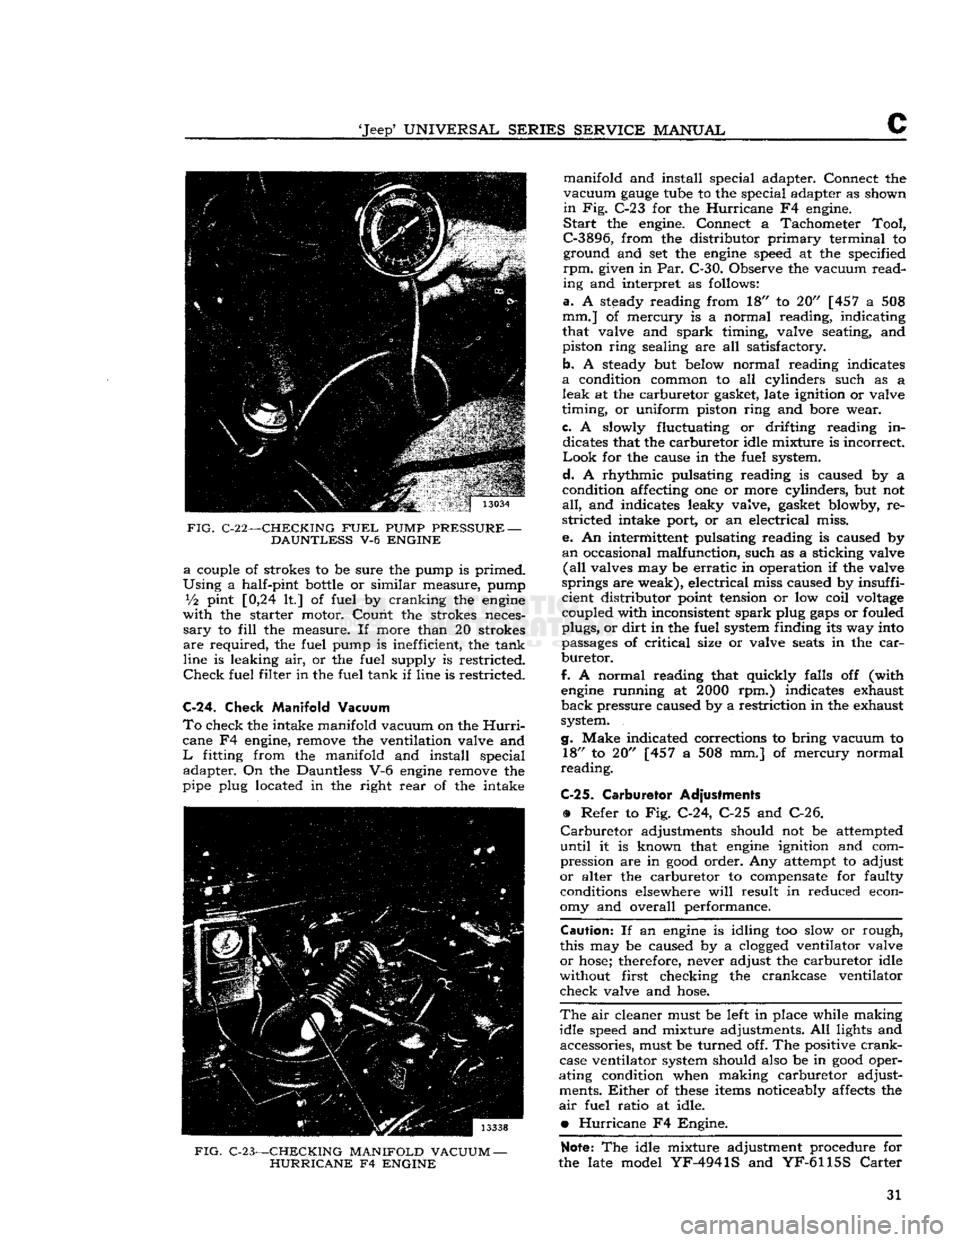
FIG.
C-22—-CHECKING
FUEL
PUMP
PRESSURE
—
DAUNTLESS
V-6
ENGINE a
couple of strokes to be sure the pump is primed.
Using
a half-pint
bottle
or similar measure, pump
Vi
pint [0,24 It] of fuel by cranking the
engine
with
the starter motor. Count the strokes neces
sary
to
fill
the measure. If more than 20 strokes
are
required, the fuel pump is inefficient, the tank
line is leaking air, or the fuel supply is restricted.
Check
fuel filter in the fuel tank if line is restricted.
C-24.
Check Manifold Vacuum
To
check the intake manifold vacuum on the
Hurri
cane F4 engine, remove the ventilation valve and
L
fitting from the manifold and install special adapter. On the Dauntless V-6
engine
remove the
pipe plug located in the right
rear
of the intake
FIG.
C-23—CHECKING MANIFOLD VACUUM
—
HURRICANE
F4
ENGINE
manifold and install special adapter. Connect the
vacuum
gauge
tube to the special adapter as shown
in
Fig. C-23 for the
Hurricane
F4 engine.
Start
the engine. Connect a Tachometer
Tool,
C-3896,
from the distributor
primary
terminal to ground and set the
engine
speed at the specified
rpm.
given in Par. C-30. Observe the vacuum
read
ing and interpret as follows:
a.
A steady reading from 18" to 20" [457 a 508
mm.] of mercury is a normal reading, indicating
that valve and
spark
timing, valve seating, and
piston ring sealing are all satisfactory.
b. A steady but below normal reading indicates
a
condition common to all cylinders such as a
leak
at the carburetor gasket, late ignition or valve
timing, or uniform piston ring and bore wear.
c.
A slowly fluctuating or drifting reading in dicates that the carburetor idle mixture is incorrect
Look
for the cause in the fuel system.
d.
A rhythmic pulsating reading is caused by a
condition affecting one or more cylinders, but not
all,
and indicates leaky valve, gasket blowby, re
stricted intake port, or an electrical miss.
e. An intermittent pulsating reading is caused by
an
occasional malfunction, such as a sticking valve
(all
valves may be
erratic
in operation if the valve
springs are weak), electrical miss caused by insuffi
cient distributor point tension or low coil
voltage
coupled with inconsistent
spark
plug
gaps
or fouled
plugs, or
dirt
in the fuel system finding its way into
passages of
critical
size or valve
seats
in the
car
buretor.
f.
A normal reading that quickly falls off (with
engine
running at
2000
rpm.) indicates exhaust
back
pressure caused by a restriction in the exhaust
system.
g.
Make indicated corrections to bring vacuum to 18" to 20" [457 a 508 mm.] of mercury normal
reading.
C-25.
Carburetor Adjustments
•
Refer to Fig. C-24, C-25 and C-26.
Carburetor
adjustments should not be attempted
until
it is known that
engine
ignition and com
pression are in
good
order. Any attempt to adjust
or
alter the carburetor to compensate for faulty conditions elsewhere
will
result in reduced econ
omy and overall performance.
Caution:
If an
engine
is idling too slow or rough,
this may be caused by a
clogged
ventilator valve
or
hose;
therefore, never adjust the carburetor idle
without first checking the crankcase ventilator
check valve and
hose.
The
air cleaner must be left in place while making
idle speed and mixture adjustments. All lights and accessories, must be turned off. The positive
crank
case ventilator system should also be in
good
oper
ating condition when making carburetor adjust ments.
Either
of
these
items noticeably affects the
air
fuel ratio at idle.
•
Hurricane
F4 Engine.
Note:
The idle mixture adjustment procedure for
the late model
YF-4941S
and
YF-6115S
Carter
31
Page 33 of 376
'Jeep*
UNIVERSAL
SERIES
SERVICE
MANUAL
C
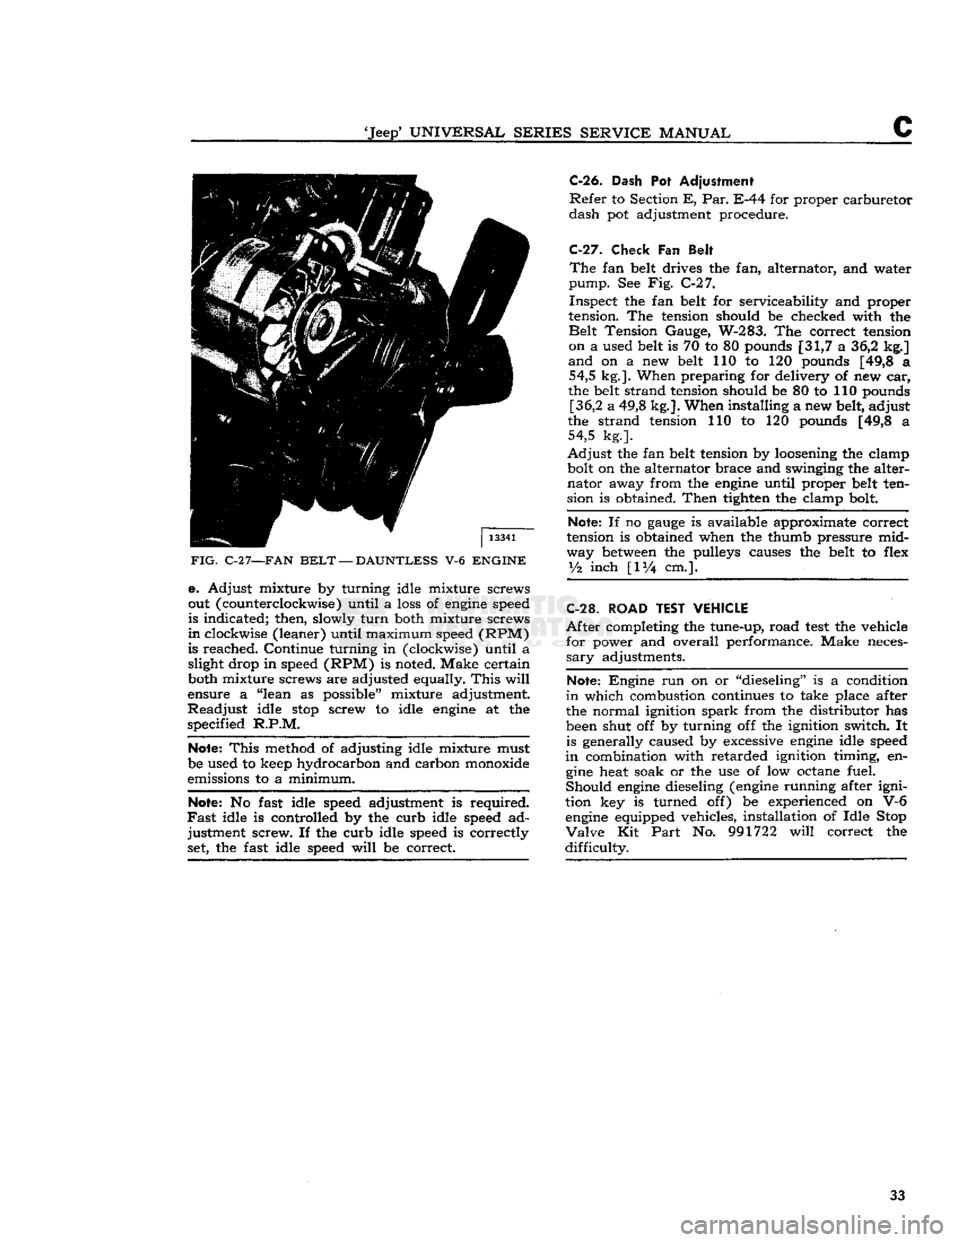
FIG.
C-2
7—FAN
BELT
—
DAUNTLESS
V-6
ENGINE
e. Adjust mixture by turning idle mixture screws
out (counterclockwise) until a loss of engine speed
is indicated; then, slowly
turn
both mixture screws
in
clockwise (leaner) until maximum speed (RPM)
is reached. Continue turning in (clockwise) until a slight drop in speed (RPM) is noted. Make certain
both mixture screws are adjusted equally.
This
will
ensure a "lean as possible" mixture adjustment.
Readjust
idle
stop
screw to idle engine at the
specified
R.P.M.
Note:
This
method of adjusting idle mixture must
be used to keep hydrocarbon and carbon monoxide
emissions to a minimum.
Note:
No fast idle speed adjustment is required.
Fast
idle is controlled by the curb idle speed ad justment screw. If the curb idle speed is correctly set, the fast idle speed
will
be correct.
C-26.
Dash
Pot
Adjustment
Refer
to Section
E, Par.
E-44 for proper carburetor
dash
pot adjustment procedure.
C-27.
Check
Fan
Belt
The
fan belt drives the fan, alternator, and water
pump.
See Fig. C-27.
Inspect
the fan belt for serviceability and proper
tension. The tension should be checked with the
Belt
Tension Gauge, W-283. The correct tension on a used belt is 70 to 80 pounds [31,7 a 36,2 kg.]
and
on a new belt 110 to 120 pounds [49,8 a 54,5 kg.]. When preparing for delivery of new car,
the belt strand tension should be 80 to 110 pounds [36,2 a 49,8 kg.]. When installing a new belt, adjust
the strand tension 110 to 120 pounds [49,8 a 54,5 kg.].
Adjust
the fan belt tension by loosening the clamp
bolt on the alternator brace and swinging the alter
nator
away from the engine until proper belt ten
sion is obtained.
Then
tighten the clamp bolt.
Note:
If no
gauge
is available approximate correct
tension is obtained when the thumb pressure mid
way between the pulleys causes the belt to flex
y%
inch
[IV4
cm.].
C-28.
ROAD TEST VEHICLE
After
completing the tune-up, road
test
the vehicle for power and overall performance. Make neces
sary
adjustments.
Note:
Engine run on or "dieseling" is a condition
in
which combustion continues to take place after
the normal ignition
spark
from the distributor has
been shut off by turning off the ignition switch. It is generally caused by excessive engine idle speed
in
combination with retarded ignition timing, en gine heat soak or the use of low octane fuel.
Should
engine dieseling (engine running after igni
tion key is turned off) be experienced on V-6 engine equipped vehicles, installation of Idle Stop
Valve
Kit
Part
No. 991722
will
correct the
difficulty.
33
Page 41 of 376
'Jeep*
UNIVERSAL SERIES
SERVICE
MANUAL
D
insulator
mountings attached to the frame side
rail
brackets. The
rear
of the engine-transmission
assembly is supported by a rubber insulator
mounting under the
rear
of the transmission on
the frame center cross member.
This
cross member
is bolted to the frame side
rails
so that it can be
dropped when removing the transmission or engine-
transmission
assembly. The rubber insulators allow
free side and vertical oscillation to effectively
neutralize
engine
vibration at the source.
The
rubber
insulator mountings should be inspected
for separation and deterioration by jacking the
power plant away from the frame, near the sup
ports. Vibration cannot be effectively absorbed by
separated or worn insulators. They should be re placed if faulty.
D-4.
Engine
Ground
Strap
To
be sure of an
effective
ground for the electrical
circuits,
a ground strap bridges the right front
engine
support to the chassis. The connections of this strap must be kept clean and tight for proper
operation of the electrical system.
D-5. ENGINE REMOVAL
Should
the
engine
require overhauling, it is neces
sary
to remove it from the vehicle. The following procedure covers removal of the
engine
only.
The
engine, transmission and transfer case may be
removed as a unit by removing (in addition to the following procedure) the radiator guard and the
access plates in the floor pan.
a.
Drain
the cooling system by opening the
drain
cocks at the
bottom
of the radiator and lower right
side of the cylinder block.
b.
Disconnect the battery at the positive terminal
to avoid the possibility of short
circuit.
c. Remove the air cleaner horn from the carburetor
and
disconnect the breather
hose
at the oil filler
pipe.
d.
Disconnect the carburetor choke and throttle controls by loosening the clamp
bolts
and set
screws.
e. Disconnect the fuel-tank-to-fuel-pump line at the fuel pump by unscrewing the connecting nut.
f- Plug the fuel line to prevent fuel leakage.
g. Remove the radiator and radiator grille support
rods.
h. Remove the upper and lower radiator
hoses
by
loosening the
hose
clamps and slipping the clamps
back
on the
hose.
If so equipped, remove the heater
hoses
(one to the water pump, one to the
rear
of
the cylinder head) in the same manner.
i.
Remove the four
bolts
from the fan hub and re
move
the fan hub and fan blades.
j.
Remove the four radiator attaching screws. Re
move
the radiator and shroud as one unit, k. Remove the starting motor cables. Remove the
starting
motor.
I.
Disconnect the wires from the alternator or
generator. Disconnect the ignition
primary
wire
at the ignition coil.
NOTE:
ON
ENGINES EQUIPPED WITH EX
HAUST
EMISSION CONTROL, REMOVE THE
AIR
PUMP,
AIR
DISTRIBUTION
MANI
FOLD,
AND
ANTI-BACKFIRE (DIVERTER)
VALVE.
SEE SECTION
Fl
FOR PROCEDURE.
m.
Disconnect the oil pressure and temperature
sending unit wires at the units.
n.
Disconnect the exhaust pipe at the exhaust
manifold by removing the stud nuts.
o.
Disconnect the
spark
plug cables at the plugs
and
remove the cable bracket from the rocker arm cover stud.
p.
Remove the rocker arm cover by removing the
attaching stud nuts.
q.
Attach a lifting bracket to the
engine
using
existing head bolt locations. Be sure the
bolts
selected
will
hold the
engine
with the weight
balanced.
Attach lifting bracket to a boom hoist,
or
other lifting device, and take up all slack,
r.
Remove the two nuts and
bolts
from each front
engine
support. Disconnect the
engine
ground strap.
Remove the
engine
supports.
Lower
the
engine
slightly to permit access to the two top
bolts
on
the flywheel housing.
s. Remove the
bolts
which attach the flywheel
housing to the engine.
t.
Pull
the
engine
forward, or
roll
the vehicle back
wards,
until the clutch clears the flywheel housing.
Lift
the
engine
from the vehicle.
D-6. ENGINE DISASSEMBLY
Engine
disassembly is presented in the sequence to be followed when the
engine
is to be completely
overhauled after removal from the vehicle. Some
of the operations of the procedure are also ap
plicable
separately with the
engine
in the vehicle,
provided
that wherever necessary the part of the
engine
to be worked on is first made accessible by
removal
of
engine
accessories or other parts.
When
the disassembly operations are performed
with
the
engine
out of the vehicle, it is assumed,
in
this procedure, that all of the accessories have been removed
prior
to starting the disassembly
and
the oil has been drained.
In
addition to the instructions covering operations
for disassembling the
engine
out of the vehicle,
special
instructions are given to cover different
operations required when disassembly is
done
with the
engine
installed.
During
disassembly operations, the
engine
should
be mounted in a suitable
engine
repair
stand. Where
practicable,
modify or adapt an existing repair
stand
as necessary to accommodate the engine. If
an
engine
repair stand is not used, take care to
perform
disassembly operations in a manner that
will
protect personnel against an accident and the
engine
and its parts against damage.
NOTE:
If the
engine
is being disassembled because
of possible valve failure, check the valve tappet
clearance
before disassembly. Improper valve
clearance
could be the possible cause of valve
failure,
indicating a need for more frequent valve
checks and adjustments. 41
Page 47 of 376
'Jeep*
UNIVERSAL
SERIES SERVICE
MANUAL
D
straight
in the hole, then tap the dowel lightly
with
a hammer until it
bottoms.
d.
When installing bearing eaps, be sure to tighten
the
bolts
evenly in each cap to
pull
it into place
without bending the
dowels
or distorting the
bearing
cap.
e. Other parts of the block which require inspec tion
and
possible
repair,
but which are directly
related
to other
engine
components (such as tappets, pistons, camshaft, valves, crankshaft, and
oil
pump) are covered later in this section.
D-35.
Cylinder
Bores
The
cylinder bores may be reconditioned by honing
or
reboring. Use oil-soaked rags to protect
crank
shaft
journals
and other
engine
parts from abrasive
dust during all reconditioning operations.
Both
honing and reboring of the cylinders must be
done
carefully to fit the pistons and to obtain
specified clearances. If reboring of the cylinder bores is not required but the walls are glazed, use
a
finishing
hone
to remove the glaze. Reboring the cylinders must not be attempted unless ade
quate facilities and experienced service technicians
are
available. The amount of material to be removed is determined from the original diameter
of the cylinder bores (3.125" to 3.127") [79,375 a
79,426
mm.] plus the amount of oversize in diameter
of the oversize pistons to be fitted. Pistons are
available
in the following oversizes.
.010"
[0,254
mm.] .030" [0,762 mm.] .020" [0,508 mm.] .040" [1,016 mm.}
The
largest cylinder bore
will
determine the over
size to which all cylinders must be rebored, since the size and weight of all pistons must be uniform
to maintain proper
engine
balance. The maximum rebore should not exceed .040" [1,016 mm.] from
standard.
Measure
the cylinder diameters by making mea
surements both parallel to and at right angles to
crankshaft
over entire piston travel and at
bottom
of cylinder. Proceed as follows:
a.
If bores are scored; if out-of-round
exceeds
.005
"
[0,127 mm.]; if diameters differ more than .005";
or
if taper
exceeds
.005
"
on diameter, it is generally
recommended that cylinders be reconditioned by
reboring
and honing to the next oversize using new
pistons of the proper size.
Note:
If reboring is performed, allow .0015"
[0,0381
mm.] for final honing.
All
cylinder bore diameters must be within .002
"
[0,0508
mm.] after reconditioning.
b.
If bore measurements are within the above
limits,
but indicate hollows or waviness, cylinders should be honed with 250 grit
stone
hone. Pump
hone
up and down in cylinder while it is rotating
to produce a satin-finish, diamond cross-hatched
pattern
approximately 30° with horizontal. Hone
only enough to correct waviness.
c. If cylinder bore correction is unnecessary, break the glaze on cylinder walls with a 250 grit
stone
hone
or with a suitable deglazing tool. Operate the
hone
or deglazer to obtain diamond cross-hatched
pattern
previously mentioned.
d.
Regardless of type of correction on cylinder
walls,
wash out bores thoroughly afterwards and
apply
a light coat of
engine
oil. If cylinders have
been rebored or honed heavily, measure cylinder
diameters again to assure proper selection of piston
size.
D-36.
Pistons, Rings, and Connecting Rods
Pistons are each fitted with three rings, two com pression rings and one oil control
ring.
The pistons have an extra
groove
above the top ring which acts as a heat dam or insulating
groove
to protect
against sealing of the top ring in the ring
groove
with
hard
carbon. The piston pin is secured by the lock screw.
The
pistons and connecting rods were removed from
the
engine
as assemblies. If cylinders were rebored,
new oversized pistons and rings
will
have to be in
stalled.
Disassemble the pistons and rods. Remove the
two compression rings, the oil control
ring,
and the oil control ring expander from each piston. Do not remove the
bolts
from the lower end of the
connecting rods unless the
bolts
are damaged.
Clamp
each connecting rod and piston assembly
in
a padded bench vise and remove the piston pin
lock
screw and lockwasher. Press the piston pin
out of the piston and connecting rod.
Clean
all
carbon,
gum, and lacquer
deposits
from both the
inner
and outer surfaces of each piston, connecting
rod,
and piston pin. Use a ring
groove
cleaner or a
broken
ring filed to a sharp square
edge
to clean
the carbon from the piston ring
grooves
and the
insulator
groove. Use care not to scrape metal from
the sides of the
grooves
or make
burrs
on ring
groove
surfaces. Run a length of wire through the
oil
spray
hole
near the lower end of the connecting
rod
to clear the
hole
of hardened oil
deposits
or
foreign matter.
Carefully
inspect the pistons and
replace
any that are broken or cracked. Replace
pistons if any of the ring lands are chipped, broken,
or
rounded on the
edges;
or if the piston is scored,
scratched,
or burned so seriously that the imperfec
tions cannot be removed with a hand honing
stone
or
crocus cloth.
Replace
the pistons as follows:
a.
After cylinder bores have been carefully checked for out-of-round and taper (Par. D-35), check fit
of each piston to cylinder bore with block and
pistons clean and dry and at approximately 70
°F.
[21°C]
by using Piston Fitting Gauge And Scale
Tool
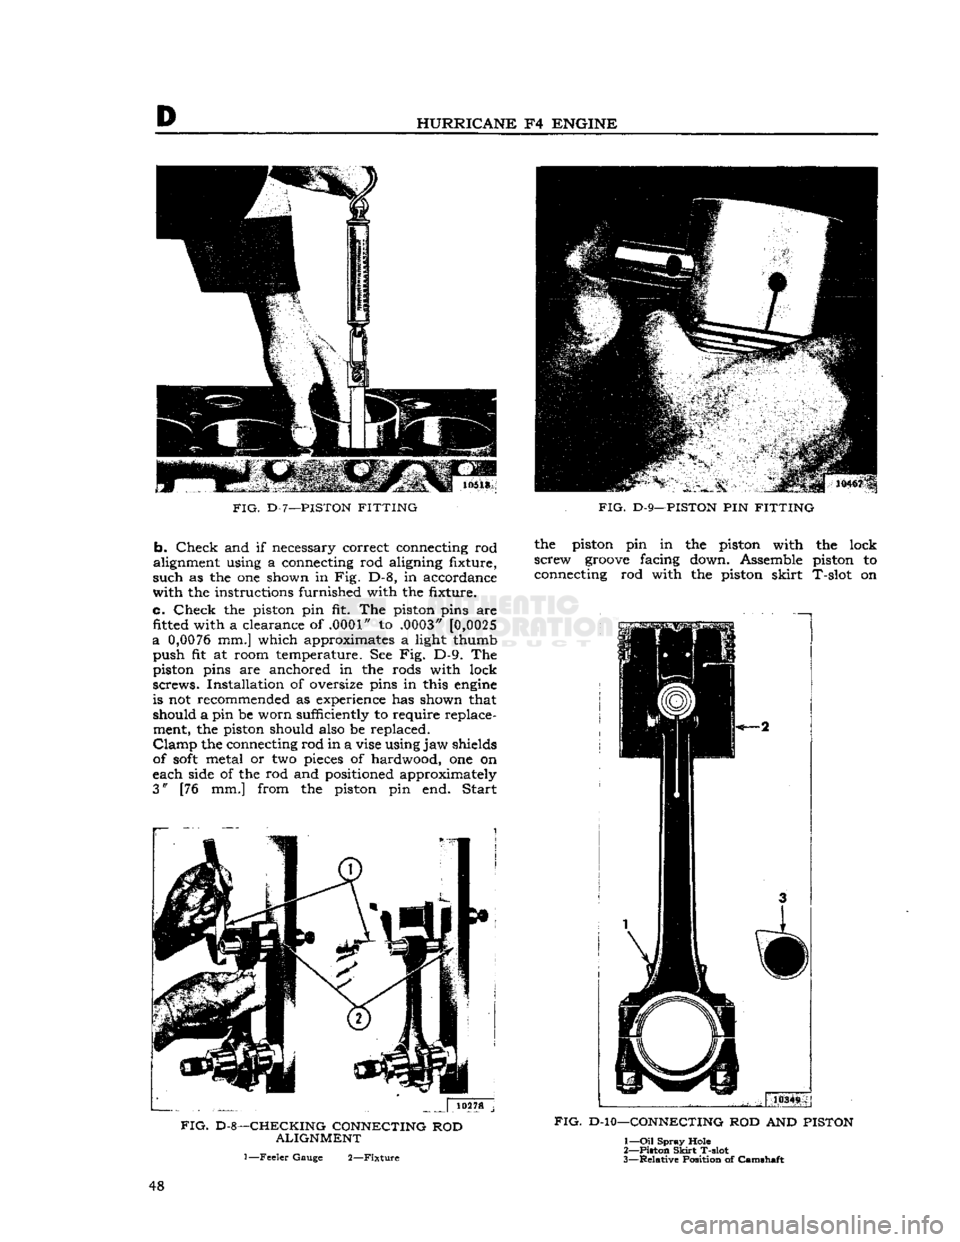
No. C-690 as shown in Fig. D-7. Use a .003"
[0,0762
mm.] thickness
gauge
%" [19 mm.] wide.
The
piston is fitted upside down in the block to
facilitate the operation. The
gauge
must extend the
full
length of the piston on the thrust side
(opposite
side from slot in piston
skirt).
Scale should register
5
to 10 pounds [2,3 a 4,5 kg.]
pull
to remove the
thickness
gauge
from
between
cylinder
wall
and piston. Excessive
pull
indicates need for a slightly
smaller
piston or additional honing of cylinder. In sufficient
pull
indicates need for fitting a larger piston. 47
Page 48 of 376
D
HURRICANE
F4
ENGINE
FIG.
D-7—PISTON
FITTING
b.
Check
and if necessary correct connecting rod
alignment using a connecting rod aligning fixture,
such
as the one shown in Fig. D-8, in accordance
with
the instructions furnished with the fixture.
c.
Check
the piston pin fit. The piston pins are fitted
with
a clearance of .0001" to .0003" [0,0025
a
0,0076
mm.] which approximates a light thumb
push
fit at room temperature. See Fig. D-9. The piston pins are anchored in the rods with lock
screws.
Installation of oversize pins in this
engine
is not recommended as experience has shown that
should a pin be worn sufficiently to require replace ment, the piston should also be replaced.
Clamp
the connecting rod in a vise using
jaw
shields
of
soft
metal or two pieces of hardwood, one on
each side of the rod and positioned approximately
3" [76 mm.] from the piston pin end.
Start
,
.. . | 10278 j
FIG.
D-8—CHECKING
CONNECTING
ROD
ALIGNMENT
1
—Feeler
Gauge
2—Fixture
FIG.
D-9—PISTON PIN
FITTING
the piston pin in the piston with the lock
screw
groove
facing down. Assemble piston to connecting rod with the piston
skirt
T-slot on
FIG.
D-10—CONNECTING ROD AND
PISTON
1—
Oil
Spray
Hole
2—
Piston
Skirt
T-slot
3—
Relative
Position
of
Camshaft
48
Page 51 of 376
![JEEP CJ 1953 User Guide
-Jeep*
UNIVERSAL
SERIES SERVICE
MANUAL
E>
[5,928 a
5,926
cm.] for all main bearings. Allowable
taper or out-of-round of the journals is .001"
[0,0254
mm.].
D-42.
Checking Connecting Ro JEEP CJ 1953 User Guide
-Jeep*
UNIVERSAL
SERIES SERVICE
MANUAL
E>
[5,928 a
5,926
cm.] for all main bearings. Allowable
taper or out-of-round of the journals is .001"
[0,0254
mm.].
D-42.
Checking Connecting Ro](/img/16/57040/w960_57040-50.png)
-Jeep*
UNIVERSAL
SERIES SERVICE
MANUAL
E>
[5,928 a
5,926
cm.] for all main bearings. Allowable
taper or out-of-round of the journals is .001"
[0,0254
mm.].
D-42.
Checking Connecting Rod
Crankpins
Check
the crankpin diameters with a micrometer
to ensure that they are not out-of-round or tapered more than .001"
[0,0254
mm.] The standard
crank-
pin
diameter is
1.9383*
to
1.9375"
[4,9233
a
4,9213
cm.].
D-43.
Crankshaft
Main
Bearings
The
crankshaft rotates on three main bearings
with
a running clearance of .0003" to .0029"
[0,0076
a
0,0736
mm.].
These
bearings are positioned and prevented from
rotating in their supports in the cylinder block by
dowel pins. Dowel pins are used in both the center
and
the
rear
bearing caps. No dowel pins are used
in
the front bearing cap because the bearing has
a
flange. The front main bearing takes the end
thrust
of the crankshaft. The main bearings are of premium type which provides long bearing life.
They
are replaceable and when correctly installed, provide proper clearance without filing, boring,
scraping,
or shimming. Crankshaft bearings can
be removed from this
engine
only with the
engine
out of the vehicle. Crankshaft bearings must be replaced as a complete set of three bearings, each
bearing consisting of two halves.
Main
bearings
are
available in the standard size and the following
undersizes:
.001" [0,025mm.] .012" [0,305 mm.] .002" [0,051mm.] .020" [0,508 mm.] .010" [0,254mm.] .030" [0,762 mm.]
The
.001" and .002" undersize main bearings are
for use with standard size crankshafts having
slightly worn
journals.
The .010", .020", and .030" undersize bearings are for use with undersize
crankshafts
in
those
sizes. The .012" undersize
bearings are for use with .010" undersize
crank
shafts having slightly worn journals. Bearing sizes
are
rubber stamped on the reverse side of each
bearing half.
D-44. Crankshaft
Main
Bearing Inspection
The
crankshaft
journals
must be carefully inspected
as detailed previously in Par. D-41. Worn journals
will
require undersize bearings. Scored, flaked, or
worn
bearings must be replaced. Measure the main
bearing bores in the cylinder block using a
telescope
gauge
and micrometer. Measure the bores at right
angles to the split line and at 45° to the split line.
The
bores should not be over .001"
[0,0254
mm.]
out-of-round or .001" in taper from end to end.
Also,
the bores should not be more then .001"
oversize, considering the average diameter of the
bore.
D-45.
Fitting Crankshaft
Main
Bearings
Using
Plastigage
After
wiping and carefully inspecting the bearing bore, install the proper bearing. See that the oil
hole
in the bearing upper half registers properly
with
the oil
hole
in the block, and that the bearing
lock fits properly in the notch in the block.
Install
the crankshaft if replacing bearings with the
engine
out of the vehicle. The desired running fit (dif
ference
between
the diameter of the crankshaft
journal
and the inside diameter of the fitted bear ing) for a main bearing is .0003" to .0029"
[0,0076
a
0,0736
mm.]. With a dimension in
excess
of this
standard
running fit, a satisfactory bearing replacement cannot be made and it
will
be necessary to
regrind
the crankshaft.
Install
the bearing lower
half
and the bearing cap and draw the nuts down
equally and only slightly tight. Rotate the
crank
shaft by hand to be sure it turns freely without
drag.
Pull
the nuts tighter, first one then the other,
a
little at a time, intermittently rotating the
crank
shaft by hand until the recommended torque of
35 to 45 lb-ft. [4,8 a 6,2 kg-m.] is reached. If the
bearings are of the correct size, and lubricated with
light oil before installation, the crankshaft should
turn
freely in the bearings. If the crankshaft cannot
be turned, a larger bearing is
required.
If there is no binding or tightness, it is still necessary to check
clearance to guard against too
loose
a fit. Never file
either the bearing cap or the bearing to compensate
for too much clearance. Do not use shims under a
bearing cap or behind a bearing shell. Do not run a
new bearing half with a worn bearing half. The use
of "Plastigage" of the proper size to measure .001" [0,025 mm.] clearance is recommended for check
ing crankshaft main bearing clearance. The method
of checking clearance is as follows:
a.
Remove the bearing cap and carefully wipe
all
oil from the bearing and the
journal.
b.
Lay a piece of "Plastigage" y%" [3 mm.]
shorter than the width of the bearing across the
journal
(lengthwise of the crankshaft).
c.
Install
the bearing and cap and tighten first
one nut, then the other, a little at a time to the specified torque. As the bearing
tightens
down
around
the
journal,
the "Plastigage" flattens to a
width that indicates the bearing clearance.
d.
Remove the cap and measure the width of
the flattened "Plastigage," using the scale printed
on the
edge
of the envelope. The proper size "Plasti
gage"
will
accurately measure clearance down to .001".
e. If the flattened "Plastigage" tapers toward the middle, or toward the end, or both ends, there
is a difference in clearance, indicating a taper, a
low
spot,
or other irregularity of the bearing or
journal.
D-46.
Fitting Crankshaft
Main
Bearings
Using
Shim Stock
Thin
feeler or shim stock may be used instead of "Plastigage" to check bearing clearances. The
method is simple, but care must be taken to protect
the bearing metal surface from
injury
by too much pressure against the feeler stock,
a.
Cut a piece of .001" [0,025 mm.] thick, by Yl [12,7 mm.] wide, feeler stock }4" [3 mm.]
shorter than the width of the bearing. Coat this 51
Page 52 of 376
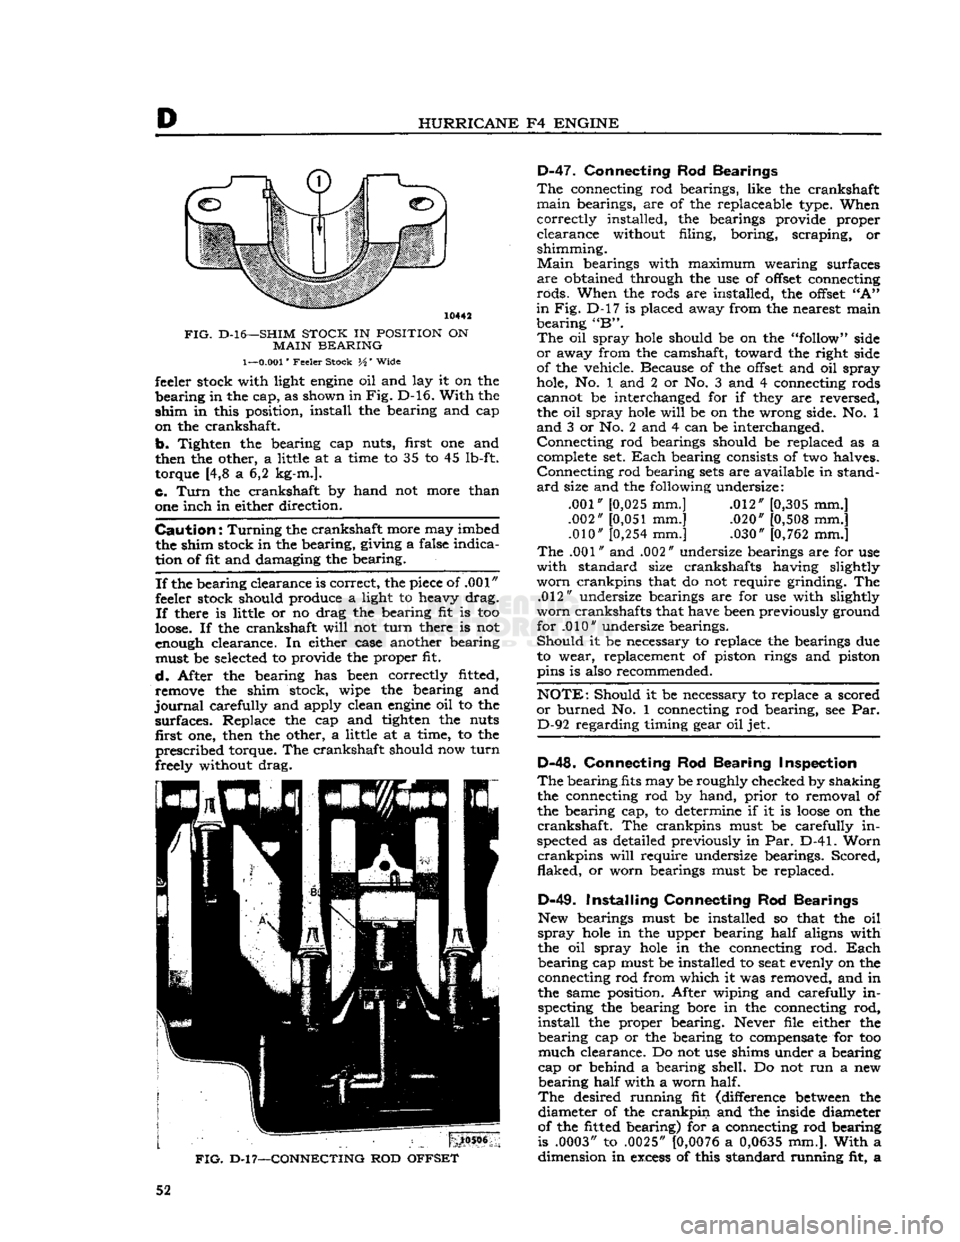
D
HURRICANE
F4
ENGINE
10442
FIG.
D-l6—SHIM
STOCK
IN
POSITION
ON
MAIN
BEARING
1—0.001"
Feeler Stock H' Wide feeler stock with light
engine
oil and lay it on the
bearing
in the cap, as shown in
Fig.
D-16.
With
the
shim
in this position, install the bearing and cap
on the crankshaft.
b.
Tighten the bearing cap nuts, first one and
then the other, a little at a time to 35 to 45 lb-ft. torque [4,8 a 6,2 kg-m.].
c.
Turn
the crankshaft by hand not more than
one inch in either direction.
Caution:
Turning
the crankshaft more may imbed the shim stock in the bearing, giving a false indica
tion of fit and damaging the bearing.
If
the bearing clearance is correct, the piece of .001"
feeler stock should produce a light to heavy drag.
If
there is little or no drag the bearing fit is too
loose.
If the crankshaft
will
not
turn
there is not
enough clearance. In either case another bearing must be selected to provide the proper fit.
d.
After the bearing has been correctly fitted, remove the shim stock, wipe the bearing and
journal
carefully and apply clean
engine
oil to the
surfaces.
Replace the cap and tighten the nuts first one, then the other, a little at a time, to the
prescribed
torque. The crankshaft should now
turn
freely without drag.
FIG.
D-l
7—CONNECTING
ROD
OFFSET
D-47.
Connecting Rod Bearings
The
connecting rod bearings, like the crankshaft
main
bearings, are of the replaceable type. When
correctly
installed, the bearings provide proper
clearance
without filing, boring, scraping, or
shimming.
Main
bearings with maximum wearing surfaces
are
obtained through the use of
offset
connecting
rods.
When the rods are installed, the
offset
"A"
in
Fig. D-l7 is placed away from the nearest main
bearing
"B".
The
oil spray
hole
should be on the "follow" side
or
away from the camshaft, toward the right side
of the vehicle. Because of the
offset
and oil spray
hole, No. 1 and 2 or No. 3 and 4 connecting rods cannot be interchanged for if they are reversed,
the oil spray
hole
will
be on the wrong side. No. 1
and
3 or No. 2 and 4 can be interchanged.
Connecting
rod bearings should be replaced as a complete set.
Each
bearing consists of two halves.
Connecting
rod bearing
sets
are available in stand
ard
size and the following undersize:
.001" [0,025 mm.] .012" [0,305 mm.]
.002"
[0,051
mm.] .020" [0,508 mm.] .010"
[0,254
mm.] .030" [0,762 mm.]
The
.001" and .002" undersize bearings are for use
with
standard size crankshafts having slightly
worn
crankpins that do not require grinding. The .012" undersize bearings are for use with slightly
worn
crankshafts that have been previously ground for .010" undersize bearings.
Should
it be necessary to replace the bearings due to wear, replacement of piston rings and piston
pins is also recommended.
NOTE:
Should it be necessary to replace a scored
or
burned No. 1 connecting rod bearing, see Par. D-92 regarding timing gear oil jet.
D-48.
Connecting Rod Bearing Inspection
The
bearing fits may be roughly checked by shaking the connecting rod by hand,
prior
to removal of
the bearing cap, to determine if it is
loose
on the
crankshaft.
The crankpins must be carefully in
spected as detailed previously in Par. D-41.
Worn
crankpins
will
require undersize bearings. Scored,
flaked,
or
worn bearings must be replaced.
D-49.
Installing Connecting Rod Bearings
New bearings must be installed so that the oil
spray
hole
in the upper bearing
half
aligns with
the oil spray
hole
in the connecting rod.
Each
bearing
cap must be installed to seat evenly on the connecting rod from which it was removed, and in
the same position. After wiping and carefully in specting the bearing bore in the connecting rod,
install
the proper bearing. Never file either the
bearing
cap or the bearing to compensate for too
much
clearance. Do not use shims under a bearing
cap or behind a bearing shell. Do not run a new
bearing
half
with a worn half.
The
desired running fit (difference
between
the diameter of the
crankpin
and the inside diameter
of the fitted bearing) for a connecting rod bearing
is .0003" to .0025"
[0,0076
a
0,0635
mm.].
With
a dimension in
excess
of this standard running fit, a 52