ESP JEEP COMPASS 2020 Owner handbook (in English)
[x] Cancel search | Manufacturer: JEEP, Model Year: 2020, Model line: COMPASS, Model: JEEP COMPASS 2020Pages: 328, PDF Size: 8.85 MB
Page 87 of 328
85
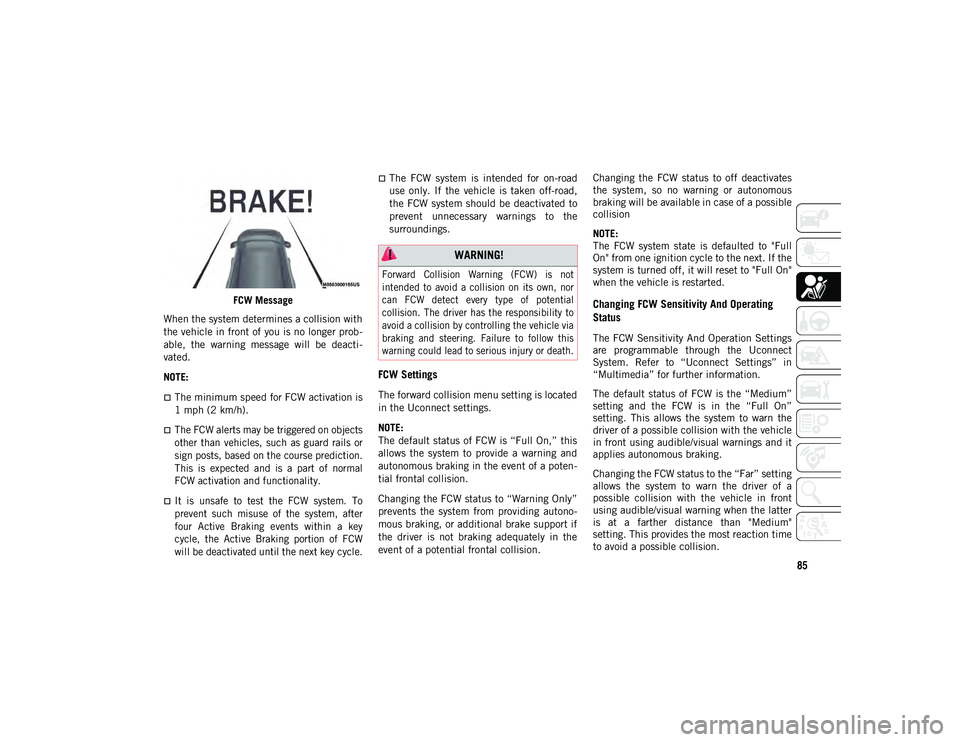
FCW Message
When the system determines a collision with
the vehicle in front of you is no longer prob -
able, the warning message will be deacti -
vated.
NOTE:
The minimum speed for FCW activation is
1 mph (2 km/h).
The FCW alerts may be triggered on objects
other than vehicles, such as guard rails or
sign posts, based on the course prediction.
This is expected and is a part of normal
FCW activation and functionality.
It is unsafe to test the FCW system. To
prevent such misuse of the system, after
four Active Braking events within a key
cycle, the Active Braking portion of FCW
will be deactivated until the next key cycle.
The FCW system is intended for on-road
use only. If the vehicle is taken off-road,
the FCW system should be deactivated to
prevent unnecessary warnings to the
surroundings.
FCW Settings
The forward collision menu setting is located
in the Uconnect settings.
NOTE:
The default status of FCW is “Full On,” this
allows the system to provide a warning and
autonomous braking in the event of a poten -
tial frontal collision.
Changing the FCW status to “Warning Only”
prevents the system from providing autono -
mous braking, or additional brake support if
the driver is not braking adequately in the
event of a potential frontal collision. Changing the FCW status to off deactivates
the system, so no warning or autonomous
braking will be available in case of a possible
collision
NOTE:
The FCW system state is defaulted to "Full
On" from one ignition cycle to the next. If the
system is turned off, it will reset to "Full On"
when the vehicle is restarted.
Changing FCW Sensitivity And Operating
Status
The FCW Sensitivity And Operation Settings
are programmable through the Uconnect
System. Refer to “Uconnect Settings” in
“Multimedia” for further information.
The default status of FCW is the “Medium”
setting and the FCW is in the “Full On”
setting. This allows the system to warn the
driver of a possible collision with the vehicle
in front using audible/visual warnings and it
applies autonomous braking.
Changing the FCW status to the “Far” setting
allows the system to warn the driver of a
possible collision with the vehicle in front
using audible/visual warning when the latter
is at a farther distance than "Medium"
setting. This provides the most reaction time
to avoid a possible collision.
WARNING!
Forward Collision Warning (FCW) is not
intended to avoid a collision on its own, nor
can FCW detect every type of potential
collision. The driver has the responsibility to
avoid a collision by controlling the vehicle via
braking and steering. Failure to follow this
warning could lead to serious injury or death.
2020_JEEP_M6_UG_UK.book Page 85
Page 89 of 328
87
NOTE:
When filling warm tires, the tire pressure
may need to be increased up to an additional
4 psi (28 kPa) above the recommended cold
placard pressure in order to turn the TPMS
Warning Light off.
The system will automatically update and
the TPMS Warning Light will turn off once
the system receives the updated tire pres-
sures. The vehicle may need to be driven for
up to 10 minutes above 15 mph (24 km/h)
in order for the TPMS to receive this informa -
tion.
For example, your vehicle may have a recom -
mended cold (parked for more than three
hours) placard pressure of 33 psi (227 kPa).
If the ambient temperature is 68°F (20°C)
and the measured tire pressure is 28 psi
(193 kPa), a temperature drop to 20°F
(-7°C) will decrease the tire pressure to
approximately 24 psi (165 kPa). This tire
pressure is low enough to turn on the “TPMS
Warning Light.” Driving the vehicle may
cause the tire pressure to rise to approxi -
mately 28 psi (193 kPa), but the TPMS
Warning Light will still be on. In this situa -
tion, the TPMS Warning Light will turn off
only after the tires are inflated to the
vehicle’s recommended cold placard pres -
sure value. NOTE:
The TPMS is not intended to replace
normal tire care and maintenance, or to
provide warning of a tire failure or condi
-
tion.
The TPMS should not be used as a tire
pressure gauge while adjusting your tire
pressure.
Driving on a significantly underinflated
tire causes the tire to overheat and can
lead to tire failure. Underinflation also
reduces fuel efficiency and tire tread life,
and may affect the vehicle’s handling and
stopping ability.
The TPMS is not a substitute for proper
tire maintenance, and it is the driver’s
responsibility to maintain correct tire pres-
sure using an accurate tire pressure
gauge, even if underinflation has not
reached the level to trigger illumination of
the TPMS Warning Light.
Seasonal temperature changes will affect
tire pressure, and the TPMS will monitor
the actual tire pressure in the tire.
The system only warns the tire pressure is
low: it is not able to inflate them.
CAUTION!
The TPMS has been optimized for the
original equipment tires and wheels.
TPMS pressures and warning have been
established for the tire size equipped on
your vehicle. Undesirable system opera-
tion or sensor damage may result when
using replacement equipment that is not
of the same size, type, and/or style. The
TPM sensor is not designed for use on
aftermarket wheels and may contribute
to a poor overall system performance or
sensor damage. Customers are encour -
aged to use OEM wheels to assure proper
TPM feature operation.
Using aftermarket tire sealants may
cause the Tire Pressure Monitoring
System (TPMS) sensor to become inop -
erable. After using an aftermarket tire
sealant it is recommended that you take
your vehicle to your authorized dealer to
have your sensor function checked.
After inspecting or adjusting the tire
pressure always reinstall the valve stem
cap. This will prevent moisture and dirt
from entering the valve stem, which
could damage the TPMS sensor.
2020_JEEP_M6_UG_UK.book Page 87
Page 111 of 328
109
(Continued)
Side Impacts
The Side Air Bags are designed to activate in
certain side impacts. The Occupant
Restraint Controller (ORC) determines
whether the deployment of the Side Air Bags
in a particular impact event is appropriate,
based on the severity and type of collision.
The side impact sensors aid the ORC in
determining the appropriate response to
impact events. The system is calibrated to
deploy the Side Air Bags on the impact side
of the vehicle during impacts that require
Side Air Bag occupant protection. In side
impacts, the Side Air Bags deploy inde-
pendently; a left side impact deploys the left
Side Air Bags only and a right-side impact
deploys the right Side Air Bags only. Vehicle
damage by itself is not a good indicator of
whether or not Side Air Bags should have
deployed.
The Side Air Bags will not deploy in all side
collisions, including some collisions at
certain angles, or some side collisions that
do not impact the area of the passenger
compartment. The Side Air Bags may deploy
during angled or offset frontal collisions
where the front air bags deploy.
Side Air Bags are a supplement to the seat
belt restraint system. Side Air Bags deploy in
less time than it takes to blink your eyes. NOTE:
Air bag covers may not be obvious in the inte
-
rior trim, but they will open during air bag
deployment.
Rollover Events (If Equipped With Rollover
Sensing)
Side Air Bags and seat belt pretensioners are
designed to activate in certain rollover events
(if equipped with rollover sensing). The
Occupant Restraint Controller (ORC) deter -
mines whether deployment in a particular
rollover event is appropriate, based on the
severity and type of collision. Vehicle
damage by itself is not a good indicator of
whether or not Side Air Bags and seat belt
pretensioners should have deployed. WARNING!
Occupants, including children, who are
up against or very close to Side Air Bags
can be seriously injured or killed. Occu -
pants, including children, should never
lean on or sleep against the door, side
windows, or area where the side air bags
inflate, even if they are in an infant or
child restraint.
Seat belts (and child restraints where
appropriate) are necessary for your
protection in all collisions. They also
help keep you in position, away from an
inflating Side Air Bag. To get the best
protection from the Side Air Bags, occu -
pants must wear their seat belts properly
and sit upright with their backs against
the seats. Children must be properly
restrained in a child restraint or booster
seat that is appropriate for the size of the
child.
WARNING!
Side Air Bags need room to inflate. Do
not lean against the door or window. Sit
upright in the center of the seat.
Being too close to the Side Air Bags
during deployment could cause you to be
severely injured or killed.
Relying on the Side Air Bags alone could
lead to more severe injuries in a colli -
sion. The Side Air Bags work with your
seat belt to restrain you properly. In
some collisions, Side Air Bags won’t
deploy at all. Always wear your seat belt
even though you have Side Air Bags.
WARNING! (Continued)
2020_JEEP_M6_UG_UK.book Page 109
Page 113 of 328
111
NOTE:
Air bag covers may not be obvious in the
interior trim, but they will open during air
bag deployment.
After any collision, the vehicle should be
taken to an authorized dealer immedi-
ately.
Enhanced Accident Response System
In the event of an impact, if the communica -
tion network remains intact, and the power
remains intact, depending on the nature of
the event, the ORC will determine whether to
have the Enhanced Accident Response
System perform the following functions:
Cut off fuel to the engine (If Equipped)
Cut off battery power to the electric motor
(If Equipped)
Flash hazard lights as long as the battery
has power
Turn on the interior lights, which remain
on as long as the battery has power or for
15 minutes from the intervention of the
Enhanced Accident Response System.
Unlock the power door locks. Your vehicle may also be designed to perform
any of these other functions in response to
the Enhanced Accident Response System:
Turn off the Fuel Filter Heater, turn off the
HVAC Blower Motor, close the HVAC
Circulation Door
Cut off battery power to the:
Engine
Electric motor (if equipped)
Electric power steering
Brake booster
Electric park brake
Automatic transmission gear selector
Horn
Front wiper
Headlamp washer pump
NOTE:
After an accident, remember to place the
ignition to the STOP (OFF/LOCK) position
and remove the key from the ignition switch
to avoid draining the battery. Carefully check
the vehicle for fuel leaks in the engine
compartment and on the ground near the
engine compartment and fuel tank before resetting the system and starting the engine.
If there are no fuel leaks or damage to the
vehicle electrical devices (e.g. headlights)
after an accident, reset the system by
following the procedure described below. If
you have any doubt, contact an authorized
dealer.
Enhanced Accident Response System Reset
Procedure
After the event occurs, when the system is
active, a message regarding fuel cutoff is
displayed. Turn the ignition switch from igni
-
tion AVV/START or MAR/ACC/ON/RUN to
ignition STOP/OFF/LOCK. Carefully check
the vehicle for fuel leaks in the engine
compartment and on the ground near the
engine compartment and fuel tank before
resetting the system and starting the engine.
Depending on the nature of the event the left
and right turn signal lights, located in the
instrument panel, may both be blinking and
will continue to blink. In order to move your
vehicle to the side of the road, you must
follow the system reset procedure.
2020_JEEP_M6_UG_UK.book Page 111
Page 118 of 328
SAFETY
116
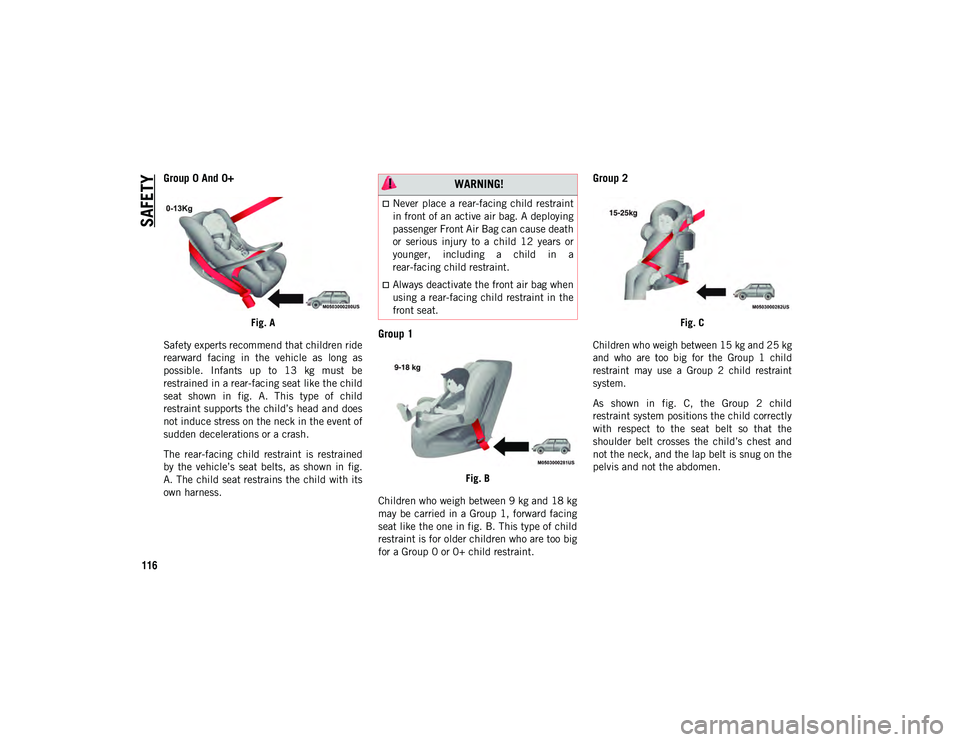
Group 0 And 0+
Fig. A
Safety experts recommend that children ride
rearward facing in the vehicle as long as
possible. Infants up to 13 kg must be
restrained in a rear-facing seat like the child
seat shown in fig. A. This type of child
restraint supports the child’s head and does
not induce stress on the neck in the event of
sudden decelerations or a crash.
The rear-facing child restraint is restrained
by the vehicle’s seat belts, as shown in fig.
A. The child seat restrains the child with its
own harness.Group 1
Fig. B
Children who weigh between 9 kg and 18 kg
may be carried in a Group 1, forward facing
seat like the one in fig. B. This type of child
restraint is for older children who are too big
for a Group 0 or 0+ child restraint.
Group 2
Fig. C
Children who weigh between 15 kg and 25 kg
and who are too big for the Group 1 child
restraint may use a Group 2 child restraint
system.
As shown in fig. C, the Group 2 child
restraint system positions the child correctly
with respect to the seat belt so that the
shoulder belt crosses the child’s chest and
not the neck, and the lap belt is snug on the
pelvis and not the abdomen.
WARNING!
Never place a rear-facing child restraint
in front of an active air bag. A deploying
passenger Front Air Bag can cause death
or serious injury to a child 12 years or
younger, including a child in a
rear-facing child restraint.
Always deactivate the front air bag when
using a rear-facing child restraint in the
front seat.
2020_JEEP_M6_UG_UK.book Page 116
Page 139 of 328
137
MANUAL TRANSMISSION —
IF EQUIPPED
NOTE:
During cold weather, you may experience
increased effort in shifting until the trans-
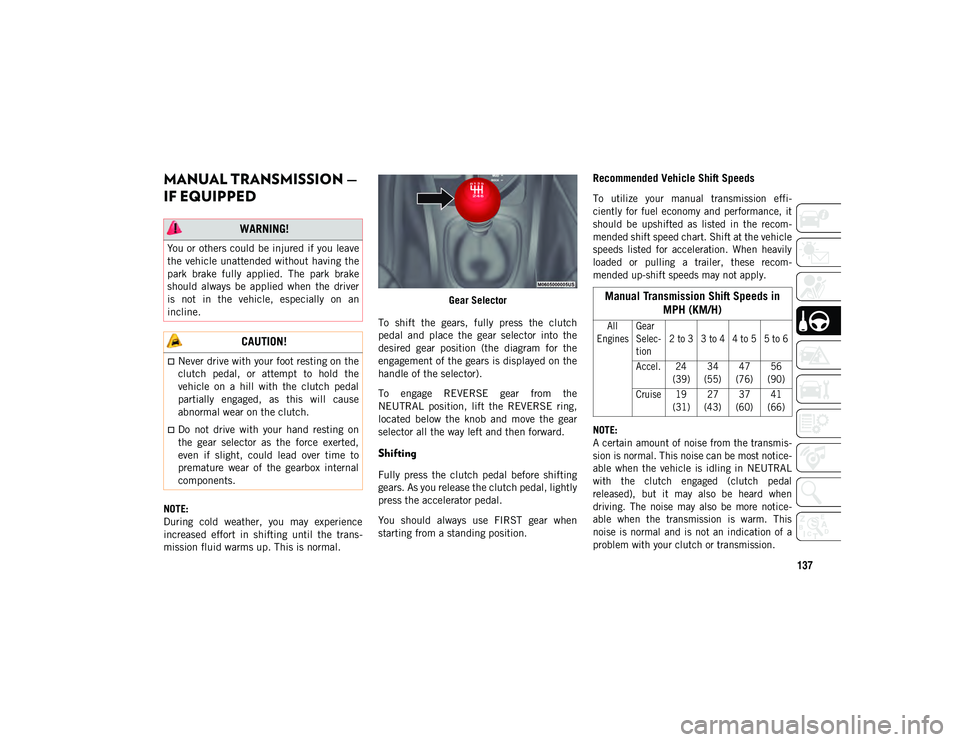
mission fluid warms up. This is normal. Gear Selector
To shift the gears, fully press the clutch
pedal and place the gear selector into the
desired gear position (the diagram for the
engagement of the gears is displayed on the
handle of the selector).
To engage REVERSE gear from the
NEUTRAL position, lift the REVERSE ring,
located below the knob and move the gear
selector all the way left and then forward.
Shifting
Fully press the clutch pedal before shifting
gears. As you release the clutch pedal, lightly
press the accelerator pedal.
You should always use FIRST gear when
starting from a standing position.
Recommended Vehicle Shift Speeds
To utilize your manual transmission effi -
ciently for fuel economy and performance, it
should be upshifted as listed in the recom -
mended shift speed chart. Shift at the vehicle
speeds listed for acceleration. When heavily
loaded or pulling a trailer, these recom -
mended up-shift speeds may not apply.
NOTE:
A certain amount of noise from the transmis -
sion is normal. This noise can be most notice -
able when the vehicle is idling in NEUTRAL
with the clutch engaged (clutch pedal
released), but it may also be heard when
driving. The noise may also be more notice -
able when the transmission is warm. This
noise is normal and is not an indication of a
problem with your clutch or transmission.
WARNING!
You or others could be injured if you leave
the vehicle unattended without having the
park brake fully applied. The park brake
should always be applied when the driver
is not in the vehicle, especially on an
incline.
CAUTION!
Never drive with your foot resting on the
clutch pedal, or attempt to hold the
vehicle on a hill with the clutch pedal
partially engaged, as this will cause
abnormal wear on the clutch.
Do not drive with your hand resting on
the gear selector as the force exerted,
even if slight, could lead over time to
premature wear of the gearbox internal
components.
Manual Transmission Shift Speeds in MPH (KM/H)
All
Engines Gear
Selec
-
tion 2 to 3 3 to 4 4 to 5 5 to 6
Accel. 24 (39)34
(55) 47
(76) 56
(90)
Cruise 19 (31)27
(43) 37
(60) 41
(66)
2020_JEEP_M6_UG_UK.book Page 137
Page 143 of 328
141
to shift the transmission out of PARK (or
NEUTRAL, when the vehicle is stopped or
moving at low speeds). Select the DRIVE
range for normal driving.
NOTE:
In the event of a mismatch between the gear
selector position and the actual transmission
gear (for example, driver selects REVERSE
while driving forward), the position indicator
will blink continuously until the selector is
returned to the proper position, or the
requested shift can be completed.
The electronically-controlled transmission
adapts its shift schedule based on driver
inputs, along with environmental and road
conditions. The transmission electronics are
self-calibrating; therefore, the first few shifts
on a new vehicle may be somewhat abrupt.
This is a normal condition, and precision
shifts will develop within a few hundred
miles (kilometers).
The nine-speed transmission has been devel-
oped to meet the needs of current and future
FWD/AWD vehicles. Software and calibration
is refined to optimize the customer’s driving
experience and fuel economy. By design,
some vehicle and driveline combinations
utilize 9th gear only in very specific driving
situations and conditions. Only shift from DRIVE to PARK or REVERSE
when the accelerator pedal is released and
the vehicle is stopped. Be sure to keep your
foot on the brake pedal when shifting
between these gears.
The transmission gear selector provides
PARK, REVERSE, NEUTRAL, DRIVE, and
AutoStick (+/-) shift positions. Manual shifts
can be made using the AutoStick shift
control. Moving the gear selector into the
AutoStick (+/-) position (beside the DRIVE
position) activates AutoStick mode,
providing manual shift control and displaying
the current gear in the instrument cluster (as
1, 2, 3, etc.). Toggling the gear selector
forward (-) or rearward (+) while in the Auto
-
Stick position will manually select the trans -
mission gear. Refer to "AutoStick" in this
section for further information.
NOTE:
If the gear selector cannot be moved to the
PARK, REVERSE, or NEUTRAL position
(when pushed forward) it is probably in the
AutoStick (+/-) position (beside the DRIVE
position). In AutoStick mode, the transmis -
sion gear (1, 2, 3, etc.) is displayed in the
instrument cluster. Move the gear selector to
the right (into the DRIVE [D] position) for
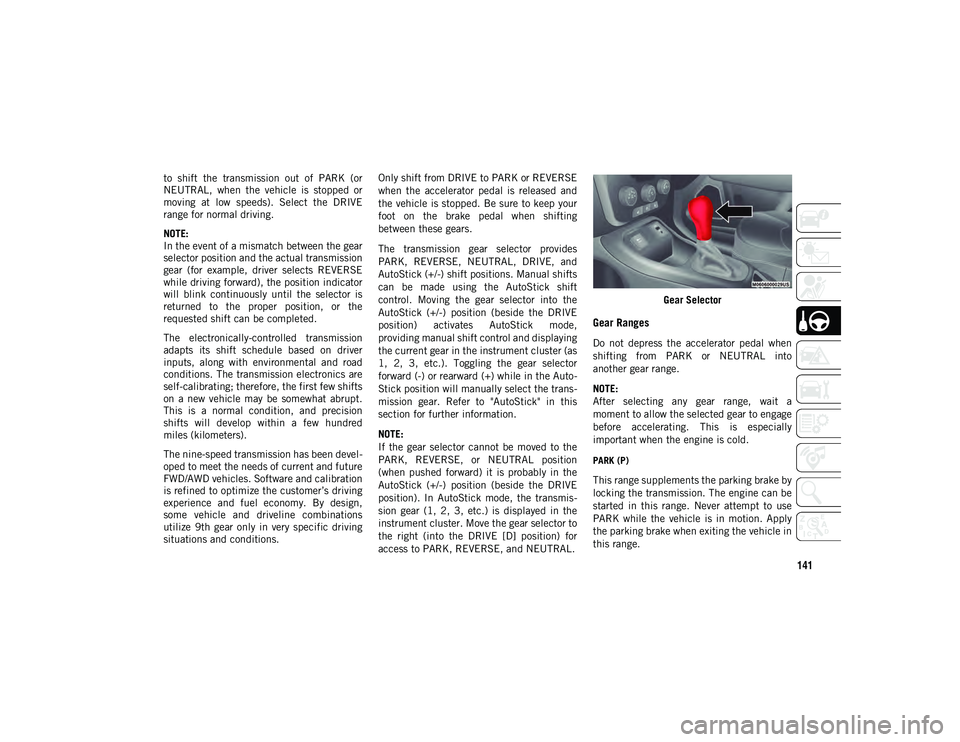
access to PARK, REVERSE, and NEUTRAL. Gear Selector
Gear Ranges
Do not depress the accelerator pedal when
shifting from PARK or NEUTRAL into
another gear range.
NOTE:
After selecting any gear range, wait a
moment to allow the selected gear to engage
before accelerating. This is especially
important when the engine is cold.
PARK (P)
This range supplements the parking brake by
locking the transmission. The engine can be
started in this range. Never attempt to use
PARK while the vehicle is in motion. Apply
the parking brake when exiting the vehicle in
this range.
2020_JEEP_M6_UG_UK.book Page 141
Page 145 of 328
143
The following indicators should be used to
ensure that you have properly engaged the
transmission into the PARK position:
When shifting into PARK, push the lock
button on the gear selector, and firmly
move the selector all the way forward until
it stops and is fully seated.
Look at the transmission gear position
display and verify that it indicates the
PARK (P) position.
With brake pedal released, verify that the
gear selector will not move out of PARK.
REVERSE (R)
This range is for moving the vehicle back-
ward. Shift into REVERSE only after the
vehicle has come to a complete stop.
NEUTRAL (N)
Use this range when the vehicle is standing
for prolonged periods with the engine
running. The engine may be started in this
range. Apply the park brake and shift the
transmission into PARK if you must exit the
vehicle.
DRIVE (D)
This range should be used for most city and
highway driving. It provides the smoothest
upshifts and downshifts, and the best fuel
economy. The transmission automatically
upshifts through all forward gears. The
DRIVE position provides optimum driving
characteristics under all normal operating
conditions.
When frequent transmission shifting occurs
(such as when operating the vehicle under
heavy loading conditions, in hilly terrain,
traveling into strong head winds, or while
towing a heavy trailer), use the AutoStick
shift control to select a lower gear (refer to
"AutoStick" in this section for further infor -
mation). Under these conditions, using a
Do not leave the key fob in or near the
vehicle (or in a location accessible to
children), and do not leave the ignition
(in a vehicle equipped with push button
start) in the ON/RUN mode. A child
could operate power windows, other
controls, or move the vehicle.
CAUTION!
Before moving the transmission gear
selector out of PARK, you must turn the
ignition to the ON/RUN mode, and also
press the brake pedal. Otherwise,
damage to the gear selector could result.
DO NOT race the engine when shifting
from PARK or NEUTRAL into another
gear range, as this can damage the drive-
train.
WARNING! (Continued)
WARNING!
Do not coast in NEUTRAL and never turn
off the ignition to coast down a hill. These
are unsafe practices that limit your
response to changing traffic or road
conditions. You might lose control of the
vehicle and have a collision.
CAUTION!
Towing the vehicle, coasting, or driving for
any other reason with the transmission in
NEUTRAL can cause severe transmission
damage.
Refer to “Recreational Towing” in
“Starting And Operating” and “Towing A
Disabled Vehicle” in “In Case Of
Emergency” for further information.
2020_JEEP_M6_UG_UK.book Page 143
Page 147 of 328
145
Transmission shifting will be more notice-
able when AutoStick is enabled.
The system may revert to automatic shift
mode if a fault or overheat condition is
detected.
NOTE:
When Selec-Speed or Hill Descent Control is
enabled, AutoStick is not active.
To disengage AutoStick, return the gear
selector to the DRIVE position. You can shift
in or out of the AutoStick position at any time
without taking your foot off the accelerator
pedal.
Transmission Limp Home Mode
Transmission function is monitored electron -
ically for abnormal conditions. If a condition
is detected that could result in transmission
damage, Transmission Limp Home Mode is
activated. In this mode, the transmission
may operate only in a fixed gear, or may remain in NEUTRAL. The Malfunction Indi
-
cator Light (MIL) may be illuminated. Limp
Home Mode may allow the vehicle to be
driven to an authorized dealer for service
without damaging the transmission.
In the event of a momentary problem, the
transmission can be reset to regain all
forward gears by performing the following
steps:
1. Stop the vehicle.
2. Shift the transmission into PARK, if possible. If not, shift the transmission to
NEUTRAL.
3. Turn the ignition to the OFF position. On vehicles with push button start, push and
hold the ignition until the engine turns
OFF.
4. Wait approximately 30 seconds.
5. Restart the engine.
6. Shift into the desired gear range. If the problem is no longer detected, the trans -
mission will return to normal operation.
NOTE:
Even if the transmission can be reset, we
recommend that you visit an authorized
dealer at your earliest possible convenience. An authorized dealer has diagnostic equip
-
ment to assess the condition of your trans -
mission. If the transmission cannot be reset,
authorized dealer service is required.
Torque Converter Clutch
A feature designed to improve fuel economy
has been included in the automatic trans -
mission on your vehicle. A clutch within the
torque converter engages automatically at
calibrated speeds. This may result in a
slightly different feeling or response during
normal operation in the upper gears. When
the vehicle speed drops or during some
accelerations, the clutch automatically
disengages.
NOTE:
The torque converter clutch will not engage
until the engine and/or transmission is warm
(usually after 1 to 3 miles [2 to 5 km] of
driving). Because the engine speed is higher
when the torque converter clutch is not
engaged, it may seem as if the transmission
is not shifting properly when the vehicle is
cold. This is normal. The torque converter
clutch will function normally once the power -
train is sufficiently warm.
WARNING!
Do not downshift for additional engine
braking on a slippery surface. The drive
wheels could lose their grip and the
vehicle could skid, causing a collision or
personal injury.
2020_JEEP_M6_UG_UK.book Page 145
Page 158 of 328
STARTING AND OPERATING
156
PARKSENSE FRONT AND
REAR PARK ASSIST — IF
EQUIPPED
The ParkSense Park Assist system provides
visual and audible indications of the
distance between the rear and/or front fascia
and a detected obstacle when backing up or
moving forward (e.g. during a parking
maneuver).
Refer to “ParkSense System Usage Precau-
tions” in “Starting And Operating” in your Owner’s Manual for limitations of this system
and recommendations.
ParkSense will retain the last system state
(enabled or disabled) from the last ignition
cycle when the ignition is changed to the ON/
RUN position.
ParkSense is active in all gear selector posi
-
tions (including PARK), as long as the
system is on. The system will remain active
until the vehicle speed is increased to
approximately 7 mph (11 km/h) or above.
While in REVERSE and above the system's
operating speed, a warning will appear in the
instrument cluster display indicating the
vehicle speed is too fast. The system will
become active again if the vehicle speed is
decreased to speeds less than approximately
6 mph (9 km/h).
ParkSense Sensors
The six ParkSense sensors, located in the
rear fascia/bumper, monitor the area behind
the vehicle that is within the sensors’ field of
view. The sensors can detect obstacles from
approximately 12 inches (30 cm) up to
79 inches (200 cm) from the rear fascia/
bumper in the horizontal direction,
depending on the location, type and orienta -
tion of the obstacle.
WARNING!
Drivers must be careful when backing up
even when using ParkSense. Always
check carefully behind your vehicle, look
behind you, and be sure to check for
pedestrians, animals, other vehicles,
obstructions, and blind spots before
backing up. You are responsible for
safety and must continue to pay atten -
tion to your surroundings. Failure to do
so can result in serious injury or death.
Before using ParkSense, it is strongly
recommended that the ball mount and
hitch ball assembly is disconnected from
the vehicle when the vehicle is not used
for towing. Failure to do so can result in
injury or damage to vehicles or obstacles
because the hitch ball will be much
closer to the obstacle than the rear fascia
when the loudspeaker sounds the contin -
uous tone. Also, the sensors could detect
the ball mount and hitch ball assembly,
depending on its size and shape, giving
a false indication that an obstacle is
behind the vehicle.
CAUTION!
ParkSense is only a parking aid and it is
unable to recognize every obstacle,
including small obstacles. Parking curbs
might be temporarily detected or not
detected at all. Obstacles located above
or below the sensors will not be detected
when they are in close proximity.
The vehicle must be driven slowly when
using ParkSense in order to be able to
stop in time when an obstacle is
detected. It is recommended that the
driver looks over his/her shoulder when
using ParkSense.
2020_JEEP_M6_UG_UK.book Page 156