stop start JEEP COMPASS 2023 User Guide
[x] Cancel search | Manufacturer: JEEP, Model Year: 2023, Model line: COMPASS, Model: JEEP COMPASS 2023Pages: 344, PDF Size: 18.8 MB
Page 52 of 344
50GETTING TO KNOW YOUR VEHICLE
If the lever is pushed while in the intermittent
setting, the wiper will turn on and operate for
several wipe cycles after the end of the lever is
released, and then resume the intermittent
interval previously selected.
NOTE:As a protective measure, the pump will stop if the
switch is held for more than 20 to 30 seconds.
Once the lever is released the pump will resume
normal operation.
WINDSHIELD WIPER DE-ICER —
I
F EQUIPPED
Your vehicle may be equipped with a Windshield
Wiper De-Icer feature that may be activated under
the following conditions:
Activation By Front Defrost — The Windshield
Wiper De-Icer shall be activated automatically in
the case of a cold weather manual start with full
front defrost, and when the ambient tempera -
ture is below 33°F (0.6°C).
Activation By Rear Defrost — The Windshield
Wiper De-Icer shall be activated automatically
when the rear defrost is turned on and when the
ambient temperature is below 33°F (0.6°C).
Activation By Remote Start Operation (If
Equipped) — When Remote Start is active and
the outside ambient temperature is less than
33°F (0.6°C), the Windshield Wiper De-Icer will
be enabled. Exiting Remote Start will resume its
previous operation. If the Windshield Wiper
De-Icer was active, the timer and operation will
continue.
CLIMATE CONTROLS
The Climate Control system allows you to regulate
the temperature, air flow, and direction of air
circulating throughout the vehicle. The controls are
located on the touchscreen (if equipped) and on
the instrument panel below the radio.
AUTOMATIC CLIMATE CONTROL
D
ESCRIPTIONS AND FUNCTIONS
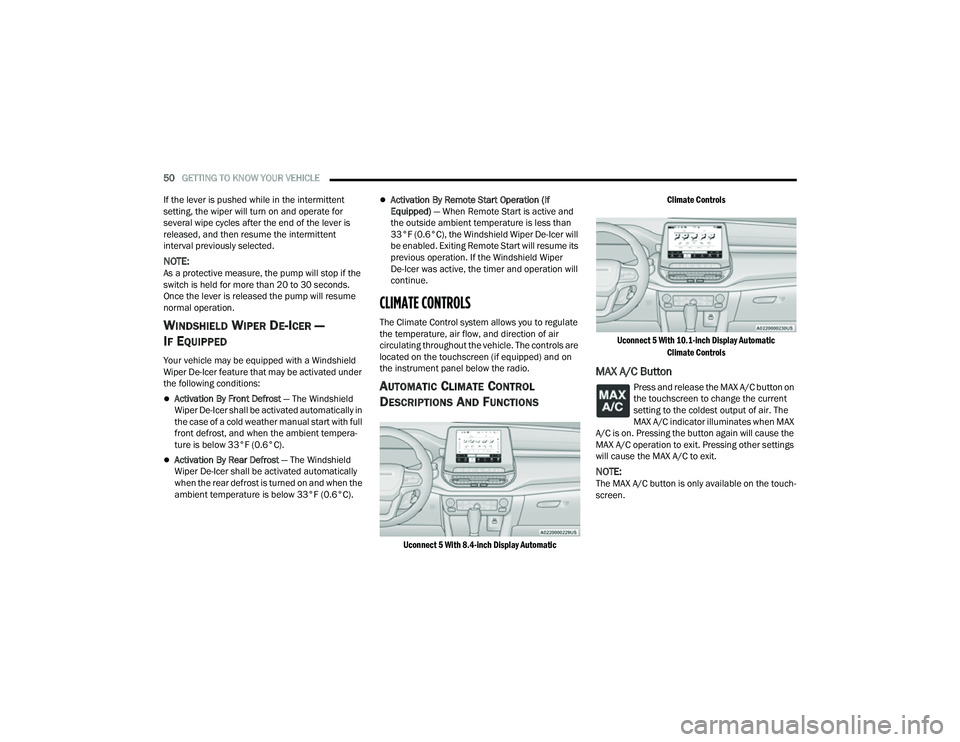
Uconnect 5 With 8.4-inch Display Automatic Climate Controls
Uconnect 5 With 10.1-inch Display Automatic Climate Controls
MAX A/C Button
Press and release the MAX A/C button on
the touchscreen to change the current
setting to the coldest output of air. The
MAX A/C indicator illuminates when MAX
A/C is on. Pressing the button again will cause the
MAX A/C operation to exit. Pressing other settings
will cause the MAX A/C to exit.
NOTE:The MAX A/C button is only available on the touch -
screen.
22_MP_OM_EN_USC_t.book Page 50
Page 59 of 344
GETTING TO KNOW YOUR VEHICLE57
Window Fogging
Vehicle windows tend to fog on the inside in mild,
rainy, and/or humid weather. To clear the
windows, select Defrost or Mix mode and increase
the front blower speed. Do not use the
Recirculation mode without A/C for long periods,
as fogging may occur.
Outside Air Intake
Make sure the air intake, located directly in front of
the windshield, is free of obstructions, such as
leaves. Leaves collected in the air intake may
reduce airflow, and if they enter the air distribution
box, they could plug the water drains. In Winter
months, make sure the air intake is clear of ice,
slush, and snow.
Cabin Air Filter
The Climate Control system filters out dust and
pollen from the air. Contact an authorized dealer to
service your cabin air filter, and to have it replaced
when needed.
Stop/Start System — If Equipped
While in an Autostop, the Climate Control system
may automatically adjust airflow to maintain cabin
comfort. Customer settings will be maintained
upon return to an engine running condition.
Windshield Wiper De-Icer — If Equipped
The windshield wiper De-Icer is a heating element
located at the base of the windshield.
It operates automatically once the following
conditions are met:
Activation By Front Defrost
The wiper De-Icer activates automatically during
a cold weather manual start with full defrost,
and when the ambient temperature is below
33°F (6°C) .
Activation By Rear Defrost
The wiper De-Icer activates automatically when
the Rear Defrost is operating and the ambient
temperature is below 33°F (6°C) .
Activation By Remote Start Operation
When Remote Start is activated and the outside
ambient temperature is less than 33°F (6°C)
the windshield wiper De-Icer is activated. Exiting
Remote Start will resume its previous operation.
If the Windshield Wiper De-Icer was active, the
timer and operation will continue.
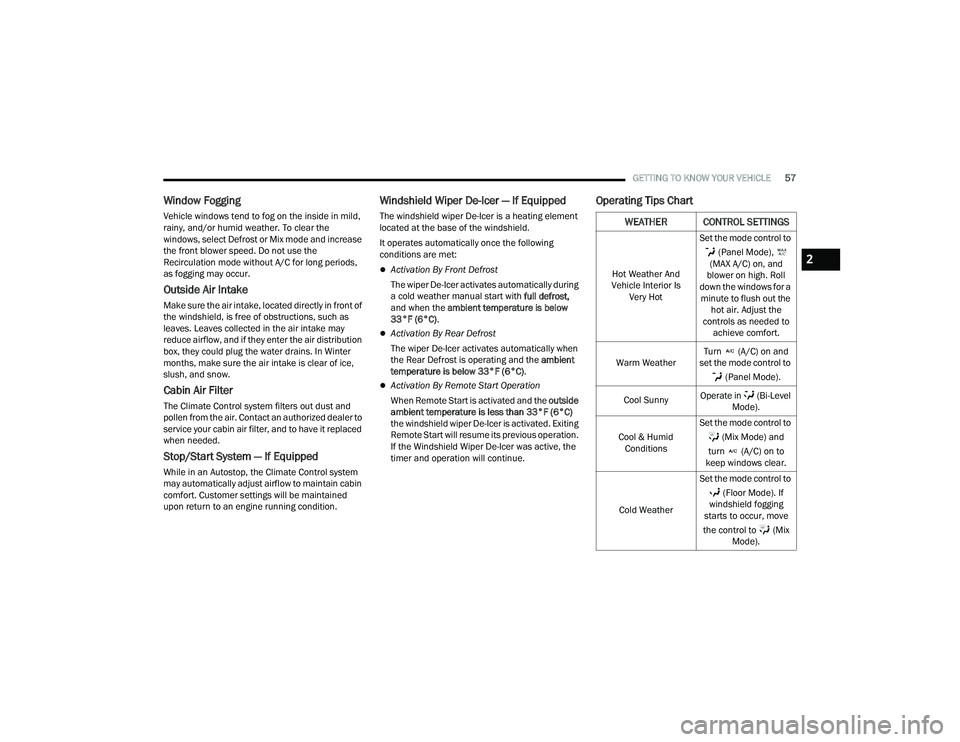
Operating Tips Chart
WEATHER CONTROL SETTINGS
Hot Weather And
Vehicle Interior Is Very Hot Set the mode control to
(Panel Mode),
(MAX A/C) on, and
blower on high. Roll
down the windows for a minute to flush out the hot air. Adjust the
controls as needed to achieve comfort.
Warm Weather Turn (A/C) on and
set the mode control to
(Panel Mode).
Cool Sunny Operate in (Bi-Level
Mode).
Cool & Humid Conditions Set the mode control to
(Mix Mode) and
turn (A/C) on to
keep windows clear.
Cold Weather Set the mode control to
(Floor Mode). If
windshield fogging
starts to occur, move
the control to (Mix Mode).
2
22_MP_OM_EN_USC_t.book Page 57
Page 64 of 344
62GETTING TO KNOW YOUR VEHICLE
WINDOWS
POWER WINDOW CONTROLS
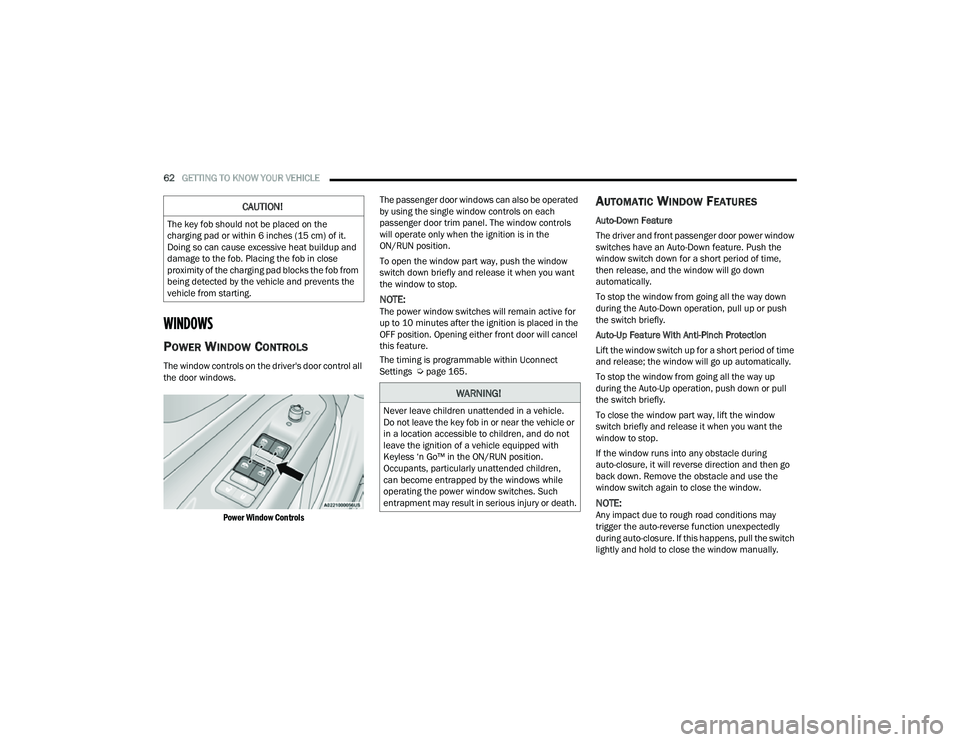
The window controls on the driver's door control all
the door windows.
Power Window Controls
The passenger door windows can also be operated
by using the single window controls on each
passenger door trim panel. The window controls
will operate only when the ignition is in the
ON/RUN position.
To open the window part way, push the window
switch down briefly and release it when you want
the window to stop.
NOTE:The power window switches will remain active for
up to 10 minutes after the ignition is placed in the
OFF position. Opening either front door will cancel
this feature.
The timing is programmable within Uconnect
Settings Ú
page 165.
AUTOMATIC WINDOW FEATURES
Auto-Down Feature
The driver and front passenger door power window
switches have an Auto-Down feature. Push the
window switch down for a short period of time,
then release, and the window will go down
automatically.
To stop the window from going all the way down
during the Auto-Down operation, pull up or push
the switch briefly.
Auto-Up Feature With Anti-Pinch Protection
Lift the window switch up for a short period of time
and release; the window will go up automatically.
To stop the window from going all the way up
during the Auto-Up operation, push down or pull
the switch briefly.
To close the window part way, lift the window
switch briefly and release it when you want the
window to stop.
If the window runs into any obstacle during
auto-closure, it will reverse direction and then go
back down. Remove the obstacle and use the
window switch again to close the window.
NOTE:Any impact due to rough road conditions may
trigger the auto-reverse function unexpectedly
during auto-closure. If this happens, pull the switch
lightly and hold to close the window manually.
CAUTION!
The key fob should not be placed on the
charging pad or within 6 inches (15 cm) of it.
Doing so can cause excessive heat buildup and
damage to the fob. Placing the fob in close
proximity of the charging pad blocks the fob from
being detected by the vehicle and prevents the
vehicle from starting.
WARNING!
Never leave children unattended in a vehicle.
Do not leave the key fob in or near the vehicle or
in a location accessible to children, and do not
leave the ignition of a vehicle equipped with
Keyless ‘n Go™ in the ON/RUN position.
Occupants, particularly unattended children,
can become entrapped by the windows while
operating the power window switches. Such
entrapment may result in serious injury or death.
22_MP_OM_EN_USC_t.book Page 62
Page 82 of 344
80GETTING TO KNOW YOUR INSTRUMENT PANEL
The instrument cluster display will normally display
the main menu or the screens of a selected feature
of the main menu. The main display area also
displays pop-up messages that consist of
approximately 60 possible warning or information
messages. These pop-up messages fall into
several categories:
Five Second Stored Messages
When the appropriate conditions occur, this
type of message takes control of the main
display area for five seconds and then returns to
the previous screen. Most of the messages of
this type are then stored (as long as the condi-
tion that activated it remains active) and can be
reviewed from the “Messages” main menu item.
Examples of this message type are “Right Front
Turn Signal Lamp Out” and “Low Tire Pressure.”
Unstored Messages
This message type is displayed indefinitely or
until the condition that activated the message is
cleared. Examples of this message type are
“Turn Signal On” (if a turn signal is left on) and
“Lights On” (if driver leaves the vehicle with the
lights on).
Unstored Messages Until RUN
These messages deal primarily with the Remote
Start feature. This message type is displayed
until the ignition is in the RUN state. Examples of
this message type are “Remote Start Canceled -
Door Ajar” and “Press Brake Pedal and Push
Button to Start.”
Five Second Unstored Messages
When the appropriate conditions occur, this
type of message takes control of the main
display area for five seconds and then returns to
the previous screen. An example of this
message type is “Automatic High Beams On.”
OIL CHANGE RESET
Your vehicle is equipped with an engine oil
change indicator system. The “Oil Change Due”
message will display in the instrument cluster
display for five seconds after a single chime has
sounded, to indicate the next scheduled oil
change interval. The engine oil change indicator
system is duty cycle based, which means the
engine oil change interval may fluctuate, depen -
dent upon your personal driving style.
Unless reset, this message will continue to
display each time the ignition is cycled to the
ON/RUN position.
To reset the oil change indicator after performing
the scheduled maintenance, refer to the following
procedure:
1. Without pressing the brake pedal, push the ENGINE START/STOP button and cycle the
ignition to the ON/RUN position (do not start
the engine).
2. Fully press the accelerator pedal, slowly, three times within ten seconds.
3. Cycle the ignition to the OFF position.
NOTE:If the indicator message illuminates when you start
the vehicle, the oil change indicator system did not
reset. If necessary, repeat this procedure.
22_MP_OM_EN_USC_t.book Page 80
Page 84 of 344
82GETTING TO KNOW YOUR INSTRUMENT PANEL
INSTRUMENT CLUSTER DISPLAY MENU
I
TEMS
The instrument cluster display can be used to view
the main menu items for several features. Use the
up and down arrow buttons to scroll through
the driver interactive display menu options until
the desired menu is reached.
NOTE:The instrument cluster display menu items display
in the center of the instrument cluster. Menu items
may vary depending on your vehicle features.
Home Screen — If Equipped
Press the Menu button to display the Home
Screen.
Push and release the left or right arrow
button to highlight the desired selection. Push and
release the OK button to select. Press the up or
down arrow button to select a different screen
within the selected category. If the Menu button is
pressed in this view, the instrument cluster will
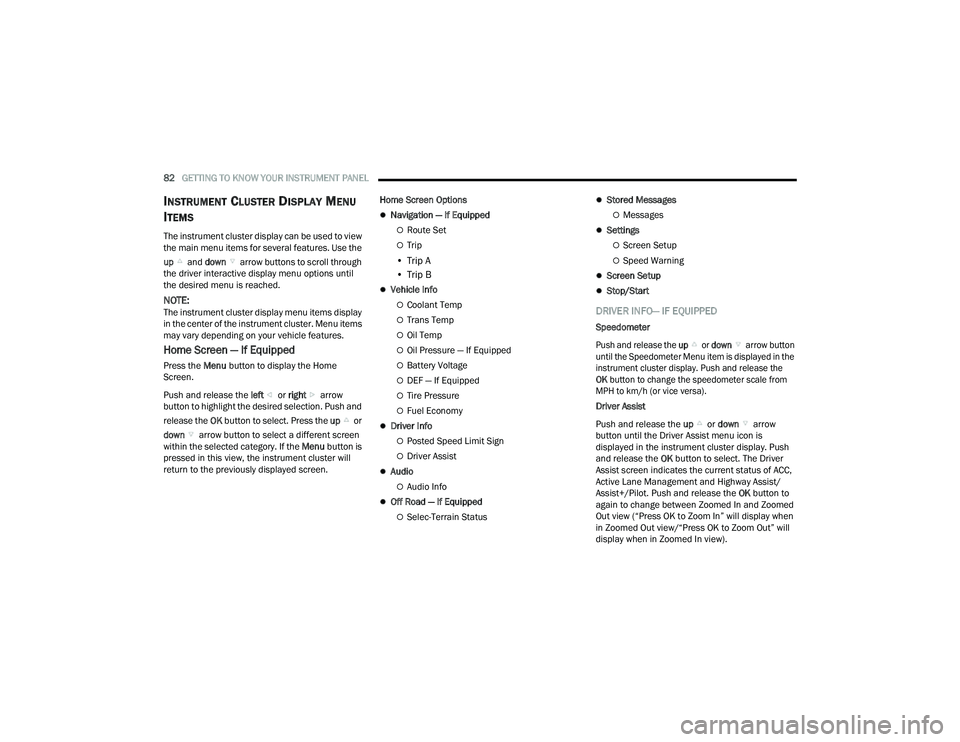
return to the previously displayed screen. Home Screen Options
Navigation — If Equipped
Route Set
Trip
• Trip A
• Trip B
Vehicle Info
Coolant Temp
Trans Temp
Oil Temp
Oil Pressure — If Equipped
Battery Voltage
DEF — If Equipped
Tire Pressure
Fuel Economy
Driver Info
Posted Speed Limit Sign
Driver Assist
Audio
Audio Info
Off Road — If Equipped
Selec-Terrain Status
Stored Messages
Messages
Settings
Screen Setup
Speed Warning
Screen Setup
Stop/Start
DRIVER INFO— IF EQUIPPED
Speedometer
Push and release the
up or down arrow button
until the Speedometer Menu item is displayed in the
instrument cluster display. Push and release the
OK button to change the speedometer scale from
MPH to km/h (or vice versa).
Driver Assist
Push and release the up or down arrow
button until the Driver Assist menu icon is
displayed in the instrument cluster display. Push
and release the OK button to select. The Driver
Assist screen indicates the current status of ACC,
Active Lane Management and Highway Assist/
Assist+/Pilot. Push and release the OK button to
again to change between Zoomed In and Zoomed
Out view (“Press OK to Zoom In” will display when
in Zoomed Out view/“Press OK to Zoom Out” will
display when in Zoomed In view).
22_MP_OM_EN_USC_t.book Page 82
Page 87 of 344
GETTING TO KNOW YOUR INSTRUMENT PANEL85
STOP/START – IF EQUIPPED
Push and release the up or down arrow
button until the Stop/Start menu title is displayed
in the instrument cluster display.
AUDIO
Push and release the up or down arrow
button until the Audio menu title is displayed in the
instrument cluster display.
STORED MESSAGES
Push and release the up or down arrow
button until the Messages Menu Icon is highlighted
in the instrument cluster display. This feature
shows the number of stored warning messages.
Pushing the left or right arrow button will
allow you to scroll through the stored messages.
SCREEN SETUP
Push and release the up or down arrow
button until the Screen Setup Menu Icon/Title is
highlighted in the instrument cluster display. Push
and release the OK button to enter the submenus
and follow the prompts on the screen as needed.
The Screen Setup feature allows you to change
what information is displayed in the instrument
cluster as well as the location that information is
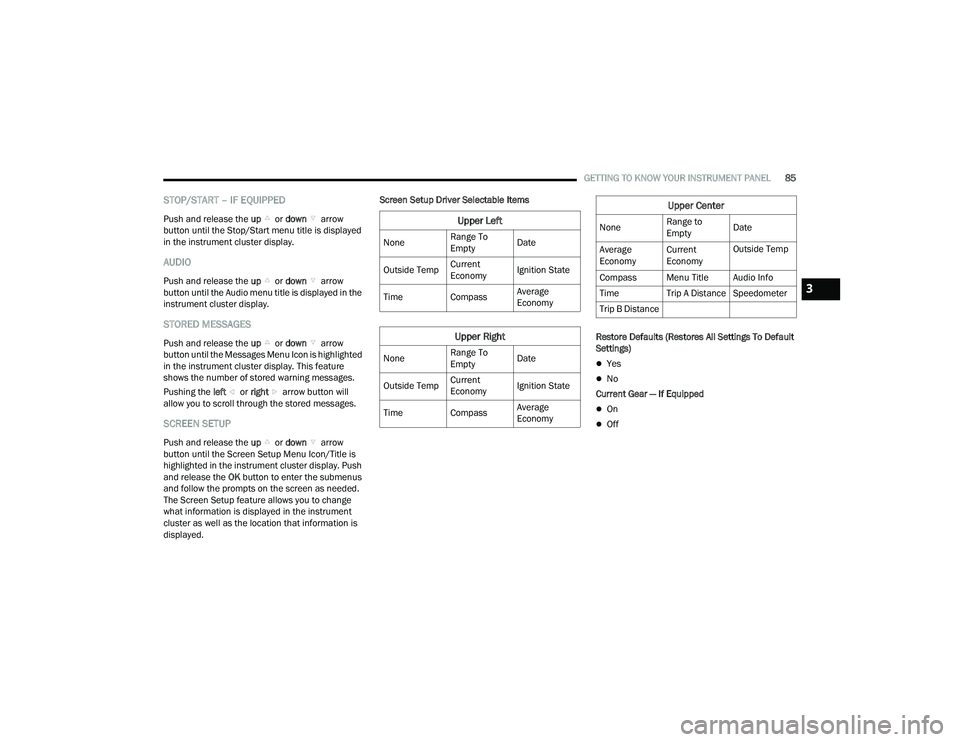
displayed. Screen Setup Driver Selectable Items
Restore Defaults (Restores All Settings To Default
Settings)
Yes
No
Current Gear — If Equipped
On
Off
Upper Left
None Range To
EmptyDate
Outside Temp Current
EconomyIgnition State
Time Compass Average
Economy
Upper Right
NoneRange To
EmptyDate
Outside Temp Current
EconomyIgnition State
Time Compass Average
Economy
Upper Center
NoneRange to
EmptyDate
Average
Economy Current
EconomyOutside Temp
Compass Menu Title Audio Info
Time Trip A Distance Speedometer
Trip B Distance
3
22_MP_OM_EN_USC_t.book Page 85
Page 91 of 344
GETTING TO KNOW YOUR INSTRUMENT PANEL89
Loss of the battery charge may indicate one or
more of the following conditions:
The charging system cannot deliver enough
electrical power to the vehicle system because
the electrical loads are larger than the capability
of charging system. The charging system is still
functioning properly.
Turning on all possible vehicle electrical loads
(e.g. HVAC to max settings, exterior and interior
lights, overloaded power outlets +12 Volts,
150W, USB ports) during certain driving condi -
tions (city driving, towing, frequent stopping).
Installing options like additional lights, upfitter
electrical accessories, audio systems, alarms
and similar devices.
Unusual driving cycles (short trips separated by
long parking periods).
The vehicle was parked for an extended period
of time (weeks, months).
The battery was recently replaced and was not
charged completely.
The battery was discharged by an electrical load
left on when the vehicle was parked.
The battery was used for an extended period
with the engine not running to supply radio,
lights, chargers, +12 Volts portable appliances
like vacuum cleaners, game consoles and
similar devices. What to do when an electrical load reduction
action message is present (“Battery Saver On” or
“Battery Saver Mode”)
During a trip:
Reduce power to unnecessary loads if possible:
Turn off redundant lights (interior or exterior)
Check what may be plugged into power
outlets +12 Volts, 150W, USB ports
Check HVAC settings (blower, temperature)
Check the audio settings (volume)
After a trip:
Check if any aftermarket equipment was
installed (additional lights, upfitter electrical
accessories, audio systems, alarms) and review
specifications if any (load and Ignition Off Draw
currents).
Evaluate the latest driving cycles (distance,
driving time and parking time).
The vehicle should have service performed if
the message is still present during consecutive
trips and the evaluation of the vehicle and
driving pattern did not help to identify the cause.
WARNING LIGHTS AND MESSAGES
The warning/indicator lights will illuminate in the
instrument panel together with a dedicated
message and/or acoustic signal when applicable.
These indications are indicative and precautionary
and as such must not be considered as exhaustive
and/or alternative to the information contained in
the Owner’s Manual, which you are advised to read
carefully in all cases. Always refer to the
information in this chapter in the event of a failure
indication. All active telltales will display first if
applicable. The system check menu may appear
different based upon equipment options and
current vehicle status. Some telltales are optional
and may not appear.
RED WARNING LIGHTS
Air Bag Warning Light
This warning light will illuminate to
indicate a fault with the air bag, and will
turn on for four to eight seconds as a bulb
check when the ignition is placed in the
ON/RUN position. This light will illuminate with a
single chime when a fault with the air bag has been
detected, it will stay on until the fault is cleared. If
the light is either not on during startup, stays on, or
turns on while driving, have the system inspected
at an authorized dealer as soon as possible.
3
22_MP_OM_EN_USC_t.book Page 89
Page 93 of 344
GETTING TO KNOW YOUR INSTRUMENT PANEL91
Drowsiness Detected Warning —
If Equipped
Driver drowsiness detection helps to
avoid crashes caused by fatigue by
advising drivers to take a break in time.
Once Drowsy Driver is detected, A pop-up
will display continuously until the driver presses
the OK button to clear.
Once the pop-up message is cleared, it is stored
until the condition is no longer true.
Electric Power Steering (EPS) Fault
Warning Light
This warning light will turn on when
there's a fault with the EPS system
Ú page 114.
Electronic Throttle Control (ETC) Warning
Light
This warning light will illuminate to
indicate a problem with the ETC system.
If a problem is detected while the vehicle
is running, the light will either stay on or flash depending on the nature of the problem.
Cycle the ignition when the vehicle is safely and
completely stopped and the transmission is placed
in the PARK position. The light should turn off. If
the light remains on with the vehicle running, your
vehicle will usually be drivable; however, see an
authorized dealer for service as soon as possible.
NOTE:This light may turn on if the accelerator and brake
pedals are pressed at the same time.
If the light continues to flash when the vehicle is
running, immediate service is required and you
may experience reduced performance, an
elevated/rough idle, or engine stall and your
vehicle may require towing. The light will come on
when the ignition is placed in the ON/RUN position
and remain on briefly as a bulb check. If the light
does not come on during starting, have the system
checked by an authorized dealer.
Engine Temperature Warning Light
This warning light will illuminate to warn
of an overheated engine condition. If the
engine coolant temperature is too high,
this light will illuminate and a single
chime will sound.
If the light turns on while driving, safely pull over
and stop the vehicle. If the Air Conditioning (A/C)
system is on, turn it off. Also, shift the transmission
into NEUTRAL (N) and idle the vehicle. If the temperature reading does not return to normal,
turn the engine off immediately and call for service
Ú
page 261.
Hood Open Warning Light
This warning light will illuminate when the
hood is left open and not fully closed.
NOTE:If the vehicle is moving, there will also be a single
chime.
Liftgate Open Warning Light
This warning light will illuminate when the
liftgate is open.
NOTE:If the vehicle is moving, there will also be a single
chime.
Oil Pressure Warning Light
This warning light will illuminate to
indicate low engine oil pressure. If the
light turns on while driving, stop the
vehicle, shut off the engine as soon as
possible, and contact an authorized dealer.
A chime will sound when this light turns on.
Do not operate the vehicle until the cause is
corrected. This light does not indicate how much oil
is in the engine. The engine oil level must be
checked under the hood.
WARNING!
Continued operation with reduced assist could
pose a safety risk to yourself and others. Service
should be obtained as soon as possible.
3
22_MP_OM_EN_USC_t.book Page 91
Page 94 of 344
92GETTING TO KNOW YOUR INSTRUMENT PANEL
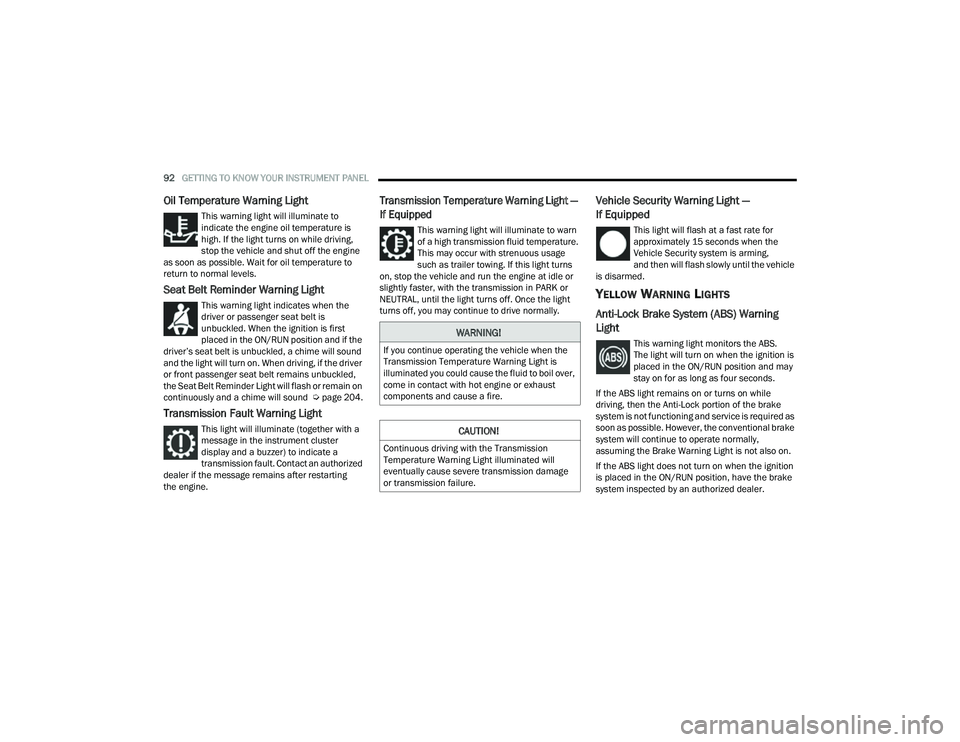
Oil Temperature Warning Light
This warning light will illuminate to
indicate the engine oil temperature is
high. If the light turns on while driving,
stop the vehicle and shut off the engine
as soon as possible. Wait for oil temperature to
return to normal levels.
Seat Belt Reminder Warning Light
This warning light indicates when the
driver or passenger seat belt is
unbuckled. When the ignition is first
placed in the ON/RUN position and if the
driver’s seat belt is unbuckled, a chime will sound
and the light will turn on. When driving, if the driver
or front passenger seat belt remains unbuckled,
the Seat Belt Reminder Light will flash or remain on
continuously and a chime will sound Ú page 204.
Transmission Fault Warning Light
This light will illuminate (together with a
message in the instrument cluster
display and a buzzer) to indicate a
transmission fault. Contact an authorized
dealer if the message remains after restarting
the engine.
Transmission Temperature Warning Light —
If Equipped
This warning light will illuminate to warn
of a high transmission fluid temperature.
This may occur with strenuous usage
such as trailer towing. If this light turns
on, stop the vehicle and run the engine at idle or
slightly faster, with the transmission in PARK or
NEUTRAL, until the light turns off. Once the light
turns off, you may continue to drive normally.
Vehicle Security Warning Light —
If Equipped
This light will flash at a fast rate for
approximately 15 seconds when the
Vehicle Security system is arming,
and then will flash slowly until the vehicle
is disarmed.
YELLOW WARNING LIGHTS
Anti-Lock Brake System (ABS) Warning
Light
This warning light monitors the ABS.
The light will turn on when the ignition is
placed in the ON/RUN position and may
stay on for as long as four seconds.
If the ABS light remains on or turns on while
driving, then the Anti-Lock portion of the brake
system is not functioning and service is required as
soon as possible. However, the conventional brake
system will continue to operate normally,
assuming the Brake Warning Light is not also on.
If the ABS light does not turn on when the ignition
is placed in the ON/RUN position, have the brake
system inspected by an authorized dealer.WARNING!
If you continue operating the vehicle when the
Transmission Temperature Warning Light is
illuminated you could cause the fluid to boil over,
come in contact with hot engine or exhaust
components and cause a fire.
CAUTION!
Continuous driving with the Transmission
Temperature Warning Light illuminated will
eventually cause severe transmission damage
or transmission failure.
22_MP_OM_EN_USC_t.book Page 92
Page 95 of 344
GETTING TO KNOW YOUR INSTRUMENT PANEL93
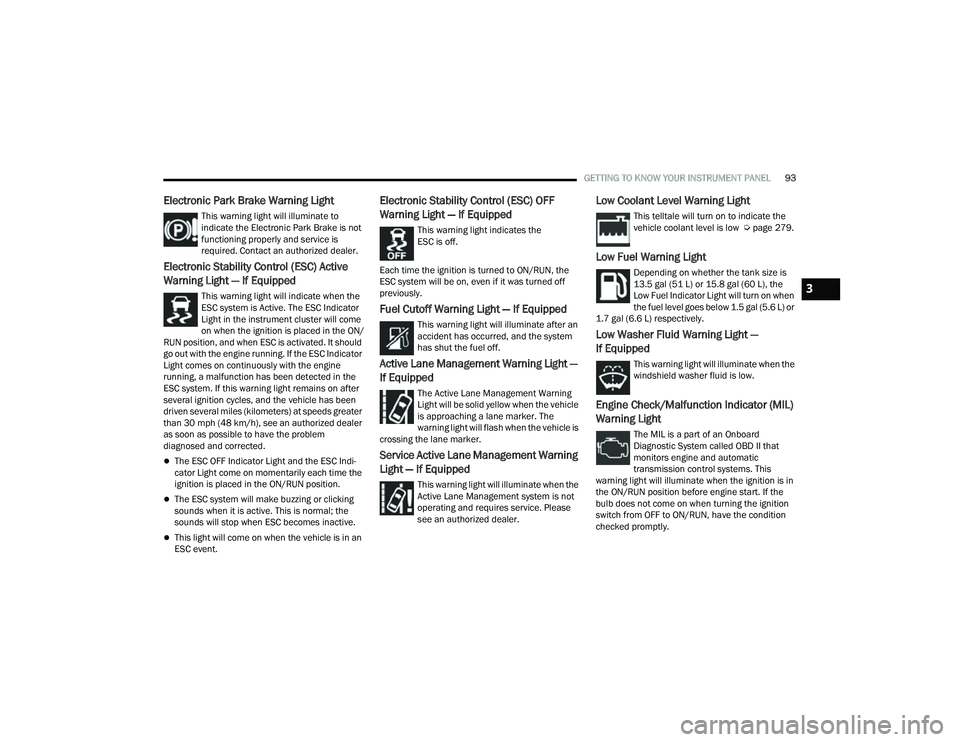
Electronic Park Brake Warning Light
This warning light will illuminate to
indicate the Electronic Park Brake is not
functioning properly and service is
required. Contact an authorized dealer.
Electronic Stability Control (ESC) Active
Warning Light — If Equipped
This warning light will indicate when the
ESC system is Active. The ESC Indicator
Light in the instrument cluster will come
on when the ignition is placed in the ON/
RUN position, and when ESC is activated. It should
go out with the engine running. If the ESC Indicator
Light comes on continuously with the engine
running, a malfunction has been detected in the
ESC system. If this warning light remains on after
several ignition cycles, and the vehicle has been
driven several miles (kilometers) at speeds greater
than 30 mph (48 km/h), see an authorized dealer
as soon as possible to have the problem
diagnosed and corrected.
The ESC OFF Indicator Light and the ESC Indi -
cator Light come on momentarily each time the
ignition is placed in the ON/RUN position.
The ESC system will make buzzing or clicking
sounds when it is active. This is normal; the
sounds will stop when ESC becomes inactive.
This light will come on when the vehicle is in an
ESC event.
Electronic Stability Control (ESC) OFF
Warning Light — If Equipped
This warning light indicates the
ESC is off.
Each time the ignition is turned to ON/RUN, the
ESC system will be on, even if it was turned off
previously.
Fuel Cutoff Warning Light — If Equipped
This warning light will illuminate after an
accident has occurred, and the system
has shut the fuel off.
Active Lane Management Warning Light —
If Equipped
The Active Lane Management Warning
Light will be solid yellow when the vehicle
is approaching a lane marker. The
warning light will flash when the vehicle is
crossing the lane marker.
Service Active Lane Management Warning
Light — If Equipped
This warning light will illuminate when the
Active Lane Management system is not
operating and requires service. Please
see an authorized dealer.
Low Coolant Level Warning Light
This telltale will turn on to indicate the
vehicle coolant level is low Ú page 279.
Low Fuel Warning Light
Depending on whether the tank size is
13.5 gal (51 L) or 15.8 gal (60 L), the
Low Fuel Indicator Light will turn on when
the fuel level goes below 1.5 gal (5.6 L) or
1.7 gal (6.6 L) respectively.
Low Washer Fluid Warning Light —
If Equipped
This warning light will illuminate when the
windshield washer fluid is low.
Engine Check/Malfunction Indicator (MIL)
Warning Light
The MIL is a part of an Onboard
Diagnostic System called OBD II that
monitors engine and automatic
transmission control systems. This
warning light will illuminate when the ignition is in
the ON/RUN position before engine start. If the
bulb does not come on when turning the ignition
switch from OFF to ON/RUN, have the condition
checked promptly.
3
22_MP_OM_EN_USC_t.book Page 93