torque JEEP GLADIATOR 2023 User Guide
[x] Cancel search | Manufacturer: JEEP, Model Year: 2023, Model line: GLADIATOR, Model: JEEP GLADIATOR 2023Pages: 448, PDF Size: 17.37 MB
Page 95 of 448
GETTING TO KNOW YOUR VEHICLE93
INSTALLING THE SOFT TOP
NOTE:If installing the soft top immediately after removing
the hard top, ensure the wire harness is stored
properly, and not tucked under the belt rail
Úpage 98.
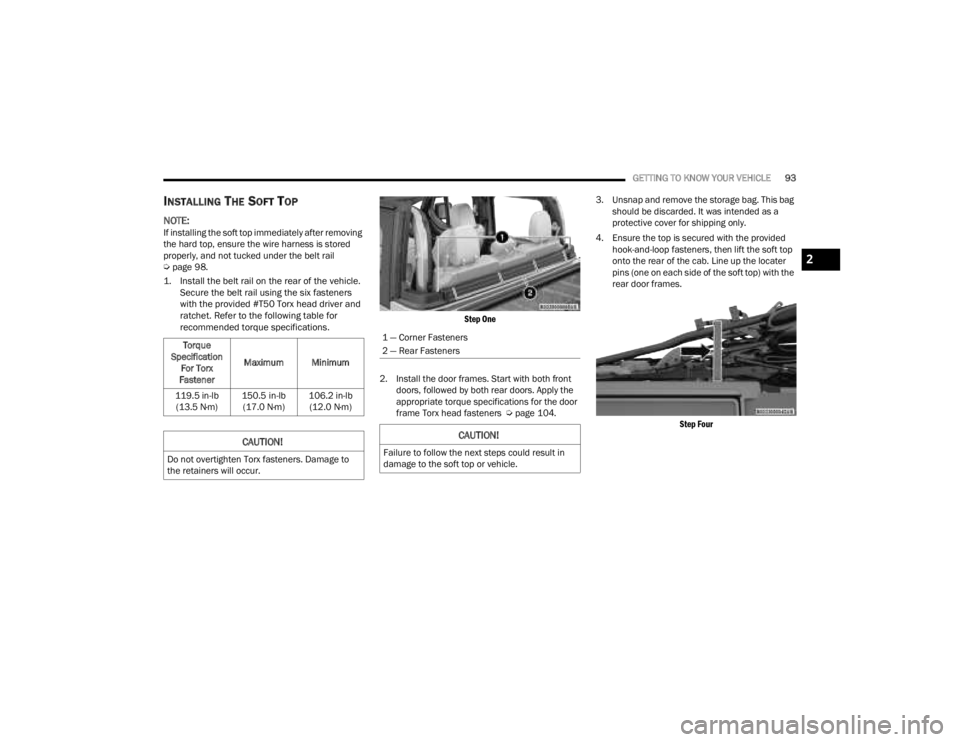
1. Install the belt rail on the rear of the vehicle. Secure the belt rail using the six fasteners
with the provided #T50 Torx head driver and
ratchet. Refer to the following table for
recommended torque specifications.
Step One
2. Install the door frames. Start with both front doors, followed by both rear doors. Apply the
appropriate torque specifications for the door
frame Torx head fasteners Ú page 104.3. Unsnap and remove the storage bag. This bag
should be discarded. It was intended as a
protective cover for shipping only.
4. Ensure the top is secured with the provided hook-and-loop fasteners, then lift the soft top
onto the rear of the cab. Line up the locater
pins (one on each side of the soft top) with the
rear door frames.
Step Four
Torque
Specification For Torx
Fastener Maximum Minimum
119.5 in-lb (13.5 N·m) 150.5 in-lb
(17.0 N·m) 106.2 in-lb
(12.0 N·m)
CAUTION!
Do not overtighten Torx fasteners. Damage to
the retainers will occur.
1 — Corner Fasteners
2 — Rear Fasteners
CAUTION!
Failure to follow the next steps could result in
damage to the soft top or vehicle.
2
23_JT_OM_EN_USC_t.book Page 93
Page 96 of 448
94GETTING TO KNOW YOUR VEHICLE
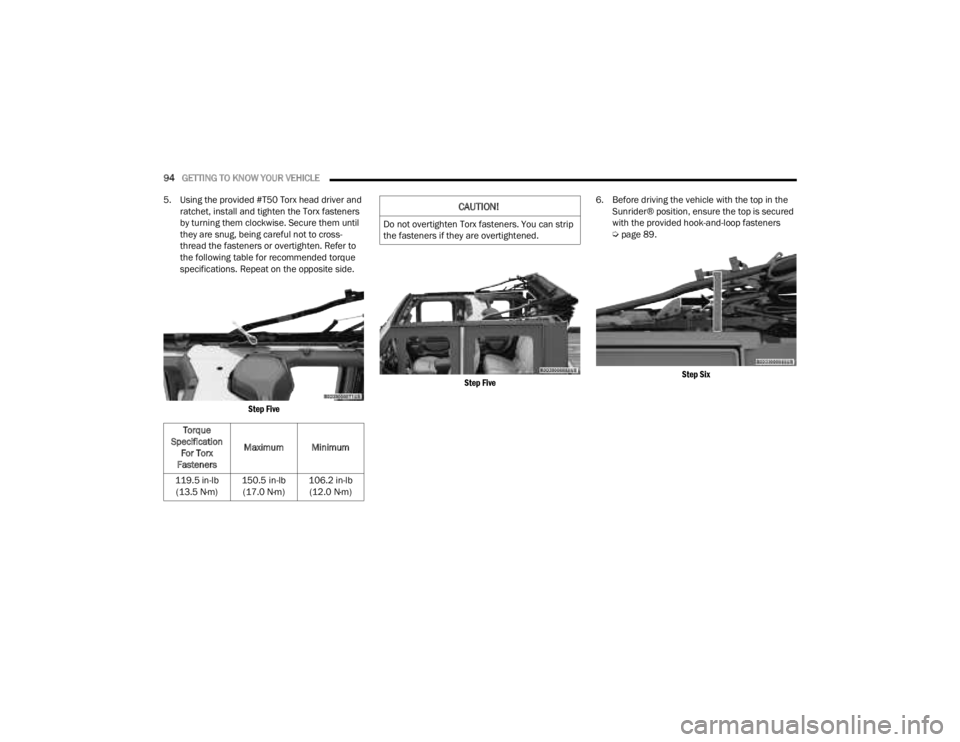
5. Using the provided #T50 Torx head driver and ratchet, install and tighten the Torx fasteners
by turning them clockwise. Secure them until
they are snug, being careful not to cross-
thread the fasteners or overtighten. Refer to
the following table for recommended torque
specifications. Repeat on the opposite side.
Step Five Step Five
6. Before driving the vehicle with the top in the
Sunrider® position, ensure the top is secured
with the provided hook-and-loop fasteners
Úpage 89.
Step Six
Torque
Specification For Torx
Fasteners Maximum Minimum
119.5 in-lb (13.5 N·m) 150.5 in-lb
(17.0 N·m) 106.2 in-lb
(12.0 N·m)
CAUTION!
Do not overtighten Torx fasteners. You can strip
the fasteners if they are overtightened.
23_JT_OM_EN_USC_t.book Page 94
Page 102 of 448
100GETTING TO KNOW YOUR VEHICLE
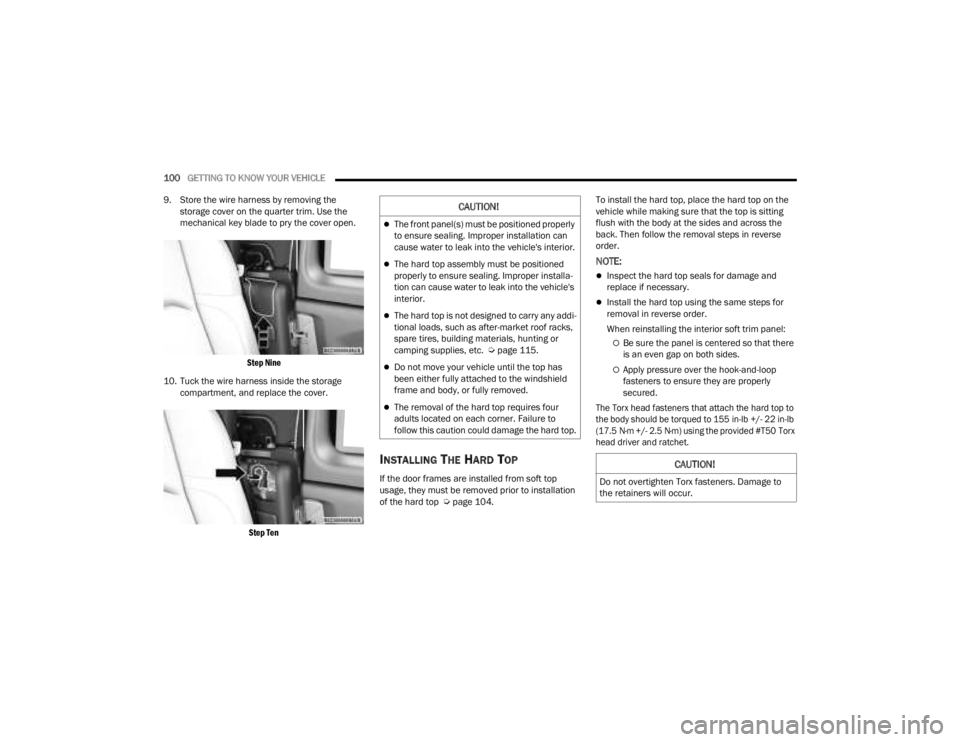
9. Store the wire harness by removing the storage cover on the quarter trim. Use the
mechanical key blade to pry the cover open.
Step Nine
10. Tuck the wire harness inside the storage compartment, and replace the cover.
Step Ten
INSTALLING THE HARD TOP
If the door frames are installed from soft top
usage, they must be removed prior to installation
of the hard top Ú page 104. To install the hard top, place the hard top on the
vehicle while making sure that the top is sitting
flush with the body at the sides and across the
back. Then follow the removal steps in reverse
order.
NOTE:
Inspect the hard top seals for damage and
replace if necessary.
Install the hard top using the same steps for
removal in reverse order.
When reinstalling the interior soft trim panel:
Be sure the panel is centered so that there
is an even gap on both sides.
Apply pressure over the hook-and-loop
fasteners to ensure they are properly
secured.
The Torx head fasteners that attach the hard top to
the body should be torqued to 155 in-lb +/- 22 in-lb
(17.5 N·m +/- 2.5 N·m) using the provided #T50 Torx
head driver and ratchet.
CAUTION!
The front panel(s) must be positioned properly
to ensure sealing. Improper installation can
cause water to leak into the vehicle's interior.
The hard top assembly must be positioned
properly to ensure sealing. Improper installa -
tion can cause water to leak into the vehicle's
interior.
The hard top is not designed to carry any addi -
tional loads, such as after-market roof racks,
spare tires, building materials, hunting or
camping supplies, etc. Ú page 115.
Do not move your vehicle until the top has
been either fully attached to the windshield
frame and body, or fully removed.
The removal of the hard top requires four
adults located on each corner. Failure to
follow this caution could damage the hard top.
CAUTION!
Do not overtighten Torx fasteners. Damage to
the retainers will occur.
23_JT_OM_EN_USC_t.book Page 100
Page 104 of 448
102GETTING TO KNOW YOUR VEHICLE
5. Repeat steps 3 and 4 on the other side of the vehicle.
NOTE:The recommended torque specification for the
front and rear door rail attachment bolts is 8.8 ft-lb
(12 N·m).
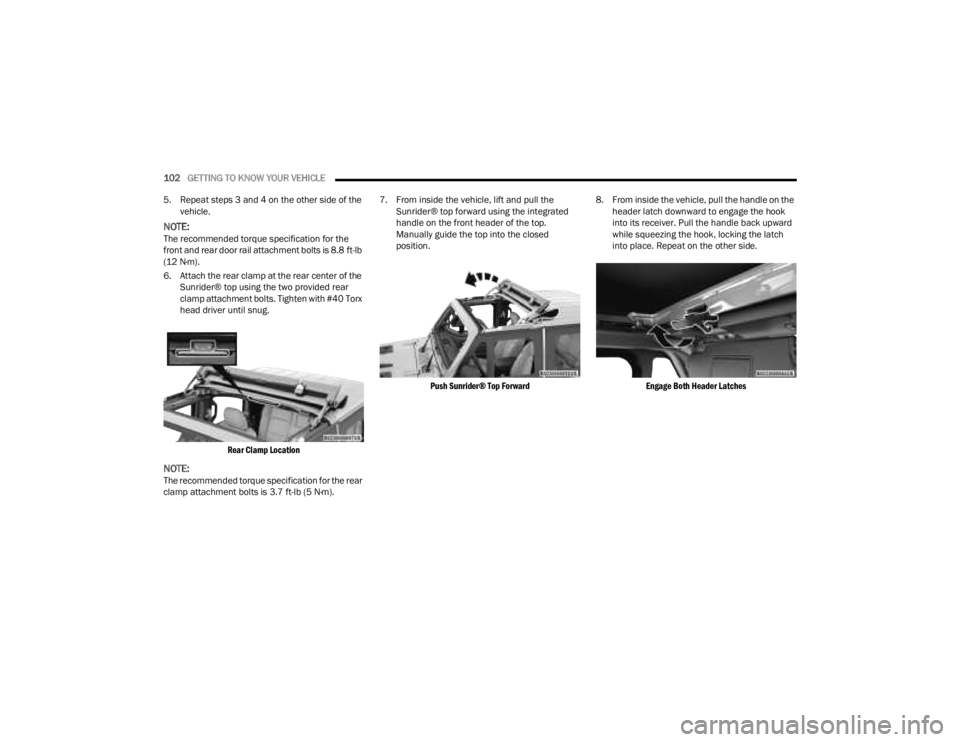
6. Attach the rear clamp at the rear center of the Sunrider® top using the two provided rear
clamp attachment bolts. Tighten with #40 Torx
head driver until snug.
Rear Clamp Location
NOTE:The recommended torque specification for the rear
clamp attachment bolts is 3.7 ft-lb (5 N·m). 7. From inside the vehicle, lift and pull the
Sunrider® top forward using the integrated
handle on the front header of the top.
Manually guide the top into the closed
position.
Push Sunrider® Top Forward
8. From inside the vehicle, pull the handle on the
header latch downward to engage the hook
into its receiver. Pull the handle back upward
while squeezing the hook, locking the latch
into place. Repeat on the other side.
Engage Both Header Latches
23_JT_OM_EN_USC_t.book Page 102
Page 107 of 448
GETTING TO KNOW YOUR VEHICLE105
DOOR FRAME INSTALLATION
1. Install the front door frame first.
2. Ensure the windshield is in the “up” position.
Carefully place the front door frame in the
rubber seal at the top of the windshield, and
line up the holes for the Torx head fasteners
(two for each door).
3. Swing the frame bracket around the side of the door frame, and insert the fasteners from
underneath. Tighten with the #T40 Torx head
driver until they are snug, being careful not to
cross-thread the fasteners or overtighten.
Refer to the following table for the appropriate
torque specifications for the door frame
fasteners.
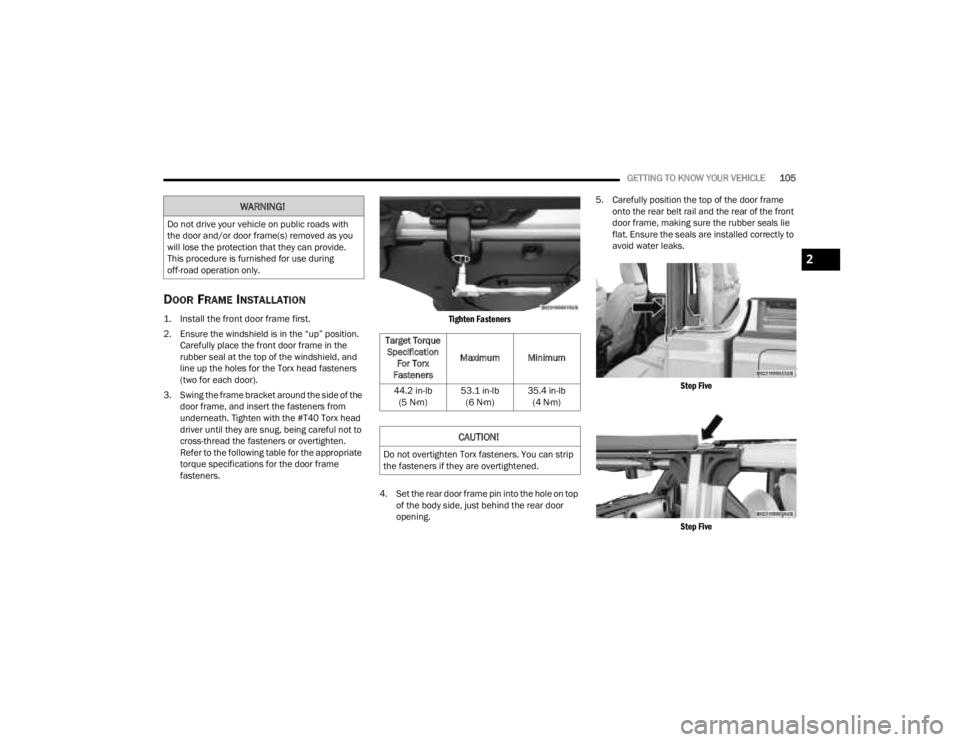
Tighten Fasteners
4. Set the rear door frame pin into the hole on top of the body side, just behind the rear door
opening. 5. Carefully position the top of the door frame
onto the rear belt rail and the rear of the front
door frame, making sure the rubber seals lie
flat. Ensure the seals are installed correctly to
avoid water leaks.
Step Five
Step Five
WARNING!
Do not drive your vehicle on public roads with
the door and/or door frame(s) removed as you
will lose the protection that they can provide.
This procedure is furnished for use during
off-road operation only.
Target Torque Specification For Torx
Fasteners Maximum Minimum
44.2 in-lb (5 N·m) 53.1 in-lb
(6 N·m) 35.4 in-lb
(4 N·m)
CAUTION!
Do not overtighten Torx fasteners. You can strip
the fasteners if they are overtightened.
2
23_JT_OM_EN_USC_t.book Page 105
Page 108 of 448
106GETTING TO KNOW YOUR VEHICLE
(Continued)
6. Insert the fasteners from underneath. Tighten
with the #T40 Torx head driver until they are
snug, being careful not to cross-thread the
fasteners or overtighten. Refer to the previous
table for the appropriate torque specifications
for the door frame fasteners.
FOLDING WINDSHIELD
The fold-down windshield on your vehicle is a
structural element that can provide protection in
some accidents. The windshield also provides
protection against weather, road debris and
intrusion of small branches and other objects.
Do not drive your vehicle on-road with the
windshield down, as you lose the protection this
structural element provides.
If required for certain off-road uses, the windshield
can be folded down. However, the protection
afforded by the windshield is then lost. If you fold
down the windshield, drive slowly and cautiously. It
is recommended that the speed of the vehicle be
limited to 10 mph (16 km/h), with low range
operation preferred if you are driving off-road with
the windshield folded down. Raise the windshield as soon as the task that
required its removal is completed and before you
return to on-road driving. Both you and your
passengers should wear seat belts at all times,
on-road and off-road, regardless of whether the
windshield is raised or folded down.
LOWERING THE WINDSHIELD
1. Before completing the following steps:
If your vehicle is equipped with a soft top,
the top
MUST be lowered Ú page 83, and
the door frames must be removed
Ú page 104 prior to lowering the wind -
shield.
If your vehicle is equipped with a hard top,
the Freedom Panels MUST be removed
prior to lowering the windshield Úpage 95.
WARNING!
Carefully follow these warnings to help protect
against personal injury:
Do not drive your vehicle on-road with the
windshield down.
Do not drive your vehicle unless the wind -
shield is securely fastened, either up or down.
Eye protection, such as goggles, should be
worn at all times when the windshield is down.
Be sure that you carefully follow the instruc -
tions for raising the windshield. Make sure
that the folding windshield, windshield wipers,
side bars, and all associated hardware and
fasteners are correctly and tightly assembled
before driving your vehicle. Failure to follow
these instructions may prevent your vehicle
from providing you and your passengers’
protection in some accidents.
If you remove the doors, store them outside
the vehicle. In the event of an accident, a
loose door may cause personal injury.
CAUTION!
Failure to follow this step will cause damage to
the vehicle’s header seal.
WARNING!
23_JT_OM_EN_USC_t.book Page 106
Page 140 of 448
138GETTING TO KNOW YOUR INSTRUMENT PANEL
AdBlue® (UREA) Injection System Failure
Warning Light — If Equipped
This warning light will illuminate along
with a dedicated message on the display
(if equipped) if an unknown fluid not
conforming with acceptable
characteristics is inserted, or if an average
consumption of AdBlue® (UREA) over 50% is
detected. Contact an authorized dealer as soon as
possible. If the problem is not solved, a specific message will
appear on the Instrument Cluster Display
whenever a certain threshold is reached until it will
no longer be possible to start the engine.
When about 125 miles (200 km) are remaining
before the AdBlue® (UREA) tank is empty, a
continuous dedicated message will appear on the
instrument panel, accompanied by a buzzer sound
(if equipped).
YELLOW INDICATOR LIGHTS
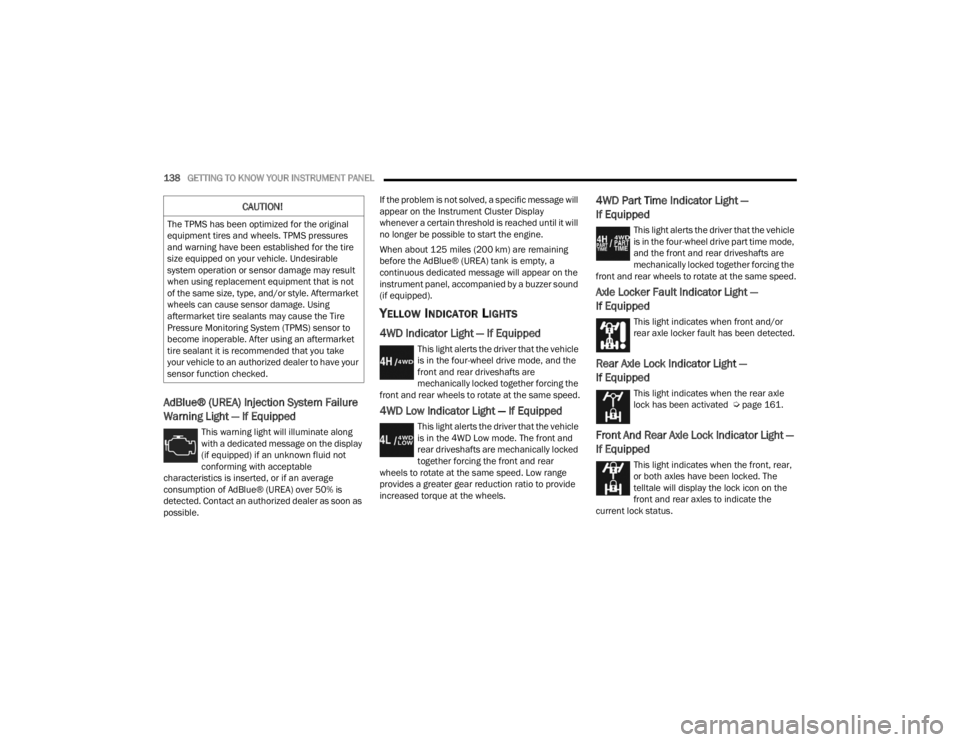
4WD Indicator Light — If Equipped
This light alerts the driver that the vehicle
is in the four-wheel drive mode, and the
front and rear driveshafts are
mechanically locked together forcing the
front and rear wheels to rotate at the same speed.
4WD Low Indicator Light — If Equipped
This light alerts the driver that the vehicle
is in the 4WD Low mode. The front and
rear driveshafts are mechanically locked
together forcing the front and rear
wheels to rotate at the same speed. Low range
provides a greater gear reduction ratio to provide
increased torque at the wheels.
4WD Part Time Indicator Light —
If Equipped
This light alerts the driver that the vehicle
is in the four-wheel drive part time mode,
and the front and rear driveshafts are
mechanically locked together forcing the
front and rear wheels to rotate at the same speed.
Axle Locker Fault Indicator Light —
If Equipped
This light indicates when front and/or
rear axle locker fault has been detected.
Rear Axle Lock Indicator Light —
If Equipped
This light indicates when the rear axle
lock has been activated Ú page 161.
Front And Rear Axle Lock Indicator Light —
If Equipped
This light indicates when the front, rear,
or both axles have been locked. The
telltale will display the lock icon on the
front and rear axles to indicate the
current lock status.
CAUTION!
The TPMS has been optimized for the original
equipment tires and wheels. TPMS pressures
and warning have been established for the tire
size equipped on your vehicle. Undesirable
system operation or sensor damage may result
when using replacement equipment that is not
of the same size, type, and/or style. Aftermarket
wheels can cause sensor damage. Using
aftermarket tire sealants may cause the Tire
Pressure Monitoring System (TPMS) sensor to
become inoperable. After using an aftermarket
tire sealant it is recommended that you take
your vehicle to an authorized dealer to have your
sensor function checked.
23_JT_OM_EN_USC_t.book Page 138
Page 163 of 448
STARTING AND OPERATING161
NOTE:When Hill Descent Control is enabled, AutoStick is
not active.
To disengage AutoStick mode, return the gear
selector to the DRIVE position. You can shift in or
out of the AutoStick position at any time without
taking your foot off the accelerator pedal.
FOUR–WHEEL DRIVE OPERATION
FOUR-POSITION TRANSFER CASE —
I
F EQUIPPED
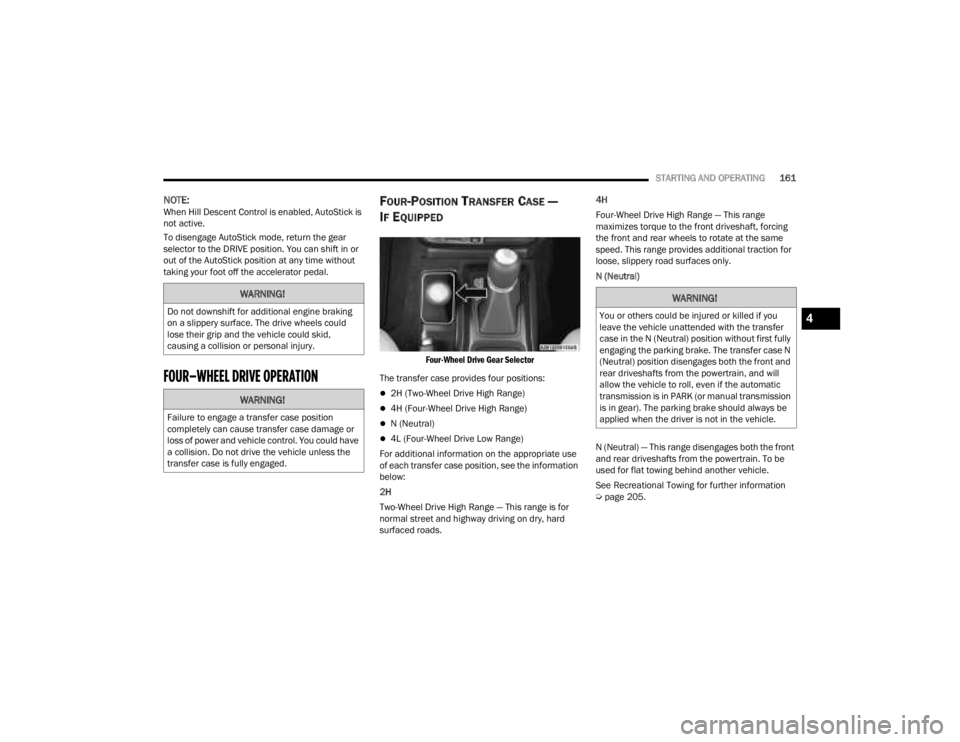
Four-Wheel Drive Gear Selector
The transfer case provides four positions:
2H (Two-Wheel Drive High Range)
4H (Four-Wheel Drive High Range)
N (Neutral)
4L (Four-Wheel Drive Low Range)
For additional information on the appropriate use
of each transfer case position, see the information
below:
2H
Two-Wheel Drive High Range — This range is for
normal street and highway driving on dry, hard
surfaced roads. 4H
Four-Wheel Drive High Range — This range
maximizes torque to the front driveshaft, forcing
the front and rear wheels to rotate at the same
speed. This range provides additional traction for
loose, slippery road surfaces only.
N (Neutral)
N (Neutral) — This range disengages both the front
and rear driveshafts from the powertrain. To be
used for flat towing behind another vehicle.
See Recreational Towing for further information
Ú
page 205.
WARNING!
Do not downshift for additional engine braking
on a slippery surface. The drive wheels could
lose their grip and the vehicle could skid,
causing a collision or personal injury.
WARNING!
Failure to engage a transfer case position
completely can cause transfer case damage or
loss of power and vehicle control. You could have
a collision. Do not drive the vehicle unless the
transfer case is fully engaged.
WARNING!
You or others could be injured or killed if you
leave the vehicle unattended with the transfer
case in the N (Neutral) position without first fully
engaging the parking brake. The transfer case N
(Neutral) position disengages both the front and
rear driveshafts from the powertrain, and will
allow the vehicle to roll, even if the automatic
transmission is in PARK (or manual transmission
is in gear). The parking brake should always be
applied when the driver is not in the vehicle.4
23_JT_OM_EN_USC_t.book Page 161
Page 164 of 448
162STARTING AND OPERATING
4L
Four-Wheel Drive Low Range — This range provides
low speed four-wheel drive. It maximizes torque to
the front driveshaft, forcing the front and rear
wheels to rotate at the same speed. This range
provides additional traction and maximum pulling
power for loose, slippery road surfaces only. Do not
exceed 25 mph (40 km/h).
The transfer case is intended to be driven in the 2H
position for normal street and highway conditions,
such as hard-surfaced roads.
In the event that additional traction is required, the
transfer case 4H and 4L positions can be used to
lock the front and rear driveshafts together, forcing
the front and rear wheels to rotate at the same
speed. The 4H and 4L positions are intended for
loose, slippery road surfaces only and not intended
for normal driving. Driving in the 4H and 4L
positions on hard-surfaced roads will cause
increased tire wear and damage to the driveline
components. For further information on shifting
into 4H or 4L Ú page 162.
The instrument cluster alerts the driver that the
vehicle is in four-wheel drive, and the front and
rear driveshafts are locked together. The light will
illuminate when the transfer case is shifted into
the 4H position.
When operating your vehicle in 4L, the engine
speed will be approximately three times (four times
for Rubicon models) that of the 2H or 4H positions at a given road speed. Take care not to overspeed
the engine.
Proper operation of four-wheel drive vehicles
depends on tires of equal size, type, and
circumference on each wheel. Any difference will
adversely affect shifting and cause damage to the
transfer case.
Because four-wheel drive provides improved
traction, there is a tendency to exceed safe turning
and stopping speeds. Do not go faster than road
conditions permit.
Shifting Procedures
2H TO 4H OR 4H TO 2H
Shifting between 2H and 4H can be made with the
vehicle stopped or in motion. The preferred shifting
speed would be 0 to 45 mph (72 km/h). With the
vehicle in motion, the transfer case will engage/
disengage faster if you momentarily release the
accelerator pedal after completing the shift. Do not
accelerate while shifting the transfer case. Apply a
constant force when shifting the transfer case lever.
NOTE:
Do not attempt to make a shift while only the
front or rear wheels are spinning. The front and
rear driveshaft speeds must be equal for the
shift to take place. Shifting while only the front
or rear wheels are spinning can cause damage
to the transfer case.
Delayed shifts out of four-wheel drive may be
experienced due to uneven tire wear, low or
uneven tire pressures, excessive vehicle
loading, or cold temperatures.
Shifting effort will increase with speed, this is
normal.
During cold weather, you may experience
increased effort in shifting until the transfer case
fluid warms up. This is normal.
4H TO 4L OR 4L TO 4H
With the vehicle rolling at 1 to 3 mph (2 to 5 km/h),
shift an automatic transmission into NEUTRAL (N), or
press the clutch pedal on a manual transmission.
While the vehicle is coasting at 1 to 3 mph (2 to
5 km/h), shift the transfer case lever firmly to the
desired position. Do not pause with the transfer case
in N (Neutral). Once the shift is completed, place the
automatic transmission into DRIVE or release the
clutch pedal on a manual transmission.
NOTE:Shifting into or out of 4L is possible with the vehicle
completely stopped; however, difficulty may occur
due to the mating teeth not being properly aligned.
Several attempts may be required for clutch teeth
alignment and shift completion to occur. The
preferred method is with the vehicle rolling at 1 to
3 mph (2 to 5 km/h). Avoid attempting to engage
or disengage 4L with the vehicle moving faster
than 1 to 3 mph (2 to 5 km/h).
23_JT_OM_EN_USC_t.book Page 162
Page 165 of 448
STARTING AND OPERATING163
During cold weather, you may experience
increased effort in shifting until the transfer case
fluid warms up. This is normal.
FIVE-POSITION TRANSFER CASE —
I
F EQUIPPED
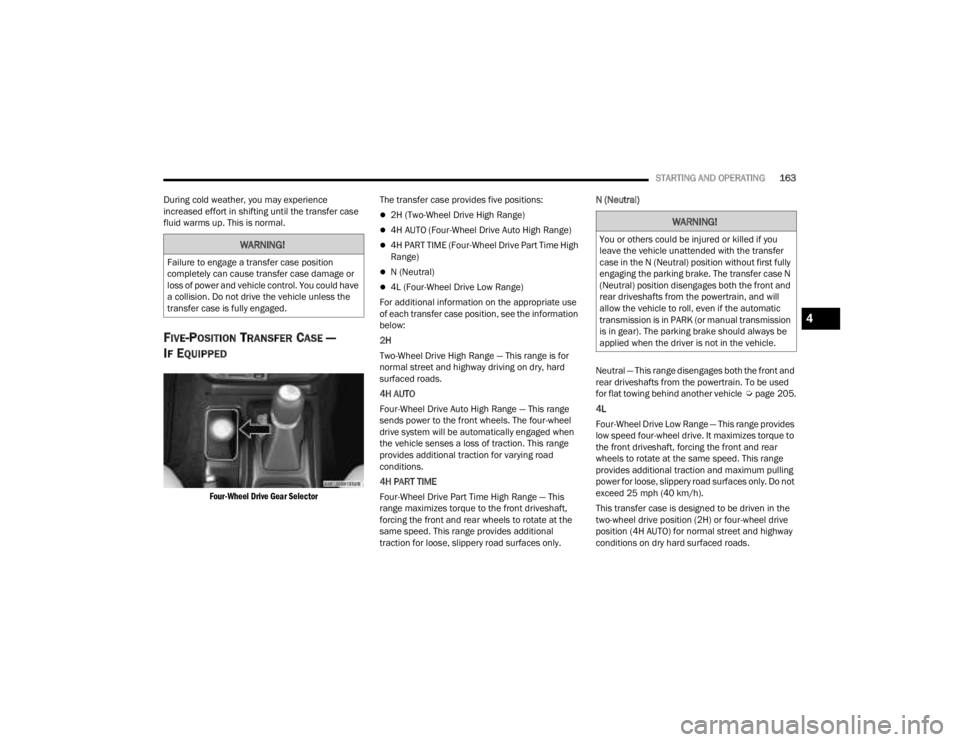
Four-Wheel Drive Gear Selector
The transfer case provides five positions:
2H (Two-Wheel Drive High Range)
4H AUTO (Four-Wheel Drive Auto High Range)
4H PART TIME (Four-Wheel Drive Part Time High
Range)
N (Neutral)
4L (Four-Wheel Drive Low Range)
For additional information on the appropriate use
of each transfer case position, see the information
below:
2H
Two-Wheel Drive High Range — This range is for
normal street and highway driving on dry, hard
surfaced roads.
4H AUTO
Four-Wheel Drive Auto High Range — This range
sends power to the front wheels. The four-wheel
drive system will be automatically engaged when
the vehicle senses a loss of traction. This range
provides additional traction for varying road
conditions.
4H PART TIME
Four-Wheel Drive Part Time High Range — This
range maximizes torque to the front driveshaft,
forcing the front and rear wheels to rotate at the
same speed. This range provides additional
traction for loose, slippery road surfaces only. N (Neutral)
Neutral — This range disengages both the front and
rear driveshafts from the powertrain. To be used
for flat towing behind another vehicle
Úpage 205.
4L
Four-Wheel Drive Low Range — This range provides
low speed four-wheel drive. It maximizes torque to
the front driveshaft, forcing the front and rear
wheels to rotate at the same speed. This range
provides additional traction and maximum pulling
power for loose, slippery road surfaces only. Do not
exceed 25 mph (40 km/h).
This transfer case is designed to be driven in the
two-wheel drive position (2H) or four-wheel drive
position (4H AUTO) for normal street and highway
conditions on dry hard surfaced roads.
WARNING!
Failure to engage a transfer case position
completely can cause transfer case damage or
loss of power and vehicle control. You could have
a collision. Do not drive the vehicle unless the
transfer case is fully engaged.
WARNING!
You or others could be injured or killed if you
leave the vehicle unattended with the transfer
case in the N (Neutral) position without first fully
engaging the parking brake. The transfer case N
(Neutral) position disengages both the front and
rear driveshafts from the powertrain, and will
allow the vehicle to roll, even if the automatic
transmission is in PARK (or manual transmission
is in gear). The parking brake should always be
applied when the driver is not in the vehicle.
4
23_JT_OM_EN_USC_t.book Page 163