engine JEEP GLADIATOR 2023 Service Manual
[x] Cancel search | Manufacturer: JEEP, Model Year: 2023, Model line: GLADIATOR, Model: JEEP GLADIATOR 2023Pages: 448, PDF Size: 17.37 MB
Page 141 of 448
GETTING TO KNOW YOUR INSTRUMENT PANEL139
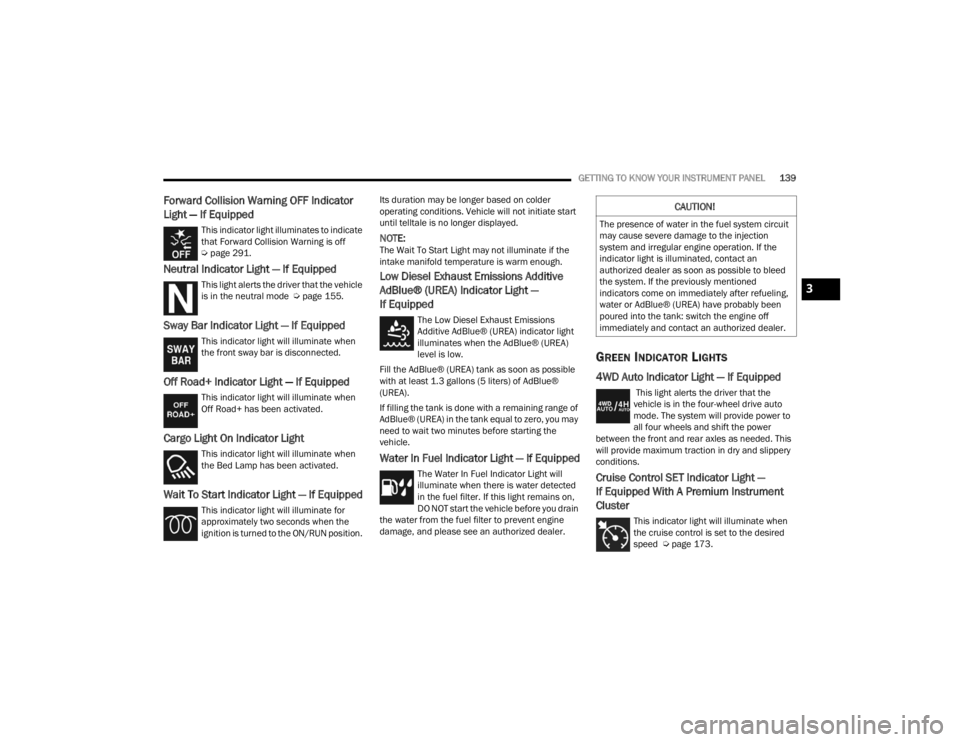
Forward Collision Warning OFF Indicator
Light — If Equipped
This indicator light illuminates to indicate
that Forward Collision Warning is off
Úpage 291.
Neutral Indicator Light — If Equipped
This light alerts the driver that the vehicle
is in the neutral mode Ú page 155.
Sway Bar Indicator Light — If Equipped
This indicator light will illuminate when
the front sway bar is disconnected.
Off Road+ Indicator Light — If Equipped
This indicator light will illuminate when
Off Road+ has been activated.
Cargo Light On Indicator Light
This indicator light will illuminate when
the Bed Lamp has been activated.
Wait To Start Indicator Light — If Equipped
This indicator light will illuminate for
approximately two seconds when the
ignition is turned to the ON/RUN position. Its duration may be longer based on colder
operating conditions. Vehicle will not initiate start
until telltale is no longer displayed.
NOTE:The Wait To Start Light may not illuminate if the
intake manifold temperature is warm enough.
Low Diesel Exhaust Emissions Additive
AdBlue® (UREA) Indicator Light —
If Equipped
The Low Diesel Exhaust Emissions
Additive AdBlue® (UREA) indicator light
illuminates when the AdBlue® (UREA)
level is low.
Fill the AdBlue® (UREA) tank as soon as possible
with at least 1.3 gallons (5 liters) of AdBlue®
(UREA).
If filling the tank is done with a remaining range of
AdBlue® (UREA) in the tank equal to zero, you may
need to wait two minutes before starting the
vehicle.
Water In Fuel Indicator Light — If Equipped
The Water In Fuel Indicator Light will
illuminate when there is water detected
in the fuel filter. If this light remains on,
DO NOT start the vehicle before you drain
the water from the fuel filter to prevent engine
damage, and please see an authorized dealer.
GREEN INDICATOR LIGHTS
4WD Auto Indicator Light — If Equipped
This light alerts the driver that the
vehicle is in the four-wheel drive auto
mode. The system will provide power to
all four wheels and shift the power
between the front and rear axles as needed. This
will provide maximum traction in dry and slippery
conditions.
Cruise Control SET Indicator Light —
If Equipped With A Premium Instrument
Cluster
This indicator light will illuminate when
the cruise control is set to the desired
speed Ú page 173.
CAUTION!
The presence of water in the fuel system circuit
may cause severe damage to the injection
system and irregular engine operation. If the
indicator light is illuminated, contact an
authorized dealer as soon as possible to bleed
the system. If the previously mentioned
indicators come on immediately after refueling,
water or AdBlue® (UREA) have probably been
poured into the tank: switch the engine off
immediately and contact an authorized dealer.
3
23_JT_OM_EN_USC_t.book Page 139
Page 143 of 448
GETTING TO KNOW YOUR INSTRUMENT PANEL141
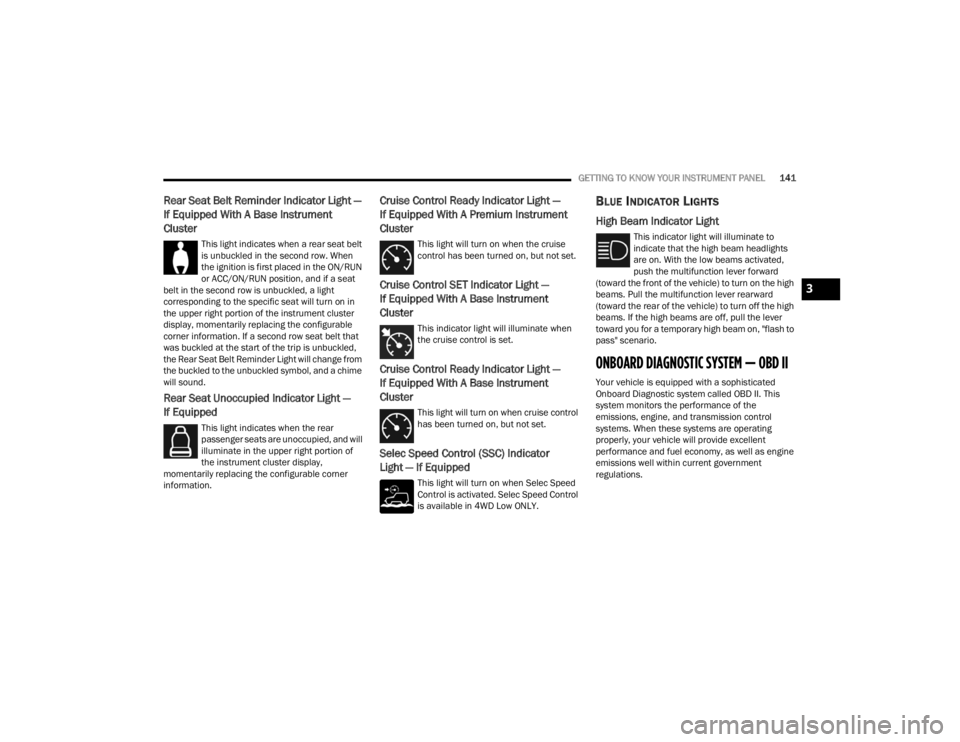
Rear Seat Belt Reminder Indicator Light —
If Equipped With A Base Instrument
Cluster
This light indicates when a rear seat belt
is unbuckled in the second row. When
the ignition is first placed in the ON/RUN
or ACC/ON/RUN position, and if a seat
belt in the second row is unbuckled, a light
corresponding to the specific seat will turn on in
the upper right portion of the instrument cluster
display, momentarily replacing the configurable
corner information. If a second row seat belt that
was buckled at the start of the trip is unbuckled,
the Rear Seat Belt Reminder Light will change from
the buckled to the unbuckled symbol, and a chime
will sound.
Rear Seat Unoccupied Indicator Light —
If Equipped
This light indicates when the rear
passenger seats are unoccupied, and will
illuminate in the upper right portion of
the instrument cluster display,
momentarily replacing the configurable corner
information.
Cruise Control Ready Indicator Light —
If Equipped With A Premium Instrument
Cluster
This light will turn on when the cruise
control has been turned on, but not set.
Cruise Control SET Indicator Light —
If Equipped With A Base Instrument
Cluster
This indicator light will illuminate when
the cruise control is set.
Cruise Control Ready Indicator Light —
If Equipped With A Base Instrument
Cluster
This light will turn on when cruise control
has been turned on, but not set.
Selec Speed Control (SSC) Indicator
Light — If Equipped
This light will turn on when Selec Speed
Control is activated. Selec Speed Control
is available in 4WD Low ONLY.
BLUE INDICATOR LIGHTS
High Beam Indicator Light
This indicator light will illuminate to
indicate that the high beam headlights
are on. With the low beams activated,
push the multifunction lever forward
(toward the front of the vehicle) to turn on the high
beams. Pull the multifunction lever rearward
(toward the rear of the vehicle) to turn off the high
beams. If the high beams are off, pull the lever
toward you for a temporary high beam on, "flash to
pass" scenario.
ONBOARD DIAGNOSTIC SYSTEM — OBD II
Your vehicle is equipped with a sophisticated
Onboard Diagnostic system called OBD II. This
system monitors the performance of the
emissions, engine, and transmission control
systems. When these systems are operating
properly, your vehicle will provide excellent
performance and fuel economy, as well as engine
emissions well within current government
regulations.
3
23_JT_OM_EN_USC_t.book Page 141
Page 144 of 448
142GETTING TO KNOW YOUR INSTRUMENT PANEL
If any of these systems require service, the OBD II
system will turn on the Malfunction Indicator Light
(MIL). It will also store diagnostic codes and other
information to assist your service technician in
making repairs. Although your vehicle will usually
be drivable and not need towing, see an authorized
dealer for service as soon as possible.
ONBOARD DIAGNOSTIC SYSTEM
(OBD II) C
YBERSECURITY
Your vehicle is required to have an OBD II and a
connection port to allow access to information
related to the performance of your emissions
controls. Authorized service technicians may need
to access this information to assist with the
diagnosis and service of your vehicle and
emissions system Ú page 214.
EMISSIONS INSPECTION AND
MAINTENANCE PROGRAMS
In some localities, it may be a legal requirement to
pass an inspection of your vehicle's emissions
control system. Failure to pass could prevent
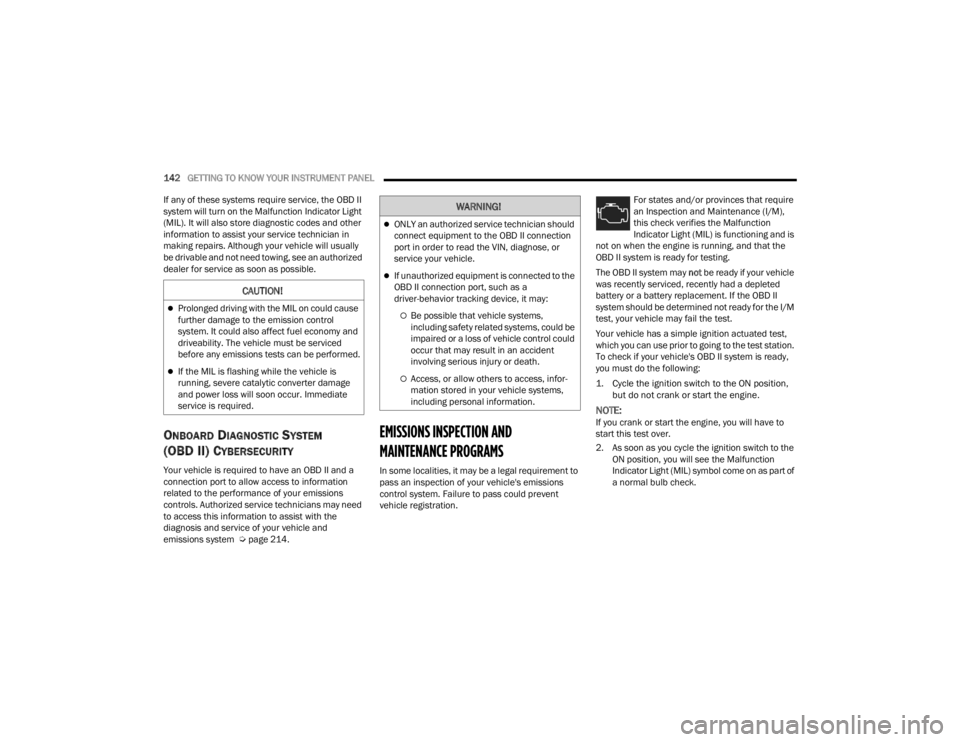
vehicle registration. For states and/or provinces that require
an Inspection and Maintenance (I/M),
this check verifies the Malfunction
Indicator Light (MIL) is functioning and is
not on when the engine is running, and that the
OBD II system is ready for testing.
The OBD II system may not be ready if your vehicle
was recently serviced, recently had a depleted
battery or a battery replacement. If the OBD II
system should be determined not ready for the I/M
test, your vehicle may fail the test.
Your vehicle has a simple ignition actuated test,
which you can use prior to going to the test station.
To check if your vehicle's OBD II system is ready,
you must do the following:
1. Cycle the ignition switch to the ON position, but do not crank or start the engine.
NOTE:If you crank or start the engine, you will have to
start this test over.
2. As soon as you cycle the ignition switch to the ON position, you will see the Malfunction
Indicator Light (MIL) symbol come on as part of
a normal bulb check.
CAUTION!
Prolonged driving with the MIL on could cause
further damage to the emission control
system. It could also affect fuel economy and
driveability. The vehicle must be serviced
before any emissions tests can be performed.
If the MIL is flashing while the vehicle is
running, severe catalytic converter damage
and power loss will soon occur. Immediate
service is required.
WARNING!
ONLY an authorized service technician should
connect equipment to the OBD II connection
port in order to read the VIN, diagnose, or
service your vehicle.
If unauthorized equipment is connected to the
OBD II connection port, such as a
driver-behavior tracking device, it may:
Be possible that vehicle systems,
including safety related systems, could be
impaired or a loss of vehicle control could
occur that may result in an accident
involving serious injury or death.
Access, or allow others to access, infor -
mation stored in your vehicle systems,
including personal information.
23_JT_OM_EN_USC_t.book Page 142
Page 145 of 448

GETTING TO KNOW YOUR INSTRUMENT PANEL143
3. Approximately 15 seconds later, one of two things will happen:
The MIL will flash for about 10 seconds and
then return to being fully illuminated until
you turn OFF the ignition or start the engine.
This means that your vehicle's OBD II
system is not ready and you should not
proceed to the I/M station.
The MIL will not flash at all and will remain
fully illuminated until you place the ignition
in the off position or start the engine. This
means that your vehicle's OBD II system is
ready and you can proceed to the I/M
station. If your OBD II system is
not ready, you should see
an authorized dealer or repair facility. If your
vehicle was recently serviced or had a battery
failure or replacement, you may need to do nothing
more than drive your vehicle as you normally would
in order for your OBD II system to update. A
recheck with the previously mentioned test routine
may then indicate that the system is now ready.
Regardless of whether your vehicle's OBD II system
is ready, if the MIL is illuminated during normal
vehicle operation you should have your vehicle
serviced before going to the I/M station. The I/M
station can fail your vehicle because the MIL is on
with the engine running.3
23_JT_OM_EN_USC_t.book Page 143
Page 146 of 448
144
STARTING AND OPERATING
STARTING THE ENGINE — GASOLINE
ENGINE (IF EQUIPPED)
Before starting your vehicle, adjust your seat,
adjust both inside and outside mirrors, and fasten
your seat belts.
MANUAL TRANSMISSION — IF EQUIPPED
Apply the parking brake, place the gear selector in
NEUTRAL, and press the clutch pedal before
starting the vehicle. This vehicle is equipped with a
clutch interlocking ignition system. It will not start
unless the clutch pedal is pressed to the floor.
Four-Wheel Drive Models Only
In 4L mode, if the vehicle is stalled, the engine will
start regardless of whether or not the clutch pedal
is pressed to the floor. This feature enhances
off-road performance by allowing the vehicle to
start when in 4L without having to press the clutch
pedal. The 4WD LOW Indicator Light will illuminate
when the transfer case has been shifted into this
mode.
AUTOMATIC TRANSMISSION —
I
F EQUIPPED
Start the vehicle with the gear selector in the PARK
position (vehicle can also be started in NEUTRAL).
Apply the brake before shifting to any driving
range.
NORMAL STARTING
To Turn On The Engine Using The ENGINE START/
STOP Button
1. The transmission must be in PARK or NEUTRAL.
2. Press and hold the brake pedal while pushing
the ENGINE START/STOP button once.
3. The system starts the vehicle. If the vehicle fails to start, the starter will disengage
automatically after 10 seconds.
4. If you wish to stop the cranking of the engine prior to the engine starting, push the ENGINE
START/STOP button again.
To Turn Off The Engine Using The ENGINE START/
STOP Button
1. Place the gear selector in PARK, then push and release the ENGINE START/STOP button.
The ignition will return to the OFF position.
2. If the gear selector is not in PARK (with vehicle stopped) and the ENGINE START/STOP button
is pushed once, the transmission will automat -
ically select PARK and the engine will turn off,
WARNING!
When exiting the vehicle, always remove the
key fob from the ignition and lock your vehicle.
Never leave children alone in a vehicle, or with
access to an unlocked vehicle.
Allowing children to be in a vehicle unattended
is dangerous for a number of reasons. A child
or others could be seriously or fatally injured.
Children should be warned not to touch the
parking brake, brake pedal or the gear
selector.
Do not leave the key fob in or near the vehicle,
or in a location accessible to children. A child
could operate power windows, other controls,
or move the vehicle.
Do not leave children or animals inside parked
vehicles in hot weather. Interior heat build-up
may cause serious injury or death.
23_JT_OM_EN_USC_t.book Page 144
Page 147 of 448
STARTING AND OPERATING145
however the ignition will remain in the ACC
position (NOT the OFF position). Never leave a
vehicle out of the PARK position, or it could roll.
3. If the gear selector is in NEUTRAL, and the vehicle speed is below 5 mph (8 km/h),
pushing the ENGINE START/STOP button once
will turn the engine off. The ignition will remain
in the ACC position.
4. If the vehicle speed is above 5 mph (8 km/h), the ENGINE START/STOP button must be held
for two seconds (or three short pushes in a
row) to turn the engine off. The ignition will
remain in the ACC position (NOT the OFF
position) if the engine is turned off when the
transmission is not in PARK.
NOTE:The system will automatically time out and the
ignition will cycle to the OFF position after
30 minutes of inactivity if the ignition is left in the
ACC or RUN (engine not running) position and the
transmission is in PARK.
ENGINE START/STOP Button Functions — With
Driver’s Foot Off The Brake Pedal (In PARK Or
NEUTRAL Position)
The ENGINE START/STOP button operates similar
to an ignition switch. It has three modes: OFF, ACC,
and RUN. To change the ignition modes without
starting the vehicle and use the accessories, follow
these steps:
1. Starting with the ignition in the OFF position.
2. Push the ENGINE START/STOP button once to
place the ignition to the ACC position
(instrument cluster will display “ACC”).
3. Push the ENGINE START/STOP button a second time to place the ignition to the RUN
position (instrument cluster will display “ON/
RUN”).
4. Push the ENGINE START/STOP button a third time to return the ignition to the OFF position
(instrument cluster will display “OFF”).
AUTOPARK
AutoPark is a supplemental feature to assist in
placing the vehicle in PARK should the situations
on the following pages occur. It is a back-up system
and should not be relied upon as the primary
method by which the driver shifts the vehicle into
PARK.
The conditions under which AutoPark will engage
are outlined on the following pages. If the vehicle is not in PARK and the driver turns off
the engine, the vehicle may AutoPark.
AutoPark will engage when all of these conditions
are met:
Vehicle is equipped with an 8-speed transmis
-
sion
Driver door is ajar or if the driver door is
removed and the driver is not on the seat (seat
pad sensor detects driver missing)
WARNING!
Driver inattention could lead to failure to place
the vehicle in PARK. ALWAYS DO A VISUAL
CHECK that your vehicle is in PARK by verifying
that a solid (not blinking) “P” is indicated in
the instrument cluster display and on the gear
selector. If the "P" indicator is blinking, your
vehicle is not in PARK. As an added precau -
tion, always apply the parking brake when
exiting the vehicle.
AutoPark is a supplemental feature. It is not
designed to replace the need to shift your
vehicle into PARK. It is a back-up system and
should not be relied upon as the primary
method by which the driver shifts the vehicle
into PARK.
4
23_JT_OM_EN_USC_t.book Page 145
Page 148 of 448
146STARTING AND OPERATING
Vehicle is not in PARK
Vehicle speed is 1.2 mph (1.9 km/h) or less
Ignition is switched from ON/RUN to OFF
NOTE:For Keyless Enter ‘n Go™ equipped vehicles, the
engine will turn off and the ignition will change to
ACC position. After 30 minutes the ignition
switches to OFF automatically, unless the driver
turns the ignition OFF.
If the vehicle is not in PARK and the driver exits the
vehicle with the engine running, the vehicle may
AutoPark.
AutoPark will engage when all of these conditions
are met:
Vehicle is equipped with an 8-speed transmis -
sion
Driver door is ajar or if the driver door is
removed and the driver is not on the seat (seat
pad sensor detects driver missing)
Vehicle is not in PARK
Vehicle speed is 1.2 mph (1.9 km/h) or less
Driver seat belt is unbuckled
Brake pedal is not pressed
The message “ AutoPark Engaged Shift To P Then
Shift To Gear ” will display in the instrument cluster.
NOTE:In some cases the ParkSense graphic will be
displayed in the instrument cluster. In these cases,
the gear selector must be returned to “P” to select
desired gear.
If the driver shifts into PARK while moving, the
vehicle may AutoPark.
AutoPark will engage ONLY when vehicle speed is
1.2 mph (1.9 km/h) or less.
The message “ Vehicle Speed Is Too High To Shift
To P ” will be displayed in the instrument cluster if
vehicle speed is above 1.2 mph (1.9 km/h).
4WD LOW
AutoPark will be disabled when operating the
vehicle in 4WD LOW.
The message “ AutoPark Disabled ” will be
displayed in the instrument cluster. Additional customer warnings will be given when
both of these conditions are met:
Vehicle is not in PARK
Driver’s door is ajar
The message “ AutoPark Not Engaged” will be
displayed in the instrument cluster. A warning
chime will continue until you shift the vehicle into
PARK or the driver’s door is closed.
ALWAYS DO A VISUAL CHECK
that your vehicle is in
PARK by looking for the “P” in the instrument
cluster display and on the gear selector. As an
added precaution, always apply the parking brake
when exiting the vehicle.
EXTREME COLD WEATHER
(B
ELOW –22°F OR −30°C)
To ensure reliable starting at these temperatures,
use of an externally powered electric engine block
heater (available from an authorized dealer) is
recommended.
EXTENDED PARK STARTING
NOTE:Extended Park condition occurs when the vehicle
has not been started or driven for at least 30 days.
1. Install a battery charger or jumper cables to
the battery to ensure a full battery charge
during the crank cycle.
WARNING!
If vehicle speed is above 1.2 mph (1.9 km/h), the
transmission will default to NEUTRAL until the
vehicle speed drops below 1.2 mph (1.9 km/h). A
vehicle left in the NEUTRAL position can roll. As
an added precaution, always apply the parking
brake when exiting the vehicle.
23_JT_OM_EN_USC_t.book Page 146
Page 149 of 448
STARTING AND OPERATING147
(Continued)
2. Press and hold the brake pedal while pushing
the ENGINE START/STOP button once.
3. If the engine fails to start within 10 seconds, place the ignition in the OFF position, wait
10 to 15 seconds to allow the starter to cool,
then repeat the “Extended Park Starting”
procedure.
4. If the engine fails to start after eight attempts, allow the starter to cool for at least
10 minutes, then repeat the procedure.
IF ENGINE FAILS TO START
If the engine fails to start after you have followed
the “Normal Starting” procedure and the vehicle
has not experienced an extended park condition
as defined previously, it may be flooded. Push the
accelerator pedal all the way to the floor and hold
it there. Crank the engine for no more than 10
seconds. This should clear any excess fuel in case
the engine is flooded. Leave the ignition key in the
ON/ RUN position, release the accelerator pedal
and repeat the “Normal Starting” procedure.
AFTER STARTING
The idle speed is controlled automatically and will
decrease as the engine warms up.
STARTING THE ENGINE — DIESEL ENGINE
(IF EQUIPPED)
Before starting your vehicle, adjust your seat, both
inside and outside mirrors, and fasten your seat
belts.
The starter is allowed to crank for up to 25-second
intervals. Waiting two minutes between such
intervals will protect the starter from overheating.
CAUTION!
To prevent damage to the starter, do not crank
continuously for more than 10 seconds at a
time. Wait 10 to 15 seconds before trying again.
WARNING!
Never pour fuel or other flammable liquid into
the throttle body air inlet opening in an
attempt to start the vehicle. This could result
in flash fire causing serious personal injury.
Do not attempt to push or tow your vehicle to
get it started. Vehicles equipped with an auto -
matic transmission cannot be started this
way. Unburned fuel could enter the catalytic
converter and once the engine has started,
ignite and damage the converter and vehicle.
If the vehicle has a discharged battery,
booster cables may be used to obtain a start
from a booster battery or the battery in
another vehicle. This type of start can be
dangerous if done improperly Ú page 343.
CAUTION!
To prevent damage to the starter, do not
continuously crank the engine for more than
10 seconds at a time. Wait 10 to 15 seconds
before trying again.
WARNING!
Before exiting a vehicle, always come to a
complete stop, then shift the automatic trans -
mission into PARK and apply the parking
brake.
Always make sure the keyless ignition node is
in the OFF position, key fob is removed from
the vehicle and vehicle is locked.
Never leave children alone in a vehicle, or with
access to an unlocked vehicle. Leaving chil -
dren in a vehicle unattended is dangerous for
a number of reasons. A child or others could
be seriously or fatally injured. Children should
be warned not to touch the parking brake,
brake pedal or the gear selector.
4
23_JT_OM_EN_USC_t.book Page 147
Page 150 of 448
148STARTING AND OPERATING
NOTE:Engine start-up in very low ambient temperature
could result in evident white smoke. This condition
will disappear as the engine warms up.
AUTOMATIC TRANSMISSION
Start the engine with the transmission gear
selector in the PARK (P) position. Apply the brake
before shifting to any driving range.
EXTREME COLD WEATHER
The cartridge block heater clips into the engine
block near the water jacket and transfers heat to
the coolant. It requires a 110–115 Volt AC
electrical outlet with a grounded, three-wire
extension cord. Its use is recommended for
environments that routinely fall below -10°F
(-23°C). It should be used when the vehicle has not
been running overnight or longer periods and
should be plugged in two hours prior to start. Its
use is required for cold starts with temperatures
under -20°F (-28°C).
NOTE:The engine block heater and heater cord are
factory installed options. If your vehicle is not
equipped, engine block heaters and heater cords
are available from an authorized Mopar® dealer.
A 12 Volt heater built into the fuel filter housing
aids in preventing fuel gelling. It is controlled by
a built-in thermostat.
A Diesel Pre-Heat system both improves engine
starting and reduces the amount of white
smoke generated by a warming engine.
NORMAL STARTING
Observe the instrument cluster lights when
starting the engine.
NOTE:Normal starting of either a cold or a warm engine is
obtained without pumping or pressing the accel -
erator pedal.
1. Always apply the parking brake.
2. Press and hold the brake pedal while pushing the ENGINE START/STOP button once.
NOTE:A delay of the start of up to five seconds is possible
under very cold conditions. The “Wait to Start”
telltale will be illuminated during the preheat
process. When the engine “Wait To Start” telltale
turns off the engine will automatically crank.
Do not leave the key fob in or near the vehicle,
or in a location accessible to children, and do
not leave the ignition of a vehicle equipped
with Keyless Enter ‘n Go™ in the ACC or ON/
RUN position. A child could operate power
windows, other controls, or move the vehicle.
Do not leave children or animals inside parked
vehicles in hot weather. Interior heat build-up
may cause serious injury or death.
CAUTION!
The engine is allowed to crank as long as
25 seconds. If the engine fails to start during
this period, please wait at least two minutes
for the starter to cool before repeating start
procedure.
If the Water in Fuel Indicator Light remains on,
DO NOT START engine before you drain the
water from the fuel filters to avoid engine
damage Ú page 368.
WARNING!
CAUTION!
If the Water in Fuel Indicator Light remains on,
DO NOT START the engine before you drain the
water from the fuel filters to avoid engine
damage Úpage 368.
23_JT_OM_EN_USC_t.book Page 148
Page 151 of 448
STARTING AND OPERATING149
(Continued)
3. The system will automatically engage the
starter to crank the engine. If the vehicle fails
to start, the starter will disengage automat-
ically after 25 seconds.
4. If you wish to stop the cranking of the engine prior to the engine starting, push the ENGINE
START/STOP button again.
5. Check that the Oil Pressure Warning Light has turned off.
6. Release the parking brake.
STARTING FLUIDS
The engine is equipped with a glow plug preheating
system. If the instructions in this manual are
followed, the engine should start in all conditions
and no type of starting fluid should be used.
NORMAL OPERATION — DIESEL ENGINE
Observe the following when the diesel engine is
operating:
All message center lights are off.
Malfunction Indicator Light (MIL) is off.
Engine Oil Pressure telltale is not illuminated.
Voltmeter operation.
The voltmeter may show a gauge fluctuation at
various engine temperatures. This is caused by the
glow plug heating system. The number of cycles
and the length of the cycling operation is controlled by the engine control module. Glow plug heater
operation can run for several minutes. Once the
heater operation is complete the voltmeter needle
will stabilize.
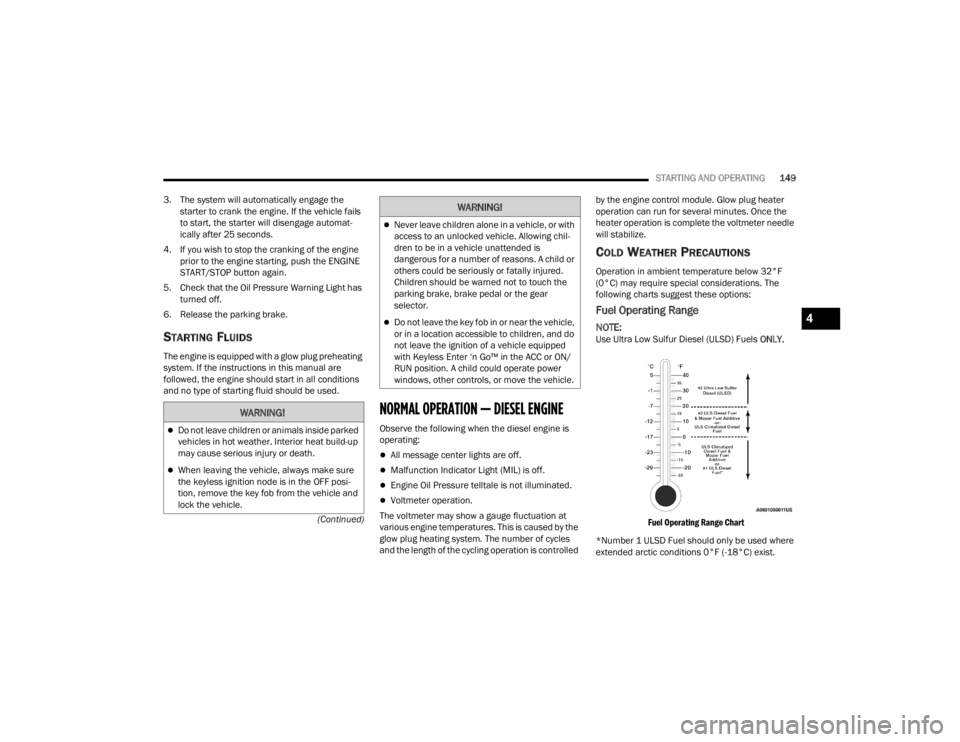
COLD WEATHER PRECAUTIONS
Operation in ambient temperature below 32°F
(0°C) may require special considerations. The
following charts suggest these options:
Fuel Operating Range
NOTE:Use Ultra Low Sulfur Diesel (ULSD) Fuels
ONLY.
Fuel Operating Range Chart
*Number 1 ULSD Fuel should only be used where
extended arctic conditions 0°F (-18°C) exist.
WARNING!
Do not leave children or animals inside parked
vehicles in hot weather. Interior heat build-up
may cause serious injury or death.
When leaving the vehicle, always make sure
the keyless ignition node is in the OFF posi -
tion, remove the key fob from the vehicle and
lock the vehicle.
Never leave children alone in a vehicle, or with
access to an unlocked vehicle. Allowing chil -
dren to be in a vehicle unattended is
dangerous for a number of reasons. A child or
others could be seriously or fatally injured.
Children should be warned not to touch the
parking brake, brake pedal or the gear
selector.
Do not leave the key fob in or near the vehicle,
or in a location accessible to children, and do
not leave the ignition of a vehicle equipped
with Keyless Enter ‘n Go™ in the ACC or ON/
RUN position. A child could operate power
windows, other controls, or move the vehicle.
WARNING!
4
23_JT_OM_EN_USC_t.book Page 149