display JEEP GLADIATOR 2023 Owners Manual
[x] Cancel search | Manufacturer: JEEP, Model Year: 2023, Model line: GLADIATOR, Model: JEEP GLADIATOR 2023Pages: 448, PDF Size: 17.37 MB
Page 6 of 448

4
INSTRUMENT CLUSTER DISPLAY ...................... 121 Instrument Cluster Display Location And
Controls .......................................................... 122
Oil Life Reset — If Equipped
S
................... 122
Off Road+ Display — If Equipped .................. 123
Instrument Cluster Display Selectable
Items .............................................................. 123
Instrument Cluster Display Menu Items ...... 124
Battery Saver On, Battery Saver Mode
Message, And Electrical Load Reduction
Actions
(If Equipped) .................................................. 127
Diesel Displays .............................................. 128 Diesel Particulate Filter (DPF) Messages .... 128Fuel System Messages ................................. 130
WARNING LIGHTS AND MESSAGES ................. 132
Red Warning Lights ....................................... 132
Yellow Warning Lights ................................... 135Yellow Indicator Lights .................................. 138
Green Indicator Lights................................... 139White Indicator Lights ................................... 140Blue Indicator Lights ..................................... 141
ONBOARD DIAGNOSTIC SYSTEM — OBD II ...... 141
Onboard Diagnostic System
(OBD II) Cybersecurity ................................... 142
EMISSIONS INSPECTION AND MAINTENANCE
PROGRAMS .......................................................... 142
STARTING AND OPERATING
STARTING THE ENGINE — GASOLINE ENGINE
(IF EQUIPPED) ...................................................... 144
Manual Transmission — If Equipped ........... 144Automatic Transmission —
If Equipped .................................................... 144
Normal Starting ............................................ 144
AutoPark ........................................................ 145Extreme Cold Weather
(Below –22°F Or −30°C) ............................ 146
Extended Park Starting ................................. 146
If Engine Fails To Start ................................. 147
After Starting ................................................. 147
STARTING THE ENGINE — DIESEL ENGINE
(IF EQUIPPED) ...................................................... 147
Automatic Transmission ............................... 148
Extreme Cold Weather .................................. 148
Normal Starting ............................................. 148Starting Fluids ............................................... 149
NORMAL OPERATION — DIESEL ENGINE ......... 149
Cold Weather Precautions ............................ 149
Engine Idling .................................................. 150
Stopping The Engine ..................................... 150
Cooling System Tips — Automatic
Transmission ................................................. 151
ENGINE BREAK-IN RECOMMENDATIONS —
GASOLINE ENGINE (IF EQUIPPED) ................... 151 ENGINE BREAK-IN RECOMMENDATIONS —
DIESEL ENGINE (IF EQUIPPED) .......................... 152
PARKING BRAKE ................................................. 152
MANUAL TRANSMISSION — IF EQUIPPED ....... 153
Shifting........................................................... 154
Downshifting.................................................. 155
AUTOMATIC TRANSMISSION —
IF EQUIPPED ......................................................... 155
Ignition Park Interlock................................... 156
Brake/Transmission Shift Interlock (BTSI)
System .......................................................... 1578–Speed Automatic Transmission .............. 157
Gear Ranges .................................................. 157
FOUR–WHEEL DRIVE OPERATION ................... 161
Four-Position Transfer Case —
If Equipped .................................................... 161
Five-Position Transfer Case —
If Equipped .................................................... 163
Trac-Lok Rear Axle — If Equipped ................ 165Axle Lock (Tru-Lok) Front And Rear —
If Equipped ................................................... 165
Axle Lock (Tru-Lok) Rear Only —
If Equipped ................................................... 166
Electronic Sway Bar Disconnect —
If Equipped ................................................... 166
OFF ROAD+ — If Equipped ............................ 168
ELECTRO-HYDRAULIC POWER STEERING ....... 168
23_JT_OM_EN_USC_t.book Page 4
Page 7 of 448
5
STOP/START SYSTEM — AUTOMATIC
TRANSMISSION (IF EQUIPPED) ........................ 169 Autostop Mode .............................................. 169Possible Reasons The Engine Does Not
Autostop ......................................................... 170
To Start The Engine While In Autostop
Mode .............................................................. 170
To Manually Turn Off The Stop/Start
System ........................................................... 171To Manually Turn On The Stop/Start
System ........................................................... 171System Malfunction ...................................... 171
STOP/START SYSTEM — MANUAL
TRANSMISSION (IF EQUIPPED) .........................171
Autostop Mode .............................................. 172Possible Reasons The Engine Does Not
Autostop ......................................................... 172
To Start The Engine While In Autostop
Mode .............................................................. 172
To Manually Turn Off The Stop/Start
System ........................................................... 173To Manually Turn On The Stop/Start
System ........................................................... 173System Malfunction ...................................... 173
CRUISE CONTROL SYSTEMS —
IF EQUIPPED ........................................................ 173
Cruise Control ............................................... 173
Adaptive Cruise Control (ACC) ...................... 175 PARKSENSE FRONT/REAR PARK ASSIST
SYSTEM — IF EQUIPPED .................................... 184
ParkSense Sensors ....................................... 184
ParkSense Warning Display ......................... 184
ParkSense Display ........................................ 184Enabling And Disabling ParkSense .............. 187Service The ParkSense Park Assist
System ........................................................... 187
Cleaning The ParkSense System ................. 187
ParkSense System Usage Precautions........ 188
PARKVIEW REAR BACK UP CAMERA............... 189
TRAILCAM SYSTEM — IF EQUIPPED ................ 190
REFUELING THE VEHICLE — GASOLINE
ENGINE (IF EQUIPPED) ....................................... 191 Fuel Filler Cap................................................ 191Loose Fuel Filler Cap Message ................... 192
REFUELING THE VEHICLE — DIESEL ENGINE
(IF EQUIPPED) ..................................................... 192
Avoid Using Contaminated Fuel ................... 193Bulk Fuel Storage — Diesel Fuel................... 193Diesel Exhaust Fluid ..................................... 193
VEHICLE LOADING .............................................. 195
Certification Label ......................................... 195
TRAILER TOWING ............................................... 197
Common Towing Definitions......................... 197
Trailer Hitch Classification ............................ 199
Trailer Towing Weights (Maximum Trailer
Weight Ratings) ............................................ 199
Trailer And Tongue Weight............................ 202
Towing Requirements ................................... 202Towing Tips .................................................... 204 RECREATIONAL TOWING (BEHIND
MOTORHOME) ...................................................... 205
Towing This Vehicle Behind Another
Vehicle ........................................................... 205
Recreational Towing — Four-Wheel Drive
Models ........................................................... 205
DRIVING TIPS ....................................................... 207
On-Road Driving Tips..................................... 207Off-Road Driving Tips .................................... 207
MULTIMEDIA
UCONNECT SYSTEMS ......................................... 214
CYBERSECURITY ................................................. 214
UCONNECT SETTINGS ......................................... 215 Customer Programmable Features ............. 215
UCONNECT INTRODUCTION................................ 230
System Overview .......................................... 230Drag & Drop Menu Bar ................................. 232
Safety And General Information................... 232
UCONNECT MODES ............................................. 233
Steering Wheel Audio Controls .................... 233
Radio Mode .................................................. 234Media Mode ................................................. 242
Phone Mode ................................................. 244
ANDROID AUTO™ & APPLE CARPLAY® —
IF EQUIPPED ......................................................... 254
Android Auto™
S
........................................ 254
Apple CarPlay®
S
....................................... 256
Android Auto™ And Apple CarPlay® Tips
And Tricks ...................................................... 258
23_JT_OM_EN_USC_t.book Page 5
Page 17 of 448
15
GETTING TO KNOW YOUR VEHICLE
KEYS
KEY FOB
Your vehicle is equipped with a key fob which
supports Passive Entry, Remote Keyless Entry
(RKE), Keyless Enter ‘n Go™ (if equipped), and
Remote Start (if equipped). The key fob allows you to
lock or unlock the doors and tailgate from distances
up to approximately 66 ft (20 m). The key fob does
not need to be pointed at the vehicle to activate the
system. The key fob also contains a mechanical key.
NOTE:
The key fob’s wireless signal may be blocked if
the key fob is located next to a mobile phone,
laptop, or other electronic device. This may
result in poor performance.
With the ignition in the ON/RUN position, and
the vehicle moving at 2 mph (4 km/h), all RKE commands are disabled.
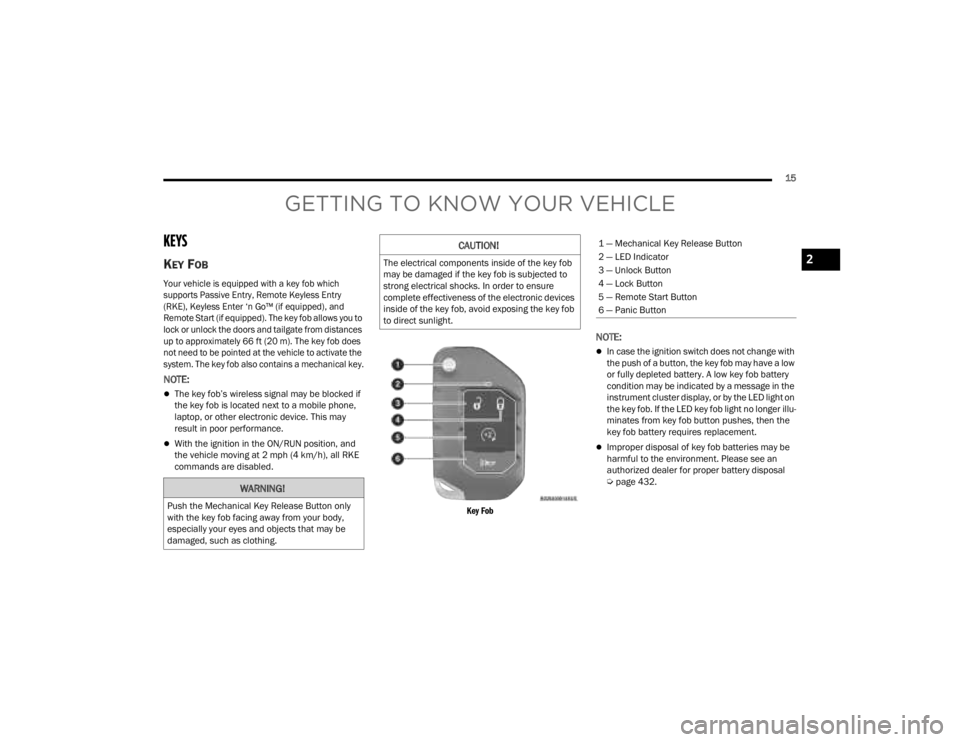
Key Fob
NOTE:
In case the ignition switch does not change with
the push of a button, the key fob may have a low
or fully depleted battery. A low key fob battery
condition may be indicated by a message in the
instrument cluster display, or by the LED light on
the key fob. If the LED key fob light no longer illu-
minates from key fob button pushes, then the
key fob battery requires replacement.
Improper disposal of key fob batteries may be
harmful to the environment. Please see an
authorized dealer for proper battery disposal
Ú page 432.
WARNING!
Push the Mechanical Key Release Button only
with the key fob facing away from your body,
especially your eyes and objects that may be
damaged, such as clothing.
CAUTION!
The electrical components inside of the key fob
may be damaged if the key fob is subjected to
strong electrical shocks. In order to ensure
complete effectiveness of the electronic devices
inside of the key fob, avoid exposing the key fob
to direct sunlight.
1 — Mechanical Key Release Button
2 — LED Indicator
3 — Unlock Button
4 — Lock Button
5 — Remote Start Button
6 — Panic Button
2
23_JT_OM_EN_USC_t.book Page 15
Page 18 of 448
16GETTING TO KNOW YOUR VEHICLE
To Lock/Unlock The Doors And Tailgate
Push and release the unlock button on the key fob
once to unlock the driver’s door, or twice to unlock
all the doors. To lock all the doors, push the lock
button once.
When the doors are unlocked, the turn signals will
flash and the illuminated entry system will be
activated. When the doors are locked, the turn
signals will flash and the horn will chirp.
NOTE:
All doors can be programmed to unlock on the
first push of the unlock button through
Uconnect Settings Úpage 215.
The mechanical flip key can be used to lock or
unlock the doors, tailgate, glove compartment,
storage compartments (if equipped), and rear
seatbacks.
Key Left Vehicle Feature
If a valid key fob is no longer detected inside the
vehicle while the vehicle’s ignition system is in the
ON/RUN or START position, the message “Key Fob
Has Left The Vehicle” will be shown in the
instrument cluster display along with an interior
chime. An exterior audible and visual alert will also
be activated to warn the driver. The vehicle’s horn will rapidly chirp three times
along with a single flash of the vehicle’s exterior
lights.
NOTE:
The doors have to be open and then closed in
order for the vehicle to check for the presence of
a key fob; the Key Left Vehicle feature will not
activate until all of the doors are closed.
These alerts will not be activated in situations
where the vehicle’s engine is left running with
the key fob inside.
Replacing The Battery In The Key Fob
The recommended replacement battery is
CR2450.
NOTE:
Customers are recommended to use a battery
obtained from Mopar®. Aftermarket coin
battery dimensions may not meet the original
OEM coin battery dimensions.
Perchlorate material — special handling may
apply. See www.dtsc.ca.gov/hazardouswaste/
perchlorate for further information.
Do not touch the battery terminals that are on
the back housing or the printed circuit board.
When a key fob battery is low, a warning will be
indicated on the vehicle’s instrument cluster,
and the fob LED will no longer illuminate with a
button push.
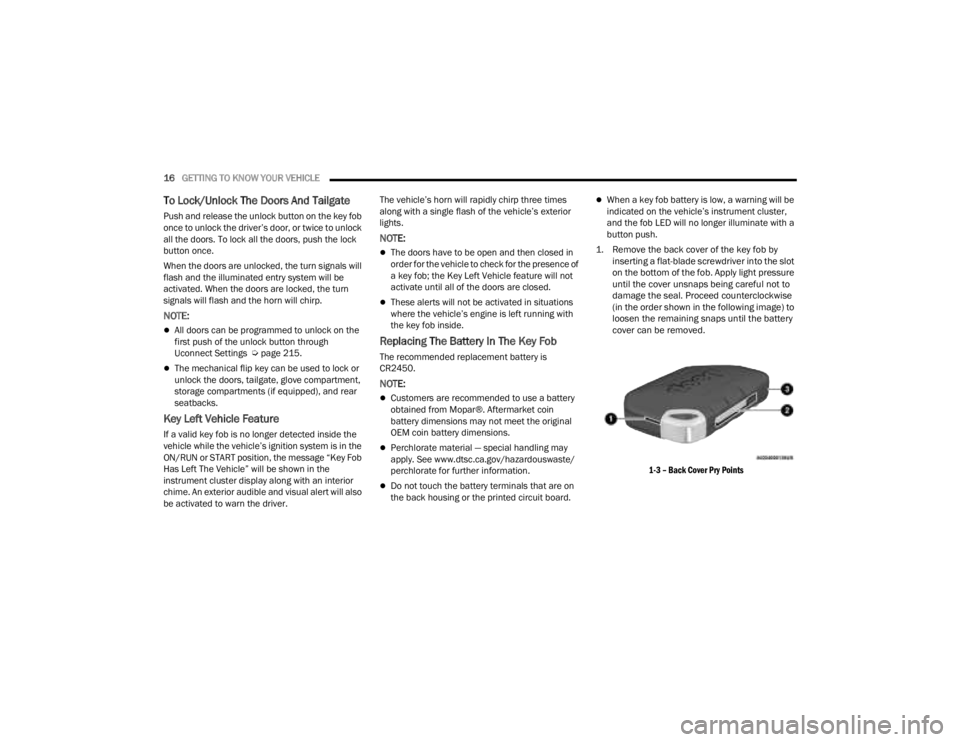
1. Remove the back cover of the key fob by inserting a flat-blade screwdriver into the slot
on the bottom of the fob. Apply light pressure
until the cover unsnaps being careful not to
damage the seal. Proceed counterclockwise
(in the order shown in the following image) to
loosen the remaining snaps until the battery
cover can be removed.
1-3 – Back Cover Pry Points
23_JT_OM_EN_USC_t.book Page 16
Page 22 of 448
20GETTING TO KNOW YOUR VEHICLE
NOTE:When opening the driver's door with the ignition in
the ON/RUN (engine not running) position, a chime
will sound to remind you to place the ignition in the
OFF position. In addition to the chime, the
message will display “Ignition Or Accessory On” in
the cluster.
REMOTE START — IF EQUIPPED
(GASOLINE)
This system uses the key fob to start the
engine conveniently from outside the
vehicle while still maintaining security.
The system has a range of 328 ft (100 m).
Remote Start is used to defrost windows in cold
weather, and to reach a comfortable climate in all
ambient conditions before the driver enters the
vehicle.
NOTE:
The vehicle must be equipped with an auto -
matic transmission to be equipped with Remote
Start.
Obstructions between the vehicle and key fob
may reduce this range Ú page 432.
HOW TO USE REMOTE START
Push and release the Remote Start button on the
key fob twice within five seconds. The vehicle
doors and tailgate will lock, the turn signals will
flash twice, and the horn will chirp twice (if
equipped). Pushing the Remote Start button again
will shut the engine off.
NOTE:
With Remote Start, the engine will only run for
15 minutes.
Remote Start can only be used twice.
If an engine fault is present or fuel level is low,
the vehicle will start and then shut down in
10 seconds.
The parking lights will turn on and remain on
during Remote Start mode.
For security, power window operation is
disabled when the vehicle is in the Remote Start
mode.
The ignition must be placed in the ON/RUN posi -
tion before the Remote Start sequence can be
repeated for a third cycle.
All of the following conditions must be met before
the engine will remote start:
Gear selector in PARK
Doors closed
Hood closed
Hazard switch off
Brake switch inactive (brake pedal not pressed)
Battery at an acceptable charge level
Panic button not pushed
System not disabled from previous Remote
Start event
CAUTION!
An unlocked vehicle is an invitation for thieves.
Always remove key fob from the vehicle and lock
all doors when leaving the vehicle unattended.
WARNING!
Do not start or run an engine in a closed
garage or confined area. Exhaust gas contains
carbon monoxide (CO) which is odorless and
colorless. Carbon monoxide is poisonous and
can cause serious injury or death when
inhaled.
Keep key fobs away from children. Operation
of the Remote Start system, windows, door
locks or other controls could cause serious
injury or death.
23_JT_OM_EN_USC_t.book Page 20
Page 23 of 448
GETTING TO KNOW YOUR VEHICLE21
Vehicle Security system indicator flashing
Ignition in OFF position
Fuel level meets minimum requirement
All removable doors must not be removed
Malfunction Indicator Light not illuminated
TO EXIT REMOTE START MODE
To drive the vehicle after starting the Remote Start
system, either push and release the unlock button
on the key fob to unlock the doors, or unlock the
vehicle using Keyless Enter ‘n Go™ — Passive Entry
via the door handles, and disarm the Vehicle
Security system (if equipped). Then, prior to the
end of the 15 minute cycle, push and release the
START/STOP ignition button.
The Remote Start system will turn the engine off if
the Remote Start button on the key fob is pushed
again, or if the engine is allowed to run for the
entire 15 minute cycle. Once the ignition is placed
in the ON/RUN position, the climate controls will
resume previously set operations (temperature,
blower control, etc.).
NOTE:
To avoid unintentional shutdowns, the system
will disable for two seconds after receiving a
valid Remote Start request.
For vehicles equipped with the Keyless
Enter ‘n Go™ — Passive Entry feature, the message “Remote Start Active — Push Start
Button” will display in the instrument cluster
display until you push the START/STOP ignition
button.
REMOTE START FRONT DEFROST
A
CTIVATION — IF EQUIPPED
When Remote Start is active, and the outside
ambient temperature is 40°F (4.5°C) or below, the
system will automatically activate front defrost for
15 minutes or less. The time is dependent on the
ambient temperature. Once the timer expires, the
system will automatically adjust the settings
depending on ambient conditions. See “Remote
Start Comfort Systems — If Equipped” in the next
section for detailed operation.
REMOTE START COMFORT SYSTEMS —
I
F EQUIPPED
When Remote Start is activated, the front and rear
defrost will automatically turn on in cold weather.
The heated steering wheel and driver heated seat
feature will also turn on if programmed in the
Comfort menu screen within Uconnect Settings
Ú page 215.
Automatic Temperature Control (ATC) —
If Equipped
The climate controls automatically adjust to an
optimal temperature and mode, dependent upon
the outside ambient temperature. When the
ignition is placed in the ON/RUN position, the
climate controls will resume their previous
settings.
Manual Temperature Control (MTC) — If Equipped
In ambient temperatures of 40°F (4.5°C) or
below, the climate settings will default to
maximum heat, with fresh air entering the
cabin. If the front defrost timer expires, the
vehicle will enter Mix Mode.
In ambient temperatures from 40°F (4.5°C) to
78°F (26°C), the climate settings will be based
on the last settings selected by the driver.
In ambient temperatures of 78°F (26°C) or
above, the climate settings will default to MAX
A/C, Bi-Level mode, and Recirculation on.
WARNING!
Do not start or run an engine in a closed
garage or confined area. Exhaust gas contains
carbon monoxide (CO) which is odorless and
colorless. Carbon monoxide is poisonous and
can cause serious injury or death when
inhaled.
Keep key fobs away from children. Operation
of the Remote Start system, windows, door
locks or other controls could cause serious
injury or death.
2
23_JT_OM_EN_USC_t.book Page 21
Page 24 of 448
22GETTING TO KNOW YOUR VEHICLE
For more information on ATC, MTC, and climate
control settings, see Ú page 61.
NOTE:These features will stay on through the duration of
Remote Start, or until the ignition is placed in the
ON/RUN position. The climate control settings will
change if manually adjusted by the driver while the
vehicle is in remote start mode. This includes
turning the climate controls off using the OFF
button.
REMOTE START WINDSHIELD WIPER
D
E-ICER ACTIVATION — IF EQUIPPED
When Remote Start is active and the outside
ambient temperature is less than 33°F (0.6°C),
the Windshield Wiper De-Icer will activate. Exiting
Remote Start will resume previous operation. If the
Windshield Wiper De-Icer was active, the
Windshield Wiper De-Icer timer and operation will
continue.
REMOTE START CANCEL MESSAGE
The following messages will display in the
instrument cluster if the vehicle fails to remote
start or exits Remote Start prematurely:
Remote Start Canceled — Door Open
Remote Start Canceled — Hood Open
Remote Start Canceled — Fuel Low
Remote Start Canceled — Tailgate Open
Remote Start Canceled — Time Expired
Remote Start Disabled — Start Vehicle To Reset
The message will stay active until the ignition is
placed in the ON/RUN position.
REMOTE START — IF EQUIPPED (DIESEL)
This system uses the key fob to start the
engine conveniently from outside the
vehicle while still maintaining security.
The system has a range of approximately
328 ft (100 m).
Remote Start is used to defrost windows in cold
weather, and to reach a comfortable climate in all
ambient conditions before the driver enters the
vehicle.
NOTE:
The vehicle must be equipped with an auto -
matic transmission to be equipped with Remote
Start.
Obstructions between the vehicle and the key
fob may reduce this range.
The Remote Start system will wait for the Wait
To Start yellow telltale to extinguish before
cranking the engine Ú page 132. This allows
time for the engine preheat cycle to heat the
cylinder air, and is normal in cold weather.
HOW TO USE REMOTE START
Push and release the Remote Start button on the
key fob twice within five seconds. The vehicle
doors and tailgate will lock, the turn signals will
flash twice, and the horn will chirp twice. Pushing
the Remote Start button again will shut the engine
off.
NOTE:
With Remote Start, the engine will only run for
15 minutes.
Remote Start can only be used twice.
If an engine fault is present or fuel level is low,
the vehicle will start and then shut down in 10
seconds.
WARNING!
Do not start or run an engine in a closed
garage or confined area. Exhaust gas contains
carbon monoxide (CO) which is odorless and
colorless. Carbon monoxide is poisonous and
can cause serious injury or death when
inhaled.
Keep key fobs away from children. Operation
of the Remote Start system, windows, door
locks or other controls could cause serious
injury or death.
23_JT_OM_EN_USC_t.book Page 22
Page 30 of 448
28GETTING TO KNOW YOUR VEHICLE
NOTE:Always use this device when carrying children.
After engaging the child lock on both rear doors,
check for effective engagement by trying to open a
door with the internal handle. Once the
Child-Protection Door Lock system is engaged, it is
impossible to open the doors from inside the
vehicle. Before getting out of the vehicle, be sure to
check that there is no one left inside.
FRONT DOOR REMOVAL
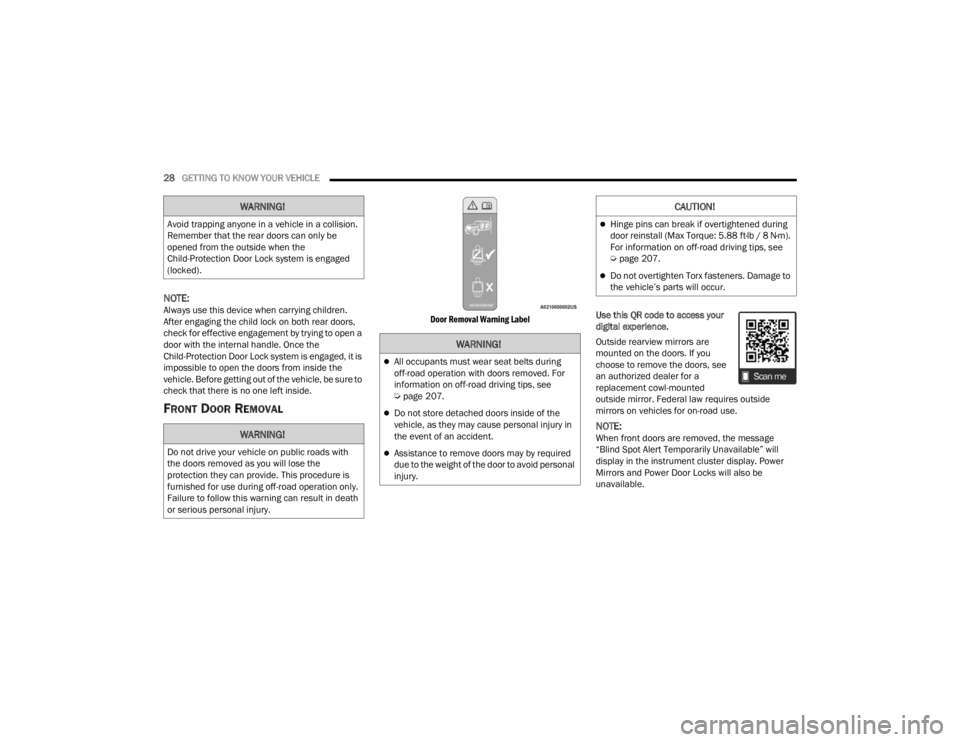
Door Removal Warning Label
Use this QR code to access your
digital experience.
Outside rearview mirrors are
mounted on the doors. If you
choose to remove the doors, see
an authorized dealer for a
replacement cowl-mounted
outside mirror. Federal law requires outside
mirrors on vehicles for on-road use.
NOTE:When front doors are removed, the message
“Blind Spot Alert Temporarily Unavailable” will
display in the instrument cluster display. Power
Mirrors and Power Door Locks will also be
unavailable.
WARNING!
Avoid trapping anyone in a vehicle in a collision.
Remember that the rear doors can only be
opened from the outside when the
Child-Protection Door Lock system is engaged
(locked).
WARNING!
Do not drive your vehicle on public roads with
the doors removed as you will lose the
protection they can provide. This procedure is
furnished for use during off-road operation only.
Failure to follow this warning can result in death
or serious personal injury.
WARNING!
All occupants must wear seat belts during
off-road operation with doors removed. For
information on off-road driving tips, see
Ú
page 207.
Do not store detached doors inside of the
vehicle, as they may cause personal injury in
the event of an accident.
Assistance to remove doors may by required
due to the weight of the door to avoid personal
injury.
CAUTION!
Hinge pins can break if overtightened during
door reinstall (Max Torque: 5.88 ft·lb / 8 N·m).
For information on off-road driving tips, see
Úpage 207.
Do not overtighten Torx fasteners. Damage to
the vehicle’s parts will occur.
23_JT_OM_EN_USC_t.book Page 28
Page 48 of 448
46GETTING TO KNOW YOUR VEHICLE
NOTE:
The vehicle is equipped with stow clips located
on the lower trim, next to the rear seats. Use
these clips to hold the seat belt out of the path
of the seatback when it is being folded and
raised.
Stow Clip Location
You may experience deformation in the seat
cushion from the seat belt buckles if the seats
are left folded for an extended period of time.
This is normal. By simply unfolding the seats to
the open position, the seat cushion will return to
its normal shape over time.
REAR SEAT STADIUM POSITION
The rear seat bottoms can be folded upward into
the Stadium Position to create more storage space
on the vehicle’s floor, and to access the under seat
storage bins (if equipped).
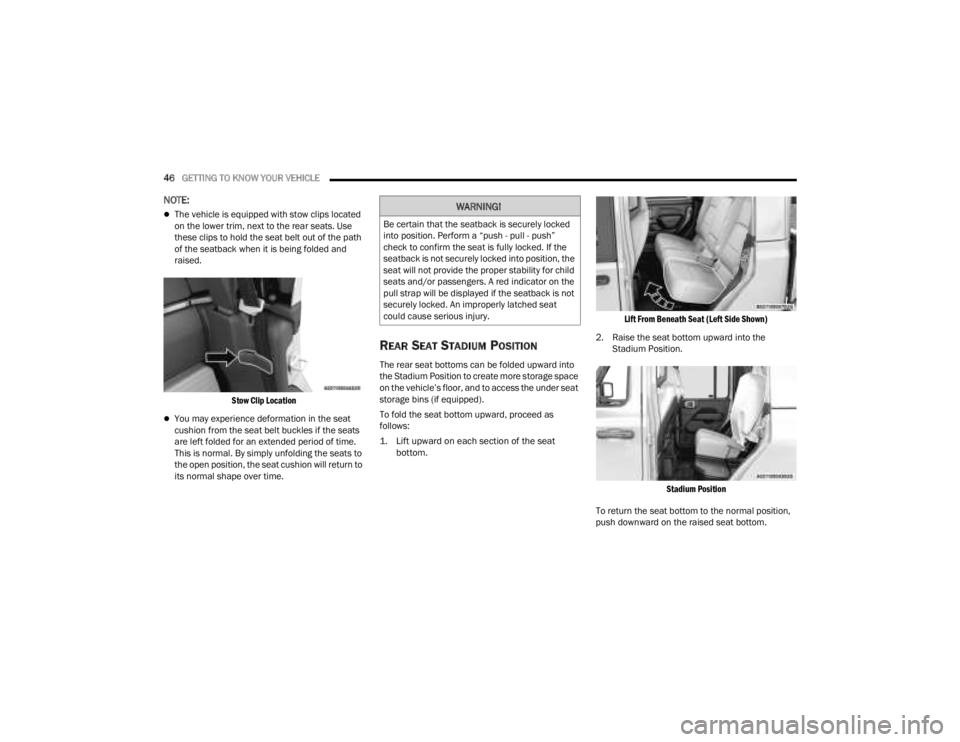
To fold the seat bottom upward, proceed as
follows:
1. Lift upward on each section of the seat bottom.
Lift From Beneath Seat (Left Side Shown)
2. Raise the seat bottom upward into the Stadium Position.
Stadium Position
To return the seat bottom to the normal position,
push downward on the raised seat bottom.
WARNING!
Be certain that the seatback is securely locked
into position. Perform a “push - pull - push”
check to confirm the seat is fully locked. If the
seatback is not securely locked into position, the
seat will not provide the proper stability for child
seats and/or passengers. A red indicator on the
pull strap will be displayed if the seatback is not
securely locked. An improperly latched seat
could cause serious injury.
23_JT_OM_EN_USC_t.book Page 46
Page 51 of 448
GETTING TO KNOW YOUR VEHICLE49
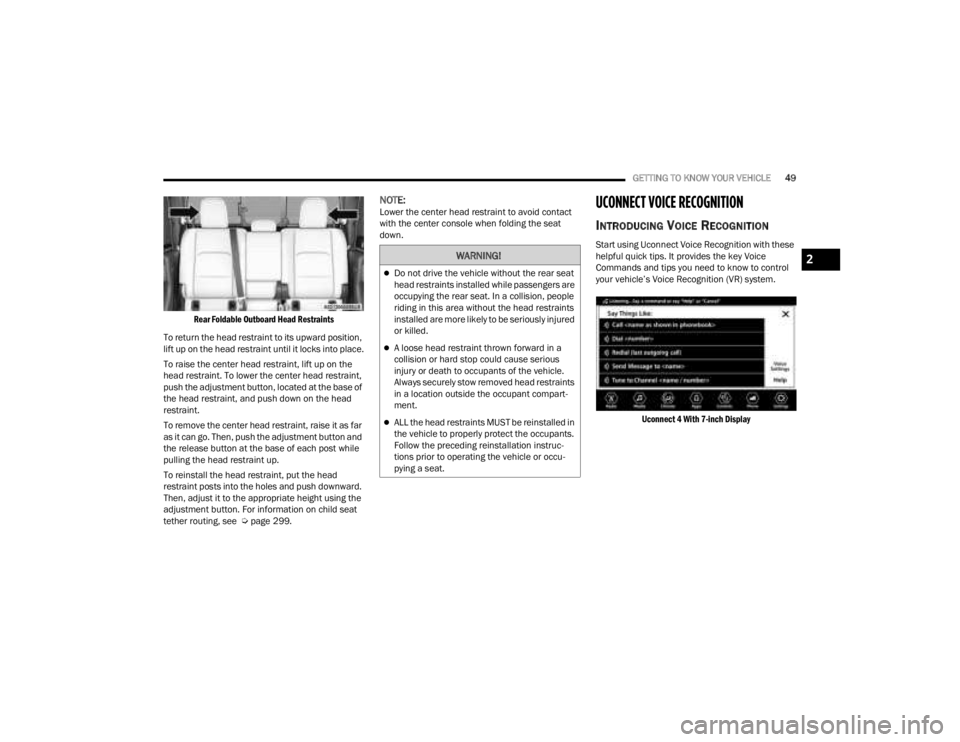
Rear Foldable Outboard Head Restraints
To return the head restraint to its upward position,
lift up on the head restraint until it locks into place.
To raise the center head restraint, lift up on the
head restraint. To lower the center head restraint,
push the adjustment button, located at the base of
the head restraint, and push down on the head
restraint.
To remove the center head restraint, raise it as far
as it can go. Then, push the adjustment button and
the release button at the base of each post while
pulling the head restraint up.
To reinstall the head restraint, put the head
restraint posts into the holes and push downward.
Then, adjust it to the appropriate height using the
adjustment button. For information on child seat
tether routing, see Ú page 299.
NOTE:Lower the center head restraint to avoid contact
with the center console when folding the seat
down.UCONNECT VOICE RECOGNITION
INTRODUCING VOICE RECOGNITION
Start using Uconnect Voice Recognition with these
helpful quick tips. It provides the key Voice
Commands and tips you need to know to control
your vehicle’s Voice Recognition (VR) system.
Uconnect 4 With 7-inch Display
WARNING!
Do not drive the vehicle without the rear seat
head restraints installed while passengers are
occupying the rear seat. In a collision, people
riding in this area without the head restraints
installed are more likely to be seriously injured
or killed.
A loose head restraint thrown forward in a
collision or hard stop could cause serious
injury or death to occupants of the vehicle.
Always securely stow removed head restraints
in a location outside the occupant compart -
ment.
ALL the head restraints MUST be reinstalled in
the vehicle to properly protect the occupants.
Follow the preceding reinstallation instruc -
tions prior to operating the vehicle or occu -
pying a seat.
2
23_JT_OM_EN_USC_t.book Page 49