CD player JEEP GRAND CHEROKEE 2012 Owner handbook (in English)
[x] Cancel search | Manufacturer: JEEP, Model Year: 2012, Model line: GRAND CHEROKEE, Model: JEEP GRAND CHEROKEE 2012Pages: 380, PDF Size: 3.21 MB
Page 207 of 380

•AM/FM band selection via Radio
Auxiliary InputsFor each video screen there is an auxiliary (Aux
jack) device input which is used to connect
external audio/video sources to the VES™.
Examples of devices that can be connected to
the Aux inputs include portable music players,
video cameras, VCR’s, game systems, and
other devices with audio and/or video outputs.
The Aux jacks are typically located on the back
of the center console or on one of the vehicles
side panels in the rear occupant area.
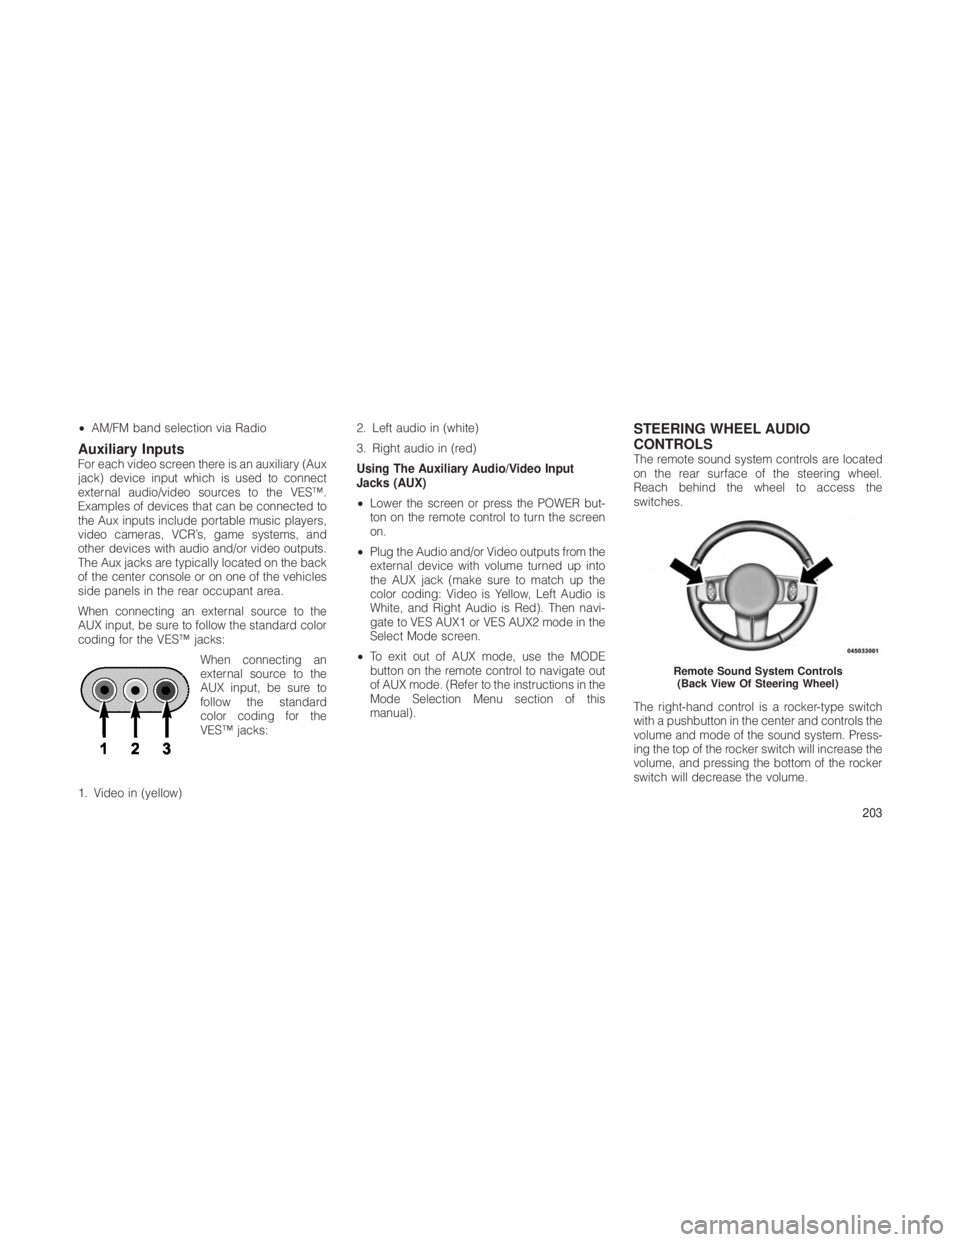
When connecting an external source to the
AUX input, be sure to follow the standard color
coding for the VES™ jacks:
When connecting an
external source to the
AUX input, be sure to
follow the standard
color coding for the
VES™ jacks:
1. Video in (yellow) 2. Left audio in (white)
3. Right audio in (red)
Using The Auxiliary Audio/Video Input
Jacks (AUX)
•
Lower the screen or press the POWER but-
ton on the remote control to turn the screen
on.
• Plug the Audio and/or Video outputs from the
external device with volume turned up into
the AUX jack (make sure to match up the
color coding: Video is Yellow, Left Audio is
White, and Right Audio is Red). Then navi-
gate to VES AUX1 or VES AUX2 mode in the
Select Mode screen.
• To exit out of AUX mode, use the MODE
button on the remote control to navigate out
of AUX mode. (Refer to the instructions in the
Mode Selection Menu section of this
manual).
STEERING WHEEL AUDIO
CONTROLS
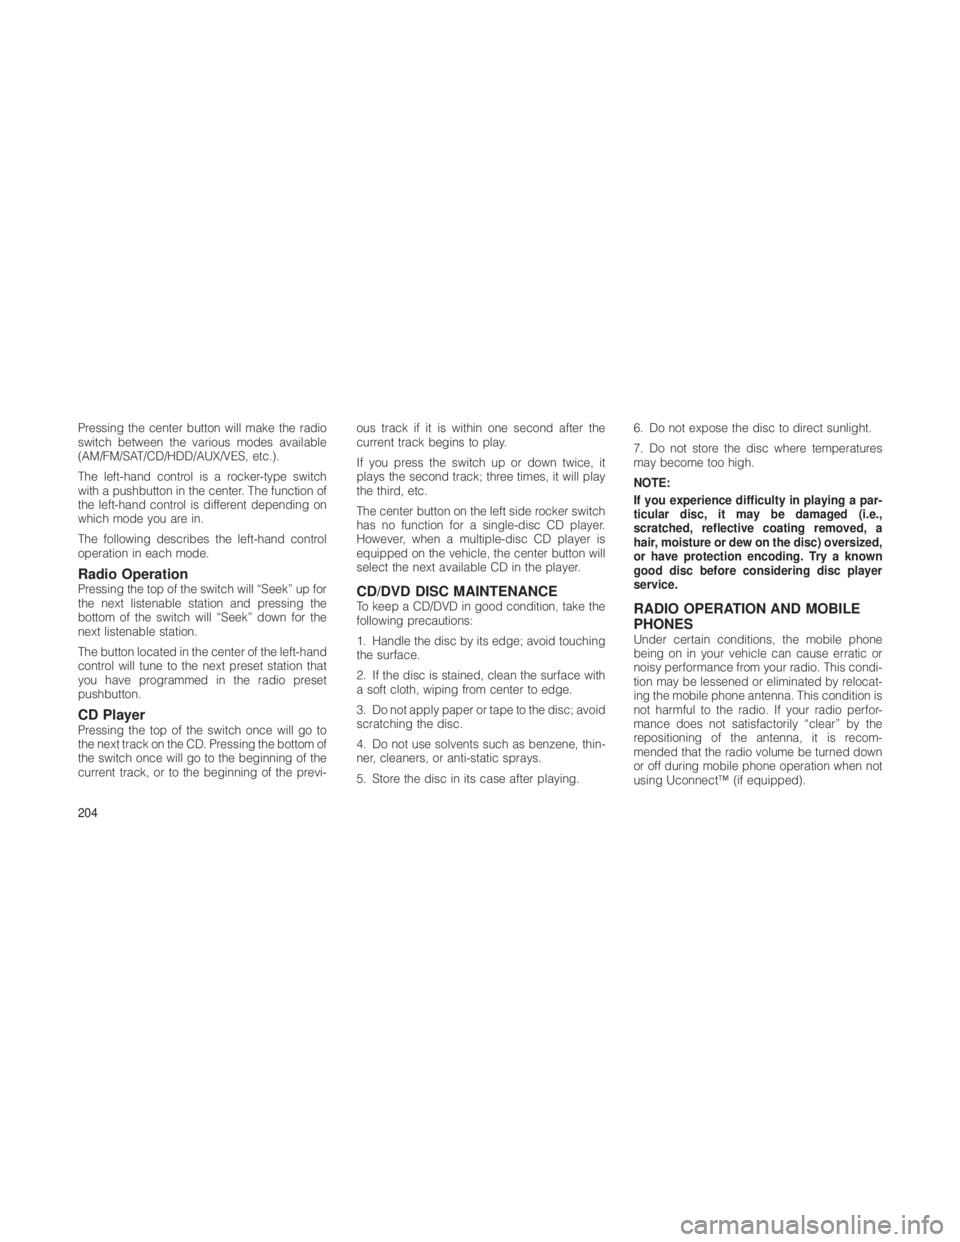
The remote sound system controls are located
on the rear surface of the steering wheel.
Reach behind the wheel to access the
switches.
The right-hand control is a rocker-type switch
with a pushbutton in the center and controls the
volume and mode of the sound system. Press-
ing the top of the rocker switch will increase the
volume, and pressing the bottom of the rocker
switch will decrease the volume.
Remote Sound System Controls
(Back View Of Steering Wheel)
203
Page 208 of 380

Pressing the center button will make the radio
switch between the various modes available
(AM/FM/SAT/CD/HDD/AUX/VES, etc.).
The left-hand control is a rocker-type switch
with a pushbutton in the center. The function of
the left-hand control is different depending on
which mode you are in.
The following describes the left-hand control
operation in each mode.
Radio OperationPressing the top of the switch will “Seek” up for
the next listenable station and pressing the
bottom of the switch will “Seek” down for the
next listenable station.
The button located in the center of the left-hand
control will tune to the next preset station that
you have programmed in the radio preset
pushbutton.
CD PlayerPressing the top of the switch once will go to
the next track on the CD. Pressing the bottom of
the switch once will go to the beginning of the
current track, or to the beginning of the previ-ous track if it is within one second after the
current track begins to play.
If you press the switch up or down twice, it
plays the second track; three times, it will play
the third, etc.
The center button on the left side rocker switch
has no function for a single-disc CD player.
However, when a multiple-disc CD player is
equipped on the vehicle, the center button will
select the next available CD in the player.
CD/DVD DISC MAINTENANCETo keep a CD/DVD in good condition, take the
following precautions:
1. Handle the disc by its edge; avoid touching
the surface.
2. If the disc is stained, clean the surface with
a soft cloth, wiping from center to edge.
3. Do not apply paper or tape to the disc; avoid
scratching the disc.
4. Do not use solvents such as benzene, thin-
ner, cleaners, or anti-static sprays.
5. Store the disc in its case after playing.6. Do not expose the disc to direct sunlight.
7. Do not store the disc where temperatures
may become too high.
NOTE:
If you experience difficulty in playing a par-
ticular disc, it may be damaged (i.e.,
scratched, reflective coating removed, a
hair, moisture or dew on the disc) oversized,
or have protection encoding. Try a known
good disc before considering disc player
service.RADIO OPERATION AND MOBILE
PHONES
Under certain conditions, the mobile phone
being on in your vehicle can cause erratic or
noisy performance from your radio. This condi-
tion may be lessened or eliminated by relocat-
ing the mobile phone antenna. This condition is
not harmful to the radio. If your radio perfor-
mance does not satisfactorily “clear” by the
repositioning of the antenna, it is recom-
mended that the radio volume be turned down
or off during mobile phone operation when not
using Uconnect™ (if equipped).
204