Oil JEEP GRAND CHEROKEE 2013 Owner handbook (in English)
[x] Cancel search | Manufacturer: JEEP, Model Year: 2013, Model line: GRAND CHEROKEE, Model: JEEP GRAND CHEROKEE 2013Pages: 408, PDF Size: 3.21 MB
Page 317 of 408
CAUTION!
•
Failure to properly maintain your vehicle or
perform repairs and service when necessary
could result in more costly repairs, damage
to other components or negatively impact
vehicle performance. Immediately have po-
tential malfunctions examined by an autho-
rized dealer or qualified repair center.
•Your vehicle has been built with improved
fluids that protect the performance and
durability of your vehicle and also allow
extended maintenance intervals. Do not
use chemical flushes in these components
as the chemicals can damage your engine,
transmission, power steering or air condi-
tioning. Such damage is not covered by
the New Vehicle Limited Warranty. If a
flush is needed because of component
malfunction, use only the specified fluid for
the flushing procedure.
Engine Oil – Gasoline Engines
Checking Oil Level
To assure proper lubrication of your vehicle’s
engine, the engine oil must be maintained at the
correct level. The best time to check the engine
oil level is about five minutes after a fully
warmed up engine is shut off or before starting
the engine after it has sat overnight.
Checking the oil while the vehicle is on level
ground will improve the accuracy of the oil level
readings. Maintain the oil level in the SAFE level
range. Adding 1 U.S. Quart (0.95L) of oil when
the level is at the bottom of the SAFE range will
result in the level being at the top of the SAFE
range.
CAUTION!
Overfilling or underfilling the crankcase will
cause aeration or loss of oil pressure. This
could damage your engine. Change Engine Oil
Refer to the “Maintenance Schedule” for the
proper maintenance intervals.
Engine Oil Selection – Non ACEA
Categories
For best performance and maximum protection
under all types of operating conditions, we
recommend you use MOPAR® API Certified
SAE 5W-20 engine oil, meeting the require-
ments of Chrysler Material Standard MS-6395.
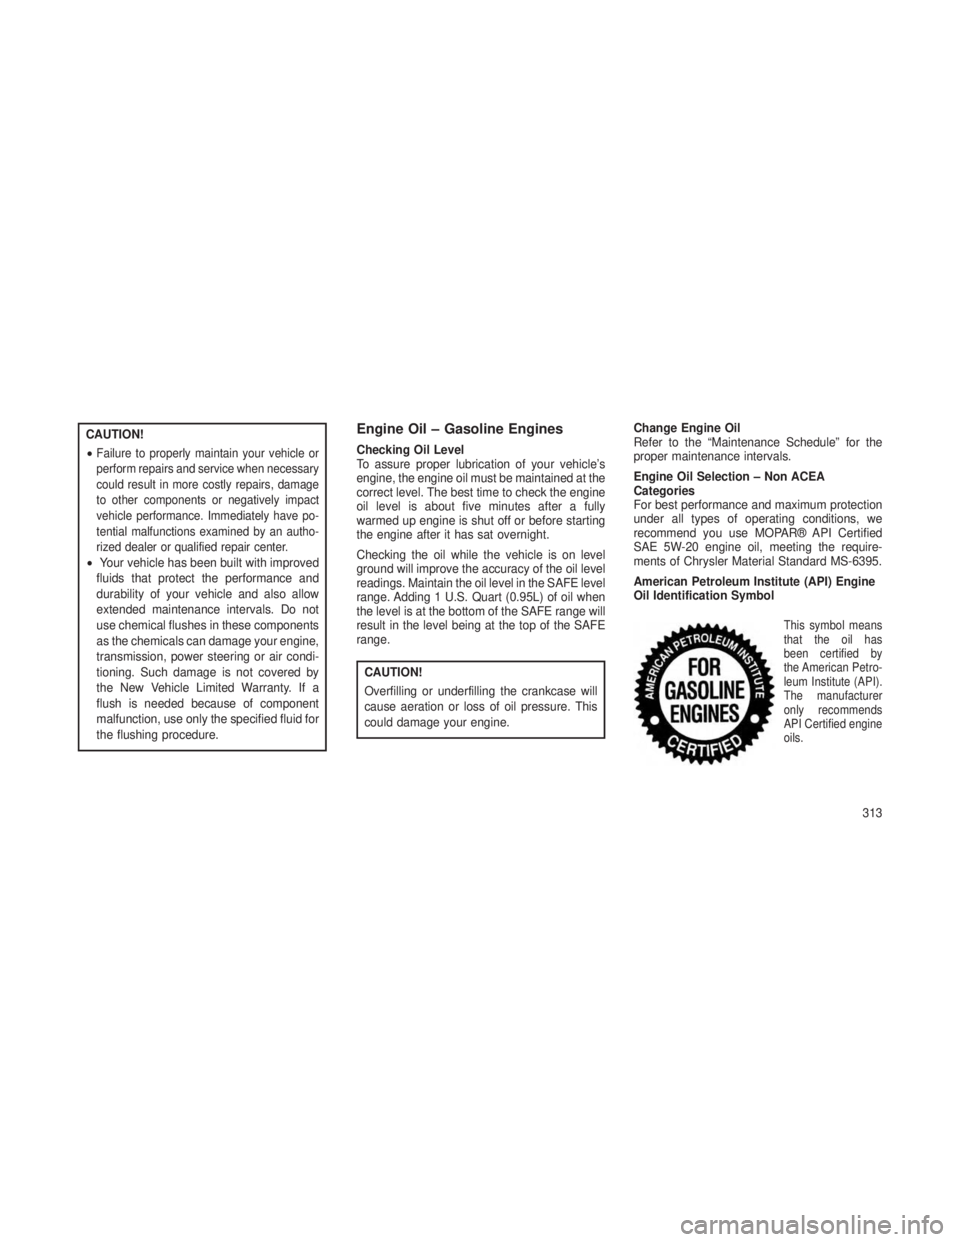
American Petroleum Institute (API) Engine
Oil Identification Symbol
This symbol means
that the oil has
been certified by
the American Petro-
leum Institute (API).
The manufacturer
only recommends
API Certified engine
oils.
313
Page 318 of 408
CAUTION!
Do not use chemical flushes in your engine
oil as the chemicals can damage your en-
gine. Such damage is not covered by the
New Vehicle Limited Warranty.
Engine Oil Selection – ACEA Categories
For countries that use the ACEA European Oil
Categories for Service Fill Oils, we recommend
you use 5W-20 engine oils that meet the re-
quirements of ACEA C3.
Engine Oil Viscosity – 3.6L Engine
SAE 5W-20 engine oil is recommended for all
operating temperatures. This engine oil im-
proves low temperature starting and vehicle fuel
economy.
The engine oil filler cap also shows the recom-
mended engine oil viscosity for your engine. For
information on engine oil filler cap location, refer
to the “Engine Compartment” illustration in this
section. NOTE:
SAE 5W-30 engine oil approved to Fiat
9.55535-S1 or Fiat 9.55535-S3 may be used
when SAE 5W-20 engine oil meeting MS-
6395 is not available.
Engine Oil Viscosity – 5.7L Engine
SAE 5W-20 engine oil is recommended for all
operating temperatures. This engine oil im-
proves low temperature starting and vehicle fuel
economy.
The engine oil filler cap also shows the recom-
mended engine oil viscosity for your engine. For
information on engine oil filler cap location, refer
to the “Engine Compartment” illustration in this
section.
NOTE:
SAE 5W-30 engine oil approved to Fiat
9.55535-S1 or Fiat 9.55535-S3 may be used
when SAE 5W-20 engine oil meeting MS-
6395 is not available.Engine Oil – Diesel Engine
Engine Oil Selection
For best performance and maximum protection
under all types of operating conditions, the
manufacturer recommends you use SAE 5W-30
Synthetic Low Ash Engine Oil meeting the re-
quirements of Chrysler Material Standard
MS-11106 and approved ACEA C3.
Engine Oil Viscosity
CAUTION!
Your vehicle is equipped with an advanced
technology Diesel Engine and an emission
device designed to limit Diesel Particulate
Emissions from being released into the at-
mosphere. The durability of your engine and
life expectancy of this diesel particulate filter
emission device is highly dependent on the
use of the correct engine oil.
314
Page 319 of 408
SAE 5W-30 Synthetic Low Ash Engine Oil is
recommended for all operating temperatures.
This engine oil improves low temperature start-
ing and vehicle fuel economy.
The engine oil filler cap also shows the recom-
mended engine oil viscosity for your engine. For
information on engine oil filler cap location, refer
to “Engine Compartment” in “Maintaining Your
Vehicle” for further information.
Synthetic Engine OilsYou may use synthetic engine oils provided the
recommended oil quality requirements are met,
and the recommended maintenance intervals
for oil and filter changes are followed.
Materials Added To Engine OilThe manufacturer strongly recommends
against the addition of any additives (other than
leak detection dyes) to the engine oil. Engine oil
is an engineered product and its performance
may be impaired by supplemental additives.
Disposing Of Used Engine Oil And
Oil Filters
Care should be taken in disposing of used
engine oil and oil filters from your vehicle. Used
oil and oil filters, indiscriminately discarded, can
present a problem to the environment. Contact
your authorized dealer, service station or gov-
ernmental agency for advice on how and where
used oil and oil filters can be safely discarded in
your area.
Engine Oil FilterThe engine oil filter should be replaced with a
new filter at every engine oil change.
Engine Oil Filter Selection
This manufacturer’s engines have a full-flow
type disposable oil filter. Use a filter of this type
for replacement. The quality of replacement
filters varies considerably. Only high quality
filters should be used to assure most efficient
service. MOPAR® engine oil filters are high
quality oil filters and are recommended.
Engine Air Cleaner FilterRefer to the “Maintenance Schedule” for the
proper maintenance intervals.
WARNING!
The air induction system (air cleaner, hoses,
etc.) can provide a measure of protection in
the case of engine backfire. Do not remove
the air induction system (air cleaner, hoses,
etc.) unless such removal is necessary for
repair or maintenance. Make sure that no
one is near the engine compartment before
starting the vehicle with the air induction
system (air cleaner, hoses, etc.) removed.
Failure to do so can result in serious per-
sonal injury.
Engine Air Cleaner Filter Selection
The quality of replacement engine air cleaner
filters varies considerably. Only high quality
filters should be used to assure most efficient
service. MOPAR® engine air cleaner filters are
a high quality filter and are recommended.
315
Page 321 of 408
WARNING!
•Use only refrigerants and compressor lu-
bricants approved by the manufacturer for
your air conditioning system. Some unap-
proved refrigerants are flammable and can
explode, injuring you. Other unapproved
refrigerants or lubricants can cause the
system to fail, requiring costly repairs.
• The air conditioning system contains re-
frigerant under high pressure. To avoid risk
of personal injury or damage to the sys-
tem, adding refrigerant or any repair re-
quiring lines to be disconnected should be
done by an experienced repairman.
NOTE:
Use only manufacturer approved A/C Sys-
tem Sealers, Stop Leak Products, Seal Con-
ditioners, Compressor Oil, and Refrigerants. Refrigerant Recovery And Recycling
R-134a Air Conditioning Refrigerant is a hydro-
fluorocarbon (HFC) that is endorsed by the
Environmental Protection Agency and is an
ozone-saving product. However, the manufac-
turer recommends that air conditioning service
be performed by authorized dealer or other
service facilities using recovery and recycling
equipment.
NOTE:
Use only manufacturer approved A/C sys-
tem sealers, stop leak products, seal condi-
tioners, compressor oil, and refrigerants.
A/C Air Filter
Refer to the “Maintenance Schedule” for the
proper maintenance intervals.
WARNING!
Do not remove the A/C air filter while the
blower is operating or personal injury may
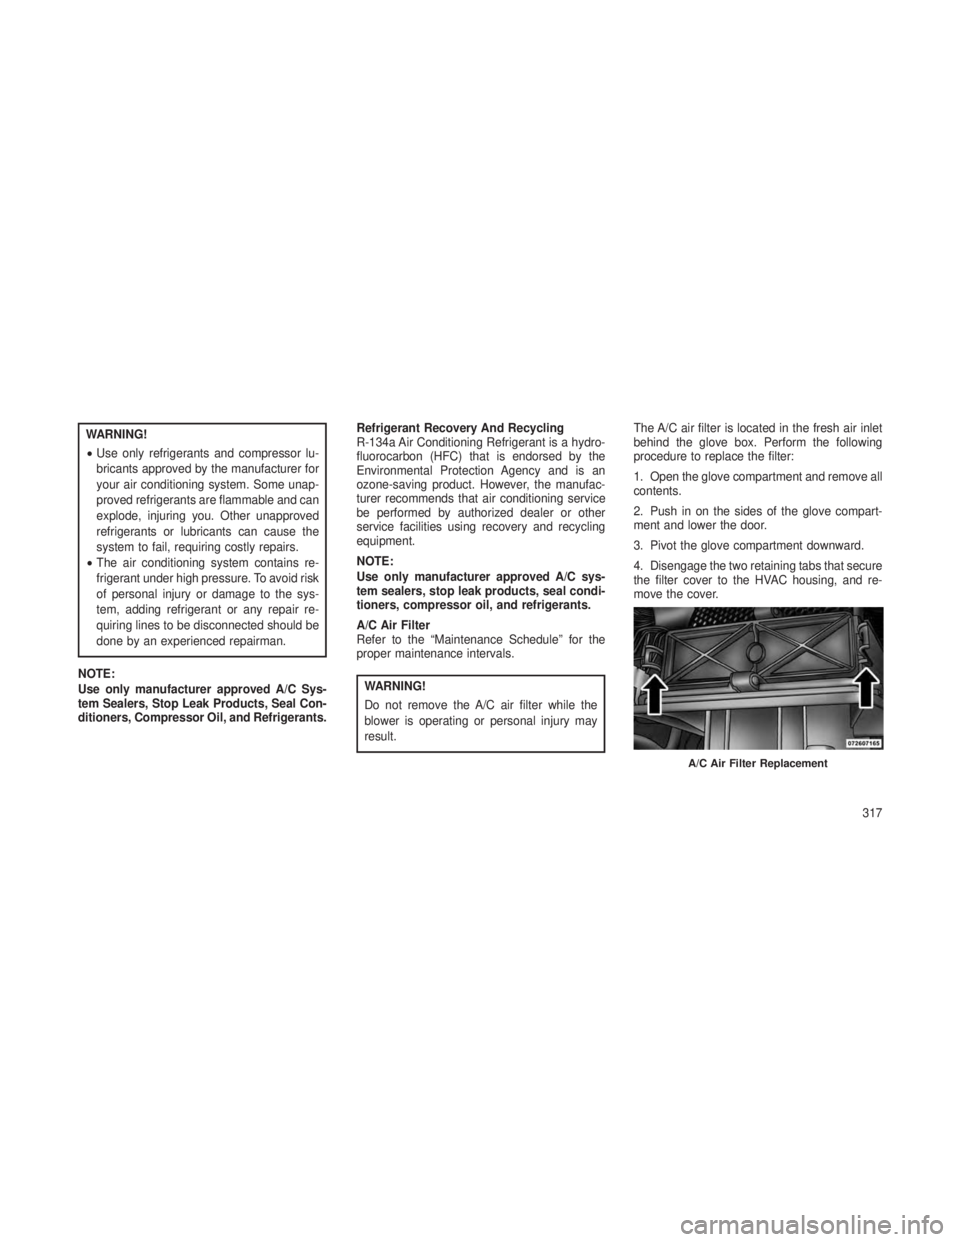
result.The A/C air filter is located in the fresh air inlet
behind the glove box. Perform the following
procedure to replace the filter:
1. Open the glove compartment and remove all
contents.
2. Push in on the sides of the glove compart-
ment and lower the door.
3. Pivot the glove compartment downward.
4. Disengage the two retaining tabs that secure
the filter cover to the HVAC housing, and re-
move the cover.
A/C Air Filter Replacement
317
Page 322 of 408
5. Remove the A/C air filter by pulling it straight
out of the housing.
6. Install the A/C air filter with the arrow on the
filter pointing toward the floor. When installing
the filter cover, make sure the retaining tabs
fully engage the cover.
CAUTION!
The A/C air filter is identified with an arrow to
indicate airflow direction through the filter.
Failure to properly install the filter will result
in the need to replace it more often.
7. Rotate the glove compartment door back
into position.
Body LubricationLocks and all body pivot points, including such
items as seat tracks, door hinge pivot points
and rollers, liftgate, tailgate, sliding doors and
hood hinges, should be lubricated periodically
with a lithium based grease, such as MOPAR®
Spray White Lube to assure quiet, easy opera-
tion and to protect against rust and wear. Prior
to the application of any lubricant, the parts
concerned should be wiped clean to remove
dust and grit; after lubricating excess oil and
grease should be removed. Particular attention
should also be given to hood latching compo-
nents to ensure proper function. When perform-
ing other underhood services, the hood latch,
release mechanism and safety catch should be
cleaned and lubricated.
The external lock cylinders should be lubricated
twice a year, preferably in the Fall and Spring.
Apply a small amount of a high quality lubricant,
such as MOPAR® Lock Cylinder Lubricant di-
rectly into the lock cylinder.Windshield Wiper BladesClean the rubber edges of the wiper blades and
the windshield periodically with a sponge or soft
cloth and a mild nonabrasive cleaner. This will
remove accumulations of salt or road film.
Operation of the wipers on dry glass for long
periods may cause deterioration of the wiper
blades. Always use washer fluid when using the
wipers to remove salt or dirt from a dry wind-
shield.
Avoid using the wiper blades to remove frost or
ice from the windshield. Keep the blade rubber
out of contact with petroleum products such as
engine oil, gasoline, etc.
NOTE:
Life expectancy of wiper blades varies de-
pending on geographical area and fre-
quency of use. Poor performance of blades
may be present with chattering, marks, wa-
ter lines or wet spots. If any of these condi-
tions are present, clean the wiper blades or
replace as necessary.
318
Page 324 of 408
WARNING!
Commercially available windshield washer
solvents are flammable. They could ignite
and burn you. Care must be exercised when
filling or working around the washer solution.
Exhaust SystemThe best protection against carbon monoxide
entry into the vehicle body is a properly main-
tained engine exhaust system.
If you notice a change in the sound of the
exhaust system; or if the exhaust fumes can be
detected inside the vehicle; or when the under-
side or rear of the vehicle is damaged; have an
authorized technician inspect the complete ex-
haust system and adjacent body areas for bro-
ken, damaged, deteriorated, or mispositioned
parts. Open seams or loose connections could
permit exhaust fumes to seep into the passen-
ger compartment. In addition, have the exhaust
system inspected each time the vehicle is
raised for lubrication or oil change. Replace as
required.
WARNING!
•Exhaust gases can injure or kill. They
contain carbon monoxide (CO), which is
colorless and odorless. Breathing it can
make you unconscious and can eventually
poison you. To avoid breathing CO, refer to
“Safety Tips/Exhaust Gas” in “Things To
Know Before Starting Your Vehicle” for
further information.
• A hot exhaust system can start a fire if you
park over materials that can burn. Such
materials might be grass or leaves coming
into contact with your exhaust system. Do
not park or operate your vehicle in areas
where your exhaust system can contact
anything that can burn.CAUTION!
•The catalytic converter requires the use of
unleaded fuel only. Leaded gasoline will
destroy the effectiveness of the catalyst as
an emissions control device and may seri-
ously reduce engine performance and
cause serious damage to the engine.
• Damage to the catalytic converter can
result if your vehicle is not kept in proper
operating condition. In the event of engine
malfunction, particularly involving engine
misfire or other apparent loss of perfor-
mance, have your vehicle serviced
promptly. Continued operation of your ve-
hicle with a severe malfunction could
cause the converter to overheat, resulting
in possible damage to the converter and
vehicle.
Under normal operating conditions, the catalytic
converter will not require maintenance. How-
ever, it is important to keep the engine properly
tuned to assure proper catalyst operation and
prevent possible catalyst damage.
320
Page 329 of 408
With disc brakes, the fluid level can be expected
to fall as the brake linings wear. However, an
unexpected drop in fluid level may be caused by
a leak and a system check should be con-
ducted.
Refer to “Fluids, Lubricants, and Genuine Parts”
in “Maintaining Your Vehicle” for further informa-
tion.
WARNING!
•Use only manufacturer’s recommended
brake fluid. Refer to “Fluids, Lubricants,
and Genuine Parts” in “Maintaining Your
Vehicle” for further information. Using the
wrong type of brake fluid can severely
damage your brake system and/or impair
its performance. The proper type of brake
fluid for your vehicle is also identified on
the original factory installed hydraulic mas-
ter cylinder reservoir.
(Continued)
WARNING!(Continued)
•To avoid contamination from foreign matter
or moisture, use only new brake fluid or fluid
that has been in a tightly closed container.
Keep the master cylinder reservoir cap se-
cured at all times. Brake fluid in a open
container absorbs moisture from the air re-
sulting in a lower boiling point. This may
cause it to boil unexpectedly during hard or
prolonged braking, resulting in sudden brake
failure. This could result in a collision.
•Overfilling the brake fluid reservoir can
result in spilling brake fluid on hot engine
parts, causing the brake fluid to catch fire.
Brake fluid can also damage painted and
vinyl surfaces, care should be taken to
avoid its contact with these surfaces.
• Do not allow petroleum based fluid to
contaminate the brake fluid. Brake seal
components could be damaged, causing
partial or complete brake failure. This
could result in a collision.
Front/Rear Axle FluidFor normal service, periodic fluid level checks
are not required. When the vehicle is serviced
for other reasons the exterior surfaces of the
axle assembly should be inspected. If gear oil
leakage is suspected inspect the fluid level.
Refer to “Fluids, Lubricants, and Genuine Parts”
in “Maintaining Your Vehicle” for further informa-
tion.
Front Axle Fluid Level Check
The front axle oil level needs to be between 1/8
in (3 mm) below the bottom of the fill hole and
the bottom of the fill hole.
The front axle fill and drain plugs should be
tightened to 22 to 29 ft lbs (30 to 40 N·m).
CAUTION!
Do not over tighten the plugs as it could
damage them and cause them to leak.
Rear Axle Fluid Level Check
The rear axle oil level needs to be between 1/8
in (3 mm) below the bottom of the fill hole and
the bottom of the fill hole. 325
Page 330 of 408
The rear axle fill and drain plugs should be
tightened to 22 to 29 ft lbs (30 to 40 N·m) on
axles with aluminum housings. The rear axle fill
and drain plugs should be tightened to 22 to
52 ft lbs (30 to 70 N·m) on axles with cast iron
housings.
CAUTION!
Do not over tighten the plugs as it could
damage then and cause them to leak.
Selection Of Lubricant
Use only the manufacturer’s recommended
fluid. Refer to “Fluids, Lubricants, and Genuine
Parts” in “Maintaining Your Vehicle” for further
information.
Transfer Case
Fluid Level Check
For normal service, periodic fluid level checks
are not required. When the vehicle is serviced
for other reasons the exterior surfaces of the
transfer case assembly should be inspected. If
oil leakage is suspected inspect the fluid level. Refer to “Fluids, Lubricants, and Genuine Parts”
in “Maintaining Your Vehicle” for further informa-
tion.
Adding Fluid
Add fluid at the filler hole, until it runs out of the
hole, when the vehicle is in a level position.
Drain
First remove fill plug, then remove drain plug.
Recommended tightening torque for drain and
fill plugs is 15 to 25 ft lbs (20 to 34 N·m).
CAUTION!
When installing plugs, do not overtighten.
You could damage them and cause them to
leak.
Selection Of Lubricant
Use only the manufacturer’s recommended
fluid. Refer to “Fluids, Lubricants, and Genuine
Parts” in “Maintaining Your Vehicle” for further
information.
Automatic Transmission
Selection Of Lubricant
It is important to use the proper transmission
fluid to ensure optimum transmission perfor-
mance and life. Use only the manufacturer’s
recommended transmission fluid. Refer to “Flu-
ids, Lubricants, and Genuine Parts” in “Main-
taining Your Vehicle” for fluid specifications. It is
important to maintain the transmission fluid at
the correct level using the recommended fluid.
NOTE:
No chemical flushes should be used in any
transmission; only the approved lubricant
should be used.
CAUTION!
Using a transmission fluid other than the
manufacturer’s recommended fluid may cause
deterioration in transmission shift quality
and/or torque converter shudder. Refer to “Flu-
ids, Lubricants, and Genuine Parts” in “Main-
taining Your Vehicle” for fluid specifications.
326
Page 332 of 408
6.Remove the dipstick again, and note the fluid
level on both sides. The fluid level reading is only
valid if there is a solid coating of oil on both sides of
the dipstick. The holes in the dipstick will be full of
fluid if the actual level is at or above the hole. The
fluid level should be between the "HOT"(upper)
reference holes on the dipstick at normal operating
temperature. If the fluid level is low, add fluid
through the dipstick tube to bring it to the proper
level. Do not overfill. Use ONLY the recom-
mended fluid (see "Fluids, Lubricants, and Genuine
Parts" for fluid specifications). After adding any
quantity of oil through the dipstick tube, wait a
minimum of two minutes for the oil to fully drain into
the transmission before rechecking the fluid level.
NOTE:If it is necessary to check the transmission
below the operating temperature, the fluid level
should be between the two “COLD” (lower)
holes on the dipstick with the fluid at approxi-
mately 70°F (21°C) (room temperature). If the
fluid level is correctly established at room tem-
perature, it should be between the “HOT” (up-
per) reference holes when the transmission
reaches 180°F (82°C). Remember it is best to
check the level at the normal operating tem-
perature.
CAUTION!
If the fluid temperature is below 50°F (10°C)
it may not register on the dipstick. Do not add
fluid until the temperature is elevated enough
to produce an accurate reading. Run the
engine at idle, in PARK, to warm the fluid.
7. Check for leaks. Release the parking brake.
NOTE:
To prevent dirt and water from entering the
transmission after checking or replenishing
fluid, make sure that the dipstick cap is
properly reseated. It is normal for the dip-
stick cap to spring back slightly from its
fully seated position, as long as its seal
remains engaged in the dipstick tube.
Fluid And Filter Changes
Refer to the “Maintenance Schedule” for the
proper maintenance intervals.
In addition, change the fluid and filter if the
transmission is disassembled for any reason.Appearance Care And Protection
From Corrosion
Protection Of Body And Paint From CorrosionVehicle body care requirements vary according
to geographic locations and usage. Chemicals
that make roads passable in snow and ice, and
those that are sprayed on trees and road sur-
faces during other seasons, are highly corrosive
to the metal in your vehicle.
The following maintenance recommendations
will enable you to obtain maximum benefit from
the corrosion resistance built into your vehicle.
What Causes Corrosion?
Corrosion is the result of deterioration or re-
moval of paint and protective coatings from your
vehicle.
The most common causes are:
• Road salt, dirt and moisture accumulation.
• Stone and gravel impact.
• Insects, tree sap and tar.
• Salt in the air near seacoast localities.
• Atmospheric fallout/industrial pollutants.
328
Page 333 of 408
Washing
•Wash your vehicle regularly. Always wash
your vehicle in the shade using MOPAR®
Car Wash, or a mild car wash soap, and rinse
the panels completely with clear water.
•
If insects, tar, or other similar deposits have
accumulated on your vehicle, use MOPAR®
Super Kleen Bug and Tar Remover to remove.
• Use a high quality cleaner wax, such as
MOPAR® Cleaner Wax to remove road film,
stains and to protect your paint finish. Take
care never to scratch the paint.
• Avoid using abrasive compounds and power
buffing that may diminish the gloss or thin out
the paint finish.
CAUTION!
•Do not use abrasive or strong cleaning
materials such as steel wool or scouring
powder that will scratch metal and painted
surfaces.
(Continued)
CAUTION!(Continued)
•Use of power washers exceeding 1,200 psi
(8 274 kPa) can result in damage or removal
of paint and decals.
Special Care
• If you drive on salted or dusty roads or if you
drive near the ocean, hose off the undercar-
riage at least once a month.
• It is important that the drain holes in the lower
edges of the doors, rocker panels, and trunk
be kept clear and open.
• If you detect any stone chips or scratches in
the paint, touch them up immediately. The
cost of such repairs is considered the re-
sponsibility of the owner.
• If your vehicle is damaged due to a collision
or similar cause that destroys the paint and
protective coating, have your vehicle re-
paired as soon as possible. The cost of such
repairs is considered the responsibility of the
owner. •
If you carry special cargo such as chemicals,
fertilizers, de-icer salt, etc., be sure that such
materials are well packaged and sealed.
• If a lot of driving is done on gravel roads,
consider mud or stone shields behind each
wheel.
• Use MOPAR® Touch Up Paint on scratches
as soon as possible. Your authorized dealer
has touch up paint to match the color of your
vehicle.
Wheel And Wheel Trim Care
• All wheels and wheel trim, especially alumi-
num and chrome plated wheels, should be
cleaned regularly with a mild soap and water
to prevent corrosion.
• To remove heavy soil and/or excessive brake
dust, use MOPAR® Wheel Cleaner.
329