maintenance JEEP GRAND CHEROKEE 2013 Owner handbook (in English)
[x] Cancel search | Manufacturer: JEEP, Model Year: 2013, Model line: GRAND CHEROKEE, Model: JEEP GRAND CHEROKEE 2013Pages: 408, PDF Size: 3.21 MB
Page 5 of 408
Table of Contents
1INTRODUCTION.....................................................................3
2THINGS TO KNOW BEFORE STARTING YOUR VEHICLE.............................................9
3UNDERSTANDING THE FEATURES OF YOUR VEHICLE.............................................63
4UNDERSTANDING YOUR INSTRUMENT PANEL.................................................157
5STARTING AND OPERATING............................................................215
6WHAT TO DO IN EMERGENCIES..........................................................293
7MAINTAINING YOUR VEHICLE...........................................................307
8MAINTENANCE SCHEDULES............................................................343
9IF YOU NEED CONSUMER ASSISTANCE.....................................................369
10 INDEX........................................................................\
.393
1
Page 9 of 408
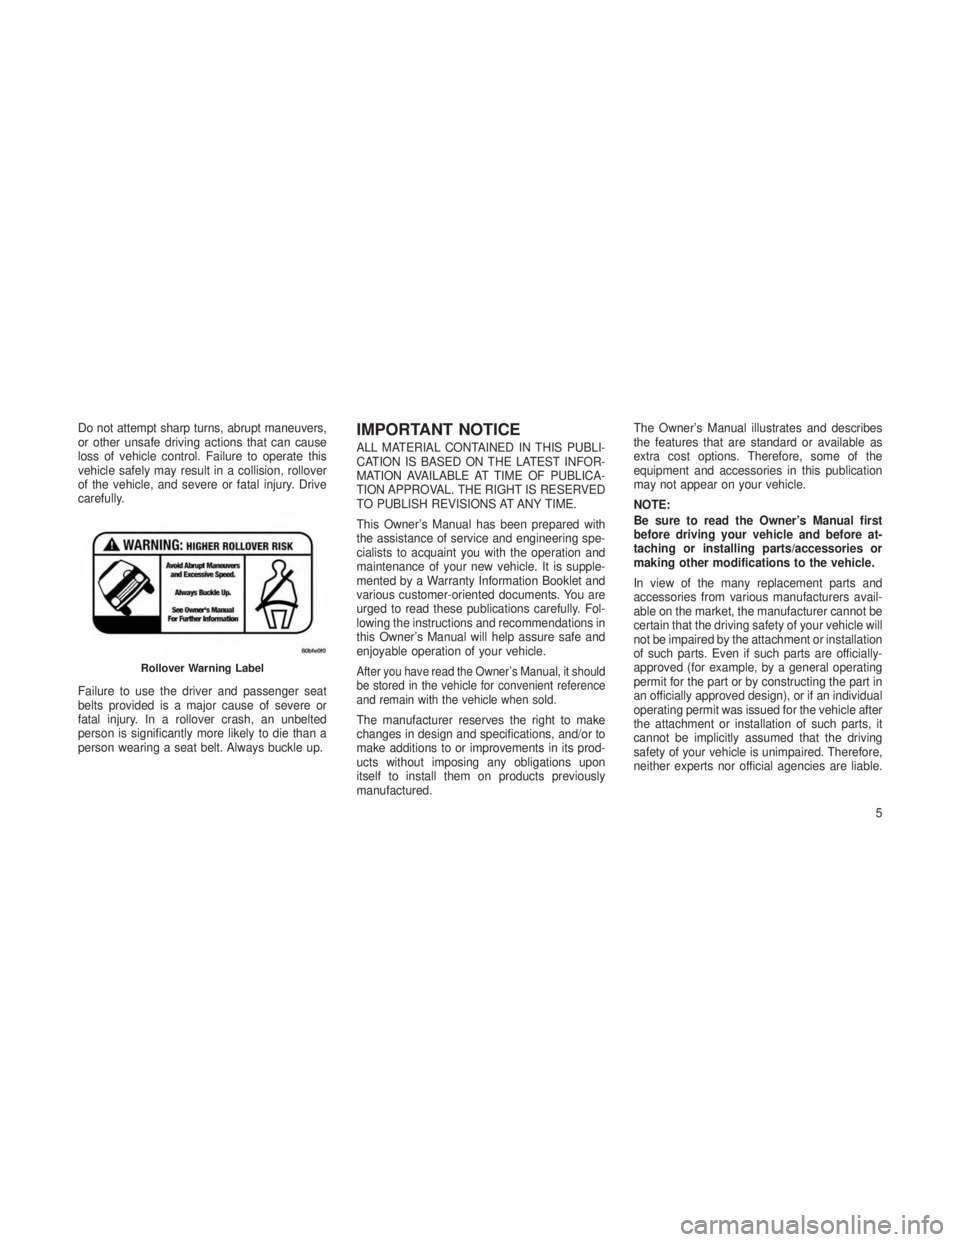
Do not attempt sharp turns, abrupt maneuvers,
or other unsafe driving actions that can cause
loss of vehicle control. Failure to operate this
vehicle safely may result in a collision, rollover
of the vehicle, and severe or fatal injury. Drive
carefully.
Failure to use the driver and passenger seat
belts provided is a major cause of severe or
fatal injury. In a rollover crash, an unbelted
person is significantly more likely to die than a
person wearing a seat belt. Always buckle up.IMPORTANT NOTICE
ALL MATERIAL CONTAINED IN THIS PUBLI-
CATION IS BASED ON THE LATEST INFOR-
MATION AVAILABLE AT TIME OF PUBLICA-
TION APPROVAL. THE RIGHT IS RESERVED
TO PUBLISH REVISIONS AT ANY TIME.
This Owner’s Manual has been prepared with
the assistance of service and engineering spe-
cialists to acquaint you with the operation and
maintenance of your new vehicle. It is supple-
mented by a Warranty Information Booklet and
various customer-oriented documents. You are
urged to read these publications carefully. Fol-
lowing the instructions and recommendations in
this Owner’s Manual will help assure safe and
enjoyable operation of your vehicle.
After you have read the Owner’s Manual, it should
be stored in the vehicle for convenient reference
and remain with the vehicle when sold.
The manufacturer reserves the right to make
changes in design and specifications, and/or to
make additions to or improvements in its prod-
ucts without imposing any obligations upon
itself to install them on products previously
manufactured.The Owner’s Manual illustrates and describes
the features that are standard or available as
extra cost options. Therefore, some of the
equipment and accessories in this publication
may not appear on your vehicle.
NOTE:
Be sure to read the Owner’s Manual first
before driving your vehicle and before at-
taching or installing parts/accessories or
making other modifications to the vehicle.
In view of the many replacement parts and
accessories from various manufacturers avail-
able on the market, the manufacturer cannot be
certain that the driving safety of your vehicle will
not be impaired by the attachment or installation
of such parts. Even if such parts are officially-
approved (for example, by a general operating
permit for the part or by constructing the part in
an officially approved design), or if an individual
operating permit was issued for the vehicle after
the attachment or installation of such parts, it
cannot be implicitly assumed that the driving
safety of your vehicle is unimpaired. Therefore,
neither experts nor official agencies are liable.
Rollover Warning Label
5
Page 53 of 408
Air Bag Warning LightYou will want to have the air bags
ready to inflate for your protection
in a collision. The Air Bag Warning
Light monitors the internal circuits
and interconnecting wiring associ-
ated with air bag system electrical
components. While the air bag system is de-
signed to be maintenance free, if any of the
following occurs, have an authorized dealer
service the air bag system immediately.
• The Air Bag Warning Light does not come on
during the four to eight seconds when the
ignition switch is first turned to the ON/RUN
position.
• The Air Bag Warning Light remains on after
the four to eight-second interval.
• The Air Bag Warning Light comes on inter-
mittently or remains on while driving. NOTE:
If the speedometer, tachometer, or any en-
gine related gauges are not working, the
Occupant Restraint Controller (ORC) may
also be disabled. The air bags may not be
ready to inflate for your protection. Promptly
check the fuse block for blown fuses. Refer
to the label located on the inside of the fuse
block cover for the proper air bag fuses. See
your authorized dealer if the fuse is good.
Event Data Recorder (EDR)This vehicle is equipped with an event data
recorder (EDR). The main purpose of an EDR is
to record, in certain crash or near crash-like
situations, such as an air bag deployment or
hitting a road obstacle, data that will assist in
understanding how a vehicle’s systems per-
formed. The EDR is designed to record data
related to vehicle dynamics and safety systems
for a short period of time, typically 30 seconds
or less. The EDR in this vehicle is designed to
record such data as:
•
How various systems in your vehicle were
operating; •
Whether or not the driver and passenger
safety belts were buckled/fastened;
• How far (if at all) the driver was depressing
the accelerator and/or brake pedal; and,
• How fast the vehicle was traveling.
These data can help provide a better under-
standing of the circumstances in which crashes
and injuries occur.
NOTE:
EDR data are recorded by your vehicle only
if a non-trivial crash situation occurs; no
data are recorded by the EDR under normal
driving conditions and no personal data
(e.g., name, gender, age, and crash location)
are recorded. However, other parties, such
as law enforcement, could combine the EDR
data with the type of personally identifying
data routinely acquired during a crash in-
vestigation.
49
Page 63 of 408
ENGINE BREAK-IN
RECOMMENDATIONS
A long break-in period is not required for the
engine and drivetrain (transmission and axle) in
your vehicle.
Drive moderately during the first 300 miles
(500 km). After the initial 60 miles (100 km),
speeds up to 50 or 55 mph (80 or 90 km/h) are
desirable.
While cruising, brief full-throttle acceleration
within the limits of local traffic laws contributes
to a good break-in. Wide-open throttle accelera-
tion in low gear can be detrimental and should
be avoided.
The engine oil installed in the engine at the
factory is a high-quality energy conserving type
lubricant. Oil changes should be consistent with
anticipated climate conditions under which ve-
hicle operations will occur. For the recom-
mended viscosity and quality grades, refer to
“Maintenance Procedures” in “Maintaining Your
Vehicle”.
CAUTION!
Never use Non-Detergent Oil or Straight
Mineral Oil in the engine or damage may
result.
NOTE:
A new engine may consume some oil during
its first few thousand miles (kilometers) of
operation. This should be considered a nor-
mal part of the break-in and not interpreted
as an indication of difficulty.
Additional Requirements For Diesel
Engine — If Equipped
During the first 1500 km avoid heavy loads, e.g.
driving at full throttle. Do not exceed 2/3 of the
maximum permissible engine speed for each
gear. Change gear in good time. Do not shift
down a gear manually in order to brake.
SAFETY TIPS
Transporting PassengersNEVER TRANSPORT PASSENGERS IN THE
CARGO AREA.
WARNING!
• Do not leave children or animals inside
parked vehicles in hot weather. Interior
heat build-up may cause serious injury or
death.
• It is extremely dangerous to ride in a cargo
area, inside or outside of a vehicle. In a
collision, people riding in these areas are
more likely to be seriously injured or killed.
• Do not allow people to ride in any area of
your vehicle that is not equipped with seats
and seat belts.
• Be sure everyone in your vehicle is in a
seat and using a seat belt properly.
59
Page 70 of 408
•ELECTRONIC SPEED CONTROL — IF EQUIPPED ...........117•To Activate ..................................117
• To Set A Desired Speed ..........................118
• To Deactivate .................................118
• To Resume Speed ..............................118
• To Vary The Speed Setting .........................118
• To Accelerate For Passing .........................118
•ADAPTIVE CRUISE CONTROL (ACC) — IF EQUIPPED ........119•Adaptive Cruise Control (ACC) Operation ................120
• Activating Adaptive Cruise Control (ACC) ................121
• To Activate ................................. .121
• To Set A Desired ACC Speed ...................... .121
• To Cancel .................................. .122
• ToTurnOff................................. .122
• To Resume Speed ............................. .123
• To Vary The Speed Setting ........................ .123
• Setting The Following Distance In ACC .................124
• Adaptive Cruise Control (ACC) Menu ..................125
• Display Warnings And Maintenance ...................126
• Precautions While Driving With ACC ...................128
• General Information ........................... .130
• Normal (Fixed Speed) Cruise Control Mode ...............130
• Forward Collision Warning — If Equipped ...............131
•PARKSENSE® FRONT AND REAR PARK ASSIST — IF
EQUIPPED ...................................134
•ParkSense® Sensors ........................... .134
• ParkSense® Warning Display ...................... .134
66
Page 71 of 408
•ParkSense® Display ......................... .135
• Enabling And Disabling ParkSense® ................136
• Service The ParkSense® Park Assist System ...........137
• Cleaning The ParkSense® System ..................137
• ParkSense® System Usage Precautions ..............137
•PARKVIEW® REAR BACK UP CAMERA — IF EQUIPPED ....139•Turning ParkView® On Or Off — With Navigation/
Multimedia Radio ........................... .140
• Turning ParkView® On Or Off — Without Navigation/
Multimedia Radio ........................... .140
•OVERHEAD CONSOLE .........................140•Front Map/Reading Lights ..................... .141
• Courtesy/Reading Lights ...................... .141
• Sunglasses Storage ......................... .141
•POWER SUNROOF — IF EQUIPPED .................142•Opening Sunroof — Express .................... .144
• Opening Sunroof — Manual Mode ..................144
• Closing Sunroof — Express ..................... .144
• Closing Sunroof — Manual Mode ..................145
• Pinch Protect Feature ........................ .145
• Venting Sunroof — Express ..................... .143
• Sunshade Operation ......................... .143
• Wind Buffeting ............................ .143
• Sunroof Maintenance ......................... .143
• Ignition OFF Operation ........................ .143
67
Page 72 of 408
•COMMANDVIEW® SUNROOF WITH POWER SHADE — IF
EQUIPPED ...................................144
•Opening Sunroof — Express ...................... .144
• Opening Sunroof — Manual Mode ....................144
• Closing Sunroof — Express ........................144
• Closing Sunroof — Manual Mode .....................145
• Opening Power Shade — Express ....................145
• Opening Power Shade — Manual Mode .................145
• Closing Power Shade — Express .....................145
• Closing Power Shade — Manual Mode .................145
• Pinch Protect Feature .......................... .145
• Wind Buffeting .............................. .145
• Sunroof Maintenance ........................... .146
• Ignition OFF Operation .......................... .146
• Sunroof Fully Closed ........................... .146
•ELECTRICAL POWER OUTLETS .....................146
• CUPHOLDERS .................................149
• STORAGE ....................................149
•Glove Compartment ............................ .149
• Door Storage ................................ .150
• Center Console .............................. .150
•CARGO AREA FEATURES .........................151•Rechargeable Flashlight ......................... .151
• Cargo Storage Bins ........................... .151
• Retractable Cargo Area Cover — If Equipped .............152
• Rear Cargo Tie-Downs .......................... .153
68
Page 130 of 408
The ACC screen will display once again if any
ACC activity occurs, which may include any of
the following:
•Set Speed Change
• Distance Setting Change
• System Cancel
• Driver Override
• System Off
• ACC Proximity Warning
• ACC Unavailable Warning
• The EVIC will return to the last display se-
lected after five seconds of no ACC display
activity.
Display Warnings And Maintenance
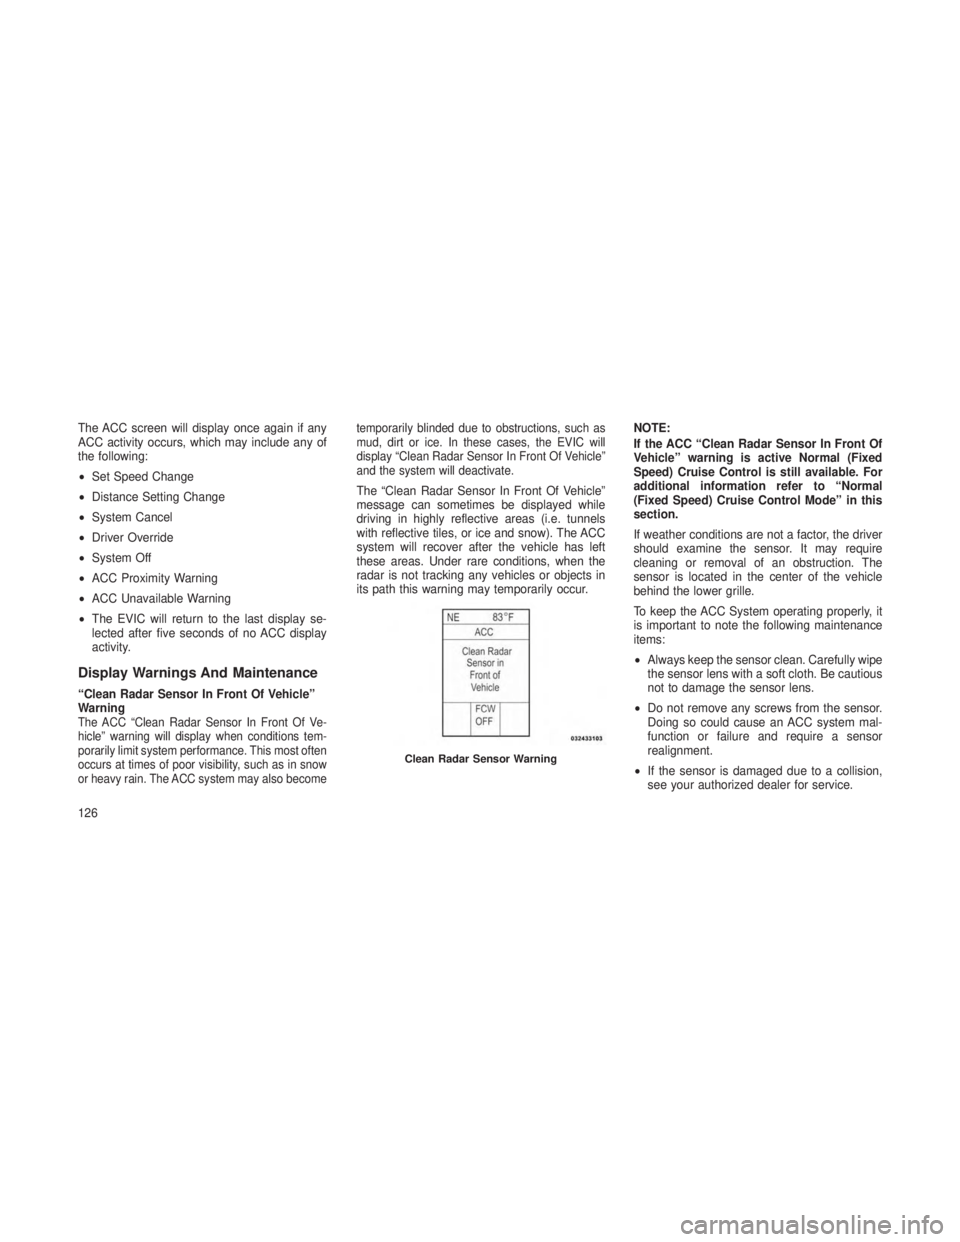
“Clean Radar Sensor In Front Of Vehicle”
Warning
The ACC “Clean Radar Sensor In Front Of Ve-
hicle” warning will display when conditions tem-
porarily limit system performance. This most often
occurs at times of poor visibility, such as in snow
or heavy rain. The ACC system may also become temporarily blinded due to obstructions, such as
mud, dirt or ice. In these cases, the EVIC will
display “Clean Radar Sensor In Front Of Vehicle”
and the system will deactivate.
The “Clean Radar Sensor In Front Of Vehicle”
message can sometimes be displayed while
driving in highly reflective areas (i.e. tunnels
with reflective tiles, or ice and snow). The ACC
system will recover after the vehicle has left
these areas. Under rare conditions, when the
radar is not tracking any vehicles or objects in
its path this warning may temporarily occur.
NOTE:
If the ACC “Clean Radar Sensor In Front Of
Vehicle” warning is active Normal (Fixed
Speed) Cruise Control is still available. For
additional information refer to “Normal
(Fixed Speed) Cruise Control Mode” in this
section.
If weather conditions are not a factor, the driver
should examine the sensor. It may require
cleaning or removal of an obstruction. The
sensor is located in the center of the vehicle
behind the lower grille.
To keep the ACC System operating properly, it
is important to note the following maintenance
items:
•
Always keep the sensor clean. Carefully wipe
the sensor lens with a soft cloth. Be cautious
not to damage the sensor lens.
• Do not remove any screws from the sensor.
Doing so could cause an ACC system mal-
function or failure and require a sensor
realignment.
• If the sensor is damaged due to a collision,
see your authorized dealer for service.
Clean Radar Sensor Warning
126
Page 147 of 408
Closing Sunroof — Manual ModeTo close the sunroof, press and hold the switch
in the forward position. Any release of the
switch will stop the movement and the sunroof
will remain in a partially closed condition until
the switch is pushed and held forward again.
Pinch Protect FeatureThis feature will detect an obstruction in the
opening of the sunroof during Express Close
operation. If an obstruction in the path of the
sunroof is detected, the sunroof will automati-
cally retract. Remove the obstruction if this
occurs. Next, press the switch forward and
release to Express Close.
NOTE:
If three consecutive sunroof close attempts
result in Pinch Protect reversals, the fourth
close attempt will be a Manual Close move-
ment with Pinch Protect disabled.
Venting Sunroof — ExpressPress and release the Vent button within one
half second and the sunroof will open to the
vent position. This is called “Express Vent”, and
it will occur regardless of sunroof position. Dur-
ing Express Vent operation, any movement of
the switch will stop the sunroof.
Sunshade OperationThe sunshade can be opened manually. How-
ever, the sunshade will open automatically as
the sunroof opens.
NOTE:
The sunshade cannot be closed if the sun-
roof is open.
Wind BuffetingWind buffeting can be described as the percep-
tion of pressure on the ears or a helicopter-type
sound in the ears. Your vehicle may exhibit wind
buffeting with the windows down, or the sunroof
(if equipped) in certain open or partially openpositions. This is a normal occurrence and can
be minimized. If the buffeting occurs with the
rear windows open, open the front and rear
windows together to minimize the buffeting. If
the buffeting occurs with the sunroof open,
adjust the sunroof opening to minimize the
buffeting or open any window.
Sunroof MaintenanceUse only a nonabrasive cleaner and a soft cloth
to clean the glass panel.
Ignition OFF OperationThe power sunroof switches remain active for
up to approximately ten minutes after the igni-
tion switch has been turned OFF. Opening
either front door will cancel this feature. The
time is programmable. Refer to “Electronic Ve-
hicle Information Center (EVIC)/Personal Set-
tings (Customer-Programmable Features)” in
“Understanding Your Instrument Panel” for fur-
ther information.
143
Page 150 of 408
If the buffeting occurs with the sunroof open,
adjust the sunroof opening to minimize the
buffeting or open any window.
Sunroof MaintenanceUse only a non-abrasive cleaner and a soft
cloth to clean the glass panel.
Ignition OFF OperationThe power sunroof switches can be programmed to
remain active for up to approximately ten minutes
after the ignition switch has been turned OFF.
Refer to “Electronic Vehicle Information Center
(EVIC)/Customer-Programmable Features (Sys-
tem Setup)” in “Understanding Your Instrument
Panel” for further information.
NOTE:
Opening either front door will cancel this
feature.
Sunroof Fully ClosedPress the switch forward and release to ensure
that the sunroof is fully closed.
ELECTRICAL POWER
OUTLETS
Your vehicle is equipped with 12 Volt (13 Amp)
power outlets that can be used to power cellular
phones, small electronics and other low pow-
ered electrical accessories. The power outlets
are labeled with either a “key” or a “battery”
symbol to indicate how the outlet is powered.
Power outlets labeled with a “key” are powered
when the ignition switch is in the ON or ACC
position, while the outlets labeled with a “bat-
tery” are connected directly to the battery and
powered at all times.
NOTE:
•All accessories connected to the “bat-
tery” powered outlets should be removed
or turned off when the vehicle is not in
use to protect the battery against dis-
charge.
• To ensure proper operation a MOPAR®
knob and element must be used.
CAUTION!
Power outlets are designed for accessory
plugs only. Do not insert any other object in
the power outlets as this will damage the
outlet and blow the fuse. Improper use of the
power outlet can cause damage not covered
by your New Vehicle Limited Warranty.
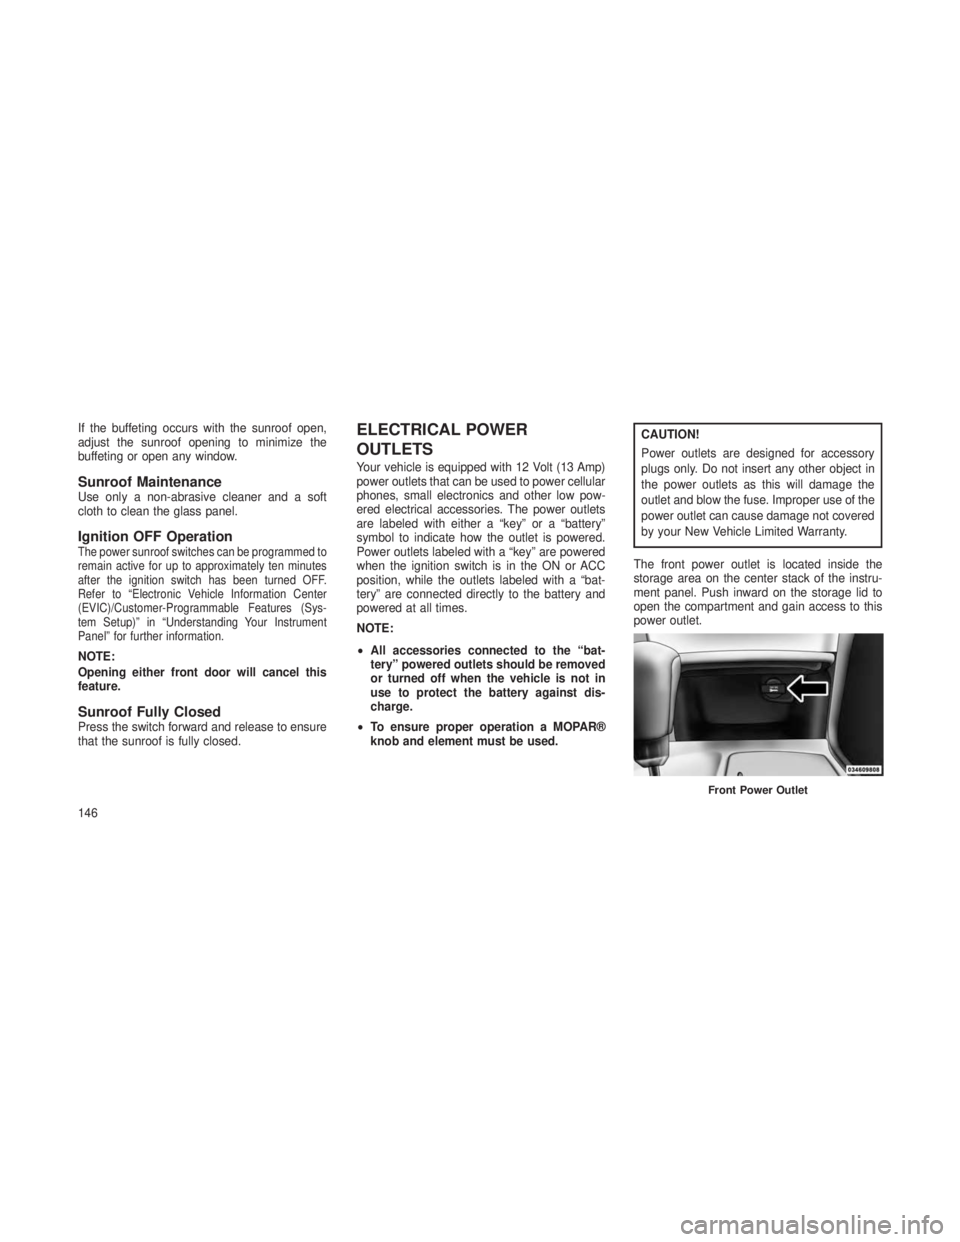
The front power outlet is located inside the
storage area on the center stack of the instru-
ment panel. Push inward on the storage lid to
open the compartment and gain access to this
power outlet.
Front Power Outlet
146