instrument cluster JEEP GRAND CHEROKEE 2016 WK2 / 4.G Owner's Manual
[x] Cancel search | Manufacturer: JEEP, Model Year: 2016, Model line: GRAND CHEROKEE, Model: JEEP GRAND CHEROKEE 2016 WK2 / 4.GPages: 276, PDF Size: 10.84 MB
Page 61 of 276
TRANSMISSION GEAR SELECTOR
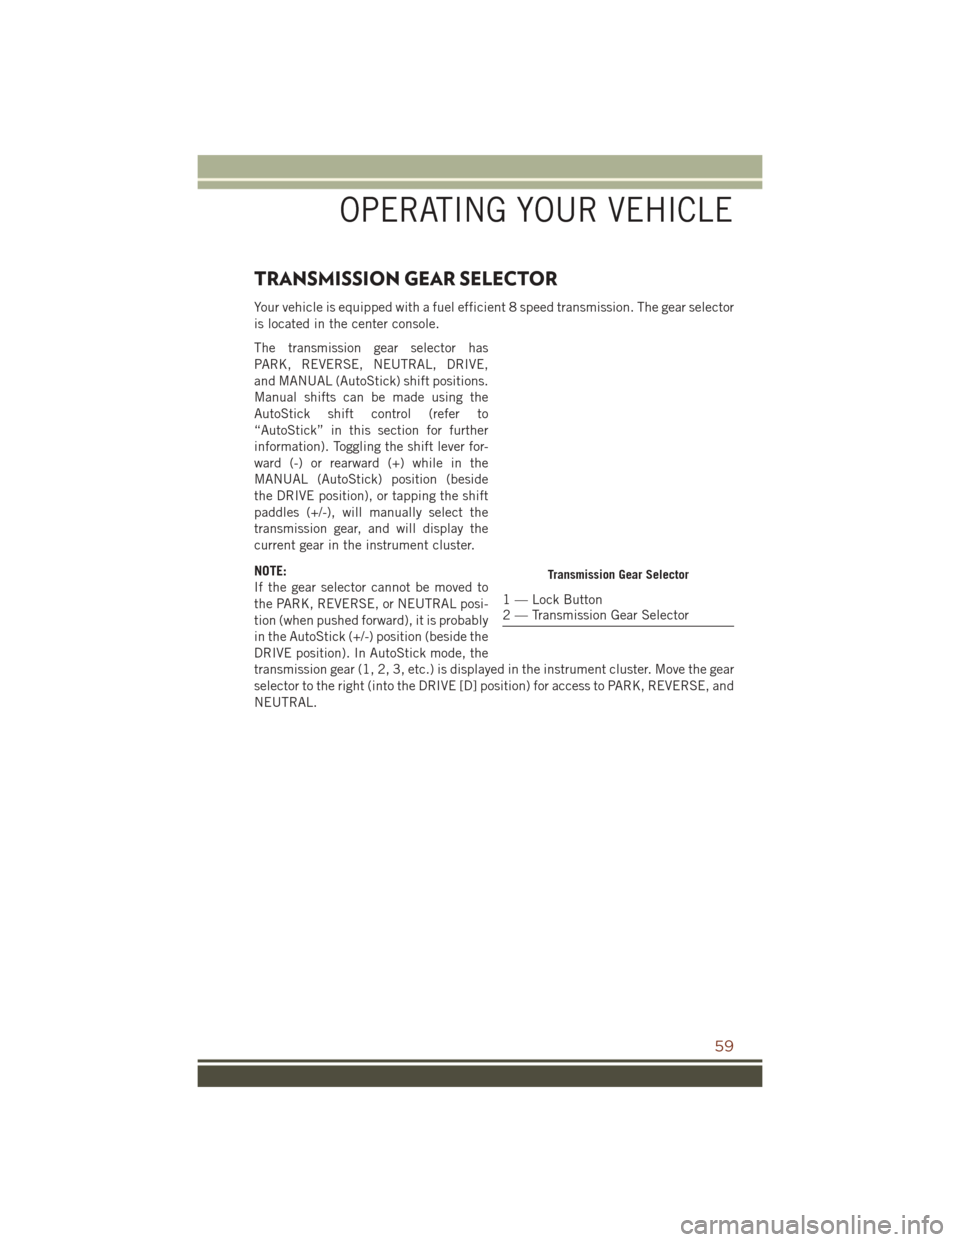
Your vehicle is equipped with a fuel efficient 8 speed transmission. The gear selector
is located in the center console.
The transmission gear selector has
PARK, REVERSE, NEUTRAL, DRIVE,
and MANUAL (AutoStick) shift positions.
Manual shifts can be made using the
AutoStick shift control (refer to
“AutoStick” in this section for further
information). Toggling the shift lever for-
ward (-) or rearward (+) while in the
MANUAL (AutoStick) position (beside
the DRIVE position), or tapping the shift
paddles (+/-), will manually select the
transmission gear, and will display the
current gear in the instrument cluster.
NOTE:
If the gear selector cannot be moved to
the PARK, REVERSE, or NEUTRAL posi-
tion (when pushed forward), it is probably
in the AutoStick (+/-) position (beside the
DRIVE position). In AutoStick mode, the
transmission gear (1, 2, 3, etc.) is displayed in the instrument cluster. Move the gear
selector to the right (into the DRIVE [D] position) for access to PARK, REVERSE, and
NEUTRAL.
Transmission Gear Selector
1 — Lock Button
2 — Transmission Gear Selector
OPERATING YOUR VEHICLE
59
Page 62 of 276
AUTOSTICK
AutoStick is a driver-interactive transmission feature providing manual shift control,
giving you more control of the vehicle. AutoStick allows you to maximize engine
braking, eliminate undesirable upshifts and downshifts, and improve overall vehicle
performance. This system can also provide you with more control during passing, city
driving, cold slippery conditions, mountain driving, trailer towing, and many other
situations.
Operation
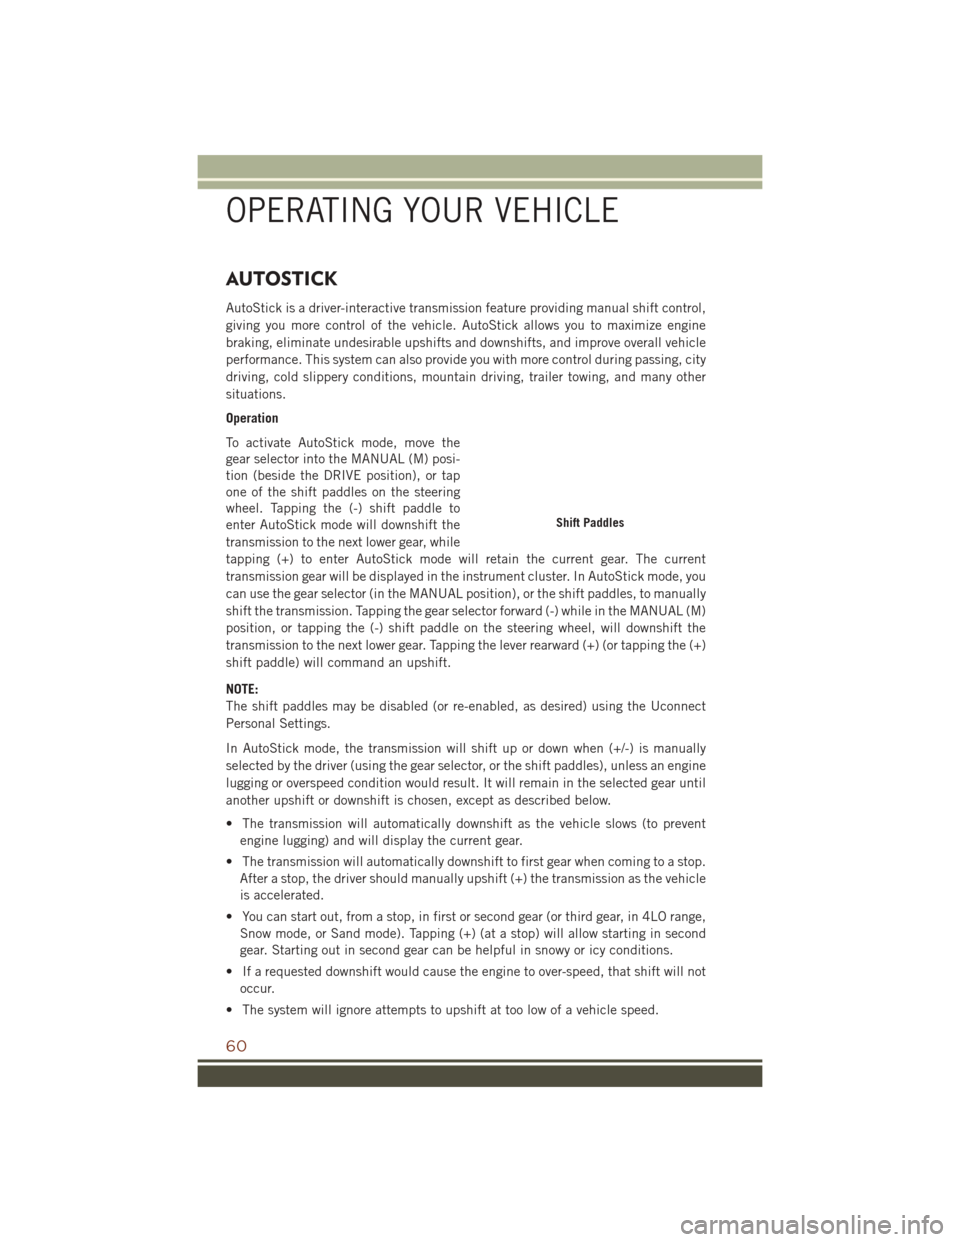
To activate AutoStick mode, move the
gear selector into the MANUAL (M) posi-
tion (beside the DRIVE position), or tap
one of the shift paddles on the steering
wheel. Tapping the (-) shift paddle to
enter AutoStick mode will downshift the
transmission to the next lower gear, while
tapping (+) to enter AutoStick mode will retain the current gear. The current
transmission gear will be displayed in the instrument cluster. In AutoStick mode, you
can use the gear selector (in the MANUAL position), or the shift paddles, to manually
shift the transmission. Tapping the gear selector forward (-) while in the MANUAL (M)
position, or tapping the (-) shift paddle on the steering wheel, will downshift the
transmission to the next lower gear. Tapping the lever rearward (+) (or tapping the (+)
shift paddle) will command an upshift.
NOTE:
The shift paddles may be disabled (or re-enabled, as desired) using the Uconnect
Personal Settings.
In AutoStick mode, the transmission will shift up or down when (+/-) is manually
selected by the driver (using the gear selector, or the shift paddles), unless an engine
lugging or overspeed condition would result. It will remain in the selected gear until
another upshift or downshift is chosen, except as described below.
• The transmission will automatically downshift as the vehicle slows (to preventengine lugging) and will display the current gear.
• The transmission will automatically downshift to first gear when coming to a stop. After a stop, the driver should manually upshift (+) the transmission as the vehicle
is accelerated.
• You can start out, from a stop, in first or second gear (or third gear, in 4LO range, Snow mode, or Sand mode). Tapping (+) (at a stop) will allow starting in second
gear. Starting out in second gear can be helpful in snowy or icy conditions.
• If a requested downshift would cause the engine to over-speed, that shift will not occur.
• The system will ignore attempts to upshift at too low of a vehicle speed.
Shift Paddles
OPERATING YOUR VEHICLE
60
Page 63 of 276
• Holding the (-) paddle depressed will downshift the transmission to the lowestgear possible at the current speed.
• Transmission shifting will be more noticeable when AutoStick is enabled.
• The system may revert to automatic shift mode if a fault or overheat condition is detected.
NOTE:
When Selec-Speed or Hill Descent Control is enabled, AutoStick is not active.
To disengage AutoStick, return the gear selector to the DRIVE position, or press and
hold the (+) shift paddle (if the gear selector is already in DRIVE) until "D" is once
again indicated in the instrument cluster. You can shift in or out of AutoStick at any
time without taking your foot off the accelerator pedal.
WARNING!
Do not downshift for additional engine braking on a slippery surface. The drive
wheels could lose their grip and the vehicle could skid, causing a collision or
personal injury.
FUEL ECONOMY (ECO) MODE
The Fuel Economy (ECO) mode can improve the vehicle's overall fuel economy during
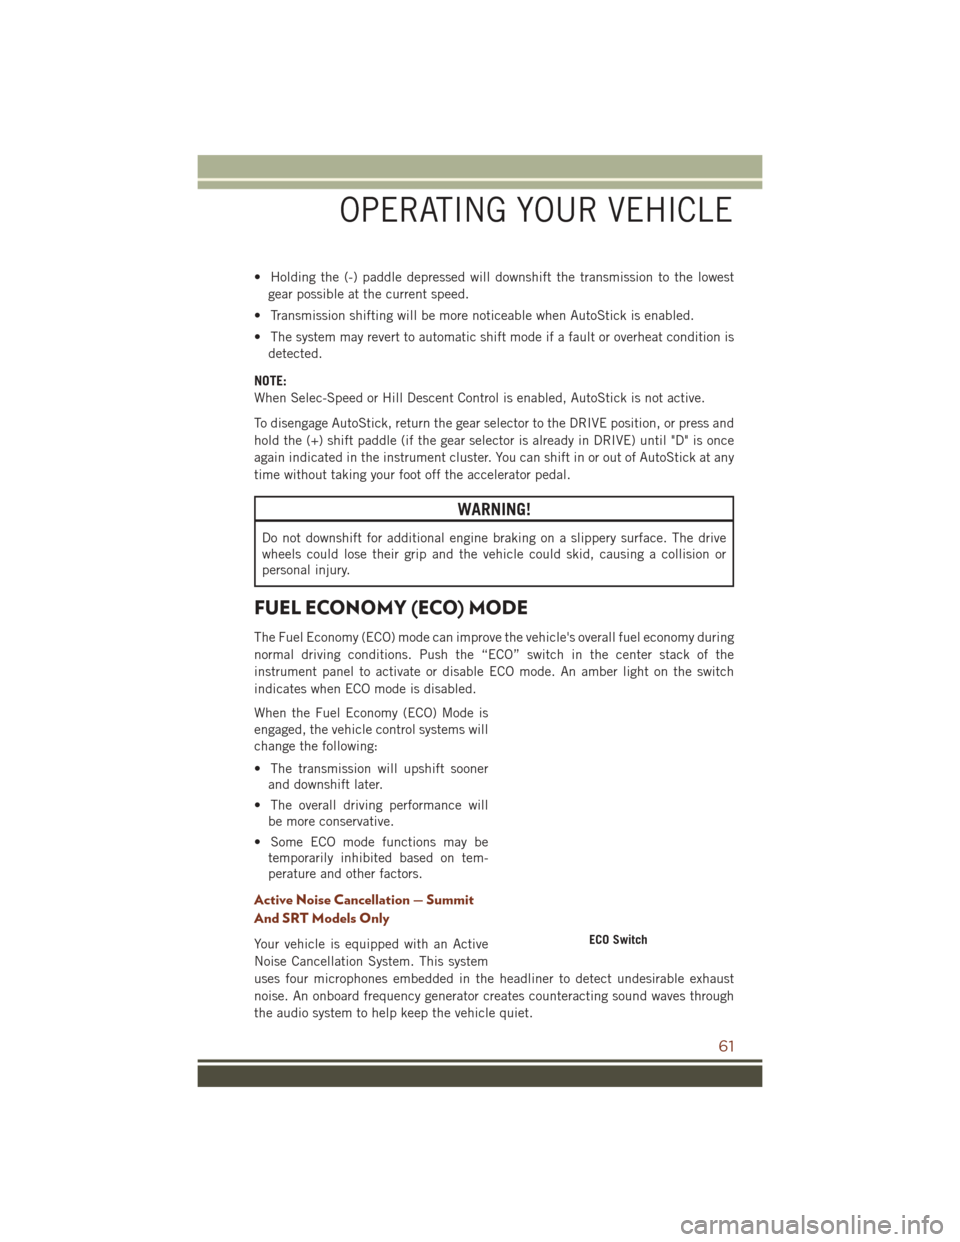
normal driving conditions. Push the “ECO” switch in the center stack of the
instrument panel to activate or disable ECO mode. An amber light on the switch
indicates when ECO mode is disabled.
When the Fuel Economy (ECO) Mode is
engaged, the vehicle control systems will
change the following:
• The transmission will upshift sooner and downshift later.
• The overall driving performance will be more conservative.
• Some ECO mode functions may be temporarily inhibited based on tem-
perature and other factors.
Active Noise Cancellation — Summit
And SRT Models Only
Your vehicle is equipped with an Active
Noise Cancellation System. This system
uses four microphones embedded in the headliner to detect undesirable exhaust
noise. An onboard frequency generator creates counteracting sound waves through
the audio system to help keep the vehicle quiet.ECO Switch
OPERATING YOUR VEHICLE
61
Page 149 of 276
DRIVER INFORMATION DISPLAY (DID)
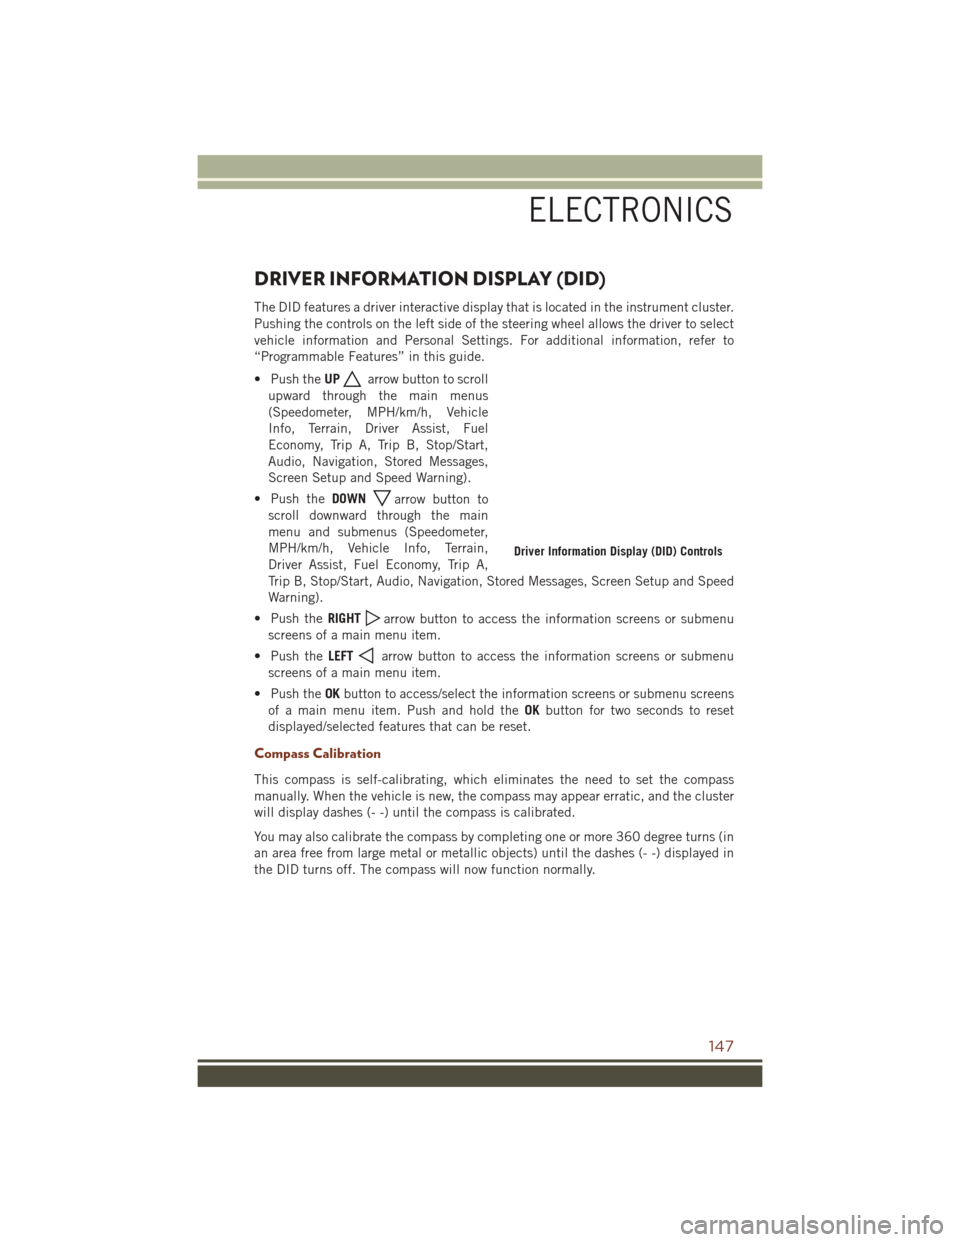
The DID features a driver interactive display that is located in the instrument cluster.
Pushing the controls on the left side of the steering wheel allows the driver to select
vehicle information and Personal Settings. For additional information, refer to
“Programmable Features” in this guide.
• Push theUP
arrow button to scroll
upward through the main menus
(Speedometer, MPH/km/h, Vehicle
Info, Terrain, Driver Assist, Fuel
Economy, Trip A, Trip B, Stop/Start,
Audio, Navigation, Stored Messages,
Screen Setup and Speed Warning).
• Push the DOWN
arrow button to
scroll downward through the main
menu and submenus (Speedometer,
MPH/km/h, Vehicle Info, Terrain,
Driver Assist, Fuel Economy, Trip A,
Trip B, Stop/Start, Audio, Navigation, Stored Messages, Screen Setup and Speed
Warning).
• Push the RIGHT
arrow button to access the information screens or submenu
screens of a main menu item.
• Push the LEFT
arrow button to access the information screens or submenu
screens of a main menu item.
• Push the OKbutton to access/select the information screens or submenu screens
of a main menu item. Push and hold the OKbutton for two seconds to reset
displayed/selected features that can be reset.
Compass Calibration
This compass is self-calibrating, which eliminates the need to set the compass
manually. When the vehicle is new, the compass may appear erratic, and the cluster
will display dashes (- -) until the compass is calibrated.
You may also calibrate the compass by completing one or more 360 degree turns (in
an area free from large metal or metallic objects) until the dashes (- -) displayed in
the DID turns off. The compass will now function normally.
Driver Information Display (DID) Controls
ELECTRONICS
147
Page 151 of 276
DID Screen Setup
The following settings allow you to change what information is displayed in the
instrument cluster as well as the location that information is displayed:
• None• Average MPH (L/100km)
• Compass • Current MPH (L/100km)
• Outside Temperature • Trip A (Distance Only)
• Time • Trip B (Distance Only)
• Range to Empty
Trip A
Push and release the UPorDOWNarrow button until the Trip A icon is
highlighted in the DID (Toggle left or right to select Trip A or Trip B). Push and release
the OKbutton to display the Trip A information.
Trip B
Push and release the UPorDOWNarrow button until the Trip B icon is
highlighted in the DID (Toggle left or right to select Trip A or Trip B). Push and release
the OKbutton to display the Trip B information.
Fuel Economy
Push and release the UPorDOWNarrow button until the Fuel Economy icon
is highlighted. Push the RIGHT
arrow button and the next screen will display the
following:
• Average Fuel Economy/Miles Per Gallon (MPG Bar graph)
• Range To Empty (RTE)
• Current Miles Per Gallon (MPG)
ELECTRONICS
149
Page 158 of 276
Shifting Procedures
4WD HI To 4WD LOW
With the vehicle at speeds of 0 to 3 mph (0 to 5 km/h), the ignition switch in the
ON/RUN position or the engine running, shift the transmission into NEUTRAL and
press the “4WD LOW” button once on the transfer case switch. The “4WD LOW”
indicator light in the instrument cluster will begin to flash and remain on solid when
the shift is complete.
4WD LOW To 4WD HI
With the vehicle at speeds of 0 to 3 mph (0 to 5 km/h), the ignition switch in the
ON/RUN position or the engine running, shift the transmission into NEUTRAL, and
press the “4WD LOW” button once on the transfer case switch. The “4WD LOW”
indicator light in the instrument cluster will flash and turn off when the shift is
complete.
NOTE:
Shifting into or out of 4WD LOW is possible with the vehicle completely stopped;
however, difficulty may occur due to the mating clutch teeth not being properly
aligned. Several attempts may be required for clutch teeth alignment and shift
completion to occur. The preferred method is with the vehicle rolling 0 to 3 mph
(0 to 5 km/h). If the vehicle is moving faster than 3 mph (5 km/h), the transfer case
will not allow the shift.
NEUTRAL Shift Procedure
WARNING!
You or others could be injured or killed if you leave the vehicle unattended with the
transfer case in the NEUTRAL (N) position without first fully engaging the parking
brake. The transfer case NEUTRAL (N) position disengages both the front and rear
driveshafts from the powertrain and will allow the vehicle to roll, even if the
transmission is in PARK. The parking brake should always be applied when the
driver is not in the vehicle.
1. Bring the vehicle to a complete stop, with the engine running.
2. Press and hold the brake pedal.
3. Shift the transmission into NEUTRAL.
4. If vehicle is equipped with Quadra-Lift air suspension, ensure the vehicle is set to Normal Ride Height.
OFF-ROAD CAPABILITIES (4WD OPERATION)
156
Page 175 of 276
SELEC-TRACK
Selec-Track combines the capabilities of
the vehicle control systems, along with
driver input, to provide the best perfor-
mance for all terrains.
Rotate the mode control knob to select
the following Selec-Track positions:
•Sport - Dry weather, on-road calibra-
tion. Performance based tuning that
provides a rear wheel drive feel but with improved handling and acceleration over
a two-wheel drive vehicle. The active suspension system will be in a semi firm
mode, and a green flag will light up in the instrument cluster.
• Snow - Tuning set for additional stability in inclement weather. Use on and off road
on loose traction surfaces such as snow.
• Auto - Fully automatic full time four-wheel drive operation can be used on and off
road. This position balances traction with seamless steering feel to provide
improved handling and acceleration over two-wheel drive vehicles.
• Track - This position offers track road calibration for use on high traction surfaces.
Driveline is maximized for traction. Some binding may be felt on less forgiving
surfaces.
• To w - Use this mode for towing. Vehicle suspension will go to Firm mode.
Active Damping System
This vehicle is equipped with an electronic controlled damping system. This system
reduces body roll and pitch in many driving situations including cornering, accelera-
tion and braking. There are 3 modes:
•Street Mode (Available in terrain positions AUTO, SNOW and CUSTOM.) — Used
during highway speeds where a touring suspension feel is desired.
• Sport Mode (Available in terrain positions AUTO, SPORT, CUSTOM and TOW.) —
Provides a firm suspension for better handling.
• Track Firm (Available in terrain positions AUTO, TRACK and CUSTOM.) —
Provides a full firm suspension for an aggressive track experience.
Selec-Track switch
SRT
173
Page 191 of 276
ROADSIDE ASSISTANCE
Dial toll-free 1-800-521-2779 for U.S. Residents or 1-800-363-4869 for Canadian
Residents.
• Provide your name, vehicle identification number, license plate number, and yourlocation, including the telephone number from which you are calling.
• Briefly describe the nature of the problem and answer a few simple questions.
• You will be given the name of the service provider and an estimated time of arrival. If you feel you are in an “unsafe situation”, please let us know. With your consent,
we will contact local police or safety authorities.
INSTRUMENT CLUSTER WARNING LIGHTS
– Battery Charge Warning Light
This light illuminates when the battery is not charging properly. If the battery charge
warning light remains on, it means that the vehicle is experiencing a problem with the
charging system.
We recommend you do not continue driving if it is on. Have the vehicle serviced
immediately.
– Oil Pressure Warning Light
This light indicates low engine oil pressure. If the light turns on while driving, stop
the vehicle and shut off the engine as soon as possible. A chime will sound for four
minutes when this light turns on.
We recommend you do not operate the vehicle or engine damage will occur. Have the
vehicle serviced immediately.
– Engine Temperature Warning Light
This light warns of an overheated engine condition.
If the light turns on and a warning chime sounds while driving, safely pull over and
stop the vehicle. If the A/C system is on, turn it off. Also, shift the transmission into
NEUTRAL and idle the vehicle. If the temperature reading does not return to normal,
turn the engine off immediately.
We recommend that you do not operate the vehicle or engine damage will occur. Have
the vehicle serviced immediately.
WARNING!
A hot engine cooling system is dangerous. You or others could be badly burned by
steam or boiling coolant.
WHAT TO DO IN EMERGENCIES
189
Page 196 of 276
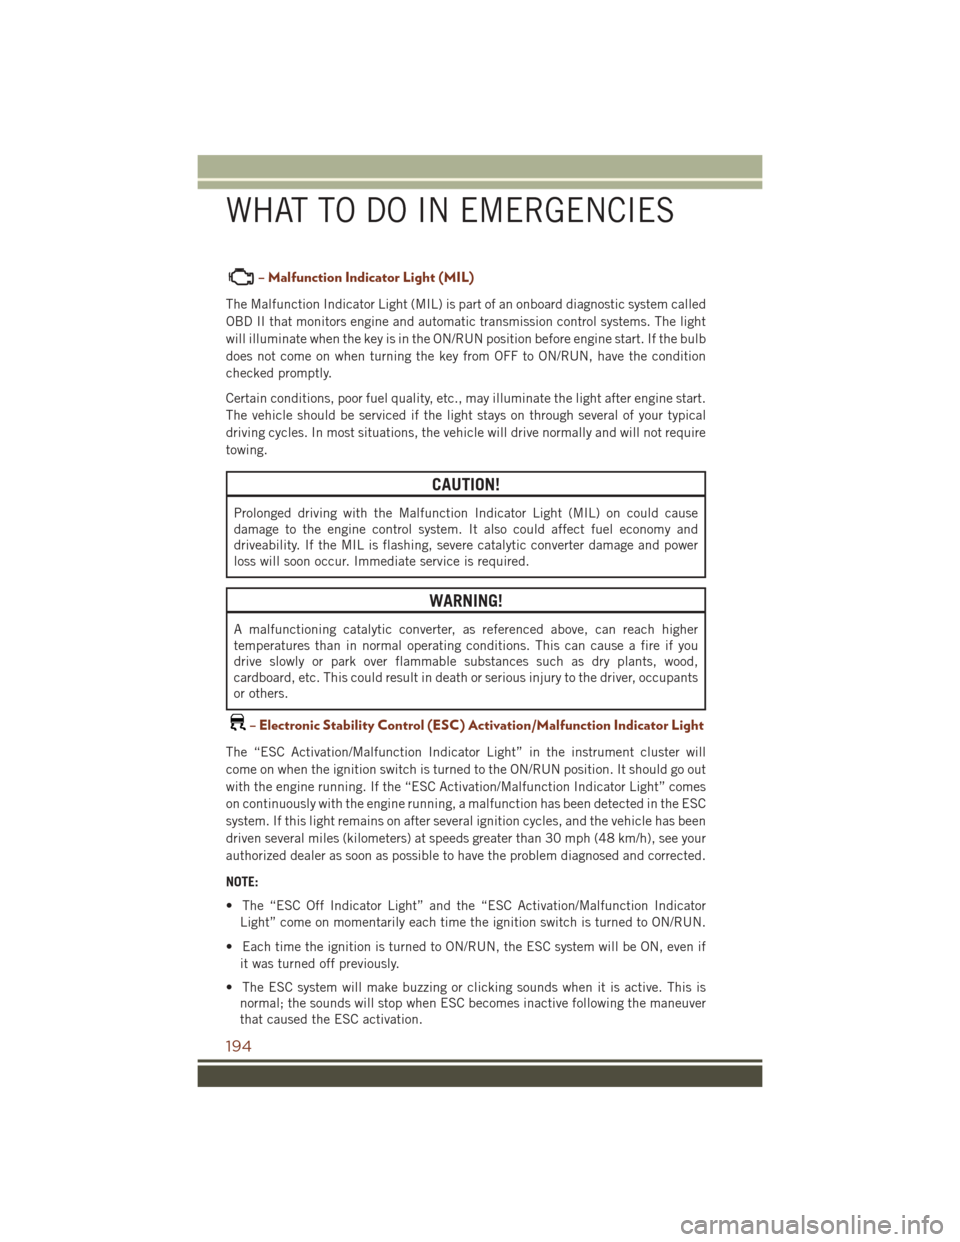
– Malfunction Indicator Light (MIL)
The Malfunction Indicator Light (MIL) is part of an onboard diagnostic system called
OBD II that monitors engine and automatic transmission control systems. The light
will illuminate when the key is in the ON/RUN position before engine start. If the bulb
does not come on when turning the key from OFF to ON/RUN, have the condition
checked promptly.
Certain conditions, poor fuel quality, etc., may illuminate the light after engine start.
The vehicle should be serviced if the light stays on through several of your typical
driving cycles. In most situations, the vehicle will drive normally and will not require
towing.
CAUTION!
Prolonged driving with the Malfunction Indicator Light (MIL) on could cause
damage to the engine control system. It also could affect fuel economy and
driveability. If the MIL is flashing, severe catalytic converter damage and power
loss will soon occur. Immediate service is required.
WARNING!
A malfunctioning catalytic converter, as referenced above, can reach higher
temperatures than in normal operating conditions. This can cause a fire if you
drive slowly or park over flammable substances such as dry plants, wood,
cardboard, etc. This could result in death or serious injury to the driver, occupants
or others.
– Electronic Stability Control (ESC) Activation/Malfunction Indicator Light
The “ESC Activation/Malfunction Indicator Light” in the instrument cluster will
come on when the ignition switch is turned to the ON/RUN position. It should go out
with the engine running. If the “ESC Activation/Malfunction Indicator Light” comes
on continuously with the engine running, a malfunction has been detected in the ESC
system. If this light remains on after several ignition cycles, and the vehicle has been
driven several miles (kilometers) at speeds greater than 30 mph (48 km/h), see your
authorized dealer as soon as possible to have the problem diagnosed and corrected.
NOTE:
• The “ESC Off Indicator Light” and the “ESC Activation/Malfunction IndicatorLight” come on momentarily each time the ignition switch is turned to ON/RUN.
• Each time the ignition is turned to ON/RUN, the ESC system will be ON, even if it was turned off previously.
• The ESC system will make buzzing or clicking sounds when it is active. This is normal; the sounds will stop when ESC becomes inactive following the maneuver
that caused the ESC activation.
WHAT TO DO IN EMERGENCIES
194
Page 197 of 276
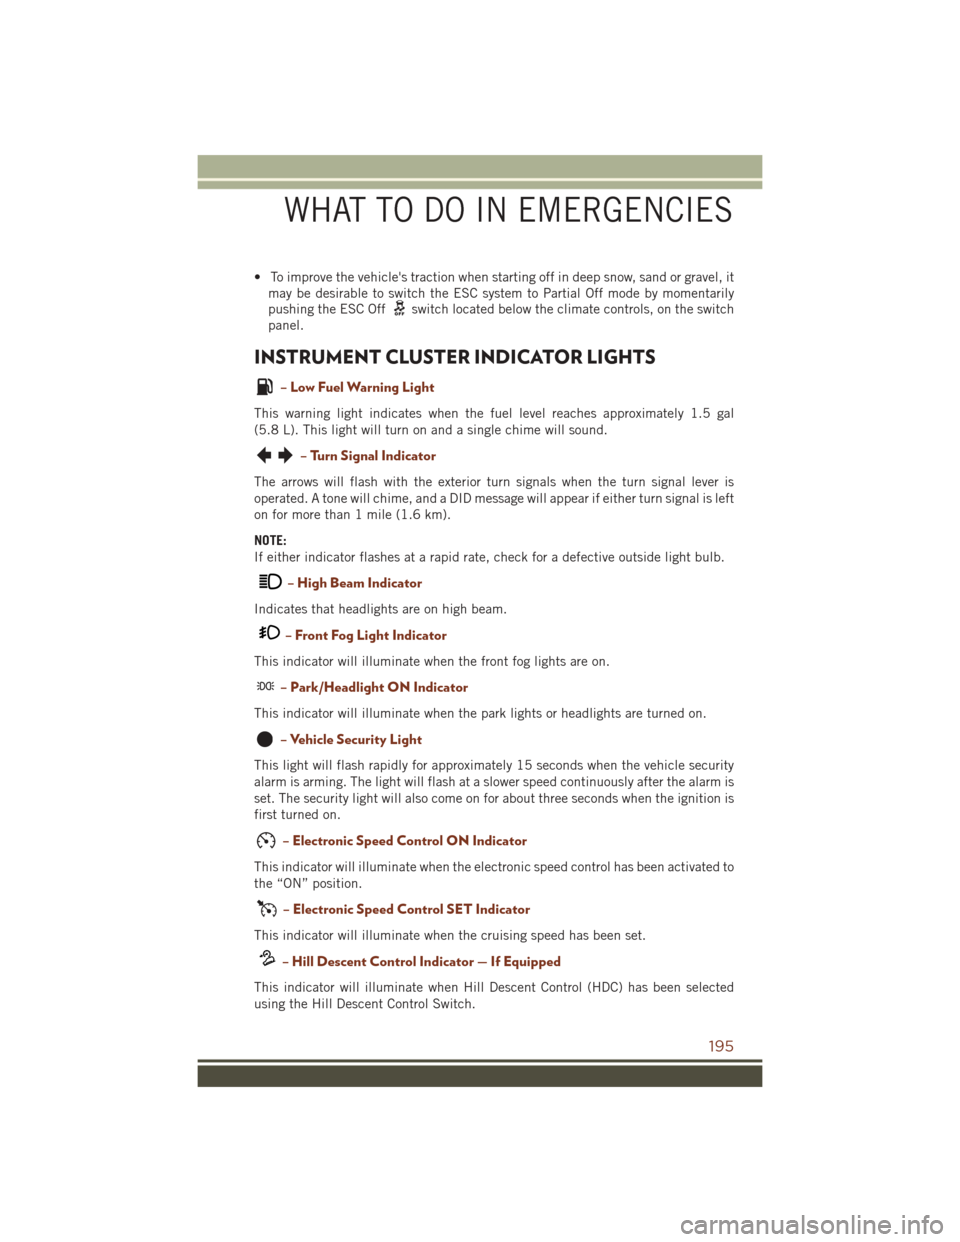
• To improve the vehicle's traction when starting off in deep snow, sand or gravel, itmay be desirable to switch the ESC system to Partial Off mode by momentarily
pushing the ESC Off
switch located below the climate controls, on the switch
panel.
INSTRUMENT CLUSTER INDICATOR LIGHTS
– Low Fuel Warning Light
This warning light indicates when the fuel level reaches approximately 1.5 gal
(5.8 L). This light will turn on and a single chime will sound.
– Turn Signal Indicator
The arrows will flash with the exterior turn signals when the turn signal lever is
operated. A tone will chime, and a DID message will appear if either turn signal is left
on for more than 1 mile (1.6 km).
NOTE:
If either indicator flashes at a rapid rate, check for a defective outside light bulb.
– High Beam Indicator
Indicates that headlights are on high beam.
– Front Fog Light Indicator
This indicator will illuminate when the front fog lights are on.
– Park/Headlight ON Indicator
This indicator will illuminate when the park lights or headlights are turned on.
– Vehicle Security Light
This light will flash rapidly for approximately 15 seconds when the vehicle security
alarm is arming. The light will flash at a slower speed continuously after the alarm is
set. The security light will also come on for about three seconds when the ignition is
first turned on.
– Electronic Speed Control ON Indicator
This indicator will illuminate when the electronic speed control has been activated to
the “ON” position.
– Electronic Speed Control SET Indicator
This indicator will illuminate when the cruising speed has been set.
– Hill Descent Control Indicator — If Equipped
This indicator will illuminate when Hill Descent Control (HDC) has been selected
using the Hill Descent Control Switch.
WHAT TO DO IN EMERGENCIES
195