engine JEEP GRAND CHEROKEE 2020 Owner handbook (in English)
[x] Cancel search | Manufacturer: JEEP, Model Year: 2020, Model line: GRAND CHEROKEE, Model: JEEP GRAND CHEROKEE 2020Pages: 378, PDF Size: 6.88 MB
Page 159 of 378
mode. An onboard frequency generator cre-
ates counteracting sound waves through the
audio system to help keep the vehicle quiet.
Eight–Speed Automatic Transmission
Your vehicle is equipped with a fuel efficient
8 speed transmission. The gear selector is
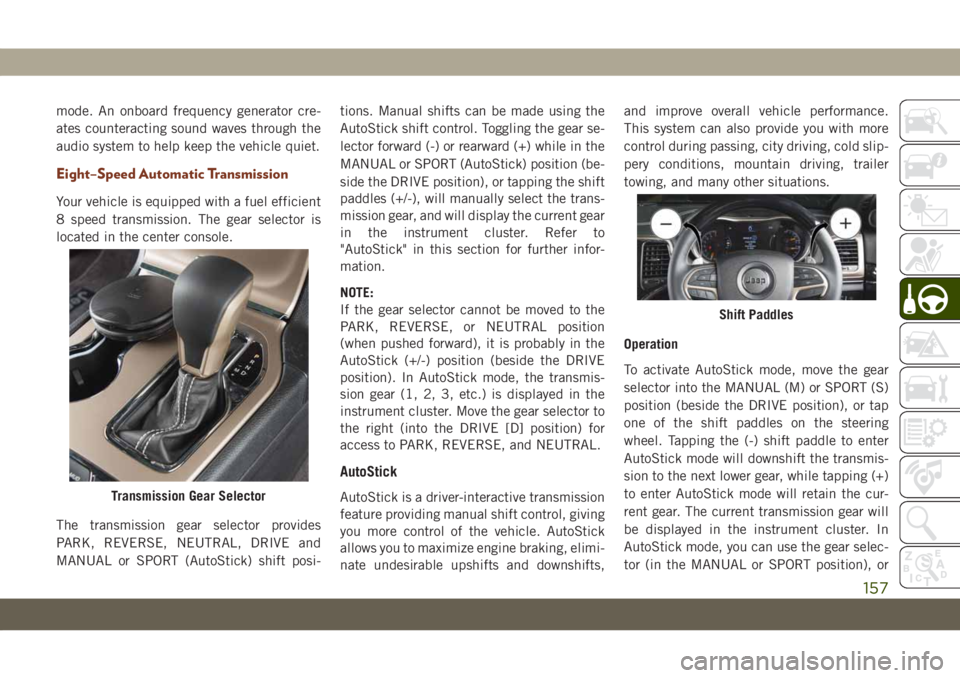
located in the center console.
The transmission gear selector provides
PARK, REVERSE, NEUTRAL, DRIVE and
MANUAL or SPORT (AutoStick) shift posi-tions. Manual shifts can be made using the
AutoStick shift control. Toggling the gear se-
lector forward (-) or rearward (+) while in the
MANUAL or SPORT (AutoStick) position (be-
side the DRIVE position), or tapping the shift
paddles (+/-), will manually select the trans-
mission gear, and will display the current gear
in the instrument cluster. Refer to
"AutoStick" in this section for further infor-
mation.
NOTE:
If the gear selector cannot be moved to the
PARK, REVERSE, or NEUTRAL position
(when pushed forward), it is probably in the
AutoStick (+/-) position (beside the DRIVE
position). In AutoStick mode, the transmis-
sion gear (1, 2, 3, etc.) is displayed in the
instrument cluster. Move the gear selector to
the right (into the DRIVE [D] position) for
access to PARK, REVERSE, and NEUTRAL.
AutoStick
AutoStick is a driver-interactive transmission
feature providing manual shift control, giving
you more control of the vehicle. AutoStick
allows you to maximize engine braking, elimi-
nate undesirable upshifts and downshifts,and improve overall vehicle performance.
This system can also provide you with more
control during passing, city driving, cold slip-
pery conditions, mountain driving, trailer
towing, and many other situations.
Operation
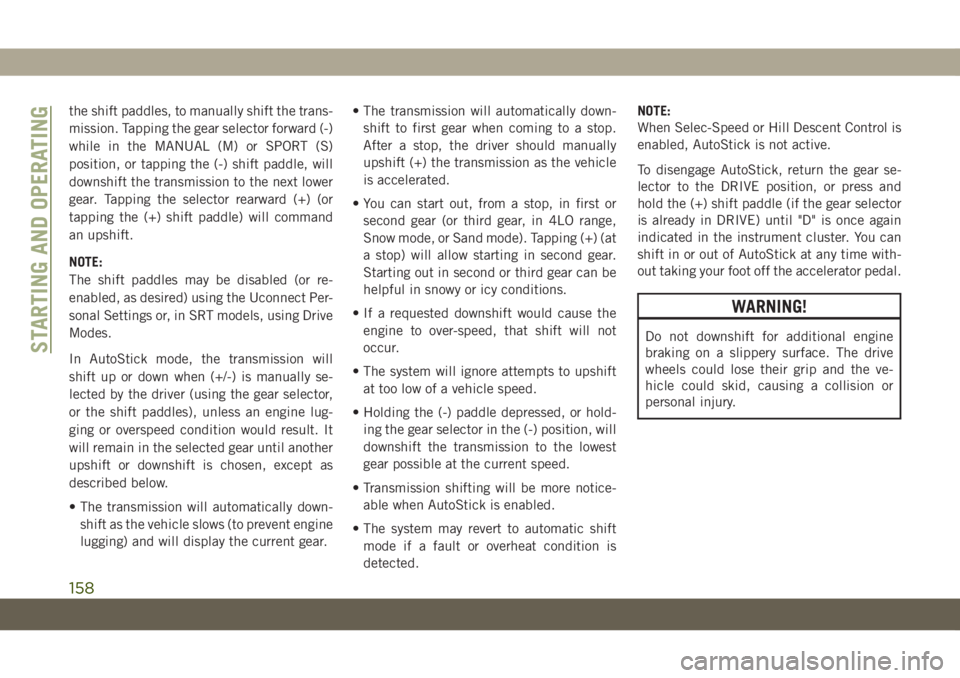
To activate AutoStick mode, move the gear
selector into the MANUAL (M) or SPORT (S)
position (beside the DRIVE position), or tap
one of the shift paddles on the steering
wheel. Tapping the (-) shift paddle to enter
AutoStick mode will downshift the transmis-
sion to the next lower gear, while tapping (+)
to enter AutoStick mode will retain the cur-
rent gear. The current transmission gear will
be displayed in the instrument cluster. In
AutoStick mode, you can use the gear selec-
tor (in the MANUAL or SPORT position), orTransmission Gear Selector
Shift Paddles
157
Page 160 of 378
the shift paddles, to manually shift the trans-
mission. Tapping the gear selector forward (-)
while in the MANUAL (M) or SPORT (S)
position, or tapping the (-) shift paddle, will
downshift the transmission to the next lower
gear. Tapping the selector rearward (+) (or
tapping the (+) shift paddle) will command
an upshift.
NOTE:
The shift paddles may be disabled (or re-
enabled, as desired) using the Uconnect Per-
sonal Settings or, in SRT models, using Drive
Modes.
In AutoStick mode, the transmission will
shift up or down when (+/-) is manually se-
lected by the driver (using the gear selector,
or the shift paddles), unless an engine lug-
ging or overspeed condition would result. It
will remain in the selected gear until another
upshift or downshift is chosen, except as
described below.
• The transmission will automatically down-
shift as the vehicle slows (to prevent engine
lugging) and will display the current gear.• The transmission will automatically down-
shift to first gear when coming to a stop.
After a stop, the driver should manually
upshift (+) the transmission as the vehicle
is accelerated.
• You can start out, from a stop, in first or
second gear (or third gear, in 4LO range,
Snow mode, or Sand mode). Tapping (+) (at
a stop) will allow starting in second gear.
Starting out in second or third gear can be
helpful in snowy or icy conditions.
• If a requested downshift would cause the
engine to over-speed, that shift will not
occur.
• The system will ignore attempts to upshift
at too low of a vehicle speed.
• Holding the (-) paddle depressed, or hold-
ing the gear selector in the (-) position, will
downshift the transmission to the lowest
gear possible at the current speed.
• Transmission shifting will be more notice-
able when AutoStick is enabled.
• The system may revert to automatic shift
mode if a fault or overheat condition is
detected.NOTE:
When Selec-Speed or Hill Descent Control is
enabled, AutoStick is not active.
To disengage AutoStick, return the gear se-
lector to the DRIVE position, or press and
hold the (+) shift paddle (if the gear selector
is already in DRIVE) until "D" is once again
indicated in the instrument cluster. You can
shift in or out of AutoStick at any time with-
out taking your foot off the accelerator pedal.
WARNING!
Do not downshift for additional engine
braking on a slippery surface. The drive
wheels could lose their grip and the ve-
hicle could skid, causing a collision or
personal injury.STARTING AND OPERATING
158
Page 161 of 378
SPORT MODE — IF
EQUIPPED
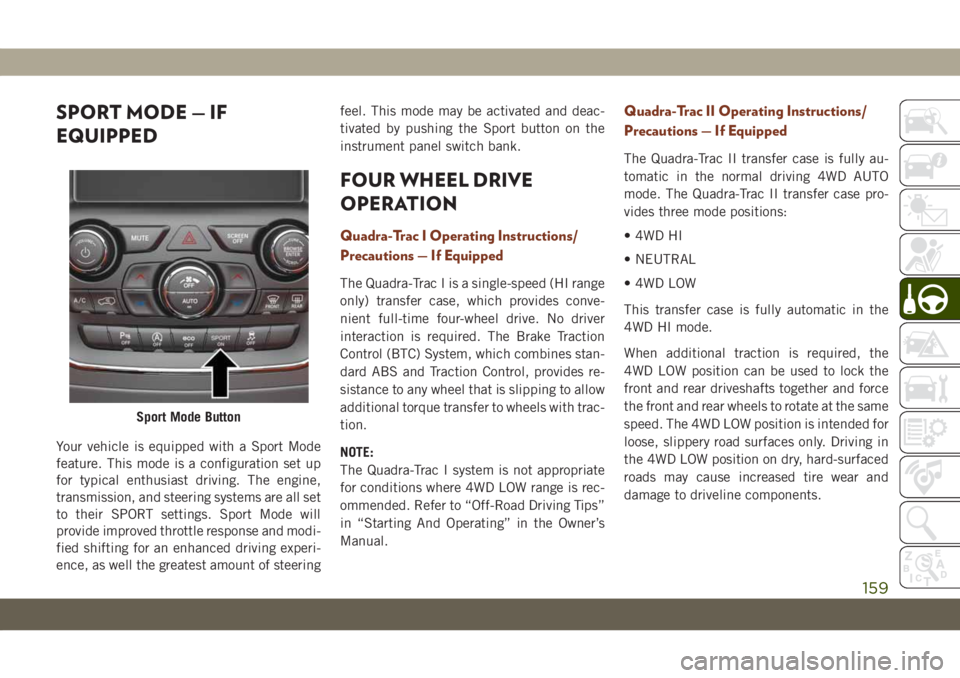
Your vehicle is equipped with a Sport Mode
feature. This mode is a configuration set up
for typical enthusiast driving. The engine,
transmission, and steering systems are all set
to their SPORT settings. Sport Mode will
provide improved throttle response and modi-
fied shifting for an enhanced driving experi-
ence, as well the greatest amount of steeringfeel. This mode may be activated and deac-
tivated by pushing the Sport button on the
instrument panel switch bank.
FOUR WHEEL DRIVE
OPERATION
Quadra-Trac I Operating Instructions/
Precautions — If Equipped
The Quadra-Trac I is a single-speed (HI range
only) transfer case, which provides conve-
nient full-time four-wheel drive. No driver
interaction is required. The Brake Traction
Control (BTC) System, which combines stan-
dard ABS and Traction Control, provides re-
sistance to any wheel that is slipping to allow
additional torque transfer to wheels with trac-
tion.
NOTE:
The Quadra-Trac I system is not appropriate
for conditions where 4WD LOW range is rec-
ommended. Refer to “Off-Road Driving Tips”
in “Starting And Operating” in the Owner’s
Manual.
Quadra-Trac II Operating Instructions/
Precautions — If Equipped
The Quadra-Trac II transfer case is fully au-
tomatic in the normal driving 4WD AUTO
mode. The Quadra-Trac II transfer case pro-
vides three mode positions:
• 4WD HI
• NEUTRAL
• 4WD LOW
This transfer case is fully automatic in the
4WD HI mode.
When additional traction is required, the
4WD LOW position can be used to lock the
front and rear driveshafts together and force
the front and rear wheels to rotate at the same
speed. The 4WD LOW position is intended for
loose, slippery road surfaces only. Driving in
the 4WD LOW position on dry, hard-surfaced
roads may cause increased tire wear and
damage to driveline components.
Sport Mode Button
159
Page 162 of 378
When operating your vehicle in 4WD LOW,
the engine speed is approximately three
times that of the 4WD HI position at a given
road speed. Take care not to overspeed the
engine and do not exceed 25 mph (40 km/h).
Proper operation of four-wheel drive vehicles
depends on tires of equal size, type, and
circumference on each wheel. Any difference
will adversely affect shifting and cause dam-
age to the transfer case.
Because four-wheel drive provides improved
traction, there is a tendency to exceed safe
turning and stopping speeds. Do not go faster
than road conditions permit.
WARNING!
You or others could be injured or killed if
you leave the vehicle unattended with the
transfer case in the NEUTRAL position
without first fully engaging the parking
brake. The transfer case NEUTRAL posi-
tion disengages both the front and rear
drive shafts from the powertrain and will
allow the vehicle to roll, even if the trans-
mission is in PARK. The parking brake
WARNING!
should always be applied when the driver
is not in the vehicle.
Shift Positions
For additional information on the appropriate
use of each 4WD system mode position, see
the information below:
4WD AUTO
This range is used on surfaces such as ice,
snow, gravel, sand, and dry hard pavement.
NOTE:
Refer to “Selec-Terrain — If Equipped” fur-
ther on in this section for further information
on the various positions and their intended
usages.
NEUTRAL
This range disengages the driveline from the
powertrain. It is to be used for flat towing
behind another vehicle. Refer to “Recre-
ational Towing” in “Starting And Operating”
for further information.
WARNING!
You or others could be injured or killed if
you leave the vehicle unattended with the
transfer case in the NEUTRAL position
without first fully engaging the parking
brake. The transfer case NEUTRAL posi-
tion disengages both the front and rear
drive shafts from the powertrain and will
allow the vehicle to roll, even if the trans-
mission is in PARK. The parking brake
should always be applied when the driver
is not in the vehicle.
4WD LOW
This range is for low speed four-wheel drive.
It provides an additional gear reduction
which allows for increased torque to be deliv-
ered to both the front and rear wheels while
providing maximum pulling power for loose,
slippery road surfaces only. Do not exceed
25 mph (40 km/h).
NOTE:
Refer to “Selec-Terrain — If Equipped” for
further information on the various positions
and their intended usages.
STARTING AND OPERATING
160
Page 163 of 378
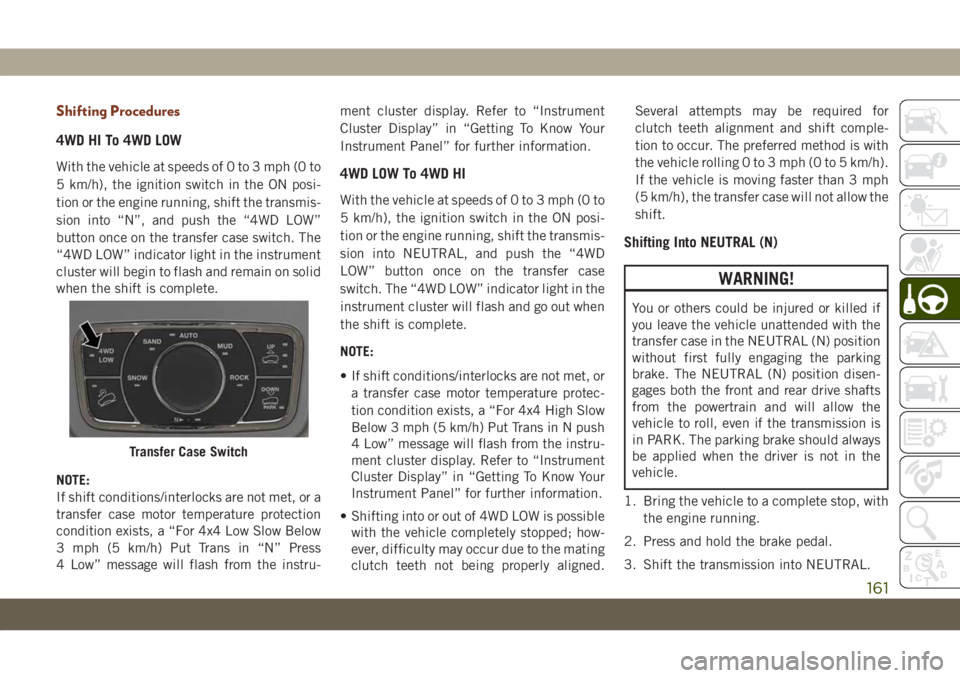
Shifting Procedures
4WD HI To 4WD LOW
With the vehicle at speeds of 0 to 3 mph (0 to
5 km/h), the ignition switch in the ON posi-
tion or the engine running, shift the transmis-
sion into “N”, and push the “4WD LOW”
button once on the transfer case switch. The
“4WD LOW” indicator light in the instrument
cluster will begin to flash and remain on solid
when the shift is complete.
NOTE:
If shift conditions/interlocks are not met, or a
transfer case motor temperature protection
condition exists, a “For 4x4 Low Slow Below
3 mph (5 km/h) Put Trans in “N” Press
4 Low” message will flash from the instru-ment cluster display. Refer to “Instrument
Cluster Display” in “Getting To Know Your
Instrument Panel” for further information.4WD LOW To 4WD HI
With the vehicle at speeds of 0 to 3 mph (0 to
5 km/h), the ignition switch in the ON posi-
tion or the engine running, shift the transmis-
sion into NEUTRAL, and push the “4WD
LOW” button once on the transfer case
switch. The “4WD LOW” indicator light in the
instrument cluster will flash and go out when
the shift is complete.
NOTE:
• If shift conditions/interlocks are not met, or
a transfer case motor temperature protec-
tion condition exists, a “For 4x4 High Slow
Below 3 mph (5 km/h) Put Trans in N push
4 Low” message will flash from the instru-
ment cluster display. Refer to “Instrument
Cluster Display” in “Getting To Know Your
Instrument Panel” for further information.
• Shifting into or out of 4WD LOW is possible
with the vehicle completely stopped; how-
ever, difficulty may occur due to the mating
clutch teeth not being properly aligned.Several attempts may be required for
clutch teeth alignment and shift comple-
tion to occur. The preferred method is with
the vehicle rolling 0 to 3 mph (0 to 5 km/h).
If the vehicle is moving faster than 3 mph
(5 km/h), the transfer case will not allow the
shift.
Shifting Into NEUTRAL (N)
WARNING!
You or others could be injured or killed if
you leave the vehicle unattended with the
transfer case in the NEUTRAL (N) position
without first fully engaging the parking
brake. The NEUTRAL (N) position disen-
gages both the front and rear drive shafts
from the powertrain and will allow the
vehicle to roll, even if the transmission is
in PARK. The parking brake should always
be applied when the driver is not in the
vehicle.
1. Bring the vehicle to a complete stop, with
the engine running.
2. Press and hold the brake pedal.
3. Shift the transmission into NEUTRAL.
Transfer Case Switch
161
Page 164 of 378
4. If vehicle is equipped with Quadra-Lift air
suspension, ensure the vehicle is set to
Normal Ride Height.
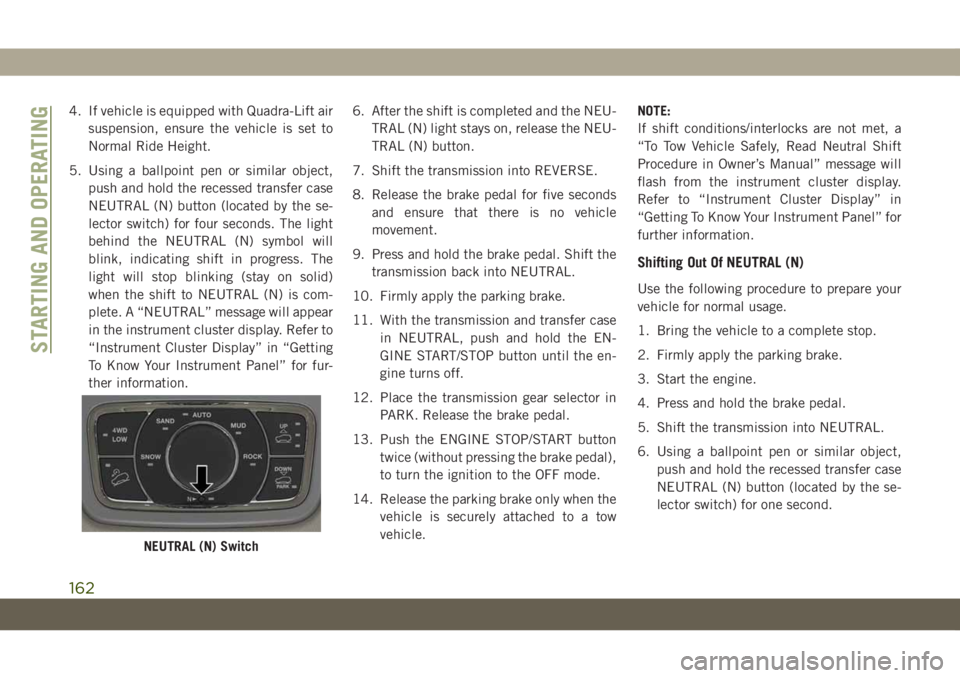
5. Using a ballpoint pen or similar object,
push and hold the recessed transfer case
NEUTRAL (N) button (located by the se-
lector switch) for four seconds. The light
behind the NEUTRAL (N) symbol will
blink, indicating shift in progress. The
light will stop blinking (stay on solid)
when the shift to NEUTRAL (N) is com-
plete. A “NEUTRAL” message will appear
in the instrument cluster display. Refer to
“Instrument Cluster Display” in “Getting
To Know Your Instrument Panel” for fur-
ther information.6. After the shift is completed and the NEU-
TRAL (N) light stays on, release the NEU-
TRAL (N) button.
7. Shift the transmission into REVERSE.
8. Release the brake pedal for five seconds
and ensure that there is no vehicle
movement.
9. Press and hold the brake pedal. Shift the
transmission back into NEUTRAL.
10. Firmly apply the parking brake.
11. With the transmission and transfer case
in NEUTRAL, push and hold the EN-
GINE START/STOP button until the en-
gine turns off.
12. Place the transmission gear selector in
PARK. Release the brake pedal.
13. Push the ENGINE STOP/START button
twice (without pressing the brake pedal),
to turn the ignition to the OFF mode.
14. Release the parking brake only when the
vehicle is securely attached to a tow
vehicle.NOTE:
If shift conditions/interlocks are not met, a
“To Tow Vehicle Safely, Read Neutral Shift
Procedure in Owner’s Manual” message will
flash from the instrument cluster display.
Refer to “Instrument Cluster Display” in
“Getting To Know Your Instrument Panel” for
further information.
Shifting Out Of NEUTRAL (N)
Use the following procedure to prepare your
vehicle for normal usage.
1. Bring the vehicle to a complete stop.
2. Firmly apply the parking brake.
3. Start the engine.
4. Press and hold the brake pedal.
5. Shift the transmission into NEUTRAL.
6. Using a ballpoint pen or similar object,
push and hold the recessed transfer case
NEUTRAL (N) button (located by the se-
lector switch) for one second.
NEUTRAL (N) Switch
STARTING AND OPERATING
162
Page 167 of 378
Selec-Terrain setting by normal use of the air
suspension buttons. Refer to “Selec-Terrain”
in “Starting And Operating” for further infor-
mation.
The system requires that the engine be run-
ning for all changes. When lowering the ve-
hicle all of the doors, including the liftgate,
must be closed. If a door is opened at any
time while the vehicle is lowering the change
will not be completed until the open door(s)
is/are closed.
The Quadra-Lift air suspension system uses a
lifting and lowering pattern which keeps the
headlights from incorrectly shining into on-
coming traffic. When raising the vehicle, the
rear of the vehicle will move up first and then
the front. When lowering the vehicle, the
front will move down first and then the rear.
After the engine is turned off, it may be
noticed that the air suspension system oper-
ates briefly, this is normal. The system is
correcting the position of the vehicle to en-
sure a proper appearance.To assist with changing a spare tire, the
Quadra-Lift air suspension system has a fea-
ture which allows the automatic leveling to be
disabled. Refer to “Uconnect Settings” in
“Multimedia” for further information.
For further information refer to “Driving Tips”
in “Starting And Operating” in the Owner’s
Manual.
NOTE:
If equipped with a touch screen radio all
enabling/disabling of air suspension features
must be done through the radio. Refer to
“Uconnect Settings” in “Multimedia” for fur-
ther information.
WARNING!
The air suspension system uses a high
pressure volume of air to operate the sys-
tem. To avoid personal injury or damage to
the system, see your authorized dealer for
service.
Air Suspension Modes
The Air Suspension system has multiple modes
to protect the system in unique situations:
Tire/Jack Mode
To assist with changing a spare tire, the air
suspension system has a feature which allows
the automatic leveling to be disabled. Refer
to “Uconnect Settings” in “Multimedia” for
further information.
NOTE:
This mode is intended to be enabled with
engine running.
Auto Entry/Exit Mode
To assist in entering and exiting the vehicle,
the air suspension system has a feature
which automatically lowers the vehicle to
entry/exit ride height. Refer to “Uconnect
Settings” in “Multimedia” for further infor-
mation.
NOTE:
This mode is intended to be enabled with
engine running.
165
Page 168 of 378
Transport Mode
To assist with flat bed towing, the air suspen-
sion system has a feature which will put the
vehicle into Entry/Exit height and disable the
automatic load leveling system. Refer to
“Uconnect Settings” in “Multimedia” for fur-
ther information.
NOTE:
This mode is intended to be enabled with
engine running.
Suspension Display Messages Mode
The “Suspension Display Messages” setting
allows you to only display suspension warn-
ings. Refer to “Uconnect Settings” in “Mul-
timedia” for further information.
NOTE:
This mode is intended to be enabled with
engine running.
Wheel Alignment Mode
Before performing a wheel alignment this
mode must be enabled. Refer to “Uconnect
Settings” in “Multimedia” for further infor-
mation.NOTE:
This mode is intended to be enabled with
engine running.
If equipped with a touch screen radio all
enabling/disabling of air suspension features
must be done through the radio. Refer to
“Uconnect Settings” in “Multimedia” for fur-
ther information.
Instrument Cluster Display Messages
When the appropriate conditions exist, a
message will appear in the instrument clus-
ter. Refer to “Instrument Cluster Display” in
“Getting To Know Your Instrument Panel” for
further information.
Operation
The indicator lamps 3 through 6 will illumi-
nate to show the current position of the
vehicle. Flashing indicator lamps will show a
position which the system is working to
achieve. When raising, if multiple indicator
lamps are flashing on the “UP” button, the
highest flashing indicator lamp is the posi-
tion the system is working to achieve. Whenlowering, if multiple indicators are flashing
on the "DOWN" button the lowest solid indi-
cator lamp is the position the system is work-
ing to achieve.
Pushing the “UP” button once will move the
suspension one position higher from the cur-
rent position, assuming all conditions are
met (i.e. engine running, speed below thresh-
old, etc). The “UP” button can be pushed
multiple times, each push will raise the re-
quested level by one position up to a maxi-
mum position of OR2 or the highest position
allowed based on current conditions (i.e. ve-
hicle speed, etc).
Pushing the “DOWN” button once will move
the suspension one position lower from the
current level, assuming all conditions are met
(i.e. engine running, doors closed, speed be-
low threshold, etc). The “DOWN” button can
be pressed multiple times. Each push will
lower the requested level by one position
down to a minimum of Park Mode or the
lowest position allowed based on current con-
ditions (i.e. vehicle speed, etc.)
STARTING AND OPERATING
166
Page 169 of 378
Automatic height changes will occur based
on vehicle speed and the current vehicle
height. The indicator lamps and instrument
cluster display messages will operate the
same for automatic changes and user re-
quested changes.
• Off-Road 2 (OR2) – Indicator lamps 4, 5,
and 6 will be illuminated when the vehicle
is in OR2.
• Off-Road 1 (OR1) – Indicator lamps 4 and
5 will be illuminated when the vehicle is in
OR1.
• Normal Ride Height (NRH) – Indicator
lamp 4 will be illuminated when the vehicle
is in this position.
• Entry/Exit Mode – Indicator lamp 3 will be
illuminated when the vehicle is in Entry/
Exit Mode. If Entry/Exit Mode is requested
while vehicle speed is between 15 mph
(24 km/h) and 25 mph (40 km/h), indicator
lamp 4 will remain on solid and indicator
lamp 3 will flash as the system waits for the
vehicle to reduce speed. If vehicle speed is
reduced to, and kept below, 15 mph
(24 km/h) indicator lamp 4 will turn off and
indicator lamp 3 will flash until Entry/ExitMode is achieved at which point indicator
lamp 3 will go solid. If during the height
change to Entry/Exit Mode, the vehicle
speed exceeds 15 mph (24 km/h), the
height change will be paused until the
vehicle speed either goes below 15 mph
(24 km/h) and the height change continues
to Entry/Exit Mode, or exceeds 25 mph
(40 km/h) and the vehicle height will return
to NRH. Entry/Exit Mode may be selected
while the vehicle is not moving provided
that the engine is still running and all doors
remain closed.
• Transport Mode - No indicator lamps will be
illuminated. Customer driving will disable
Transport Mode.
• Tire/Jack Mode - Indicator lamps 3 and
6 will be illuminated. Customer driving will
disable Tire/Jack Mode.
• Wheel Alignment Mode - Indicator lamps
3 and 4 will be illuminated. Customer driv-
ing will disable Wheel Alignment Mode.SELEC-TERRAIN — IF
EQUIPPED
Selec-Terrain Mode Selection
Selec-Terrain combines the capabilities of
the vehicle control systems, along with driver
input, to provide the best performance for all
terrains.
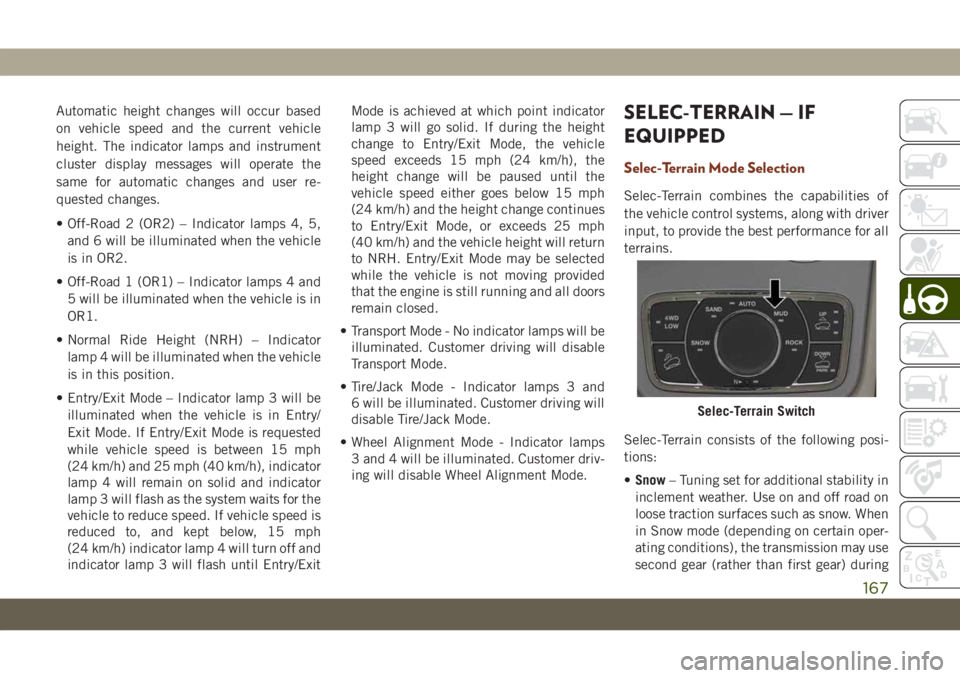
Selec-Terrain consists of the following posi-
tions:
•Snow– Tuning set for additional stability in
inclement weather. Use on and off road on
loose traction surfaces such as snow. When
in Snow mode (depending on certain oper-
ating conditions), the transmission may use
second gear (rather than first gear) during
Selec-Terrain Switch
167
Page 172 of 378
Launch Control— If Equipped
This vehicle is equipped with a Launch Con-
trol system that is designed to allow the driver
to achieve maximum vehicle acceleration in a
straight line. Launch Control is a form of
traction control that manages tire slip while
launching the vehicle. This feature is in-
tended for use during race events on a closed
course where consistent quarter mile and
zero to sixty times are desired. The system is
not intended to compensate for lack of driver
experience or familiarity with the race track.
Use of this feature in low traction (cold, wet,
gravel, etc.) conditions may results in excess
wheel slip outside this systems control result-
ing in an aborted launch.
Preconditions:
• Launch Control should not be used on pub-
lic roads. Always check track conditions
and the surrounding area.
•L
aunch Control is not available within the first
500 miles (805 km) of engine break-in.
• Launch Control should only be used when
the engine and transmission are at operat-
ing temperature.• Launch Control is intended to be used on
dry, paved road surfaces only.
CAUTION!
Use on slippery or loose surfaces may
cause damage to vehicle components and
is not recommended.
Launch Control is only available when the
following procedure is followed:
NOTE:
Pushing the SRT button on the Select-Track
switch or pressing the “Apps” button on the
touchscreen are the two options to access
launch control features. Please refer to “SRT
Drive Modes” in “Multimedia” in your Own-
er’s Manual for further information.
1. Press the “Race Options” button on the
touchscreen or push the LAUNCH button
on the Select-Track switch.
2. Press the “Launch RPM Set-Up” button
on the touchscreen. This screen will allow
you to adjust your launch RPM’s for opti-
mum launch/traction.3. Press the “Activate Launch Control” but-
ton on the touchscreen, follow instruc-
tions in the instrument cluster display.
• Make sure the vehicle is not moving.
• Put vehicle in first gear.
• Steering wheel must be pointing
straight.
• Vehicle must be on level ground.
• Apply brake pressure.
• While holding the brake, rapidly apply
and hold the accelerator pedal to wide
open throttle. The engine speed will
hold at the RPM that was set in the
“Launch RPM Set-up” screen.
NOTE:
Messages will appear in the instrument
cluster display to inform the driver if one
or more of the above conditions have not
been met.
4. When the above conditions have been
met, the instrument cluster display will
read “Release Brake”.
5. Keep the vehicle pointed straight.
STARTING AND OPERATING
170