lock JEEP GRAND CHEROKEE 2020 Owner handbook (in English)
[x] Cancel search | Manufacturer: JEEP, Model Year: 2020, Model line: GRAND CHEROKEE, Model: JEEP GRAND CHEROKEE 2020Pages: 378, PDF Size: 6.88 MB
Page 142 of 378
WARNING!
failure of the restraint. The child could
be badly injured or killed.
• Follow the child restraint manufacturer’s
directions exactly when installing an in-
fant or child restraint.
1. Place the child seat in the center of the
seating position. For some second row
seats, you may need to recline the seat
and/or raise the head restraint (if adjust-
able) to get a better fit. If the rear seat can
be moved forward and rearward in the
vehicle, you may wish to move it to its
rear-most position to make room for the
child seat. You may also move the front
seat forward to allow more room for the
child seat.
2. Pull enough of the seat belt webbing from
the retractor to pass it through the belt
path of the child restraint. Do not twist the
belt webbing in the belt path.
3. Slide the latch plate into the buckle until
you hear a “click.”
4. Pull on the webbing to make the lap
portion tight against the child seat.5. To lock the seat belt, pull down on the
shoulder part of the belt until you have
pulled all the seat belt webbing out of the
retractor. Then, allow the webbing to re-
tract back into the retractor. As the web-
bing retracts, you will hear a clicking
sound. This means the seat belt is now in
the Automatic Locking mode.
6. Try to pull the webbing out of the retractor.
If it is locked, you should not be able to
pull out any webbing. If the retractor is
not locked, repeat step 5.
7. Finally, pull up on any excess webbing to
tighten the lap portion around the child
restraint while you push the child restraint
rearward and downward into the vehicle
seat.
8. Test that the child restraint is installed
tightly by pulling back and forth on the
child seat at the belt path. It should not
move more than 25 mm in any direction.
Any seat belt system will loosen with time, so
check the belt occasionally, and pull it tight if
necessary.
Transporting Pets
Air Bags deploying in the front seat could
harm your pet. An unrestrained pet will be
thrown about and possibly injured, or injure a
passenger during panic braking or in a colli-
sion.
Pets should be restrained in the rear seat (if
equipped) in pet harnesses or pet carriers
that are secured by seat belts.
SAFETY TIPS
Transporting Passengers
NEVER TRANSPORT PASSENGERS IN THE
CARGO AREA.
WARNING!
• Do not leave children or animals inside
parked vehicles in hot weather. Interior
heat build-up may cause serious injury
or death.
• It is extremely dangerous to ride in a
cargo area, inside or outside of a vehicle.
SAFETY
140
Page 145 of 378
WARNING!
• NEVER place any objects under the floor
mat (e.g., towels, keys, etc.). These ob-
jects could change the position of the
floor mat and may cause interference
with the accelerator, brake, or clutch
pedals.
• If the vehicle carpet has been removed
and re-installed, always properly attach
carpet to the floor and check the floor
mat fasteners are secure to the vehicle
carpet. Fully depress each pedal to
check for interference with the accelera-
tor, brake, or clutch pedals then re-
install the floor mats.
• It is recommended to only use mild soap
and water to clean your floor mats. After
cleaning, always check your floor mat
has been properly installed and is se-
cured to your vehicle using the floor mat
fasteners by lightly pulling mat.
Periodic Safety Checks You Should Make
Outside The Vehicle
Tires
Examine tires for excessive tread wear and
uneven wear patterns. Check for stones,
nails, glass, or other objects lodged in the
tread or sidewall. Inspect the tread for cuts
and cracks. Inspect sidewalls for cuts,
cracks, and bulges. Check the wheel nuts for
tightness. Check the tires (including spare)
for proper cold inflation pressure.
Lights
Have someone observe the operation of brake
lights and exterior lights while you work the
controls. Check turn signal and high beam
indicator lights on the instrument panel.
Door Latches
Check for proper closing, latching, and locking.
Fluid Leaks
Check area under the vehicle after overnight
parking for fuel, coolant, oil, or other fluid
leaks. Also, if gasoline fumes are detected or
if fuel, or brake fluid leaks are suspected. The
cause should be located and corrected
immediately.
WARNING!
To prevent SERIOUS INJURY or DEATH
when using “Track-Use” parts and equip-
ment:
• NEVER use any “Track-Use” equipment
on public roads. FCA does not authorize
the use of “Track-Use” equipment on
public roads.
• The intended use of “Track-Use” parts is
for race vehicles on race tracks. To help
ensure the safety of the race driver, en-
gineers should supervise the installation
of “Track-Use” parts.
• FCA does not authorize the installation
or use of any part noted as “Track-Use”
on any new vehicle prior to its first retail
sale.
143
Page 147 of 378
STARTING THE ENGINE —
GAS
Before starting your vehicle, adjust your seat,
adjust the inside and outside mirrors, fasten
your seat belt, and if present, instruct all
other occupants to buckle their seat belts.
WARNING!
• Before exiting a vehicle, always come to
a complete stop, then shift the auto-
matic transmission into PARK and apply
the parking brake.
• Always make sure the keyless ignition
node is in the OFF mode, key fob is
removed from the vehicle and vehicle is
locked.
• Never leave children alone in a vehicle,
or with access to an unlocked vehicle.
Leaving children in a vehicle unattended
is dangerous for a number of reasons. A
child or others could be seriously or
fatally injured. Children should be
warned not to touch the parking brake,
brake pedal or the gear selector.
WARNING!
• Do not leave the key fob in or near the
vehicle, or in a location accessible to
children, and do not leave the ignition of
a vehicle equipped with Keyless Enter-
N-Go in the ACC or ON/RUN mode. A
child could operate power windows,
other controls, or move the vehicle.
• Do not leave children or animals inside
parked vehicles in hot weather. Interior
heat build-up may cause serious injury
or death.
Automatic Transmission
The gear selector must be in the NEUTRAL or
PARK position before you can start the en-
gine. Apply the brakes before shifting into
any driving gear.
CAUTION!
Damage to the transmission may occur if
the following precautions are not ob-
served:
• Do not shift from REVERSE, PARK, or
NEUTRAL into any forward gear when
the engine is above idle speed.
• Shift into PARK only after the vehicle
has come to a complete stop.
• Shift into or out of REVERSE only after
the vehicle has come to a complete stop
and the engine is at idle speed.
• Before shifting into any gear, make sure
your foot is firmly on the brake pedal.
Normal Starting
To Turn On The Engine Using The ENGINE START/
STOP Button
1. The transmission must be in PARK or
NEUTRAL.
2. Press and hold the brake pedal while
pushing the ENGINE START/STOP button
once.
145
Page 150 of 378
NOTE:
In some cases the ParkSense graphic will be
displayed in the instrument cluster. In these
cases, the shifter must be returned to “P” to
select desired gear.
If the driver shifts into PARK while moving, the
vehicle may AutoPark.
AutoPark will engageONLYwhen vehicle
speed is 1.2 MPH (1.9 km/h) or less.
The MESSAGE “Vehicle Speed is Too High to
Shift to P”will be displayed in the instrument
cluster if vehicle speed is above 1.2 MPH
(1.9 km/h).
WARNING!
If vehicle speed is above 1.2 MPH
(1.9 km/h), the transmission will default
to NEUTRAL until the vehicle speed drops
below 1.2 MPH (1.9 km). A vehicle left in
the NEUTRAL position can roll. As an
added precaution, always apply the park-
ing brake when exiting the vehicle.4WD LOW — If Equipped
AutoPark will be disabled when operating the
vehicle in 4WD LOW.
The MESSAGE “AutoPark Disabled” will be
displayed in the instrument cluster.
Additional customer warnings will be given
when both of these conditions are met:
• Vehicle is not in PARK
• Driver’s Door is ajar
The MESSAGE “AutoPark Not Engaged” will
be displayed in the instrument cluster. A
warning chime will continue until you shift
the vehicle into PARK or the Driver’s Door is
closed.
ALWAYS DO A VISUAL CHECKthat your vehicle
is in PARK by looking for the "P" in the
instrument cluster display and on the shifter.
As an added precaution, always apply the
parking brake when exiting the vehicle.
STARTING THE ENGINE —
3.0L DIESEL ENGINE
Before starting your vehicle, adjust your seat,
both inside and outside mirrors, and fasten
your seat belts.
The starter is allowed to crank for up to
30-second intervals. Waiting a few minutes
between such intervals will protect the starter
from overheating.
WARNING!
• Before exiting a vehicle, always come to
a complete stop, then shift the auto-
matic transmission into PARK and apply
the parking brake.
• Always make sure the keyless ignition
node is in the OFF mode, key fob is
removed from the vehicle and vehicle is
locked.
• Never leave children alone in a vehicle,
or with access to an unlocked vehicle.
Leaving children in a vehicle unattended
is dangerous for a number of reasons. A
child or others could be seriously orSTARTING AND OPERATING
148
Page 157 of 378
WARNING!
• It is dangerous to shift out of PARK or
NEUTRAL if the engine speed is higher
than idle speed. If your foot is not firmly
pressing the brake pedal, the vehicle
could accelerate quickly forward or in
reverse. You could lose control of the
vehicle and hit someone or something.
Only shift into gear when the engine is
idling normally and your foot is firmly
pressing the brake pedal.
• Unintended movement of a vehicle
could injure those in or near the vehicle.
As with all vehicles, you should never
exit a vehicle while the engine is run-
ning. Before exiting a vehicle, always
come to a complete stop, then apply the
parking brake, shift the transmission
into PARK, and turn the ignition OFF.
When the ignition is in the OFF mode,
the transmission is locked in PARK, se-
curing the vehicle against unwanted
movement.
• When exiting the vehicle, always make
sure the ignition is in the OFF mode,
WARNING!
remove the key fob from the vehicle, and
lock the vehicle.
• Never leave children alone in a vehicle,
or with access to an unlocked vehicle.
Allowing children to be in a vehicle un-
attended is dangerous for a number of
reasons. A child or others could be seri-
ously or fatally injured. Children should
be warned not to touch the parking
brake, brake pedal or the transmission
gear selector.
• Do not leave the key fob in or near the
vehicle (or in a location accessible to
children), and do not leave the ignition
in the ACC or ON/RUN mode. A child
could operate power windows, other
controls, or move the vehicle.
CAUTION!
Damage to the transmission may occur if
the following precautions are not ob-
served:
• Shift into or out of PARK or REVERSE
only after the vehicle has come to a
complete stop.
• Do not shift between PARK, REVERSE,
NEUTRAL, or DRIVE when the engine is
above idle speed.
• Before shifting into any gear, make sure
your foot is firmly pressing the brake
pedal.
NOTE:
You must press and hold the brake pedal
while shifting out of PARK.
Ignition Park Interlock
This vehicle is equipped with an Ignition Park
Interlock which requires the transmission to
be in PARK before the ignition can be turned
to the OFF mode. This helps the driver avoid
inadvertently leaving the vehicle without
155
Page 158 of 378
placing the transmission in PARK. This sys-
tem also locks the transmission in PARK
whenever the ignition is in the OFF mode.
NOTE:
The transmission is NOT locked in PARK
when the ignition is in the ACC mode (even
though the engine will be off). Ensure that
the transmission is in PARK, and the ignition
isOFF(not in ACC mode) before exiting the
vehicle.
Brake/Transmission Shift Interlock
System
This vehicle is equipped with a Brake Trans-
mission Shift Interlock system (BTSI) that
holds the transmission gear selector in PARK
unless the brakes are applied. To shift the
transmission out of PARK, the engine must
be running and the brake pedal must be
pressed. The brake pedal must also be
pressed to shift from NEUTRAL into DRIVE or
REVERSE when the vehicle is stopped or
moving at low speeds.
Fuel Economy (ECO) Mode
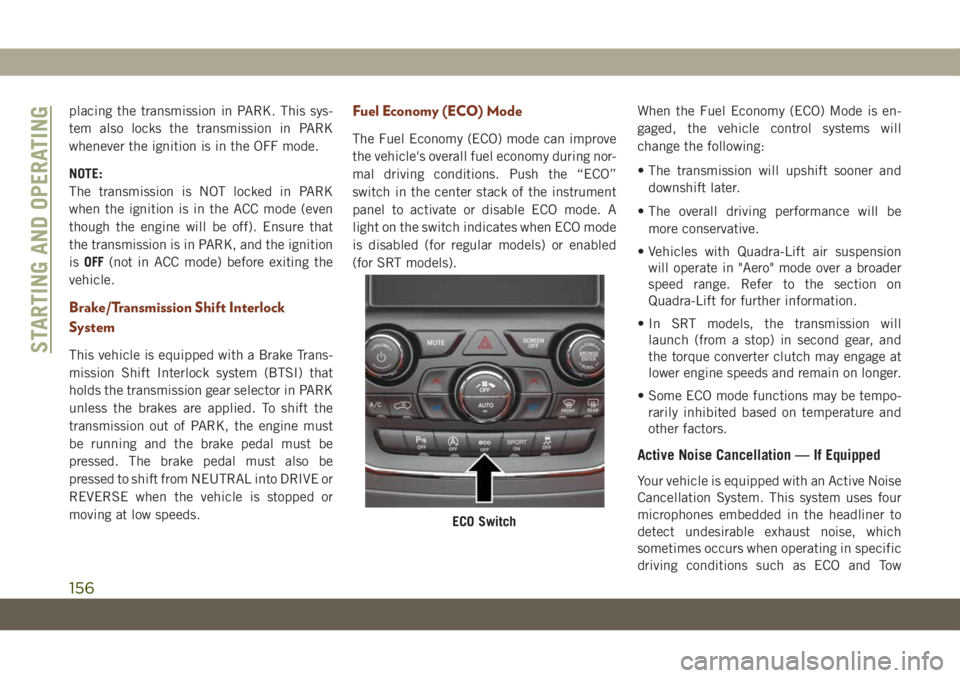
The Fuel Economy (ECO) mode can improve
the vehicle's overall fuel economy during nor-
mal driving conditions. Push the “ECO”
switch in the center stack of the instrument
panel to activate or disable ECO mode. A
light on the switch indicates when ECO mode
is disabled (for regular models) or enabled
(for SRT models).When the Fuel Economy (ECO) Mode is en-
gaged, the vehicle control systems will
change the following:
• The transmission will upshift sooner and
downshift later.
• The overall driving performance will be
more conservative.
• Vehicles with Quadra-Lift air suspension
will operate in "Aero" mode over a broader
speed range. Refer to the section on
Quadra-Lift for further information.
• In SRT models, the transmission will
launch (from a stop) in second gear, and
the torque converter clutch may engage at
lower engine speeds and remain on longer.
• Some ECO mode functions may be tempo-
rarily inhibited based on temperature and
other factors.
Active Noise Cancellation — If Equipped
Your vehicle is equipped with an Active Noise
Cancellation System. This system uses four
microphones embedded in the headliner to
detect undesirable exhaust noise, which
sometimes occurs when operating in specific
driving conditions such as ECO and Tow
ECO Switch
STARTING AND OPERATING
156
Page 161 of 378
SPORT MODE — IF
EQUIPPED
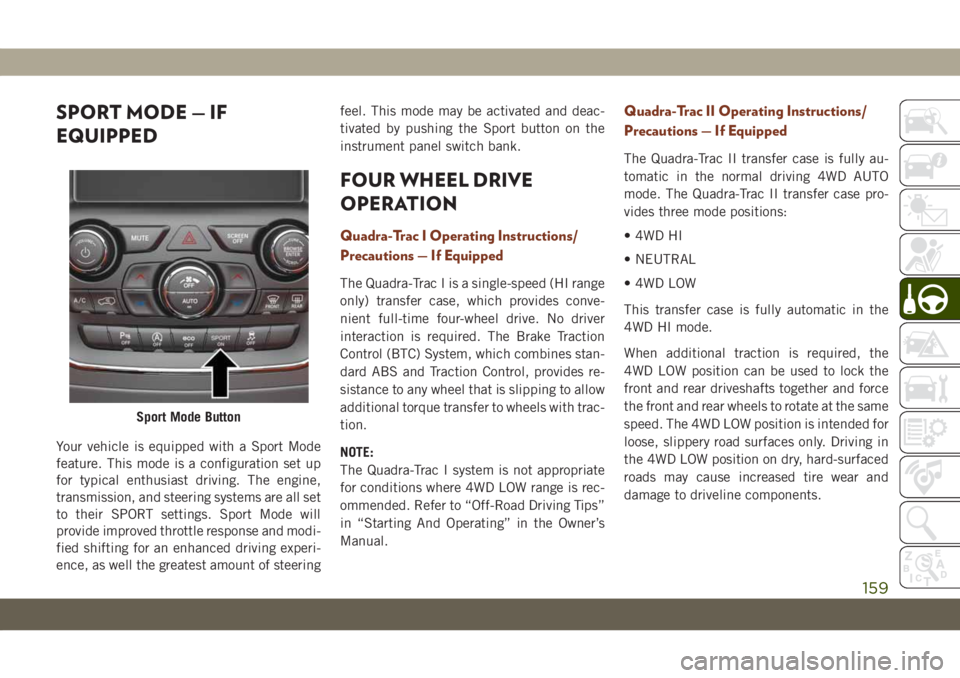
Your vehicle is equipped with a Sport Mode
feature. This mode is a configuration set up
for typical enthusiast driving. The engine,
transmission, and steering systems are all set
to their SPORT settings. Sport Mode will
provide improved throttle response and modi-
fied shifting for an enhanced driving experi-
ence, as well the greatest amount of steeringfeel. This mode may be activated and deac-
tivated by pushing the Sport button on the
instrument panel switch bank.
FOUR WHEEL DRIVE
OPERATION
Quadra-Trac I Operating Instructions/
Precautions — If Equipped
The Quadra-Trac I is a single-speed (HI range
only) transfer case, which provides conve-
nient full-time four-wheel drive. No driver
interaction is required. The Brake Traction
Control (BTC) System, which combines stan-
dard ABS and Traction Control, provides re-
sistance to any wheel that is slipping to allow
additional torque transfer to wheels with trac-
tion.
NOTE:
The Quadra-Trac I system is not appropriate
for conditions where 4WD LOW range is rec-
ommended. Refer to “Off-Road Driving Tips”
in “Starting And Operating” in the Owner’s
Manual.
Quadra-Trac II Operating Instructions/
Precautions — If Equipped
The Quadra-Trac II transfer case is fully au-
tomatic in the normal driving 4WD AUTO
mode. The Quadra-Trac II transfer case pro-
vides three mode positions:
• 4WD HI
• NEUTRAL
• 4WD LOW
This transfer case is fully automatic in the
4WD HI mode.
When additional traction is required, the
4WD LOW position can be used to lock the
front and rear driveshafts together and force
the front and rear wheels to rotate at the same
speed. The 4WD LOW position is intended for
loose, slippery road surfaces only. Driving in
the 4WD LOW position on dry, hard-surfaced
roads may cause increased tire wear and
damage to driveline components.
Sport Mode Button
159
Page 163 of 378
Shifting Procedures
4WD HI To 4WD LOW
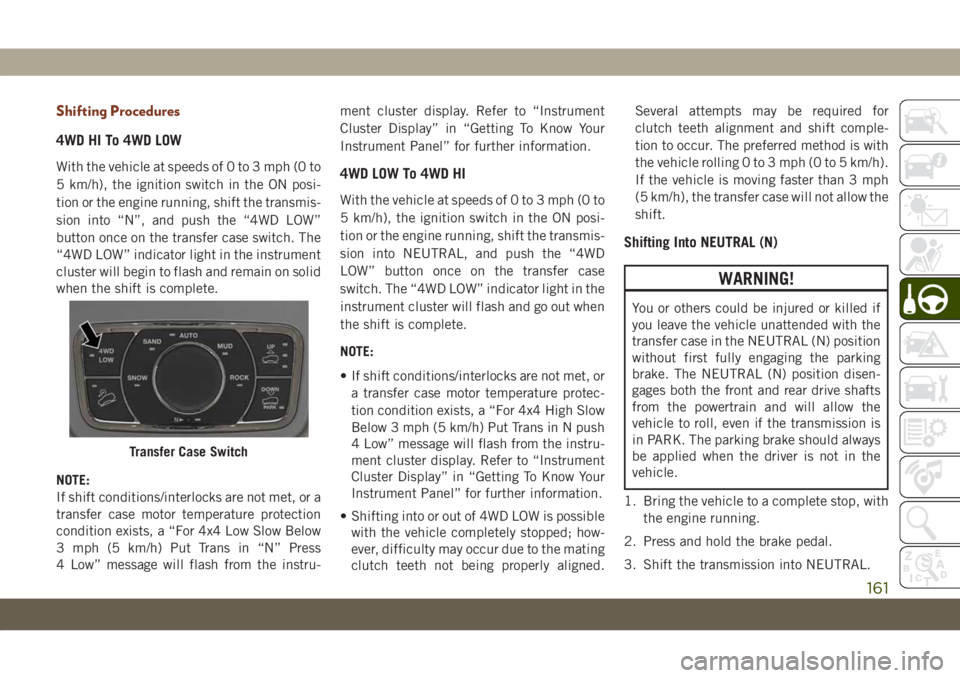
With the vehicle at speeds of 0 to 3 mph (0 to
5 km/h), the ignition switch in the ON posi-
tion or the engine running, shift the transmis-
sion into “N”, and push the “4WD LOW”
button once on the transfer case switch. The
“4WD LOW” indicator light in the instrument
cluster will begin to flash and remain on solid
when the shift is complete.
NOTE:
If shift conditions/interlocks are not met, or a
transfer case motor temperature protection
condition exists, a “For 4x4 Low Slow Below
3 mph (5 km/h) Put Trans in “N” Press
4 Low” message will flash from the instru-ment cluster display. Refer to “Instrument
Cluster Display” in “Getting To Know Your
Instrument Panel” for further information.4WD LOW To 4WD HI
With the vehicle at speeds of 0 to 3 mph (0 to
5 km/h), the ignition switch in the ON posi-
tion or the engine running, shift the transmis-
sion into NEUTRAL, and push the “4WD
LOW” button once on the transfer case
switch. The “4WD LOW” indicator light in the
instrument cluster will flash and go out when
the shift is complete.
NOTE:
• If shift conditions/interlocks are not met, or
a transfer case motor temperature protec-
tion condition exists, a “For 4x4 High Slow
Below 3 mph (5 km/h) Put Trans in N push
4 Low” message will flash from the instru-
ment cluster display. Refer to “Instrument
Cluster Display” in “Getting To Know Your
Instrument Panel” for further information.
• Shifting into or out of 4WD LOW is possible
with the vehicle completely stopped; how-
ever, difficulty may occur due to the mating
clutch teeth not being properly aligned.Several attempts may be required for
clutch teeth alignment and shift comple-
tion to occur. The preferred method is with
the vehicle rolling 0 to 3 mph (0 to 5 km/h).
If the vehicle is moving faster than 3 mph
(5 km/h), the transfer case will not allow the
shift.
Shifting Into NEUTRAL (N)
WARNING!
You or others could be injured or killed if
you leave the vehicle unattended with the
transfer case in the NEUTRAL (N) position
without first fully engaging the parking
brake. The NEUTRAL (N) position disen-
gages both the front and rear drive shafts
from the powertrain and will allow the
vehicle to roll, even if the transmission is
in PARK. The parking brake should always
be applied when the driver is not in the
vehicle.
1. Bring the vehicle to a complete stop, with
the engine running.
2. Press and hold the brake pedal.
3. Shift the transmission into NEUTRAL.
Transfer Case Switch
161
Page 164 of 378
4. If vehicle is equipped with Quadra-Lift air
suspension, ensure the vehicle is set to
Normal Ride Height.
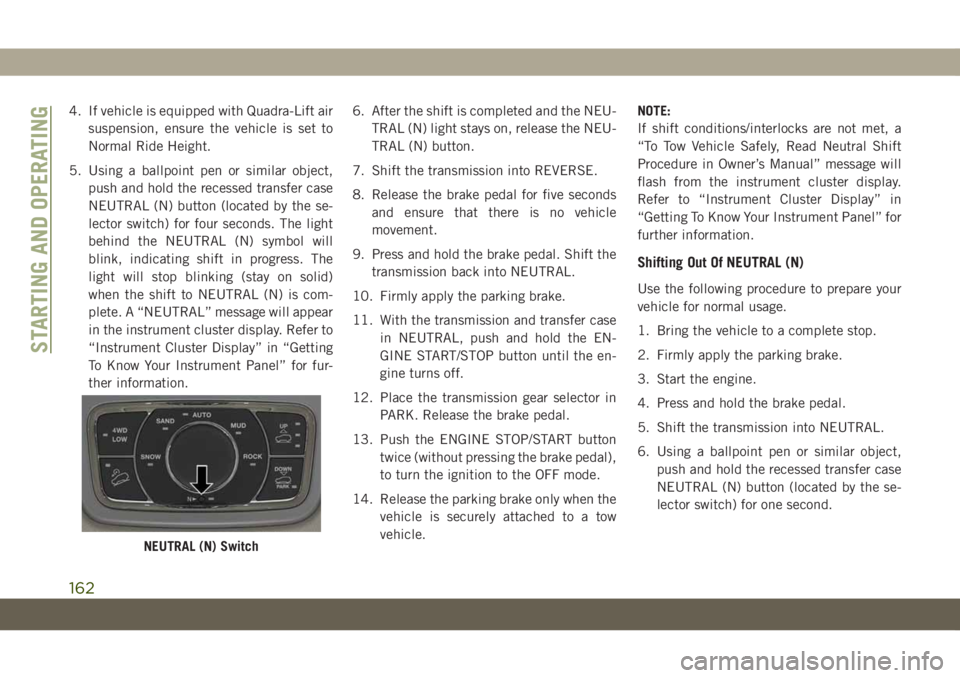
5. Using a ballpoint pen or similar object,
push and hold the recessed transfer case
NEUTRAL (N) button (located by the se-
lector switch) for four seconds. The light
behind the NEUTRAL (N) symbol will
blink, indicating shift in progress. The
light will stop blinking (stay on solid)
when the shift to NEUTRAL (N) is com-
plete. A “NEUTRAL” message will appear
in the instrument cluster display. Refer to
“Instrument Cluster Display” in “Getting
To Know Your Instrument Panel” for fur-
ther information.6. After the shift is completed and the NEU-
TRAL (N) light stays on, release the NEU-
TRAL (N) button.
7. Shift the transmission into REVERSE.
8. Release the brake pedal for five seconds
and ensure that there is no vehicle
movement.
9. Press and hold the brake pedal. Shift the
transmission back into NEUTRAL.
10. Firmly apply the parking brake.
11. With the transmission and transfer case
in NEUTRAL, push and hold the EN-
GINE START/STOP button until the en-
gine turns off.
12. Place the transmission gear selector in
PARK. Release the brake pedal.
13. Push the ENGINE STOP/START button
twice (without pressing the brake pedal),
to turn the ignition to the OFF mode.
14. Release the parking brake only when the
vehicle is securely attached to a tow
vehicle.NOTE:
If shift conditions/interlocks are not met, a
“To Tow Vehicle Safely, Read Neutral Shift
Procedure in Owner’s Manual” message will
flash from the instrument cluster display.
Refer to “Instrument Cluster Display” in
“Getting To Know Your Instrument Panel” for
further information.
Shifting Out Of NEUTRAL (N)
Use the following procedure to prepare your
vehicle for normal usage.
1. Bring the vehicle to a complete stop.
2. Firmly apply the parking brake.
3. Start the engine.
4. Press and hold the brake pedal.
5. Shift the transmission into NEUTRAL.
6. Using a ballpoint pen or similar object,
push and hold the recessed transfer case
NEUTRAL (N) button (located by the se-
lector switch) for one second.
NEUTRAL (N) Switch
STARTING AND OPERATING
162
Page 185 of 378
• When the LaneSense system senses the
lane has been approached and is in a lane
departure situation, the left thick lane line
flashes yellow (on/off), the left thin line
remains solid yellow and the LaneSense
telltale
changes from solid white to
flashing yellow.
NOTE:
The LaneSense system operates with the
similar behavior for a right lane departure
when only the right lane marking has been
detected.
Left Lane Departure — Both Lanes Detected
• When the LaneSense system is on, the lane
lines turn from gray to white to indicate that
both of the lane markings have been de-
tected. The LaneSense telltale
is solid
green when both lane markings have been
detected and the system is on to provide
visual warnings in the instrument cluster
display and a torque warning in the steering
wheel if an unintentional lane departure
occurs.• When the LaneSense system senses a lane
drift situation, the left thick lane line and
left thin line turn solid yellow. The Lane-
Sense telltale
changes from solid green
to solid yellow. At this time torque is ap-
plied to the steering wheel in the opposite
direction of the lane boundary.
For example: If approaching the left side of
the lane the steering wheel will turn to the
right.
• When the LaneSense system senses the
lane has been approached and is in a lane
departure situation, the left thick lane line
flashes yellow (on/off) and the left thin line
remains solid yellow. The LaneSense tell-
tale
changes from solid yellow to flash-
ing yellow. At this time torque is applied to
the steering wheel in the opposite direction
of the lane boundary.
For example: If approaching the left side of
the lane the steering wheel will turn to the
right.
NOTE:
The LaneSense system operates with the
similar behavior for a right lane departure.
Changing LaneSense Status
The LaneSense system has settings to adjust
the intensity of the torque warning and the
warning zone sensitivity (early/late) that you
can configure through the Uconnect system
screen. Refer to “Uconnect Settings” in
“Multimedia” in your Owner’s Manual for
further information.
NOTE:
• When enabled the system operates above
37 mph (60 km/h) and below 112 mph
(180 km/h).
• Use of the turn signal suppresses the warn-
ings.
• The system will not apply torque to the
steering wheel whenever a safety system
engages (anti-lock brakes, traction control
system, electronic stability control, forward
collision warning, etc.).
183