JEEP PATRIOT 2020 Owner handbook (in English)
Manufacturer: JEEP, Model Year: 2020, Model line: PATRIOT, Model: JEEP PATRIOT 2020Pages: 332, PDF Size: 1.99 MB
Page 61 of 332
room for the child seat. You may also move
the front seat forward to allow more room for
the child seat.
2. Pull enough of the seat belt webbing from
the retractor to pass it through the belt path
of the child restraint. Do not twist the belt
webbing in the belt path.
3. Slide the latch plate into the buckle until you
hear a “click.”
4. Pull on the webbing to make the lap portion
tight against the child seat.
5. To lock the seat belt, pull down on the
shoulder part of the belt until you have pulled
all the seat belt webbing out of the retractor.
Then, allow the webbing to retract back into
the retractor. As the webbing retracts, you
will hear a clicking sound. This means the
seat belt is now in the Automatic Locking
mode.6. Try to pull the webbing out of the retractor. If
it is locked, you should not be able to pull out
any webbing. If the retractor is not locked,
repeat step 5.
7.
Finally, pull up on any excess webbing to
tighten the lap portion around the child re-
straint while you push the child restraint rear-
ward and downward into the vehicle seat.
8. Test that the child restraint is installed tightly
by pulling back and forth on the child seat at
the belt path. It should not move more than
25 mm in any direction.
Any seat belt system will loosen with time, so
check the belt occasionally, and pull it tight if
necessary.
Transporting PetsAir Bags deploying in the front seat could harm
your pet. An unrestrained pet will be thrown
about and possibly injured, or injure a passen-
ger during panic braking or in a collision.
Pets should be restrained in the rear seat in pet
harnesses or pet carriers that are secured by
seat belts.
ENGINE BREAK-IN
RECOMMENDATIONS
A long break-in period is not required for the
engine and drivetrain (transmission and axle) in
your vehicle.
Drive moderately during the first 300 miles
(500 km). After the initial 60 miles (100 km),
speeds up to 50 or 55 mph (80 or 90 km/h) are
desirable.
While cruising, brief full-throttle acceleration
within the limits of local traffic laws contributes
to a good break-in. Wide-open throttle accelera-
tion in low gear can be detrimental and should
be avoided.
The engine oil installed in the engine at the
factory is a high-quality energy conserving type
lubricant. Oil changes should be consistent with
anticipated climate conditions under which ve-
hicle operations will occur. For the recom-
mended viscosity and quality grades, refer to
“Maintenance Procedures” in “Maintaining Your
Vehicle.”
57
Page 62 of 332
CAUTION!
Never use Non-Detergent Oil or Straight Min-
eral Oil in the engine or damage may result.
NOTE:
A new engine may consume some oil during
its first few thousand miles (kilometers) of
operation. This should be considered a nor-
mal part of the break-in and not interpreted
as a problem.
SAFETY TIPS
Transporting PassengersNEVER TRANSPORT PASSENGERS IN THE
CARGO AREA.
WARNING!
•Do not leave children or animals inside
parked vehicles in hot weather. Interior
heat build-up may cause serious injury or
death.
(Continued)
WARNING!(Continued)
•It is extremely dangerous to ride in a cargo
area, inside or outside of a vehicle. In a
collision, people riding in these areas are
more likely to be seriously injured or killed.
•Do not allow people to ride in any area of
your vehicle that is not equipped with seats
and seat belts.
•Be sure everyone in your vehicle is in a
seat and using a seat belt properly.
Exhaust Gas
WARNING!
Exhaust gases can injure or kill. They con-
tain carbon monoxide (CO), which is color-
less and odorless. Breathing it can make you
unconscious and can eventually poison you.
To avoid breathing (CO), follow these safety
tips:
(Continued)
WARNING!(Continued)
•Do not run the engine in a closed garage
or in confined areas any longer than
needed to move your vehicle in or out of
the area.
•If you are required to drive with the trunk/
liftgate/rear doors open, make sure that all
windows are closed and the climate con-
trol BLOWER switch is set at high speed.
DO NOT use the recirculation mode.
•If it is necessary to sit in a parked vehicle
with the engine running, adjust your heat-
ing or cooling controls to force outside air
into the vehicle. Set the blower at high
speed.
The best protection against carbon monoxide
entry into the vehicle body is a properly main-
tained engine exhaust system.
Whenever a change is noticed in the sound of
the exhaust system, when exhaust fumes can
be detected inside the vehicle, or when the
underside or rear of the vehicle is damaged,
have a competent mechanic inspect the com-
58
Page 63 of 332
plete exhaust system and adjacent body areas
for broken, damaged, deteriorated, or misposi-
tioned parts. Open seams or loose connections
could permit exhaust fumes to seep into the
passenger compartment. In addition, inspect
the exhaust system each time the vehicle is
raised for lubrication or oil change. Replace as
required.
Safety Checks You Should Make
Inside The Vehicle
Seat Belts
Inspect the seat belt system periodically, check-
ing for cuts, frays, and loose parts. Damaged
parts must be replaced immediately. Do not
disassemble or modify the system.
Front seat belt assemblies must be replaced
after a collision. Rear seat belt assemblies must
be replaced after a collision if they have been
damaged (i.e., bent retractor, torn webbing,
etc.). If there is any question regarding seat belt
or retractor condition, replace the seat belt.
Air Bag Warning Light
The Air Bag warning light
will turn on for four
to eight seconds as a bulb check when theignition is first placed in the ON/RUN position. If
the light is either not on during starting, stays
on, or turns on while driving, have the system
inspected at an authorized dealer as soon as
possible. This light will illuminate with a single
chime when a fault with the Air Bag Warning
Light has been detected, it will stay on until the
fault is cleared. If the light comes on intermit-
tently or remains on while driving, have an
authorized dealer service the vehicle immedi-
ately. Refer to “Occupant Restraints” for further
information.
Defroster
Check operation by selecting the defrost mode
and place the blower control on high speed. You
should be able to feel the air directed against
the windshield. See your authorized dealer for
service if your defroster is inoperable.
Floor Mat Safety Information
Always use floor mats designed to fit the foot-
well of your vehicle. Use only floor mats that
leave the pedal area unobstructed and that are
firmly secured so that they cannot slip out of
position and interfere with the pedals or impair
safe operation of your vehicle in other ways.
WARNING!
Pedals that cannot move freely can cause
loss of vehicle control and increase the risk
of serious personal injury.
•Always make sure that floor mats are
properly attached to the floor mat fasten-
ers.
•Never place or install floor mats or other
floor coverings in the vehicle that cannot
be properly secured to prevent them from
moving and interfering with the pedals or
the ability to control the vehicle.
•Never put floor mats or other floor cover-
ings on top of already installed floor mats.
Additional floor mats and other coverings
will reduce the size of the pedal area and
interfere with the pedals.
•Check mounting of mats on a regular
basis. Always properly reinstall and secure
floor mats that have been removed for
cleaning.
(Continued)
59
Page 64 of 332
WARNING!(Continued)
•Always make sure that objects cannot fall
into the driver footwell while the vehicle is
moving. Objects can become trapped un-
der the brake pedal and accelerator pedal
causing a loss of vehicle control.
•If required, mounting posts must be prop-
erly installed, if not equipped from the
factory.
Failure to properly follow floor mat installa-
tion or mounting can cause interference with
the brake pedal and accelerator pedal opera-
tion causing loss of control of the vehicle.
Periodic Safety Checks You Should
Make Outside The Vehicle
Tires
Examine tires for excessive tread wear and
uneven wear patterns. Check for stones, nails,
glass, or other objects lodged in the tread or
sidewall. Inspect the tread for cuts and cracks.
Inspect sidewalls for cuts, cracks, and bulges.
Check the wheel nuts for tightness. Check the
tires (including spare) for proper cold inflation
pressure.
Lights
Have someone observe the operation of brake
lights and exterior lights while you work the
controls. Check turn signal and high beam
indicator lights on the instrument panel.Door Latches
Check for proper closing, latching, and locking.
Fluid Leaks
Check area under vehicle after overnight park-
ing for fuel, engine coolant, oil, or other fluid
leaks. Also, if gasoline fumes are detected or if
fuel, power steering fluid (if equipped), or brake
fluid leaks are suspected. The cause should be
located and corrected immediately.
60
Page 65 of 332
3
UNDERSTANDING THE FEATURES OF YOUR
VEHICLE
•MIRRORS..................................65•Inside Day/Night Mirror.........................65
•Automatic Dimming Mirror — If Equipped..............65
•Outside Mirror — Driver Side.....................65
•Outside Mirror — Passenger Side...................65
•Folding Outside Mirrors........................66
•Power Mirrors..............................66
•Heated Mirrors — If Equipped.....................66
•Vanity Mirrors — If Equipped.....................66
•Sun Visor “Slide-On-Rod” Feature — If Equipped.........66
•UCONNECT PHONE — IF EQUIPPED . . . . . . . . . ........67•Operation.................................68
•Phone Call Features...........................72
•Uconnect Phone Features.......................73
•Advanced Phone Connectivity....................76
•Things You Should Know About Your Uconnect Phone......77
•VOICE COMMAND — IF EQUIPPED . .................85•Voice Command System Operation..................85
61
Page 66 of 332
•Commands..................................86
•Voice Training.................................88
•SEATS ......................................88•Power Seats — If Equipped........................88
•Heated Seats — If Equipped........................89
•Manual Front Seat Adjustment.......................90
•Manual Seat Height Adjustment — If Equipped.............90
•Manual Lumbar — If Equipped......................91
•Driver’s Seatback Recline.........................91
•Fold-Flat Front Passenger Seat — If Equipped.............92
•Head Restraints...............................92
•Folding Rear Seat..............................94
•Reclining Rear Seat — If Equipped....................95
•TO OPEN AND CLOSE THE HOOD . ....................95
•LIGHTS......................................96
•Multifunction Lever.............................96
•Headlights And Parking Lights......................96
•Daytime Running Lights — If Equipped.................97
•Lights-On Reminder.............................97
•Front Fog Lights...............................97
•Rear Fog Lights................................97
•Turn Signals.................................97
•Lane Change Assist.............................98
•High/Low Beam Switch...........................98
•Flash-To-Pass................................98
•Instrument Panel Dimmer..........................98
•Headlight Leveling System — If Equipped................98
62
Page 67 of 332
•Map/Reading/Lights...........................99•WINDSHIELD WIPERS AND WASHERS . . . . . . .. . . . . . . .100•Windshield Wiper Operation.....................100
•Intermittent Wiper System......................100
•Windshield Washers..........................101
•Mist Feature...............................101
•TILT STEERING COLUMN . . . . . . . . . . . . . . . . . . . . . . . .101
•ELECTRONIC SPEED CONTROL — IF EQUIPPED . . . . .. . . .102
•To Activate................................102
•To Set A Desired Speed........................103
•To Deactivate..............................103
•To Resume Speed...........................103
•To Vary The Speed Setting......................103
•Manual Transmission..........................104
•To Accelerate For Passing......................104
•PARKVIEW REAR BACK UP CAMERA — IF EQUIPPED . . . . .104
•POWER SUNROOF — IF EQUIPPED . . .. . . . . . . . . . . . . .106
•Opening Sunroof — Express.....................106
•Opening Sunroof — Manual Mode..................106
•Closing Sunroof — Express......................106
•Closing Sunroof — Manual Mode..................107
•Pinch Protect Feature.........................107
•Venting Sunroof — Express......................107
•Sunshade Operation..........................107
•Wind Buffeting.............................107
•Sunroof Maintenance..........................107
•Ignition Off Operation.........................107
63
Page 68 of 332
•ELECTRICAL POWER OUTLETS. . . . . . . . . . . . . . . . . . . . .108
•CUPHOLDERS . . . . . . . . . ........................109
•STORAGE . . . . . . . . . . . . . . . . . . . . . . . . . . . .. . . . . . . .109
•Glove Compartment And Storage Bin..................109
•Door Storage.................................110
•CONSOLE FEATURES . . . . . . . .....................111
•CARGO AREA FEATURES . . . . . . . . . . . . . . . . . . . .......111
•Cargo Light.................................111
•Cargo Cover.................................111
•Removable Load Floor...........................112
•Cargo Tie-Down Loops..........................112
•Fold Down Speakers — If Equipped...................113
•REAR WINDOW FEATURES . . . . . . . . . . . . . . . ..........113•Rear Window Wiper/Washer.......................113
•Rear Window Defroster..........................114
•ROOF LUGGAGE RACK — IF EQUIPPED . . . . . . . . . . . .....114
64
Page 69 of 332
MIRRORS
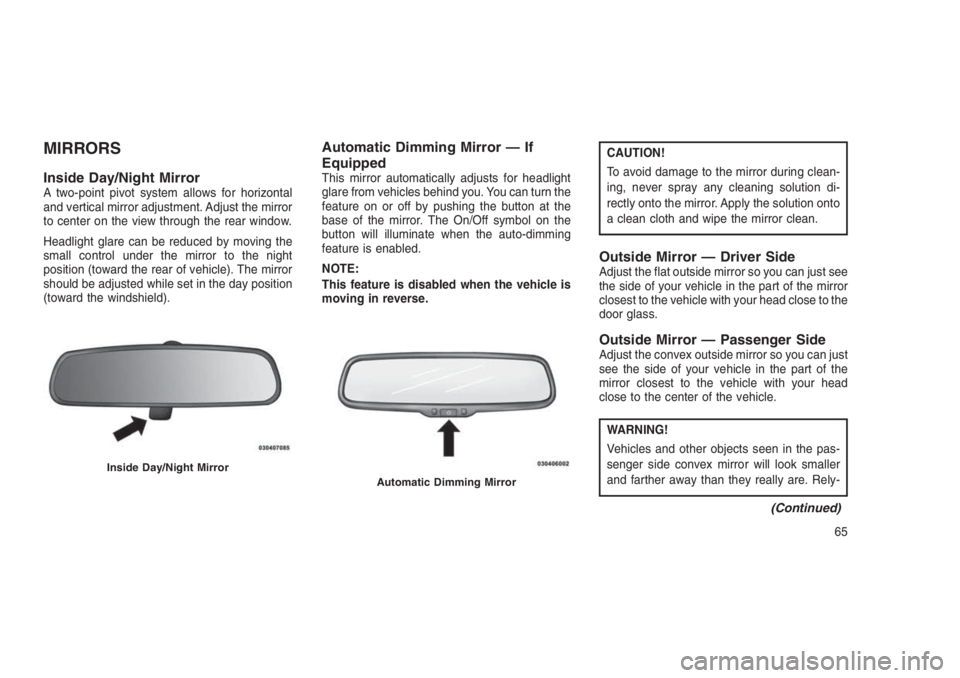
Inside Day/Night MirrorA two-point pivot system allows for horizontal
and vertical mirror adjustment. Adjust the mirror
to center on the view through the rear window.
Headlight glare can be reduced by moving the
small control under the mirror to the night
position (toward the rear of vehicle). The mirror
should be adjusted while set in the day position
(toward the windshield).
Automatic Dimming Mirror — If
Equipped
This mirror automatically adjusts for headlight
glare from vehicles behind you. You can turn the
feature on or off by pushing the button at the
base of the mirror. The On/Off symbol on the
button will illuminate when the auto-dimming
feature is enabled.
NOTE:
This feature is disabled when the vehicle is
moving in reverse.
CAUTION!
To avoid damage to the mirror during clean-
ing, never spray any cleaning solution di-
rectly onto the mirror. Apply the solution onto
a clean cloth and wipe the mirror clean.
Outside Mirror — Driver SideAdjust the flat outside mirror so you can just see
the side of your vehicle in the part of the mirror
closest to the vehicle with your head close to the
door glass.
Outside Mirror — Passenger SideAdjust the convex outside mirror so you can just
see the side of your vehicle in the part of the
mirror closest to the vehicle with your head
close to the center of the vehicle.
WARNING!
Vehicles and other objects seen in the pas-
senger side convex mirror will look smaller
and farther away than they really are. Rely-
(Continued)
Inside Day/Night MirrorAutomatic Dimming Mirror
65
Page 70 of 332
WARNING!(Continued)
ing too much on your passenger side convex
mirror could cause you to collide with an-
other vehicle or other object. Use your inside
mirror when judging the size or distance of a
vehicle seen in the passenger side convex
mirror. Some vehicles will not have a convex
passenger side mirror.
Folding Outside MirrorsThe outside mirrors are hinged and may be
moved, manually, either forward or rearward to
resist damage. The hinges have three detent
positions; full forward, full rearward and normal.
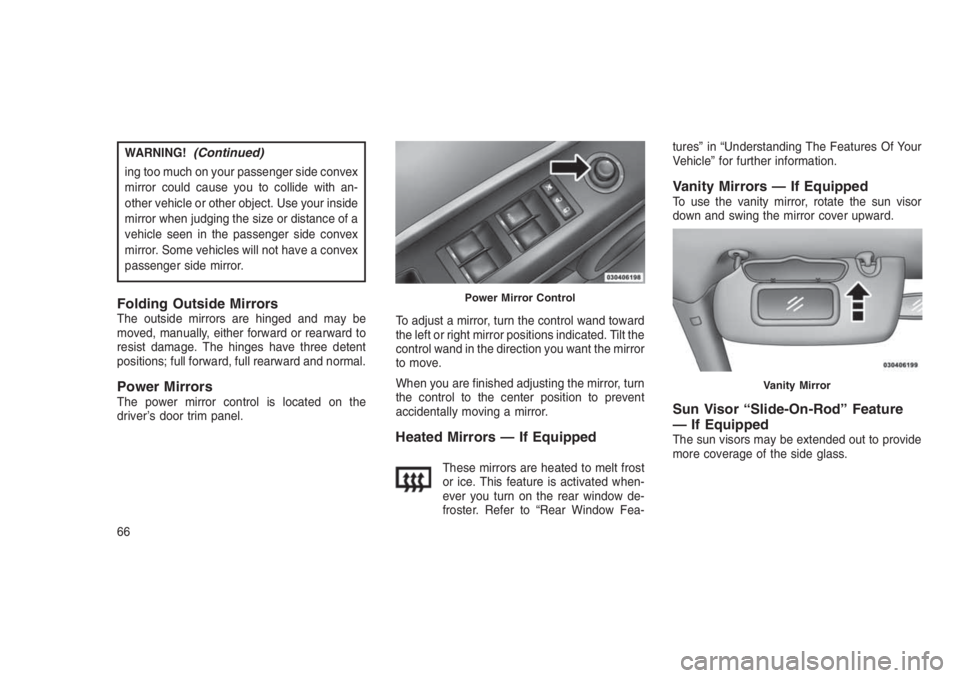
Power MirrorsThe power mirror control is located on the
driver’s door trim panel.To adjust a mirror, turn the control wand toward
the left or right mirror positions indicated. Tilt the
control wand in the direction you want the mirror
to move.
When you are finished adjusting the mirror, turn
the control to the center position to prevent
accidentally moving a mirror.
Heated Mirrors — If Equipped
These mirrors are heated to melt frost
or ice. This feature is activated when-
ever you turn on the rear window de-
froster. Refer to “Rear Window Fea-tures” in “Understanding The Features Of Your
Vehicle” for further information.
Vanity Mirrors — If EquippedTo use the vanity mirror, rotate the sun visor
down and swing the mirror cover upward.
Sun Visor “Slide-On-Rod” Feature
— If Equipped
The sun visors may be extended out to provide
more coverage of the side glass.
Power Mirror Control
Vanity Mirror
66