JEEP RENEGADE 2015 1.G Owners Manual
Manufacturer: JEEP, Model Year: 2015, Model line: RENEGADE, Model: JEEP RENEGADE 2015 1.GPages: 678, PDF Size: 29.84 MB
Page 421 of 678
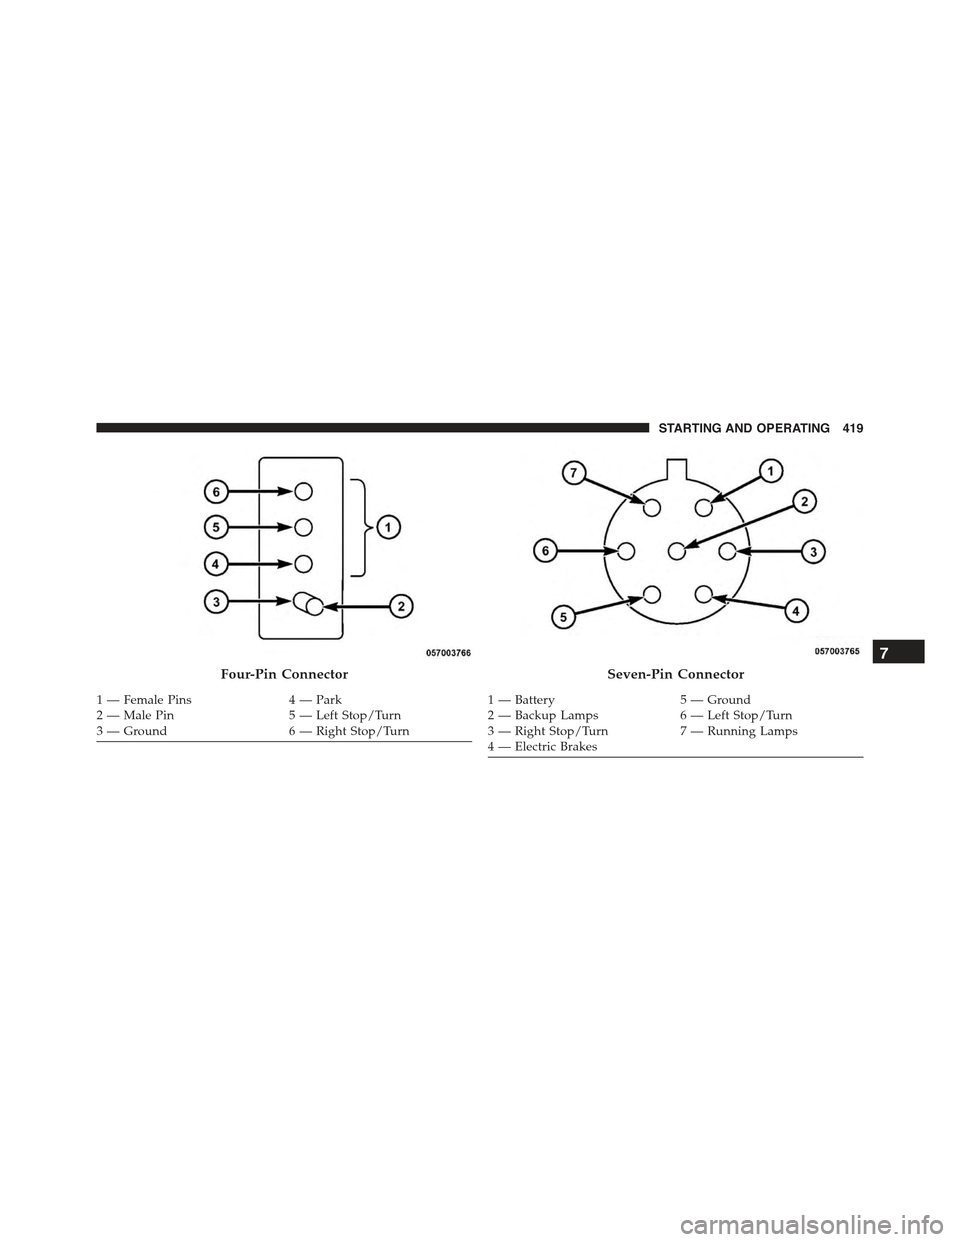
Four-Pin Connector
1 — Female Pins4 — Park2 — Male Pin5 — Left Stop/Turn3—Ground6—RightStop/Turn
Seven-Pin Connector
1—Battery5—Ground2—BackupLamps6—LeftStop/Turn3—RightStop/Turn7—RunningLamps4 — Electric Brakes
7
STARTING AND OPERATING 419
Page 422 of 678
Towing Tips
Before setting out on a trip, practice turning, stopping,
and backing the trailer in an area located away from
heavy traffic.
Automatic Transmission — If Equipped
The DRIVE range can be selected when towing. The
transmission controls include a drive strategy to avoid
frequent shifting when towing. However, if frequent
shifting does occur while in DRIVE, you can use the
AutoStick shift control to manually select a lower gear.
NOTE:Using a lower gear while operating the vehicle
under heavy loading conditions will improve perfor-
mance and extend transmission life by reducing exces-
sive shifting and heat build up. This action will also
provide better engine braking.
AutoStick
•When using the AutoStick shift control, select the
highest gear that allows for adequate performance and
avoids frequent downshifts. For example, choose “5” if
the desired speed can be maintained. Choose “4” or
“3” if needed to maintain the desired speed.
•To prevent excess heat generation, avoid continuous
driving at high RPM. Reduce vehicle speed as neces-
sary to avoid extended driving at high RPM. Return to
a higher gear or vehicle speed when grade and road
conditions allow.
420 STARTING AND OPERATING
Page 423 of 678
Electronic Speed Control — If Equipped
•Do not use in hilly terrain or with heavy loads.
•When using the speed control, if you experience speed
drops greater than 10 mph (16 km/h), disengage until
you can get back to cruising speed.
•Use speed control in flat terrain and with light loads to
maximize fuel efficiency.
Cooling System
To reduce potential for engine and transmission over-
heating, take the following actions:
City Driving
When stopped for short periods of time, shift the trans-
mission into NEUTRAL and increase engine idle speed.
Highway Driving
Reduce speed.
Air Conditioning
Turn off temporarily.
7
STARTING AND OPERATING 421
Page 424 of 678
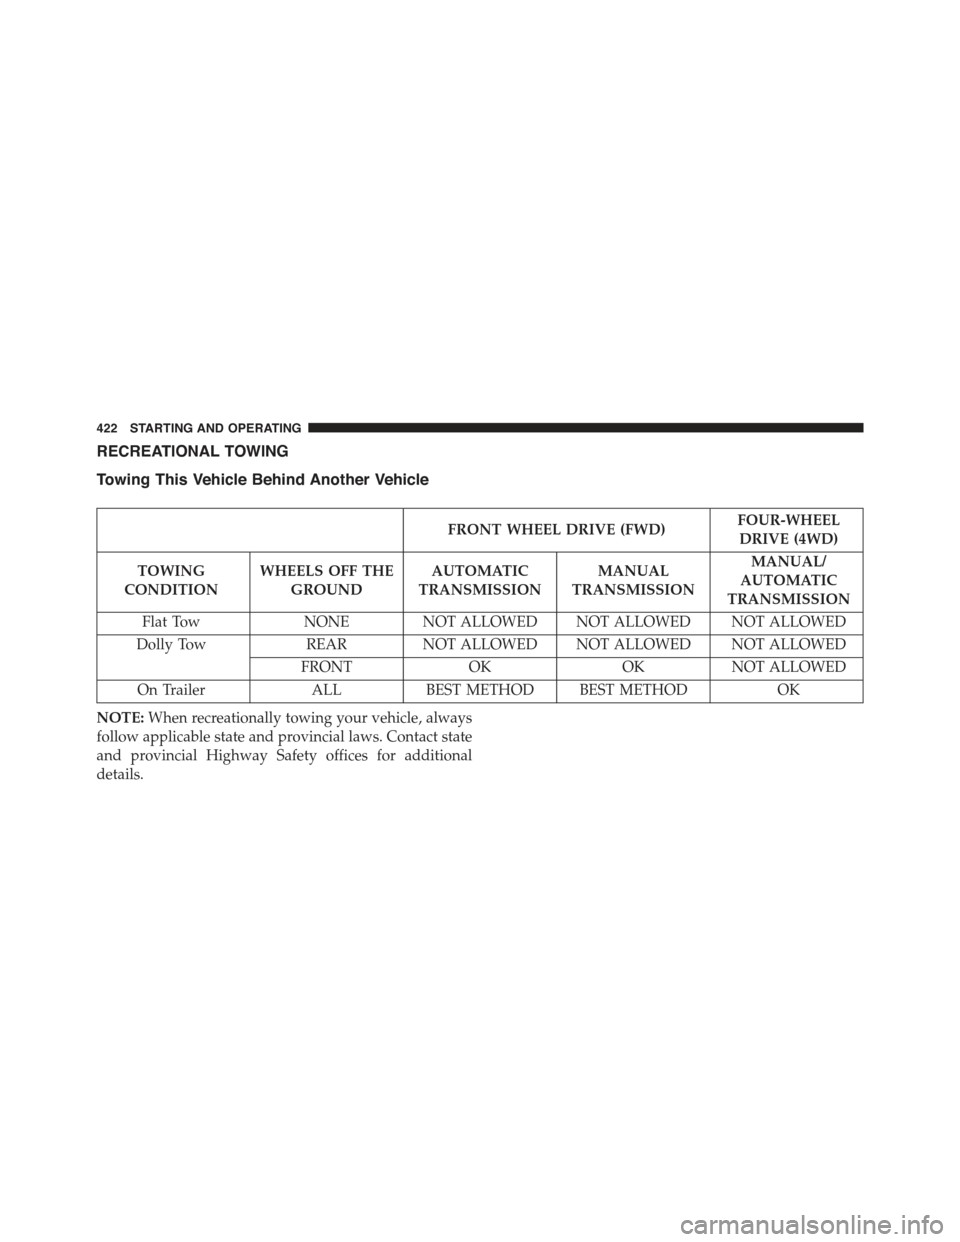
RECREATIONAL TOWING
Towing This Vehicle Behind Another Vehicle
FRONT WHEEL DRIVE (FWD)FOUR-WHEEL
DRIVE (4WD)
TOWING
CONDITION
WHEELS OFF THE
GROUND
AUTOMATIC
TRANSMISSION
MANUAL
TRANSMISSION
MANUAL/
AUTOMATIC
TRANSMISSION
Flat TowNONE NOT ALLOWED NOT ALLOWED NOT ALLOWED
Dolly TowREARNOT ALLOWED NOT ALLOWED NOT ALLOWED
FRONTOKOKNOT ALLOWED
On TrailerALLBEST METHOD BEST METHODOK
NOTE:When recreationally towing your vehicle, always
follow applicable state and provincial laws. Contact state
and provincial Highway Safety offices for additional
details.
422 STARTING AND OPERATING
Page 425 of 678
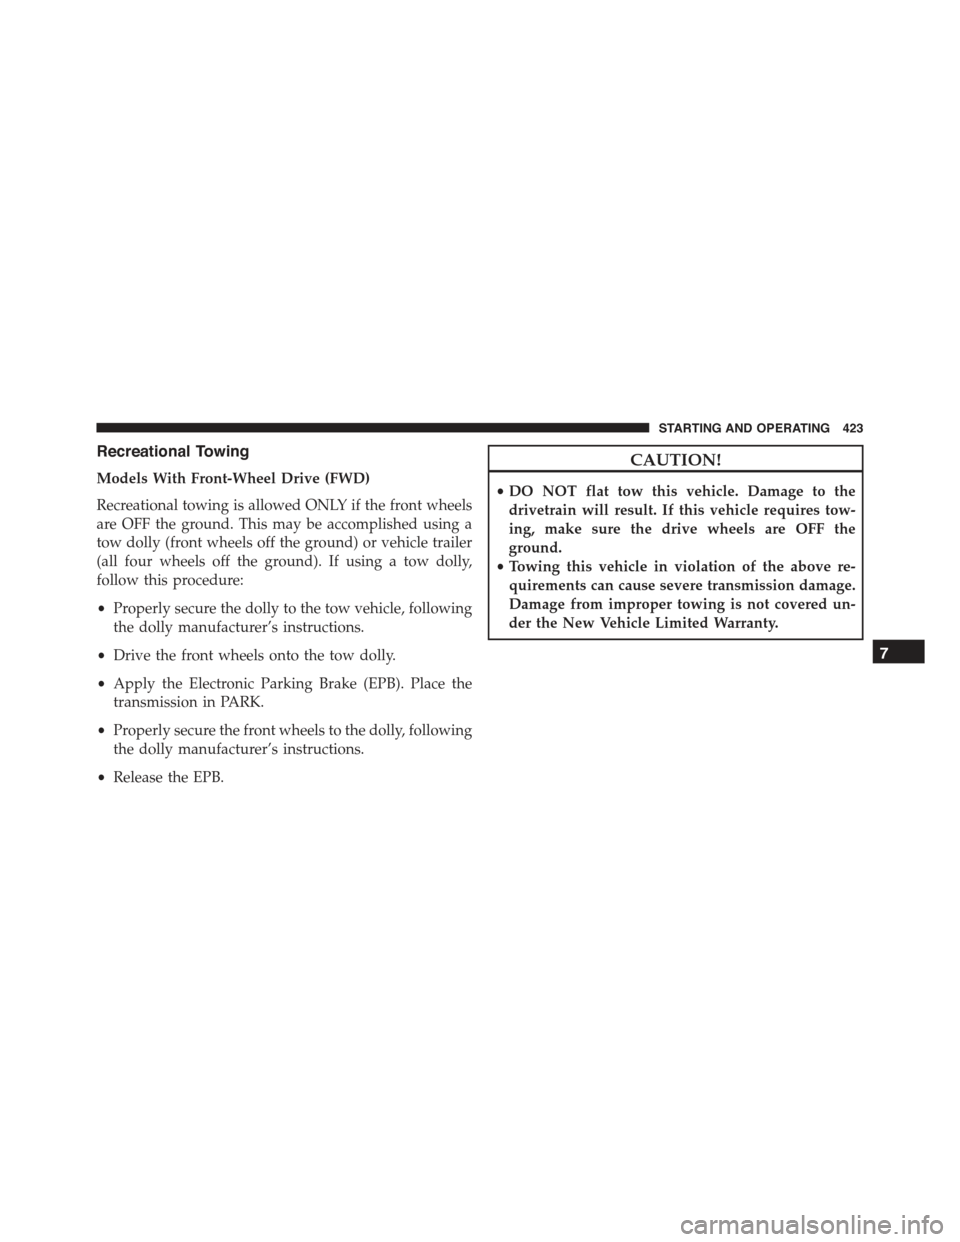
Recreational Towing
Models With Front-Wheel Drive (FWD)
Recreational towing is allowed ONLY if the front wheels
are OFF the ground. This may be accomplished using a
tow dolly (front wheels off the ground) or vehicle trailer
(all four wheels off the ground). If using a tow dolly,
follow this procedure:
•Properly secure the dolly to the tow vehicle, following
the dolly manufacturer’s instructions.
•Drive the front wheels onto the tow dolly.
•Apply the Electronic Parking Brake (EPB). Place the
transmission in PARK.
•Properly secure the front wheels to the dolly, following
the dolly manufacturer’s instructions.
•Release the EPB.
CAUTION!
•DO NOT flat tow this vehicle. Damage to the
drivetrain will result. If this vehicle requires tow-
ing, make sure the drive wheels are OFF the
ground.
•Towing this vehicle in violation of the above re-
quirements can cause severe transmission damage.
Damage from improper towing is not covered un-
der the New Vehicle Limited Warranty.
7
STARTING AND OPERATING 423
Page 426 of 678
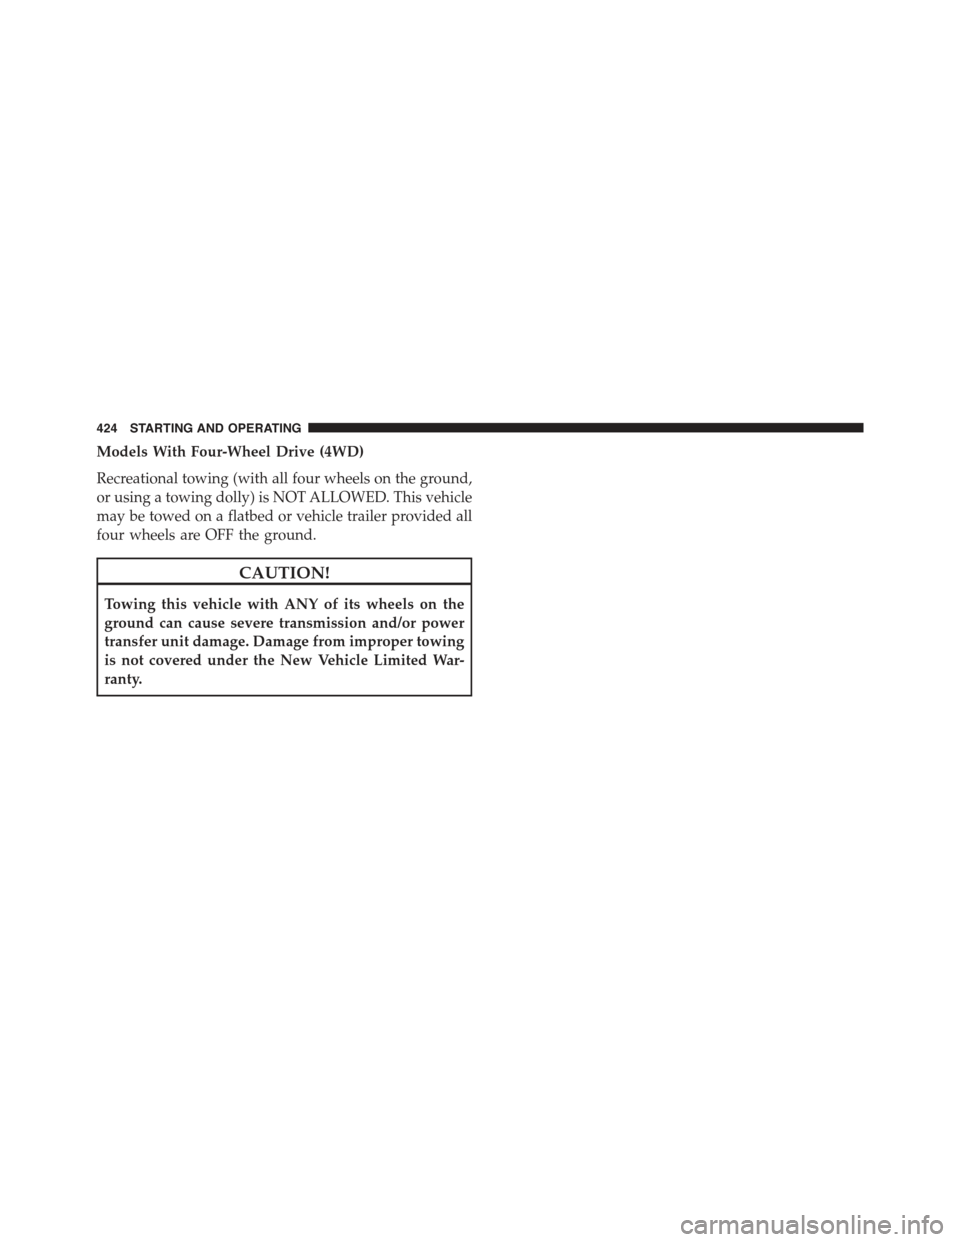
Models With Four-Wheel Drive (4WD)
Recreational towing (with all four wheels on the ground,
or using a towing dolly) is NOT ALLOWED. This vehicle
may be towed on a flatbed or vehicle trailer provided all
four wheels are OFF the ground.
CAUTION!
Towing this vehicle with ANY of its wheels on the
ground can cause severe transmission and/or power
transfer unit damage. Damage from improper towing
is not covered under the New Vehicle Limited War-
ranty.
424 STARTING AND OPERATING
Page 427 of 678
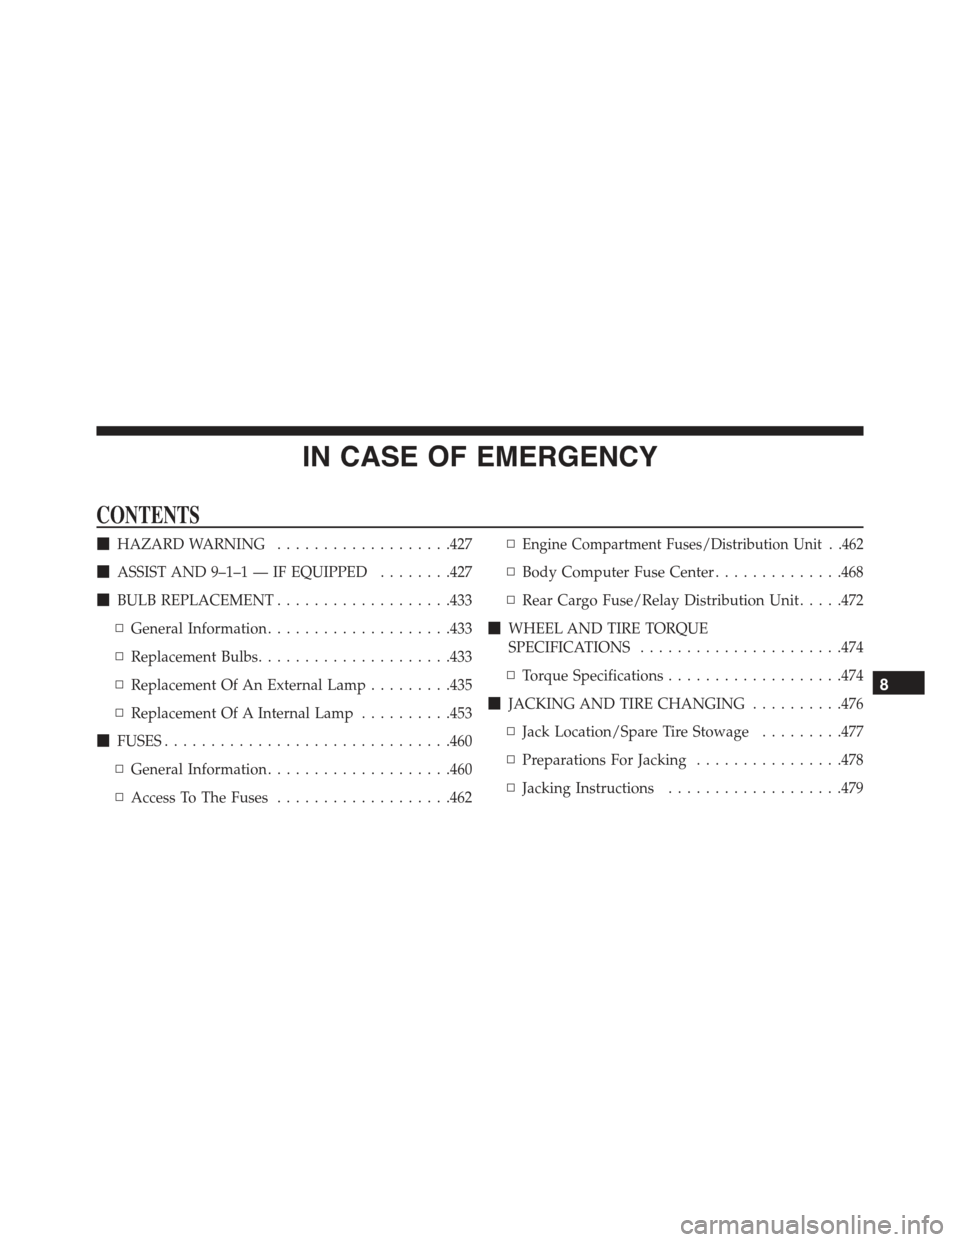
IN CASE OF EMERGENCY
CONTENTS
!HAZARD WARNING...................427
!ASSIST AND 9–1–1 — IF EQUIPPED........427
!BULB REPLACEMENT...................433
▫General Information....................433
▫Replacement Bulbs.....................433
▫Replacement Of An External Lamp.........435
▫Replacement Of A Internal Lamp..........453
!FUSES...............................460
▫General Information....................460
▫Access To The Fuses...................462
▫Engine Compartment Fuses/Distribution Unit . .462
▫Body Computer Fuse Center..............468
▫Rear Cargo Fuse/Relay Distribution Unit.....472
!WHEEL AND TIRE TORQUE
SPECIFICATIONS......................474
▫Torque Specifications...................474
!JACKING AND TIRE CHANGING..........476
▫Jack Location/Spare Tire Stowage.........477
▫Preparations For Jacking................478
▫Jacking Instructions...................479
8
Page 428 of 678
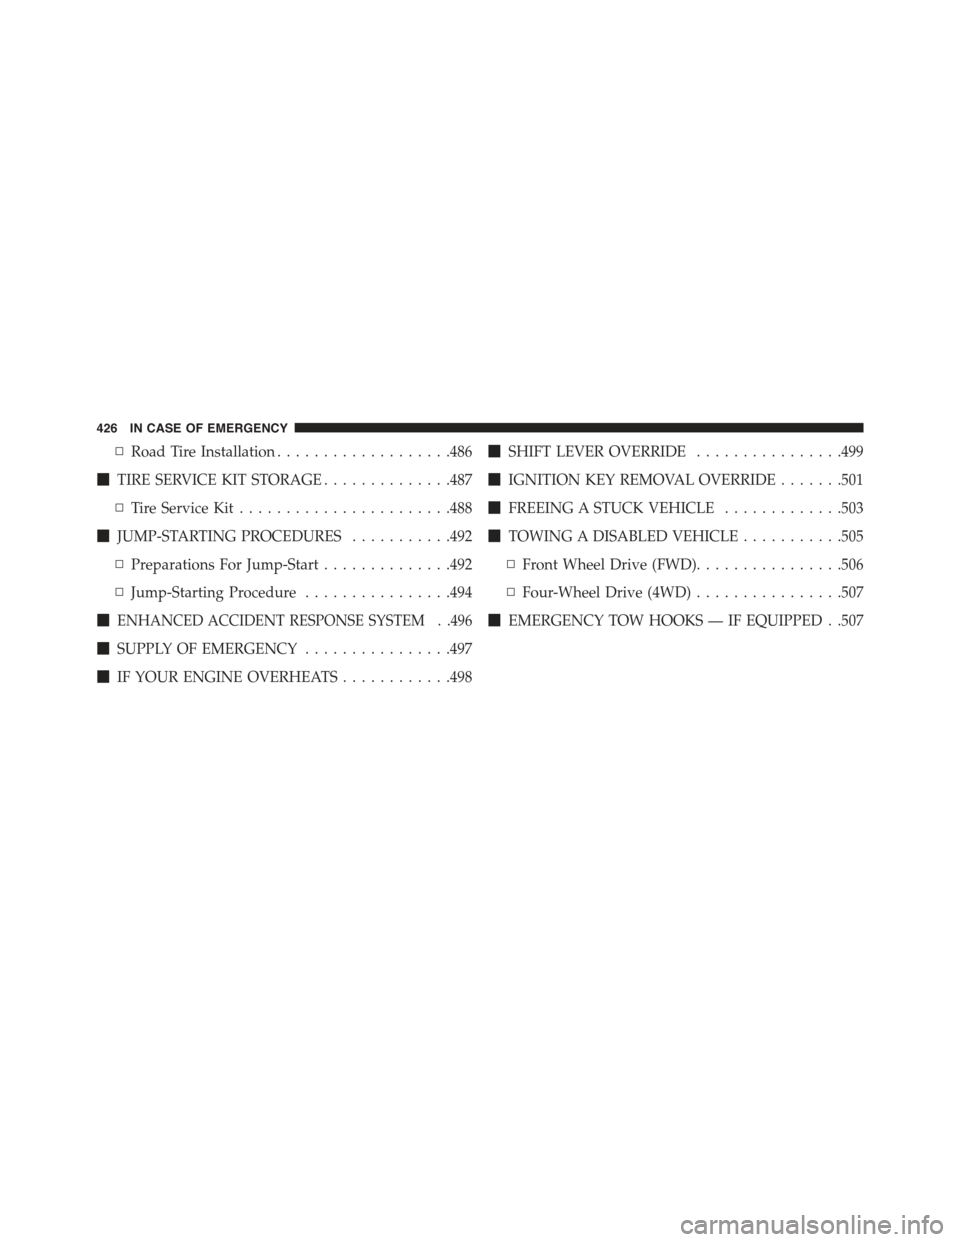
▫Road Tire Installation...................486
!TIRE SERVICE KIT STORAGE..............487
▫Tire Service Kit.......................488
!JUMP-STARTING PROCEDURES...........492
▫Preparations For Jump-Start..............492
▫Jump-Starting Procedure................494
!ENHANCED ACCIDENT RESPONSE SYSTEM . .496
!SUPPLY OF EMERGENCY................497
!IF YOUR ENGINE OVERHEATS............498
!SHIFT LEVER OVERRIDE................499
!IGNITION KEY REMOVAL OVERRIDE.......501
!FREEING A STUCK VEHICLE.............503
!TOWING A DISABLED VEHICLE...........505
▫Front Wheel Drive (FWD)................506
▫Four-Wheel Drive (4WD)................507
!EMERGENCY TOW HOOKS — IF EQUIPPED . .507
426 IN CASE OF EMERGENCY
Page 429 of 678
HAZARD WARNING
The Hazard Warning flasher switch is located on the
switch bank below the radio.
Push the switch to turn on the Hazard Warning
Flasher. When the switch is activated, all direc-
tional turn signals will flash on and off to warn oncoming
traffic of an emergency. Push the switch a second time to
turn off the Hazard Warning flashers.
This is an emergency warning system and it should not
be used when the vehicle is in motion. Use it when your
vehicle is disabled and it is creating a safety hazard for
other motorists.
When you must leave the vehicle to seek assistance, the
Hazard Warning flashers will continue to operate even
though the ignition is placed in the STOP/OFF position.
NOTE:With extended use the Hazard Warning flashers
may wear down your battery.
ASSIST AND 9–1–1 — IF EQUIPPED
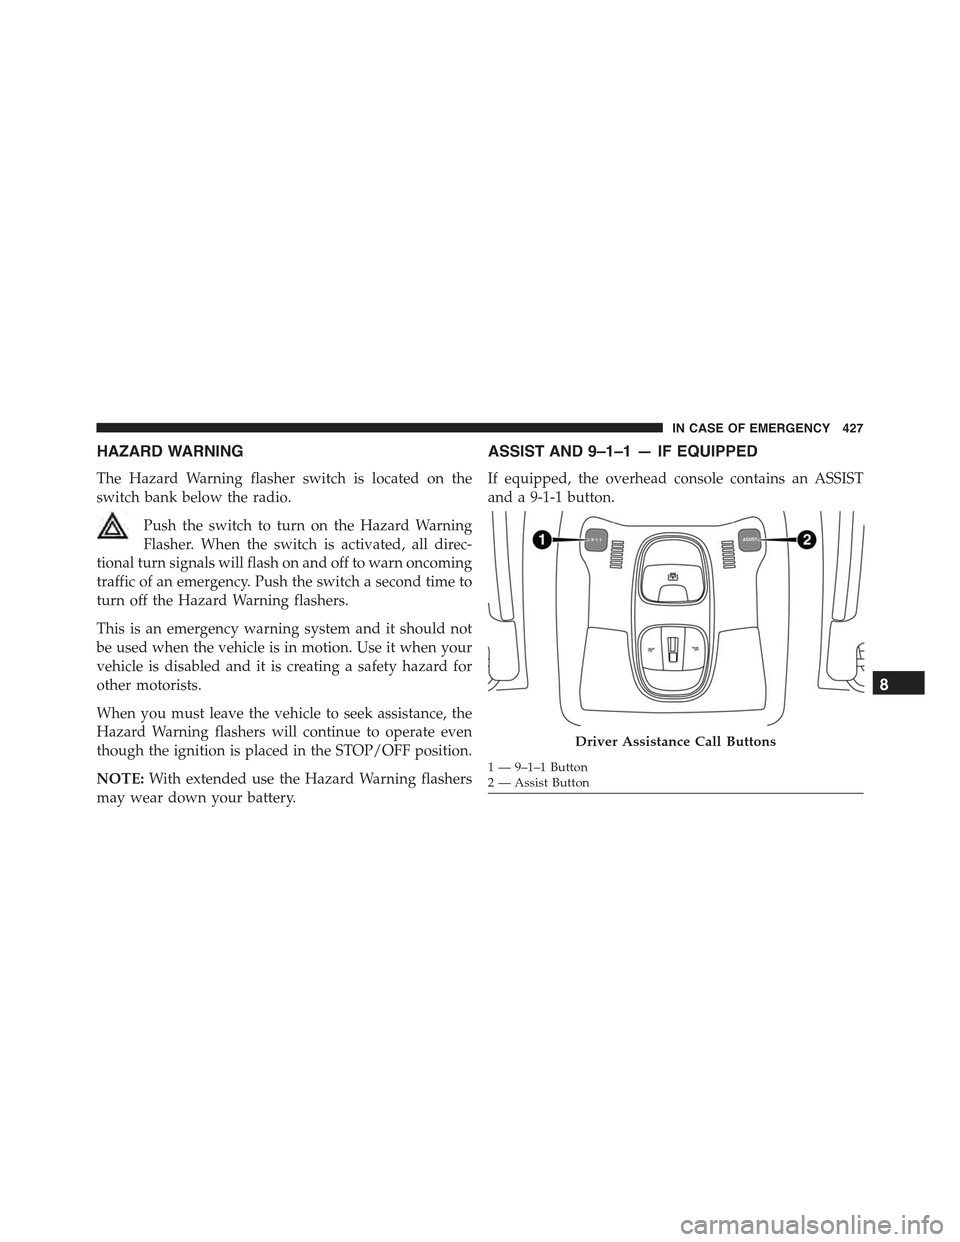
If equipped, the overhead console contains an ASSIST
and a 9-1-1 button.
Driver Assistance Call Buttons
1 — 9–1–1 Button2 — Assist Button
8
IN CASE OF EMERGENCY 427
Page 430 of 678
NOTE:The ASSIST and 9–1–1 features operate through
the Uconnect® Access service. These buttons will only
operate as long as your Uconnect® Access service is
active. Refer to your “Uconnect® Radio supplement” for
further information.
ASSIST Call
The ASSIST Button is used to automatically connect you
to any one of the following support centers:
•Roadside Assistance – If you get a flat tire, or need a
tow, just push the Assist button and you’ll be con-
nected to someone who can help. Roadside Assistance
will know what vehicle you’re driving and its location.
Additional fees may apply for Roadside Assistance.
•Uconnect® Access Customer Care – In-vehicle support
for Uconnect® Access and Uconnect® Access Via
Mobile features.
•Vehicle Customer Care – Total support for all other
vehicle issues.
9-1-1 Call
1. Push the 9-1-1 Call button on the overhead console.
NOTE:In case the 9-1-1 Call button is pushed in error,
there will be a 10 second delay before the 9-1-1 Call
system initiates a call to a 9-1-1 operator. To cancel the
9-1-1 Call connection, push the 9-1-1 Call button on the
overhead console or press the cancellation button on the
Phone Screen. Termination of the 9-1-1 Call will turn the
green LED light on the overhead console off.
2. The LED light located on the Assist and 9-1-1 buttons
in the overhead console will turn green once you push
these buttons and will remain on until the call is
ended.
428 IN CASE OF EMERGENCY