reset JEEP RENEGADE 2015 1.G Owner's Manual
[x] Cancel search | Manufacturer: JEEP, Model Year: 2015, Model line: RENEGADE, Model: JEEP RENEGADE 2015 1.GPages: 220, PDF Size: 34.11 MB
Page 140 of 220
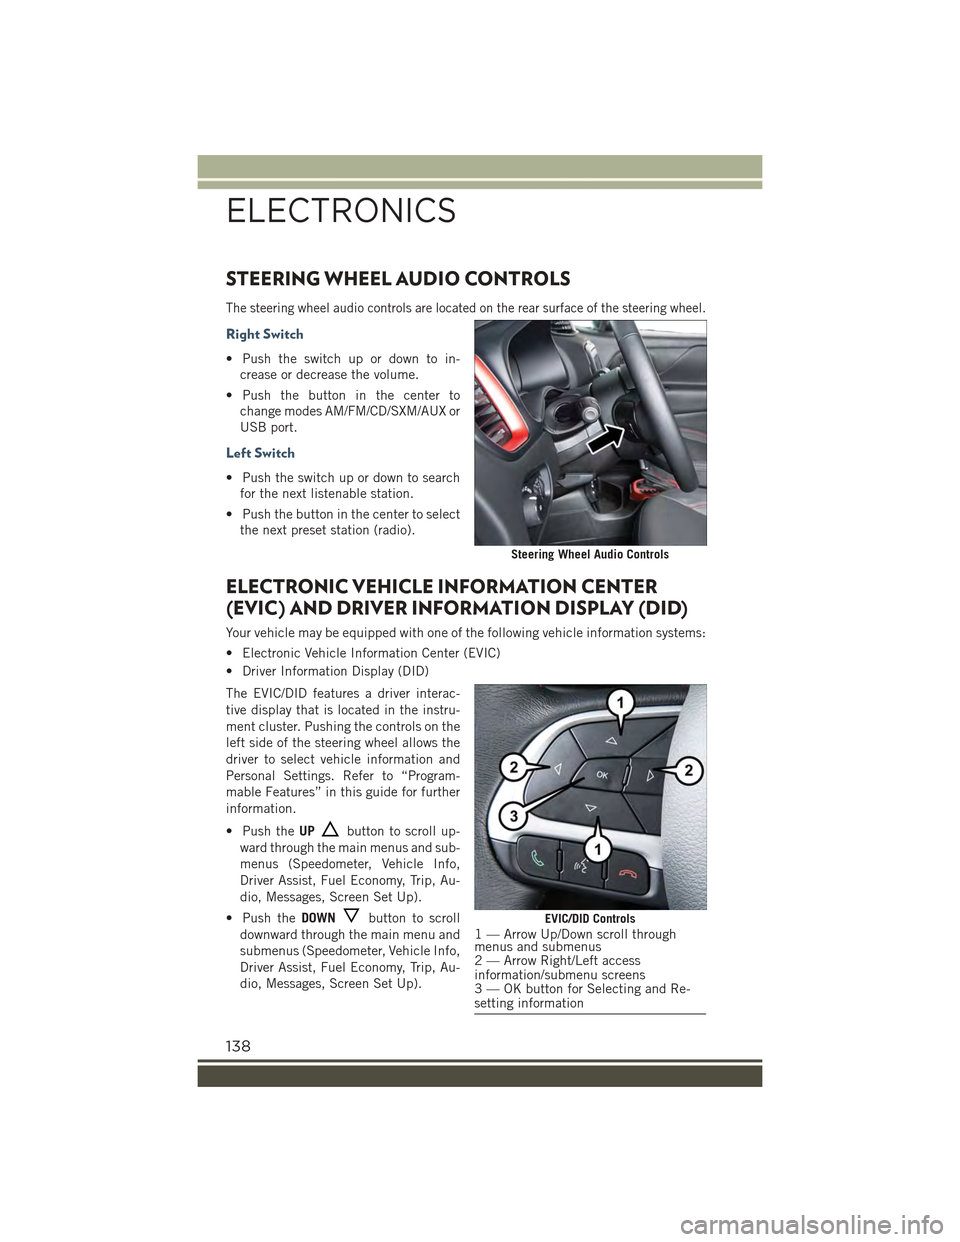
STEERING WHEEL AUDIO CONTROLS
The steering wheel audio controls are located on the rear surface of the steering wheel.
Right Switch
• Push the switch up or down to in-
crease or decrease the volume.
• Push the button in the center to
change modes AM/FM/CD/SXM/AUX or
USB port.
Left Switch
• Push the switch up or down to search
for the next listenable station.
• Push the button in the center to select
the next preset station (radio).
ELECTRONIC VEHICLE INFORMATION CENTER
(EVIC) AND DRIVER INFORMATION DISPLAY (DID)
Your vehicle may be equipped with one of the following vehicle information systems:
• Electronic Vehicle Information Center (EVIC)
• Driver Information Display (DID)
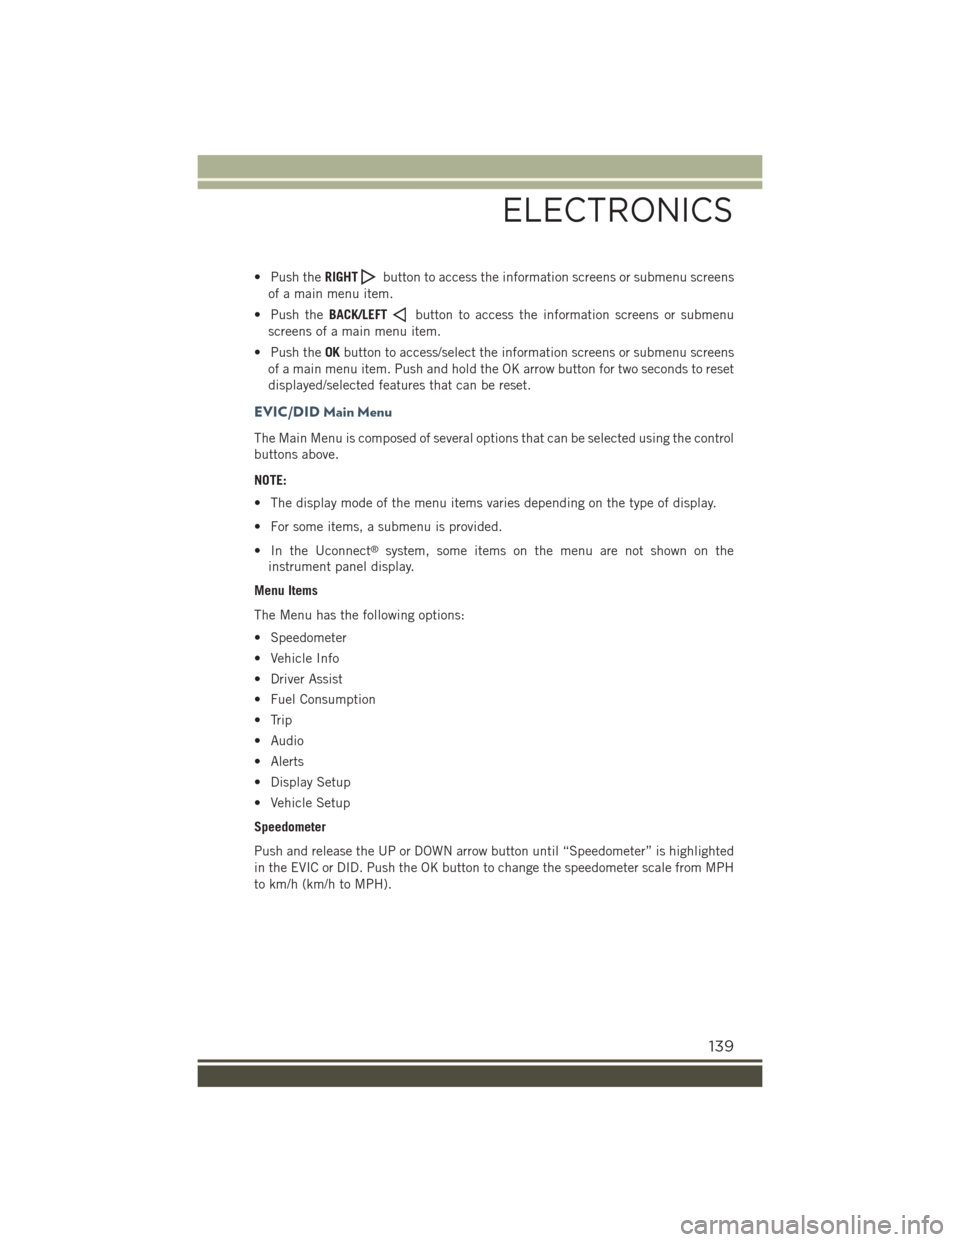
The EVIC/DID features a driver interac-
tive display that is located in the instru-
ment cluster. Pushing the controls on the
left side of the steering wheel allows the
driver to select vehicle information and
Personal Settings. Refer to “Program-
mable Features” in this guide for further
information.
• Push theUPbutton to scroll up-
ward through the main menus and sub-
menus (Speedometer, Vehicle Info,
Driver Assist, Fuel Economy, Trip, Au-
dio, Messages, Screen Set Up).
• Push theDOWNbutton to scroll
downward through the main menu and
submenus (Speedometer, Vehicle Info,
Driver Assist, Fuel Economy, Trip, Au-
dio, Messages, Screen Set Up).
Steering Wheel Audio Controls
EVIC/DID Controls1 — Arrow Up/Down scroll throughmenus and submenus2 — Arrow Right/Left accessinformation/submenu screens3 — OK button for Selecting and Re-setting information
ELECTRONICS
138
Page 141 of 220
• Push theRIGHTbutton to access the information screens or submenu screens
of a main menu item.
• Push theBACK/LEFTbutton to access the information screens or submenu
screens of a main menu item.
• Push theOKbutton to access/select the information screens or submenu screens
of a main menu item. Push and hold the OK arrow button for two seconds to reset
displayed/selected features that can be reset.
EVIC/DID Main Menu
The Main Menu is composed of several options that can be selected using the control
buttons above.
NOTE:
• The display mode of the menu items varies depending on the type of display.
• For some items, a submenu is provided.
• In the Uconnect®system, some items on the menu are not shown on the
instrument panel display.
Menu Items
The Menu has the following options:
• Speedometer
• Vehicle Info
• Driver Assist
• Fuel Consumption
• Trip
• Audio
• Alerts
• Display Setup
• Vehicle Setup
Speedometer
Push and release the UP or DOWN arrow button until “Speedometer” is highlighted
in the EVIC or DID. Push the OK button to change the speedometer scale from MPH
to km/h (km/h to MPH).
ELECTRONICS
139
Page 144 of 220
Display Gears (Vehicles With Reconfigurable Multi-Functional Display And Automatic
Transmission)
By selecting this item, you can select the display mode, the particulars relating to the
automatic transmission, and choose between the following options:
"Single digit"
• The right side of the display will show the letter concerning the automatic
transmission shift lever (P,N,R or D) position. After approximately two seconds, the
letter will be displayed in a central position.
"Full PNRD"
• (Default): The right side of the display the letters PNRD, the position assumed by
the shift lever will be highlighted in the display. During the operation in sequential
mode ("AutoStick"), in place of the letter D, the gear will be will be displayed.
In The Top Left/Top Right
The information relating to the following can be displayed:
• External temperature
• Compass (If Equipped)
• Date (Month/Day)
• Time (Hours/Minutes)
In the central area of the display, you can view all of the information listed above as
well as the following:
• Audio Information
• Speed Display (If Equipped)
• Date (Day/Month/Year)
• Range To Empty
• Menu Item
• Average Consumption
• Current Consumption
• Distance Traveled (Trip)
• Distance Traveled B (Trip B)
Restore Default Settings
Selecting this item, and you can reset and restore the default settings.
Vehicle Setup (Edit Settings Of The Car)
This menu item allows you to change the settings for the following:
• Display
• Units of measure
• Clock and Data
• Safety
ELECTRONICS
142
Page 149 of 220
NOTE:
The power inverter is designed with built-in overload protection. If the power rating
of 150 Watts is exceeded, the power inverter will automatically shut down. Once the
electrical device has been removed from the outlet, the inverter should automatically
reset. If the power rating exceeds approximately 170 Watts, the power inverter may
have to be reset manually. To reset the inverter manually, unplug the device and plug
it in again. To avoid overloading the circuit, check the power ratings on electrical
devices prior to using the inverter.
WARNING!
To Avoid Serious Injury or Death DO NOT:
• insert any objects into the receptacles
• touch with wet hands
Close the lid when not in use. If this outlet is mishandled, it may cause an electric
shock and failure.
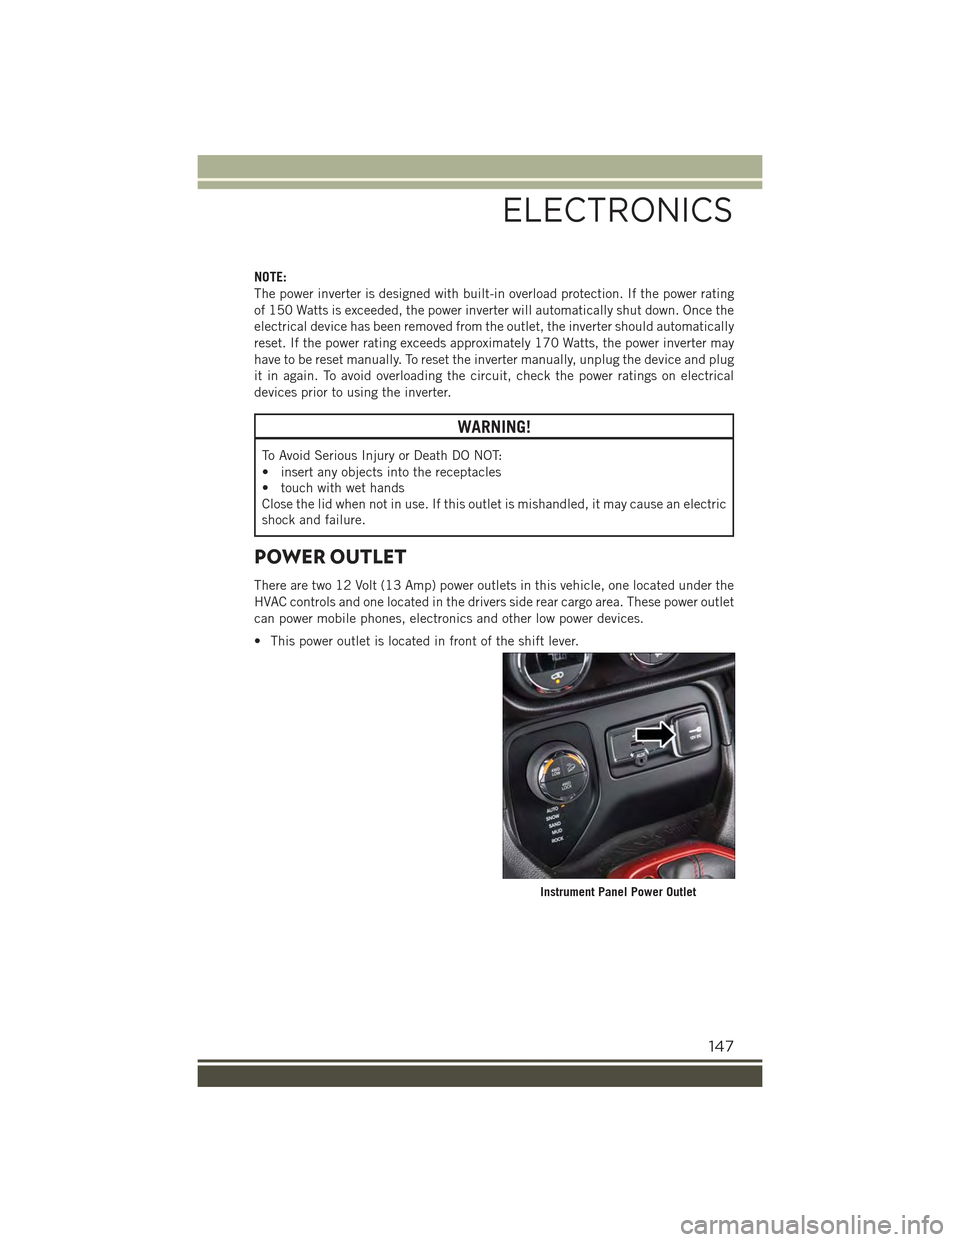
POWER OUTLET
There are two 12 Volt (13 Amp) power outlets in this vehicle, one located under the
HVAC controls and one located in the drivers side rear cargo area. These power outlet
can power mobile phones, electronics and other low power devices.
• This power outlet is located in front of the shift lever.
Instrument Panel Power Outlet
ELECTRONICS
147
Page 165 of 220
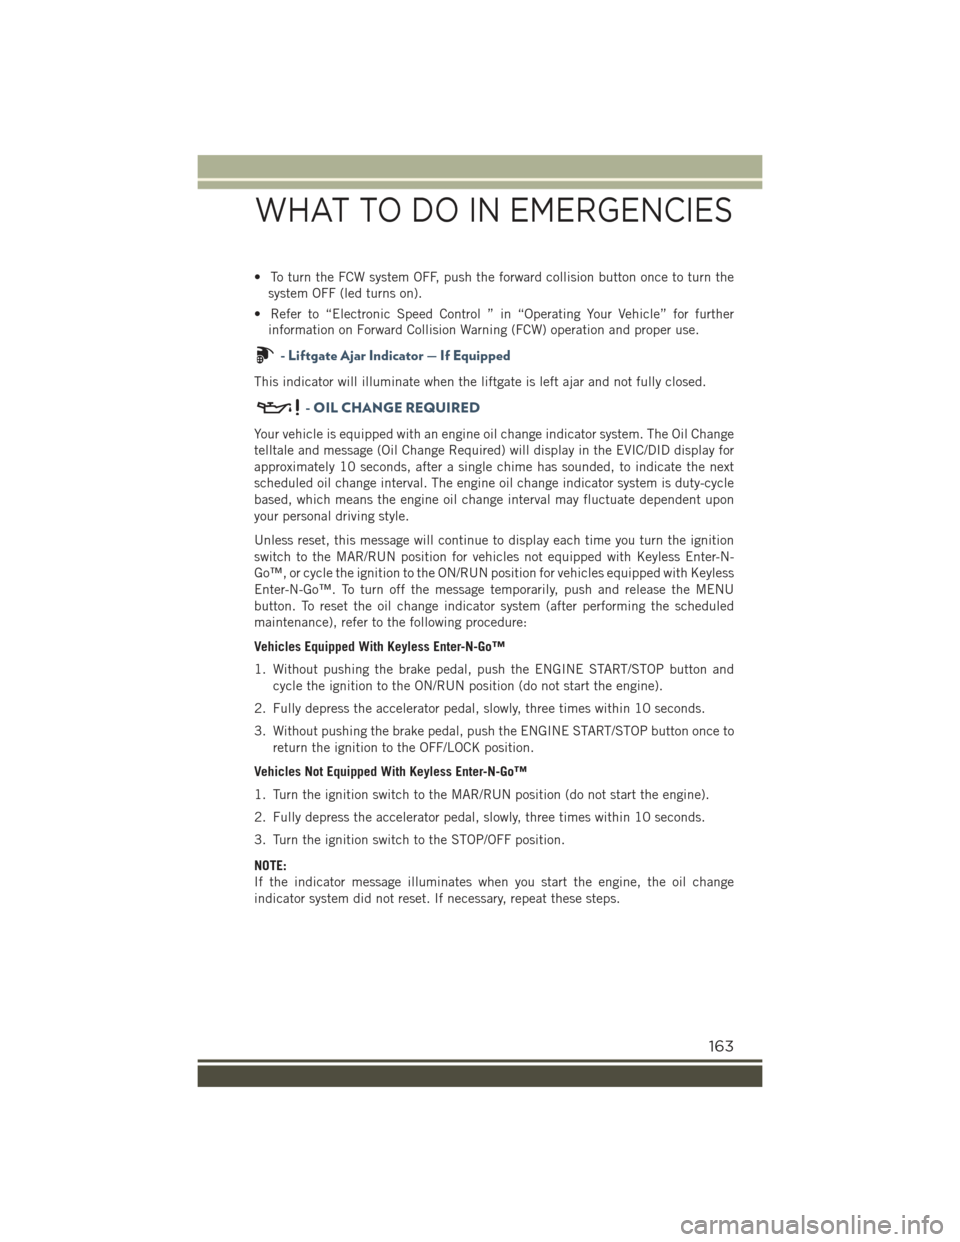
• To turn the FCW system OFF, push the forward collision button once to turn the
system OFF (led turns on).
• Refer to “Electronic Speed Control ” in “Operating Your Vehicle” for further
information on Forward Collision Warning (FCW) operation and proper use.
- Liftgate Ajar Indicator — If Equipped
This indicator will illuminate when the liftgate is left ajar and not fully closed.
-OILCHANGEREQUIRED
Your vehicle is equipped with an engine oil change indicator system. The Oil Change
telltale and message (Oil Change Required) will display in the EVIC/DID display for
approximately 10 seconds, after a single chime has sounded, to indicate the next
scheduled oil change interval. The engine oil change indicator system is duty-cycle
based, which means the engine oil change interval may fluctuate dependent upon
your personal driving style.
Unless reset, this message will continue to display each time you turn the ignition
switch to the MAR/RUN position for vehicles not equipped with Keyless Enter-N-
Go™, or cycle the ignition to the ON/RUN position for vehicles equipped with Keyless
Enter-N-Go™. To turn off the message temporarily, push and release the MENU
button. To reset the oil change indicator system (after performing the scheduled
maintenance), refer to the following procedure:
Vehicles Equipped With Keyless Enter-N-Go™
1. Without pushing the brake pedal, push the ENGINE START/STOP button and
cycle the ignition to the ON/RUN position (do not start the engine).
2. Fully depress the accelerator pedal, slowly, three times within 10 seconds.
3. Without pushing the brake pedal, push the ENGINE START/STOP button once to
return the ignition to the OFF/LOCK position.
Vehicles Not Equipped With Keyless Enter-N-Go™
1. Turn the ignition switch to the MAR/RUN position (do not start the engine).
2. Fully depress the accelerator pedal, slowly, three times within 10 seconds.
3. Turn the ignition switch to the STOP/OFF position.
NOTE:
If the indicator message illuminates when you start the engine, the oil change
indicator system did not reset. If necessary, repeat these steps.
WHAT TO DO IN EMERGENCIES
163
Page 189 of 220
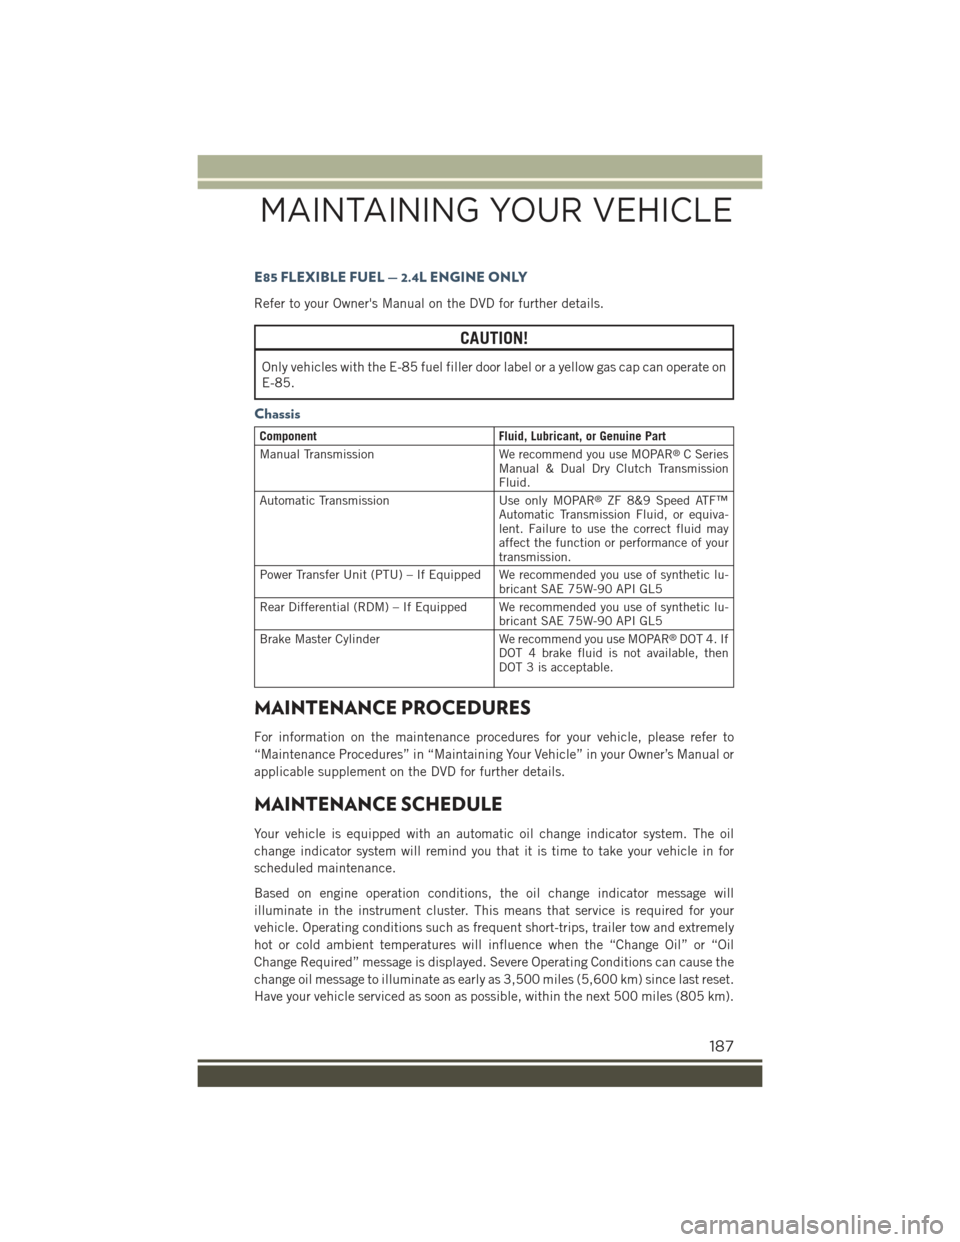
E85 FLEXIBLE FUEL — 2.4L ENGINE ONLY
Refer to your Owner's Manual on the DVD for further details.
CAUTION!
Only vehicles with the E-85 fuel filler door label or a yellow gas cap can operate on
E-85.
Chassis
ComponentFluid, Lubricant, or Genuine Part
Manual TransmissionWe recommend you use MOPAR®C SeriesManual & Dual Dry Clutch TransmissionFluid.
Automatic TransmissionUse only MOPAR®ZF 8&9 Speed ATF™Automatic Transmission Fluid, or equiva-lent. Failure to use the correct fluid mayaffect the function or performance of yourtransmission.
Power Transfer Unit (PTU) – If Equipped We recommended you use of synthetic lu-bricant SAE 75W-90 API GL5
Rear Differential (RDM) – If Equipped We recommended you use of synthetic lu-bricant SAE 75W-90 API GL5
Brake Master CylinderWe recommend you use MOPAR®DOT 4. IfDOT 4 brake fluid is not available, thenDOT 3 is acceptable.
MAINTENANCE PROCEDURES
For information on the maintenance procedures for your vehicle, please refer to
“Maintenance Procedures” in “Maintaining Your Vehicle” in your Owner’s Manual or
applicable supplement on the DVD for further details.
MAINTENANCE SCHEDULE
Your vehicle is equipped with an automatic oil change indicator system. The oil
change indicator system will remind you that it is time to take your vehicle in for
scheduled maintenance.
Based on engine operation conditions, the oil change indicator message will
illuminate in the instrument cluster. This means that service is required for your
vehicle. Operating conditions such as frequent short-trips, trailer tow and extremely
hot or cold ambient temperatures will influence when the “Change Oil” or “Oil
Change Required” message is displayed. Severe Operating Conditions can cause the
change oil message to illuminate as early as 3,500 miles (5,600 km) since last reset.
Have your vehicle serviced as soon as possible, within the next 500 miles (805 km).
MAINTAINING YOUR VEHICLE
187
Page 190 of 220
Your authorized dealer will reset the oil change indicator message after completing
the scheduled oil change. If a scheduled oil change is performed by someone other
than your authorized dealer, the message can be reset by referring to the steps
described under “Electronic Vehicle Information Center (EVIC)/Driver Information
Display (DID)” in “Getting To Know Your Instrument Panel” in your Owners Manual
on the DVD for further information.
NOTE:
Under no circumstances should oil change intervals exceed 10,000 miles
(16,000 km) or one year, whichever comes first.
Severe Duty All Models
Change Engine Oil at 4000 miles (6,500 km) if the vehicle is operated in a dusty and
off road environment. This type of vehicle use is considered Severe Duty
NOTE:
The Oil Change Indicator will not illuminate under these conditions.
Once A Month Or Before A Long Trip:
• Check engine oil level.
• Check windshield washer fluid level.
• Check the tire inflation pressures and look for unusual wear or damage.
• Check the fluid levels of the coolant reservoir, and brake master cylinder reservoir,
and fill as needed.
• Check function of all interior and exterior lights.
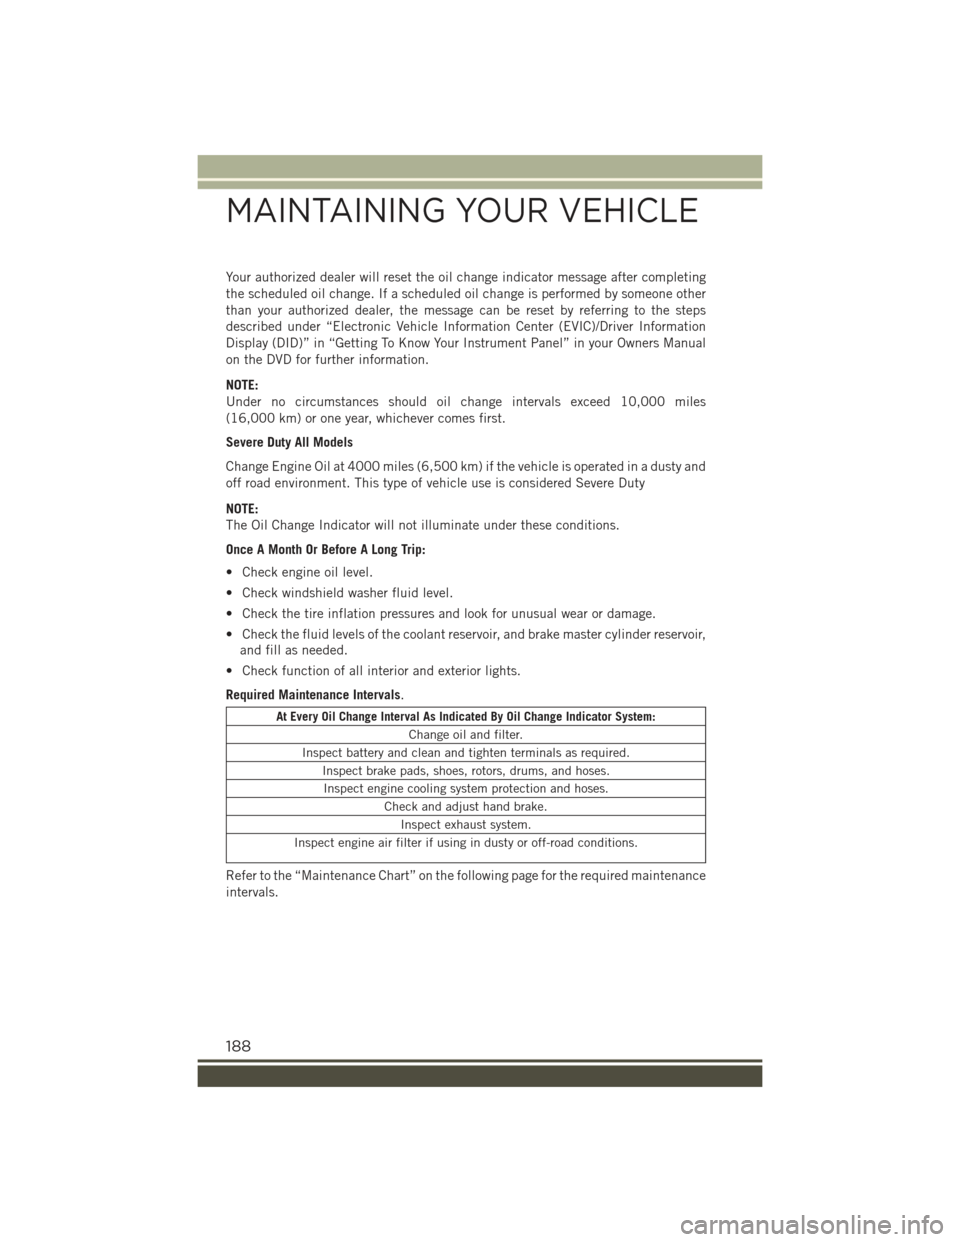
Required Maintenance Intervals.
At Every Oil Change Interval As Indicated By Oil Change Indicator System:
Change oil and filter.
Inspect battery and clean and tighten terminals as required.
Inspect brake pads, shoes, rotors, drums, and hoses.
Inspect engine cooling system protection and hoses.
Check and adjust hand brake.
Inspect exhaust system.
Inspect engine air filter if using in dusty or off-road conditions.
Refer to the “Maintenance Chart” on the following page for the required maintenance
intervals.
MAINTAINING YOUR VEHICLE
188