ECO mode JEEP RENEGADE 2023 Owner's Guide
[x] Cancel search | Manufacturer: JEEP, Model Year: 2023, Model line: RENEGADE, Model: JEEP RENEGADE 2023Pages: 364, PDF Size: 18.65 MB
Page 123 of 364
STARTING AND OPERATING 121
CHANGING LANESENSE STATUS
The LaneSense system has settings to adjust the
intensity of the torque warning and the warning
zone sensitivity (early/late) that you can configure
through the Uconnect system
Ú page 133.
NOTE:
When enabled the system operates above
37 mph (60 km/h) and below 112 mph
(180 km
/h).
Use of the turn signal suppresses the warnings.
The system will not apply torque to the steering
wheel whenever a safety system engages
(Anti-Lock Brakes, Traction Control System,
Electronic Stability Control, Forward Collision
Warning, etc.).
REAR BACK UP CAMERA
The Rear Back Up Camera allows you to see an
on-screen image of your vehicle's rear
surroundings when the gear selector is put into
REVERSE. The image will be displayed on the
touchscreen display along with a note to “Check
Entire Surroundings” across the top of the screen.
After five seconds, this note will disappear. The
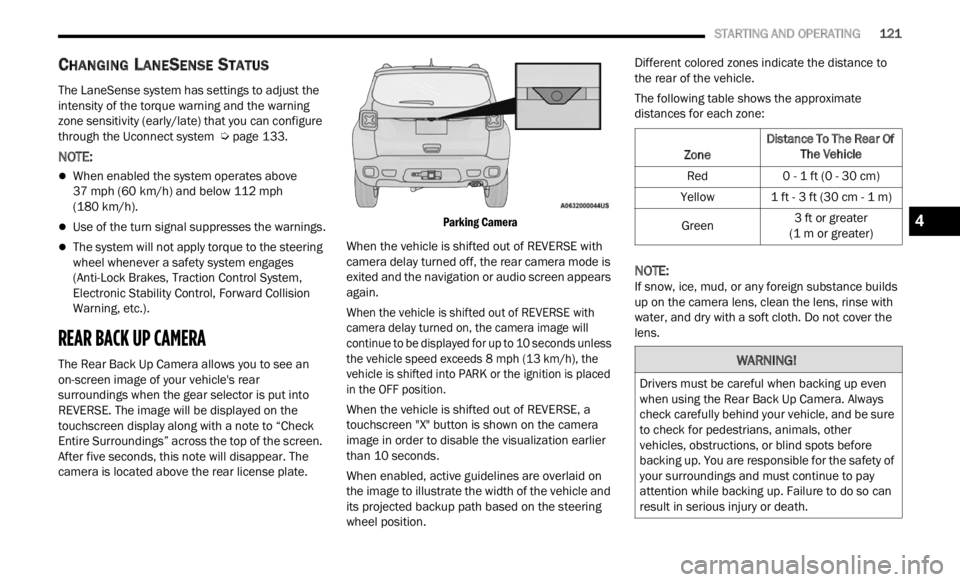
camera is located above the rear license plate.
Parking Camera
When the vehicle is shifted out of REVERSE with
camer a
delay turned off, the rear camera mode is
exited and the navigation or audio screen appears
again.
When the vehicle is shifted out of REVERSE with
camera
delay turned on, the camera image will
continue to be displayed for up to 10 seconds unless
the vehicle speed exceeds 8 mph (13 km/h), the
vehic l
e is shifted into PARK or the ignition is placed
in the OFF position.
When the vehicle is shifted out of REVERSE, a
touchs c
reen "X" button is shown on the camera
image in order to disable the visualization earlier
than 10 seconds.
When enabled, active guidelines are overlaid on
the im
age to illustrate the width of the vehicle and
its projected backup path based on the steering
wheel position. Different colored zones indicate the distance to
the r
e
ar of the vehicle.
The following table shows the approximate
distan
ces for each zone:
NOTE:
If snow, ice, mud, or any foreign substance builds
up on t
he camera lens, clean the lens, rinse with
water, and dry with a soft cloth. Do not cover the
lens.
Zone Distance To The Rear Of
The Ve hicle
Red 0 - 1 ft (0 - 30 cm)
Yellow 1 ft - 3 ft (30 cm - 1 m)
Green 3
ft or greater
(1 m or
greater)
WARNING!
Drivers must be careful when backing up even
when using the Rear Back Up Camera. Always
check carefully behind your vehicle, and be sure
to check for pedestrians, animals, other
vehicles, obstructions, or blind spots before
backing up. You are responsible for the safety of
your surroundings and must continue to pay
attention while backing up. Failure to do so can
result in serious injury or death.
4
Page 138 of 364

136 MULTIMEDIA
Units
Display Brightness With Headlights OFF This setting will allow you to set the brightness when the headlights are off. To
acces
s
this setting, Display Mode must be set to Manual. The “+” setting will
increase the brightness; the “-” will decrease the brightness.
Touchscreen Beep This setting will allow you to turn the touchscreen beep on or off.
Control Screen Timeout This setting will allow you to set the Control Screen to turn off automatically
after
five seconds or stay open until manually closed.
Navigation Next Turn Pop-ups Displayed in Cluster This setting will display navigation prompts in the Instrument Cluster Display.
Setting NameDescription
When the Units button is pressed on the touchscreen, the system displays the different measurement options. The selected unit of measurement will display in
the instrument cluster display and Navigation system (if equipped). The available settings are:
NOTE:
Depending on the vehicle’s options, feature settings may vary.
Setting Name Description
US This setting will change the unit of measurement on the display to US.
Metric This setting will change the unit of measurement on the display to Metric.
Custom This setting will change the “Speed” (MPH or km/h), “Distance” (mi or km),
“Fuel
Consumption” (MPG [US], MPG [UK], L/100 km, or km/L), “Pressure”
(psi,
kPa, or bar), and “Temperature” (°C or °F) units of measurement
independently.
Page 150 of 364
148 MULTIMEDIA
Feature Description
Radio/MediaPress/Push the Radio button or Media button to enter Radio Mode/Media
Mode a
n
d access the radio functions and external audio sources
Ú page 150.
Phone Press/Push the Phone button to enter Phone Mode and access the
h
ands-
free phone system Ú page 164.
Settings Press/Push the Settings button to access the Uconnect Settings Ú page 133.
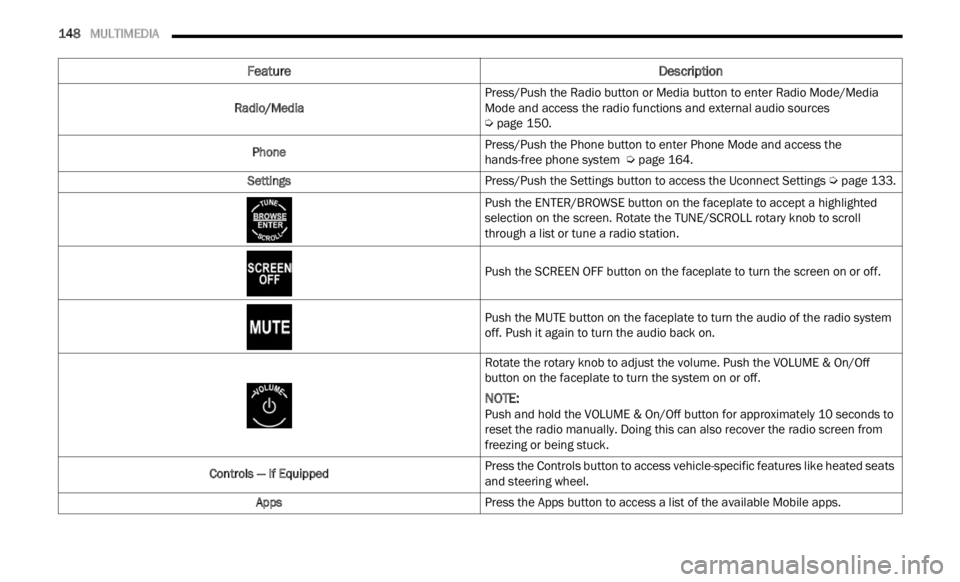
Push the ENTER/BROWSE button on the faceplate to accept a highlighted
s elec t
ion on the screen. Rotate the TUNE/SCROLL rotary knob to scroll
through a list or tune a radio station.
Push the SCREEN OFF button on the faceplate to turn the screen on or off.
Push the MUTE button on the faceplate to turn the audio of the radio system
off. Pu
sh it again to turn the audio back on.
Rotate the rotary knob to adjust the volume. Push the VOLUME & On/Off
button
on the faceplate to turn the system on or off.
NOTE:
Push and hold the VOLUME & On/Off button for approximately 10 seconds to
reset
the radio manually. Doing this can also recover the radio screen from
freezing or being stuck.
Controls — If Equipped Press the Controls button to access vehicle-specific features like heated seats
and st
eering wheel.
Apps Press the Apps button to access a list of the available Mobile apps.
Page 152 of 364
150 MULTIMEDIA
Safe Usage Of The Uconnect System
The Uconnect system is a sophisticated elec -
tronic device. Do not let young children use the
syste m
.
Permanent hearing loss may occur if you play
your music or sound system at loud volumes.
Exercise caution when setting the volume on the
system.
Keep drinks, rain and other sources of moisture
away from the system. Besides damage to the
system, moisture can cause electric shocks as
with any electronic device.
NOTE:
Many features of this system are speed
depen d
ent. For your own safety, it is not possible to
use some of the touchscreen features while the
vehicle is in motion.
Care And Maintenance
Do not press the touchscreen with any hard or
sharp objects (pen, USB stick, jewelry, etc.),
which could scratch the surface.
Do not spray any liquid or chemicals directly on
the screen! Use a clean and dry microfiber lens
cleaning cloth in order to clean the touchscreen.
If necessary, use a lint-free cloth dampened
with a cleaning solution, such as isopropyl
alcohol or an isopropyl alcohol and water solu -tion ratio of 50:50. Be sure to follow the solvent
manuf
a
cturer's precautions and directions
Ú page 349.
UCONNECT MODES
STEERING WHEEL AUDIO CONTROLS
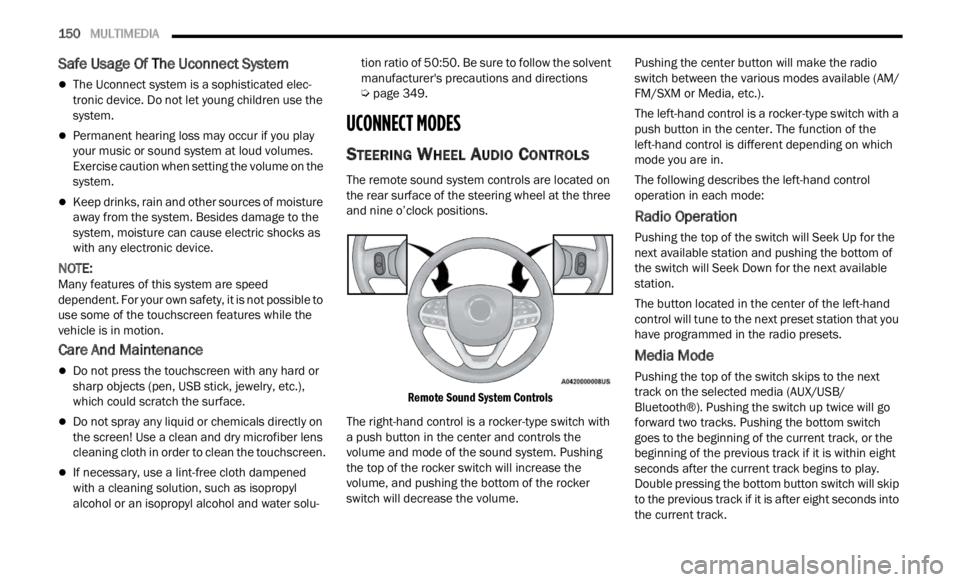
The remote sound system controls are located on
the rear surface of the steering wheel at the three
and nine o’clock positions.
Remote Sound System Controls
The right-hand control is a rocker-type switch with
a pus h
button in the center and controls the
volume and mode of the sound system. Pushing
the top of the rocker switch will increase the
volume, and pushing the bottom of the rocker
switch will decrease the volume. Pushing the center button will make the radio
switc
h
between the various modes available (AM/
FM/SXM or Media, etc.).
The left-hand control is a rocker-type switch with a
push b
utton in the center. The function of the
left-hand control is different depending on which
mode you are in.
The following describes the left-hand control
operati
on in each mode:
Radio Operation
Pushing the top of the switch will Seek Up for the
next available station and pushing the bottom of
the switch will Seek Down for the next available
station.
The button located in the center of the left-hand
control
will tune to the next preset station that you
have programmed in the radio presets.
Media Mode
Pushing the top of the switch skips to the next
track on the selected media (AUX/USB/
Bluetooth®). Pushing the switch up twice will go
forward two tracks. Pushing the bottom switch
goes to the beginning of the current track, or the
beginning of the previous track if it is within eight
seconds after the current track begins to play.
Double pressing the bottom button switch will skip
to the previous track if it is after eight seconds into
the current track.
Page 153 of 364
MULTIMEDIA 151
RADIO MODE
Radio Controls
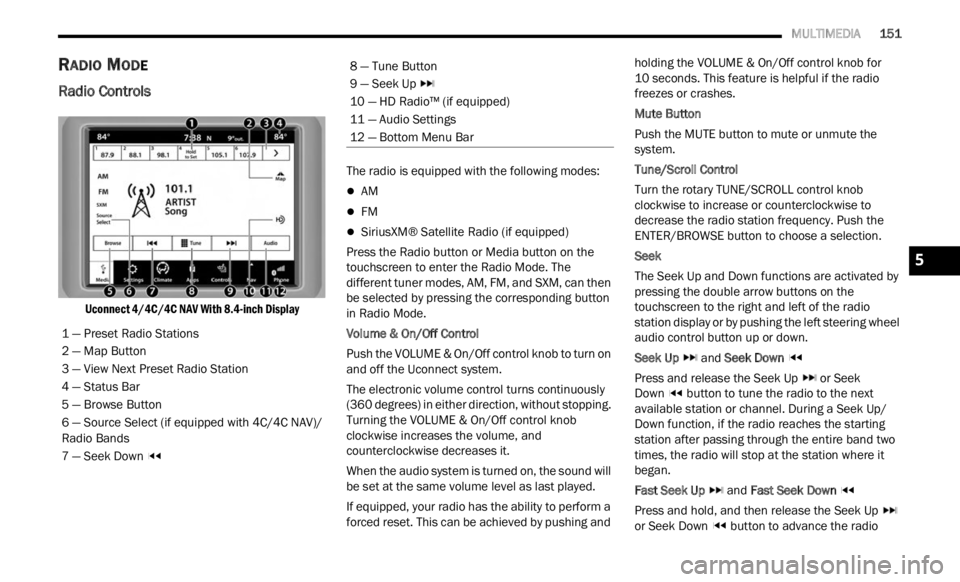
Uconnect 4/4C/4C NAV With 8.4-inch Display
The radio is equipped with the following modes:
AM
FM
SiriusXM® Satellite Radio (if equipped)
Press the Radio button or M
ed
i
a button on the
touchscreen to enter the Radio Mode. The
different tuner modes, AM, FM, and SXM, can then
be selected by pressing the corresponding button
in Radio Mode.
Volume & On/Off Control
Push the VOLUME & On/Off control knob to turn on
a nd of f
the Uconnect system.
The electronic volume control turns continuously
(360 d
egrees) in either direction, without stopping.
Turning the VOLUME & On/Off control knob
clockwise increases the volume, and
counterclockwise decreases it.
When the audio system is turned on, the sound will
be se t
at the same volume level as last played.
If equipped, your radio has the ability to perform a
forced
reset. This can be achieved by pushing and holding the VOLUME & On/Off control knob for
10 seconds. This feature is helpful if the radio
freez e
s or crashes.
Mute Button
Push the MUTE button to mute or unmute the
syste m
.
Tune/Scroll Control
Turn the rotary TUNE/SCROLL control knob
clock w
ise to increase or counterclockwise to
decrease the radio station frequency. Push the
ENTER/BROWSE button to choose a selection.
Seek
The Seek Up and Down functions are activated by
press i
ng the double arrow buttons on the
touchscreen to the right and left of the radio
station display or by pushing the left steering wheel
audio control button up or down.
Seek Up and Seek Down
Pres s
and release the Seek Up or Seek
Down button to tune the radio to the next
available station or channel. During a Seek Up/
D own f u
nction, if the radio reaches the starting
station after passing through the entire band two
times, the radio will stop at the station where it
began.
Fast Seek Up and Fast Seek Down
Pres s
and hold, and then release the Seek Up
or Seek Down button to advance the radio
1 — Preset Radio Stations
2 — Map Button
3 — View Next Preset Radio Station
4 — Status Bar
5 — Browse Button
6 — Source Select (if equipped with 4C/4C NAV)/
R
adio B
ands
7 — Seek Down
8 — Tune Button
9 — Seek Up
10 — HD Radio™ (if equipped)
11 — Audio Settings
12 — Bottom Menu Bar
5
Page 155 of 364

MULTIMEDIA 153
When HD Radio™ broadcasts are active, you can
access the following functions:
Seek Up And Down: Press to seek to the next
strong radio station. If the current station has
multiple digital broadcasts, the multicast indi -
cator numbers will display. Press “Seek” repeat -
edly to advance through all available
b roadc
asts. If you are on the last multicast
channel, press “Seek Up” to advance to the next
strong station.
Saving A Multicast Station As A Preset: When
the channel is active on-screen, press and hold
a Preset button; it will save the station to the
available slot. When recalling an HD2, HD3, etc.
memory preset, there will be a momentary mute
before the digital audio is played as the system
acquires the digital signal. If you have turned
this feature off, this will automatically turn on
HD Radio™ broadcasts and will tune to the
selected frequency. As with any saved radio
station, you will not be able to access the saved
station if your vehicle is outside the station’s
reception area.
“LIVE” Ballgame Mode Broadcasts: If a station
has a live broadcast (such as a baseball game),
“LIVE” may appear on screen beside the multi -
cast numbers. These are analog broadcasts
with d
igital components (i.e. artist, title). If HD1
is in a live broadcast mode, the HD Radio™ logo
will be gray. You will hear analog audio; the user
will still be able to tune to the multicast chan -
nels.
Reception Area:
If y ou
are listening to a multicast
(HD2, HD3, etc.) station and you are on the fringe
of the reception area, the station may mute due to
weak signal strength. If you are listening to HD1,
the system will simply switch to the analog
broadcast until the digital broadcast is available
again.
However, if you are listening to any of the possible
multi c
ast (HD2, HD3, etc.) channels, the station
will mute and stay muted unless it is able to
connect to the digital signal again. While in this
state, the text “buffering” will appear for 30 sec-
onds. If it is not able to reconnect to the digital
signal, the screen will be cleared and “HD Radio™
Signal Unavailable” will appear in artist and title
field area. Station Blending:
When
an HD1 station is received,
the system will play the analog audio broadcast
from the station for a few seconds and then, if the
receiver verifies the station is an HD Radio™
station, it will transition to play the digital audio
broadcast. Depending on the station quality, you
may hear a slight sound change when the station
transitions from analog to the digital broadcast.
The shift from analog to digital or digital back to
analog sound is known as “blending”.
Station Issues: In ord
er to provide the best
possible experience, a contact form has been
developed to report any station issues found while
listening to a station broadcasting with HD Radio™
technology. Every station is independently owned
and operated. These stations are responsible for
ensuring all audio streams and data fields are
accurate. This form can be found at https://
hdradio.com/stations/feedback/ .
5
Page 156 of 364

154 MULTIMEDIA
HD Radio™ Technology manufactured under license from iBiquity Digital Corporation. US and Foreign Patents. For patents, see http://dts.com/patents. HD
Radio™, Artist Experience, and the HD, HD Radio™, and "ARC" logos are registered trademarks or trademarks of iBiquity Digital Corporation in the United States
and/or
other countries.
Troubleshooting
Experience CauseAction
Mismatch of time alignment — a user may hear a
short period of programming replayed or an echo,
stutter, or skip. The radio station’s analog and digital volume is not
proper
l
y aligned or the station is in ballgame mode. None. It is a radio broadcast issue. The user can
contac
t the station.
Sound fades, blending in and out. Radio is shifting between analogue and digital
audio.Re
ception issue: It may clear up as the vehicle
conti n
ues to be driven. Turning off HD Radio™ can
force the radio to use analogue audio.
Audio mute condition when an HD2, HD3, etc.
multic
ast channel is playing. The radio does not have access to digital signals at
the mom
ent. This is normal behavior. Wait until the digital signal
return
s. If out of coverage area, seek a new station.
Audio mute delay when selecting an HD2, HD3, etc.
multic
ast channel preset. The digital multicast content is not available until
HD
R
ad
i
o™ broadcast can be decoded and make
the audio available. This can take up to seven
seconds. This is normal behavior. Wait until the audio is
a
va
il
a
ble again.
Text information does not match the present song
audio or
no text information shown for the present
selected frequency. Data service issue by the radio broadcaster.
Broadcaster should be notified. Use the form at
https://hdradio.com/stations/feedback/
Page 162 of 364
160 MULTIMEDIA
Setting Presets
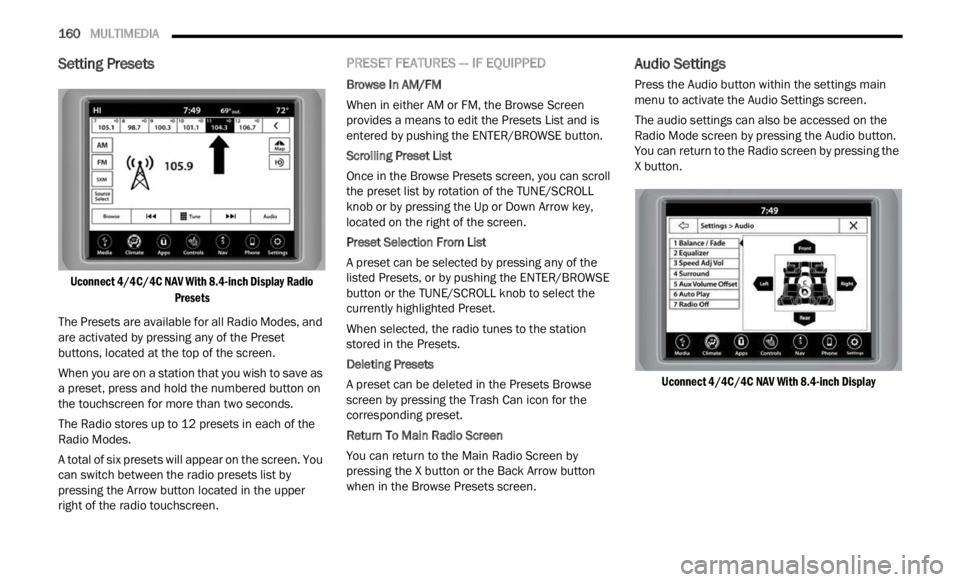
Uconnect 4/4C/4C NAV With 8.4-inch Display Radio
Presets
The Presets are available for all Radio Modes, and
are ac
tivated by pressing any of the Preset
buttons, located at the top of the screen.
When you are on a station that you wish to save as
a pre s
et, press and hold the numbered button on
the touchscreen for more than two seconds.
The Radio stores up to 12 presets in each of the
Radio M
odes.
A total of six presets will appear on the screen. You
can sw
itch between the radio presets list by
pressing the Arrow button located in the upper
right of the radio touchscreen.
PRESET FEATURES — IF EQUIPPED
Browse In AM/FM
When in either AM or FM, the Browse Screen
provid e
s a means to edit the Presets List and is
entered by pushing the ENTER/BROWSE button.
Scrolling Preset List
Once in the Browse Presets screen, you can scroll
t he pr
eset list by rotation of the TUNE/SCROLL
knob or by pressing the Up or Down Arrow key,
located on the right of the screen.
Preset Selection From List
A preset can be selected by pressing any of the
liste d
Presets, or by pushing the ENTER/BROWSE
button or the TUNE/SCROLL knob to select the
currently highlighted Preset.
When selected, the radio tunes to the station
stored
in the Presets.
Deleting Presets
A preset can be deleted in the Presets Browse
scree n
by pressing the Trash Can icon for the
corresponding preset.
Return To Main Radio Screen
You can return to the Main Radio Screen by
p ressi
ng the X button or the Back Arrow button
when in the Browse Presets screen.
Audio Settings
Press the Audio button within the settings main
menu to activate the Audio Settings screen.
The audio settings can also be accessed on the
Radio M
ode screen by pressing the Audio button.
You can return to the Radio screen by pressing the
X button.
Uconnect 4/4C/4C NAV With 8.4-inch Display
Page 165 of 364
MULTIMEDIA 163
AUX MODE
Overview
Auxiliary Mode (AUX) is entered by inserting an AUX
device
using a cable with a 3.5 mm audio jack into
t h
e
A U
X port, or by pressing the AUX button on the
left side of the touchscreen, or under the Source
Select button (if equipped).
To insert an Auxiliary device, gently insert the
Auxili
ary device cable into the AUX port. If you
insert an Auxiliary device with the ignition and the
radio on, the unit will switch to AUX Mode and
begin to play.
Controlling The Auxiliary Device
The control of the Auxiliary device (e.g., selecting
p layl i
sts, play, fast forward, etc.) cannot be
provided by the radio; use the device controls
instead. Adjust the volume with the Volume button,
VOLUME/MUTE rotary knob, or the On/Off rotary
knob, or with the volume of the attached device.
NOTE:
The radio unit is acting as the amplifier for audio
output
from the Auxiliary device. Therefore, if the
volume control on the Auxiliary device is set too
low, there will be insufficient audio signal for the
radio unit to play the music on the device. Seek Up
/Seek Down
In USB Mode, press the Seek Up button on the
t ouchs c
reen for the next selection on the USB
device. Press and release the Seek Down button
on the touchscreen to return to the beginning of
the current selection, or to return to the beginning
of the previous selection if the USB device is within
the first three seconds of the current selection.
In Bluetooth® Mode, press and release the Seek
Up bu t
ton on the touchscreen for the next
selection on the Bluetooth® device. Press and
release the Seek Down button on the touchscreen
to return to the beginning of the current selection,
or return to the beginning of the previous selection
if the Bluetooth® device is within the first second
of the current selection.
Browse
In USB Mode, press the Browse button on the
touchs c
reen to display the browse window. In USB
Mode, the left side of the browse window displays
a list of ways you can browse through the contents
of the USB device. If supported by the device, you
can browse by Folder, Artist, Playlist, Album, Song,
etc. Press the desired button on the touchscreen
on the left side of the screen. The center of the
browse window shows items and their
sub-functions, which can be scrolled through by
pressing the Up and Down buttons to the right. The
TUNE/SCROLL knob can also be used to scroll. Media Mode
In USB Mode, press the Media button on the
touchs
c
reen to select the desired audio source:
USB.
In Bluetooth® Mode, press the Media button on
the t ou
chscreen to select the desired audio
source: Bluetooth®.
In AUX Mode, press the Media button on the
touchs c
reen to select the desired audio source:
AUX.
Repeat
In USB Mode, press the Repeat button on the
t ouchsc
reen to toggle the repeat functionality. The
Repeat button on the touchscreen is highlighted
when active. The Radio will continue to play the
current track, repeatedly, as long as the repeat is
active. Press the Repeat button again to enter
Repeat All. The radio will continue to play all the
current tracks, repeatedly, as long as the repeat
function is active. To cancel Repeat, press the
Repeat button a third time.
Shuffle
In USB Mode, press the Shuffle button on the
touchs c
reen to play the selections on the USB
device in random order to provide an interesting
change of pace. Press the Shuffle button on the
touchscreen a second time to turn this feature off.
5
Page 166 of 364
164 MULTIMEDIA
Audio
Audio settings can be accessed by pressing the
Audio b
utton Ú page 151.
Info
In USB Mode, press the Info button on the
t ouchs c
reen to display the current track
information. Press the Info or X button on the
touchscreen a second time to cancel this feature.
Tracks
In USB Mode, press the Tracks button on the
touchs c
reen to display a pop-up with the Song List.
The song currently playing is indicated by an arrow
and lines above and below the song title. When in
the Tracks List screen you can rotate the TUNE/
SCROLL knob to highlight a track (indicated by the
line above and below the track name) and then
push the ENTER/BROWSE knob to start playing
that track.
In Bluetooth® Mode, if the Bluetooth® device
suppor t
s this feature, press the Tracks button on
the touchscreen to display a pop-up with the Song
List. The currently playing song is indicated by a red
arrow and lines above and below the song title.
Pressing the Tracks button on the touchscreen
while
the pop-up is displayed will close the pop-up.
MEDIA VOICE COMMANDS
Uconnect offers connections via USB, Bluetooth®,
and auxiliary (AUX) ports. Voice operation is only
available for connected USB and AUX devices.
Push the VR button located on the steering
wheel. After the beep, say one of the following
c ommand
s and follow the prompts to switch your
media source or choose an artist:
“ Change source to Bluetooth®”
“Change source to AUX”
“Change source to USB”
“Play artist Beethoven”; “ Play album Greatest
Hits”; “ Play song Moonlight Sonata”; “ Play genre
Classical”
Did You Know: Press
the Browse button on the
touchscreen to see all of the music on your USB
device. Your Voice Command must match exactly
how the artist, album, song, and genre information
is displayed.
PHONE MODE
Overview
Uconnect Phone is a voice-activated, hands-free,
in-vehicle communications system. It allows you to
dial a phone number with your mobile phone. The feature supports the following:
Voice Activated Features
Hands-Free dialing via Voice (“Call John Smith
Mobile” or “Dial 248-555-1212”).
Hands-Free text-to-speech listening of your
incoming SMS messages.
Hands-Free Text Message Replying: Forward
one of 18 predefined SMS messages to
incoming calls/text messages.
Redialing last dialed numbers (“Redial”).
Calling Back the last incoming call number
(“Call Back”).
Viewing call logs on screen (“Show Incoming
Calls,” “Show Outgoing Calls,” “Show Missed
Calls,” or “Show Recent Calls”).
Searching Contacts phone number (“Search for
John Smith Mobile”).
Screen Activated Features
Dialing via Keypad using touchscreen.
Viewing and Calling contacts from Phonebooks
displayed on the touchscreen.
Setting Favorite Contact phone numbers so they
are easily accessible on the Main Phone screen.
Viewing and Calling contacts from Recent Call
logs.